Psycraft: mudanças entre as edições
(→Tiers) |
|||
| (12 revisões intermediárias por 2 usuários não estão sendo mostradas) | |||
| Linha 68: | Linha 68: | ||
</center> | </center> | ||
Abaixo estão listados todos os Pokémon do clã Psycraft e suas respectivas funções, separados por Tier. | Abaixo estão listados todos os Pokémon do clã '''Psycraft''' e suas respectivas funções, separados por Tier e com algumas recomendações de Held Itens. <br> | ||
<b>Observação:</b> A nossa lista de Helds Recomendados foi composta por colaboradores experientes da Wiki da PokeXGames e serve como sugestões de Held Itens para os Pokémon no âmbito do PvP e PvE, respectivamente. | |||
O jogador ainda tem toda a liberdade de testar e utilizar outros Helds que não esses, podendo personalizar seu Pokémon de um jeito diferente. Ressaltamos que em caso de alterações nos Pokémon, essa lista pode ser alterada e não será garantido que o Pokémon seja adicionado como opção no NPC Jorge.</br> | |||
<b>Observação:</b> Na listagem, o Held PvP sugerido é o primeiro, seguido pelo Held PvE. Caso o Pokémon utilize o mesmo Held Item nos 2 âmbitos, aparecerá listado somente 1 Held Item.</br> | |||
==Tier 1A== | ==Tier 1A== | ||
<center> | <center> | ||
{| class="wikitable" style="text-align:center" width=" | {| class="wikitable" style="text-align:center" width="65%;" | ||
|- | |- | ||
! scope="col" width=" | ! scope="col" width="10%" style="background-color: #F1C232"| <span style="color:black">Nº Dex</span> | ||
! scope="col" style="background-color: # | ! scope="col" style="background-color: #F1C232"| <span style="color:black">Ícone</span> | ||
! scope="col" width=" | ! scope="col" width="15%;" style="background-color: #F1C232"| <span style="color:black">Nome</span> | ||
! scope="col" style="background-color: # | ! scope="col" style="background-color: #F1C232"| <span style="color:black">Elementos</span> | ||
! scope="col" width=" | ! scope="col" width="15%;" style="background-color: #F1C232"| <span style="color:black">Função PvE</span> | ||
! scope="col" width=" | ! scope="col" width="15%;" style="background-color: #F1C232"| <span style="color:black">Função PvP</span> | ||
! scope="col" width="20%;" style="background-color: #F1C232"| <span style="color:black">Held Recomendado (PvP/PvE)</span> | |||
|- | |- | ||
| text-align:center;" | #065 | | text-align:center;" | #065 | ||
| Linha 88: | Linha 93: | ||
| width="10%" | [[Arquivo:Interface_BDD_PVE.png|24px|link=]] [[Arquivo:Interface_OTDD_PVE.png|24px|link=]] | | width="10%" | [[Arquivo:Interface_BDD_PVE.png|24px|link=]] [[Arquivo:Interface_OTDD_PVE.png|24px|link=]] | ||
| width="10%" | [[Arquivo:Interface_BDD_PVP.png|24px|link=]] | | width="10%" | [[Arquivo:Interface_BDD_PVP.png|24px|link=]] | ||
| text-align:"center;" | [[file:Atk7.png|Attack T7|link=]] | |||
|} | |} | ||
</center> | </center> | ||
| Linha 94: | Linha 100: | ||
<center> | <center> | ||
{| class="wikitable" style="text-align:center" width=" | {| class="wikitable" style="text-align:center" width="65%;" | ||
|- | |- | ||
! scope="col" width=" | ! scope="col" width="10%" style="background-color: #F1C232"| <span style="color:black">Nº Dex</span> | ||
! scope="col" style="background-color: # | ! scope="col" style="background-color: #F1C232"| <span style="color:black">Ícone</span> | ||
! scope="col" width=" | ! scope="col" width="15%;" style="background-color: #F1C232"| <span style="color:black">Nome</span> | ||
! scope="col" style="background-color: # | ! scope="col" style="background-color: #F1C232"| <span style="color:black">Elementos</span> | ||
! scope="col" width=" | ! scope="col" width="15%;" style="background-color: #F1C232"| <span style="color:black">Função PvE</span> | ||
! scope="col" width=" | ! scope="col" width="15%;" style="background-color: #F1C232"| <span style="color:black">Função PvP</span> | ||
! scope="col" width="20%;" style="background-color: #F1C232"| <span style="color:black">Held Recomendado (PvP/PvE)</span> | |||
|- | |- | ||
| text-align:center;" | #700 | | text-align:center;" | #700 | ||
| Linha 109: | Linha 116: | ||
| width="10%" | [[Arquivo:Interface_BDD_PVE.png|24px|link=]] [[Arquivo:Interface_OTDD_PVE.png|24px|link=]] | | width="10%" | [[Arquivo:Interface_BDD_PVE.png|24px|link=]] [[Arquivo:Interface_OTDD_PVE.png|24px|link=]] | ||
| width="10%" | [[Arquivo:Interface_Tanker_PVP.png|24px|link=]] | | width="10%" | [[Arquivo:Interface_Tanker_PVP.png|24px|link=]] | ||
| text-align:"center;" | [[file:Def7.png|Defense T7|link=]] [[file:Atk7.png|Attack T7|link=]] | |||
|} | |} | ||
</center> | </center> | ||
| Linha 115: | Linha 123: | ||
<center> | <center> | ||
{| class="wikitable sortable" style="text-align:center" width=" | {| class="wikitable sortable" style="text-align:center" width="65%;" | ||
|- | |- | ||
! scope="col" width=" | ! scope="col" width="10%" style="background-color: #F1C232"| <span style="color:black">Nº Dex</span> | ||
! scope="col" style="background-color: # | ! scope="col" style="background-color: #F1C232"| <span style="color:black">Ícone</span> | ||
! scope="col" width=" | ! scope="col" width="15%;" style="background-color: #F1C232"| <span style="color:black">Nome</span> | ||
! scope="col" style="background-color: # | ! scope="col" style="background-color: #F1C232"| <span style="color:black">Elementos</span> | ||
! scope="col" width=" | ! scope="col" width="15%;" style="background-color: #F1C232"| <span style="color:black">Função PvE</span> | ||
! scope="col" width=" | ! scope="col" width="15%;" style="background-color: #F1C232"| <span style="color:black">Função PvP</span> | ||
! scope="col" width="20%;" style="background-color: #F1C232"| <span style="color:black">Held Recomendado (PvP/PvE)</span> | |||
|- | |- | ||
| text-align:center;" | #038 | | text-align:center;" | #038 | ||
| Linha 130: | Linha 139: | ||
| width="10%" | [[Arquivo:Interface_BDD_PVE.png|24px|link=]] | | width="10%" | [[Arquivo:Interface_BDD_PVE.png|24px|link=]] | ||
| width="10%" | [[Arquivo:Interface_OffTank_PVP.png|24px|link=]] | | width="10%" | [[Arquivo:Interface_OffTank_PVP.png|24px|link=]] | ||
| text-align:"center;" | [[file:Atk7.png|Attack T7|link=]] | |||
|- | |- | ||
| text-align:center;" | #065 | | text-align:center;" | #065 | ||
| Linha 137: | Linha 147: | ||
| width="10%" | [[Arquivo:Not.png|link=]] | | width="10%" | [[Arquivo:Not.png|link=]] | ||
| width="10%" | [[Arquivo:Interface_Disrupter_PVP.png|24px|link=]] | | width="10%" | [[Arquivo:Interface_Disrupter_PVP.png|24px|link=]] | ||
| text-align:"center;" | [[file:Acc7.png|Accuracy T7|link=]] | |||
|- | |- | ||
| text-align:center;" | #122 | | text-align:center;" | #122 | ||
| Linha 144: | Linha 155: | ||
| width="10%" | [[Arquivo:Interface_OTDD_PVE.png|24px|link=]] | | width="10%" | [[Arquivo:Interface_OTDD_PVE.png|24px|link=]] | ||
| width="10%" | [[Arquivo:Interface_Disrupter_PVP.png|24px|link=]] | | width="10%" | [[Arquivo:Interface_Disrupter_PVP.png|24px|link=]] | ||
| text-align:"center;" | [[file:Acc7.png|Accuracy T7|link=]] [[file:Atk7.png|Attack T7|link=]] | |||
|- | |- | ||
| text-align:center;" | #124 | | text-align:center;" | #124 | ||
| Linha 151: | Linha 163: | ||
| width="10%" | [[Arquivo:Interface_BDD_PVE.png|24px|link=]] | | width="10%" | [[Arquivo:Interface_BDD_PVE.png|24px|link=]] | ||
| width="10%" | [[Arquivo:Interface_Disrupter_PVP.png|24px|link=]] | | width="10%" | [[Arquivo:Interface_Disrupter_PVP.png|24px|link=]] | ||
| text-align:"center;" | [[file:Acc7.png|Accuracy T7|link=]] [[file:Atk7.png|Attack T7|link=]] | |||
|- | |- | ||
| text-align:center;" | #178 | | text-align:center;" | #178 | ||
| Linha 158: | Linha 171: | ||
| width="10%" | [[Arquivo:Interface_OTDD_PVE.png|24px|link=]] | | width="10%" | [[Arquivo:Interface_OTDD_PVE.png|24px|link=]] | ||
| width="10%" | [[Arquivo:Interface_Disrupter_PVP.png|24px|link=]] | | width="10%" | [[Arquivo:Interface_Disrupter_PVP.png|24px|link=]] | ||
| text-align:"center;" | [[file:Acc7.png|Accuracy T7|link=]] [[file:Atk7.png|Attack T7|link=]] | |||
|- | |- | ||
| text-align:center;" | #196 | | text-align:center;" | #196 | ||
| Linha 165: | Linha 179: | ||
| width="10%" | [[Arquivo:Interface_BDD_PVE.png|24px|link=]] | | width="10%" | [[Arquivo:Interface_BDD_PVE.png|24px|link=]] | ||
| width="10%" | [[Arquivo:Interface_Disrupter_PVP.png|24px|link=]] | | width="10%" | [[Arquivo:Interface_Disrupter_PVP.png|24px|link=]] | ||
| text-align:"center;" | [[file:Acc7.png|Accuracy T7|link=]] [[file:Atk7.png|Attack T7|link=]] | |||
|- | |- | ||
| text-align:center;" | #210 | | text-align:center;" | #210 | ||
| Linha 172: | Linha 187: | ||
| width="10%" | [[Arquivo:Interface_OTDD_PVE.png|24px|link=]] | | width="10%" | [[Arquivo:Interface_OTDD_PVE.png|24px|link=]] | ||
| width="10%" | [[Arquivo:Interface_Tanker_PVP.png|24px|link=]] | | width="10%" | [[Arquivo:Interface_Tanker_PVP.png|24px|link=]] | ||
| text-align:"center;" | [[file:Def7.png|Defense T7|link=]] [[file:Atk7.png|Attack T7|link=]] | |||
|- | |- | ||
| text-align:center;" | #282 | | text-align:center;" | #282 | ||
| Linha 179: | Linha 195: | ||
| width="10%" | [[Arquivo:Not.png|link=]] | | width="10%" | [[Arquivo:Not.png|link=]] | ||
| width="10%" | [[Arquivo:Interface_Disrupter_PVP.png|24px|link=]] [[Arquivo:Interface_Support_PVP.png|24px|link=]] | | width="10%" | [[Arquivo:Interface_Disrupter_PVP.png|24px|link=]] [[Arquivo:Interface_Support_PVP.png|24px|link=]] | ||
| text-align:"center;" | [[file:Acc7.png|Accuracy T7|link=]] | |||
|- | |- | ||
| text-align:center;" | #334 | | text-align:center;" | #334 | ||
| Linha 186: | Linha 203: | ||
| width="10%" | [[Arquivo:Not.png|link=]] | | width="10%" | [[Arquivo:Not.png|link=]] | ||
| width="10%" | [[Arquivo:Interface_Disrupter_PVP.png|24px|link=]] | | width="10%" | [[Arquivo:Interface_Disrupter_PVP.png|24px|link=]] | ||
| text-align:"center;" | [[file:Acc7.png|Accuracy T7|link=]] [[file:Atk7.png|Attack T7|link=]] | |||
|- | |- | ||
| text-align:center;" | #376 | | text-align:center;" | #376 | ||
| Linha 193: | Linha 211: | ||
| width="10%" | [[Arquivo:Not.png|link=]] | | width="10%" | [[Arquivo:Not.png|link=]] | ||
| width="10%" | [[Arquivo:Interface_Tanker_PVP.png|24px|link=]] | | width="10%" | [[Arquivo:Interface_Tanker_PVP.png|24px|link=]] | ||
| text-align:"center;" | [[file:Def7.png|Defense T7|link=]] | |||
|- | |- | ||
| text-align:center;" | #437 | | text-align:center;" | #437 | ||
| Linha 200: | Linha 219: | ||
| width="10%" | [[Arquivo:Interface_BDD_PVE.png|24px|link=]] | | width="10%" | [[Arquivo:Interface_BDD_PVE.png|24px|link=]] | ||
| width="10%" | [[Arquivo:Interface_Disrupter_PVP.png|24px|link=]] | | width="10%" | [[Arquivo:Interface_Disrupter_PVP.png|24px|link=]] | ||
| text-align:"center;" | [[file:Acc7.png|Accuracy T7|link=]] [[file:Atk7.png|Attack T7|link=]] | |||
|- | |- | ||
| text-align:center;" | #475 | | text-align:center;" | #475 | ||
| Linha 207: | Linha 227: | ||
| width="10%" | [[Arquivo:Interface_OTDD_PVE.png|24px|link=]] | | width="10%" | [[Arquivo:Interface_OTDD_PVE.png|24px|link=]] | ||
| width="10%" | [[Arquivo:Interface_Tanker_PVP.png|24px|link=]] | | width="10%" | [[Arquivo:Interface_Tanker_PVP.png|24px|link=]] | ||
| text-align:"center;" | [[file:Def7.png|Defense T7|link=]] [[file:Atk7.png|Attack T7|link=]] | |||
|- | |- | ||
| text-align:center;" | #475 | | text-align:center;" | #475 | ||
| Linha 214: | Linha 235: | ||
| width="10%" | [[Arquivo:Interface_BDD_PVE.png|24px|link=]] | | width="10%" | [[Arquivo:Interface_BDD_PVE.png|24px|link=]] | ||
| width="10%" | [[Arquivo:Interface_Disrupter_PVP.png|24px|link=]] | | width="10%" | [[Arquivo:Interface_Disrupter_PVP.png|24px|link=]] | ||
| text-align:"center;" | [[file:Acc7.png|Accuracy T7|link=]] [[file:Atk7.png|Attack T7|link=]] | |||
|- | |- | ||
| text-align:center;" | #655 | | text-align:center;" | #655 | ||
| Linha 221: | Linha 243: | ||
| width="10%" | [[Arquivo:Interface_OTDD_PVE.png|24px|link=]] | | width="10%" | [[Arquivo:Interface_OTDD_PVE.png|24px|link=]] | ||
| width="10%" | [[Arquivo:Interface_OTDD_PVP.png|24px|link=]] | | width="10%" | [[Arquivo:Interface_OTDD_PVP.png|24px|link=]] | ||
| text-align:"center;" | [[file:Atk7.png|Attack T7|link=]] | |||
|- | |- | ||
|} | |} | ||
| Linha 229: | Linha 252: | ||
<center> | <center> | ||
{| class="wikitable" style="text-align:center" width=" | {| class="wikitable" style="text-align:center" width="65%;" | ||
|- | |- | ||
! scope="col" width=" | ! scope="col" width="10%" style="background-color: #F1C232"| <span style="color:black">Nº Dex</span> | ||
! scope="col" style="background-color: # | ! scope="col" style="background-color: #F1C232"| <span style="color:black">Ícone</span> | ||
! scope="col" width=" | ! scope="col" width="15%;" style="background-color: #F1C232"| <span style="color:black">Nome</span> | ||
! scope="col" style="background-color: # | ! scope="col" style="background-color: #F1C232"| <span style="color:black">Elementos</span> | ||
! scope="col" width=" | ! scope="col" width="15%;" style="background-color: #F1C232"| <span style="color:black">Função PvE</span> | ||
! scope="col" width=" | ! scope="col" width="15%;" style="background-color: #F1C232"| <span style="color:black">Função PvP</span> | ||
! scope="col" width="20%;" style="background-color: #F1C232"| <span style="color:black">Held Recomendado (PvE)</span> | |||
|- | |- | ||
| text-align:center;" | #282 | | text-align:center;" | #282 | ||
| Linha 244: | Linha 268: | ||
| width="10%" | [[Arquivo:Interface_BDD_PVE.png|24px|link=]] | | width="10%" | [[Arquivo:Interface_BDD_PVE.png|24px|link=]] | ||
| width="10%" | [[Arquivo:Not.png|link=]] | | width="10%" | [[Arquivo:Not.png|link=]] | ||
| text-align:"center;" | [[file:Atk7.png|Attack T7|link=]] | |||
|- | |- | ||
| text-align:center;" | #576 | | text-align:center;" | #576 | ||
| Linha 251: | Linha 276: | ||
| width="10%" | [[Arquivo:Interface_BDD_PVE.png|24px|link=]] | | width="10%" | [[Arquivo:Interface_BDD_PVE.png|24px|link=]] | ||
| width="10%" | [[Arquivo:Not.png|link=]] | | width="10%" | [[Arquivo:Not.png|link=]] | ||
| text-align:"center;" | [[file:Atk7.png|Attack T7|link=]] | |||
|} | |} | ||
</center> | </center> | ||
| Linha 259: | Linha 285: | ||
<center> | <center> | ||
{| class="wikitable sortable" style="text-align:center" width=" | {| class="wikitable sortable" style="text-align:center" width="65%;" | ||
|- | |- | ||
! scope="col" width=" | ! scope="col" width="10%" style="background-color: #F1C232"| <span style="color:black">Nº Dex</span> | ||
! scope="col" style="background-color: # | ! scope="col" style="background-color: #F1C232"| <span style="color:black">Ícone</span> | ||
! scope="col" width=" | ! scope="col" width="15%;" style="background-color: #F1C232"| <span style="color:black">Nome</span> | ||
! scope="col" style="background-color: # | ! scope="col" style="background-color: #F1C232"| <span style="color:black">Elementos</span> | ||
! scope="col" width=" | ! scope="col" width="15%;" style="background-color: #F1C232"| <span style="color:black">Função PvE</span> | ||
! scope="col" width=" | ! scope="col" width="15%;" style="background-color: #F1C232"| <span style="color:black">Função PvP</span> | ||
! scope="col" width="20%;" style="background-color: #F1C232"| <span style="color:black">Held Recomendado (PvP/PvE)</span> | |||
|- | |- | ||
| text-align:center;" | #026 | | text-align:center;" | #026 | ||
| Linha 274: | Linha 301: | ||
| width="10%" | [[Arquivo:not.png|link=]] | | width="10%" | [[Arquivo:not.png|link=]] | ||
| width="10%" | [[Arquivo:Interface_BDD_PVP.png|24px|link=]] | | width="10%" | [[Arquivo:Interface_BDD_PVP.png|24px|link=]] | ||
| text-align:"center;" | [[file:Atk7.png|Attack T7|link=]] | |||
|- | |- | ||
| text-align:center;" | #063 | | text-align:center;" | #063 | ||
| Linha 281: | Linha 309: | ||
| width="10%" | [[Arquivo:Not.png|link=]] | | width="10%" | [[Arquivo:Not.png|link=]] | ||
| width="10%" | [[Arquivo:Interface_Disrupter_PVP.png|24px|link=]] | | width="10%" | [[Arquivo:Interface_Disrupter_PVP.png|24px|link=]] | ||
| text-align:"center;" | [[file:Acc7.png|Accuracy T7|link=]] | |||
|- | |- | ||
| text-align:center;" | #065 | | text-align:center;" | #065 | ||
| Linha 288: | Linha 317: | ||
| width="10%" | [[Arquivo:Interface_BDD_PVE.png|24px|link=]] | | width="10%" | [[Arquivo:Interface_BDD_PVE.png|24px|link=]] | ||
| width="10%" | [[Arquivo:Not.png|link=]] | | width="10%" | [[Arquivo:Not.png|link=]] | ||
| text-align:"center;" | [[file:Atk7.png|Attack T7|link=]] | |||
|- | |- | ||
| text-align:center;" | #078 | | text-align:center;" | #078 | ||
| Linha 295: | Linha 325: | ||
| width="10%" | [[Arquivo:Interface_OffensiveTanker_pve.png|24px|link=]] | | width="10%" | [[Arquivo:Interface_OffensiveTanker_pve.png|24px|link=]] | ||
| width="10%" | [[Arquivo:Not.png|link=]] | | width="10%" | [[Arquivo:Not.png|link=]] | ||
| text-align:"center;" | [[file:Atk7.png|Attack T7|link=]] [[file:Def7.png|Defense T7|link=]] | |||
|- | |- | ||
| text-align:center;" | #080 | | text-align:center;" | #080 | ||
| Linha 302: | Linha 333: | ||
| width="10%" | [[Arquivo:Not.png|link=]] | | width="10%" | [[Arquivo:Not.png|link=]] | ||
| width="10%" | [[Arquivo:Interface_Disrupter_PVP.png|24px|link=]] | | width="10%" | [[Arquivo:Interface_Disrupter_PVP.png|24px|link=]] | ||
| text-align:"center;" | [[file:Acc7.png|Accuracy T7|link=]] | |||
|- | |- | ||
| text-align:center;" | #100 | | text-align:center;" | #100 | ||
| Linha 309: | Linha 341: | ||
| width="10%" | [[Arquivo:Not.png|link=]] | | width="10%" | [[Arquivo:Not.png|link=]] | ||
| width="10%" | [[Arquivo:Interface_Disrupter_PVP.png|24px|link=]] | | width="10%" | [[Arquivo:Interface_Disrupter_PVP.png|24px|link=]] | ||
| text-align:"center;" | [[file:Acc7.png|Accuracy T7|link=]] | |||
|- | |- | ||
| text-align:center;" | #103 | | text-align:center;" | #103 | ||
| Linha 316: | Linha 349: | ||
| width="10%" | [[Arquivo:Not.png|link=]] | | width="10%" | [[Arquivo:Not.png|link=]] | ||
| width="10%" | [[Arquivo:Interface_OffTank_PVP.png|24px|link=]] | | width="10%" | [[Arquivo:Interface_OffTank_PVP.png|24px|link=]] | ||
| text-align:"center;" | [[file:Acc7.png|Accuracy T7|link=]] | |||
|- | |- | ||
| text-align:center;" | #121 | | text-align:center;" | #121 | ||
| Linha 323: | Linha 357: | ||
| width="10%" | [[Arquivo:Not.png|link=]] | | width="10%" | [[Arquivo:Not.png|link=]] | ||
| width="10%" | [[Arquivo:Interface_OTDD_PVP.png|24px|link=]] | | width="10%" | [[Arquivo:Interface_OTDD_PVP.png|24px|link=]] | ||
| text-align:"center;" | [[file:Atk7.png|Attack T7|link=]] | |||
|- | |- | ||
| text-align:center;" | #124 | | text-align:center;" | #124 | ||
| Linha 330: | Linha 365: | ||
| width="10%" | [[Arquivo:Not.png|link=]] | | width="10%" | [[Arquivo:Not.png|link=]] | ||
| width="10%" | [[Arquivo:Interface_Disrupter_PVP.png|24px|link=]] | | width="10%" | [[Arquivo:Interface_Disrupter_PVP.png|24px|link=]] | ||
| text-align:"center;" | [[file:Acc7.png|Accuracy T7|link=]] | |||
|- | |- | ||
| text-align:center;" | #176 | | text-align:center;" | #176 | ||
| Linha 337: | Linha 373: | ||
| width="10%" | [[Arquivo:Not.png|link=]] | | width="10%" | [[Arquivo:Not.png|link=]] | ||
| width="10%" | [[Arquivo:Interface_Disrupter_PVP.png|24px|link=]] [[Arquivo:Interface_Support_PVP.png|24px|link=]] | | width="10%" | [[Arquivo:Interface_Disrupter_PVP.png|24px|link=]] [[Arquivo:Interface_Support_PVP.png|24px|link=]] | ||
| text-align:"center;" | [[file:Acc7.png|Accuracy T7|link=]] | |||
|- | |- | ||
| text-align:center;" | #184 | | text-align:center;" | #184 | ||
| Linha 344: | Linha 381: | ||
| width="10%" | [[Arquivo:Not.png|link=]] | | width="10%" | [[Arquivo:Not.png|link=]] | ||
| width="10%" | [[Arquivo:Interface_Tanker_PVP.png|link=]] | | width="10%" | [[Arquivo:Interface_Tanker_PVP.png|link=]] | ||
| text-align:"center;" | [[file:Def7.png|Defense T7|link=]] | |||
|- | |- | ||
| text-align:center;" | #199 | | text-align:center;" | #199 | ||
| Linha 351: | Linha 389: | ||
| width="10%" | [[Arquivo:Not.png|link=]] | | width="10%" | [[Arquivo:Not.png|link=]] | ||
| width="10%" | [[Arquivo:Interface_Disrupter_PVP.png|24px|link=]] | | width="10%" | [[Arquivo:Interface_Disrupter_PVP.png|24px|link=]] | ||
| text-align:"center;" | [[file:Acc7.png|Accuracy T7|link=]] | |||
|- | |- | ||
| text-align:center;" | #202 | | text-align:center;" | #202 | ||
| Linha 358: | Linha 397: | ||
| width="10%" | [[Arquivo:Interface_OffensiveTanker_pve.png|24px|link=]] | | width="10%" | [[Arquivo:Interface_OffensiveTanker_pve.png|24px|link=]] | ||
| width="10%" | [[Arquivo:Not.png|link=]] | | width="10%" | [[Arquivo:Not.png|link=]] | ||
| text-align:"center;" | [[file:Atk7.png|Attack T7|link=]] | |||
|- | |- | ||
| text-align:center;" | #282 | | text-align:center;" | #282 | ||
| Linha 365: | Linha 405: | ||
| width="10%" | [[Arquivo:Not.png|link=]] | | width="10%" | [[Arquivo:Not.png|link=]] | ||
| width="10%" | [[Arquivo:Interface_Disrupter_PVP.png|24px|link=]] [[Arquivo:Interface_Support_PVP.png|24px|link=]] | | width="10%" | [[Arquivo:Interface_Disrupter_PVP.png|24px|link=]] [[Arquivo:Interface_Support_PVP.png|24px|link=]] | ||
| text-align:"center;" | [[file:Acc7.png|Accuracy T7|link=]] [[file:Atk7.png|Attack T7|link=]] | |||
|- | |- | ||
| text-align:center;" | #308 | | text-align:center;" | #308 | ||
| Linha 372: | Linha 413: | ||
| width="10%" | [[Arquivo:Not.png|link=]] | | width="10%" | [[Arquivo:Not.png|link=]] | ||
| width="10%" | [[Arquivo:Interface_OTDD_PVP.png|24px|link=]] | | width="10%" | [[Arquivo:Interface_OTDD_PVP.png|24px|link=]] | ||
| text-align:"center;" | [[file:Def7.png|Defense T7|link=]] | |||
|- | |- | ||
| text-align:center;" | #326 | | text-align:center;" | #326 | ||
| Linha 379: | Linha 421: | ||
| width="10%" | [[Arquivo:Interface_Tank_PVE.png|24px|link=]] | | width="10%" | [[Arquivo:Interface_Tank_PVE.png|24px|link=]] | ||
| width="10%" | [[Arquivo:Not.png|link=]] | | width="10%" | [[Arquivo:Not.png|link=]] | ||
| text-align:"center;" | [[file:Def7.png|Defense T7|link=]] | |||
|- | |- | ||
| text-align:center;" | #375 | | text-align:center;" | #375 | ||
| Linha 386: | Linha 429: | ||
| width="10%" | [[Arquivo:Not.png|link=]] | | width="10%" | [[Arquivo:Not.png|link=]] | ||
| width="10%" | [[Arquivo:Interface_OffTank_PVP.png|24px|link=]] | | width="10%" | [[Arquivo:Interface_OffTank_PVP.png|24px|link=]] | ||
| text-align:"center;" | [[file:Def7.png|Defense T7|link=]] | |||
|- | |||
| text-align:center;" | #437 | |||
| text-align:center;" | [[Arquivo:437-Bronzong.png|link=Bronzong]] | |||
| text-align:center;" | [[Bronzong]] | |||
| text-align:center;" | [[Arquivo:Steel.png|link=]] [[Arquivo:Psychic.png|link=Psycraft]] | |||
| width="10%" | [[Arquivo:Interface_BDD_PVE.png|24px|link=]] | |||
| width="10%" | [[Arquivo:Not.png|link=]] | |||
| text-align:"center;" | [[file:Atk7.png|Attack T7|link=]] | |||
|- | |- | ||
| text-align:center;" | #468 | | text-align:center;" | #468 | ||
| Linha 393: | Linha 445: | ||
| width="10%" | [[Arquivo:Interface_OTDD_PVE.png|24px|link=]] | | width="10%" | [[Arquivo:Interface_OTDD_PVE.png|24px|link=]] | ||
| width="10%" | [[Arquivo:Interface_BDD_PVP.png|24px|link=]] | | width="10%" | [[Arquivo:Interface_BDD_PVP.png|24px|link=]] | ||
| text-align:"center;" | [[file:Atk7.png|Attack T7|link=]] | |||
|- | |- | ||
| text-align:center;" | #475 | | text-align:center;" | #475 | ||
| Linha 400: | Linha 453: | ||
| width="10%" | [[Arquivo:Not.png|link=]] | | width="10%" | [[Arquivo:Not.png|link=]] | ||
| width="10%" | [[Arquivo:Interface_OffTank_PVP.png|24px|link=]] | | width="10%" | [[Arquivo:Interface_OffTank_PVP.png|24px|link=]] | ||
| text-align:"center;" | [[file:Def7.png|Defense T7|link=]] | |||
|- | |- | ||
| text-align:center;" | #547 | | text-align:center;" | #547 | ||
| Linha 407: | Linha 461: | ||
| width="10%" | [[Arquivo:Not.png|link=]] | | width="10%" | [[Arquivo:Not.png|link=]] | ||
| width="10%" | [[Arquivo:Interface_OffTank_PVP.png|24px|link=]] | | width="10%" | [[Arquivo:Interface_OffTank_PVP.png|24px|link=]] | ||
| text-align:"center;" | [[file:Def7.png|Defense T7|link=]] | |||
|- | |- | ||
| text-align:center;" | #555 | | text-align:center;" | #555 | ||
| Linha 414: | Linha 469: | ||
| width="10%" | [[Arquivo:Not.png|link=]] | | width="10%" | [[Arquivo:Not.png|link=]] | ||
| width="10%" | [[Arquivo:Interface_OffTank_PVP.png|24px|link=]] | | width="10%" | [[Arquivo:Interface_OffTank_PVP.png|24px|link=]] | ||
| text-align:"center;" | [[file:Def7.png|Defense T7|link=]] | |||
|- | |- | ||
| text-align:center;" | #576 | | text-align:center;" | #576 | ||
| Linha 421: | Linha 477: | ||
| width="10%" | [[Arquivo:Interface_OTDD_PVE.png|24px|link=]] | | width="10%" | [[Arquivo:Interface_OTDD_PVE.png|24px|link=]] | ||
| width="10%" | [[Arquivo:Not.png|link=]] | | width="10%" | [[Arquivo:Not.png|link=]] | ||
| text-align:"center;" | [[file:Atk7.png|Attack T7|link=]] | |||
|- | |- | ||
| text-align:center;" | #671 | | text-align:center;" | #671 | ||
| Linha 428: | Linha 485: | ||
| width="10%" | [[Arquivo:Interface_OffensiveTanker_pve.png|24px|link=]] | | width="10%" | [[Arquivo:Interface_OffensiveTanker_pve.png|24px|link=]] | ||
| width="10%" | [[Arquivo:Not.png|link=]] | | width="10%" | [[Arquivo:Not.png|link=]] | ||
| text-align:"center;" | [[file:Atk7.png|Attack T7|link=]] [[file:Def7.png|Defense T7|link=]] | |||
|- | |- | ||
| text-align:center;" | #678 | | text-align:center;" | #678 | ||
| Linha 435: | Linha 493: | ||
| width="10%" | [[Arquivo:Interface_BDD_PVE.png|24px|link=]] | | width="10%" | [[Arquivo:Interface_BDD_PVE.png|24px|link=]] | ||
| width="10%" | [[Arquivo:not.png|link=]] | | width="10%" | [[Arquivo:not.png|link=]] | ||
| text-align:"center;" | [[file:Atk7.png|Attack T7|link=]] | |||
|- | |- | ||
| text-align:center;" | #683 | | text-align:center;" | #683 | ||
| Linha 442: | Linha 501: | ||
| width="10%" | [[Arquivo:Interface_SupportOT_PVE.png|24px|link=]] | | width="10%" | [[Arquivo:Interface_SupportOT_PVE.png|24px|link=]] | ||
| width="10%" | [[Arquivo:Not.png|link=]] | | width="10%" | [[Arquivo:Not.png|link=]] | ||
| text-align:"center;" | [[file:Atk7.png|Attack T7|link=]] | |||
|- | |- | ||
| text-align:"center;" | #703 | | text-align:"center;" | #703 | ||
| Linha 449: | Linha 509: | ||
| text-align:"center;" | [[Arquivo:Not.png|link=]] | | text-align:"center;" | [[Arquivo:Not.png|link=]] | ||
| text-align:"center;" | [[Arquivo:Interface_Tanker_PVP.png|24px|link=]] | | text-align:"center;" | [[Arquivo:Interface_Tanker_PVP.png|24px|link=]] | ||
| text-align:"center;" | [[file:Def7.png|Defense T7|link=]] | |||
|- | |- | ||
| text-align:center;" | #707 | | text-align:center;" | #707 | ||
| Linha 456: | Linha 517: | ||
| width="10%" | [[Arquivo:Not.png|link=]] | | width="10%" | [[Arquivo:Not.png|link=]] | ||
| width="10%" | [[Arquivo:Interface_Disrupter_PVP.png|24px|link=]] | | width="10%" | [[Arquivo:Interface_Disrupter_PVP.png|24px|link=]] | ||
| text-align:"center;" | [[file:Acc7.png|Accuracy T7|link=]] | |||
|- | |- | ||
| text-align:center;" | #778 | | text-align:center;" | #778 | ||
| Linha 463: | Linha 525: | ||
| width="10%" | [[Arquivo:Interface_BDD_PVE.png|24px|link=]] | | width="10%" | [[Arquivo:Interface_BDD_PVE.png|24px|link=]] | ||
| width="10%" | [[Arquivo:Interface_OffTank_PVP.png|24px|link=]] | | width="10%" | [[Arquivo:Interface_OffTank_PVP.png|24px|link=]] | ||
| text-align:"center;" | [[file:Atk7.png|Attack T7|link=]] | |||
|- | |- | ||
| text-align:center;" | #858 | | text-align:center;" | #858 | ||
| Linha 470: | Linha 533: | ||
| width="10%" | [[Arquivo:Interface_BDD_PVE.png|24px|link=]] | | width="10%" | [[Arquivo:Interface_BDD_PVE.png|24px|link=]] | ||
| width="10%" | [[Arquivo:not.png|link=]] | | width="10%" | [[Arquivo:not.png|link=]] | ||
| text-align:"center;" | [[file:Atk7.png|Attack T7|link=]] | |||
|- | |- | ||
| text-align:center;" | #869 | | text-align:center;" | #869 | ||
| Linha 477: | Linha 541: | ||
| width="10%" | [[Arquivo:Interface_BDD_PVE.png|24px|link=]] | | width="10%" | [[Arquivo:Interface_BDD_PVE.png|24px|link=]] | ||
| width="10%" | [[Arquivo:Not.png|link=]] | | width="10%" | [[Arquivo:Not.png|link=]] | ||
| text-align:"center;" | [[file:Atk7.png|Attack T7|link=]] | |||
|} | |} | ||
</center> | </center> | ||
| Linha 486: | Linha 551: | ||
<center> | <center> | ||
{| class="wikitable sortable" style="text-align:center" width=" | {| class="wikitable sortable" style="text-align:center" width="65%;" | ||
|- | |- | ||
! scope="col" width=" | ! scope="col" width="10%" style="background-color: #F1C232"| <span style="color:black">Nº Dex</span> | ||
! scope="col" style="background-color: # | ! scope="col" style="background-color: #F1C232"| <span style="color:black">Ícone</span> | ||
! scope="col" width=" | ! scope="col" width="15%;" style="background-color: #F1C232"| <span style="color:black">Nome</span> | ||
! scope="col" style="background-color: # | ! scope="col" style="background-color: #F1C232"| <span style="color:black">Elementos</span> | ||
! scope="col" width=" | ! scope="col" width="15%;" style="background-color: #F1C232"| <span style="color:black">Função PvE</span> | ||
! scope="col" width=" | ! scope="col" width="15%;" style="background-color: #F1C232"| <span style="color:black">Função PvP</span> | ||
! scope="col" width="20%;" style="background-color: #F1C232"| <span style="color:black">Held Recomendado (PvP/PvE)</span> | |||
|- | |- | ||
| text-align:center;" | #036 | | text-align:center;" | #036 | ||
| Linha 501: | Linha 567: | ||
| width="10%" | [[Arquivo:Interface_Tank_PVE.png|24px|link=]] | | width="10%" | [[Arquivo:Interface_Tank_PVE.png|24px|link=]] | ||
| width="10%" | [[Arquivo:Not.png|link=]] | | width="10%" | [[Arquivo:Not.png|link=]] | ||
| text-align:"center;" | [[file:Def7.png|Defense T7|link=]] | |||
|- | |- | ||
| text-align:center;" | #040 | | text-align:center;" | #040 | ||
| Linha 508: | Linha 575: | ||
| width="10%" | [[Arquivo:Not.png]] | | width="10%" | [[Arquivo:Not.png]] | ||
| width="10%" | [[Arquivo:Interface_Disrupter_PVP.png|24px|link=]] | | width="10%" | [[Arquivo:Interface_Disrupter_PVP.png|24px|link=]] | ||
| text-align:"center;" | [[file:Acc7.png|Accuracy T7|link=]] | |||
|- | |- | ||
| text-align:center;" | #121 | | text-align:center;" | #121 | ||
| Linha 515: | Linha 583: | ||
| width="10%" | [[Arquivo:Not.png|link=]] | | width="10%" | [[Arquivo:Not.png|link=]] | ||
| width="10%" | [[Arquivo:Interface_OTDD_PVP.png|24px|link=]] | | width="10%" | [[Arquivo:Interface_OTDD_PVP.png|24px|link=]] | ||
| text-align:"center;" | [[file:Atk7.png|Attack T7|link=]] | |||
|- | |- | ||
| text-align:center;" | #122 | | text-align:center;" | #122 | ||
| Linha 522: | Linha 591: | ||
| width="10%" | [[Arquivo:Interface_BDD_PVE.png|24px|link=]] | | width="10%" | [[Arquivo:Interface_BDD_PVE.png|24px|link=]] | ||
| width="10%" | [[Arquivo:Not.png|link]] | | width="10%" | [[Arquivo:Not.png|link]] | ||
| text-align:"center;" | [[file:Atk7.png|Attack T7|link=]] | |||
|- | |- | ||
| text-align:center;" | #176 | | text-align:center;" | #176 | ||
| Linha 529: | Linha 599: | ||
| width="10%" | [[Arquivo:Interface_BDD_PVE.png|24px|link=]] | | width="10%" | [[Arquivo:Interface_BDD_PVE.png|24px|link=]] | ||
| width="10%" | [[Arquivo:Not.png|link]] | | width="10%" | [[Arquivo:Not.png|link]] | ||
| text-align:"center;" | [[file:Atk7.png|Attack T7|link=]] | |||
|- | |- | ||
| text-align:center;" | #178 | | text-align:center;" | #178 | ||
| Linha 536: | Linha 607: | ||
| width="10%" | [[Arquivo:Interface_BDD_PVE.png|24px|link=]] | | width="10%" | [[Arquivo:Interface_BDD_PVE.png|24px|link=]] | ||
| width="10%" | [[Arquivo:Not.png|link]] | | width="10%" | [[Arquivo:Not.png|link]] | ||
| text-align:"center;" | [[file:Atk7.png|Attack T7|link=]] | |||
|- | |- | ||
| text-align:center;" | #184 | | text-align:center;" | #184 | ||
| Linha 543: | Linha 615: | ||
| width="10%" | [[Arquivo:Interface_BDD_PVE.png|24px|link=]] | | width="10%" | [[Arquivo:Interface_BDD_PVE.png|24px|link=]] | ||
| width="10%" | [[Arquivo:Not.png|link]] | | width="10%" | [[Arquivo:Not.png|link]] | ||
| text-align:"center;" | [[file:Atk7.png|Attack T7|link=]] | |||
|- | |- | ||
| text-align:center;" | #196 | | text-align:center;" | #196 | ||
| Linha 550: | Linha 623: | ||
| width="10%" | [[Arquivo:Interface_BDD_PVE.png|24px|link=]] | | width="10%" | [[Arquivo:Interface_BDD_PVE.png|24px|link=]] | ||
| width="10%" | [[Arquivo:Not.png|link]] | | width="10%" | [[Arquivo:Not.png|link]] | ||
| text-align:"center;" | [[file:Atk7.png|Attack T7|link=]] | |||
|- | |- | ||
| text-align:center;" | #203 | | text-align:center;" | #203 | ||
| Linha 557: | Linha 631: | ||
| width="10%" | [[Arquivo:Not.png|link=]] | | width="10%" | [[Arquivo:Not.png|link=]] | ||
| width="10%" | [[Arquivo:Interface_OTDD_PVP.png|24px|link=]] | | width="10%" | [[Arquivo:Interface_OTDD_PVP.png|24px|link=]] | ||
| text-align:"center;" | [[file:Def7.png|Defense T7|link=]] | |||
|- | |- | ||
| Linha 565: | Linha 640: | ||
| width="10%" | [[Arquivo:Interface_BDD_PVE.png|24px|link=]] | | width="10%" | [[Arquivo:Interface_BDD_PVE.png|24px|link=]] | ||
| width="10%" | [[Arquivo:Not.png|link]] | | width="10%" | [[Arquivo:Not.png|link]] | ||
| text-align:"center;" | [[file:Atk7.png|Attack T7|link=]] | |||
|- | |- | ||
| text-align:center;" | #303 | | text-align:center;" | #303 | ||
| Linha 572: | Linha 648: | ||
| width="10%" | [[Arquivo:Not.png|link=]] | | width="10%" | [[Arquivo:Not.png|link=]] | ||
| width="10%" | [[Arquivo:Interface_Support_PVP.png|24px|link=]] | | width="10%" | [[Arquivo:Interface_Support_PVP.png|24px|link=]] | ||
| text-align:"center;" | [[file:Def7.png|Defense T7|link=]] | |||
|- | |- | ||
| text-align:center;" | #308 | | text-align:center;" | #308 | ||
| Linha 579: | Linha 656: | ||
| width="10%" | [[Arquivo:Not.png|link=]] | | width="10%" | [[Arquivo:Not.png|link=]] | ||
| width="10%" | [[Arquivo:Interface_OTDD_PVP.png|24px|link=]] | | width="10%" | [[Arquivo:Interface_OTDD_PVP.png|24px|link=]] | ||
| text-align:"center;" | [[file:Acc7.png|Accuracy T7|link=]] | |||
|- | |- | ||
| text-align:center;" | #326 | | text-align:center;" | #326 | ||
| Linha 586: | Linha 664: | ||
| width="10%" | [[Arquivo:Not.png|link=]] | | width="10%" | [[Arquivo:Not.png|link=]] | ||
| width="10%" | [[Arquivo:Interface_OffTank_PVP.png|24px|link=]] | | width="10%" | [[Arquivo:Interface_OffTank_PVP.png|24px|link=]] | ||
| text-align:"center;" | [[file:Def7.png|Defense T7|link=]] | |||
|- | |- | ||
| text-align:center;" | #337 | | text-align:center;" | #337 | ||
| Linha 593: | Linha 672: | ||
| width="10%" | [[Arquivo:Not.png|link=]] | | width="10%" | [[Arquivo:Not.png|link=]] | ||
| width="10%" | [[Arquivo:Interface_Support_PVP.png|24px|link=]] [[Arquivo:Interface_Disrupter_PVP.png|24px|link=]] | | width="10%" | [[Arquivo:Interface_Support_PVP.png|24px|link=]] [[Arquivo:Interface_Disrupter_PVP.png|24px|link=]] | ||
| text-align:"center;" | [[file:Acc7.png|Accuracy T7|link=]] | |||
|- | |- | ||
| text-align:center;" | #338 | | text-align:center;" | #338 | ||
| Linha 600: | Linha 680: | ||
| width="10%" | [[Arquivo:Interface_BDD_PVE.png|24px|link=]] | | width="10%" | [[Arquivo:Interface_BDD_PVE.png|24px|link=]] | ||
| width="10%" | [[Arquivo:Not.png|link]] | | width="10%" | [[Arquivo:Not.png|link]] | ||
| text-align:"center;" | [[file:Atk7.png|Attack T7|link=]] | |||
|- | |- | ||
| text-align:center;" | #344 | | text-align:center;" | #344 | ||
| Linha 607: | Linha 688: | ||
| width="10%" | [[Arquivo:Not.png|link=]] | | width="10%" | [[Arquivo:Not.png|link=]] | ||
| width="10%" | [[Arquivo:Interface_Disrupter_PVP.png|24px|link=]] | | width="10%" | [[Arquivo:Interface_Disrupter_PVP.png|24px|link=]] | ||
| text-align:"center;" | [[file:X-Haste Tier7.png|Haste T7|link=]] | |||
|- | |- | ||
| text-align:center;" | #375 | | text-align:center;" | #375 | ||
| Linha 614: | Linha 696: | ||
| width="10%" | [[Arquivo:Interface_BDD_PVE.png|24px|link=]] | | width="10%" | [[Arquivo:Interface_BDD_PVE.png|24px|link=]] | ||
| width="10%" | [[Arquivo:Not.png|link=]] | | width="10%" | [[Arquivo:Not.png|link=]] | ||
| text-align:"center;" | [[file:Atk7.png|Attack T7|link=]] | |||
| text-align: | |||
|- | |- | ||
| text-align:center;" | #700 | | text-align:center;" | #700 | ||
| Linha 628: | Linha 704: | ||
| width="10%" | [[Arquivo:Interface_OffensiveTanker_pve.png|24px|link=]] | | width="10%" | [[Arquivo:Interface_OffensiveTanker_pve.png|24px|link=]] | ||
| width="10%" | [[Arquivo:Not.png|link=]] | | width="10%" | [[Arquivo:Not.png|link=]] | ||
| text-align:"center;" | [[file:Atk7.png|Attack T7|link=]] | |||
|- | |- | ||
|} | |} | ||
Edição atual tal como às 16h07min de 16 de maio de 2024
Caso encontre algum erro ou queira acrescentar alguma informação, entre em contato com um dos membros da wiki.
Introdução
Os membros deste clã são enigmáticos. Dizem que eles podem controlar a mente de Pokémon do tipo ![]() Psychic e têm um forte vínculo com Pokémon do tipo
Psychic e têm um forte vínculo com Pokémon do tipo ![]() Fairy, que são muito afetuosos com seus mestres.
Fairy, que são muito afetuosos com seus mestres.
Ranking
- Rank 1: Psycraft Mind.
- Rank 2: Psycraft Brain.
- Rank 3: Psycraft Scholar.
- Rank 4: Psycraft Telepath.
- Rank 5: Psycraft Medium.
Acesse a página de Tasks do clã Psycraft para conferir os requisitos necessários em cada um dos Rankings.
Bônus de Clã
O bônus máximo do clã é aplicado ao completar as tarefas do Rank 5. Abaixo estão as porcentagens de bônus adquiridas:
![]() Psychic: Atk 28%, Def 28%
Psychic: Atk 28%, Def 28%
![]() Fairy: Atk 28%, Def 28%
Fairy: Atk 28%, Def 28%
Tiers
Tier é uma classificação comum entre os Pokémon, indicando não apenas a raridade deste dentro do jogo, mas também qual executará melhor uma função, contanto que a comparação seja realizada entre dois Pokémon de mesma função. O Tier e a Função de um Pokémon pode ser conferido na ![]() Pokédex (Atalho Shift + D). Caso deseje ler mais sobre, acesse a página Tier e Funções ou Tiers (listagem) para conferir a listagem de Tier de todos os Pokémon.
Pokédex (Atalho Shift + D). Caso deseje ler mais sobre, acesse a página Tier e Funções ou Tiers (listagem) para conferir a listagem de Tier de todos os Pokémon.
Para facilitar a leitura desta página, a tabela a seguir contém a legenda de todas as Funções, PvP e PvE disponíveis no jogo.
| Função PvE | Função PvP | ||
|---|---|---|---|
| Ícone | Função | Ícone | Função |
| Tank | Tank | ||
| Offensive Tank | Offensive Tank | ||
| Burst Damage Dealer | Burst Damage Dealer | ||
| Over Time Damage Dealer | Over Time Damage Dealer | ||
| Support Overtime | Support | ||
| - | Disrupter | ||
Abaixo estão listados todos os Pokémon do clã Psycraft e suas respectivas funções, separados por Tier e com algumas recomendações de Held Itens.
Observação: A nossa lista de Helds Recomendados foi composta por colaboradores experientes da Wiki da PokeXGames e serve como sugestões de Held Itens para os Pokémon no âmbito do PvP e PvE, respectivamente.
O jogador ainda tem toda a liberdade de testar e utilizar outros Helds que não esses, podendo personalizar seu Pokémon de um jeito diferente. Ressaltamos que em caso de alterações nos Pokémon, essa lista pode ser alterada e não será garantido que o Pokémon seja adicionado como opção no NPC Jorge.
Observação: Na listagem, o Held PvP sugerido é o primeiro, seguido pelo Held PvE. Caso o Pokémon utilize o mesmo Held Item nos 2 âmbitos, aparecerá listado somente 1 Held Item.
Tier 1A
| Nº Dex | Ícone | Nome | Elementos | Função PvE | Função PvP | Held Recomendado (PvP/PvE) |
|---|---|---|---|---|---|---|
| #065 | Shiny Alakazam |
Tier 1B
| Nº Dex | Ícone | Nome | Elementos | Função PvE | Função PvP | Held Recomendado (PvP/PvE) |
|---|---|---|---|---|---|---|
| #700 | Shiny Sylveon |
Tier 1C
| Nº Dex | Ícone | Nome | Elementos | Função PvE | Função PvP | Held Recomendado (PvP/PvE) |
|---|---|---|---|---|---|---|
| #038 | Alolan Ninetales | |||||
| #065 | Mega Alakazam | |||||
| #122 | Shiny Mr.Mime | |||||
| #124 | Shiny Jynx | |||||
| #178 | Shiny Xatu | |||||
| #196 | Shiny Espeon | |||||
| #210 | Shiny Granbull | |||||
| #282 | Mega Gardevoir | |||||
| #334 | Mega Altaria | |||||
| #376 | Metagross | |||||
| #437 | Shiny Bronzong | |||||
| #475 | Shiny Gallade | |||||
| #475 | Mega Audino* | |||||
| #655 | Shiny Delphox |
*Observação: O Pokémon Mega Audino é exclusivo de outro clã no PvP.
Tier 1H
| Nº Dex | Ícone | Nome | Elementos | Função PvE | Função PvP | Held Recomendado (PvE) |
|---|---|---|---|---|---|---|
| #282 | Shiny Gardevoir | |||||
| #576 | Shiny Gothitelle |
Observação: Os Pokémon T1H tem força de T1C fora da Nightmare World e são acima dos T1C dentro dela ou pelo menos tem um diferencial perante os demais Pokémon. São balanceados exclusivamente para conteúdos PvE e não podem ser utilizados em duelos PvP.
Tier 2
| Nº Dex | Ícone | Nome | Elementos | Função PvE | Função PvP | Held Recomendado (PvP/PvE) |
|---|---|---|---|---|---|---|
| #026 | Alolan Raichu | |||||
| #063 | Light Abra | |||||
| #065 | Alakazam | |||||
| #078 | Galarian Rapidash | |||||
| #080 | Mega Slowbro | |||||
| #100 | Shiny Hypno | |||||
| #103 | Exeggutor | |||||
| #121 | Shiny Starmie | |||||
| #124 | Jynx | |||||
| #176 | Shiny Togetic* | |||||
| #184 | Shiny Azumarill | |||||
| #199 | Slowking | |||||
| #202 | Wobbuffet | |||||
| #282 | Gardevoir | |||||
| #308 | Mega Medicham | |||||
| #326 | Shiny Grumpig | |||||
| #375 | Shiny Metang | |||||
| #437 | Bronzong | |||||
| #468 | Togekiss | |||||
| #475 | Gallade | |||||
| #547 | Whimsicott | |||||
| #555 | Darmanitan** | |||||
| #576 | Gothitelle | |||||
| #671 | Florges | |||||
| #678 | Meowstic | |||||
| #683 | Aromatisse | |||||
| #703 | Shiny Carbink* | |||||
| #707 | Klefki* | |||||
| #778 | Mimikyu | |||||
| #858 | Hatterene | |||||
| #869 | Alcremie |
*Observação: Os Pokémon Shiny Togetic, Shiny Carbink e Klefki são exclusivos de outros clãs no PvP.
**Observação: O Pokémon Darmanitan é do clã Psycraft mesmo constando como tipo Fogo puro na Pokédex. Não se trata de um bug. Por favor, não abra reports sobre o assunto.
Tier 3
| Nº Dex | Ícone | Nome | Elementos | Função PvE | Função PvP | Held Recomendado (PvP/PvE) |
|---|---|---|---|---|---|---|
| #036 | Clefable | |||||
| #040 | Wigglytuff | |||||
| #121 | Starmie | |||||
| #122 | Mr.Mime | |||||
| #176 | Togetic | |||||
| #178 | Xatu | |||||
| #184 | Azumarill | |||||
| #196 | Espeon | |||||
| #203 | Girafarig | |||||
| #210 | Granbull | |||||
| #303 | Mawile | |||||
| #308 | Medicham | |||||
| #326 | Grumpig | |||||
| #337 | Lunatone | |||||
| #338 | Solrock | |||||
| #344 | Claydol | |||||
| #375 | Metang | |||||
| #700 | Sylveon |
Rotação Mid-Late Game
| Pokémon | Nome | Função | Tier |
|---|---|---|---|
| Clefable | 3 | ||
| Florges | 2 | ||
| Sylveon | 3 | ||
| Shiny Gardevoir | 1H | ||
| Hatterene | 2 | ||
| Alcremie | 2 | ||
| Togetic | 3 | ||
| Granbull | 3 | ||
| Pokémon | Nome | Função | Tier |
|---|---|---|---|
| Shiny Grumpig | 2 | ||
| Wobbuffet | 2 | ||
| Galarian Rapidash | 2 | ||
| Shiny Gothitelle | 1H | ||
| Alakazam | 2 | ||
| Meowstic | 2 | ||
| Mr.Mime | 3 | ||
| Xatu | 3 | ||
| Espeon | 3 | ||
Exclusividade do Clã no PvP
| Pokémon | Nome | Requer Rank 5 |
|---|---|---|
| Alolan Ninetales | ||
| Mega Alakazam | ||
| Shiny Hypno | ||
| Shiny Grumpig | ||
| Gallade | ||
| Shiny Gallade | ||
| Whimsicott | ||
| Darmanitan | ||
| Shiny Delphox |
Observação: A exclusividade é aplicada apenas em conteúdos PvP. No PvE, o uso é liberado para todos os clãs.
Pokémon obtido via NPC de Clã
- Shiny de Clã
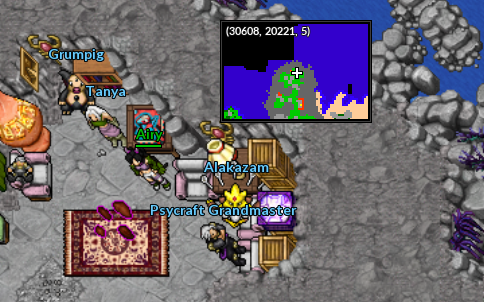
Para obter um ![]() Shiny Hypno, fale com a NPC Tanya, localizada na área do Clã Psycraft , no Trade Center.
Shiny Hypno, fale com a NPC Tanya, localizada na área do Clã Psycraft , no Trade Center.

- Shiny de Clã da Nightmare World
Para obter um ![]() Shiny Grumpig, fale com a NPC Tanya, localizada na área de Psycraft, na resistência de Cerulean.
Shiny Grumpig, fale com a NPC Tanya, localizada na área de Psycraft, na resistência de Cerulean.
Efetividade
Abaixo são apresentadas as efetividades dos Pokémon deste clã, considerando apenas aqueles que possuem um elemento. A efetividade pode mudar caso o Pokémon possua dois elementos ou possua alguma resistência à algum elemento, como é o caso do Shiny Xatu, que possui a passiva Fearless, permitindo que receba menos dano de ataques do tipo Ghost (0,5x).
A efetividade de um Pokémon pode ser conferida na ![]() Pokédex ou realizando uma busca na página Pokémon (uso do Ctrl+F recomendado).Clique no ícone do elemento desejado para conferir a tabela de efetividade deste clã.
Pokédex ou realizando uma busca na página Pokémon (uso do Ctrl+F recomendado).Clique no ícone do elemento desejado para conferir a tabela de efetividade deste clã.
![]() Fairy
Fairy
| | ||
|---|---|---|
| Dano | Elemento | |
| 0x | - | |
| | ||
|---|---|---|
| Dano | Elemento | |
| 0x | ||
![]() Psychic
Psychic
| Dano | Elemento | |
|---|---|---|
| 0x | ||
| Dano | Elemento | |
|---|---|---|
| 0x | - | |
Mais informações poderão ser adquiridas acessando a página Efetividades.
Outfits Exclusivas
| Rank 1 | Rank 5 | ||
|---|---|---|---|

|

|

|

|
| Master | |
|---|---|

|

|