Ironhard: mudanças entre as edições
(→Tier 2) |
|||
| (114 revisões intermediárias por 12 usuários não estão sendo mostradas) | |||
| Linha 1: | Linha 1: | ||
<center>[[file:Banner Clã Ironhard.png|link=]]<br></center> | |||
<br>'''Caso encontre algum erro ou queira acrescentar alguma informação, <span style="color:#F60303">entre em contato com um dos membros da wiki</span>.''' | |||
= Introdução = | = Introdução = | ||
Os Pokémon do clã '''Ironhard''' são conhecidos por sua força bruta, resistência e alcance, dominando o elemento [[Arquivo:Steel.png|link=Ironhard]] Steel. Eles passaram anos aperfeiçoando suas técnicas para quebrar todos os limites. <br> | Os Pokémon do clã '''Ironhard''' são conhecidos por sua força bruta, resistência e alcance, dominando o elemento [[Arquivo:Steel.png|link=Ironhard]] Steel. Eles passaram anos aperfeiçoando suas técnicas para quebrar todos os limites. <br> | ||
= Ranking = | = Ranking = | ||
| Linha 182: | Linha 20: | ||
O bônus máximo do clã é aplicado ao completar as tarefas do '''Rank 5'''. Abaixo estão as porcentagens de bônus adquiridas: | O bônus máximo do clã é aplicado ao completar as tarefas do '''Rank 5'''. Abaixo estão as porcentagens de bônus adquiridas: | ||
[[Arquivo:Steel.png|link=]] '''Steel:''' Atk 28%, Def 28% | [[Arquivo:Steel.png|link=]] '''Steel:''' Atk 28%, Def 28% | ||
= | [[Arquivo:Crystal.png|link=]] '''Crystal:''' Atk 28%, Def 28% | ||
* | * É possível observar na [[Diamond Shop]], dentro do jogo, o bônus ofensivo e defensivo que cada clã recebe no ranking 5. | ||
* O bônus de ataque é aplicado aos movimentos do Pokémon. Se o jogador estiver usando um Pokémon de fora do seu clã, mas que execute um movimento do elemento do seu clã, o bônus de ataque ainda será concedido. | |||
* | |||
=Tiers= | =Tiers= | ||
| Linha 234: | Linha 36: | ||
{| class="wikitable" style="text-align:center" width="50%;" | {| class="wikitable" style="text-align:center" width="50%;" | ||
|- | |- | ||
! colspan="2" scope="col" style="background-color: # | ! colspan="2" scope="col" style="background-color: #8A0808"| Função PvE | ||
! colspan="2" scope="col" style="background-color: # | ! colspan="2" scope="col" style="background-color: #8A0808"| Função PvP | ||
|- | |- | ||
! scope="col | ! scope="col" | <span style="color:black">Ícone</span> | ||
! scope="col | ! scope="col" | <span style="color:black">Função</span> | ||
! scope="col | ! scope="col" | <span style="color:black">Ícone</span> | ||
! scope="col | ! scope="col" | <span style="color:black">Função</span> | ||
|- | |- | ||
| text-align:"center;" | [[Arquivo:Interface_Tank_PVE.png|24px|link=]] | | text-align:"center;" | [[Arquivo:Interface_Tank_PVE.png|24px|link=]] | ||
| Linha 267: | Linha 69: | ||
| text-align:"center;" | Support | | text-align:"center;" | Support | ||
|- | |- | ||
| | | text-align:"center;" | [[Arquivo:Interface_Speedster_PVE.png|24px|link=]] | ||
| text-align:"center;" | Speedster | |||
| text-align:"center;" | [[Arquivo:Interface_Disrupter_PVP.png|24px|link=]] | | text-align:"center;" | [[Arquivo:Interface_Disrupter_PVP.png|24px|link=]] | ||
| text-align:"center;" | Disrupter | | text-align:"center;" | Disrupter | ||
| Linha 273: | Linha 76: | ||
</center> | </center> | ||
Abaixo estão listados todos os Pokémon do clã '''Ironhard''' e suas respectivas funções, separados por Tier. <br> | Abaixo estão listados todos os Pokémon do clã '''Ironhard''' e suas respectivas funções, separados por Tier e com algumas recomendações de Held Itens. <br> | ||
<b>Observação:</b> A nossa lista de Helds Recomendados foi composta por colaboradores experientes da Wiki da PokeXGames e serve como sugestões de Held Itens para os Pokémon no âmbito do PvP e PvE, respectivamente. | |||
O jogador ainda tem toda a liberdade de testar e utilizar outros Helds que não esses, podendo personalizar seu Pokémon de um jeito diferente. Ressaltamos que em caso de alterações nos Pokémon, essa lista pode ser alterada e não será garantido que o Pokémon seja adicionado como opção no NPC Jorge.</br> | |||
<b>Observação:</b> Na listagem, o Held PvP sugerido é o primeiro, seguido pelo Held PvE. Caso o Pokémon utilize o mesmo Held Item nos 2 âmbitos, aparecerá listado somente 1 Held Item.</br> | |||
== Tier 1A == | == Tier 1A == | ||
<center> | <center> | ||
{| class="wikitable" style="text-align:center" width=" | {| class="wikitable" style="text-align:center" width="65%;" | ||
|- | |- | ||
! scope="col" width=" | ! scope="col" width="10%" style="background-color: #F1C232"| <span style="color:black">Nº Dex</span> | ||
! scope="col" style="background-color: # | ! scope="col" style="background-color: #F1C232"| <span style="color:black">Ícone</span> | ||
! scope="col" width=" | ! scope="col" width="15%;" style="background-color: #F1C232"| <span style="color:black">Nome</span> | ||
! scope="col" style="background-color: # | ! scope="col" style="background-color: #F1C232"| <span style="color:black">Elementos</span> | ||
! scope="col" width=" | ! scope="col" width="15%;" style="background-color: #F1C232"| <span style="color:black">Função PvE</span> | ||
! scope="col" width=" | ! scope="col" width="15%;" style="background-color: #F1C232"| <span style="color:black">Função PvP</span> | ||
! scope="col" width="20%;" style="background-color: #F1C232"| <span style="color:black">Held Recomendado (PvP/PvE)</span> | |||
|- | |- | ||
| text-align:center;" | #212 | | text-align:center;" | #212 | ||
| Linha 291: | Linha 99: | ||
| text-align:center;" | [[Mega Scizor]] | | text-align:center;" | [[Mega Scizor]] | ||
| text-align:center;" | [[Arquivo:Bug.png|link=Naturia]] [[Arquivo:Steel.png|link=]] | | text-align:center;" | [[Arquivo:Bug.png|link=Naturia]] [[Arquivo:Steel.png|link=]] | ||
| width="10%" | [[Arquivo: | | width="10%" | [[Arquivo:Interface_BDD_PVE.png|24px|link=]] [[Arquivo:Interface_OTDD_PVE.png|24px|link=]] | ||
| width="10%" | [[Arquivo:Interface_Tanker_PVP.png|24px|link=]] | | width="10%" | [[Arquivo:Interface_Tanker_PVP.png|24px|link=]] | ||
| text-align:"center;" | [[file:Def7.png|Defense T7|link=]] [[file:Atk7.png|Attack T7|link=]] | |||
|} | |} | ||
</center> | </center> | ||
| Linha 299: | Linha 108: | ||
<center> | <center> | ||
{| class="wikitable" style="text-align:center" width=" | {| class="wikitable" style="text-align:center" width="65%;" | ||
|- | |- | ||
! scope="col" width=" | ! scope="col" width="10%" style="background-color: #F1C232"| <span style="color:black">Nº Dex</span> | ||
! scope="col" style="background-color: # | ! scope="col" style="background-color: #F1C232"| <span style="color:black">Ícone</span> | ||
! scope="col" width=" | ! scope="col" width="15%;" style="background-color: #F1C232"| <span style="color:black">Nome</span> | ||
! scope="col" style="background-color: # | ! scope="col" style="background-color: #F1C232"| <span style="color:black">Elementos</span> | ||
! scope="col" width=" | ! scope="col" width="15%;" style="background-color: #F1C232"| <span style="color:black">Função PvE</span> | ||
! scope="col" width=" | ! scope="col" width="15%;" style="background-color: #F1C232"| <span style="color:black">Função PvP</span> | ||
! scope="col" width="20%;" style="background-color: #F1C232"| <span style="color:black">Held Recomendado (PvP/PvE)</span> | |||
|- | |- | ||
| text-align:center;" | #306 | | text-align:center;" | #306 | ||
| Linha 312: | Linha 122: | ||
| text-align:center;" | [[Mega Aggron]] | | text-align:center;" | [[Mega Aggron]] | ||
| text-align:center;" | [[Arquivo:Steel.png|link=]] | | text-align:center;" | [[Arquivo:Steel.png|link=]] | ||
| width="10%" | [[Arquivo: | | width="10%" | [[Arquivo:Interface_BDD_PVE.png|24px|link=]] [[Arquivo:Interface_OTDD_PVE.png|24px|link=]] | ||
| width="10%" | [[Arquivo:Interface_Tanker_PVP.png|24px|link=]] | | width="10%" | [[Arquivo:Interface_Tanker_PVP.png|24px|link=]] | ||
| text-align:"center;" | [[file:Def7.png|Defense T7|link=]] [[file:Atk7.png|Attack T7|link=]] | |||
|} | |} | ||
</center> | </center> | ||
| Linha 320: | Linha 131: | ||
<center> | <center> | ||
{| class="wikitable sortable" style="text-align:center" width=" | {| class="wikitable sortable" style="text-align:center" width="65%;" | ||
|- | |- | ||
! scope="col" width=" | ! scope="col" width="10%" style="background-color: #F1C232"| <span style="color:black">Nº Dex</span> | ||
! scope="col" style="background-color: # | ! scope="col" style="background-color: #F1C232"| <span style="color:black">Ícone</span> | ||
! scope="col" width=" | ! scope="col" width="15%;" style="background-color: #F1C232"| <span style="color:black">Nome</span> | ||
! scope="col" style="background-color: # | ! scope="col" style="background-color: #F1C232"| <span style="color:black">Elementos</span> | ||
! scope="col" width=" | ! scope="col" width="15%;" style="background-color: #F1C232"| <span style="color:black">Função PvE</span> | ||
! scope="col" width=" | ! scope="col" width="15%;" style="background-color: #F1C232"| <span style="color:black">Função PvP</span> | ||
! scope="col" width="20%;" style="background-color: #F1C232"| <span style="color:black">Held Recomendado (PvP/PvE)</span> | |||
|- | |- | ||
| text-align:"center;" | #028 | | text-align:"center;" | #028 | ||
| Linha 333: | Linha 145: | ||
| text-align:"center;" | [[Alolan Sandslash]] | | text-align:"center;" | [[Alolan Sandslash]] | ||
| text-align:"center;" | [[Arquivo:Ice.png|link=Seavell]] [[Arquivo:Steel.png|link=]] | | text-align:"center;" | [[Arquivo:Ice.png|link=Seavell]] [[Arquivo:Steel.png|link=]] | ||
| text-align:"center;" | [[Arquivo: | | text-align:"center;" | [[Arquivo:Interface_OTDD_PVE.png|24px|link=]] | ||
| text-align:"center;" | [[Arquivo: | | text-align:"center;" | [[Arquivo:Interface_OffTank_PVP.png|24px|link=]] | ||
| text-align:"center;" | [[file:Def7.png|Defense T7|link=]] [[file:Atk7.png|Attack T7|link=]] | |||
|- | |- | ||
| text-align:"center;" | #082 | | text-align:"center;" | #082 | ||
| Linha 340: | Linha 153: | ||
| text-align:"center;" | [[Shiny Magneton]] | | text-align:"center;" | [[Shiny Magneton]] | ||
| text-align:"center;" | [[Arquivo:Electric.png|link=Raibolt]] [[Arquivo:Steel.png|link=]] | | text-align:"center;" | [[Arquivo:Electric.png|link=Raibolt]] [[Arquivo:Steel.png|link=]] | ||
| text-align:"center;" | [[Arquivo: | | text-align:"center;" | [[Arquivo:Interface_OTDD_PVE.png|24px|link=]] | ||
| text-align:"center;" | [[Arquivo:Interface_Disrupter_PVP.png|24px|link=]] | | text-align:"center;" | [[Arquivo:Interface_Disrupter_PVP.png|24px|link=]] | ||
| text-align:"center;" | [[file:Acc7.png|Accuracy T7|link=]] | |||
|- | |- | ||
| text-align:"center;" | #095 | | text-align:"center;" | #095 | ||
| Linha 349: | Linha 163: | ||
| text-align:"center;" | [[Arquivo:Not.png|link=]] | | text-align:"center;" | [[Arquivo:Not.png|link=]] | ||
| text-align:"center;" | [[Arquivo:Interface_OffTank_PVP.png|24px|link=]] | | text-align:"center;" | [[Arquivo:Interface_OffTank_PVP.png|24px|link=]] | ||
| text-align:"center;" | [[file:Def7.png|Defense T7|link=]] [[file:Atk7.png|Attack T7|link=]] | |||
|- | |- | ||
| text-align:"center;" | #208 | | text-align:"center;" | #208 | ||
| Linha 355: | Linha 170: | ||
| text-align:"center;" | [[Arquivo:Steel.png|link=]] [[Arquivo:Ground.png|link=Orebound]] | | text-align:"center;" | [[Arquivo:Steel.png|link=]] [[Arquivo:Ground.png|link=Orebound]] | ||
| text-align:"center;" | [[Arquivo:Not.png|link=]] | | text-align:"center;" | [[Arquivo:Not.png|link=]] | ||
| text-align:"center;" | [[Arquivo: | | text-align:"center;" | [[Arquivo:Interface_OffTank_PVP.png|24px|link=]] | ||
| text-align:"center;" | [[file:Def7.png|Defense T7|link=]] [[file:Atk7.png|Attack T7|link=]] | |||
|- | |- | ||
| text-align:"center;" | #208 | | text-align:"center;" | #208 | ||
| Linha 361: | Linha 177: | ||
| text-align:"center;" | [[Golden Steelix]] | | text-align:"center;" | [[Golden Steelix]] | ||
| text-align:"center;" | [[Arquivo:Steel.png|link=]] [[Arquivo:Ground.png|link=Orebound]] | | text-align:"center;" | [[Arquivo:Steel.png|link=]] [[Arquivo:Ground.png|link=Orebound]] | ||
| text-align:"center;" | [[Arquivo: | | text-align:"center;" | [[arquivo:Interface Speedster PVE.png|24px|link=]] [[Arquivo:Interface_BDD_PVE.png|24px|link=]] | ||
| text-align:"center;" | [[Arquivo:Interface_BDD_PVP.png|24px|link=]] | | text-align:"center;" | [[Arquivo:Interface_BDD_PVP.png|24px|link=]] | ||
| text-align:"center;" | [[file:Atk7.png|Attack T7|link=]] | |||
|- | |||
| text-align:"center;" | #212 | |||
| text-align:"center;" | [[file:Shinyscizor.png|link=Shiny Scizor]] | |||
| text-align:"center;" | [[Shiny Scizor]] | |||
| text-align:"center;" | [[Arquivo:Bug.png|link=Naturia]] [[Arquivo:Steel.png|link=Ironhard]] | |||
| text-align:"center;" | [[Arquivo:Interface_BDD_PVE.png|24px|link=]] | |||
| text-align:"center;" | [[Arquivo:Interface_OTDD_PVP.png|24px|link=]] | |||
| text-align:"center;" | [[file:Atk7.png|Attack T7|link=]] | |||
|- | |- | ||
| text-align:"center;" | #303 | | text-align:"center;" | #303 | ||
| Linha 370: | Linha 195: | ||
| text-align:"center;" | [[Arquivo:Not.png|link=]] | | text-align:"center;" | [[Arquivo:Not.png|link=]] | ||
| text-align:"center;" | [[Arquivo:Interface_OffTank_PVP.png|24px|link=]] [[Arquivo:Interface_Support_PVP.png|24px|link=]] | | text-align:"center;" | [[Arquivo:Interface_OffTank_PVP.png|24px|link=]] [[Arquivo:Interface_Support_PVP.png|24px|link=]] | ||
| text-align:"center;" | [[file:Def7.png|Defense T7|link=]] | |||
|- | |||
| text-align:"center;" | #358 | |||
| text-align:"center;" | [[Arquivo:358-Mega_Chimecho.png|link=Mega Chimecho]] | |||
| text-align:"center;" | [[Mega Chimecho]] | |||
| text-align:"center;" | [[Arquivo:Psychic.png|link=Psycraft]] [[Arquivo:Steel.png|link=]] | |||
| text-align:"center;" | [[Arquivo:Not.png|link=]] | |||
| text-align:"center;" | [[Arquivo:Interface_Disrupter_PVP.png|24px|link=]] | |||
| text-align:"center;" | [[file:Acc7.png|Accuracy T7|link=]] | |||
|- | |- | ||
| text-align:"center;" | #376 | | text-align:"center;" | #376 | ||
| Linha 377: | Linha 211: | ||
| text-align:"center;" | [[Arquivo:Not.png|link=]] | | text-align:"center;" | [[Arquivo:Not.png|link=]] | ||
| text-align:"center;" | [[Arquivo:Interface_Tanker_PVP.png|24px|link=]] | | text-align:"center;" | [[Arquivo:Interface_Tanker_PVP.png|24px|link=]] | ||
| text-align:"center;" | [[file:Def7.png|Defense T7|link=]] | |||
|- | |- | ||
| text-align:"center;" | #395 | | text-align:"center;" | #395 | ||
| Linha 382: | Linha 217: | ||
| text-align:"center;" | [[Shiny Empoleon]] | | text-align:"center;" | [[Shiny Empoleon]] | ||
| text-align:"center;" | [[Arquivo:Water.png|link=Seavell]] [[Arquivo:Steel.png|link=]] | | text-align:"center;" | [[Arquivo:Water.png|link=Seavell]] [[Arquivo:Steel.png|link=]] | ||
| text-align:"center;" | [[Arquivo: | | text-align:"center;" | [[Arquivo:Interface_OTDD_PVE.png|24px|link=]] | ||
| text-align:"center;" | [[Arquivo:Interface_Tanker_PVP.png|24px|link=]] | | text-align:"center;" | [[Arquivo:Interface_Tanker_PVP.png|24px|link=]] | ||
| text-align:"center;" | [[file:Def7.png|Defense T7|link=]] [[file:Atk7.png|Attack T7|link=]] | |||
|- | |- | ||
| text-align:"center;" | #437 | | text-align:"center;" | #437 | ||
| Linha 389: | Linha 225: | ||
| text-align:"center;" | [[Shiny Bronzong]] | | text-align:"center;" | [[Shiny Bronzong]] | ||
| text-align:"center;" | [[Arquivo:Steel.png|link=]] [[Arquivo:Psychic.png|link=Psycraft]] | | text-align:"center;" | [[Arquivo:Steel.png|link=]] [[Arquivo:Psychic.png|link=Psycraft]] | ||
| text-align:"center;" | [[Arquivo: | | text-align:"center;" | [[Arquivo:Interface_BDD_PVE.png|24px|link=]] | ||
| text-align:"center;" | [[Arquivo:Interface_Disrupter_PVP.png|24px|link=]] | | text-align:"center;" | [[Arquivo:Interface_Disrupter_PVP.png|24px|link=]] | ||
| text-align:"center;" | [[file:Acc7.png|Accuracy T7|link=]] [[file:Atk7.png|Attack T7|link=]] | |||
|- | |- | ||
| text-align:"center;" | #448 | | text-align:"center;" | #448 | ||
| Linha 396: | Linha 233: | ||
| text-align:"center;" | [[Mega Lucario]] | | text-align:"center;" | [[Mega Lucario]] | ||
| text-align:"center;" | [[Arquivo:Fighting.png|link=Gardestrike]] [[Arquivo:Steel.png|link=]] | | text-align:"center;" | [[Arquivo:Fighting.png|link=Gardestrike]] [[Arquivo:Steel.png|link=]] | ||
| text-align:"center;" | [[Arquivo: | | text-align:"center;" | [[Arquivo:Interface_BDD_PVE.png|24px|link=]] | ||
| text-align:"center;" | [[Arquivo:Interface_OffTank_PVP.png|24px|link=]] | | text-align:"center;" | [[Arquivo:Interface_OffTank_PVP.png|24px|link=]] | ||
| text-align:"center;" | [[file:Atk7.png|Attack T7|link=]] | |||
|- | |- | ||
| text-align:"center;" | #462 | | text-align:"center;" | #462 | ||
| text-align:"center;" | [[Arquivo:462-Shiny Magnezone.png|link=Shiny Magnezone]] | | text-align:"center;" | [[Arquivo:462-Shiny Magnezone.png|link=Shiny Magnezone]] | ||
| text-align:"center;" | [[Shiny Magnezone]] | | text-align:"center;" | [[Shiny Magnezone]] | ||
| text-align:"center;" | [[Arquivo:Electric.png|link=Raibolt]] [[Arquivo:Steel.png|link=]] | | text-align:"center;" | [[Arquivo:Electric.png|link=Raibolt]] [[Arquivo:Steel.png|link=]] | ||
| text-align:"center;" | [[Arquivo:Interface_OTDD_PVE.png|24px|link=]] | | text-align:"center;" | [[Arquivo:Interface_OTDD_PVE.png|24px|link=]] | ||
| text-align:"center;" | [[Arquivo:Interface_BDD_PVP.png|24px|link=]] | | text-align:"center;" | [[Arquivo:Interface_BDD_PVP.png|24px|link=]] | ||
| text-align:"center;" | [[file:Atk7.png|Attack T7|link=]] | |||
|- | |- | ||
| text-align:"center;" | #485 | | text-align:"center;" | #485 | ||
| Linha 410: | Linha 249: | ||
| text-align:"center;" | [[Heatran]] | | text-align:"center;" | [[Heatran]] | ||
| text-align:"center;" | [[Arquivo:Fire.png|link=Volcanic]] [[Arquivo:Steel.png|link=]] | | text-align:"center;" | [[Arquivo:Fire.png|link=Volcanic]] [[Arquivo:Steel.png|link=]] | ||
| text-align:"center;" | [[Arquivo: | | text-align:"center;" | [[Arquivo:Interface_OTDD_PVE.png|24px|link=]] | ||
| text-align:"center;" | [[Arquivo:Interface_Tanker_PVP.png|24px|link=]] | |||
| text-align:"center;" | [[file:Def7.png|Defense T7|link=]] [[file:Atk7.png|Attack T7|link=]] | |||
|- | |||
| text-align:"center;" | #768 | |||
| text-align:"center;" | [[Arquivo:768-Mega_Golisopod.png|link=Mega Golisopod]] | |||
| text-align:"center;" | '''[[Mega Golisopod]]*''' | |||
| text-align:"center;" | [[Arquivo:Bug.png|link=Naturia]] [[Arquivo:Steel.png|link=]] | |||
| text-align:"center;" | [[Arquivo:not.png|link=]] | |||
| text-align:"center;" | [[Arquivo:Interface_Tanker_PVP.png|24px|link=]] | | text-align:"center;" | [[Arquivo:Interface_Tanker_PVP.png|24px|link=]] | ||
| text-align:"center;" | [[file:Def7.png|Defense T7|link=]] | |||
|- | |- | ||
| text-align:"center;" | #879 | | text-align:"center;" | #879 | ||
| Linha 417: | Linha 265: | ||
| text-align:"center;" | [[Shiny Copperajah]] | | text-align:"center;" | [[Shiny Copperajah]] | ||
| text-align:"center;" | [[Arquivo:Steel.png|link=]] | | text-align:"center;" | [[Arquivo:Steel.png|link=]] | ||
| text-align:"center;" | [[Arquivo: | | text-align:"center;" | [[Arquivo:Interface_BDD_PVE.png|24px|link=]] | ||
| text-align:"center;" | [[Arquivo:Interface_BDD_PVP.png|24px|link=]] | | text-align:"center;" | [[Arquivo:Interface_BDD_PVP.png|24px|link=]] | ||
| text-align:"center;" | [[file:Atk7.png|Attack T7|link=]] | |||
|} | |||
</center> <br> | |||
'''Observação:*''' O Pokémon [[Arquivo:768-Mega_Golisopod.png|link=Mega Golisopod]] '''[[Mega Golisopod]]''' é exclusivo de outro clã no PvP. | |||
==Technical Machine (TM)== | |||
<center> | |||
{| class="wikitable sortable" style="text-align:center" width="65%;" | |||
|- | |||
! scope="col" width="10%" style="background-color: #F1C232"| <span style="color:black">Nº Dex</span> | |||
! scope="col" style="background-color: #F1C232"| <span style="color:black">Ícone</span> | |||
! scope="col" width="15%;" style="background-color: #F1C232"| <span style="color:black">Nome</span> | |||
! scope="col" style="background-color: #F1C232"| <span style="color:black">Elementos</span> | |||
! scope="col" width="15%;" style="background-color: #F1C232"| <span style="color:black">Função PvE</span> | |||
! scope="col" width="15%;" style="background-color: #F1C232"| <span style="color:black">Função PvP</span> | |||
! scope="col" width="20%;" style="background-color: #F1C232"| <span style="color:black">Held Recomendado (PvE)</span> | |||
|- | |||
| text-align:"center;" | #082 | |||
| text-align:"center;" | [[Arquivo:082-Sh Magneton.png|link=Shiny Magneton (TM)]] | |||
| text-align:"center;" | [[Shiny Magneton (TM)]] | |||
| text-align:"center;" | [[Arquivo: Steel.png|link=Ironhard]] [[Arquivo:Electric.png|link=Raibolt]] | |||
| text-align:"center;" | [[Arquivo:Interface_BDD_PVE.png|24px|link=]] | |||
| text-align:"center;" | [[Arquivo:not.png|link=]] | |||
| text-align:"center;" | [[file:Atk7.png|Attack T7|link=]] | |||
|- | |||
| text-align:"center;" | #448 | |||
| text-align:"center;" | [[Arquivo:448-MegaLucario.png|link=Mega Lucario Steel (TM)]] | |||
| text-align:"center;" | [[Mega Lucario Steel (TM)]] | |||
| text-align:"center;" | [[Arquivo: Steel.png|link=Ironhard]] | |||
| text-align:"center;" | [[Arquivo:Interface OTDD PVE.png|24px|link=]] | |||
| text-align:"center;" | [[Arquivo:not.png|link=]] | |||
| text-align:"center;" | [[file:Atk7.png|Attack T7|link=]] | |||
|- | |||
| text-align:"center;" | #462 | |||
| text-align:"center;" | [[Arquivo:462-Shiny Magnezone.png|link=Shiny Magnezone (TM)]] | |||
| text-align:"center;" | [[Shiny Magnezone (TM)]] | |||
| text-align:"center;" | [[Arquivo: Steel.png|link=Ironhard]] | |||
| text-align:"center;" | [[Arquivo:Interface OTDD PVE.png|24px|link=]] | |||
| text-align:"center;" | [[Arquivo:not.png|link=]] | |||
| text-align:"center;" | [[file:Atk7.png|Attack T7|link=]] | |||
|- | |||
| text-align:"center;" | #879 | |||
| text-align:"center;" | [[Arquivo:879-ShinyCopperajah.png|link=Shiny Copperajah (TM)]] | |||
| text-align:"center;" | [[Shiny Copperajah (TM)]] | |||
| text-align:"center;" | [[Arquivo: Steel.png|link=Ironhard]] | |||
| text-align:"center;" | [[Arquivo:Interface Tank PVE.png|24px|link=]] | |||
| text-align:"center;" | [[Arquivo:not.png|link=]] | |||
| text-align:"center;" | [[file:Def7.png|Defense T7|link=]] | |||
|} | |||
</center> <br> | |||
{{#widget:container}} | |||
<table class="seeMore"> | |||
<tr> | |||
<td class="seeMore__image">[[Arquivo:Telekinetic-compass.gif|link=]]</td> | |||
<td> '''Saiba Mais: [[Technical Machine (TM)]]'''</td> | |||
</tr> | |||
</table> | |||
{{#widget:closecontainer}} | |||
==Technical Records (TR)== | |||
<center> | |||
{| class="wikitable sortable" style="text-align:center" width="65%;" | |||
|- | |||
! scope="col" width="10%" style="background-color: #F1C232"| <span style="color:black">Nº Dex</span> | |||
! scope="col" style="background-color: #F1C232"| <span style="color:black">Ícone</span> | |||
! scope="col" width="15%;" style="background-color: #F1C232"| <span style="color:black">Nome</span> | |||
! scope="col" style="background-color: #F1C232"| <span style="color:black">Elementos</span> | |||
! scope="col" width="15%;" style="background-color: #F1C232"| <span style="color:black">Função PvE</span> | |||
! scope="col" width="15%;" style="background-color: #F1C232"| <span style="color:black">Função PvP</span> | |||
! scope="col" width="20%;" style="background-color: #F1C232"| <span style="color:black">Held Recomendado (PvE)</span> | |||
|- | |||
| text-align:"center;" | #212 | |||
| text-align:"center;" | [[Arquivo:Scizor.png|link=Scizor (TR)]] | |||
| text-align:"center;" | [[Scizor (TR)]] | |||
| text-align:"center;" | [[Arquivo:Bug.png|link=Naturia]] [[Arquivo:Steel.png|link=]] | |||
| text-align:"center;" | [[Arquivo:Interface BDD PVE.png|24px|link=]] | |||
| text-align:"center;" | [[Arquivo:not.png|link=]] | |||
| text-align:"center;" | [[file:Atk7.png|Attack T7|link=]] | |||
|- | |||
|} | |} | ||
</center> | </center> | ||
''' | |||
{{#widget:container}} | |||
<table class="seeMore"> | |||
<tr> | |||
<td class="seeMore__image">[[Arquivo:Telekinetic-compass.gif|link=]]</td> | |||
<td> '''Saiba Mais: [[Technical Records (TR)]]'''</td> | |||
</tr> | |||
</table> | |||
{{#widget:closecontainer}} | |||
== Tier 1H == | == Tier 1H == | ||
<center> | <center> | ||
{| class="wikitable" style="text-align:center" width=" | {| class="wikitable" style="text-align:center" width="65%;" | ||
|- | |||
! scope="col" width="10%" style="background-color: #F1C232"| <span style="color:black">Nº Dex</span> | |||
! scope="col" style="background-color: #F1C232"| <span style="color:black">Ícone</span> | |||
! scope="col" width="15%;" style="background-color: #F1C232"| <span style="color:black">Nome</span> | |||
! scope="col" style="background-color: #F1C232"| <span style="color:black">Elementos</span> | |||
! scope="col" width="15%;" style="background-color: #F1C232"| <span style="color:black">Função PvE</span> | |||
! scope="col" width="15%;" style="background-color: #F1C232"| <span style="color:black">Função PvP</span> | |||
! scope="col" width="20%;" style="background-color: #F1C232"| <span style="color:black">Held Recomendado (PvE)</span> | |||
|- | |- | ||
| text-align:center;" | #227 | |||
| text-align:center;" | [[Arquivo:227_-_Mega_Skarmory.png|link=Mega Skarmory]] | |||
| text-align:center;" | [[Mega Skarmory]] | |||
| text-align:center;" | [[Arquivo:Steel.png|link=]] [[Arquivo:Flying.png|link=Wingeon]] | |||
| width="10%" | [[Arquivo:Interface_BDD_PVE.png|24px|link=]] | |||
| width="10%" | [[Arquivo:Not.png|link=]] | |||
| text-align:"center;" | [[file:Atk7.png|Attack T7|link=]] | |||
|- | |- | ||
| text-align:center;" | #303 | | text-align:center;" | #303 | ||
| Linha 442: | Linha 390: | ||
| width="10%" | [[Arquivo:Interface_BDD_PVE.png|24px|link=]] | | width="10%" | [[Arquivo:Interface_BDD_PVE.png|24px|link=]] | ||
| width="10%" | [[Arquivo:Not.png|link=]] | | width="10%" | [[Arquivo:Not.png|link=]] | ||
| text-align:"center;" | [[file:Atk7.png|Attack T7|link=]] | |||
|- | |||
| text-align:center;" | #306 | |||
| text-align:center;" | [[Arquivo:306 - Shiny Aggron.png|link=Shiny Aggron]] | |||
| text-align:center;" | [[Shiny Aggron]] | |||
| text-align:center;" | [[Arquivo:Steel.png|link=]] | |||
| width="10%" | [[Arquivo:Interface_OTDD_PVE.png|24px|link=]] | |||
| width="10%" | [[Arquivo:Not.png|link=]] | |||
| text-align:"center;" | [[file:Atk7.png|Attack T7|link=]] | |||
|- | |||
| text-align:"center;" | #376 | |||
| text-align:"center;" | [[Arquivo:376_-_Mega_Metagross.png|link=Mega Metagross]] | |||
| text-align:"center;" | [[Mega Metagross]] | |||
| text-align:"center;" | [[Arquivo: Steel.png|link=Ironhard]] | |||
| text-align:"center;" | [[Arquivo:Interface_OffensiveTanker_pve.png|24px|link=]] | |||
| text-align:"center;" | [[Arquivo:not.png|link=]] | |||
| text-align:"center;" | [[file:Atk7.png|Attack T7|link=]] | |||
|- | |||
| text-align:"center;" | #530 | |||
| text-align:"center;" | [[Arquivo:530-Mega Excadrill.png|link=Mega Excadrill]] | |||
| text-align:"center;" | [[Mega Excadrill]] | |||
| text-align:"center;" | [[Arquivo:Ground.png|link=Orebound]] [[arquivo:Steel.png|link=]] | |||
| text-align:"center;" | [[Arquivo:Interface_BDD_PVE.png|24px|link=]] | |||
| text-align:"center;" | [[Arquivo:Not.png|link=]] | |||
| text-align:"center;" | [[file:Atk7.png|Attack T7|link=]] | |||
|- | |||
| text-align:center;" | #681 | |||
| text-align:center;" | [[Arquivo:681-Shiny_Aegislash.png|link=Shiny Aegislash]] | |||
| text-align:center;" | [[Shiny Aegislash]] | |||
| text-align:center;" | [[Arquivo:Steel.png|link=]] | |||
| width="10%" | [[Arquivo:Interface_BDD_PVE.png|24px|link=]] | |||
| width="10%" | [[Arquivo:Not.png|link=]] | |||
| text-align:"center;" | [[file:Atk7.png|Attack T7|link=]] | |||
|} | |} | ||
</center> | </center> | ||
<br> | <br> | ||
'''Observação:''' Os Pokémon T1H | '''Observação:''' | ||
* Os Pokémon T1H têm força de T1C fora da '''[[Nightmare World]]''' e são acima dos T1C dentro dela ou pelo menos tem um diferencial perante os demais Pokémon. São balanceados exclusivamente para conteúdos PvE e não podem ser utilizados em duelos PvP. | |||
* O [[arquivo:530-Mega Excadrill.png|link=Mega Excadrill]] '''[[Mega Excadrill]]''' possui seu moveset focado no tipo [[arquivo:Ground.png|link=Orebound]] Ground. | |||
== Tier 2 == | == Tier 2 == | ||
<center> | <center> | ||
{| class="wikitable sortable" style="text-align:center" width=" | {| class="wikitable sortable" style="text-align:center" width="65%;" | ||
|- | |- | ||
! scope="col" width=" | ! scope="col" width="10%" style="background-color: #F1C232"| <span style="color:black">Nº Dex</span> | ||
! scope="col" style="background-color: # | ! scope="col" style="background-color: #F1C232"| <span style="color:black">Ícone</span> | ||
! scope="col" width=" | ! scope="col" width="15%;" style="background-color: #F1C232"| <span style="color:black">Nome</span> | ||
! scope="col" style="background-color: # | ! scope="col" style="background-color: #F1C232"| <span style="color:black">Elementos</span> | ||
! scope="col" width=" | ! scope="col" width="15%;" style="background-color: #F1C232"| <span style="color:black">Função PvE</span> | ||
! scope="col" width=" | ! scope="col" width="15%;" style="background-color: #F1C232"| <span style="color:black">Função PvP</span> | ||
! scope="col" width="20%;" style="background-color: #F1C232"| <span style="color:black">Held Recomendado (PvP/PvE)</span> | |||
|- | |- | ||
| text-align:center;" | #205 | | text-align:center;" | #205 | ||
| Linha 466: | Linha 450: | ||
| width="10%" | [[Arquivo:Interface_OffensiveTanker_pve.png|24px|link=]] | | width="10%" | [[Arquivo:Interface_OffensiveTanker_pve.png|24px|link=]] | ||
| width="10%" | [[Arquivo:Not.png|link=]] | | width="10%" | [[Arquivo:Not.png|link=]] | ||
| text-align:"center;" | [[file:Atk7.png|Attack T7|link=]] [[file:Def7.png|Defense T7|link=]] | |||
|- | |- | ||
| text-align:center;" | #208 | | text-align:center;" | #208 | ||
| text-align:center;" | [[Arquivo:208-Steelix.png|link=Steelix]] | | text-align:center;" | [[Arquivo:208-Steelix.png|link=Steelix]] | ||
| text-align:center;" | [[Steelix]] | | text-align:center;" | [[Steelix]] | ||
| text-align:center;" | [[Arquivo:Steel.png|link=Ironhard]] [[Arquivo:Ground.png|link=Orebound]] | | text-align:center;" | [[Arquivo:Steel.png|link=Ironhard]] [[Arquivo:Ground.png|link=Orebound]] | ||
| width="10%" | [[Arquivo:Interface_BDD_PVE.png|24px|link=]] | | width="10%" | [[Arquivo:Interface_BDD_PVE.png|24px|link=]] | ||
| width="10%" | [[Arquivo:Not.png|link=]] | | width="10%" | [[Arquivo:Not.png|link=]] | ||
| text-align:"center;" | [[file:Atk7.png|Attack T7|link=]] | |||
|- | |- | ||
| text-align:center;" | #212 | | text-align:center;" | #212 | ||
| Linha 480: | Linha 466: | ||
| width="10%" | [[Arquivo:Not.png|link=]] | | width="10%" | [[Arquivo:Not.png|link=]] | ||
| width="10%" | [[Arquivo:Interface_OTDD_PVP.png|24px|link=]] | | width="10%" | [[Arquivo:Interface_OTDD_PVP.png|24px|link=]] | ||
| text-align:"center;" | [[file:Def7.png|Defense T7|link=]] | |||
|- | |- | ||
| text-align:center;" | #227 | | text-align:center;" | #227 | ||
| Linha 487: | Linha 474: | ||
| width="10%" | [[Arquivo:Not.png|link=]] | | width="10%" | [[Arquivo:Not.png|link=]] | ||
| width="10%" | [[Arquivo:Interface_OffTank_PVP.png|24px|link=]] | | width="10%" | [[Arquivo:Interface_OffTank_PVP.png|24px|link=]] | ||
| text-align:"center;" | [[file:Def7.png|Defense T7|link=]] | |||
|- | |- | ||
| text-align:center;" | #306 | | text-align:center;" | #306 | ||
| Linha 494: | Linha 482: | ||
| width="10%" | [[Arquivo:Not.png|link=]] | | width="10%" | [[Arquivo:Not.png|link=]] | ||
| width="10%" | [[Arquivo:Interface_Tanker_PVP.png|24px|link=]] | | width="10%" | [[Arquivo:Interface_Tanker_PVP.png|24px|link=]] | ||
| text-align:"center;" | [[file:Def7.png|Defense T7|link=]] | |||
|- | |||
| text-align:center;" | #375 | |||
| text-align:center;" | [[Arquivo:375-Shiny_Metang.png|link=Shiny Metang]] | |||
| text-align:center;" | [[Shiny Metang]] | |||
| text-align:center;" | [[Arquivo:Steel.png|link=]] [[Arquivo:Psychic.png|link=Psycraft]] | |||
| width="10%" | [[Arquivo:Not.png|link=]] | |||
| width="10%" | [[Arquivo:Interface_OffTank_PVP.png|24px|link=]] | |||
| text-align:"center;" | [[file:Def7.png|Defense T7|link=]] | |||
|- | |- | ||
| text-align:center;" | #395 | | text-align:center;" | #395 | ||
| Linha 499: | Linha 496: | ||
| text-align:center;" | [[Empoleon]] | | text-align:center;" | [[Empoleon]] | ||
| text-align:center;" | [[Arquivo:Water.png|link=Seavell]] [[Arquivo:Steel.png|link=Ironhard]] | | text-align:center;" | [[Arquivo:Water.png|link=Seavell]] [[Arquivo:Steel.png|link=Ironhard]] | ||
| width="10%" | [[Arquivo: | | width="10%" | [[Arquivo:Interface_OTDD_PVE.png|24px|link=]] | ||
| width="10%" | [[Arquivo:Interface_BDD_PVP.png|24px|link=]] | | width="10%" | [[Arquivo:Interface_BDD_PVP.png|24px|link=]] | ||
| text-align:"center;" | [[file:Atk7.png|Attack T7|link=]] | |||
|- | |- | ||
| text-align:center;" | #411 | | text-align:center;" | #411 | ||
| Linha 508: | Linha 506: | ||
| width="10%" | [[Arquivo:Not.png|link=]] | | width="10%" | [[Arquivo:Not.png|link=]] | ||
| width="10%" | [[Arquivo:Interface_BDD_PVP.png|24px|link=]] | | width="10%" | [[Arquivo:Interface_BDD_PVP.png|24px|link=]] | ||
| text-align:"center;" | [[file:Atk7.png|Attack T7|link=]] | |||
|- | |||
| text-align:center;" | #437 | |||
| text-align:center;" | [[Arquivo:437-Bronzong.png|link=Bronzong]] | |||
| text-align:center;" | [[Bronzong]] | |||
| text-align:center;" | [[Arquivo:Steel.png|link=]] [[Arquivo:Psychic.png|link=Psycraft]] | |||
| width="10%" | [[Arquivo:Interface_BDD_PVE.png|24px|link=]] | |||
| width="10%" | [[Arquivo:Not.png|link=]] | |||
| text-align:"center;" | [[file:Atk7.png|Attack T7|link=]] | |||
|- | |- | ||
| text-align:center;" | #448 | | text-align:center;" | #448 | ||
| text-align:center;" | [[Arquivo:Shinyluc.png|link=Shiny Lucario]] | | text-align:center;" | [[Arquivo:Shinyluc.png|link=Shiny Lucario]] | ||
| text-align:center;" | [[Shiny Lucario]] | | text-align:center;" | [[Shiny Lucario]] | ||
| text-align:center;" | [[ | | text-align:center;" | [[arquivo:Fighting.png|link=Gardestrike]] [[Arquivo:Steel.png|link=Ironhard]] | ||
| width="10%" | [[Arquivo:Not.png|link=]] | | width="10%" | [[Arquivo:Not.png|link=]] | ||
| width="10%" | [[Arquivo:Interface_OTDD_PVP.png|24px|link=]] | |||
| text-align:"center;" | [[file:Atk7.png|Attack T7|link=]] | |||
|- | |- | ||
| text-align:center;" | #462 | | text-align:center;" | #462 | ||
| Linha 522: | Linha 530: | ||
| width="10%" | [[Arquivo:Not.png|link=]] | | width="10%" | [[Arquivo:Not.png|link=]] | ||
| width="10%" | [[Arquivo:Interface_Disrupter_PVP.png|24px|link=]] | | width="10%" | [[Arquivo:Interface_Disrupter_PVP.png|24px|link=]] | ||
| text-align:"center;" | [[file:Acc7.png|Accuracy T7|link=]] | |||
|- | |||
| text-align:center;" | #476 | |||
| text-align:center;" | [[Arquivo:476-Probopass.png|link=Probopass]] | |||
| text-align:center;" | [[Probopass]] | |||
| text-align:center;" | [[Arquivo:Rock.png|link=Orebound]] [[Arquivo:Steel.png|link=]] | |||
| width="10%" | [[Arquivo:Not.png|link=]] | |||
| width="10%" | [[Arquivo:Interface_OffTank_PVP.png|24px|link=]] | |||
| text-align:"center;" | [[file:Atk7.png|Attack T7|link=]] | |||
|- | |- | ||
| text-align:center;" | #530 | | text-align:center;" | #530 | ||
| Linha 528: | Linha 545: | ||
| text-align:center;" | [[Arquivo:Ground.png|link=Orebound]] [[Arquivo:Steel.png|link=Ironhard]] | | text-align:center;" | [[Arquivo:Ground.png|link=Orebound]] [[Arquivo:Steel.png|link=Ironhard]] | ||
| width="10%" | [[Arquivo:Not.png|link=]] | | width="10%" | [[Arquivo:Not.png|link=]] | ||
| width="10%" | [[Arquivo:Interface_BDD_PVP.png|24px|link=]] | | width="10%" | [[Arquivo:Interface_BDD_PVP.png|24px|link=]] | ||
| text-align:"center;" | [[file:Atk7.png|Attack T7|link=]] | |||
|- | |- | ||
| text-align:center;" | # | | text-align:"center;" | #589 | ||
| text-align:center;" | [[Arquivo:598- | | text-align:"center;" | [[file:589_-_Escavalier.png|link=Escavalier]] | ||
| text-align:center;" | [[Ferrothorn]] | | text-align:"center;" | [[Escavalier]] | ||
| text-align:center;" | [[Arquivo:Grass.png|link= | | text-align:"center;" | [[Arquivo:Bug.png|link=]] [[Arquivo:Steel.png|link=Ironhard]] | ||
| | | text-align:"center;" | [[Arquivo:Not.png|link=]] | ||
| | | text-align:"center;" | [[Arquivo:Interface_Tanker_PVP.png|24px|link=]] | ||
| text-align:"center;" | [[file:Def7.png|Defense T7|link=]] | |||
|- | |||
| text-align:"center;" | #598 | |||
| text-align:"center;" | [[file:598_-_Shiny_Ferrothorn.png|link=Shiny Ferrothorn]] | |||
| text-align:"center;" | [[Shiny Ferrothorn]] | |||
| text-align:"center;" | [[Arquivo:Grass.png|link=]] [[Arquivo:Steel.png|link=Ironhard]] | |||
| text-align:"center;" | [[Arquivo:Not.png|link=]] | |||
| text-align:"center;" | [[Arquivo:Interface_Tanker_PVP.png|24px|link=]] | |||
| text-align:"center;" | [[file:Def7.png|Defense T7|link=]] | |||
|- | |- | ||
| text-align:center;" | #601 | | text-align:center;" | #601 | ||
| Linha 543: | Linha 570: | ||
| width="10%" | [[Arquivo:Interface_Tank_PVE.png|24px|link=]] | | width="10%" | [[Arquivo:Interface_Tank_PVE.png|24px|link=]] | ||
| width="10%" | [[Arquivo:Not.png|link=]] | | width="10%" | [[Arquivo:Not.png|link=]] | ||
| text-align:"center;" | [[file:Def7.png|Defense T7|link=]] | |||
|- | |- | ||
| text-align:center;" | #681 | | text-align:center;" | #681 | ||
| Linha 550: | Linha 578: | ||
| width="10%" | [[Arquivo:Not.png|link=]] | | width="10%" | [[Arquivo:Not.png|link=]] | ||
| width="10%" | [[Arquivo:Interface_OffTank_PVP.png|24px|link=]] | | width="10%" | [[Arquivo:Interface_OffTank_PVP.png|24px|link=]] | ||
| text-align:"center;" | [[file:Atk7.png|Attack T7|link=]] | |||
|- | |||
| text-align:center;" | #707 | |||
| text-align:center;" | [[Arquivo:707-Klefki.png|link=Klefki]] | |||
| text-align:center;" | [[Klefki]] | |||
| text-align:center;" | [[Arquivo:Steel.png|link=]] [[Arquivo:Fairy.png|link=Psycraft]] | |||
| width="10%" | [[Arquivo:Not.png|link=]] | |||
| width="10%" | [[Arquivo:Interface_Disrupter_PVP.png|24px|link=]] [[Arquivo:Interface_Support_PVP.png|24px|link=]] | |||
| text-align:"center;" | [[file:Acc7.png|Accuracy T7|link=]] | |||
|- | |||
| text-align:center;" | #777 | |||
| text-align:center;" | [[Arquivo:777-Shiny_Togedemaru.png|link=Shiny_Togedemaru]] | |||
| text-align:center;" | [[Shiny Togedemaru]] | |||
| text-align:center;" | [[Arquivo:Electric.png|link=Raibolt]] [[Arquivo:Steel.png|link=Ironhard]] | |||
| width="10%" | [[Arquivo:Interface_SupportOT_PVE.png|24px|link=]] | |||
| width="10%" | [[Arquivo:Not.png|link=]] | |||
| text-align:"center;" | [[file:Atk7.png|Attack T7|link=]] | |||
|- | |||
| text-align:center;" | #863 | |||
| text-align:center;" | [[Arquivo:863-Perrserker.png|link=Perrserkerr]] | |||
| text-align:center;" | [[Perrserker]] | |||
| text-align:center;" | [[Arquivo:Steel.png|link=Ironhard]] | |||
| width="10%" | [[Arquivo:Interface_BDD_PVE.png|24px|link=]] | |||
| width="10%" | [[Arquivo:Not.png|link=]] | |||
| text-align:"center;" | [[file:Atk7.png|Attack T7|link=]] | |||
|- | |||
| text-align:center;" | #879 | |||
| text-align:center;" | [[Arquivo:879-Copperajah.png|link=Copperajah]] | |||
| text-align:center;" | [[Copperajah]] | |||
| text-align:center;" | [[Arquivo:Steel.png|link=Ironhard]] | |||
| width="10%" | [[Arquivo:Interface_OTDD_PVE.png|24px|link=]] | |||
| width="10%" | [[Arquivo:Interface_BDD_PVP.png|24px|link=]] | |||
| text-align:"center;" | [[file:Atk7.png|Attack T7|link=]] | |||
|} | |} | ||
</center> | </center> | ||
== Tier 3 == | == Tier 3 == | ||
<center> | <center> | ||
{| class="wikitable sortable" style="text-align:center" width=" | {| class="wikitable sortable" style="text-align:center" width="65%;" | ||
|- | |- | ||
! scope="col" width=" | ! scope="col" width="10%" style="background-color: #F1C232"| <span style="color:black">Nº Dex</span> | ||
! scope="col" style="background-color: # | ! scope="col" style="background-color: #F1C232"| <span style="color:black">Ícone</span> | ||
! scope="col" width=" | ! scope="col" width="15%;" style="background-color: #F1C232"| <span style="color:black">Nome</span> | ||
! scope="col" style="background-color: # | ! scope="col" style="background-color: #F1C232"| <span style="color:black">Elementos</span> | ||
! scope="col" width=" | ! scope="col" width="15%;" style="background-color: #F1C232"| <span style="color:black">Função PvE</span> | ||
! scope="col" width=" | ! scope="col" width="15%;" style="background-color: #F1C232"| <span style="color:black">Função PvP</span> | ||
! scope="col" width="20%;" style="background-color: #F1C232"| <span style="color:black">Held Recomendado (PvP/PvE)</span> | |||
|- | |- | ||
| text-align:center;" | #051 | | text-align:center;" | #051 | ||
| text-align:center;" | [[Arquivo:051-AlolanDugtrio.png|link=Alolan Dugtrio]] | | text-align:center;" | [[Arquivo:051-AlolanDugtrio.png|link=Alolan Dugtrio]] | ||
| text-align:center;" | [[Alolan Dugtrio]] | | text-align:center;" | [[Alolan Dugtrio]] | ||
| text-align:center;" | [[Arquivo:Ground.png|link=Orebound]] [[Arquivo:Steel.png|link=]] | | text-align:center;" | [[Arquivo:Ground.png|link=Orebound]] [[Arquivo:Steel.png|link=]] | ||
| width="10%" | [[Arquivo:Interface_BDD_PVE.png|24px|link=]] | | width="10%" | [[Arquivo:Interface_BDD_PVE.png|24px|link=]] | ||
| width="10%" | [[Arquivo:Not.png|link=]] | | width="10%" | [[Arquivo:Not.png|link=]] | ||
| text-align:"center;" | [[file:Atk7.png|Attack T7|link=]] | |||
|- | |- | ||
| text-align:center;" | #082 | | text-align:center;" | #082 | ||
| Linha 580: | Linha 641: | ||
| width="10%" | [[Arquivo:Interface_BDD_PVE.png|24px|link=]] | | width="10%" | [[Arquivo:Interface_BDD_PVE.png|24px|link=]] | ||
| width="10%" | [[Arquivo:Not.png|link=]] | | width="10%" | [[Arquivo:Not.png|link=]] | ||
| text-align:"center;" | [[file:Atk7.png|Attack T7|link=]] | |||
|- | |- | ||
| text-align:center;" | #205 | | text-align:center;" | #205 | ||
| Linha 587: | Linha 649: | ||
| width="10%" | [[Arquivo:Not.png|link=]] | | width="10%" | [[Arquivo:Not.png|link=]] | ||
| width="10%" | [[Arquivo:Interface_Tanker_PVP.png|24px|link=]] [[Arquivo:Interface_Support_PVP.png|24px|link=]] | | width="10%" | [[Arquivo:Interface_Tanker_PVP.png|24px|link=]] [[Arquivo:Interface_Support_PVP.png|24px|link=]] | ||
| text-align:"center;" | [[file:Def7.png|Defense T7|link=]] | |||
|- | |- | ||
| text-align:center;" | #303 | | text-align:center;" | #303 | ||
| Linha 594: | Linha 657: | ||
| width="10%" | [[Arquivo:Not.png|link=]] | | width="10%" | [[Arquivo:Not.png|link=]] | ||
| width="10%" | [[Arquivo:Interface_Support_PVP.png|24px|link=]] | | width="10%" | [[Arquivo:Interface_Support_PVP.png|24px|link=]] | ||
| text-align:"center;" | [[file:Def7.png|Defense T7|link=]] | |||
|- | |||
| text-align:center;" | #305 | |||
| text-align:center;" | [[Arquivo:305 - Shiny Lairon.png|link=Shiny Lairon]] | |||
| text-align:center;" | [[Shiny Lairon]] | |||
| text-align:center;" | [[Arquivo:Steel.png|link=]] | |||
| width="10%" |[[Arquivo:Interface_BDD_PVE.png|24px|link=]] | |||
| width="10%" | [[Arquivo:Not.png|link=]] | |||
| text-align:"center;" | [[file:Atk7.png|Attack T7|link=]] | |||
|- | |- | ||
| text-align:center;" | #375 | | text-align:center;" | #375 | ||
| Linha 599: | Linha 671: | ||
| text-align:center;" | [[Metang]] | | text-align:center;" | [[Metang]] | ||
| text-align:center;" | [[Arquivo:Steel.png|link=]] [[Arquivo:Psychic.png|link=Psycraft]] | | text-align:center;" | [[Arquivo:Steel.png|link=]] [[Arquivo:Psychic.png|link=Psycraft]] | ||
| width="10%" | [[Arquivo: | | width="10%" |[[Arquivo:Interface_BDD_PVE.png|24px|link=]] | ||
| width="10%" | [[Arquivo:Not.png|link=]] | | width="10%" | [[Arquivo:Not.png|link=]] | ||
| text-align:"center;" | [[file:Atk7.png|Attack T7|link=]] | |||
|- | |- | ||
| | | text-align:center;" | #448 | ||
| | | text-align:center;" | [[Arquivo:448-Lucario.png|link=Lucario]] | ||
| | | text-align:center;" | [[Lucario]] | ||
| | | text-align:center;" | [[Arquivo:Fighting.png|link=Gardestrike]] [[Arquivo:Steel.png|link=]] | ||
| | | width="10%" | [[Arquivo:Interface_Speedster_PVE.png|24px|link=]] | ||
| | | width="10%" | [[Arquivo:Interface_BDD_PVP.png|24px|link=]] | ||
| text-align:"center;" | [[file:Atk7.png|Attack T7|link=]] | |||
|- | |- | ||
| text-align:center;" | # | | text-align:"center;" | #598 | ||
| text-align:center;" | [[Arquivo: | | text-align:"center;" | [[Arquivo:Ferrothorn.png|link=ferrothorn]] | ||
| text-align:center;" | [[ | | text-align:"center;" | [[Ferrothorn]] | ||
| text-align:center;" | [[Arquivo: | | text-align:"center;" | [[Arquivo:Grass.png|link=Naturia]] [[Arquivo:Steel.png|link=Ironhard]] | ||
| | | text-align:"center;" | [[Arquivo:Not.png|link=]] | ||
| text-align:"center;" | [[Arquivo:Interface Support PVP.png|24px|link=]] | |||
| text-align:"center;" | [[file:Def7.png|Defense T7|link=]] | |||
| text-align: | |||
| text-align: | |||
|- | |- | ||
| text-align:center;" | #601 | | text-align:center;" | #601 | ||
| Linha 627: | Linha 695: | ||
| text-align:center;" | [[Klinklang]] | | text-align:center;" | [[Klinklang]] | ||
| text-align:center;" | [[Arquivo:Steel.png|link=]] | | text-align:center;" | [[Arquivo:Steel.png|link=]] | ||
| width="10%" | [[Arquivo: | | width="10%" | [[Arquivo:Interface_OffensiveTanker_pve.png|25px|link=]] | ||
| width="10%" | [[Arquivo:Not.png|link=]] | | width="10%" | [[Arquivo:Not.png|link=]] | ||
| text-align:"center;" | [[file:Atk7.png|Attack T7|link=]] | |||
|- | |- | ||
| text-align:center;" | #625 | | text-align:center;" | #625 | ||
| Linha 636: | Linha 705: | ||
| width="10%" | [[Arquivo:Not.png|link=]] | | width="10%" | [[Arquivo:Not.png|link=]] | ||
| width="10%" | [[Arquivo:Interface_BDD_PVP.png|24px|link=]] | | width="10%" | [[Arquivo:Interface_BDD_PVP.png|24px|link=]] | ||
| text-align:"center;" | [[file:Def7.png|Defense T7|link=]] | |||
|- | |||
| text-align:center;" | #777 | |||
| text-align:center;" | [[Arquivo:777-Togedemaru.png|link=Togedemaru]] | |||
| text-align:center;" | [[Togedemaru]] | |||
| text-align:center;" | [[Arquivo:Electric.png|link=Raibolt]] [[Arquivo:Steel.png|link=Ironhard]] | |||
| width="10%" | [[Arquivo:Not.png|link=]] | |||
| width="10%" | [[Arquivo:Interface_BDD_PVP.png|24px|link=]] | |||
| text-align:"center;" | [[file:Def7.png|Defense T7|link=]] | |||
|} | |} | ||
</center> | </center> | ||
= Rotação Mid-Late Game = | |||
<center> | <center> | ||
{| class="wikitable" style="text-align:center" width="50%;" | {| class="wikitable" style="text-align:center" width="50%;" | ||
|- | |- | ||
! colspan="4" scope="col" style="background-color: #848484"| | ! colspan="4" scope="col" style="background-color: #848484"| [[Arquivo:Steel.png|link=]] Steel | ||
|- | |- | ||
! scope="col" style="background-color: #BDBDBD"| <span style="color:black">Pokémon</span> | ! scope="col" style="background-color: #BDBDBD"| <span style="color:black">Pokémon</span> | ||
| Linha 657: | Linha 733: | ||
| text-align:"center;" | [[Arquivo:Interface_Tank_PVE.png|24px|link=]] | | text-align:"center;" | [[Arquivo:Interface_Tank_PVE.png|24px|link=]] | ||
| text-align:"center;" | 2 | | text-align:"center;" | 2 | ||
|- | |||
| text-align:"center;" | [[Arquivo:Megametagross.png|link=Mega Metagross]] | |||
| text-align:"center;" | [[Mega Metagross]] | |||
| text-align:"center;" | [[Arquivo:Interface_OffensiveTanker_pve.png|25px|link=]] | |||
| text-align:"center;" | 1H | |||
|- | |- | ||
| text-align:"center;" | [[Arquivo:205-ShinyForretress.png|link=Shiny Forretress]] | | text-align:"center;" | [[Arquivo:205-ShinyForretress.png|link=Shiny Forretress]] | ||
| Linha 662: | Linha 743: | ||
| text-align:"center;" | [[Arquivo:Interface_OffensiveTanker_pve.png|25px|link=]] | | text-align:"center;" | [[Arquivo:Interface_OffensiveTanker_pve.png|25px|link=]] | ||
| text-align:"center;" | 2 | | text-align:"center;" | 2 | ||
|- | |- | ||
| text-align:"center;" | [[Arquivo: | | text-align:"center;" | [[Arquivo:601.png|link=Klinklang]] | ||
| text-align:"center;" | [[ | | text-align:"center;" | [[Klinklang]] | ||
| text-align:"center;" | [[Arquivo:Interface_OffensiveTanker_pve.png|25px|link=]] | | text-align:"center;" | [[Arquivo:Interface_OffensiveTanker_pve.png|25px|link=]] | ||
| text-align:"center;" | 3 | | text-align:"center;" | 3 | ||
| Linha 673: | Linha 754: | ||
| text-align:"center;" | 1H | | text-align:"center;" | 1H | ||
|- | |- | ||
| text-align:"center;" | [[Arquivo: | | text-align:"center;" | [[Arquivo:681-Shiny_Aegislash.png|link=Shiny Aegislash]] | ||
| text-align:"center;" | [[Shiny | | text-align:"center;" | [[Shiny Aegislash]] | ||
| text-align:"center;" | [[Arquivo:Interface_BDD_PVE.png|24px|link=]] | |||
| text-align:"center;" | 1H | |||
|- | |||
| text-align:"center;" | [[Arquivo:227_-_Mega_Skarmory.png|link=Mega Skarmory]] | |||
| text-align:"center;" | [[Mega Skarmory]] | |||
| text-align:"center;" | [[Arquivo:Interface_BDD_PVE.png|24px|link=]] | |||
| text-align:"center;" | 1H | |||
|- | |||
| text-align:"center;" | [[Arquivo:437-Bronzong.png|link=Bronzong]] | |||
| text-align:"center;" | [[Bronzong]] | |||
| text-align:"center;" | [[Arquivo:Interface_BDD_PVE.png|24px|link=]] | |||
| text-align:"center;" | 2 | |||
|- | |||
| text-align:"center;" | [[Arquivo:863-Perrserker.png|link=Perrserker]] | |||
| text-align:"center;" | [[Perrserker]] | |||
| text-align:"center;" | [[Arquivo:Interface_BDD_PVE.png|24px|link=]] | |||
| text-align:"center;" | 2 | |||
|- | |||
| text-align:"center;" | [[Arquivo:082-Magneton.png|link=Magneton]] | |||
| text-align:"center;" | [[Magneton]] | |||
| text-align:"center;" | [[Arquivo:Interface_BDD_PVE.png|25px|link=]] | | text-align:"center;" | [[Arquivo:Interface_BDD_PVE.png|25px|link=]] | ||
| text-align:"center;" | | | text-align:"center;" | 3 | ||
|- | |- | ||
| text-align:"center;" | [[Arquivo: | | text-align:"center;" | [[Arquivo:375-Metang.png|link=Metang]] | ||
| text-align:"center;" | [[ | | text-align:"center;" | [[Metang]] | ||
| text-align:"center;" | [[Arquivo:Interface_BDD_PVE.png| | | text-align:"center;" | [[Arquivo:Interface_BDD_PVE.png|24px|link=]] | ||
| text-align:"center;" | 3 | | text-align:"center;" | 3 | ||
|- | |- | ||
| text-align:"center;" | [[Arquivo: | | text-align:"center;" | [[Arquivo:305 - Shiny Lairon.png|link=Shiny Lairon]] | ||
| text-align:"center;" | [[ | | text-align:"center;" | [[Shiny Lairon]] | ||
| text-align:"center;" | [[Arquivo:Interface_BDD_PVE.png|24px|link=]] | |||
| text-align:"center;" | 3 | |||
|- | |||
| text-align:"center;" | [[Arquivo:082-Sh Magneton.png|link=Shiny Magneton (TM)]] | |||
| text-align:"center;" | [[Shiny Magneton (TM)]] | |||
| text-align:"center;" | [[Arquivo:Interface_BDD_PVE.png|25px|link=]] | | text-align:"center;" | [[Arquivo:Interface_BDD_PVE.png|25px|link=]] | ||
| text-align:"center;" | | | text-align:"center;" | TM Burst | ||
|- | |||
| text-align:"center;" | [[Arquivo:Scizor.png|link=Scizor (TR)]] | |||
| text-align:"center;" | [[Scizor (TR)]] | |||
| text-align:"center;" | [[Arquivo:Interface BDD PVE.png|24px|link=]] | |||
| text-align:"center;" | TR | |||
|} | |} | ||
</center> | </center> | ||
'''Observações:''' | |||
* Não existe uma rotação [[Arquivo:Crystal.png|link=]] Crystal-type. O único Pokémon existente com tal elemento é o '''[[Crystal Onix]]'''. | |||
=Exclusividade do Clã no PvP= | =Exclusividade do Clã no PvP= | ||
| Linha 712: | Linha 809: | ||
<center> | <center> | ||
{| class="wikitable" style="text-align:center" width=" | {| class="wikitable" style="text-align:center" width="25%;" | ||
|- | |- | ||
! scope="col" width="5%;" style="background-color: #848484"| | ! scope="col" width="5%;" style="background-color: #848484"| Pokémon | ||
! scope="col" width="15%;" style="background-color: #848484"| | ! scope="col" width="15%;" style="background-color: #848484"| Nome | ||
|- | |- | ||
| text-align:"center;" | [[Arquivo:028-AlolanSandslash.png|link=Alolan Sandslash]] | | text-align:"center;" | [[Arquivo:028-AlolanSandslash.png|link=Alolan Sandslash]] | ||
| text-align:"center;" | [[Alolan Sandslash]] | | text-align:"center;" | [[Alolan Sandslash]] | ||
|- | |- | ||
| text-align:"center;" | [[Arquivo:Shiny steelix.png|link=Golden Steelix]] | | text-align:"center;" | [[Arquivo:Shiny steelix.png|link=Golden Steelix]] | ||
| text-align:"center;" | [[Golden Steelix]] | | text-align:"center;" | [[Golden Steelix]] | ||
|- | |- | ||
| text-align:"center;" | [[Arquivo:205-ShinyForretress.png|link=Shiny Forretress]] | | text-align:"center;" | [[Arquivo:205-ShinyForretress.png|link=Shiny Forretress]] | ||
| text-align:"center;" | [[Shiny Forretress]] | | text-align:"center;" | [[Shiny Forretress]] | ||
| text-align:"center;" | [[ | |||
|- | |||
| text-align:"center;" | [[file:Shinyscizor.png|link=Shiny Scizor]] | |||
| text-align:"center;" | [[Shiny Scizor]] | |||
|- | |- | ||
| text-align:"center;" | [[Arquivo:303-MegaMawile.png|link=Mega Mawile]] | | text-align:"center;" | [[Arquivo:303-MegaMawile.png|link=Mega Mawile]] | ||
| text-align:"center;" | [[Mega Mawile]] | | text-align:"center;" | [[Mega Mawile]] | ||
| text-align:"center;" | [[Arquivo: | |||
|- | |||
| text-align:"center;" | [[Arquivo:358-Mega_Chimecho.png|link=Mega Chimecho]] | |||
| text-align:"center;" | [[Mega Chimecho]] | |||
|- | |- | ||
| text-align:"center;" | [[Arquivo:395-Empoleon.png|link=Empoleon]] | | text-align:"center;" | [[Arquivo:395-Empoleon.png|link=Empoleon]] | ||
| text-align:"center;" | [[Empoleon]] | | text-align:"center;" | [[Empoleon]] | ||
| text-align:"center;" | [[Arquivo: | |||
|- | |||
| text-align:"center;" | [[Arquivo:395-Shiny_Empoleon.png|link=Shiny Empoleon]] | |||
| text-align:"center;" | [[Shiny Empoleon]] | |||
|- | |- | ||
| text-align:"center;" | [[Arquivo:Shinyluc.png|link=Shiny Lucario]] | | text-align:"center;" | [[Arquivo:Shinyluc.png|link=Shiny Lucario]] | ||
| text-align:"center;" | [[Shiny Lucario]] | | text-align:"center;" | [[Shiny Lucario]] | ||
| text-align:"center;" | [[Arquivo: | |||
|- | |||
| text-align:"center;" | [[Arquivo:530-Excadrill.png|link=Excadrill]] | |||
| text-align:"center;" | [[Excadrill]] | |||
|- | |||
| text-align:"center;" | [[Arquivo:598_-_Shiny_Ferrothorn.png|link=Shiny Ferrothorn]] | |||
| text-align:"center;" | [[Shiny Ferrothorn]] | |||
|- | |- | ||
| text-align:"center;" | [[Arquivo:681-Aegislash.png|link=Aegislash]] | | text-align:"center;" | [[Arquivo:681-Aegislash.png|link=Aegislash]] | ||
| text-align:"center;" | [[Aegislash]] | | text-align:"center;" | [[Aegislash]] | ||
| text-align:"center;" | [[Arquivo: | |||
|- | |||
| text-align:"center;" | [[Arquivo:707-Klefki.png|link=Klefki]] | |||
| text-align:"center;" | [[Klefki]] | |||
|- | |- | ||
| text-align:"center;" | [[Arquivo:879-ShinyCopperajah.png|link=Shiny Copperajah]] | | text-align:"center;" | [[Arquivo:879-ShinyCopperajah.png|link=Shiny Copperajah]] | ||
| text-align:"center;" | [[Shiny Copperajah]] | | text-align:"center;" | [[Shiny Copperajah]] | ||
|} | |} | ||
</center> | </center> | ||
'''Observação:''' A exclusividade é aplicada apenas em conteúdos PvP. No PvE, o uso é liberado para todos os clãs. | '''Observação:''' A exclusividade é aplicada apenas em conteúdos PvP. No PvE, o uso é liberado para todos os clãs. | ||
=Pokémon obtido via NPC de Clã= | |||
*'''Shiny de Clã''' | |||
Para obter um, [[Arquivo:205-ShinyForretress.png|link=Shiny Forretress]] '''[[Shiny Forretress]]''' fale com a '''[[Pokémon_Obtidos_via_NPC#Shiny_de_Cl.C3.A3|NPC Bellemere]]''', localizada na área do Clã Ironhard, no Trade Center. | |||
<br><center>[[Arquivo:NPC Bellemere Ironhard.png|link=]] </center> | |||
*'''Shiny de Clã da Nightmare World''' | |||
Para obter um, [[Arquivo:Shinyluc.png|link=Shiny Lucario]] '''[[Shiny Lucario]]''' fale com a '''[[Pokémon_Obtidos_via_NPC#Shiny_de_Cl.C3.A3_da_Nightmare_World|NPC Bellemere]]''', na área Ironhard, na resistência de Cerulean. | |||
<br><center> [[Arquivo:NPC NW Bellemere Ironhard.png|link=]] </center> | |||
= Efetividades = | |||
Abaixo são apresentadas as efetividades dos Pokémon deste clã, considerando apenas aqueles que possuem '''um elemento'''. A efetividade pode mudar caso o Pokémon possua dois elementos ou possua alguma resistência à algum elemento, como é o caso do '''[[Shiny Bronzong]]''' que possui a passiva '''Heatproof''', permitindo que ganhe resistência contra ataques do tipo Fire (0.5x). | |||
A efetividade de um Pokémon pode ser conferida na [[Arquivo:PokedexIcon.png|link=]] '''Pokédex''' ou realizando uma busca na página '''[[Pokémon]]''' (uso do Ctrl+F recomendado). Clique no ícone do elemento desejado para conferir a tabela de efetividade deste clã. | |||
<span class="mw-customtoggle-myDivision34"><font size="2"> [[Arquivo:Steel.png|20px|link=]] '''Steel''' </font></span> | |||
<div class="mw-collapsible mw-collapsed" id="mw-customcollapsible-myDivision34"> | |||
<center> | |||
{| class="wikitable" style="text-align:center" width="30%;" | |||
|- | |||
! colspan="3" scope="col" width="2%" style="background-color: #848484"| [[Arquivo:Steel.png|20px|link=]] Ofensivo | |||
|- | |||
! scope="col" width="1%" | <span style="color:black">Dano</span> | |||
! colspan="2" scope="col" width="4%" | <span style="color:black">Elemento</span> | |||
|- | |||
| rowspan="3" style="border-right-style: hidden; background-color: #01DF01;" | 2x | |||
| width="1%" style="border-bottom-style: hidden;" | [[Arquivo:Fairy.png|link=Psycraft]] | |||
| style="border-left-style: hidden; text-align:left; border-bottom-style: hidden;" | Fairy | |||
|- | |||
| width="1%" style="border-bottom-style: hidden;" | [[Arquivo:Ice.png|link=Seavell]] | |||
| style="border-left-style: hidden; text-align:left; border-bottom-style: hidden;" | Ice | |||
|- | |||
| width="1%" | [[Arquivo:Rock.png|link=Orebound]] | |||
| style="border-left-style: hidden; text-align:left" | Rock | |||
|- | |||
| rowspan="4" style="border-right-style: hidden; background-color: #FE2E2E"| 0.5x | |||
| width="1%" style="border-bottom-style: hidden;"| [[Arquivo:Electric.png|link=Raibolt]] | |||
| style="border-left-style: hidden; text-align:left; border-bottom-style: hidden;" | Electric | |||
|- | |||
| width="1%" style="border-bottom-style: hidden;" | [[Arquivo:Fire.png|link=Volcanic]] | |||
| style="border-left-style: hidden; text-align:left; border-bottom-style: hidden;"| Fire | |||
|- | |||
| width="1%" style="border-bottom-style: hidden;" | [[Arquivo:Steel.png|link=]] | |||
| style="border-left-style: hidden; text-align:left; border-bottom-style: hidden;" | Steel | |||
|- | |||
| width="1%" | [[Arquivo:Water.png|link=Seavell]] | |||
| style="border-left-style: hidden; text-align:left" | Water | |||
|- | |||
| style="background-color: #A4A4A4" width="1%"| 0x | |||
| colspan="2" text-align:center" | - | |||
|} | |||
</center> | |||
<center> | |||
{| class="wikitable" style="text-align:center" width="30%;" | |||
|- | |||
! colspan="3" scope="col" width="2%" style="background-color: #848484"| [[Arquivo:Steel.png|20px|link=]] Defensivo | |||
|- | |||
! scope="col" width="1%" | <span style="color:black">Dano</span> | |||
! colspan="2" scope="col" width="4%" | <span style="color:black">Elemento</span> | |||
|- | |||
| rowspan="10" style="border-right-style: hidden; background-color: #FE2E2E;"| 0.5x | |||
| width="1%" style="border-right-style: hidden; text-align:center; border-bottom-style: hidden;"| [[Arquivo:Bug.png|link=Naturia]] | |||
| style="text-align:left; border-bottom-style: hidden;" | Fighting | |||
|- | |||
| style="border-right-style: hidden; text-align:center; border-bottom-style: hidden;" | [[Arquivo:Dragon.png|link=Wingeon]] | |||
| style="text-align:left; border-bottom-style: hidden;" | Dragon | |||
|- | |||
| style="border-right-style: hidden; text-align:center; border-bottom-style: hidden;" | [[Arquivo:Fairy.png|link=Psycraft]] | |||
| style="text-align:left; border-bottom-style: hidden;" | Fairy | |||
|- | |||
| style="border-right-style: hidden; text-align:center; border-bottom-style: hidden;" | [[Arquivo:Flying.png|link=Wingeon]] | |||
| style="text-align:left; border-bottom-style: hidden;" | Flying | |||
|- | |||
| style="border-right-style: hidden; text-align:center; border-bottom-style: hidden;" | [[Arquivo:Grass.png|link=Naturia]] | |||
| style="text-align:left; border-bottom-style: hidden;" | Grass | |||
|- | |||
| style="border-right-style: hidden; text-align:center; border-bottom-style: hidden;" | [[Arquivo:Ice.png|link=Seavell]] | |||
| style="text-align:left; border-bottom-style: hidden;" | Ice | |||
|- | |||
| style="border-right-style: hidden; text-align:center; border-bottom-style: hidden;" | [[Arquivo:Normal1.png|link=Gardestrike]] | |||
| style="text-align:left; border-bottom-style: hidden;" | Normal | |||
|- | |||
| style="border-right-style: hidden; text-align:center; border-bottom-style: hidden;" | [[Arquivo:Psychic.png|link=Psycraft]] | |||
| style="text-align:left; border-bottom-style: hidden;" | Psychic | |||
|- | |||
| style="border-right-style: hidden; text-align:center; border-bottom-style: hidden;" | [[Arquivo:Rock.png|link=Orebound]] | |||
| style="text-align:left; border-bottom-style: hidden;" | Rock | |||
|- | |||
| style="border-right-style: hidden; text-align:center" | [[Arquivo:Steel.png|link=]] | |||
| style="text-align:left" | Steel | |||
|- | |||
| rowspan="3" style="border-right-style: hidden; background-color: #01DF01;"| 2x | |||
| width="1%" style="border-bottom-style: hidden;" | [[Arquivo:Fighting.png|link=Gardestrike]] | |||
| style="border-left-style: hidden; text-align:left; border-bottom-style: hidden;" | Fighting | |||
|- | |||
| width="1%" style="border-bottom-style: hidden;" | [[Arquivo:Fire.png|link=Volcanic]] | |||
| style="border-left-style: hidden; text-align:left; border-bottom-style: hidden;" | Fire | |||
|- | |||
| width="1%" | [[Arquivo:Ground.png|link=Orebound]] | |||
| style="border-left-style: hidden; text-align:left" | Ground | |||
|- | |||
| width="1%" style="background-color: #A4A4A4" | 0x | |||
| width="1%" | [[Arquivo:Poison1.png|link=Malefic]] | |||
| style="border-left-style: hidden; text-align:left" | Poison | |||
|} | |||
</center> | |||
</div> | |||
<span class="mw-customtoggle-myDivision55"><font size="2"> [[Arquivo:Crystal.png|20px|link=]] '''Crystal''' </font></span> | |||
<div class="mw-collapsible mw-collapsed" id="mw-customcollapsible-myDivision55"> | |||
<center> | |||
{| class="wikitable" style="text-align:center" width="30%;" | |||
|- | |||
! colspan="3" scope="col" width="2%" style="background-color: #848484"| [[Arquivo:Crystal.png|20px|link=]] Defensivo | |||
|- | |||
! scope="col" width="1%" | <span style="color:black">Dano</span> | |||
! colspan="2" scope="col" width="4%" | <span style="color:black">Elemento</span> | |||
|- | |||
| rowspan="7" style="border-right-style: hidden; background-color: #FE2E2E;"| 0.5x | |||
| width="1%" style="border-right-style: hidden; text-align:center; border-bottom-style: hidden;"| [[Arquivo:Normal1.png|link=Gardestrike]] | |||
| style="text-align:left; border-bottom-style: hidden;" | Normal | |||
|- | |||
| style="border-right-style: hidden; text-align:center; border-bottom-style: hidden;" | [[Arquivo:Water.png|link=Seavell]] | |||
| style="text-align:left; border-bottom-style: hidden;" | Water | |||
|- | |||
| style="border-right-style: hidden; text-align:center; border-bottom-style: hidden;" | [[Arquivo:Ice.png|link=Seavell]] | |||
| style="text-align:left; border-bottom-style: hidden;" | Ice | |||
|- | |||
| style="border-right-style: hidden; text-align:center; border-bottom-style: hidden;" | [[Arquivo:Flying.png|link=Wingeon]] | |||
| style="text-align:left; border-bottom-style: hidden;" | Flying | |||
|- | |||
| style="border-right-style: hidden; text-align:center; border-bottom-style: hidden;" | [[Arquivo:Psychic.png|link=Psycraft]] | |||
| style="text-align:left; border-bottom-style: hidden;" | Psychic | |||
|- | |||
| style="border-right-style: hidden; text-align:center; border-bottom-style: hidden;" | [[Arquivo:Rock.png|link=Orebound]] | |||
| style="text-align:left; border-bottom-style: hidden;" | Rock | |||
|- | |||
| style="border-right-style: hidden; text-align:center" | [[Arquivo:Dragon.png|link=Wingeon]] | |||
| style="text-align:left" | Dragon | |||
|- | |||
| rowspan="6" style="border-right-style: hidden; background-color: #01DF01;"| 2x | |||
| width="1%" style="border-bottom-style: hidden;" | [[Arquivo:Fire.png|link=Volcanic]] | |||
| style="border-left-style: hidden; text-align:left; border-bottom-style: hidden;" | Fire | |||
|- | |||
| width="1%" style="border-bottom-style: hidden;" | [[Arquivo:Grass.png|link=Naturia]] | |||
| style="border-left-style: hidden; text-align:left; border-bottom-style: hidden;" | Grass | |||
|- | |||
| width="1%" style="border-bottom-style: hidden;" | [[Arquivo:Fighting.png|link=Gardestrike]] | |||
| style="border-left-style: hidden; text-align:left; border-bottom-style: hidden;" | Fighting | |||
|- | |||
| width="1%" style="border-bottom-style: hidden;" | [[Arquivo:Poison1.png|link=Malefic]] | |||
| style="border-left-style: hidden; text-align:left; border-bottom-style: hidden;" | Poison | |||
|- | |||
| width="1%" style="border-bottom-style: hidden;" | [[Arquivo:Ground.png|link=Orebound]] | |||
| style="border-left-style: hidden; text-align:left; border-bottom-style: hidden;" | Ground | |||
|- | |||
| width="1%" | [[Arquivo:Steel.png|link=]] | |||
| style="border-left-style: hidden; text-align:left" | Steel | |||
|- | |||
| width="1%" style="background-color: #A4A4A4" | 0x | |||
| width="1%" | [[Arquivo:Electric.png|link=Raibolt]] | |||
| style="border-left-style: hidden; text-align:left" | Electric | |||
|} | |||
</center> | |||
'''Observação:''' Não existe uma tabela de efetividades Ofensiva do elemento [[Arquivo:Crystal.png|link=]] Crystal, pois não existe nenhum ataque deste tipo no jogo. | |||
</div> | |||
Mais informações poderão ser adquiridas acessando a página '''[[Efetividades]]'''. | |||
= Outfits Exclusivas = | |||
<center> | |||
{| class="wikitable" width="42%" | |||
! colspan="2" width="50%" style="background-color: #848484" | Rank 1 | |||
! colspan="2" width="50%" style="background-color: #848484" | Rank 5 | |||
|- | |||
| width="5%" align="center" | [[Arquivo:Ironhard1 female.png|link=]] | |||
| width="5%" align="center" | [[Arquivo:Ironhard1 male.png|link=]] | |||
| width="5%" align="center" | [[Arquivo:Ironhard5 female.png|link=]] | |||
| width="5%" align="center" | [[Arquivo:Ironhard5 male.png|link=]] | |||
|} | |||
</center> | |||
<center> | |||
{| class="wikitable" width="42%" | |||
! colspan="2" width="50%" style="background-color: #848484" | Master | |||
|- | |||
| width="5%" align="center" | [[Arquivo:Ironhardfemale.gif|100px|link=]] | |||
| width="5%" align="center" | [[Arquivo:Ironhardmale.gif|100px|link=]] | |||
|} | |||
</center> | |||
Edição atual tal como às 20h13min de 5 de junho de 2026
Caso encontre algum erro ou queira acrescentar alguma informação, entre em contato com um dos membros da wiki.
Introdução
Os Pokémon do clã Ironhard são conhecidos por sua força bruta, resistência e alcance, dominando o elemento ![]() Steel. Eles passaram anos aperfeiçoando suas técnicas para quebrar todos os limites.
Steel. Eles passaram anos aperfeiçoando suas técnicas para quebrar todos os limites.
Ranking
- Rank 1: Ironhard Smither.
- Rank 2: Ironhard Forge.
- Rank 3: Ironhard Hammer.
- Rank 4: Ironhard Metal.
- Rank 5: Ironhard Titan.
Acesse a página de Tasks do clã Ironhard para conferir os requisitos necessários em cada um dos Rankings.
Bônus de Clã
O bônus máximo do clã é aplicado ao completar as tarefas do Rank 5. Abaixo estão as porcentagens de bônus adquiridas:
![]() Steel: Atk 28%, Def 28%
Steel: Atk 28%, Def 28%
![]() Crystal: Atk 28%, Def 28%
Crystal: Atk 28%, Def 28%
- É possível observar na Diamond Shop, dentro do jogo, o bônus ofensivo e defensivo que cada clã recebe no ranking 5.
- O bônus de ataque é aplicado aos movimentos do Pokémon. Se o jogador estiver usando um Pokémon de fora do seu clã, mas que execute um movimento do elemento do seu clã, o bônus de ataque ainda será concedido.
Tiers
Tier é uma classificação comum entre os Pokémon, indicando não apenas a raridade deste dentro do jogo, mas também qual executará melhor uma função, contanto que a comparação seja realizada entre dois Pokémon de mesma função. O Tier e a Função de um Pokémon pode ser conferido na ![]() Pokédex (Atalho Shift + D). Caso deseje ler mais sobre, acesse a página Tier e Funções ou Tiers (listagem) para conferir a listagem de Tier de todos os Pokémon.
Pokédex (Atalho Shift + D). Caso deseje ler mais sobre, acesse a página Tier e Funções ou Tiers (listagem) para conferir a listagem de Tier de todos os Pokémon.
Para facilitar a leitura desta página, a tabela a seguir contém a legenda de todas as Funções, PvP e PvE disponíveis no jogo.
| Função PvE | Função PvP | ||
|---|---|---|---|
| Ícone | Função | Ícone | Função |
| Tank | Tank | ||
| Offensive Tank | Offensive Tank | ||
| Burst Damage Dealer | Burst Damage Dealer | ||
| Over Time Damage Dealer | Over Time Damage Dealer | ||
| Support Overtime | Support | ||
| Speedster | Disrupter | ||
Abaixo estão listados todos os Pokémon do clã Ironhard e suas respectivas funções, separados por Tier e com algumas recomendações de Held Itens.
Observação: A nossa lista de Helds Recomendados foi composta por colaboradores experientes da Wiki da PokeXGames e serve como sugestões de Held Itens para os Pokémon no âmbito do PvP e PvE, respectivamente.
O jogador ainda tem toda a liberdade de testar e utilizar outros Helds que não esses, podendo personalizar seu Pokémon de um jeito diferente. Ressaltamos que em caso de alterações nos Pokémon, essa lista pode ser alterada e não será garantido que o Pokémon seja adicionado como opção no NPC Jorge.
Observação: Na listagem, o Held PvP sugerido é o primeiro, seguido pelo Held PvE. Caso o Pokémon utilize o mesmo Held Item nos 2 âmbitos, aparecerá listado somente 1 Held Item.
Tier 1A
| Nº Dex | Ícone | Nome | Elementos | Função PvE | Função PvP | Held Recomendado (PvP/PvE) |
|---|---|---|---|---|---|---|
| #212 | Mega Scizor |
Tier 1B
| Nº Dex | Ícone | Nome | Elementos | Função PvE | Função PvP | Held Recomendado (PvP/PvE) |
|---|---|---|---|---|---|---|
| #306 | Mega Aggron |
Tier 1C
| Nº Dex | Ícone | Nome | Elementos | Função PvE | Função PvP | Held Recomendado (PvP/PvE) |
|---|---|---|---|---|---|---|
| #028 | Alolan Sandslash | |||||
| #082 | Shiny Magneton | |||||
| #095 | Crystal Onix | |||||
| #208 | Mega Steelix | |||||
| #208 | Golden Steelix | |||||
| #212 | Shiny Scizor | |||||
| #303 | Mega Mawile | |||||
| #358 | Mega Chimecho | |||||
| #376 | Metagross | |||||
| #395 | Shiny Empoleon | |||||
| #437 | Shiny Bronzong | |||||
| #448 | Mega Lucario | |||||
| #462 | Shiny Magnezone | |||||
| #485 | Heatran | |||||
| #768 | Mega Golisopod* | |||||
| #879 | Shiny Copperajah |
Observação:* O Pokémon ![]() Mega Golisopod é exclusivo de outro clã no PvP.
Mega Golisopod é exclusivo de outro clã no PvP.
Technical Machine (TM)
| Nº Dex | Ícone | Nome | Elementos | Função PvE | Função PvP | Held Recomendado (PvE) |
|---|---|---|---|---|---|---|
| #082 | Shiny Magneton (TM) | |||||
| #448 | Mega Lucario Steel (TM) | |||||
| #462 | Shiny Magnezone (TM) | |||||
| #879 | Shiny Copperajah (TM) |
| Saiba Mais: Technical Machine (TM) |
Technical Records (TR)
| Nº Dex | Ícone | Nome | Elementos | Função PvE | Função PvP | Held Recomendado (PvE) |
|---|---|---|---|---|---|---|
| #212 | Scizor (TR) |
| Saiba Mais: Technical Records (TR) |
Tier 1H
| Nº Dex | Ícone | Nome | Elementos | Função PvE | Função PvP | Held Recomendado (PvE) |
|---|---|---|---|---|---|---|
| #227 | Mega Skarmory | |||||
| #303 | Shiny Mawile | |||||
| #306 | Shiny Aggron | |||||
| #376 | Mega Metagross | |||||
| #530 | Mega Excadrill | |||||
| #681 | Shiny Aegislash |
Observação:
- Os Pokémon T1H têm força de T1C fora da Nightmare World e são acima dos T1C dentro dela ou pelo menos tem um diferencial perante os demais Pokémon. São balanceados exclusivamente para conteúdos PvE e não podem ser utilizados em duelos PvP.
- O
 Mega Excadrill possui seu moveset focado no tipo
  Ground.
Tier 2
| Nº Dex | Ícone | Nome | Elementos | Função PvE | Função PvP | Held Recomendado (PvP/PvE) |
|---|---|---|---|---|---|---|
| #205 | Shiny Forretress | |||||
| #208 | Steelix | |||||
| #212 | Scizor | |||||
| #227 | Skarmory | |||||
| #306 | Aggron | |||||
| #375 | Shiny Metang | |||||
| #395 | Empoleon | |||||
| #411 | Bastiodon | |||||
| #437 | Bronzong | |||||
| #448 | Shiny Lucario | |||||
| #462 | Magnezone | |||||
| #476 | Probopass | |||||
| #530 | Excadrill | |||||
| #589 | Escavalier | |||||
| #598 | Shiny Ferrothorn | |||||
| #601 | Shiny Klinklang | |||||
| #681 | Aegislash | |||||
| #707 | Klefki | |||||
| #777 | Shiny Togedemaru | |||||
| #863 | Perrserker | |||||
| #879 | Copperajah |
Tier 3
| Nº Dex | Ícone | Nome | Elementos | Função PvE | Função PvP | Held Recomendado (PvP/PvE) |
|---|---|---|---|---|---|---|
| #051 | Alolan Dugtrio | |||||
| #082 | Magneton | |||||
| #205 | Forretress | |||||
| #303 | Mawile | |||||
| #305 | Shiny Lairon | |||||
| #375 | Metang | |||||
| #448 | Lucario | |||||
| #598 | Ferrothorn | |||||
| #601 | Klinklang | |||||
| #625 | Bisharp | |||||
| #777 | Togedemaru |
Rotação Mid-Late Game
| Pokémon | Nome | Função | Tier |
|---|---|---|---|
| Shiny Klinklang | 2 | ||
| Mega Metagross | 1H | ||
| Shiny Forretress | 2 | ||
| Klinklang | 3 | ||
| Shiny Mawile | 1H | ||
| Shiny Aegislash | 1H | ||
| Mega Skarmory | 1H | ||
| Bronzong | 2 | ||
| Perrserker | 2 | ||
| Magneton | 3 | ||
| Metang | 3 | ||
| Shiny Lairon | 3 | ||
| Shiny Magneton (TM) | TM Burst | ||
| Scizor (TR) | TR | ||
Observações:
- Não existe uma rotação
 Crystal-type. O único Pokémon existente com tal elemento é o Crystal Onix.
Exclusividade do Clã no PvP
| Pokémon | Nome |
|---|---|
| Alolan Sandslash | |
| Golden Steelix | |
| Shiny Forretress | |
| Shiny Scizor | |
| Mega Mawile | |
| Mega Chimecho | |
| Empoleon | |
| Shiny Empoleon | |
| Shiny Lucario | |
| Excadrill | |
| Shiny Ferrothorn | |
| Aegislash | |
| Klefki | |
| Shiny Copperajah |
Observação: A exclusividade é aplicada apenas em conteúdos PvP. No PvE, o uso é liberado para todos os clãs.
Pokémon obtido via NPC de Clã
- Shiny de Clã
Para obter um, ![]() Shiny Forretress fale com a NPC Bellemere, localizada na área do Clã Ironhard, no Trade Center.
Shiny Forretress fale com a NPC Bellemere, localizada na área do Clã Ironhard, no Trade Center.
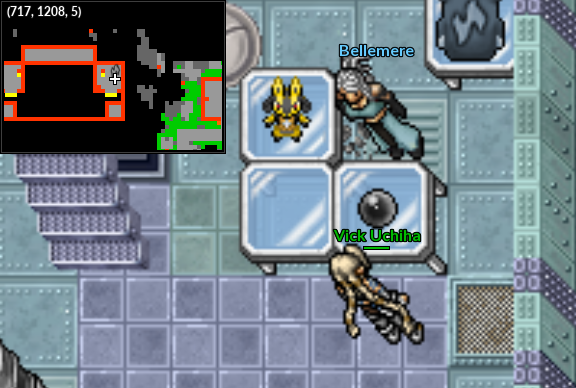
- Shiny de Clã da Nightmare World
Para obter um, ![]() Shiny Lucario fale com a NPC Bellemere, na área Ironhard, na resistência de Cerulean.
Shiny Lucario fale com a NPC Bellemere, na área Ironhard, na resistência de Cerulean.
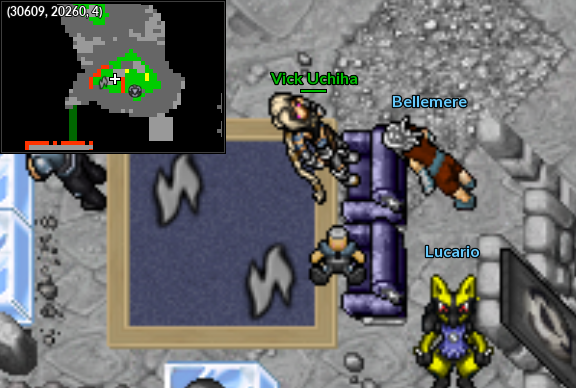
Efetividades
Abaixo são apresentadas as efetividades dos Pokémon deste clã, considerando apenas aqueles que possuem um elemento. A efetividade pode mudar caso o Pokémon possua dois elementos ou possua alguma resistência à algum elemento, como é o caso do Shiny Bronzong que possui a passiva Heatproof, permitindo que ganhe resistência contra ataques do tipo Fire (0.5x).
A efetividade de um Pokémon pode ser conferida na ![]() Pokédex ou realizando uma busca na página Pokémon (uso do Ctrl+F recomendado). Clique no ícone do elemento desejado para conferir a tabela de efetividade deste clã.
Pokédex ou realizando uma busca na página Pokémon (uso do Ctrl+F recomendado). Clique no ícone do elemento desejado para conferir a tabela de efetividade deste clã.
![]() Steel
Steel
| Dano | Elemento | |
|---|---|---|
| 0x | - | |
| Dano | Elemento | |
|---|---|---|
| Steel | ||
| 0x | ||
![]() Crystal
Crystal
| Dano | Elemento | |
|---|---|---|
| Dragon | ||
| 0x | ||
Observação: Não existe uma tabela de efetividades Ofensiva do elemento ![]() Crystal, pois não existe nenhum ataque deste tipo no jogo.
Crystal, pois não existe nenhum ataque deste tipo no jogo.
Mais informações poderão ser adquiridas acessando a página Efetividades.
Outfits Exclusivas
| Rank 1 | Rank 5 | ||
|---|---|---|---|

|

|

|

|
| Master | |
|---|---|
|

|