Ironhard: mudanças entre as edições
(→Tier 3) |
|||
| (11 revisões intermediárias por um outro usuário não estão sendo mostradas) | |||
| Linha 68: | Linha 68: | ||
</center> | </center> | ||
Abaixo estão listados todos os Pokémon do clã '''Ironhard''' e suas respectivas funções, separados por Tier. <br> | Abaixo estão listados todos os Pokémon do clã '''Ironhard''' e suas respectivas funções, separados por Tier e com algumas recomendações de Held Itens. <br> | ||
<b>Observação:</b> A nossa lista de Helds Recomendados foi composta por colaboradores experientes da Wiki da PokeXGames e serve como sugestões de Held Itens para os Pokémon no âmbito do PvP e PvE, respectivamente. | |||
O jogador ainda tem toda a liberdade de testar e utilizar outros Helds que não esses, podendo personalizar seu Pokémon de um jeito diferente. Ressaltamos que em caso de alterações nos Pokémon, essa lista pode ser alterada e não será garantido que o Pokémon seja adicionado como opção no NPC Jorge.</br> | |||
<b>Observação:</b> Na listagem, o Held PvP sugerido é o primeiro, seguido pelo Held PvE. Caso o Pokémon utilize o mesmo Held Item nos 2 âmbitos, aparecerá listado somente 1 Held Item.</br> | |||
== Tier 1A == | == Tier 1A == | ||
<center> | <center> | ||
{| class="wikitable" style="text-align:center" width=" | {| class="wikitable" style="text-align:center" width="65%;" | ||
|- | |- | ||
! scope="col" width=" | ! scope="col" width="10%" style="background-color: #F1C232"| <span style="color:black">Nº Dex</span> | ||
! scope="col" style="background-color: # | ! scope="col" style="background-color: #F1C232"| <span style="color:black">Ícone</span> | ||
! scope="col" width=" | ! scope="col" width="15%;" style="background-color: #F1C232"| <span style="color:black">Nome</span> | ||
! scope="col" style="background-color: # | ! scope="col" style="background-color: #F1C232"| <span style="color:black">Elementos</span> | ||
! scope="col" width=" | ! scope="col" width="15%;" style="background-color: #F1C232"| <span style="color:black">Função PvE</span> | ||
! scope="col" width=" | ! scope="col" width="15%;" style="background-color: #F1C232"| <span style="color:black">Função PvP</span> | ||
! scope="col" width="20%;" style="background-color: #F1C232"| <span style="color:black">Held Recomendado (PvP/PvE)</span> | |||
|- | |- | ||
| text-align:center;" | #212 | | text-align:center;" | #212 | ||
| Linha 88: | Linha 93: | ||
| width="10%" | [[Arquivo:Interface_BDD_PVE.png|24px|link=]] [[Arquivo:Interface_OTDD_PVE.png|24px|link=]] | | width="10%" | [[Arquivo:Interface_BDD_PVE.png|24px|link=]] [[Arquivo:Interface_OTDD_PVE.png|24px|link=]] | ||
| width="10%" | [[Arquivo:Interface_Tanker_PVP.png|24px|link=]] | | width="10%" | [[Arquivo:Interface_Tanker_PVP.png|24px|link=]] | ||
| text-align:"center;" | [[file:Def7.png|Defense T7|link=]] [[file:Atk7.png|Attack T7|link=]] | |||
|} | |} | ||
</center> | </center> | ||
| Linha 94: | Linha 100: | ||
<center> | <center> | ||
{| class="wikitable" style="text-align:center" width=" | {| class="wikitable" style="text-align:center" width="65%;" | ||
|- | |- | ||
! scope="col" width=" | ! scope="col" width="10%" style="background-color: #F1C232"| <span style="color:black">Nº Dex</span> | ||
! scope="col" style="background-color: # | ! scope="col" style="background-color: #F1C232"| <span style="color:black">Ícone</span> | ||
! scope="col" width=" | ! scope="col" width="15%;" style="background-color: #F1C232"| <span style="color:black">Nome</span> | ||
! scope="col" style="background-color: # | ! scope="col" style="background-color: #F1C232"| <span style="color:black">Elementos</span> | ||
! scope="col" width=" | ! scope="col" width="15%;" style="background-color: #F1C232"| <span style="color:black">Função PvE</span> | ||
! scope="col" width=" | ! scope="col" width="15%;" style="background-color: #F1C232"| <span style="color:black">Função PvP</span> | ||
! scope="col" width="20%;" style="background-color: #F1C232"| <span style="color:black">Held Recomendado (PvP/PvE)</span> | |||
|- | |- | ||
| text-align:center;" | #306 | | text-align:center;" | #306 | ||
| Linha 109: | Linha 116: | ||
| width="10%" | [[Arquivo:Interface_BDD_PVE.png|24px|link=]] [[Arquivo:Interface_OTDD_PVE.png|24px|link=]] | | width="10%" | [[Arquivo:Interface_BDD_PVE.png|24px|link=]] [[Arquivo:Interface_OTDD_PVE.png|24px|link=]] | ||
| width="10%" | [[Arquivo:Interface_Tanker_PVP.png|24px|link=]] | | width="10%" | [[Arquivo:Interface_Tanker_PVP.png|24px|link=]] | ||
| text-align:"center;" | [[file:Def7.png|Defense T7|link=]] [[file:Atk7.png|Attack T7|link=]] | |||
|} | |} | ||
</center> | </center> | ||
| Linha 115: | Linha 123: | ||
<center> | <center> | ||
{| class="wikitable sortable" style="text-align:center" width=" | {| class="wikitable sortable" style="text-align:center" width="65%;" | ||
|- | |- | ||
! scope="col" width=" | ! scope="col" width="10%" style="background-color: #F1C232"| <span style="color:black">Nº Dex</span> | ||
! scope="col" style="background-color: # | ! scope="col" style="background-color: #F1C232"| <span style="color:black">Ícone</span> | ||
! scope="col" width=" | ! scope="col" width="15%;" style="background-color: #F1C232"| <span style="color:black">Nome</span> | ||
! scope="col" style="background-color: # | ! scope="col" style="background-color: #F1C232"| <span style="color:black">Elementos</span> | ||
! scope="col" width=" | ! scope="col" width="15%;" style="background-color: #F1C232"| <span style="color:black">Função PvE</span> | ||
! scope="col" width=" | ! scope="col" width="15%;" style="background-color: #F1C232"| <span style="color:black">Função PvP</span> | ||
! scope="col" width="20%;" style="background-color: #F1C232"| <span style="color:black">Held Recomendado (PvP/PvE)</span> | |||
|- | |- | ||
| text-align:"center;" | #028 | | text-align:"center;" | #028 | ||
| Linha 129: | Linha 138: | ||
| text-align:"center;" | [[Arquivo:Ice.png|link=Seavell]] [[Arquivo:Steel.png|link=]] | | text-align:"center;" | [[Arquivo:Ice.png|link=Seavell]] [[Arquivo:Steel.png|link=]] | ||
| text-align:"center;" | [[Arquivo:Interface_OTDD_PVE.png|24px|link=]] | | text-align:"center;" | [[Arquivo:Interface_OTDD_PVE.png|24px|link=]] | ||
| text-align:"center;" | [[Arquivo: | | text-align:"center;" | [[Arquivo:Interface_OffTank_PVP.png|24px|link=]] | ||
| text-align:"center;" | [[file:Def7.png|Defense T7|link=]] [[file:Atk7.png|Attack T7|link=]] | |||
|- | |- | ||
| text-align:"center;" | #082 | | text-align:"center;" | #082 | ||
| Linha 137: | Linha 147: | ||
| text-align:"center;" | [[Arquivo:Interface_OTDD_PVE.png|24px|link=]] | | text-align:"center;" | [[Arquivo:Interface_OTDD_PVE.png|24px|link=]] | ||
| text-align:"center;" | [[Arquivo:Interface_Disrupter_PVP.png|24px|link=]] | | text-align:"center;" | [[Arquivo:Interface_Disrupter_PVP.png|24px|link=]] | ||
| text-align:"center;" | [[file:Acc7.png|Accuracy T7|link=]] | |||
|- | |- | ||
| text-align:"center;" | #095 | | text-align:"center;" | #095 | ||
| Linha 144: | Linha 155: | ||
| text-align:"center;" | [[Arquivo:Not.png|link=]] | | text-align:"center;" | [[Arquivo:Not.png|link=]] | ||
| text-align:"center;" | [[Arquivo:Interface_OffTank_PVP.png|24px|link=]] | | text-align:"center;" | [[Arquivo:Interface_OffTank_PVP.png|24px|link=]] | ||
| text-align:"center;" | [[file:Def7.png|Defense T7|link=]] [[file:Atk7.png|Attack T7|link=]] | |||
|- | |- | ||
| text-align:"center;" | #208 | | text-align:"center;" | #208 | ||
| Linha 150: | Linha 162: | ||
| text-align:"center;" | [[Arquivo:Steel.png|link=]] [[Arquivo:Ground.png|link=Orebound]] | | text-align:"center;" | [[Arquivo:Steel.png|link=]] [[Arquivo:Ground.png|link=Orebound]] | ||
| text-align:"center;" | [[Arquivo:Not.png|link=]] | | text-align:"center;" | [[Arquivo:Not.png|link=]] | ||
| text-align:"center;" | [[Arquivo: | | text-align:"center;" | [[Arquivo:Interface_OffTank_PVP.png|24px|link=]] | ||
| text-align:"center;" | [[file:Def7.png|Defense T7|link=]] [[file:Atk7.png|Attack T7|link=]] | |||
|- | |- | ||
| text-align:"center;" | #208 | | text-align:"center;" | #208 | ||
| Linha 158: | Linha 171: | ||
| text-align:"center;" | [[Arquivo:Not.png|link=]] | | text-align:"center;" | [[Arquivo:Not.png|link=]] | ||
| text-align:"center;" | [[Arquivo:Interface_BDD_PVP.png|24px|link=]] | | text-align:"center;" | [[Arquivo:Interface_BDD_PVP.png|24px|link=]] | ||
| text-align:"center;" | [[file:Atk7.png|Attack T7|link=]] | |||
|- | |- | ||
| text-align:"center;" | #303 | | text-align:"center;" | #303 | ||
| Linha 165: | Linha 179: | ||
| text-align:"center;" | [[Arquivo:Not.png|link=]] | | text-align:"center;" | [[Arquivo:Not.png|link=]] | ||
| text-align:"center;" | [[Arquivo:Interface_OffTank_PVP.png|24px|link=]] [[Arquivo:Interface_Support_PVP.png|24px|link=]] | | text-align:"center;" | [[Arquivo:Interface_OffTank_PVP.png|24px|link=]] [[Arquivo:Interface_Support_PVP.png|24px|link=]] | ||
| text-align:"center;" | [[file:Def7.png|Defense T7|link=]] | |||
|- | |- | ||
| text-align:"center;" | #376 | | text-align:"center;" | #376 | ||
| Linha 172: | Linha 187: | ||
| text-align:"center;" | [[Arquivo:Not.png|link=]] | | text-align:"center;" | [[Arquivo:Not.png|link=]] | ||
| text-align:"center;" | [[Arquivo:Interface_Tanker_PVP.png|24px|link=]] | | text-align:"center;" | [[Arquivo:Interface_Tanker_PVP.png|24px|link=]] | ||
| text-align:"center;" | [[file:Def7.png|Defense T7|link=]] | |||
|- | |- | ||
| text-align:"center;" | #395 | | text-align:"center;" | #395 | ||
| Linha 179: | Linha 195: | ||
| text-align:"center;" | [[Arquivo:Interface_OTDD_PVE.png|24px|link=]] | | text-align:"center;" | [[Arquivo:Interface_OTDD_PVE.png|24px|link=]] | ||
| text-align:"center;" | [[Arquivo:Interface_Tanker_PVP.png|24px|link=]] | | text-align:"center;" | [[Arquivo:Interface_Tanker_PVP.png|24px|link=]] | ||
| text-align:"center;" | [[file:Def7.png|Defense T7|link=]] [[file:Atk7.png|Attack T7|link=]] | |||
|- | |- | ||
| text-align:"center;" | #437 | | text-align:"center;" | #437 | ||
| Linha 186: | Linha 203: | ||
| text-align:"center;" | [[Arquivo:Interface_BDD_PVE.png|24px|link=]] | | text-align:"center;" | [[Arquivo:Interface_BDD_PVE.png|24px|link=]] | ||
| text-align:"center;" | [[Arquivo:Interface_Disrupter_PVP.png|24px|link=]] | | text-align:"center;" | [[Arquivo:Interface_Disrupter_PVP.png|24px|link=]] | ||
| text-align:"center;" | [[file:Acc7.png|Accuracy T7|link=]] [[file:Atk7.png|Attack T7|link=]] | |||
|- | |- | ||
| text-align:"center;" | #448 | | text-align:"center;" | #448 | ||
| Linha 193: | Linha 211: | ||
| text-align:"center;" | [[Arquivo:Interface_BDD_PVE.png|24px|link=]] | | text-align:"center;" | [[Arquivo:Interface_BDD_PVE.png|24px|link=]] | ||
| text-align:"center;" | [[Arquivo:Interface_OffTank_PVP.png|24px|link=]] | | text-align:"center;" | [[Arquivo:Interface_OffTank_PVP.png|24px|link=]] | ||
| text-align:"center;" | [[file:Atk7.png|Attack T7|link=]] | |||
|- | |- | ||
| text-align:"center;" | #462 | | text-align:"center;" | #462 | ||
| Linha 200: | Linha 219: | ||
| text-align:"center;" | [[Arquivo:Interface_OTDD_PVE.png|24px|link=]] | | text-align:"center;" | [[Arquivo:Interface_OTDD_PVE.png|24px|link=]] | ||
| text-align:"center;" | [[Arquivo:Interface_BDD_PVP.png|24px|link=]] | | text-align:"center;" | [[Arquivo:Interface_BDD_PVP.png|24px|link=]] | ||
| text-align:"center;" | [[file:Atk7.png|Attack T7|link=]] | |||
|- | |- | ||
| text-align:"center;" | #485 | | text-align:"center;" | #485 | ||
| Linha 207: | Linha 227: | ||
| text-align:"center;" | [[Arquivo:Interface_OTDD_PVE.png|24px|link=]] | | text-align:"center;" | [[Arquivo:Interface_OTDD_PVE.png|24px|link=]] | ||
| text-align:"center;" | [[Arquivo:Interface_Tanker_PVP.png|24px|link=]] | | text-align:"center;" | [[Arquivo:Interface_Tanker_PVP.png|24px|link=]] | ||
| text-align:"center;" | [[file:Def7.png|Defense T7|link=]] [[file:Atk7.png|Attack T7|link=]] | |||
|- | |- | ||
| text-align:"center;" | #879 | | text-align:"center;" | #879 | ||
| Linha 214: | Linha 235: | ||
| text-align:"center;" | [[Arquivo:Interface_BDD_PVE.png|24px|link=]] | | text-align:"center;" | [[Arquivo:Interface_BDD_PVE.png|24px|link=]] | ||
| text-align:"center;" | [[Arquivo:Interface_BDD_PVP.png|24px|link=]] | | text-align:"center;" | [[Arquivo:Interface_BDD_PVP.png|24px|link=]] | ||
| text-align:"center;" | [[file:Atk7.png|Attack T7|link=]] | |||
|} | |} | ||
</center> | </center> | ||
| Linha 220: | Linha 242: | ||
<center> | <center> | ||
{| class="wikitable" style="text-align:center" width=" | {| class="wikitable" style="text-align:center" width="65%;" | ||
|- | |- | ||
! scope="col" width=" | ! scope="col" width="10%" style="background-color: #F1C232"| <span style="color:black">Nº Dex</span> | ||
! scope="col" style="background-color: # | ! scope="col" style="background-color: #F1C232"| <span style="color:black">Ícone</span> | ||
! scope="col" width=" | ! scope="col" width="15%;" style="background-color: #F1C232"| <span style="color:black">Nome</span> | ||
! scope="col" style="background-color: # | ! scope="col" style="background-color: #F1C232"| <span style="color:black">Elementos</span> | ||
! scope="col" width=" | ! scope="col" width="15%;" style="background-color: #F1C232"| <span style="color:black">Função PvE</span> | ||
! scope="col" width=" | ! scope="col" width="15%;" style="background-color: #F1C232"| <span style="color:black">Função PvP</span> | ||
! scope="col" width="20%;" style="background-color: #F1C232"| <span style="color:black">Held Recomendado (PvE)</span> | |||
|- | |- | ||
| text-align:center;" | #303 | | text-align:center;" | #303 | ||
| Linha 235: | Linha 258: | ||
| width="10%" | [[Arquivo:Interface_BDD_PVE.png|24px|link=]] | | width="10%" | [[Arquivo:Interface_BDD_PVE.png|24px|link=]] | ||
| width="10%" | [[Arquivo:Not.png|link=]] | | width="10%" | [[Arquivo:Not.png|link=]] | ||
| text-align:"center;" | [[file:Atk7.png|Attack T7|link=]] | |||
|- | |- | ||
| text-align:center;" | #681 | | text-align:center;" | #681 | ||
| Linha 242: | Linha 266: | ||
| width="10%" | [[Arquivo:Interface_BDD_PVE.png|24px|link=]] | | width="10%" | [[Arquivo:Interface_BDD_PVE.png|24px|link=]] | ||
| width="10%" | [[Arquivo:Not.png|link=]] | | width="10%" | [[Arquivo:Not.png|link=]] | ||
| text-align:"center;" | [[file:Atk7.png|Attack T7|link=]] | |||
|} | |} | ||
</center> | </center> | ||
| Linha 251: | Linha 276: | ||
<center> | <center> | ||
{| class="wikitable sortable" style="text-align:center" width=" | {| class="wikitable sortable" style="text-align:center" width="65%;" | ||
|- | |- | ||
! scope="col" width=" | ! scope="col" width="10%" style="background-color: #F1C232"| <span style="color:black">Nº Dex</span> | ||
! scope="col" style="background-color: # | ! scope="col" style="background-color: #F1C232"| <span style="color:black">Ícone</span> | ||
! scope="col" width=" | ! scope="col" width="15%;" style="background-color: #F1C232"| <span style="color:black">Nome</span> | ||
! scope="col" style="background-color: # | ! scope="col" style="background-color: #F1C232"| <span style="color:black">Elementos</span> | ||
! scope="col" width=" | ! scope="col" width="15%;" style="background-color: #F1C232"| <span style="color:black">Função PvE</span> | ||
! scope="col" width=" | ! scope="col" width="15%;" style="background-color: #F1C232"| <span style="color:black">Função PvP</span> | ||
! scope="col" width="20%;" style="background-color: #F1C232"| <span style="color:black">Held Recomendado (PvP/PvE)</span> | |||
|- | |- | ||
| text-align:center;" | #205 | | text-align:center;" | #205 | ||
| Linha 266: | Linha 292: | ||
| width="10%" | [[Arquivo:Interface_OffensiveTanker_pve.png|24px|link=]] | | width="10%" | [[Arquivo:Interface_OffensiveTanker_pve.png|24px|link=]] | ||
| width="10%" | [[Arquivo:Not.png|link=]] | | width="10%" | [[Arquivo:Not.png|link=]] | ||
| text-align:"center;" | [[file:Atk7.png|Attack T7|link=]] [[file:Def7.png|Defense T7|link=]] | |||
|- | |- | ||
| text-align:center;" | #208 | | text-align:center;" | #208 | ||
| Linha 273: | Linha 300: | ||
| width="10%" | [[Arquivo:Interface_BDD_PVE.png|24px|link=]] | | width="10%" | [[Arquivo:Interface_BDD_PVE.png|24px|link=]] | ||
| width="10%" | [[Arquivo:Not.png|link=]] | | width="10%" | [[Arquivo:Not.png|link=]] | ||
| text-align:"center;" | [[file:Atk7.png|Attack T7|link=]] | |||
|- | |- | ||
| text-align:center;" | #212 | | text-align:center;" | #212 | ||
| Linha 280: | Linha 308: | ||
| width="10%" | [[Arquivo:Not.png|link=]] | | width="10%" | [[Arquivo:Not.png|link=]] | ||
| width="10%" | [[Arquivo:Interface_OTDD_PVP.png|24px|link=]] | | width="10%" | [[Arquivo:Interface_OTDD_PVP.png|24px|link=]] | ||
| text-align:"center;" | [[file:Def7.png|Defense T7|link=]] | |||
|- | |- | ||
| text-align:center;" | #227 | | text-align:center;" | #227 | ||
| Linha 287: | Linha 316: | ||
| width="10%" | [[Arquivo:Not.png|link=]] | | width="10%" | [[Arquivo:Not.png|link=]] | ||
| width="10%" | [[Arquivo:Interface_OffTank_PVP.png|24px|link=]] | | width="10%" | [[Arquivo:Interface_OffTank_PVP.png|24px|link=]] | ||
| text-align:"center;" | [[file:Def7.png|Defense T7|link=]] | |||
|- | |- | ||
| text-align:center;" | #306 | | text-align:center;" | #306 | ||
| Linha 294: | Linha 324: | ||
| width="10%" | [[Arquivo:Not.png|link=]] | | width="10%" | [[Arquivo:Not.png|link=]] | ||
| width="10%" | [[Arquivo:Interface_Tanker_PVP.png|24px|link=]] | | width="10%" | [[Arquivo:Interface_Tanker_PVP.png|24px|link=]] | ||
| text-align:"center;" | [[file:Def7.png|Defense T7|link=]] | |||
|- | |- | ||
| text-align:center;" | #375 | | text-align:center;" | #375 | ||
| Linha 301: | Linha 332: | ||
| width="10%" | [[Arquivo:Not.png|link=]] | | width="10%" | [[Arquivo:Not.png|link=]] | ||
| width="10%" | [[Arquivo:Interface_OffTank_PVP.png|24px|link=]] | | width="10%" | [[Arquivo:Interface_OffTank_PVP.png|24px|link=]] | ||
| text-align:"center;" | [[file:Def7.png|Defense T7|link=]] | |||
|- | |- | ||
| text-align:center;" | #395 | | text-align:center;" | #395 | ||
| Linha 308: | Linha 340: | ||
| width="10%" | [[Arquivo:Not.png|link=]] | | width="10%" | [[Arquivo:Not.png|link=]] | ||
| width="10%" | [[Arquivo:Interface_BDD_PVP.png|24px|link=]] | | width="10%" | [[Arquivo:Interface_BDD_PVP.png|24px|link=]] | ||
| text-align:"center;" | [[file:Atk7.png|Attack T7|link=]] | |||
|- | |- | ||
| text-align:center;" | #411 | | text-align:center;" | #411 | ||
| Linha 315: | Linha 348: | ||
| width="10%" | [[Arquivo:Not.png|link=]] | | width="10%" | [[Arquivo:Not.png|link=]] | ||
| width="10%" | [[Arquivo:Interface_BDD_PVP.png|24px|link=]] | | width="10%" | [[Arquivo:Interface_BDD_PVP.png|24px|link=]] | ||
| text-align:"center;" | [[file:Atk7.png|Attack T7|link=]] | |||
|- | |- | ||
| text-align:center;" | #437 | | text-align:center;" | #437 | ||
| Linha 322: | Linha 356: | ||
| width="10%" | [[Arquivo:Interface_BDD_PVE.png|24px|link=]] | | width="10%" | [[Arquivo:Interface_BDD_PVE.png|24px|link=]] | ||
| width="10%" | [[Arquivo:Not.png|link=]] | | width="10%" | [[Arquivo:Not.png|link=]] | ||
| text-align:"center;" | [[file:Atk7.png|Attack T7|link=]] | |||
|- | |- | ||
| text-align:center;" | #448 | | text-align:center;" | #448 | ||
| Linha 329: | Linha 364: | ||
| width="10%" | [[Arquivo:Not.png|link=]] | | width="10%" | [[Arquivo:Not.png|link=]] | ||
| width="10%" | [[Arquivo:Interface_OTDD_PVP.png|24px|link=]] | | width="10%" | [[Arquivo:Interface_OTDD_PVP.png|24px|link=]] | ||
| text-align:"center;" | [[file:Def7.png|Defense T7|link=]] | |||
|- | |- | ||
| text-align:center;" | #462 | | text-align:center;" | #462 | ||
| Linha 336: | Linha 372: | ||
| width="10%" | [[Arquivo:Not.png|link=]] | | width="10%" | [[Arquivo:Not.png|link=]] | ||
| width="10%" | [[Arquivo:Interface_Disrupter_PVP.png|24px|link=]] | | width="10%" | [[Arquivo:Interface_Disrupter_PVP.png|24px|link=]] | ||
| text-align:"center;" | [[file:Acc7.png|Accuracy T7|link=]] | |||
|- | |- | ||
| text-align:center;" | #476 | | text-align:center;" | #476 | ||
| Linha 343: | Linha 380: | ||
| width="10%" | [[Arquivo:Not.png|link=]] | | width="10%" | [[Arquivo:Not.png|link=]] | ||
| width="10%" | [[Arquivo:Interface_OffTank_PVP.png|24px|link=]] | | width="10%" | [[Arquivo:Interface_OffTank_PVP.png|24px|link=]] | ||
| text-align:"center;" | [[file:Atk7.png|Attack T7|link=]] | |||
|- | |- | ||
| text-align:center;" | #530 | | text-align:center;" | #530 | ||
| Linha 349: | Linha 387: | ||
| text-align:center;" | [[Arquivo:Ground.png|link=Orebound]] [[Arquivo:Steel.png|link=Ironhard]] | | text-align:center;" | [[Arquivo:Ground.png|link=Orebound]] [[Arquivo:Steel.png|link=Ironhard]] | ||
| width="10%" | [[Arquivo:Not.png|link=]] | | width="10%" | [[Arquivo:Not.png|link=]] | ||
| width="10%" | [[Arquivo:Interface_BDD_PVP.png|24px|link=]] | | width="10%" | [[Arquivo:Interface_BDD_PVP.png|24px|link=]] | ||
| text-align:"center;" | [[file:Atk7.png|Attack T7|link=]] | |||
|- | |- | ||
| text-align:center;" | #598 | | text-align:center;" | #598 | ||
| Linha 357: | Linha 396: | ||
| width="10%" | [[Arquivo:Not.png|link=]] | | width="10%" | [[Arquivo:Not.png|link=]] | ||
| width="10%" | [[Arquivo:Interface_Tanker_PVP.png|24px|link=]] | | width="10%" | [[Arquivo:Interface_Tanker_PVP.png|24px|link=]] | ||
| text-align:"center;" | [[file:Def7.png|Defense T7|link=]] | |||
|- | |- | ||
| text-align:center;" | #601 | | text-align:center;" | #601 | ||
| Linha 364: | Linha 404: | ||
| width="10%" | [[Arquivo:Interface_Tank_PVE.png|24px|link=]] | | width="10%" | [[Arquivo:Interface_Tank_PVE.png|24px|link=]] | ||
| width="10%" | [[Arquivo:Not.png|link=]] | | width="10%" | [[Arquivo:Not.png|link=]] | ||
| text-align:"center;" | [[file:Def7.png|Defense T7|link=]] | |||
|- | |- | ||
| text-align:center;" | #681 | | text-align:center;" | #681 | ||
| Linha 371: | Linha 412: | ||
| width="10%" | [[Arquivo:Not.png|link=]] | | width="10%" | [[Arquivo:Not.png|link=]] | ||
| width="10%" | [[Arquivo:Interface_OffTank_PVP.png|24px|link=]] | | width="10%" | [[Arquivo:Interface_OffTank_PVP.png|24px|link=]] | ||
| text-align:"center;" | [[file:Atk7.png|Attack T7|link=]] | |||
|- | |- | ||
| text-align:center;" | #707 | | text-align:center;" | #707 | ||
| Linha 378: | Linha 420: | ||
| width="10%" | [[Arquivo:Not.png|link=]] | | width="10%" | [[Arquivo:Not.png|link=]] | ||
| width="10%" | [[Arquivo:Interface_Disrupter_PVP.png|24px|link=]] [[Arquivo:Interface_Support_PVP.png|24px|link=]] | | width="10%" | [[Arquivo:Interface_Disrupter_PVP.png|24px|link=]] [[Arquivo:Interface_Support_PVP.png|24px|link=]] | ||
| text-align:"center;" | [[file:Acc7.png|Accuracy T7|link=]] | |||
|- | |- | ||
| text-align:center;" | #777 | | text-align:center;" | #777 | ||
| Linha 385: | Linha 428: | ||
| width="10%" | [[Arquivo:Interface_SupportOT_PVE.png|24px|link=]] | | width="10%" | [[Arquivo:Interface_SupportOT_PVE.png|24px|link=]] | ||
| width="10%" | [[Arquivo:Not.png|link=]] | | width="10%" | [[Arquivo:Not.png|link=]] | ||
| text-align:"center;" | [[file:Atk7.png|Attack T7|link=]] | |||
|- | |- | ||
| text-align:center;" | #863 | | text-align:center;" | #863 | ||
| Linha 392: | Linha 436: | ||
| width="10%" | [[Arquivo:Interface_BDD_PVE.png|24px|link=]] | | width="10%" | [[Arquivo:Interface_BDD_PVE.png|24px|link=]] | ||
| width="10%" | [[Arquivo:Not.png|link=]] | | width="10%" | [[Arquivo:Not.png|link=]] | ||
| text-align:"center;" | [[file:Atk7.png|Attack T7|link=]] | |||
|- | |- | ||
| text-align:center;" | #879 | | text-align:center;" | #879 | ||
| Linha 398: | Linha 443: | ||
| text-align:center;" | [[Arquivo:Steel.png|link=Ironhard]] | | text-align:center;" | [[Arquivo:Steel.png|link=Ironhard]] | ||
| width="10%" | [[Arquivo:Not.png|link=]] | | width="10%" | [[Arquivo:Not.png|link=]] | ||
| width="10%" | [[Arquivo:Interface_BDD_PVP.png|24px|link=]] | | width="10%" | [[Arquivo:Interface_BDD_PVP.png|24px|link=]] | ||
| text-align:"center;" | [[file:Atk7.png|Attack T7|link=]] | |||
|} | |} | ||
</center> | </center> | ||
| Linha 405: | Linha 451: | ||
<center> | <center> | ||
{| class="wikitable sortable" style="text-align:center" width=" | {| class="wikitable sortable" style="text-align:center" width="65%;" | ||
|- | |- | ||
! scope="col" width=" | ! scope="col" width="10%" style="background-color: #F1C232"| <span style="color:black">Nº Dex</span> | ||
! scope="col" style="background-color: # | ! scope="col" style="background-color: #F1C232"| <span style="color:black">Ícone</span> | ||
! scope="col" width=" | ! scope="col" width="15%;" style="background-color: #F1C232"| <span style="color:black">Nome</span> | ||
! scope="col" style="background-color: # | ! scope="col" style="background-color: #F1C232"| <span style="color:black">Elementos</span> | ||
! scope="col" width=" | ! scope="col" width="15%;" style="background-color: #F1C232"| <span style="color:black">Função PvE</span> | ||
! scope="col" width=" | ! scope="col" width="15%;" style="background-color: #F1C232"| <span style="color:black">Função PvP</span> | ||
! scope="col" width="20%;" style="background-color: #F1C232"| <span style="color:black">Held Recomendado (PvP/PvE)</span> | |||
|- | |- | ||
| text-align:center;" | #051 | | text-align:center;" | #051 | ||
| Linha 420: | Linha 467: | ||
| width="10%" | [[Arquivo:Interface_BDD_PVE.png|24px|link=]] | | width="10%" | [[Arquivo:Interface_BDD_PVE.png|24px|link=]] | ||
| width="10%" | [[Arquivo:Not.png|link=]] | | width="10%" | [[Arquivo:Not.png|link=]] | ||
| text-align:"center;" | [[file:Atk7.png|Attack T7|link=]] | |||
|- | |- | ||
| text-align:center;" | #082 | | text-align:center;" | #082 | ||
| Linha 427: | Linha 475: | ||
| width="10%" | [[Arquivo:Interface_BDD_PVE.png|24px|link=]] | | width="10%" | [[Arquivo:Interface_BDD_PVE.png|24px|link=]] | ||
| width="10%" | [[Arquivo:Not.png|link=]] | | width="10%" | [[Arquivo:Not.png|link=]] | ||
| text-align:"center;" | [[file:Atk7.png|Attack T7|link=]] | |||
|- | |- | ||
| text-align:center;" | #205 | | text-align:center;" | #205 | ||
| Linha 434: | Linha 483: | ||
| width="10%" | [[Arquivo:Not.png|link=]] | | width="10%" | [[Arquivo:Not.png|link=]] | ||
| width="10%" | [[Arquivo:Interface_Tanker_PVP.png|24px|link=]] [[Arquivo:Interface_Support_PVP.png|24px|link=]] | | width="10%" | [[Arquivo:Interface_Tanker_PVP.png|24px|link=]] [[Arquivo:Interface_Support_PVP.png|24px|link=]] | ||
| text-align:"center;" | [[file:Def7.png|Defense T7|link=]] | |||
|- | |- | ||
| text-align:center;" | #303 | | text-align:center;" | #303 | ||
| Linha 441: | Linha 491: | ||
| width="10%" | [[Arquivo:Not.png|link=]] | | width="10%" | [[Arquivo:Not.png|link=]] | ||
| width="10%" | [[Arquivo:Interface_Support_PVP.png|24px|link=]] | | width="10%" | [[Arquivo:Interface_Support_PVP.png|24px|link=]] | ||
| text-align:"center;" | [[file:Def7.png|Defense T7|link=]] | |||
|- | |- | ||
| text-align:center;" | #375 | | text-align:center;" | #375 | ||
| Linha 448: | Linha 499: | ||
| width="10%" |[[Arquivo:Interface_BDD_PVE.png|24px|link=]] | | width="10%" |[[Arquivo:Interface_BDD_PVE.png|24px|link=]] | ||
| width="10%" | [[Arquivo:Not.png|link=]] | | width="10%" | [[Arquivo:Not.png|link=]] | ||
| text-align:"center;" | [[file:Atk7.png|Attack T7|link=]] | |||
|- | |- | ||
| text-align:center;" | #448 | | text-align:center;" | #448 | ||
| Linha 454: | Linha 506: | ||
| text-align:center;" | [[Arquivo:Fighting.png|link=Gardestrike]] [[Arquivo:Steel.png|link=]] | | text-align:center;" | [[Arquivo:Fighting.png|link=Gardestrike]] [[Arquivo:Steel.png|link=]] | ||
| width="10%" | [[Arquivo:Interface_BDD_PVE.png|24px|link=]] | | width="10%" | [[Arquivo:Interface_BDD_PVE.png|24px|link=]] | ||
| width="10%" | [[Arquivo: | | width="10%" | [[Arquivo:Interface_BDD_PVP.png|24px|link=]] | ||
| text-align:"center;" | [[file:Atk7.png|Attack T7|link=]] | |||
|- | |- | ||
| text-align:center;" | #601 | | text-align:center;" | #601 | ||
| Linha 462: | Linha 515: | ||
| width="10%" | [[Arquivo:Interface_OffensiveTanker_pve.png|25px|link=]] | | width="10%" | [[Arquivo:Interface_OffensiveTanker_pve.png|25px|link=]] | ||
| width="10%" | [[Arquivo:Not.png|link=]] | | width="10%" | [[Arquivo:Not.png|link=]] | ||
| text-align:"center;" | [[file:Atk7.png|Attack T7|link=]] | |||
|- | |- | ||
| text-align:center;" | #625 | | text-align:center;" | #625 | ||
| Linha 469: | Linha 523: | ||
| width="10%" | [[Arquivo:Not.png|link=]] | | width="10%" | [[Arquivo:Not.png|link=]] | ||
| width="10%" | [[Arquivo:Interface_BDD_PVP.png|24px|link=]] | | width="10%" | [[Arquivo:Interface_BDD_PVP.png|24px|link=]] | ||
| text-align:"center;" | [[file:Def7.png|Defense T7|link=]] | |||
|- | |- | ||
| text-align:center;" | #777 | | text-align:center;" | #777 | ||
| Linha 476: | Linha 531: | ||
| width="10%" | [[Arquivo:Not.png|link=]] | | width="10%" | [[Arquivo:Not.png|link=]] | ||
| width="10%" | [[Arquivo:Interface_BDD_PVP.png|24px|link=]] | | width="10%" | [[Arquivo:Interface_BDD_PVP.png|24px|link=]] | ||
| text-align:"center;" | [[file:Def7.png|Defense T7|link=]] | |||
|} | |} | ||
</center> | </center> | ||
Edição atual tal como às 17h11min de 10 de junho de 2024
Introdução
Os Pokémon do clã Ironhard são conhecidos por sua força bruta, resistência e alcance, dominando o elemento ![]() Steel. Eles passaram anos aperfeiçoando suas técnicas para quebrar todos os limites.
Steel. Eles passaram anos aperfeiçoando suas técnicas para quebrar todos os limites.
Ranking
- Rank 1: Ironhard Smither.
- Rank 2: Ironhard Forge.
- Rank 3: Ironhard Hammer.
- Rank 4: Ironhard Metal.
- Rank 5: Ironhard Titan.
Acesse a página de Tasks do clã Ironhard para conferir os requisitos necessários em cada um dos Rankings.
Bônus de Clã
O bônus máximo do clã é aplicado ao completar as tarefas do Rank 5. Abaixo estão as porcentagens de bônus adquiridas:
![]() Steel: Atk 28%, Def 28%
Steel: Atk 28%, Def 28%
![]() Crystal: Atk 28%, Def 28%
Crystal: Atk 28%, Def 28%
Tiers
Tier é uma classificação comum entre os Pokémon, indicando não apenas a raridade deste dentro do jogo, mas também qual executará melhor uma função, contanto que a comparação seja realizada entre dois Pokémon de mesma função. O Tier e a Função de um Pokémon pode ser conferido na ![]() Pokédex (Atalho Shift + D). Caso deseje ler mais sobre, acesse a página Tier e Funções ou Tiers (listagem) para conferir a listagem de Tier de todos os Pokémon.
Pokédex (Atalho Shift + D). Caso deseje ler mais sobre, acesse a página Tier e Funções ou Tiers (listagem) para conferir a listagem de Tier de todos os Pokémon.
Para facilitar a leitura desta página, a tabela a seguir contém a legenda de todas as Funções, PvP e PvE disponíveis no jogo.
| Função PvE | Função PvP | ||
|---|---|---|---|
| Ícone | Função | Ícone | Função |
| Tank | Tank | ||
| Offensive Tank | Offensive Tank | ||
| Burst Damage Dealer | Burst Damage Dealer | ||
| Over Time Damage Dealer | Over Time Damage Dealer | ||
| Support Overtime | Support | ||
| - | Disrupter | ||
Abaixo estão listados todos os Pokémon do clã Ironhard e suas respectivas funções, separados por Tier e com algumas recomendações de Held Itens.
Observação: A nossa lista de Helds Recomendados foi composta por colaboradores experientes da Wiki da PokeXGames e serve como sugestões de Held Itens para os Pokémon no âmbito do PvP e PvE, respectivamente.
O jogador ainda tem toda a liberdade de testar e utilizar outros Helds que não esses, podendo personalizar seu Pokémon de um jeito diferente. Ressaltamos que em caso de alterações nos Pokémon, essa lista pode ser alterada e não será garantido que o Pokémon seja adicionado como opção no NPC Jorge.
Observação: Na listagem, o Held PvP sugerido é o primeiro, seguido pelo Held PvE. Caso o Pokémon utilize o mesmo Held Item nos 2 âmbitos, aparecerá listado somente 1 Held Item.
Tier 1A
| Nº Dex | Ícone | Nome | Elementos | Função PvE | Função PvP | Held Recomendado (PvP/PvE) |
|---|---|---|---|---|---|---|
| #212 | Mega Scizor |
Tier 1B
| Nº Dex | Ícone | Nome | Elementos | Função PvE | Função PvP | Held Recomendado (PvP/PvE) |
|---|---|---|---|---|---|---|
| #306 | Mega Aggron |
Tier 1C
| Nº Dex | Ícone | Nome | Elementos | Função PvE | Função PvP | Held Recomendado (PvP/PvE) |
|---|---|---|---|---|---|---|
| #028 | Alolan Sandslash | |||||
| #082 | Shiny Magneton | |||||
| #095 | Crystal Onix | |||||
| #208 | Mega Steelix | |||||
| #208 | Golden Steelix | |||||
| #303 | Mega Mawile | |||||
| #376 | Metagross | |||||
| #395 | Shiny Empoleon | |||||
| #437 | Shiny Bronzong | |||||
| #448 | Mega Lucario | |||||
| #462 | Shiny Magnezone | |||||
| #485 | Heatran | |||||
| #879 | Shiny Copperajah |
Tier 1H
| Nº Dex | Ícone | Nome | Elementos | Função PvE | Função PvP | Held Recomendado (PvE) |
|---|---|---|---|---|---|---|
| #303 | Shiny Mawile | |||||
| #681 | Shiny Aegislash |
Observação: Os Pokémon T1H têm força de T1C fora da Nightmare World e são acima dos T1C dentro dela ou pelo menos tem um diferencial perante os demais Pokémon. São balanceados exclusivamente para conteúdos PvE e não podem ser utilizados em duelos PvP.
Tier 2
| Nº Dex | Ícone | Nome | Elementos | Função PvE | Função PvP | Held Recomendado (PvP/PvE) |
|---|---|---|---|---|---|---|
| #205 | Shiny Forretress | |||||
| #208 | Steelix | |||||
| #212 | Scizor | |||||
| #227 | Skarmory | |||||
| #306 | Aggron | |||||
| #375 | Shiny Metang | |||||
| #395 | Empoleon | |||||
| #411 | Bastiodon | |||||
| #437 | Bronzong | |||||
| #448 | Shiny Lucario | |||||
| #462 | Magnezone | |||||
| #476 | Probopass | |||||
| #530 | Excadrill | |||||
| #598 | Ferrothorn | |||||
| #601 | Shiny Klinklang | |||||
| #681 | Aegislash | |||||
| #707 | Klefki | |||||
| #777 | Shiny Togedemaru | |||||
| #863 | Perrserker | |||||
| #879 | Copperajah |
Tier 3
| Nº Dex | Ícone | Nome | Elementos | Função PvE | Função PvP | Held Recomendado (PvP/PvE) |
|---|---|---|---|---|---|---|
| #051 | Alolan Dugtrio | |||||
| #082 | Magneton | |||||
| #205 | Forretress | |||||
| #303 | Mawile | |||||
| #375 | Metang | |||||
| #448 | Lucario | |||||
| #601 | Klinklang | |||||
| #625 | Bisharp | |||||
| #777 | Togedemaru |
Rotação Mid-Late Game
| Pokémon | Nome | Função | Tier |
|---|---|---|---|
| Shiny Klinklang | 2 | ||
| Shiny Forretress | 2 | ||
| Klinklang | 3 | ||
| Shiny Mawile | 1H | ||
| Shiny Aegislash | 1H | ||
| Bronzong | 2 | ||
| Perrserker | 2 | ||
| Magneton | 3 | ||
| Metang | 3 | ||
| Lucario | 3 | ||
Observação: Não existe uma rotação ![]() Crystal-type. O único Pokémon existente com tal elemento é o Crystal Onix.
Crystal-type. O único Pokémon existente com tal elemento é o Crystal Onix.
Exclusividade do Clã no PvP
| Pokémon | Nome | Requer Rank 5 |
|---|---|---|
| Alolan Sandslash | ||
| Golden Steelix | ||
| Shiny Forretress | ||
| Mega Mawile | ||
| Empoleon | ||
| Shiny Lucario | ||
| Aegislash | ||
| Shiny Copperajah | ||
| Shiny Empoleon |
Observação: A exclusividade é aplicada apenas em conteúdos PvP. No PvE, o uso é liberado para todos os clãs.
Pokémon obtido via NPC de Clã
- Shiny de Clã
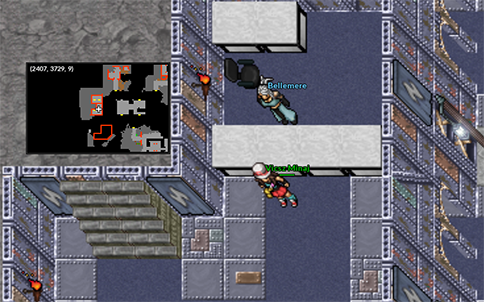
Para obter um, ![]() Shiny Forretress fale com a NPC Bellemere, localizada na área do Clã Ironhard, no Trade Center.
Shiny Forretress fale com a NPC Bellemere, localizada na área do Clã Ironhard, no Trade Center.
- Shiny de Clã da Nightmare World
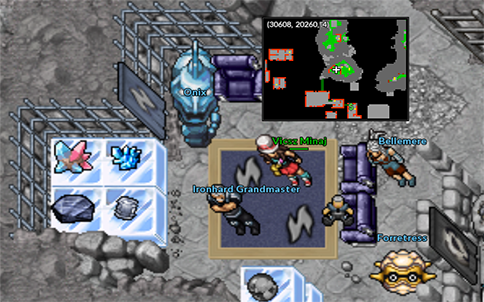
Para obter um, ![]() Shiny Lucario fale com a NPC Bellemere, na área Ironhard, na resistência de Cerulean.
Shiny Lucario fale com a NPC Bellemere, na área Ironhard, na resistência de Cerulean.
Efetividades
Abaixo são apresentadas as efetividades dos Pokémon deste clã, considerando apenas aqueles que possuem um elemento. A efetividade pode mudar caso o Pokémon possua dois elementos ou possua alguma resistência à algum elemento, como é o caso do Shiny Bronzong que possui a passiva Heatproof, permitindo que ganhe resistência contra ataques do tipo Fire (0.5x).
A efetividade de um Pokémon pode ser conferida na ![]() Pokédex ou realizando uma busca na página Pokémon (uso do Ctrl+F recomendado). Clique no ícone do elemento desejado para conferir a tabela de efetividade deste clã.
Pokédex ou realizando uma busca na página Pokémon (uso do Ctrl+F recomendado). Clique no ícone do elemento desejado para conferir a tabela de efetividade deste clã.
![]() Steel
Steel
| Dano | Elemento | |
|---|---|---|
| 0x | - | |
| Dano | Elemento | |
|---|---|---|
| Steel | ||
| 0x | ||
![]() Crystal
Crystal
| Dano | Elemento | |
|---|---|---|
| Dragon | ||
| 0x | ||
Observação: Não existe uma tabela de efetividades Ofensiva do elemento ![]() Crystal, pois não existe nenhum ataque deste tipo no jogo.
Crystal, pois não existe nenhum ataque deste tipo no jogo.
Mais informações poderão ser adquiridas acessando a página Efetividades.
Outfits Exclusivas
| Rank 1 | Rank 5 | ||
|---|---|---|---|

|

|

|

|
| Master | |
|---|---|
|

|