Predefinição:Teste16: mudanças entre as edições
Ir para navegação
Ir para pesquisar
Os clãs disponíveis são:
Sem resumo de edição |
Sem resumo de edição |
||
| Linha 5: | Linha 5: | ||
Como cada pokémon no jogo tem no mínimo um elemento, ao chegar no nível 80 você poderá se especializar em um clã, ou seja, você se tornará um mestre do elemento escolhido e ganhará bônus de força e defesa nos seus pokémon. Ao escolher o seu clã você receberá uma '''roupa especial exclusiva''' de membros desse clã e poderá iniciar [[Clan_Tasks|missões para aumentar o seu '''ranking''']], de modo que aumentará também o bônus que ganha nos pokémon. | Como cada pokémon no jogo tem no mínimo um elemento, ao chegar no nível 80 você poderá se especializar em um clã, ou seja, você se tornará um mestre do elemento escolhido e ganhará bônus de força e defesa nos seus pokémon. Ao escolher o seu clã você receberá uma '''roupa especial exclusiva''' de membros desse clã e poderá iniciar [[Clan_Tasks|missões para aumentar o seu '''ranking''']], de modo que aumentará também o bônus que ganha nos pokémon. | ||
{| class="wikitable" style="float:left" width="18%;" | {| class="wikitable" style="float:left; background-color: transparent"" width="18%;" | ||
|- | |- | ||
| width="10%" align="center" style="border-style: hidden;" | [[Arquivo:Oreboundvetor.png|190px|link=Orebound]] | | width="10%" align="center" style="border-style: hidden;" | [[Arquivo:Oreboundvetor.png|190px|link=Orebound]] | ||
| Linha 13: | Linha 13: | ||
|} | |} | ||
{| class="wikitable" style="float:left" width="18%;" | {| class="wikitable" style="float:left; background-color: transparent"" width="18%;" | ||
|- | |- | ||
| width="10%" align="center" style="border-style: hidden;" | [[Arquivo:Volcanicvetorr.png|190px|link=Orebound]] | | width="10%" align="center" style="border-style: hidden;" | [[Arquivo:Volcanicvetorr.png|190px|link=Orebound]] | ||
| Linha 21: | Linha 21: | ||
|} | |} | ||
{| class="wikitable" style="float:left" width="18%;" | {| class="wikitable" style="float:left; background-color: transparent"" width="18%;" | ||
|- | |- | ||
| width="10%" align="center" style="border-style: hidden;" | [[Arquivo:Naturiavetor.png|190px|link=Orebound]] | | width="10%" align="center" style="border-style: hidden;" | [[Arquivo:Naturiavetor.png|190px|link=Orebound]] | ||
| Linha 29: | Linha 29: | ||
|} | |} | ||
{| class="wikitable" style="float:left" width="18%;" | {| class="wikitable" style="float:left; background-color: transparent"" width="18%;" | ||
|- | |- | ||
| width="10%" align="center" style="border-style: hidden;" | [[Arquivo:Gardestrikevetor.png|190px|link=Orebound]] | | width="10%" align="center" style="border-style: hidden;" | [[Arquivo:Gardestrikevetor.png|190px|link=Orebound]] | ||
| Linha 37: | Linha 37: | ||
|} | |} | ||
{| class="wikitable" style="float:left" width="18%;" | {| class="wikitable" style="float:left; background-color: transparent"" width="18%;" | ||
|- | |- | ||
| width="10%" align="center" style="border-style: hidden;" | [[Arquivo:Maleficvetor.png|190px|link=Orebound]] | | width="10%" align="center" style="border-style: hidden;" | [[Arquivo:Maleficvetor.png|190px|link=Orebound]] | ||
| Linha 49: | Linha 49: | ||
|} | |} | ||
{| class="wikitable" style="float:left" width="18%;" | {| class="wikitable" style="float:left; background-color: transparent"" width="18%;" | ||
|- | |- | ||
| width="10%" align="center" style="border-style: hidden;" | [[Arquivo:Ironhardvetor.png|190px|link=Orebound]] | | width="10%" align="center" style="border-style: hidden;" | [[Arquivo:Ironhardvetor.png|190px|link=Orebound]] | ||
| Linha 57: | Linha 57: | ||
|} | |} | ||
{| class="wikitable" style="float:left" width="18%;" | {| class="wikitable" style="float:left; background-color: transparent"" width="18%;" | ||
|- | |- | ||
| width="10%" align="center" style="border-style: hidden;" | [[Arquivo:Wingeonvetor.png|190px|link=Orebound]] | | width="10%" align="center" style="border-style: hidden;" | [[Arquivo:Wingeonvetor.png|190px|link=Orebound]] | ||
| Linha 65: | Linha 65: | ||
|} | |} | ||
{| class="wikitable" style="float:left" width="18%;" | {| class="wikitable" style="float:left; background-color: transparent"" width="18%;" | ||
|- | |- | ||
| width="10%" align="center" style="border-style: hidden;" | [[Arquivo:Raiboltvetor.png|190px|link=Orebound]] | | width="10%" align="center" style="border-style: hidden;" | [[Arquivo:Raiboltvetor.png|190px|link=Orebound]] | ||
| Linha 73: | Linha 73: | ||
|} | |} | ||
{| class="wikitable" style="float:left" width="18%;" | {| class="wikitable" style="float:left; background-color: transparent"" width="18%;" | ||
|- | |- | ||
| width="10%" align="center" style="border-style: hidden;" | [[Arquivo:Psycraftvetor.png|190px|link=Orebound]] | | width="10%" align="center" style="border-style: hidden;" | [[Arquivo:Psycraftvetor.png|190px|link=Orebound]] | ||
| Linha 81: | Linha 81: | ||
|} | |} | ||
{| class="wikitable" style="float:left" width="18%;" | {| class="wikitable" style="float:left; background-color: transparent"" width="18%;" | ||
|- | |- | ||
| width="10%" align="center" style="border-style: hidden;" | [[Arquivo:Seavellvetor.png|190px|link=Orebound]] | | width="10%" align="center" style="border-style: hidden;" | [[Arquivo:Seavellvetor.png|190px|link=Orebound]] | ||
Edição das 20h53min de 28 de fevereiro de 2023
Página de Clãs
Como cada pokémon no jogo tem no mínimo um elemento, ao chegar no nível 80 você poderá se especializar em um clã, ou seja, você se tornará um mestre do elemento escolhido e ganhará bônus de força e defesa nos seus pokémon. Ao escolher o seu clã você receberá uma roupa especial exclusiva de membros desse clã e poderá iniciar missões para aumentar o seu ranking, de modo que aumentará também o bônus que ganha nos pokémon.
    
|
    
|
| Clã | Elementos | Shiny Especial | Task de Clã | ||
|---|---|---|---|---|---|
| Orebound | Shiny Golem | Orebound Tasks | |||
| Volcanic | Shiny Flareon | Volcanic Tasks | |||
| Naturia | Shiny Vileplume | Naturia Tasks | |||
| Gardestrike | Elite Hitmontop | Gardestrike Tasks | |||
| Malefic | Shiny Nidoking | Malefic Tasks | |||
| Ironhard | Shiny Lucario | Ironhard Tasks | |||
| Wingeon | Shiny Fearow | Wingeon Tasks | |||
| Raibolt | Shiny Jolteon | Raibolt Tasks | |||
| Psycraft | Shiny Hypno | Psycraft Tasks | |||
| Seavell | Shiny Vaporeon | Seavell Tasks | |||
Teste tabela localização Heather:
Kanto
| Celadon |
|---|
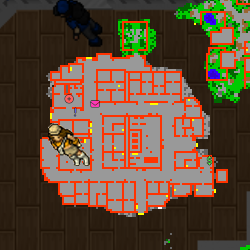
|
| Vermilion |
|---|
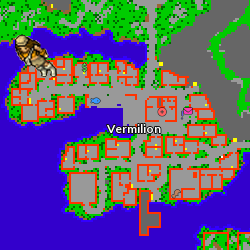
|
| Viridian |
|---|
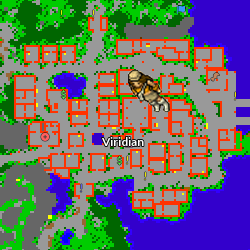
|
Orange Islands
| Hamlin |
|---|
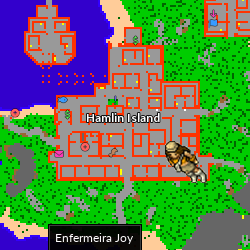
|
| Mandarin |
|---|
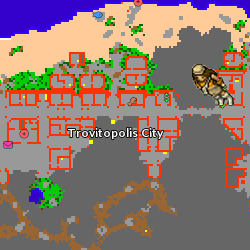
|
| Shamouti |
|---|
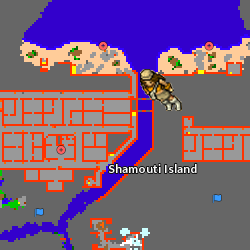
|
Orre
| Agate |
|---|
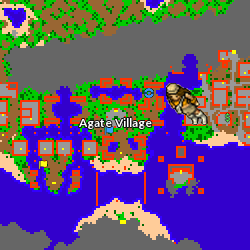
|
| S.S. Libra |
|---|
|
› Tasks Diárias / Semanais
| Tasks Diárias / Semanais | |||||||
|---|---|---|---|---|---|---|---|
| NPC Officer Jenny | NPC Gary Oak | NPC Fawkes | NPC Eleanor | ||||

|

|

|

| ||||
| Veja Também: Danger Room • Clan Tasks. |