|
|
| (4 revisões intermediárias por 2 usuários não estão sendo mostradas) |
| Linha 1: |
Linha 1: |
| <center>[[Arquivo:Malefic.png|link=Malefic Tasks]]</center> | | <center>[[file:Banner Clã Malefic.png|link=]]<br></center> |
|
| |
|
| ==Introdução==
| | =Introdução= |
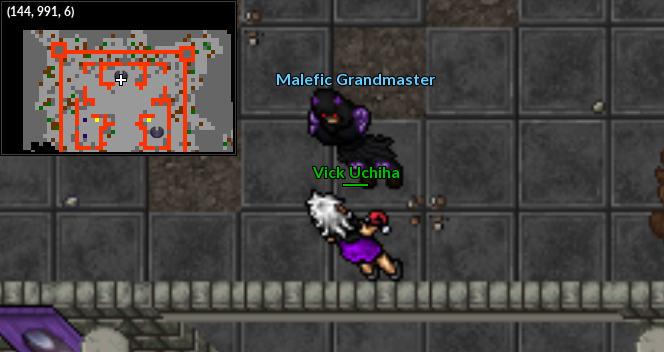
| | Para escolher seu clã, o jogador deve ir até os portais na área norte do Trade Center. Pode acessar dessa forma, ou subindo as escadas após a seção de profissões. O portal para os domínios do clã '''Malefic''' é representado por um Gengar. |
|
| |
|
| Em cada Clã existe 5 Rankings. Quando o jogador entra para um Clã, o mesmo se torna membro do Rank 1, sendo necessário concluir as 4 Tasks do Clã para alcançar o Rank 5. Cada task constitui em 4 partes, sendo elas:
| | <center> |
| | <br> |
| | [[Arquivo:Porta Clãs.gif|link=]] |
| | </center> |
| | |
| | <br> |
| | Ao atravessar o portal, o jogador deve encontrar o NPC '''Malefic Grandmaster''', responsável pelo recrutamento de novos membros. Ao ingressar no clã, o jogador receberá o título de '''Malefic Troublemaker''', o primeiro dos cinco rankings disponíveis. |
| | |
| | <center> |
| | <br> |
| | [[Arquivo:NPC Malefic Grandmaster.png|link=]] |
| | </center> |
| | |
| | ==Tasks== |
| | |
| | Para progredir no clã escolhido, o jogador deve concluir uma série de tarefas divididas em etapas. Essas etapas incluem coletar itens, capturar Pokémon, derrotar Pokémon selvagens com o Pokémon capturado e, por fim, enfrentar as Danger Rooms. O jogador deve conversar com os treinadores de cada ranking para receber suas missões. Não é possível pular etapas, a progressão segue a ordem: '''Troublemaker''', '''Venomancer''', '''Spectre''', '''Nightwalker''' e, por fim, o ranking máximo, '''Lady/Lord''' (dependendo do gênero do personagem). |
| | |
| | <center> |
| | <br> |
| | {| class="wikitable" style="width: 30%; text-align: center" |
| | |- |
| | ! colspan="2" | Requisitos |
| | |- |
| | ! style="width: 50%" | Task |
| | ! style="width: 50%" | Nível |
| | |- |
| | | Rank 1 ao 2 || 90 |
| | |- |
| | | Rank 2 ao 3 || 100 |
| | |- |
| | | Rank 3 ao 4 || 110 |
| | |- |
| | | Rank 4 ao 5 || 120 |
| | |} |
|
| |
|
| *Coletar e entregar itens.
| | </center> |
| **'''Observação:''' Os itens podem ser comprados de outros jogadores.
| |
| *Capturar um Pokémon.
| |
| *Derrotar duas listas de diferentes Pokémon.
| |
| *Entregar o Pokémon capturado e concluir duas Danger Room.
| |
|
| |
|
| <table class="seeMore">
| | <br> |
| <tr>
| | '''Dicas''': |
| <td class="seeMore__image">[[Arquivo:Telekinetic-compass.gif|link=]]</td>
| | * Os itens solicitados na primeira etapa de cada tarefa podem ser comprados de outros jogadores. |
| <td> '''Veja Também:''' [[Danger Room]] • [[Clan Tasks]]. </td>
| | * Durante a etapa de captura, a taxa de captura de todas as Pokéballs é igualada. Portanto, recomenda-se o uso de Pokéballs comuns para evitar gastos desnecessários. |
| </tr>
| | * Na etapa de combate contra Pokémon selvagens, é possível utilizar uma cópia do Pokémon capturado feita com um Ditto ou Shiny Ditto. Há também a possibilidade de utilizar um Pokémon com boost e/ou held item para facilitar a task durante esta etapa. |
| </table>
| | * Não é possível equipar helds nem boosts nos Pokémon capturados com a task do clã. |
| | * Para a etapa de combate contra Pokémon selvagens, há a opção de derrotar Pokémon na Outland e no continente de Orre para completar a tarefa. |
|
| |
|
| ==Tasks Rank 1 ao 2 (Level 90)==
| |
| <tabber> | | <tabber> |
| |-|Coletar= | | |-|Rank 1 ao 2= |
| | |
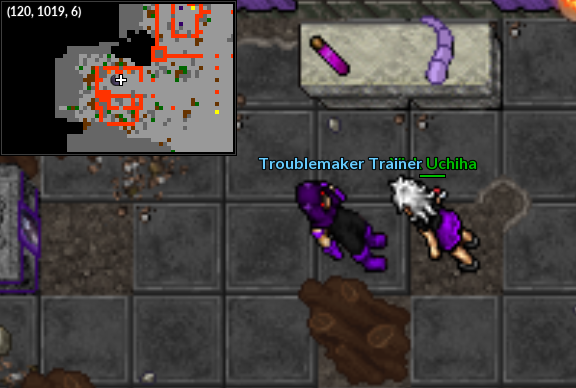
| | Para iniciar a primeira tarefa, o jogador deve conversar com o NPC Troublemaker Trainer, localizado a oeste da área do clã Malefic. |
| | |
| | <center> <br> |
| | [[Arquivo:NPC Malefic Troublemaker Trainer.png|link=]] |
| | </center> |
| | |
| <center> | | <center> |
| {|class="wikitable" width="40%" align="center" text-align="center" | | <br> |
| ! colspan="2" style="background-color: #993399" | <span style="color: white">'''Coletar'''</span> | | {|class="wikitable" width="45%" align="center" style="text-align:center;" |
| |-style="width:50px; text-align:center;" | | ! colspan="2" style="background-color: #E84B16" | <span>'''Etapa 1 - Coletar'''</span> |
| ! | Quantidade
| | |- |
| ! | Item | | ! width="50%" | Quantidade |
| |-style="width:50px; text-align:center;" | | ! width="50%" | Item |
| | '''1.500''' | | |- |
| | [[Arquivo:BottleOfPoison.png|link=Drop de Itens]] Bottle Of Poison | | | '''1.500''' || [[Arquivo:BottleOfPoison.png|link=Drop de Itens]] Bottle Of Poison |
| |-style="width:50px; text-align:center;" | | |- |
| | '''1.500''' | | | '''1.500''' || [[Arquivo:GhostEssence.png|link=Drop de Itens]] Ghost Essence |
| | [[Arquivo:GhostEssence.png|link=Drop de Itens]] Ghost Essence | | |- |
| |-style="width:50px; text-align:center;" | | | '''5''' || [[Arquivo:Snake_Tail.png|link=Drop de Itens]] Snake Tail |
| | '''5''' | |
| | [[Arquivo: Snake Tail.png|link= Drop de Itens]] Snake Tail | |
| |} | | |} |
| </center> | | </center> |
| |-|Capturar=
| | |
| <center> | | <center> |
| {|class="wikitable" width="40%" align="center" text-align="center" | | <br> |
| ! colspan="2" style="background-color: #993399" | <span style="color: white">'''Capturar'''</span> | | {|class="wikitable" width="45%" align="center" text-align="center" |
| |-style="width:50px; text-align:center;" | | ! colspan="2" style="background-color: #E84B16" | <span>'''Etapa 2 - Capturar'''</span> |
| ! width="20%" |
| | |-style="width:40px; text-align:center;" |
| ! | Pokémon
| | | width="33%" | [[Arquivo:198-Murkrow.png|link=Murkrow]]<br />Murkrow |
| |-style="width:50px; text-align:center;"
| |
| | [[Arquivo:198-Murkrow.png|link=Murkrow]] | |
| | Murkrow
| |
| |} | | |} |
| | </center> |
| | |
| | <br>Em 15/12/2021, a lista de Pokémon exigidos para as tarefas de clã foi atualizada. Jogadores que já estavam nessa fase antes da alteração deverão entregar um [[Arquivo:110-Weezing.png|link=Weezing]] '''Weezing''' em vez de um [[Arquivo:198-Murkrow.png|link=Murkrow]] '''Murkrow'''. |
|
| |
|
| Pokémon que era solicitado ao jogador antes da atualização: '''Weezing''' ([[Arquivo:110-Weezing.png|link=Weezing]]).
| | <center> |
| | <br> |
| | {|class="wikitable" width="45%" align="center" text-align="center" |
| | ! colspan="3" style="background-color: #E84B16" | <span>'''Etapa 3 - Derrotar (1ª Lista)'''</span> |
| | |-style="text-align:center;" |
| | | width="33%" | [[Arquivo:097-Hypno.png|link=Hypno]]<br />'''50''' Hypno |
| | | width="33%" | [[Arquivo:064-Kadabra.png|link=Kadabra]]<br />'''50''' Kadabra |
| | | width="33%" | [[Arquivo:093-Haunter.png|link=Haunter]]<br />'''50''' Haunter |
| | |} |
| </center> | | </center> |
| |-|Derrotar=
| | |
| | <br> |
| | |
| <center> | | <center> |
| {|class="wikitable" width="40%" align="center" text-align="center" | | <br> |
| ! colspan="3" style="background-color: #993399" | <span style="color: white">'''Derrotar (1ª Lista)'''</span> | | {|class="wikitable" width="45%" align="center" text-align="center" |
| |-style="width:50px; text-align:center;" | | ! colspan="3" style="background-color: #E84B16" | <span>'''Etapa 4 - Derrotar (2ª Lista)'''</span> |
| | [[Arquivo:097-Hypno.png|link=Hypno]]<br />'''50''' Hypno | | |-style="text-align:center;" |
| | [[Arquivo:064-Kadabra.png|link=Kadabra]]<br />'''50''' Kadabra
| | | width="33%" | [[Arquivo:178-Xatu.png|link=Xatu]]<br />'''55''' Xatu |
| | [[Arquivo:093-Haunter.png|link=Haunter]]<br />'''50''' Haunter
| | | width="33%" | [[Arquivo:203-Girafarig.png|link=Girafarig]]<br />'''55''' Girafarig |
| |}
| |
| <br />
| |
| {|class="wikitable" width="40%" align="center" text-align="center"
| |
| ! colspan="2" style="background-color: #993399" | <span style="color: white">'''Derrotar (2ª Lista)'''</span>
| |
| |-style="width:50px; text-align:center;"
| |
| | [[Arquivo:178-Xatu.png|link=Xatu]]<br />'''55''' Xatu | |
| | [[Arquivo:203-Girafarig.png|link=Girafarig]]<br />'''55''' Girafarig | |
| |} | | |} |
| </center> | | </center> |
| |-|Danger Room=
| | |
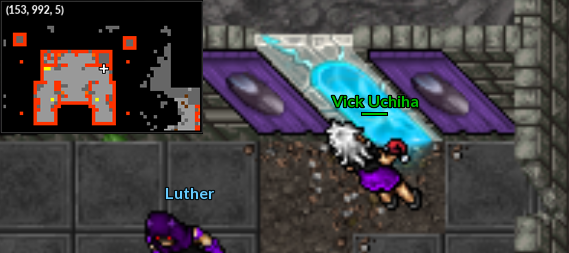
| | <br>Depois dessas etapas, você deve ir até o portal da [[Danger Room]] e completar duas salas diferentes. |
| | * O jogador poderá usar revives infinitos dentro da dungeon. |
| | * Para passar pelo portal, o jogador deve deixar os Pokémon no locker. Há um próximo ao portal. |
| | * O jogador poderá usar ajudantes dentro da Danger Room, como o Mew/Mewtwo Card ou outros ajudantes. |
| | * Ao entrar, o jogador receberá os Pokémon da Danger Room para essa etapa. |
| | |
| | <br> |
| | <center> |
| | [[Arquivo:DR Clã Malefic.png|link=]] |
| | </center> |
| | |
| <center> | | <center> |
| {|class="wikitable" width="40%" align="center" text-align="center" | | <br> |
| ! colspan="3" style="background-color: #993399" | <span style="color: white">'''Danger Room Team'''</span> | | {|class="wikitable" width="45%" align="center" text-align="center" |
| |-style="width:50px; text-align:center;" | | ! colspan="3" style="background-color: #E84B16" | <span>'''Danger Room Team'''</span> |
| | [[Arquivo:110-Weezing.png|link=Weezing]]<br />Weezing | | |-style="text-align:center;" |
| | [[Arquivo:042-Sh_Golbat.png|link=Shiny Golbat]]<br />Shiny Golbat | | | width="33%" | [[Arquivo:110-Weezing.png|link=Weezing]]<br />Weezing |
| | [[Arquivo:198-Murkrow.png|link=Murkrow]]<br />Murkrow | | | width="33%" | [[Arquivo:042-Sh_Golbat.png|link=Shiny Golbat]]<br />Shiny Golbat |
| |-style="width:50px; text-align:center;" | | | width="33%" | [[Arquivo:198-Murkrow.png|link=Murkrow]]<br />Murkrow |
| | [[Arquivo:045-Vileplume.png|link=Vileplume]]<br />Vileplume | | |-style="text-align:center;" |
| | [[Arquivo:093-Sh_Haunter.png|link=Shiny Haunter]]<br />Shiny Haunter | | | width="33%" | [[Arquivo:045-Vileplume.png|link=Vileplume]]<br />Vileplume |
| | [[Arquivo:302-Sableye.png|link=Sableye]]<br />Sableye | | | width="33%" | [[Arquivo:093-Sh_Haunter.png|link=Shiny Haunter]]<br />Shiny Haunter |
| | | width="33%" | [[Arquivo:302-Sableye.png|link=Sableye]]<br />Sableye |
| |} | | |} |
| </center> | | </center> |
| </tabber>
| |
|
| |
|
| '''Recompensa:''' 100.000 de [[Arquivo:Exp_icon.png|24px|link=]]Experiência e 1 [[Arquivo:Venom-stone.gif|link=Pedras de Evolução]] Venom Stone. | | <br>Após concluir duas salas da Danger Room e conversar com o NPC Trainer do clã, o jogador receberá '''100.000''' de experiência e uma [[Arquivo:Venom-stone.gif|link=Pedras de Evolução]] Venom Stone. |
| | |
| | |-|Rank 2 ao 3= |
| | |
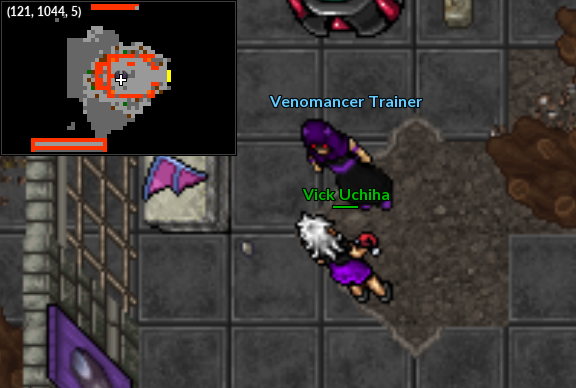
| | Para iniciar a segunda tarefa, o jogador deve conversar com o NPC Venomancer Trainer. |
|
| |
|
| ==Tasks Rank 2 ao 3 (Level 100)== | | <center> <br> |
| | [[Arquivo:NPC Malefic Venomancer Trainer.png|link=]] |
| | </center> |
|
| |
|
| <tabber>
| |
| |-|Coletar=
| |
| <center> | | <center> |
| {|class="wikitable" width="40%" align="center" text-align="center" | | <br> |
| ! colspan="2" style="background-color: #993399" | <span style="color: white">'''Coletar'''</span> | | {|class="wikitable" width="45%" align="center" style="text-align:center;" |
| |-style="width:50px; text-align:center;" | | ! colspan="2" style="background-color: #E84B16" | <span>'''Etapa 1 - Coletar'''</span> |
| ! | Quantidade
| | |- |
| ! | Item | | ! width="50%" | Quantidade |
| |-style="width:50px; text-align:center;" | | ! width="50%" | Item |
| | '''2.000''' | | |- |
| | [[Arquivo:BottleOfPoison.png|link=Drop de Itens]] Bottle Of Poison | | | '''2.000''' || [[Arquivo:BottleOfPoison.png|link=Drop de Itens]] Bottle Of Poison |
| |-style="width:50px; text-align:center;" | | |- |
| | '''2.000''' | | | '''2.000''' || [[Arquivo:GhostEssence.png|link=Drop de Itens]] Ghost Essence |
| | [[Arquivo:GhostEssence.png|link=Drop de Itens]] Ghost Essence | | |- |
| |-style="width:50px; text-align:center;" | | | '''10''' || [[Arquivo:Bat_Wing.png|link=Drop de Itens]] Bat Wing |
| | '''10''' | |
| | [[Arquivo: Bat Wing.png |link= Drop de Itens]] Bat Wing | |
| |} | | |} |
| </center> | | </center> |
| |-|Capturar=
| | |
| <center> | | <center> |
| {|class="wikitable" width="40%" align="center" text-align="center" | | <br> |
| ! colspan="2" style="background-color: #993399" | <span style="color: white">'''Capturar'''</span> | | {|class="wikitable" width="45%" align="center" text-align="center" |
| |-style="width:50px; text-align:center;" | | ! colspan="2" style="background-color: #E84B16" | <span>'''Etapa 2 - Capturar'''</span> |
| ! width="20%" |
| | |-style="width:40px; text-align:center;" |
| ! | Pokémon
| | |
| |-style="width:50px; text-align:center;"
| | | width="33%" | [[Arquivo:089-Muk.png|link=Muk]]<br />Muk |
| | [[Arquivo:089-Muk.png|link=Muk]] | |
| | Muk
| |
| |} | | |} |
| | </center> |
| | |
| | <br>Em 15/12/2021, a lista de Pokémon exigidos para as tarefas de clã foi atualizada. Jogadores que já estavam nessa fase antes da alteração deverão entregar um [[Arquivo:093-Haunter.png|link=Haunter]] '''Haunter''' em vez de um [[Arquivo:089-Muk.png|link=Muk]] '''Muk'''. |
|
| |
|
| Pokémon que era solicitado ao jogador antes da atualização: '''Haunter''' ([[Arquivo:093-Haunter.png|link=Haunter]]).
| | <center> |
| | <br> |
| | {|class="wikitable" width="45%" align="center" text-align="center" |
| | ! colspan="3" style="background-color: #E84B16" | <span>'''Etapa 3 - Derrotar (1ª Lista)'''</span> |
| | |-style="text-align:center;" |
| | | width="33%" | [[Arquivo:154-Meganium.png|link=Ninetales]]<br />'''50''' Meganium |
| | | width="33%" | [[Arquivo:036-Clefable.png|link=Typhlosion]]<br />'''50''' Clefable |
| | | width="33%" | [[Arquivo:040-Wigglytuff.png|link=Magcargo]]<br />'''50''' Wigglytuff |
| | |} |
| </center> | | </center> |
| |-|Derrotar=
| | |
| <center> | | <center> |
| {|class="wikitable" width="40%" align="center" text-align="center" | | <br> |
| ! colspan="3" style="background-color: #993399" | <span style="color: white">'''Derrotar (1ª Lista)'''</span> | | {|class="wikitable" width="45%" align="center" text-align="center" |
| |-style="width:50px; text-align:center;" | | ! colspan="2" style="background-color: #E84B16" | <span>'''Etapa 4 - Derrotar (2ª Lista)'''</span> |
| | [[Arquivo:154-Meganium.png|link=Meganium]]<br />'''50''' Meganium | | |-style="text-align:center;" |
| | [[Arquivo:036-Clefable.png|link=Clefable]]<br />'''50''' Clefable
| | | width="50%" | [[Arquivo:055-Golduck.png|link=Golduck]]<br />'''35''' Golduck |
| | [[Arquivo:040-Wigglytuff.png|link=Wigglytuff]]<br />'''50''' Wigglytuff
| | | width="50%" | [[Arquivo:186-Politoed.png|link=Politoed]]<br />'''35''' Politoed |
| |}
| | |-style="text-align:center;" |
| <br />
| | | width="50%" | [[Arquivo:087-Dewgong.png|link=Dewgong]]<br />'''40''' Dewgong |
| {|class="wikitable" width="40%" align="center" text-align="center"
| | | width="50%" | [[Arquivo:091-Cloyster.png|link=Cloyster]]<br />'''40''' Cloyster |
| ! colspan="2" style="background-color: #993399" | <span style="color: white">'''Derrotar (2ª Lista)'''</span>
| |
| |-style="width:50px; text-align:center;"
| |
| | [[Arquivo:055-Golduck.png|link=Golduck]]<br />'''35''' Golduck | |
| | [[Arquivo:186-Politoed.png|link=Politoed]]<br />'''35''' Politoed | |
| |-style="width:50px; text-align:center;" | |
| | [[Arquivo:087-Dewgong.png|link=Dewgong]]<br />'''40''' Dewgong | |
| | [[Arquivo:091-Cloyster.png|link=Cloyster]]<br />'''40''' Cloyster | |
| |} | | |} |
| </center> | | </center> |
| |-|Danger Room=
| | |
| | <br>Depois dessas etapas, você deve ir até o portal da [[Danger Room]] e completar duas salas diferentes. |
| | * O jogador poderá usar revives infinitos dentro da dungeon. |
| | * Para passar pelo portal, o jogador deve deixar os Pokémon no locker. Há um próximo ao portal. |
| | * O jogador poderá usar ajudantes dentro da Danger Room, como o Mew/Mewtwo Card ou outros ajudantes. |
| | * Ao entrar, o jogador receberá os Pokémon da Danger Room para essa etapa. |
| | |
| | <br> |
| | <center> |
| | [[Arquivo:DR Clã Malefic.png|link=]] |
| | </center> |
| | |
| <center> | | <center> |
| {|class="wikitable" width="40%" align="center" text-align="center" | | <br> |
| ! colspan="3" style="background-color: #993399" | <span style="color: white">'''Danger Room Team'''</span> | | {|class="wikitable" width="45%" align="center" text-align="center" |
| | ! colspan="3" style="background-color: #E84B16" | <span>'''Danger Room Team'''</span> |
| |-style="width:50px; text-align:center;" | | |-style="width:50px; text-align:center;" |
| | [[Arquivo:031-Nidoqueen.png|link=Nidoqueen]]<br />Nidoqueen | | | [[Arquivo:031-Nidoqueen.png|link=Nidoqueen]]<br />Nidoqueen |
| Linha 156: |
Linha 221: |
| |} | | |} |
| </center> | | </center> |
| </tabber>
| |
|
| |
|
| '''Recompensa:''' 200.000 de [[Arquivo:Exp_icon.png|24px|link=]]Experiência, 1 [[Arquivo:Venom-stone.gif|link=Pedras de Evolução]] Venom Stone e 1 [[Arquivo:HrnVNwK.png|link=Pedras de Evolução]] Darkness Stone. | | <br>Após concluir duas salas da Danger Room e conversar com o NPC Trainer do clã, o jogador receberá '''200.000''' de experiência, uma [[Arquivo:Venom-stone.gif|link=Pedras de Evolução]] Venom Stone e uma [[Arquivo:HrnVNwK.png|link=Pedras de Evolução]] Darkness Stone. |
| | |
| | |-|Rank 3 ao 4= |
| | |
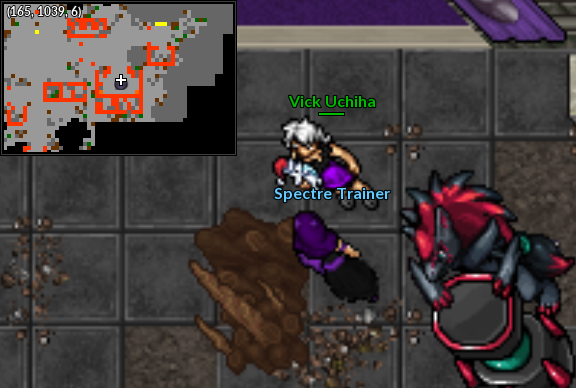
| | Para iniciar a terceira tarefa, o jogador deve conversar com o NPC Spectre Trainer. |
|
| |
|
| ==Tasks Rank 3 ao 4 (Level 110)== | | <center> <br> |
| | [[Arquivo:NPC Malefic Spectre Trainer.png|link=]] |
| | </center> |
|
| |
|
| <tabber>
| |
| |-|Coletar=
| |
| <center> | | <center> |
| {|class="wikitable" width="40%" align="center" text-align="center" | | <br> |
| ! colspan="2" style="background-color: #993399" | <span style="color: white">'''Coletar'''</span> | | {|class="wikitable" width="45%" align="center" style="text-align:center;" |
| |-style="width:50px; text-align:center;" | | ! colspan="2" style="background-color: #E84B16" | <span>'''Etapa 1 - Coletar'''</span> |
| ! | Quantidade
| | |- |
| ! | Item | | ! width="50%" | Quantidade |
| |-style="width:50px; text-align:center;" | | ! width="50%" | Item |
| | '''2.500''' | | |- |
| | [[Arquivo:BottleOfPoison.png|link=Drop de Itens]] Bottle Of Poison | | | '''2.500''' || [[Arquivo:BottleOfPoison.png|link=Drop de Itens]] Bottle Of Poison |
| |-style="width:50px; text-align:center;" | | |- |
| | '''2.500''' | | | '''2.500''' || [[Arquivo:GhostEssence.png|link=Drop de Itens]] Ghost Essence |
| | [[Arquivo:GhostEssence.png|link=Drop de Itens]] Ghost Essence | | |- |
| |-style="width:50px; text-align:center;" | | | '''15''' || [[Arquivo:Traces_Of_Ghost.png|link=Drop de Itens]] Traces of Ghost |
| | '''15''' | |
| | [[Arquivo: Traces Of Ghost.png|link= Drop de Itens]] Traces of Ghost | |
| |} | | |} |
| </center> | | </center> |
| |-|Capturar=
| | |
| <center> | | <center> |
| {|class="wikitable" width="40%" align="center" text-align="center" | | <br> |
| ! colspan="2" style="background-color: #993399" | <span style="color: white">'''Capturar'''</span> | | {|class="wikitable" width="45%" align="center" text-align="center" |
| |-style="width:50px; text-align:center;" | | ! colspan="2" style="background-color: #E84B16" | <span>'''Etapa 2 - Capturar'''</span> |
| ! width="20%" |
| | |-style="width:40px; text-align:center;" |
| ! | Pokémon
| | |
| |-style="width:50px; text-align:center;"
| | | width="33%" | [[Arquivo:094-Gengar.png|link=Gengar]]<br />Gengar |
| | [[Arquivo:094-Gengar.png|link=Gengar]] | |
| | Gengar
| |
| |} | | |} |
| | </center> |
|
| |
|
| Pokémon que era solicitado ao jogador antes da atualização: '''Nidoking''' ([[Arquivo:034-Nidoking.png|link=Nidoking]]). | | <br>Em 15/12/2021, a lista de Pokémon exigidos para as tarefas de clã foi atualizada. Jogadores que já estavam nessa fase antes da alteração deverão entregar um [[Arquivo:034-Nidoking.png|link=Nidoking]] '''Nidoking''' em vez de um [[Arquivo:094-Gengar.png|link=Gengar]] '''Gengar'''. |
|
| |
|
| | <center> |
| | <br> |
| | {|class="wikitable" width="45%" align="center" text-align="center" |
| | ! colspan="2" style="background-color: #E84B16" | <span>'''Etapa 3 - Derrotar (1ª Lista)'''</span> |
| | |-style="text-align:center;" |
| | | width="50%" | [[Arquivo:009-Blastoise.png|link=Blastoise]]<br />'''50''' Blastoise |
| | | width="50%" | [[Arquivo:006-Charizard.png|link=Charizard]]<br />'''50''' Charizard |
| | |-style="text-align:center;" |
| | | width="50%" | [[Arquivo:065-Alakazam.png|link=Alakazam]]<br />'''50''' Alakazam |
| | | width="50%" | [[Arquivo:124-Jynx.png|link=Jynx]]<br />'''50''' Jynx |
| | |} |
| </center> | | </center> |
| |-|Derrotar=
| | |
| <center> | | <center> |
| {|class="wikitable" width="40%" align="center" text-align="center" | | <br> |
| ! colspan="3" style="background-color: #993399" | <span style="color: white">'''Derrotar (1ª Lista)'''</span> | | {|class="wikitable" width="45%" align="center" text-align="center" |
| |-style="width:50px; text-align:center;" | | ! colspan="2" style="background-color: #E84B16" | <span>'''Etapa 4 - Derrotar (2ª Lista)'''</span> |
| | [[Arquivo:009-Blastoise.png|link=Blastoise]]<br />'''50''' Blastoise | | |-style="text-align:center;" |
| | [[Arquivo:006-Charizard.png|link=Charizard]]<br />'''50''' Charizard
| | | width="50%" | [[Arquivo:160-Feraligatr.png|link=Feraligatr]]<br />'''50''' Feraligatr |
| |-style="width:50px; text-align:center;"
| | | width="50%" | [[Arquivo:157-Typhlosion.png|link=Typhlosion]]<br />'''50''' Typhlosion |
| | [[Arquivo:065-Alakazam.png|link=Alakazam]]<br />'''50''' Alakazam | | |-style="text-align:center;" |
| | [[Arquivo:124-Jynx.png|link=Jynx]]<br />'''50''' Jynx
| | | width="50%" | [[Arquivo:227-Skarmory.png|link=Skarmory]]<br />'''50''' Skarmory |
| |} | | | width="50%" | [[Arquivo:059-Arcanine.png|link=Arcanine]]<br />'''50''' Arcanine |
| <br />
| |
| {|class="wikitable" width="40%" align="center" text-align="center"
| |
| ! colspan="2" style="background-color: #993399" | <span style="color: white">'''Derrotar (2ª Lista)'''</span>
| |
| |-style="width:50px; text-align:center;"
| |
| | [[Arquivo:160-Feraligatr.png|link=Feraligatr]]<br />'''50''' Feraligatr
| |
| | [[Arquivo:157-Typhlosion.png|link=Typhlosion]]<br />'''50''' Typhlosion | |
| |-style="width:50px; text-align:center;" | |
| | [[Arquivo:227-Skarmory.png|link=Skarmory]]<br />'''50''' Skarmory | |
| | [[Arquivo:059-Arcanine.png|link=Arcanine]]<br />'''50''' Arcanine | |
| |} | | |} |
| </center> | | </center> |
| |-|Danger Room=
| | |
| | <br>Depois dessas etapas, você deve ir até o portal da [[Danger Room]] e completar duas salas diferentes. |
| | * O jogador poderá usar revives infinitos dentro da dungeon. |
| | * Para passar pelo portal, o jogador deve deixar os Pokémon no locker. Há um próximo ao portal. |
| | * O jogador poderá usar ajudantes dentro da Danger Room, como o Mew/Mewtwo Card ou outros ajudantes. |
| | * Ao entrar, o jogador receberá os Pokémon da Danger Room para essa etapa. |
| | |
| | <br> |
| | <center> |
| | [[Arquivo:DR Clã Malefic.png|link=]] |
| | </center> |
| | |
| <center> | | <center> |
| {|class="wikitable" width="40%" align="center" text-align="center" | | <br> |
| ! colspan="3" style="background-color: #993399" | <span style="color: white">'''Danger Room Team'''</span> | | {|class="wikitable" width="45%" align="center" text-align="center" |
| |-style="width:50px; text-align:center;" | | ! colspan="3" style="background-color: #E84B16" | <span>'''Danger Room Team'''</span> |
| | [[Arquivo:359-Absol.png|link=Absol]]<br />Absol | | |-style="text-align:center;" |
| | [[Arquivo:275-Shiftry.png|link=Shiftry]]<br />Shiftry | | | width="33%" | [[Arquivo:359-Absol.png|link=Absol]]<br />Absol |
| | [[Arquivo:248-Tyranitar.png|link=Tyranitar]]<br />Tyranitar | | | width="33%" | [[Arquivo:275-Shiftry.png|link=Shiftry]]<br />Shiftry |
| |-style="width:50px; text-align:center;" | | | width="33%" | [[Arquivo:248-Tyranitar.png|link=Tyranitar]]<br />Tyranitar |
| | [[Arquivo:229-Houndoom.png|link=Houndoom]]<br />Houndoom | | |-style="text-align:center;" |
| | [[Arquivo:169-Sh_Crobat.png|link=Shiny Crobat]]<br />Shiny Crobat | | | width="33%" | [[Arquivo:229-Houndoom.png|link=Houndoom]]<br />Houndoom |
| | [[Arquivo:200-Misdreavus.png|link=Misdreavus]]<br />Misdreavus | | | width="33%" | [[Arquivo:169-Sh_Crobat.png|link=Shiny Crobat]]<br />Shiny Crobat |
| | | width="33%" | [[Arquivo:200-Misdreavus.png|link=Misdreavus]]<br />Misdreavus |
| |} | | |} |
| </center> | | </center> |
| </tabber>
| |
|
| |
|
| '''Recompensa:''' 400.000 de [[Arquivo:Exp_icon.png|24px|link=]]Experiência, 2 [[Arquivo:Venom-stone.gif|link=Pedras de Evolução]] Venom Stone e 1 [[Arquivo:HrnVNwK.png|link=Pedras de Evolução]] Darkness Stone. | | <br>Após concluir duas salas da Danger Room e conversar com o NPC Trainer do clã, o jogador receberá '''400.000''' de experiência, duas [[Arquivo:Venom-stone.gif|link=Pedras de Evolução]] Venom Stone e uma [[Arquivo:HrnVNwK.png|link=Pedras de Evolução]] Darkness Stone. |
| | |
| | |-|Rank 4 ao 5= |
| | |
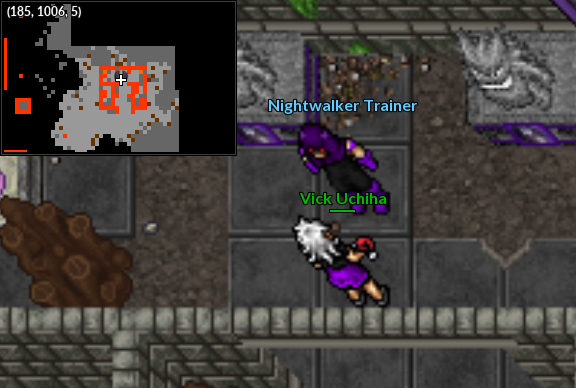
| | Para iniciar a quarta tarefa, o jogador deve conversar com o NPC Nightwalker Trainer. |
|
| |
|
| ==Tasks Rank 4 ao 5 (Level 120)== | | <center> <br> |
| | [[Arquivo:NPC Malefic Nightwalker Trainer.png|link=]] |
| | </center> |
|
| |
|
| <tabber>
| |
| |-|Coletar=
| |
| <center> | | <center> |
| {|class="wikitable" width="40%" align="center" text-align="center" | | <br> |
| ! colspan="2" style="background-color: #993399" | <span style="color: white">'''Coletar'''</span> | | {|class="wikitable" width="45%" align="center" style="text-align:center;" |
| |-style="width:50px; text-align:center;" | | ! colspan="2" style="background-color: #E84B16" | <span>'''Etapa 1 - Coletar'''</span> |
| ! | Quantidade
| | |- |
| ! | Item | | ! width="50%" | Quantidade |
| |-style="width:50px; text-align:center;" | | ! width="50%" | Item |
| | '''3.000''' | | |- |
| | [[Arquivo:BottleOfPoison.png|link=Drop de Itens]] Bottle Of Poison | | | '''3.000''' || [[Arquivo:BottleOfPoison.png|link=Drop de Itens]] Bottle Of Poison |
| |-style="width:50px; text-align:center;" | | |- |
| | '''3.000''' | | | '''3.000''' || [[Arquivo:GhostEssence.png|link=Drop de Itens]] Ghost Essence |
| | [[Arquivo:GhostEssence.png|link=Drop de Itens]] Ghost Essence | | |- |
| |-style="width:50px; text-align:center;" | | | '''20''' || [[Arquivo:Sticky_Hand.png|link=Drop de Itens]] Sticky Hand |
| | '''20''' | |
| | [[Arquivo: Sticky Hand.png|link= Drop de Itens]] Sticky Hand | |
| |} | | |} |
| </center> | | </center> |
| |-|Capturar=
| | |
| <center> | | <center> |
| {|class="wikitable" width="40%" align="center" text-align="center" | | <br> |
| ! colspan="2" style="background-color: #993399" | <span style="color: white">'''Capturar'''</span> | | {|class="wikitable" width="45%" align="center" text-align="center" |
| |-style="width:50px; text-align:center;" | | ! colspan="2" style="background-color: #E84B16" | <span>'''Etapa 2 - Capturar'''</span> |
| ! width="20%" |
| | |-style="width:40px; text-align:center;" |
| ! | Pokémon
| | |
| |-style="width:50px; text-align:center;"
| | | width="33%" | [[Arquivo:248-Tyranitar.png|link=Tyranitar]]<br />Tyranitar |
| | [[Arquivo:248-Tyranitar.png|link=Tyranitar]] | |
| | Tyranitar
| |
| |} | | |} |
| | </center> |
| | |
| | <br>Em 15/12/2021, a lista de Pokémon exigidos para as tarefas de clã foi atualizada. Jogadores que já estavam nessa fase antes da alteração deverão entregar um [[Arquivo:094-Gengar.png|link=Gengar]] '''Gengar''' em vez de um [[Arquivo:248-Tyranitar.png|link=Tyranitar]] '''Tyranitar'''. |
|
| |
|
| Pokémon que era solicitado ao jogador antes da atualização: '''Gengar''' ([[Arquivo:094-Gengar.png|link=Gengar]]).
| | <center> |
| | <br> |
| | {|class="wikitable" width="45%" align="center" text-align="center" |
| | ! colspan="3" style="background-color: #E84B16" | <span>'''Etapa 3 - Derrotar (1ª Lista)'''</span> |
| | |-style="text-align:center;" |
| | | width="33%" | [[Arquivo:065-Alakazam.png|link=Alakazam]]<br />'''100''' Alakazam |
| | | width="33%" | [[Arquivo:094-Gengar.png|link=Gengar]]<br />'''100''' Gengar |
| | | width="33%" | [[Arquivo:103-Exeggutor.png|link=Exeggutor]]<br />'''100''' Exeggutor |
| | |} |
| </center> | | </center> |
| |-|Derrotar=
| | |
| <center> | | <center> |
| {|class="wikitable" width="40%" align="center" text-align="center" | | <br> |
| ! colspan="3" style="background-color: #993399" | <span style="color: white">'''Derrotar (1ª Lista)'''</span> | | {|class="wikitable" width="45%" align="center" text-align="center" |
| |-style="width:50px; text-align:center;" | | ! colspan="3" style="background-color: #E84B16" | <span>'''Etapa 4 - Derrotar (2ª Lista)'''</span> |
| | [[Arquivo:065-Alakazam.png|link=Alakazam]]<br />'''100''' Alakazam | | |-style="text-align:center;" |
| | [[Arquivo:094-Gengar.png|link=Gengar]]<br />'''100''' Gengar
| | | width="33%" | [[Arquivo:227-Skarmory.png|link=Magmar]]<br />'''50''' Skarmory |
| | [[Arquivo:103-Exeggutor.png|link=Exeggutor]]<br />'''100''' Exeggutor
| | | width="33%" | [[Arquivo:068-Machamp.png|link=Arcanine]]<br />'''50''' Machamp |
| |}
| | | width="33%" | [[Arquivo:214-Heracross.png|link=Magneton]]<br />'''50''' Heracross |
| <br />
| |
| {|class="wikitable" width="40%" align="center" text-align="center"
| |
| ! colspan="3" style="background-color: #993399" | <span style="color: white">'''Derrotar (2ª Lista)'''</span>
| |
| |-style="width:50px; text-align:center;"
| |
| | [[Arquivo:227-Skarmory.png|link=Skarmory]]<br />'''50''' Skarmory | |
| | [[Arquivo:068-Machamp.png|link=Machamp]]<br />'''50''' Machamp | |
| | [[Arquivo:214-Heracross.png|link=Heracross]]<br />'''50''' Heracross | |
| |} | | |} |
| </center> | | </center> |
| |-|Danger Room=
| | |
| | <br>Depois dessas etapas, você deve ir até o portal da [[Danger Room]] e completar duas salas diferentes. |
| | * O jogador poderá usar revives infinitos dentro da dungeon. |
| | * Para passar pelo portal, o jogador deve deixar os Pokémon no locker. Há um próximo ao portal. |
| | * O jogador poderá usar ajudantes dentro da Danger Room, como o Mew/Mewtwo Card ou outros ajudantes. |
| | * Ao entrar, o jogador receberá os Pokémon da Danger Room para essa etapa. |
| | |
| | <br> |
| | <center> |
| | [[Arquivo:DR Clã Malefic.png|link=]] |
| | </center> |
| | |
| <center> | | <center> |
| {|class="wikitable" width="40%" align="center" text-align="center" | | <br> |
| ! colspan="3" style="background-color: #993399" | <span style="color: white">'''Danger Room Team'''</span> | | {|class="wikitable" width="45%" align="center" text-align="center" |
| |-style="width:50px; text-align:center;" | | ! colspan="3" style="background-color: #E84B16" | <span>'''Danger Room Team'''</span> |
| | [[Arquivo:Sh_venu.png|link=Shiny Venusaur]]<br />Shiny Venusaur | | |-style="text-align:center;" |
| | [[Arquivo:089-Sh Muk.png|link=Shiny Muk]]<br />Shiny Muk | | | style="width:33%;" | [[Arquivo:Sh_venu.png|link=Shiny Venusaur]]<br />Shiny Venusaur |
| | [[Arquivo:073-Sh_Tentacruel.png|link=Shiny Tentacruel]]<br />Shiny Tentacruel | | | style="width:33%;" | [[Arquivo:089-Sh_Muk.png|link=Shiny Muk]]<br />Shiny Muk |
| |-style="width:50px; text-align:center;" | | | style="width:33%;" | [[Arquivo:073-Sh_Tentacruel.png|link=Shiny Jynx]]<br />Shiny Tentacruel |
| | [[Arquivo:Sgengar.png|link=Shiny Gengar]]<br />Shiny Gengar | | |-style="text-align:center;" |
| | [[Arquivo:359-Absol.png|link=Absol]]<br />Absol | | | style="width:33%;" | [[Arquivo:Sgengar.png|link=Shiny Gengar]]<br />Shiny Gengar |
| | [[Arquivo:049-Sh_Venomoth.png|link=Shiny Venomoth]]<br />Shiny Venomoth | | | style="width:33%;" | [[Arquivo:359-Absol.png|link=Absol]]<br />Absol |
| | | style="width:33%;" | [[Arquivo:049-Sh_Venomoth.png|link=Shiny Venomoth]]<br />Shiny Venomoth |
| | |
| |} | | |} |
| </center> | | </center> |
| | |
| | <br>Após concluir duas salas da Danger Room e conversar com o NPC Trainer do clã, o jogador receberá '''600.000''' de experiência, uma [[Arquivo:Venom-stone.gif|link=Pedras de Evolução]] Venom Stone e três [[Arquivo:HrnVNwK.png|link=Pedras de Evolução]] Darkness Stone. |
| | |
| </tabber> | | </tabber> |
|
| |
|
| '''Recompensa:''' 600.000 de [[Arquivo:Exp_icon.png|24px|link=]]Experiência, 1 [[Arquivo:Venom-stone.gif|link=Pedras de Evolução]] Venom Stone e 3 [[Arquivo:HrnVNwK.png|link=Pedras de Evolução]] Darkness Stone.
| | <table class="seeMore"> |
| | <tr> |
| | <td class="seeMore__image">[[Arquivo:Telekinetic-compass.gif|link=]]</td> |
| | <td> '''Veja mais: [[Coordenadas]] | [[Danger Room]]'''</td> |
| | </tr> |
| | </table> |