Predefinição:Teste9: mudanças entre as edições
Ir para navegação
Ir para pesquisar
| (260 revisões intermediárias por 8 usuários não estão sendo mostradas) | |||
| Linha 1: | Linha 1: | ||
nalu 2 | |||
==== access card ==== | |||
Ao derrotar o Alpha Subject, o tubo de experimento no centro da sala estará desprotegido e poderá ser quebrado, revelando dois Pokémon Mega ou Shiny do respectivo clã que poderão ser capturados ou "dropados". É importante destacar que, caso o jogador seja derrotado pelo protetor do local, não sofrerá penalidade de experiência e Bless; apenas seu Access Card será consumido. | |||
É possível encontrar todos os T1B e os principais T1C (não estão presentes os Pokémon T1 da Cyber, Embedded Tower, Shiny Mr. Mime e os Megas das DZs). | |||
Há dez laboratórios ocultos pela Nightmare World, cada um deles referente a um determinado clã e com um experimento imperfeito de Sarkies defendendo o local. | |||
Apenas os pokémon do tubo são elementais. | |||
Levar cura | |||
mecanicas talvez | |||
= | ==== Pag. Acess Cards ==== | ||
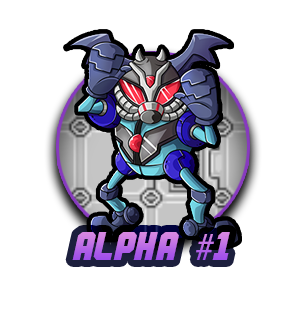
<center>[[Arquivo:Banner Bolinha Alpha -1.png|link=]]</center> | |||
== Introdução == | |||
x | |||
== Habilidades == | |||
<center class="center-tab"><tabber> | |||
|-|Dragon Claw= | |||
{{#widget:Video|url={{filepath:boss mecha mega charizard x - dragon claw.mp4}}|}} | |||
|-|Dragon Flight= | |||
{{#widget:Video|url={{filepath:boss mecha mega charizard x - dragon flight.mp4}}|}} | |||
= | |-|Ember= | ||
{{#widget:Video|url={{filepath:boss mecha mega charizard x - ember.mp4}}|}} | |||
|-|Fire Ball= | |||
{{#widget:Video|url={{filepath:boss mecha mega charizard x - fire ball.mp4}}|}} | |||
== | |-|Fire Blast= | ||
{{#widget:Video|url={{filepath:boss mecha mega charizard x - fire blast.mp4}}|}} | |||
{| class=wikitable | |-|Flame Burst= | ||
|- | {{#widget:Video|url={{filepath:boss mecha mega charizard x - flame burst.mp4}}|}} | ||
| | |||
| | |-|Flamethrower= | ||
| | {{#widget:Video|url={{filepath:boss mecha mega charizard x - flamethrower.mp4}}|}} | ||
| | |||
| | |-|Fly= | ||
{{#widget:Video|url={{filepath:boss mecha mega charizard x - fly.mp4}}|}} | |||
|-|Incinerate= | |||
{{#widget:Video|url={{filepath:boss mecha mega charizard x - incinerate.mp4}}|}} | |||
|-|Magma Storm= | |||
{{#widget:Video|url={{filepath:boss mecha mega charizard x - magma storm.mp4}}|}} | |||
</tabber> | |||
<center> | |||
{| class="wikitable" style="text-align:center;" | |||
|- | |||
! colspan="9" | Volcanic Tube | |||
|- | |||
! scope="col" |Shiny Arcanine | |||
! scope="col" |Shiny Infernape | |||
! scope="col" |Mega Houndoom | |||
! scope="col" |Marowak | |||
! scope="col" |Tangela | |||
! scope="col" |Cloyster | |||
! scope="col" |Hypno | |||
! scope="col" |Corsola | |||
! scope="col" |Murkrow | |||
|- | |||
| [[Arquivo:059-Sh_Arcanine.png|link=Shiny Arcanine]] | |||
| [[Arquivo:Shiny_Infernape.png|link=Shiny Infernape]] | |||
| [[Arquivo:Megahoundoom.png|link=Mega Houndoom]] | |||
| [[Arquivo:105-Marowak.png|link=Marowak]] | |||
| [[Arquivo:114-Tangela.png|link=Tangela]] | |||
| [[Arquivo:091-Cloyster.png|link=Cloyster]] | |||
| [[Arquivo:097-Hypno.png|link=Hypno]] | |||
| [[Arquivo:222-Corsola.png|link=Corsola]] | |||
| [[Arquivo:198-Murkrow.png|link=Murkrow]] | |||
|- | |||
! scope="col" |Quagsire | |||
! scope="col" |Fearow | |||
! scope="col" |Sandslash | |||
! scope="col" |Vileplume | |||
! scope="col" |Bellossom | |||
! scope="col" |Primeape | |||
! scope="col" |Noctowl | |||
! scope="col" |Dewgong | |||
! scope="col" |Onix | |||
|- | |||
| [[Arquivo:195-Quagsire.png|link=Quagsire]] | |||
| [[Arquivo:022-Fearow.png|link=Fearow]] | |||
| [[Arquivo:028-Sandslash.png|link=Sandslash]] | |||
| [[Arquivo:045-Vileplume.png|link=Vileplume]] | |||
| [[Arquivo:182-Bellossom.png|link=Bellossom]] | |||
| [[Arquivo:057-Primeape.png|link=Primeape]] | |||
| [[Arquivo:164-Noctowl.png|link=Noctowl]] | |||
| [[Arquivo:087-Dewgong.png|link=Dewgong]] | |||
| [[Arquivo:095-Onix.png|link=Onix]] | |||
|- | |||
! scope="col" |Vibrava | |||
! scope="col" |Politoed | |||
! scope="col" |Sneasel | |||
! scope="col" |Delibird | |||
! scope="col" |Stantler | |||
! scope="col" |Victreebel | |||
! scope="col" |Sealeo | |||
! scope="col" |Vigoroth | |||
! scope="col" |Lairon | |||
|- | |||
| [[Arquivo:329-Vibrava.png|link=Vibrava]] | |||
| [[Arquivo:186-Politoed.png|link=Politoed]] | |||
| [[Arquivo:215-Sneasel.png|link=Sneasel]] | |||
| [[Arquivo:225-Delibird.png|link=Delibird]] | |||
| [[Arquivo:234-Stantler.png|link=Stantler]] | |||
| [[Arquivo:071-Victreebel.png|link=Victreebel]] | |||
| [[Arquivo:364-Sealeo.png|link=Sealeo]] | |||
| [[Arquivo:288-Vigoroth.png|link=Vigoroth]] | |||
|[[Arquivo:305-Lairon.png|link=Lairon]] | |||
|} | |} | ||
</center> | |||
== Loots == | |||
<center> | |||
{| class="wikitable" width="45%" style="text-align:center" | |||
|- | |||
! colspan="2" | Item | |||
! Quantidade | |||
! Chance de Drop | |||
|- | |||
| align="center" |[[Arquivo:Moderate_Nightmare_experience_candy..png|link=]] | |||
| style="border-left-style: hidden; | Moderate Nightmare Experience Candy | |||
|align="center" |3 | |||
|align="center" | 100% | |||
|- | |||
| align="center" |[[Arquivo:Compressed_Nightmare_Gems.png|link=]] | |||
| style="border-left-style: hidden; | Compressed Nightmare Gem | |||
|align="center" |3 | |||
|align="center" | 100% | |||
|- | |||
| align="center" | [[Arquivo:NW_ore.png|link=]] | |||
| style="border-left-style: hidden; | Nightmare Ore | |||
|align="center" |15 | |||
|align="center" | 100% | |||
|- | |||
| align="center" | [[Arquivo:NW_unusual_ore.png|link=]] | |||
| style="border-left-style: hidden; | Nightmare Unusual Ore | |||
|align="center" |1 | |||
|align="center" | 100% | |||
|- | |||
| align="center" | [[Arquivo:Nightmare_Token.png|link=]] | |||
| style="border-left-style: hidden; | Nightmare Token | |||
|align="center" | 1 | |||
|align="center" | 100% | |||
|- | |||
| align="center" | [[Arquivo:Exp_icon.png|30px|link=]] | |||
| style="border-left-style: hidden; | Experience | |||
|align="center" |300,000 | |||
|align="center" | 100% | |||
|- | |||
| align="center" | [[Arquivo:Black Nightmare Gem.png|link=]] | |||
| style="border-left-style: hidden; | Black Nightmare Gem | |||
|align="center" | 1 | |||
|align="center" | Raro (Menor que 1%) | |||
|- | |||
|} | |||
<center>[[Arquivo:Banner Bolinha Alpha -1.png|link=]]</center> | |||
== Introdução == | |||
x | |||
== Habilidades == | |||
<center class="center-tab"><tabber> | |||
|-|Fire Ball= | |||
{{#widget:Video|url={{filepath:boss mecha mega charizard y - fire ball.mp4}}|}} | |||
|-|Fire Blast= | |||
{{#widget:Video|url={{filepath:boss mecha mega charizard y - fire blast.mp4}}|}} | |||
|-|Flame Burst= | |||
{{#widget:Video|url={{filepath:boss mecha mega charizard y - flame burst.mp4}}|}} | |||
|-|Air Cutter= | |||
{{#widget:Video|url={{filepath:boss mecha mega charizard y - air cutter.mp4}}|}} | |||
|-|Air Slash= | |||
{{#widget:Video|url={{filepath:boss mecha mega charizard y - air slash.mp4}}|}} | |||
|-|Aerial Ace= | |||
{{#widget:Video|url={{filepath:boss mecha mega charizard y - aerial ace.mp4}}|}} | |||
|-|Fly= | |||
{{#widget:Video|url={{filepath:boss mecha mega charizard y - fly.mp4}}|}} | |||
|-|Hurricane= | |||
{{#widget:Video|url={{filepath:boss mecha mega charizard y - hurricane.mp4}}|}} | |||
|-|Sunny Day= | |||
{{#widget:Video|url={{filepath:boss mecha mega charizard y - sunny day.mp4}}|}} | |||
|-|Solar Beam= | |||
{{#widget:Video|url={{filepath:boss mecha mega charizard y - solar beam.mp4}}|}} | |||
</tabber> | |||
{| class="wikitable" style="text-align:center;" | |||
|- | |||
! colspan="9" | Wingeon Tube | |||
|- | |||
! scope="col" |Shiny Dragonair | |||
! scope="col" |Lombree | |||
! scope="col" |Loudred | |||
! scope="col" |Marowak | |||
! scope="col" |Tangela | |||
! scope="col" |Cloyster | |||
! scope="col" |Hypno | |||
! scope="col" |Corsola | |||
! scope="col" |Murkrow | |||
|- | |||
| [[Arquivo:148-Sh_Dragonair.png|link=Shiny Dragonair]] | |||
| [[Arquivo:271-Lombre.png|link=Lombre]] | |||
| [[Arquivo:294-Loudred.png|link=Loudred]] | |||
| [[Arquivo:105-Marowak.png|link=Marowak]] | |||
| [[Arquivo:114-Tangela.png|link=Tangela]] | |||
| [[Arquivo:091-Cloyster.png|link=Cloyster]] | |||
| [[Arquivo:097-Hypno.png|link=Hypno]] | |||
| [[Arquivo:222-Corsola.png|link=Corsola]] | |||
| [[Arquivo:198-Murkrow.png|link=Murkrow]] | |||
|- | |||
! scope="col" |Quagsire | |||
! scope="col" |Fearow | |||
! scope="col" |Sandslash | |||
! scope="col" |Vileplume | |||
! scope="col" |Bellossom | |||
! scope="col" |Primeape | |||
! scope="col" |Noctowl | |||
! scope="col" |Dewgong | |||
! scope="col" |Onix | |||
|- | |||
| [[Arquivo:195-Quagsire.png|link=Quagsire]] | |||
| [[Arquivo:022-Fearow.png|link=Fearow]] | |||
| [[Arquivo:028-Sandslash.png|link=Sandslash]] | |||
| [[Arquivo:045-Vileplume.png|link=Vileplume]] | |||
| [[Arquivo:182-Bellossom.png|link=Bellossom]] | |||
| [[Arquivo:057-Primeape.png|link=Primeape]] | |||
| [[Arquivo:164-Noctowl.png|link=Noctowl]] | |||
| [[Arquivo:087-Dewgong.png|link=Dewgong]] | |||
| [[Arquivo:095-Onix.png|link=Onix]] | |||
|- | |||
! scope="col" |Vibrava | |||
! scope="col" |Politoed | |||
! scope="col" |Sneasel | |||
! scope="col" |Delibird | |||
! scope="col" |Stantler | |||
! scope="col" |Victreebel | |||
! scope="col" |Sealeo | |||
! scope="col" |Vigoroth | |||
! scope="col" |Lairon | |||
|- | |||
| [[Arquivo:329-Vibrava.png|link=Vibrava]] | |||
| [[Arquivo:186-Politoed.png|link=Politoed]] | |||
| [[Arquivo:215-Sneasel.png|link=Sneasel]] | |||
| [[Arquivo:225-Delibird.png|link=Delibird]] | |||
| [[Arquivo:234-Stantler.png|link=Stantler]] | |||
| [[Arquivo:071-Victreebel.png|link=Victreebel]] | |||
| [[Arquivo:364-Sealeo.png|link=Sealeo]] | |||
| [[Arquivo:288-Vigoroth.png|link=Vigoroth]] | |||
|[[Arquivo:305-Lairon.png|link=Lairon]] | |||
|} | |||
</center> | |||
== Loots == | |||
<center> | <center> | ||
{| class=wikitable width= | {| class="wikitable" width="45%" style="text-align:center" | ||
|- align=center | |- | ||
| | ! colspan="2" | Item | ||
| | ! Quantidade | ||
|- align=center | ! Chance de Drop | ||
| [[Arquivo: | |- | ||
| | | align="center" |[[Arquivo:Moderate_Nightmare_experience_candy..png|link=]] | ||
|- align=center | | style="border-left-style: hidden; | Moderate Nightmare Experience Candy | ||
| [[Arquivo: | |align="center" |3 | ||
| | |align="center" | 100% | ||
|- align= | |- | ||
| align="center" |[[Arquivo:Compressed_Nightmare_Gems.png|link=]] | |||
| style="border-left-style: hidden; | Compressed Nightmare Gem | |||
|align="center" |3 | |||
|align="center" | 100% | |||
|- | |||
| align="center" | [[Arquivo:NW_ore.png|link=]] | |||
| style="border-left-style: hidden; | Nightmare Ore | |||
|align="center" |15 | |||
|align="center" | 100% | |||
|- | |||
| align="center" | [[Arquivo:NW_unusual_ore.png|link=]] | |||
| style="border-left-style: hidden; | Nightmare Unusual Ore | |||
|align="center" |1 | |||
|align="center" | 100% | |||
|- | |||
| align="center" | [[Arquivo:Nightmare_Token.png|link=]] | |||
| style="border-left-style: hidden; | Nightmare Token | |||
|align="center" | 1 | |||
|align="center" | 100% | |||
|- | |||
| align="center" | [[Arquivo:Exp_icon.png|30px|link=]] | |||
| style="border-left-style: hidden; | Experience | |||
|align="center" |300,000 | |||
|align="center" | 100% | |||
|- | |||
| align="center" | [[Arquivo:Black Nightmare Gem.png|link=]] | |||
| style="border-left-style: hidden; | Black Nightmare Gem | |||
|align="center" | 1 | |||
|align="center" | Raro (Menor que 1%) | |||
|- | |||
|} | |||
<center>[[Arquivo:Banner Bolinha Alpha -1.png|link=]]</center> | |||
== Introdução == | |||
x | |||
== Habilidades == | |||
<center class="center-tab"><tabber> | |||
|-|Shadow Ball= | |||
{{#widget:Video|url={{filepath:boss mecha mega gengar - shadow ball.mp4}}|}} | |||
|-|Shadow Punch= | |||
{{#widget:Video|url={{filepath:boss mecha mega gengar - shadow punch.mp4}}|}} | |||
|-|Creepy Lick= | |||
{{#widget:Video|url={{filepath:boss mecha mega gengar - creepy lick.mp4}}|}} | |||
|-|Night Shade= | |||
{{#widget:Video|url={{filepath:boss mecha mega gengar - night shade.mp4}}|}} | |||
|-|Scary Face= | |||
{{#widget:Video|url={{filepath:boss mecha mega gengar - scary face.mp4}}|}} | |||
|-|Hex= | |||
{{#widget:Video|url={{filepath:boss mecha mega gengar - hex.mp4}}|}} | |||
|-|Hand of Despair= | |||
{{#widget:Video|url={{filepath:boss mecha mega gengar - hand of despair.mp4}}|}} | |||
|-|Never Ending Nightmare= | |||
{{#widget:Video|url={{filepath:boss mecha mega gengar - never ending nightmare.mp4}}|}} | |||
|-|Spectral Fist= | |||
{{#widget:Video|url={{filepath:boss mecha mega gengar - spectral fist.mp4}}|}} | |||
|-|Shadow Tag= | |||
{{#widget:Video|url={{filepath:boss mecha mega gengar - shadow tag.mp4}}|}} | |||
|-|Vanish= | |||
{{#widget:Video|url={{filepath:boss mecha mega gengar - vanish.mp4}}|}} | |||
</tabber> | |||
{| class="wikitable" style="text-align:center;" | |||
|- | |||
! colspan="9" | Malefic Tube | |||
|- | |||
! scope="col" |Shiny Gengar | |||
! scope="col" |Mega Houndoom | |||
! scope="col" |Loudred | |||
! scope="col" |Marowak | |||
! scope="col" |Tangela | |||
! scope="col" |Cloyster | |||
! scope="col" |Hypno | |||
! scope="col" |Corsola | |||
! scope="col" |Murkrow | |||
|- | |||
| [[Arquivo:Sgengar.png|link=Shiny Gengar]] | | [[Arquivo:Sgengar.png|link=Shiny Gengar]] | ||
| Shiny | | [[Arquivo:Megahoundoom.png|link=Mega Houndoom]] | ||
|- align=center | | [[Arquivo:294-Loudred.png|link=Loudred]] | ||
| [[Arquivo: | | [[Arquivo:105-Marowak.png|link=Marowak]] | ||
| | | [[Arquivo:114-Tangela.png|link=Tangela]] | ||
|- align=center | | [[Arquivo:091-Cloyster.png|link=Cloyster]] | ||
| [[Arquivo: | | [[Arquivo:097-Hypno.png|link=Hypno]] | ||
| | | [[Arquivo:222-Corsola.png|link=Corsola]] | ||
|- align=center | | [[Arquivo:198-Murkrow.png|link=Murkrow]] | ||
| [[Arquivo: | |- | ||
| | ! scope="col" |Quagsire | ||
|- align=center | ! scope="col" |Fearow | ||
| [[Arquivo: | ! scope="col" |Sandslash | ||
| | ! scope="col" |Vileplume | ||
! scope="col" |Bellossom | |||
! scope="col" |Primeape | |||
! scope="col" |Noctowl | |||
! scope="col" |Dewgong | |||
! scope="col" |Onix | |||
|- | |||
| [[Arquivo:195-Quagsire.png|link=Quagsire]] | |||
| [[Arquivo:022-Fearow.png|link=Fearow]] | |||
| [[Arquivo:028-Sandslash.png|link=Sandslash]] | |||
| [[Arquivo:045-Vileplume.png|link=Vileplume]] | |||
| [[Arquivo:182-Bellossom.png|link=Bellossom]] | |||
| [[Arquivo:057-Primeape.png|link=Primeape]] | |||
| [[Arquivo:164-Noctowl.png|link=Noctowl]] | |||
| [[Arquivo:087-Dewgong.png|link=Dewgong]] | |||
| [[Arquivo:095-Onix.png|link=Onix]] | |||
|- | |||
! scope="col" |Vibrava | |||
! scope="col" |Politoed | |||
! scope="col" |Sneasel | |||
! scope="col" |Delibird | |||
! scope="col" |Stantler | |||
! scope="col" |Victreebel | |||
! scope="col" |Sealeo | |||
! scope="col" |Vigoroth | |||
! scope="col" |Lairon | |||
|- | |||
| [[Arquivo:329-Vibrava.png|link=Vibrava]] | |||
| [[Arquivo:186-Politoed.png|link=Politoed]] | |||
| [[Arquivo:215-Sneasel.png|link=Sneasel]] | |||
| [[Arquivo:225-Delibird.png|link=Delibird]] | |||
| [[Arquivo:234-Stantler.png|link=Stantler]] | |||
| [[Arquivo:071-Victreebel.png|link=Victreebel]] | |||
| [[Arquivo:364-Sealeo.png|link=Sealeo]] | |||
| [[Arquivo:288-Vigoroth.png|link=Vigoroth]] | |||
|[[Arquivo:305-Lairon.png|link=Lairon]] | |||
|} | |||
</center> | |||
== Loots == | |||
<center> | |||
{| class="wikitable" width="45%" style="text-align:center" | |||
|- | |||
! colspan="2" | Item | |||
! Quantidade | |||
! Chance de Drop | |||
|- | |||
| align="center" |[[Arquivo:Moderate_Nightmare_experience_candy..png|link=]] | |||
| style="border-left-style: hidden; | Moderate Nightmare Experience Candy | |||
|align="center" |3 | |||
|align="center" | 100% | |||
|- | |||
| align="center" |[[Arquivo:Compressed_Nightmare_Gems.png|link=]] | |||
| style="border-left-style: hidden; | Compressed Nightmare Gem | |||
|align="center" |3 | |||
|align="center" | 100% | |||
|- | |||
| align="center" | [[Arquivo:NW_ore.png|link=]] | |||
| style="border-left-style: hidden; | Nightmare Ore | |||
|align="center" |15 | |||
|align="center" | 100% | |||
|- | |||
| align="center" | [[Arquivo:NW_unusual_ore.png|link=]] | |||
| style="border-left-style: hidden; | Nightmare Unusual Ore | |||
|align="center" |1 | |||
|align="center" | 100% | |||
|- | |||
| align="center" | [[Arquivo:Nightmare_Token.png|link=]] | |||
| style="border-left-style: hidden; | Nightmare Token | |||
|align="center" | 1 | |||
|align="center" | 100% | |||
|- | |||
| align="center" | [[Arquivo:Exp_icon.png|30px|link=]] | |||
| style="border-left-style: hidden; | Experience | |||
|align="center" |300,000 | |||
|align="center" | 100% | |||
|- | |||
| align="center" | [[Arquivo:Black Nightmare Gem.png|link=]] | |||
| style="border-left-style: hidden; | Black Nightmare Gem | |||
|align="center" | 1 | |||
|align="center" | Raro (Menor que 1%) | |||
|- | |||
|} | |||
<center>[[Arquivo:Banner Bolinha Alpha -1.png|link=]]</center> | |||
== Introdução == | |||
x | |||
== Habilidades == | |||
<center class="center-tab"><tabber> | |||
|-|Psy Ball= | |||
{{#widget:Video|url={{filepath:boss mecha mega alakazam - psy ball.mp4}}|}} | |||
|-|Psy Pulse= | |||
{{#widget:Video|url={{filepath:boss mecha mega alakazam - psy pulse.mp4}}|}} | |||
|-|Confusion= | |||
{{#widget:Video|url={{filepath:boss mecha mega alakazam - confusion.mp4}}|}} | |||
|-|Magic Room= | |||
{{#widget:Video|url={{filepath:boss mecha mega alakazam - magic room.mp4}}|}} | |||
|-|Psy Terrain= | |||
{{#widget:Video|url={{filepath:boss mecha mega alakazam - psy terrain.mp4}}|}} | |||
|-|Kinesis= | |||
{{#widget:Video|url={{filepath:boss mecha mega alakazam - kinesis.mp4}}|}} | |||
|-|Psychokinesis= | |||
{{#widget:Video|url={{filepath:boss mecha mega alakazam - psychokinesis.mp4}}|}} | |||
|-|Stored Power= | |||
{{#widget:Video|url={{filepath:boss mecha mega alakazam - stored power.mp4}}|}} | |||
|-|Zen Headbutt= | |||
{{#widget:Video|url={{filepath:boss mecha mega alakazam - zen headbutt.mp4}}|}} | |||
|-|Future Sight= | |||
{{#widget:Video|url={{filepath:boss mecha mega alakazam - future sight.mp4}}|}} | |||
|-|Instant Teleportation= | |||
{{#widget:Video|url={{filepath:boss mecha mega alakazam - instant teleportation.mp4}}|}} | |||
|-|Reflect= | |||
{{#widget:Video|url={{filepath:boss mecha mega alakazam - reflect.mp4}}|}} | |||
|-|Recover= | |||
{{#widget:Video|url={{filepath:boss mecha mega alakazam - recover.mp4}}|}} | |||
</tabber> | |||
{| class="wikitable" style="text-align:center;" | |||
|- | |||
! colspan="9" | Psycraft Tube | |||
|- | |||
! scope="col" |Shiny Sylveon | |||
! scope="col" |Lombree | |||
! scope="col" |Loudred | |||
! scope="col" |Marowak | |||
! scope="col" |Tangela | |||
! scope="col" |Cloyster | |||
! scope="col" |Hypno | |||
! scope="col" |Corsola | |||
! scope="col" |Murkrow | |||
|- | |||
| [[Arquivo:700-Sh_Sylveon.png|link=Shiny Sylveon]] | |||
| [[Arquivo:271-Lombre.png|link=Lombre]] | |||
| [[Arquivo:294-Loudred.png|link=Loudred]] | |||
| [[Arquivo:105-Marowak.png|link=Marowak]] | |||
| [[Arquivo:114-Tangela.png|link=Tangela]] | |||
| [[Arquivo:091-Cloyster.png|link=Cloyster]] | |||
| [[Arquivo:097-Hypno.png|link=Hypno]] | |||
| [[Arquivo:222-Corsola.png|link=Corsola]] | |||
| [[Arquivo:198-Murkrow.png|link=Murkrow]] | |||
|- | |||
! scope="col" |Quagsire | |||
! scope="col" |Fearow | |||
! scope="col" |Sandslash | |||
! scope="col" |Vileplume | |||
! scope="col" |Bellossom | |||
! scope="col" |Primeape | |||
! scope="col" |Noctowl | |||
! scope="col" |Dewgong | |||
! scope="col" |Onix | |||
|- | |||
| [[Arquivo:195-Quagsire.png|link=Quagsire]] | |||
| [[Arquivo:022-Fearow.png|link=Fearow]] | |||
| [[Arquivo:028-Sandslash.png|link=Sandslash]] | |||
| [[Arquivo:045-Vileplume.png|link=Vileplume]] | |||
| [[Arquivo:182-Bellossom.png|link=Bellossom]] | |||
| [[Arquivo:057-Primeape.png|link=Primeape]] | |||
| [[Arquivo:164-Noctowl.png|link=Noctowl]] | |||
| [[Arquivo:087-Dewgong.png|link=Dewgong]] | |||
| [[Arquivo:095-Onix.png|link=Onix]] | |||
|- | |||
! scope="col" |Vibrava | |||
! scope="col" |Politoed | |||
! scope="col" |Sneasel | |||
! scope="col" |Delibird | |||
! scope="col" |Stantler | |||
! scope="col" |Victreebel | |||
! scope="col" |Sealeo | |||
! scope="col" |Vigoroth | |||
! scope="col" |Lairon | |||
|- | |||
| [[Arquivo:329-Vibrava.png|link=Vibrava]] | |||
| [[Arquivo:186-Politoed.png|link=Politoed]] | |||
| [[Arquivo:215-Sneasel.png|link=Sneasel]] | |||
| [[Arquivo:225-Delibird.png|link=Delibird]] | |||
| [[Arquivo:234-Stantler.png|link=Stantler]] | |||
| [[Arquivo:071-Victreebel.png|link=Victreebel]] | |||
| [[Arquivo:364-Sealeo.png|link=Sealeo]] | |||
| [[Arquivo:288-Vigoroth.png|link=Vigoroth]] | |||
|[[Arquivo:305-Lairon.png|link=Lairon]] | |||
|} | |||
</center> | |||
== Loots == | |||
<center> | |||
{| class="wikitable" width="45%" style="text-align:center" | |||
|- | |||
! colspan="2" | Item | |||
! Quantidade | |||
! Chance de Drop | |||
|- | |||
| align="center" |[[Arquivo:Moderate_Nightmare_experience_candy..png|link=]] | |||
| style="border-left-style: hidden; | Moderate Nightmare Experience Candy | |||
|align="center" |3 | |||
|align="center" | 100% | |||
|- | |||
| align="center" |[[Arquivo:Compressed_Nightmare_Gems.png|link=]] | |||
| style="border-left-style: hidden; | Compressed Nightmare Gem | |||
|align="center" |3 | |||
|align="center" | 100% | |||
|- | |||
| align="center" | [[Arquivo:NW_ore.png|link=]] | |||
| style="border-left-style: hidden; | Nightmare Ore | |||
|align="center" |15 | |||
|align="center" | 100% | |||
|- | |||
| align="center" | [[Arquivo:NW_unusual_ore.png|link=]] | |||
| style="border-left-style: hidden; | Nightmare Unusual Ore | |||
|align="center" |1 | |||
|align="center" | 100% | |||
|- | |||
| align="center" | [[Arquivo:Nightmare_Token.png|link=]] | |||
| style="border-left-style: hidden; | Nightmare Token | |||
|align="center" | 1 | |||
|align="center" | 100% | |||
|- | |||
| align="center" | [[Arquivo:Exp_icon.png|30px|link=]] | |||
| style="border-left-style: hidden; | Experience | |||
|align="center" |300,000 | |||
|align="center" | 100% | |||
|- | |||
| align="center" | [[Arquivo:Black Nightmare Gem.png|link=]] | |||
| style="border-left-style: hidden; | Black Nightmare Gem | |||
|align="center" | 1 | |||
|align="center" | Raro (Menor que 1%) | |||
|- | |||
|} | |||
<center>[[Arquivo:Banner Bolinha Alpha -1.png|link=]]</center> | |||
== Introdução == | |||
x | |||
== Habilidades == | |||
<center class="center-tab"><tabber> | |||
|-|Spark= | |||
{{#widget:Video|url={{filepath:boss mecha mega manectric - spark.mp4}}|}} | |||
|-|Fire Fang= | |||
{{#widget:Video|url={{filepath:boss mecha mega manectric - fire fang.mp4}}|}} | |||
|-|Thunderbolt= | |||
{{#widget:Video|url={{filepath:boss mecha mega manectric - thunderbolt.mp4}}|}} | |||
|-|Volt Tackle= | |||
{{#widget:Video|url={{filepath:boss mecha mega manectric - volt tackle.mp4}}|}} | |||
|-|Thunder= | |||
{{#widget:Video|url={{filepath:boss mecha mega manectric - thunder.mp4}}|}} | |||
|-|Leer= | |||
{{#widget:Video|url={{filepath:boss mecha mega manectric - leer.mp4}}|}} | |||
|-|Electric Terrain= | |||
{{#widget:Video|url={{filepath:boss mecha mega manectric - electric terrain.mp4}}|}} | |||
|-|Discharge= | |||
{{#widget:Video|url={{filepath:boss mecha mega manectric - discharge.mp4}}|}} | |||
</tabber> | |||
{| class="wikitable" style="text-align:center;" | |||
|- | |||
! colspan="9" | Raibolt Tube | |||
|- | |||
! scope="col" |Shiny Manectric | |||
! scope="col" |Mega Manectric | |||
! scope="col" |Shiny Luxray | |||
! scope="col" |Shiny Eelektross | |||
! scope="col" |Giant Galvantula | |||
! scope="col" |Shiny Lanturn | |||
! scope="col" |Shiny Ampharos | |||
! scope="col" |Shiny Magnezone | |||
|- | |||
| [[Arquivo:310-Sh_Manectric.png|link=Shiny Manectric]] | |||
| [[Arquivo:310-MegaManectric.png|link=Mega Manectric]] | |||
| [[Arquivo:405-Shiny_Luxray.png|link=Shiny Luxray]] | |||
| [[Arquivo:604-Shiny_Eelektross.png|link=Shiny Eelektross]] | |||
| [[Arquivo:596-G_Galvantula.png|link=Giant Galvantula]] | |||
| [[Arquivo:171-shLanturn.png|link=Shiny Lanturn]] | |||
| [[Arquivo:181-Sh_Ampharos.png|link=Shiny Ampharos]] | |||
| [[Arquivo:462-Shiny_Magnezone.png|link=Shiny Magnezone]] | |||
|} | |||
</center> | |||
== Loots == | |||
<center> | |||
{| class="wikitable" width="45%" style="text-align:center" | |||
|- | |||
! colspan="2" | Item | |||
! Quantidade | |||
! Chance de Drop | |||
|- | |||
| align="center" |[[Arquivo:Moderate_Nightmare_experience_candy..png|link=]] | |||
| style="border-left-style: hidden; | Moderate Nightmare Experience Candy | |||
|align="center" |3 | |||
|align="center" | 100% | |||
|- | |||
| align="center" |[[Arquivo:Compressed_Nightmare_Gems.png|link=]] | |||
| style="border-left-style: hidden; | Compressed Nightmare Gem | |||
|align="center" |3 | |||
|align="center" | 100% | |||
|- | |||
| align="center" | [[Arquivo:NW_ore.png|link=]] | |||
| style="border-left-style: hidden; | Nightmare Ore | |||
|align="center" |15 | |||
|align="center" | 100% | |||
|- | |||
| align="center" | [[Arquivo:NW_unusual_ore.png|link=]] | |||
| style="border-left-style: hidden; | Nightmare Unusual Ore | |||
|align="center" |1 | |||
|align="center" | 100% | |||
|- | |||
| align="center" | [[Arquivo:Nightmare_Token.png|link=]] | |||
| style="border-left-style: hidden; | Nightmare Token | |||
|align="center" | 1 | |||
|align="center" | 100% | |||
|- | |||
| align="center" | [[Arquivo:Exp_icon.png|30px|link=]] | |||
| style="border-left-style: hidden; | Experience | |||
|align="center" |300,000 | |||
|align="center" | 100% | |||
|- | |||
| align="center" | [[Arquivo:Black Nightmare Gem.png|link=]] | |||
| style="border-left-style: hidden; | Black Nightmare Gem | |||
|align="center" | 1 | |||
|align="center" | Raro (Menor que 1%) | |||
|- | |||
|} | |||
<center>[[Arquivo:Banner Bolinha Alpha -1.png|link=]]</center> | |||
== Introdução == | |||
x | |||
== Habilidades == | |||
<center class="center-tab"><tabber> | |||
|-|Rock Throw= | |||
{{#widget:Video|url={{filepath:boss mecha mega steelix - rock throw.mp4}}|}} | |||
|-|Rock Slide= | |||
{{#widget:Video|url={{filepath:boss mecha mega steelix - rock slide.mp4}}|}} | |||
|-|Crunch= | |||
{{#widget:Video|url={{filepath:boss mecha mega steelix - crunch.mp4}}|}} | |||
|-|Iron Tail= | |||
{{#widget:Video|url={{filepath:boss mecha mega steelix - iron tail.mp4}}|}} | |||
|-|Dig= | |||
{{#widget:Video|url={{filepath:boss mecha mega steelix - dig.mp4}}|}} | |||
|-|Magnet Rise= | |||
{{#widget:Video|url={{filepath:boss mecha mega steelix - magnet rise.mp4}}|}} | |||
|-|Magnetic Repulsion= | |||
{{#widget:Video|url={{filepath:boss mecha mega steelix - magnetic repulsion.mp4}}|}} | |||
|-|Stealth Rock= | |||
{{#widget:Video|url={{filepath:boss mecha mega steelix - stealth rock.mp4}}|}} | |||
</tabber> | |||
{| class="wikitable" style="text-align:center;" | |||
|- | |||
! colspan="9" | Ironhard Tube | |||
|- | |||
! scope="col" |Mega Aggron | |||
! scope="col" |Lombree | |||
! scope="col" |Loudred | |||
! scope="col" |Marowak | |||
! scope="col" |Tangela | |||
! scope="col" |Cloyster | |||
! scope="col" |Hypno | |||
! scope="col" |Corsola | |||
! scope="col" |Murkrow | |||
|- | |||
| [[Arquivo:306-MegaAggron.png|link=Mega Aggron]] | |||
| [[Arquivo:271-Lombre.png|link=Lombre]] | |||
| [[Arquivo:294-Loudred.png|link=Loudred]] | |||
| [[Arquivo:105-Marowak.png|link=Marowak]] | |||
| [[Arquivo:114-Tangela.png|link=Tangela]] | |||
| [[Arquivo:091-Cloyster.png|link=Cloyster]] | |||
| [[Arquivo:097-Hypno.png|link=Hypno]] | |||
| [[Arquivo:222-Corsola.png|link=Corsola]] | |||
| [[Arquivo:198-Murkrow.png|link=Murkrow]] | |||
|- | |||
! scope="col" |Quagsire | |||
! scope="col" |Fearow | |||
! scope="col" |Sandslash | |||
! scope="col" |Vileplume | |||
! scope="col" |Bellossom | |||
! scope="col" |Primeape | |||
! scope="col" |Noctowl | |||
! scope="col" |Dewgong | |||
! scope="col" |Onix | |||
|- | |||
| [[Arquivo:195-Quagsire.png|link=Quagsire]] | |||
| [[Arquivo:022-Fearow.png|link=Fearow]] | |||
| [[Arquivo:028-Sandslash.png|link=Sandslash]] | |||
| [[Arquivo:045-Vileplume.png|link=Vileplume]] | |||
| [[Arquivo:182-Bellossom.png|link=Bellossom]] | |||
| [[Arquivo:057-Primeape.png|link=Primeape]] | |||
| [[Arquivo:164-Noctowl.png|link=Noctowl]] | |||
| [[Arquivo:087-Dewgong.png|link=Dewgong]] | |||
| [[Arquivo:095-Onix.png|link=Onix]] | |||
|- | |||
! scope="col" |Vibrava | |||
! scope="col" |Politoed | |||
! scope="col" |Sneasel | |||
! scope="col" |Delibird | |||
! scope="col" |Stantler | |||
! scope="col" |Victreebel | |||
! scope="col" |Sealeo | |||
! scope="col" |Vigoroth | |||
! scope="col" |Lairon | |||
|- | |||
| [[Arquivo:329-Vibrava.png|link=Vibrava]] | |||
| [[Arquivo:186-Politoed.png|link=Politoed]] | |||
| [[Arquivo:215-Sneasel.png|link=Sneasel]] | |||
| [[Arquivo:225-Delibird.png|link=Delibird]] | |||
| [[Arquivo:234-Stantler.png|link=Stantler]] | |||
| [[Arquivo:071-Victreebel.png|link=Victreebel]] | |||
| [[Arquivo:364-Sealeo.png|link=Sealeo]] | |||
| [[Arquivo:288-Vigoroth.png|link=Vigoroth]] | |||
|[[Arquivo:305-Lairon.png|link=Lairon]] | |||
|} | |} | ||
</center> | </center> | ||
== | == Loots == | ||
<center> | |||
{| class="wikitable" width="45%" style="text-align:center" | |||
|- | |||
! colspan="2" | Item | |||
! Quantidade | |||
! Chance de Drop | |||
|- | |||
| align="center" |[[Arquivo:Moderate_Nightmare_experience_candy..png|link=]] | |||
| style="border-left-style: hidden; | Moderate Nightmare Experience Candy | |||
|align="center" |3 | |||
|align="center" | 100% | |||
|- | |||
| align="center" |[[Arquivo:Compressed_Nightmare_Gems.png|link=]] | |||
| style="border-left-style: hidden; | Compressed Nightmare Gem | |||
|align="center" |3 | |||
|align="center" | 100% | |||
|- | |||
| align="center" | [[Arquivo:NW_ore.png|link=]] | |||
| style="border-left-style: hidden; | Nightmare Ore | |||
|align="center" |15 | |||
|align="center" | 100% | |||
|- | |||
| align="center" | [[Arquivo:NW_unusual_ore.png|link=]] | |||
| style="border-left-style: hidden; | Nightmare Unusual Ore | |||
|align="center" |1 | |||
|align="center" | 100% | |||
|- | |||
| align="center" | [[Arquivo:Nightmare_Token.png|link=]] | |||
| style="border-left-style: hidden; | Nightmare Token | |||
|align="center" | 1 | |||
|align="center" | 100% | |||
|- | |||
| align="center" | [[Arquivo:Exp_icon.png|30px|link=]] | |||
| style="border-left-style: hidden; | Experience | |||
|align="center" |300,000 | |||
|align="center" | 100% | |||
|- | |||
| align="center" | [[Arquivo:Black Nightmare Gem.png|link=]] | |||
| style="border-left-style: hidden; | Black Nightmare Gem | |||
|align="center" | 1 | |||
|align="center" | Raro (Menor que 1%) | |||
|- | |||
|} | |||
<center>[[Arquivo:Banner Bolinha Alpha -1.png|link=]]</center> | |||
== | == Introdução == | ||
x | |||
== Habilidades == | |||
=== | <center class="center-tab"><tabber> | ||
|-|Bubble= | |||
{{#widget:Video|url={{filepath:boss mecha mega blastoise - bubble.mp4}}|}} | |||
|-|Bubble Beam= | |||
{{#widget:Video|url={{filepath:boss mecha mega blastoise - bubble beam.mp4}}|}} | |||
|-|Brine= | |||
{{#widget:Video|url={{filepath:boss mecha mega blastoise - brine.mp4}}|}} | |||
= | |-|Headbutt= | ||
{{#widget:Video|url={{filepath:boss mecha mega blastoise - headbutt.mp4}}|}} | |||
|-|Water Pulse= | |||
{{#widget:Video|url={{filepath:boss mecha mega blastoise - water pulse.mp4}}|}} | |||
|-|Giant Water Gun= | |||
{{#widget:Video|url={{filepath:boss mecha mega blastoise - giant water gun.mp4}}|}} | |||
== | |-|Hydro Cannon= | ||
{{#widget:Video|url={{filepath:boss mecha mega blastoise - hydro cannon.mp4}}|}} | |||
|-|Water Spout= | |||
{{#widget:Video|url={{filepath:boss mecha mega blastoise - water spout.mp4}}|}} | |||
|-|Withdraw= | |||
{{#widget:Video|url={{filepath:boss mecha mega blastoise - withdraw.mp4}}|}} | |||
</tabber> | |||
{| class="wikitable" style="text-align:center;" | |||
|- | |||
! colspan="9" | Seavell Tube | |||
|- | |||
! scope="col" |Shiny Glaceon | |||
! scope="col" |Lombree | |||
! scope="col" |Loudred | |||
! scope="col" |Marowak | |||
! scope="col" |Tangela | |||
! scope="col" |Cloyster | |||
! scope="col" |Hypno | |||
! scope="col" |Corsola | |||
! scope="col" |Murkrow | |||
|- | |||
| [[Arquivo:471-Sh_Glaceon.png|link=Shiny Glaceon]] | |||
| [[Arquivo:271-Lombre.png|link=Lombre]] | |||
| [[Arquivo:294-Loudred.png|link=Loudred]] | |||
| [[Arquivo:105-Marowak.png|link=Marowak]] | |||
| [[Arquivo:114-Tangela.png|link=Tangela]] | |||
| [[Arquivo:091-Cloyster.png|link=Cloyster]] | |||
| [[Arquivo:097-Hypno.png|link=Hypno]] | |||
| [[Arquivo:222-Corsola.png|link=Corsola]] | |||
| [[Arquivo:198-Murkrow.png|link=Murkrow]] | |||
|- | |||
! scope="col" |Quagsire | |||
! scope="col" |Fearow | |||
! scope="col" |Sandslash | |||
! scope="col" |Vileplume | |||
! scope="col" |Bellossom | |||
! scope="col" |Primeape | |||
! scope="col" |Noctowl | |||
! scope="col" |Dewgong | |||
! scope="col" |Onix | |||
|- | |||
| [[Arquivo:195-Quagsire.png|link=Quagsire]] | |||
| [[Arquivo:022-Fearow.png|link=Fearow]] | |||
| [[Arquivo:028-Sandslash.png|link=Sandslash]] | |||
| [[Arquivo:045-Vileplume.png|link=Vileplume]] | |||
| [[Arquivo:182-Bellossom.png|link=Bellossom]] | |||
| [[Arquivo:057-Primeape.png|link=Primeape]] | |||
| [[Arquivo:164-Noctowl.png|link=Noctowl]] | |||
| [[Arquivo:087-Dewgong.png|link=Dewgong]] | |||
| [[Arquivo:095-Onix.png|link=Onix]] | |||
|- | |||
! scope="col" |Vibrava | |||
! scope="col" |Politoed | |||
! scope="col" |Sneasel | |||
! scope="col" |Delibird | |||
! scope="col" |Stantler | |||
! scope="col" |Victreebel | |||
! scope="col" |Sealeo | |||
! scope="col" |Vigoroth | |||
! scope="col" |Lairon | |||
|- | |||
| [[Arquivo:329-Vibrava.png|link=Vibrava]] | |||
| [[Arquivo:186-Politoed.png|link=Politoed]] | |||
| [[Arquivo:215-Sneasel.png|link=Sneasel]] | |||
| [[Arquivo:225-Delibird.png|link=Delibird]] | |||
| [[Arquivo:234-Stantler.png|link=Stantler]] | |||
| [[Arquivo:071-Victreebel.png|link=Victreebel]] | |||
| [[Arquivo:364-Sealeo.png|link=Sealeo]] | |||
| [[Arquivo:288-Vigoroth.png|link=Vigoroth]] | |||
|[[Arquivo:305-Lairon.png|link=Lairon]] | |||
|} | |||
</center> | |||
{| class=wikitable width= | == Loots == | ||
<center> | |||
{| class="wikitable" width="45%" style="text-align:center" | |||
|- | |||
! colspan="2" | Item | |||
! Quantidade | |||
! Chance de Drop | |||
|- | |||
| align="center" |[[Arquivo:Moderate_Nightmare_experience_candy..png|link=]] | |||
| style="border-left-style: hidden; | Moderate Nightmare Experience Candy | |||
|align="center" |3 | |||
|align="center" | 100% | |||
|- | |||
| align="center" |[[Arquivo:Compressed_Nightmare_Gems.png|link=]] | |||
| style="border-left-style: hidden; | Compressed Nightmare Gem | |||
|align="center" |3 | |||
|align="center" | 100% | |||
|- | |||
| align="center" | [[Arquivo:NW_ore.png|link=]] | |||
| style="border-left-style: hidden; | Nightmare Ore | |||
|align="center" |15 | |||
|align="center" | 100% | |||
|- | |||
| align="center" | [[Arquivo:NW_unusual_ore.png|link=]] | |||
| style="border-left-style: hidden; | Nightmare Unusual Ore | |||
|align="center" |1 | |||
|align="center" | 100% | |||
|- | |||
| align="center" | [[Arquivo:Nightmare_Token.png|link=]] | |||
| style="border-left-style: hidden; | Nightmare Token | |||
|align="center" | 1 | |||
|align="center" | 100% | |||
|- | |||
| align="center" | [[Arquivo:Exp_icon.png|30px|link=]] | |||
| style="border-left-style: hidden; | Experience | |||
|align="center" |300,000 | |||
|align="center" | 100% | |||
|- | |||
| align="center" | [[Arquivo:Black Nightmare Gem.png|link=]] | |||
| style="border-left-style: hidden; | Black Nightmare Gem | |||
|align="center" | 1 | |||
|align="center" | Raro (Menor que 1%) | |||
|- | |- | ||
|} | |} | ||
<center>[[Arquivo:Banner Bolinha Alpha -1.png|link=]]</center> | |||
== Introdução == | |||
x | |||
== Habilidades == | |||
<center> | <center class="center-tab"><tabber> | ||
|-|Dark Pulse= | |||
{{#widget:Video|url={{filepath:boss mecha mega tyranitar - dark pulse.mp4}}|}} | |||
== | |-|Rock Throw= | ||
{{#widget:Video|url={{filepath:boss mecha mega tyranitar - rock throw.mp4}}|}} | |||
|-|Stone Edge= | |||
{{#widget:Video|url={{filepath:boss mecha mega tyranitar - stone edge.mp4}}|}} | |||
|-|Crunch= | |||
{{#widget:Video|url={{filepath:boss mecha mega tyranitar - crunch.mp4}}|}} | |||
<center> [[Arquivo: | |-|Hyper Beam= | ||
{{#widget:Video|url={{filepath:boss mecha mega tyranitar - hyper beam.mp4}}|}} | |||
|-|Payback= | |||
{{#widget:Video|url={{filepath:boss mecha mega tyranitar - payback.mp4}}|}} | |||
|-|Assurance= | |||
{{#widget:Video|url={{filepath:boss mecha mega tyranitar - assurance.mp4}}|}} | |||
|-|Ancient Power= | |||
{{#widget:Video|url={{filepath:boss mecha mega tyranitar - ancient power.mp4}}|}} | |||
</tabber> | |||
{| class="wikitable" style="text-align:center;" | |||
|- | |||
! colspan="9" | Orebound Tube | |||
|- | |||
! scope="col" |Shiny Pupitar | |||
! scope="col" |Lombree | |||
! scope="col" |Loudred | |||
! scope="col" |Marowak | |||
! scope="col" |Tangela | |||
! scope="col" |Cloyster | |||
! scope="col" |Hypno | |||
! scope="col" |Corsola | |||
! scope="col" |Murkrow | |||
|- | |||
| [[Arquivo:247-Sh_Pupitar.png|link=Shiny Pupitar]] | |||
| [[Arquivo:271-Lombre.png|link=Lombre]] | |||
| [[Arquivo:294-Loudred.png|link=Loudred]] | |||
| [[Arquivo:105-Marowak.png|link=Marowak]] | |||
| [[Arquivo:114-Tangela.png|link=Tangela]] | |||
| [[Arquivo:091-Cloyster.png|link=Cloyster]] | |||
| [[Arquivo:097-Hypno.png|link=Hypno]] | |||
| [[Arquivo:222-Corsola.png|link=Corsola]] | |||
| [[Arquivo:198-Murkrow.png|link=Murkrow]] | |||
|- | |||
! scope="col" |Quagsire | |||
! scope="col" |Fearow | |||
! scope="col" |Sandslash | |||
! scope="col" |Vileplume | |||
! scope="col" |Bellossom | |||
! scope="col" |Primeape | |||
! scope="col" |Noctowl | |||
! scope="col" |Dewgong | |||
! scope="col" |Onix | |||
|- | |||
| [[Arquivo:195-Quagsire.png|link=Quagsire]] | |||
| [[Arquivo:022-Fearow.png|link=Fearow]] | |||
| [[Arquivo:028-Sandslash.png|link=Sandslash]] | |||
| [[Arquivo:045-Vileplume.png|link=Vileplume]] | |||
| [[Arquivo:182-Bellossom.png|link=Bellossom]] | |||
| [[Arquivo:057-Primeape.png|link=Primeape]] | |||
| [[Arquivo:164-Noctowl.png|link=Noctowl]] | |||
| [[Arquivo:087-Dewgong.png|link=Dewgong]] | |||
| [[Arquivo:095-Onix.png|link=Onix]] | |||
|- | |||
! scope="col" |Vibrava | |||
! scope="col" |Politoed | |||
! scope="col" |Sneasel | |||
! scope="col" |Delibird | |||
! scope="col" |Stantler | |||
! scope="col" |Victreebel | |||
! scope="col" |Sealeo | |||
! scope="col" |Vigoroth | |||
! scope="col" |Lairon | |||
|- | |||
| [[Arquivo:329-Vibrava.png|link=Vibrava]] | |||
| [[Arquivo:186-Politoed.png|link=Politoed]] | |||
| [[Arquivo:215-Sneasel.png|link=Sneasel]] | |||
| [[Arquivo:225-Delibird.png|link=Delibird]] | |||
| [[Arquivo:234-Stantler.png|link=Stantler]] | |||
| [[Arquivo:071-Victreebel.png|link=Victreebel]] | |||
| [[Arquivo:364-Sealeo.png|link=Sealeo]] | |||
| [[Arquivo:288-Vigoroth.png|link=Vigoroth]] | |||
|[[Arquivo:305-Lairon.png|link=Lairon]] | |||
|} | |||
</center> | |||
== Loots == | |||
<center> | |||
{| class="wikitable" width="45%" style="text-align:center" | |||
|- | |||
! colspan="2" | Item | |||
! Quantidade | |||
! Chance de Drop | |||
|- | |||
| align="center" |[[Arquivo:Moderate_Nightmare_experience_candy..png|link=]] | |||
| style="border-left-style: hidden; | Moderate Nightmare Experience Candy | |||
|align="center" |3 | |||
|align="center" | 100% | |||
|- | |||
| align="center" |[[Arquivo:Compressed_Nightmare_Gems.png|link=]] | |||
| style="border-left-style: hidden; | Compressed Nightmare Gem | |||
|align="center" |3 | |||
|align="center" | 100% | |||
|- | |||
| align="center" | [[Arquivo:NW_ore.png|link=]] | |||
| style="border-left-style: hidden; | Nightmare Ore | |||
|align="center" |15 | |||
|align="center" | 100% | |||
|- | |||
| align="center" | [[Arquivo:NW_unusual_ore.png|link=]] | |||
| style="border-left-style: hidden; | Nightmare Unusual Ore | |||
|align="center" |1 | |||
|align="center" | 100% | |||
|- | |||
| align="center" | [[Arquivo:Nightmare_Token.png|link=]] | |||
| style="border-left-style: hidden; | Nightmare Token | |||
|align="center" | 1 | |||
|align="center" | 100% | |||
|- | |||
| align="center" | [[Arquivo:Exp_icon.png|30px|link=]] | |||
| style="border-left-style: hidden; | Experience | |||
|align="center" |300,000 | |||
|align="center" | 100% | |||
|- | |||
| align="center" | [[Arquivo:Black Nightmare Gem.png|link=]] | |||
| style="border-left-style: hidden; | Black Nightmare Gem | |||
|align="center" | 1 | |||
|align="center" | Raro (Menor que 1%) | |||
|- | |||
|} | |||
<center>[[Arquivo:Banner Bolinha Alpha -1.png|link=]]</center> | |||
== Introdução == | |||
x | |||
== Habilidades == | |||
<center class="center-tab"><tabber> | |||
|-|Razor Leaf= | |||
{{#widget:Video|url={{filepath:boss mecha mega venusaur - razor leaf.mp4}}|}} | |||
|-|Seed Bomb= | |||
{{#widget:Video|url={{filepath:boss mecha mega venusaur - seed bomb.mp4}}|}} | |||
|-|Vine Whip= | |||
{{#widget:Video|url={{filepath:boss mecha mega venusaur - vine whip.mp4}}|}} | |||
|-|Vine Grab= | |||
{{#widget:Video|url={{filepath:boss mecha mega venusaur - vine grab.mp4}}|}} | |||
|-|Leaf Storm= | |||
{{#widget:Video|url={{filepath:boss mecha mega venusaur - leaf storm.mp4}}|}} | |||
|-|Headbutt= | |||
{{#widget:Video|url={{filepath:boss mecha mega venusaur - headbutt.mp4}}|}} | |||
|-|Mud Sludge= | |||
{{#widget:Video|url={{filepath:boss mecha mega venusaur - headbutt.mp4}}|}} | |||
|-|Bulldoze= | |||
{{#widget:Video|url={{filepath:boss mecha mega venusaur - bulldoze.mp4}}|}} | |||
|-|Giga Impact= | |||
{{#widget:Video|url={{filepath:boss mecha mega venusaur - giga impact.mp4}}|}} | |||
|-|Stomping Tantrum= | |||
{{#widget:Video|url={{filepath:boss mecha mega venusaur - stomping tantrum.mp4}}|}} | |||
|-|Tectonic Rage= | |||
{{#widget:Video|url={{filepath:boss mecha mega venusaur - tectonic rage.mp4}}|}} | |||
|-|Sunny Day= | |||
{{#widget:Video|url={{filepath:boss mecha mega venusaur - sunny day.mp4}}|}} | |||
|-|Solar Beam= | |||
{{#widget:Video|url={{filepath:boss mecha mega venusaur - solar beam.mp4}}|}} | |||
|-|Ancient Armor= | |||
{{#widget:Video|url={{filepath:boss mecha mega venusaur - tectonic rage.mp4}}|}} | |||
</tabber> | |||
{| class="wikitable" style="text-align:center;" | |||
|- | |||
! colspan="9" | Volcanic Tube | |||
|- | |||
! scope="col" |Shiny Leafeon | |||
! scope="col" |Lombree | |||
! scope="col" |Loudred | |||
! scope="col" |Marowak | |||
! scope="col" |Tangela | |||
! scope="col" |Cloyster | |||
! scope="col" |Hypno | |||
! scope="col" |Corsola | |||
! scope="col" |Murkrow | |||
|- | |||
| [[Arquivo:Sh_leafeon.png|link=Shiny Leafeon]] | |||
| [[Arquivo:271-Lombre.png|link=Lombre]] | |||
| [[Arquivo:294-Loudred.png|link=Loudred]] | |||
| [[Arquivo:105-Marowak.png|link=Marowak]] | |||
| [[Arquivo:114-Tangela.png|link=Tangela]] | |||
| [[Arquivo:091-Cloyster.png|link=Cloyster]] | |||
| [[Arquivo:097-Hypno.png|link=Hypno]] | |||
| [[Arquivo:222-Corsola.png|link=Corsola]] | |||
| [[Arquivo:198-Murkrow.png|link=Murkrow]] | |||
|- | |||
! scope="col" |Quagsire | |||
! scope="col" |Fearow | |||
! scope="col" |Sandslash | |||
! scope="col" |Vileplume | |||
! scope="col" |Bellossom | |||
! scope="col" |Primeape | |||
! scope="col" |Noctowl | |||
! scope="col" |Dewgong | |||
! scope="col" |Onix | |||
|- | |||
| [[Arquivo:195-Quagsire.png|link=Quagsire]] | |||
| [[Arquivo:022-Fearow.png|link=Fearow]] | |||
| [[Arquivo:028-Sandslash.png|link=Sandslash]] | |||
| [[Arquivo:045-Vileplume.png|link=Vileplume]] | |||
| [[Arquivo:182-Bellossom.png|link=Bellossom]] | |||
| [[Arquivo:057-Primeape.png|link=Primeape]] | |||
| [[Arquivo:164-Noctowl.png|link=Noctowl]] | |||
| [[Arquivo:087-Dewgong.png|link=Dewgong]] | |||
| [[Arquivo:095-Onix.png|link=Onix]] | |||
|- | |||
! scope="col" |Vibrava | |||
! scope="col" |Politoed | |||
! scope="col" |Sneasel | |||
! scope="col" |Delibird | |||
! scope="col" |Stantler | |||
! scope="col" |Victreebel | |||
! scope="col" |Sealeo | |||
! scope="col" |Vigoroth | |||
! scope="col" |Lairon | |||
|- | |||
| [[Arquivo:329-Vibrava.png|link=Vibrava]] | |||
| [[Arquivo:186-Politoed.png|link=Politoed]] | |||
| [[Arquivo:215-Sneasel.png|link=Sneasel]] | |||
| [[Arquivo:225-Delibird.png|link=Delibird]] | |||
| [[Arquivo:234-Stantler.png|link=Stantler]] | |||
| [[Arquivo:071-Victreebel.png|link=Victreebel]] | |||
| [[Arquivo:364-Sealeo.png|link=Sealeo]] | |||
| [[Arquivo:288-Vigoroth.png|link=Vigoroth]] | |||
|[[Arquivo:305-Lairon.png|link=Lairon]] | |||
|} | |||
</center> | |||
== Loots == | |||
<center> | |||
{| class="wikitable" width="45%" style="text-align:center" | |||
|- | |||
! colspan="2" | Item | |||
! Quantidade | |||
! Chance de Drop | |||
|- | |||
| align="center" |[[Arquivo:Moderate_Nightmare_experience_candy..png|link=]] | |||
| style="border-left-style: hidden; | Moderate Nightmare Experience Candy | |||
|align="center" |3 | |||
|align="center" | 100% | |||
|- | |||
| align="center" |[[Arquivo:Compressed_Nightmare_Gems.png|link=]] | |||
| style="border-left-style: hidden; | Compressed Nightmare Gem | |||
|align="center" |3 | |||
|align="center" | 100% | |||
|- | |||
| align="center" | [[Arquivo:NW_ore.png|link=]] | |||
| style="border-left-style: hidden; | Nightmare Ore | |||
|align="center" |15 | |||
|align="center" | 100% | |||
|- | |||
| align="center" | [[Arquivo:NW_unusual_ore.png|link=]] | |||
| style="border-left-style: hidden; | Nightmare Unusual Ore | |||
|align="center" |1 | |||
|align="center" | 100% | |||
|- | |||
| align="center" | [[Arquivo:Nightmare_Token.png|link=]] | |||
| style="border-left-style: hidden; | Nightmare Token | |||
|align="center" | 1 | |||
|align="center" | 100% | |||
|- | |||
| align="center" | [[Arquivo:Exp_icon.png|30px|link=]] | |||
| style="border-left-style: hidden; | Experience | |||
|align="center" |300,000 | |||
|align="center" | 100% | |||
|- | |||
| align="center" | [[Arquivo:Black Nightmare Gem.png|link=]] | |||
| style="border-left-style: hidden; | Black Nightmare Gem | |||
|align="center" | 1 | |||
|align="center" | Raro (Menor que 1%) | |||
|- | |||
|} | |||
<center>[[Arquivo:Banner Bolinha Alpha -1.png|link=]]</center> | |||
== Introdução == | |||
x | |||
== Habilidades == | |||
<center class="center-tab"><tabber> | |||
|-|Mach Punch= | |||
{{#widget:Video|url={{filepath:boss mecha shiny machamp - mach punch.mp4}}|}} | |||
|-|Karate Chop= | |||
{{#widget:Video|url={{filepath:boss mecha shiny machamp - karate chop.mp4}}|}} | |||
|-|Triple Kick= | |||
{{#widget:Video|url={{filepath:boss mecha shiny machamp - triple kick.mp4}}|}} | |||
|-|Leap Strike= | |||
{{#widget:Video|url={{filepath:boss mecha shiny machamp - leap strike.mp4}}|}} | |||
|-|Arm Thrust= | |||
{{#widget:Video|url={{filepath:boss mecha shiny machamp - arm thrust.mp4}}|}} | |||
|-|Focus Blast= | |||
{{#widget:Video|url={{filepath:boss mecha shiny machamp - focus blast.mp4}}|}} | |||
|-|Reversal= | |||
{{#widget:Video|url={{filepath:boss mecha shiny machamp - reversal.mp4}}|}} | |||
|-|Scary Face= | |||
{{#widget:Video|url={{filepath:boss mecha shiny machamp - scary face.mp4}}|}} | |||
|-|Agility= | |||
{{#widget:Video|url={{filepath:boss mecha shiny machamp - agility.mp4}}|}} | |||
|-|Strafe= | |||
{{#widget:Video|url={{filepath:boss mecha shiny machamp - strafe.mp4}}|}} | |||
|-|Rage= | |||
{{#widget:Video|url={{filepath:boss mecha shiny machamp - rage.mp4}}|}} | |||
</tabber> | |||
{| class="wikitable" style="text-align:center;" | |||
|- | |||
! colspan="9" | Volcanic Tube | |||
|- | |||
! scope="col" |Shiny Tauros | |||
! scope="col" |Shiny Infernape | |||
! scope="col" |Loudred | |||
! scope="col" |Marowak | |||
! scope="col" |Tangela | |||
! scope="col" |Cloyster | |||
! scope="col" |Hypno | |||
! scope="col" |Corsola | |||
! scope="col" |Murkrow | |||
|- | |||
| [[Arquivo:128-shTauros.png|link=Shiny Tauros]] | |||
| [[Arquivo:Shiny_Infernape.png|link=Shiny Infernape]] | |||
| [[Arquivo:294-Loudred.png|link=Loudred]] | |||
| [[Arquivo:105-Marowak.png|link=Marowak]] | |||
| [[Arquivo:114-Tangela.png|link=Tangela]] | |||
| [[Arquivo:091-Cloyster.png|link=Cloyster]] | |||
| [[Arquivo:097-Hypno.png|link=Hypno]] | |||
| [[Arquivo:222-Corsola.png|link=Corsola]] | |||
| [[Arquivo:198-Murkrow.png|link=Murkrow]] | |||
|- | |||
! scope="col" |Quagsire | |||
! scope="col" |Fearow | |||
! scope="col" |Sandslash | |||
! scope="col" |Vileplume | |||
! scope="col" |Bellossom | |||
! scope="col" |Primeape | |||
! scope="col" |Noctowl | |||
! scope="col" |Dewgong | |||
! scope="col" |Onix | |||
|- | |||
| [[Arquivo:195-Quagsire.png|link=Quagsire]] | |||
| [[Arquivo:022-Fearow.png|link=Fearow]] | |||
| [[Arquivo:028-Sandslash.png|link=Sandslash]] | |||
| [[Arquivo:045-Vileplume.png|link=Vileplume]] | |||
| [[Arquivo:182-Bellossom.png|link=Bellossom]] | |||
| [[Arquivo:057-Primeape.png|link=Primeape]] | |||
| [[Arquivo:164-Noctowl.png|link=Noctowl]] | |||
| [[Arquivo:087-Dewgong.png|link=Dewgong]] | |||
| [[Arquivo:095-Onix.png|link=Onix]] | |||
|- | |||
! scope="col" |Vibrava | |||
! scope="col" |Politoed | |||
! scope="col" |Sneasel | |||
! scope="col" |Delibird | |||
! scope="col" |Stantler | |||
! scope="col" |Victreebel | |||
! scope="col" |Sealeo | |||
! scope="col" |Vigoroth | |||
! scope="col" |Lairon | |||
|- | |||
| [[Arquivo:329-Vibrava.png|link=Vibrava]] | |||
| [[Arquivo:186-Politoed.png|link=Politoed]] | |||
| [[Arquivo:215-Sneasel.png|link=Sneasel]] | |||
| [[Arquivo:225-Delibird.png|link=Delibird]] | |||
| [[Arquivo:234-Stantler.png|link=Stantler]] | |||
| [[Arquivo:071-Victreebel.png|link=Victreebel]] | |||
| [[Arquivo:364-Sealeo.png|link=Sealeo]] | |||
| [[Arquivo:288-Vigoroth.png|link=Vigoroth]] | |||
|[[Arquivo:305-Lairon.png|link=Lairon]] | |||
|} | |||
</center> | |||
== Loots == | |||
<center> | |||
{| class="wikitable" width="45%" style="text-align:center" | |||
|- | |||
! colspan="2" | Item | |||
! Quantidade | |||
! Chance de Drop | |||
|- | |||
| align="center" |[[Arquivo:Moderate_Nightmare_experience_candy..png|link=]] | |||
| style="border-left-style: hidden; | Moderate Nightmare Experience Candy | |||
|align="center" |3 | |||
|align="center" | 100% | |||
|- | |||
| align="center" |[[Arquivo:Compressed_Nightmare_Gems.png|link=]] | |||
| style="border-left-style: hidden; | Compressed Nightmare Gem | |||
|align="center" |3 | |||
|align="center" | 100% | |||
|- | |||
| align="center" | [[Arquivo:NW_ore.png|link=]] | |||
| style="border-left-style: hidden; | Nightmare Ore | |||
|align="center" |15 | |||
|align="center" | 100% | |||
|- | |||
| align="center" | [[Arquivo:NW_unusual_ore.png|link=]] | |||
| style="border-left-style: hidden; | Nightmare Unusual Ore | |||
|align="center" |1 | |||
|align="center" | 100% | |||
|- | |||
| align="center" | [[Arquivo:Nightmare_Token.png|link=]] | |||
| style="border-left-style: hidden; | Nightmare Token | |||
|align="center" | 1 | |||
|align="center" | 100% | |||
|- | |||
| align="center" | [[Arquivo:Exp_icon.png|30px|link=]] | |||
| style="border-left-style: hidden; | Experience | |||
|align="center" |300,000 | |||
|align="center" | 100% | |||
|- | |||
| align="center" | [[Arquivo:Black Nightmare Gem.png|link=]] | |||
| style="border-left-style: hidden; | Black Nightmare Gem | |||
|align="center" | 1 | |||
|align="center" | Raro (Menor que 1%) | |||
|- | |||
|} | |||
Edição atual tal como às 00h09min de 28 de junho de 2024
nalu 2
access card
Ao derrotar o Alpha Subject, o tubo de experimento no centro da sala estará desprotegido e poderá ser quebrado, revelando dois Pokémon Mega ou Shiny do respectivo clã que poderão ser capturados ou "dropados". É importante destacar que, caso o jogador seja derrotado pelo protetor do local, não sofrerá penalidade de experiência e Bless; apenas seu Access Card será consumido. É possível encontrar todos os T1B e os principais T1C (não estão presentes os Pokémon T1 da Cyber, Embedded Tower, Shiny Mr. Mime e os Megas das DZs). Há dez laboratórios ocultos pela Nightmare World, cada um deles referente a um determinado clã e com um experimento imperfeito de Sarkies defendendo o local. Apenas os pokémon do tubo são elementais. Levar cura
mecanicas talvez
Pag. Acess Cards
Introdução
x
Habilidades
| Volcanic Tube | ||||||||
|---|---|---|---|---|---|---|---|---|
| Shiny Arcanine | Shiny Infernape | Mega Houndoom | Marowak | Tangela | Cloyster | Hypno | Corsola | Murkrow |
| Quagsire | Fearow | Sandslash | Vileplume | Bellossom | Primeape | Noctowl | Dewgong | Onix |
| Vibrava | Politoed | Sneasel | Delibird | Stantler | Victreebel | Sealeo | Vigoroth | Lairon |
Loots
| Item | Quantidade | Chance de Drop | |
|---|---|---|---|
| 3 | 100% | ||
| 3 | 100% | ||
| 15 | 100% | ||
| 1 | 100% | ||
| 1 | 100% | ||
| 300,000 | 100% | ||
| 1 | Raro (Menor que 1%) | ||
Introdução
x
Habilidades
| Wingeon Tube | ||||||||
|---|---|---|---|---|---|---|---|---|
| Shiny Dragonair | Lombree | Loudred | Marowak | Tangela | Cloyster | Hypno | Corsola | Murkrow |
| Quagsire | Fearow | Sandslash | Vileplume | Bellossom | Primeape | Noctowl | Dewgong | Onix |
| Vibrava | Politoed | Sneasel | Delibird | Stantler | Victreebel | Sealeo | Vigoroth | Lairon |
Loots
| Item | Quantidade | Chance de Drop | |
|---|---|---|---|
| 3 | 100% | ||
| 3 | 100% | ||
| 15 | 100% | ||
| 1 | 100% | ||
| 1 | 100% | ||
| 300,000 | 100% | ||
| 1 | Raro (Menor que 1%) | ||
Introdução
x
Habilidades
| Malefic Tube | ||||||||
|---|---|---|---|---|---|---|---|---|
| Shiny Gengar | Mega Houndoom | Loudred | Marowak | Tangela | Cloyster | Hypno | Corsola | Murkrow |
| Quagsire | Fearow | Sandslash | Vileplume | Bellossom | Primeape | Noctowl | Dewgong | Onix |
| Vibrava | Politoed | Sneasel | Delibird | Stantler | Victreebel | Sealeo | Vigoroth | Lairon |
Loots
| Item | Quantidade | Chance de Drop | |
|---|---|---|---|
| 3 | 100% | ||
| 3 | 100% | ||
| 15 | 100% | ||
| 1 | 100% | ||
| 1 | 100% | ||
| 300,000 | 100% | ||
| 1 | Raro (Menor que 1%) | ||
Introdução
x
Habilidades
| Psycraft Tube | ||||||||
|---|---|---|---|---|---|---|---|---|
| Shiny Sylveon | Lombree | Loudred | Marowak | Tangela | Cloyster | Hypno | Corsola | Murkrow |
| Quagsire | Fearow | Sandslash | Vileplume | Bellossom | Primeape | Noctowl | Dewgong | Onix |
| Vibrava | Politoed | Sneasel | Delibird | Stantler | Victreebel | Sealeo | Vigoroth | Lairon |
Loots
| Item | Quantidade | Chance de Drop | |
|---|---|---|---|
| 3 | 100% | ||
| 3 | 100% | ||
| 15 | 100% | ||
| 1 | 100% | ||
| 1 | 100% | ||
| 300,000 | 100% | ||
| 1 | Raro (Menor que 1%) | ||
Introdução
x
Habilidades
| Raibolt Tube | ||||||||
|---|---|---|---|---|---|---|---|---|
| Shiny Manectric | Mega Manectric | Shiny Luxray | Shiny Eelektross | Giant Galvantula | Shiny Lanturn | Shiny Ampharos | Shiny Magnezone | |
Loots
| Item | Quantidade | Chance de Drop | |
|---|---|---|---|
| 3 | 100% | ||
| 3 | 100% | ||
| 15 | 100% | ||
| 1 | 100% | ||
| 1 | 100% | ||
| 300,000 | 100% | ||
| 1 | Raro (Menor que 1%) | ||
Introdução
x
Habilidades
| Ironhard Tube | ||||||||
|---|---|---|---|---|---|---|---|---|
| Mega Aggron | Lombree | Loudred | Marowak | Tangela | Cloyster | Hypno | Corsola | Murkrow |
| Quagsire | Fearow | Sandslash | Vileplume | Bellossom | Primeape | Noctowl | Dewgong | Onix |
| Vibrava | Politoed | Sneasel | Delibird | Stantler | Victreebel | Sealeo | Vigoroth | Lairon |
Loots
| Item | Quantidade | Chance de Drop | |
|---|---|---|---|
| 3 | 100% | ||
| 3 | 100% | ||
| 15 | 100% | ||
| 1 | 100% | ||
| 1 | 100% | ||
| 300,000 | 100% | ||
| 1 | Raro (Menor que 1%) | ||
Introdução
x
Habilidades
| Seavell Tube | ||||||||
|---|---|---|---|---|---|---|---|---|
| Shiny Glaceon | Lombree | Loudred | Marowak | Tangela | Cloyster | Hypno | Corsola | Murkrow |
| Quagsire | Fearow | Sandslash | Vileplume | Bellossom | Primeape | Noctowl | Dewgong | Onix |
| Vibrava | Politoed | Sneasel | Delibird | Stantler | Victreebel | Sealeo | Vigoroth | Lairon |
Loots
| Item | Quantidade | Chance de Drop | |
|---|---|---|---|
| 3 | 100% | ||
| 3 | 100% | ||
| 15 | 100% | ||
| 1 | 100% | ||
| 1 | 100% | ||
| 300,000 | 100% | ||
| 1 | Raro (Menor que 1%) | ||
Introdução
x
Habilidades
| Orebound Tube | ||||||||
|---|---|---|---|---|---|---|---|---|
| Shiny Pupitar | Lombree | Loudred | Marowak | Tangela | Cloyster | Hypno | Corsola | Murkrow |
| Quagsire | Fearow | Sandslash | Vileplume | Bellossom | Primeape | Noctowl | Dewgong | Onix |
| Vibrava | Politoed | Sneasel | Delibird | Stantler | Victreebel | Sealeo | Vigoroth | Lairon |
Loots
| Item | Quantidade | Chance de Drop | |
|---|---|---|---|
| 3 | 100% | ||
| 3 | 100% | ||
| 15 | 100% | ||
| 1 | 100% | ||
| 1 | 100% | ||
| 300,000 | 100% | ||
| 1 | Raro (Menor que 1%) | ||
Introdução
x
Habilidades
| Volcanic Tube | ||||||||
|---|---|---|---|---|---|---|---|---|
| Shiny Leafeon | Lombree | Loudred | Marowak | Tangela | Cloyster | Hypno | Corsola | Murkrow |
| Quagsire | Fearow | Sandslash | Vileplume | Bellossom | Primeape | Noctowl | Dewgong | Onix |
| Vibrava | Politoed | Sneasel | Delibird | Stantler | Victreebel | Sealeo | Vigoroth | Lairon |
Loots
| Item | Quantidade | Chance de Drop | |
|---|---|---|---|
| 3 | 100% | ||
| 3 | 100% | ||
| 15 | 100% | ||
| 1 | 100% | ||
| 1 | 100% | ||
| 300,000 | 100% | ||
| 1 | Raro (Menor que 1%) | ||
Introdução
x
Habilidades
| Volcanic Tube | ||||||||
|---|---|---|---|---|---|---|---|---|
| Shiny Tauros | Shiny Infernape | Loudred | Marowak | Tangela | Cloyster | Hypno | Corsola | Murkrow |
| Quagsire | Fearow | Sandslash | Vileplume | Bellossom | Primeape | Noctowl | Dewgong | Onix |
| Vibrava | Politoed | Sneasel | Delibird | Stantler | Victreebel | Sealeo | Vigoroth | Lairon |
Loots
| Item | Quantidade | Chance de Drop | |
|---|---|---|---|
| 3 | 100% | ||
| 3 | 100% | ||
| 15 | 100% | ||
| 1 | 100% | ||
| 1 | 100% | ||
| 300,000 | 100% | ||
| 1 | Raro (Menor que 1%) | ||