Embedded Tower - Sexto Andar: mudanças entre as edições
Sem resumo de edição |
|||
| (14 revisões intermediárias por 3 usuários não estão sendo mostradas) | |||
| Linha 1: | Linha 1: | ||
<center> [[Arquivo: | [[Arquivo:ES.png|link=Embedded_Tower_Sexto_Piso]] | ||
<center> [[Arquivo:Banner_Embedded-Tower.png|link=]] | |||
{| class="wikitable" style="text-align:center" width="54%;" | |||
|- | |||
! colspan="5" scope="col" style="background-color: #4682B4"| Navegação rápida | |||
|- | |||
| text-align:"center;" | '''[[Embedded Tower|Embedded Tower]]''' | |||
| text-align:"center;" | '''[[Embedded Tower - Primeiro ao Quarto Andar|Primeiro ao Quarto Andar]]''' | |||
| text-align:"center;" | '''[[Embedded Tower - Quinto Andar|Quinto Andar]]''' | |||
| text-align:"center;" | '''[[Câmara do Jirachi]]''' | |||
| text-align:"center;" | '''[[Embedded_Tower_-_Sétimo_Andar|Sétimo Andar]]''' | |||
|} </center> | |||
= Introdução = | = Introdução = | ||
| Linha 32: | Linha 45: | ||
<center> | <center> | ||
{| class="wikitable" width="42%" | {| class="wikitable" width="42%" | ||
! colspan="2" width="50%" style="background-color: #4682B4" | | ! colspan="2" width="50%" style="background-color: #4682B4" | Quebra-cabeça | ||
|- | |- | ||
| width="5%" align="center" |''' Antes ''' <br> [[Arquivo:Puzzle_Tower_6_2.jpeg|link=]] | | width="5%" align="center" |''' Antes ''' <br> [[Arquivo:Puzzle_Tower_6_2.jpeg|link=]] | ||
| Linha 46: | Linha 59: | ||
{| class="wikitable" width="42%" | {| class="wikitable" width="42%" | ||
! colspan="2" width="20%" style="background-color: #4682B4" | | ! colspan="2" width="20%" style="background-color: #4682B4" | Mapa | ||
|- | |- | ||
| width="5%" align="center" | [[Arquivo:Mapa Tower 6.png|500px|link=]] | | width="5%" align="center" | [[Arquivo:Mapa Tower 6.png|500px|link=]] | ||
| Linha 64: | Linha 77: | ||
<center> | <center> | ||
{| class="wikitable" width="42%" | {| class="wikitable" width="42%" | ||
! colspan="2" width="50%" style="background-color: #4682B4" | | ! colspan="2" width="50%" style="background-color: #4682B4" | Portões fechados | ||
|- | |- | ||
| width="5%" align="center" |''' Acionando o piso ''' <br> [[Arquivo:Tower_6_acionando_piso.gif|400px|link=]] | | width="5%" align="center" |''' Acionando o piso ''' <br> [[Arquivo:Tower_6_acionando_piso.gif|400px|link=]] | ||
| Linha 77: | Linha 90: | ||
<center> | <center> | ||
{| class="wikitable" width="42%" | {| class="wikitable" width="42%" | ||
! colspan="2" width="50%" style="background-color: #4682B4" | | ! colspan="2" width="50%" style="background-color: #4682B4" | Salas especiais | ||
|- | |- | ||
| width="5%" align="center" |''' Cura ''' <br> [[Arquivo:Tower_6_cura.gif|400px|link=]] | | width="5%" align="center" |''' Cura ''' <br> [[Arquivo:Tower_6_cura.gif|400px|link=]] | ||
| Linha 96: | Linha 109: | ||
<center> | <center> | ||
{| class="wikitable" width="35%" | {| class="wikitable" width="35%" | ||
! colspan="2" width="20%" style="background-color: #4682B4" | | ! colspan="2" width="20%" style="background-color: #4682B4" | Pedras | ||
|- | |- | ||
| width="5%" align="center" | [[Arquivo:Pedras_Tower_6_morte.gif|400px|link=]] | | width="5%" align="center" | [[Arquivo:Pedras_Tower_6_morte.gif|400px|link=]] | ||
| Linha 104: | Linha 117: | ||
= Fontes = | = Fontes = | ||
Além de derrotar todos os | Além de derrotar todos os Pokémon existentes no mapa, os jogadores deverão encontrar 4 fontes que estarão espalhadas nas extremidades da torre e então deverão utilizar a placa tectônica correta na fonte para que seja possível energizá-la. [[Arquivo:Ultimo 5 item.png|45px|link=]] <br /> | ||
Será possível encontrar duas fontes azuis e duas vermelhas. Cada jogador deverá utilizar uma de cada cor pra energizar as duas placas tectônicas. <br /> | Será possível encontrar duas fontes azuis e duas vermelhas. Cada jogador deverá utilizar uma de cada cor pra energizar as duas placas tectônicas. <br /> | ||
| Linha 110: | Linha 123: | ||
<center> | <center> | ||
{| class="wikitable" width="42%" | {| class="wikitable" width="42%" | ||
! colspan="2" width="50%" style="background-color: #4682B4" | | ! colspan="2" width="50%" style="background-color: #4682B4" | Fontes | ||
|- | |- | ||
| width="5%" align="center" |''' Fonte vermelha ''' <br> [[Arquivo:Fonte_Tower_6_Vermelha.png|550px|link=]] | | width="5%" align="center" |''' Fonte vermelha ''' <br> [[Arquivo:Fonte_Tower_6_Vermelha.png|550px|link=]] | ||
| Linha 128: | Linha 141: | ||
<center> | <center> | ||
{| class="wikitable" width="20%" | {| class="wikitable" width="20%" | ||
! width="1%" style="background-color: #4682B4" | | ! width="1%" style="background-color: #4682B4" | Boss | ||
! width="1%" style="background-color: #4682B4" | | ! width="1%" style="background-color: #4682B4" | Item | ||
|- | |- | ||
| align="center" | | | align="center" | Shiny Salamence <br> '''[[Arquivo:Shinysalamence.png|Shiny Salamence|link=]]''' | ||
| align="center" | '''[[Arquivo:Blue wings.png|Blue Wings|link=]]''' | | align="center" | '''[[Arquivo:Blue wings.png|Blue Wings|link=]]''' | ||
|- | |- | ||
|- | |- | ||
| align="center" | | | align="center" | Shiny Magmortar <br> '''[[Arquivo:Shinymagmortar.png|Shiny Magmortar|link=]]''' | ||
| align="center" | '''[[Arquivo:Cyan topknot.png|link=]]''' | | align="center" | '''[[Arquivo:Cyan topknot.png|link=]]''' | ||
|- | |- | ||
|- | |- | ||
| align="center" | | | align="center" | Shiny Electivire <br> '''[[Arquivo:Shinyelectivire.png|Shiny Electivire|link=]]''' | ||
| align="center" | '''[[Arquivo:White volt paw.png|link=]]''' | | align="center" | '''[[Arquivo:White volt paw.png|link=]]''' | ||
|- | |- | ||
|- | |- | ||
| align="center" | | | align="center" | Shiny Scizor <br> '''[[Arquivo:Shinyscizor.png|Shiny Scizor|link=]]''' | ||
| align="center" | '''[[Arquivo:Green scizor claw.png|link=]]''' | | align="center" | '''[[Arquivo:Green scizor claw.png|link=]]''' | ||
|- | |- | ||
| Linha 160: | Linha 173: | ||
<center> | <center> | ||
{| class="wikitable" width="60%" | {| class="wikitable" width="60%" | ||
! width="31%" style="background-color: #4682B4" | | ! width="31%" style="background-color: #4682B4" | Armadilhas: | ||
! width="15%" style="background-color: #4682B4" | | ! width="15%" style="background-color: #4682B4" | Dano e efeitos: | ||
|- | |- | ||
| align="center" | '''Trap Ground'''<br> Espere as traps aparecerem e depois passe, para evitar o dano e efeito negativo.<br /> | | align="center" | '''Trap Ground'''<br> Espere as traps aparecerem e depois passe, para evitar o dano e efeito negativo.<br /> | ||
| Linha 292: | Linha 305: | ||
Ao iniciar o diálogo, o jogador deverá clicar nas Spheres na seguinte ordem: [[Arquivo:EP6vNy8.png|link=]] Rock Sphere, [[Arquivo:Y5cn4NA.png|link=]] Ice Sphere e [[Arquivo:JxDLRxB.png|link=]] Steel Sphere. | Ao iniciar o diálogo, o jogador deverá clicar nas Spheres na seguinte ordem: [[Arquivo:EP6vNy8.png|link=]] Rock Sphere, [[Arquivo:Y5cn4NA.png|link=]] Ice Sphere e [[Arquivo:JxDLRxB.png|link=]] Steel Sphere. | ||
A partir daqui, o jogador terá liberado o caminho para encontrar com o | A partir daqui, o jogador terá liberado o caminho para encontrar com o '''[[Câmara do Jirachi|Jirachi]]''' e continuar a quest. | ||
[[ | |||
''' | |||
Edição das 21h56min de 27 de janeiro de 2025
![]()
| Navegação rápida | ||||
|---|---|---|---|---|
| Embedded Tower | Primeiro ao Quarto Andar | Quinto Andar | Câmara do Jirachi | Sétimo Andar |
Introdução
Após finalizar o enredo da Tower 5, o jogador poderá desbloquear a Tower 6 utilizando 600 Tower Points (![]() )
)
Level necessário: 450 ou superior.
Modalidade: Dupla.
Tempo: 1 hora e 30 minutos.
Recompensa: 1.000.000 (1KK) de experiência e 50 Wish Points (![]() ).
).
Tower Attempts necessários: O jogador deverá ter no mínimo 6 Tower Attempts para entrar no andar. Caso conclua, serão consumidas 6 Tower Attempts. Caso falhe, serão consumidas apenas 2 Tower Attempts (de cada jogador da dupla).
Informações importantes:
1. Até que o jogador conclua pela primeira vez este andar, terá o level cap* 450. O level cap é individual, ou seja, se um dos jogadores já completou este andar uma vez, não será aplicado a ele.
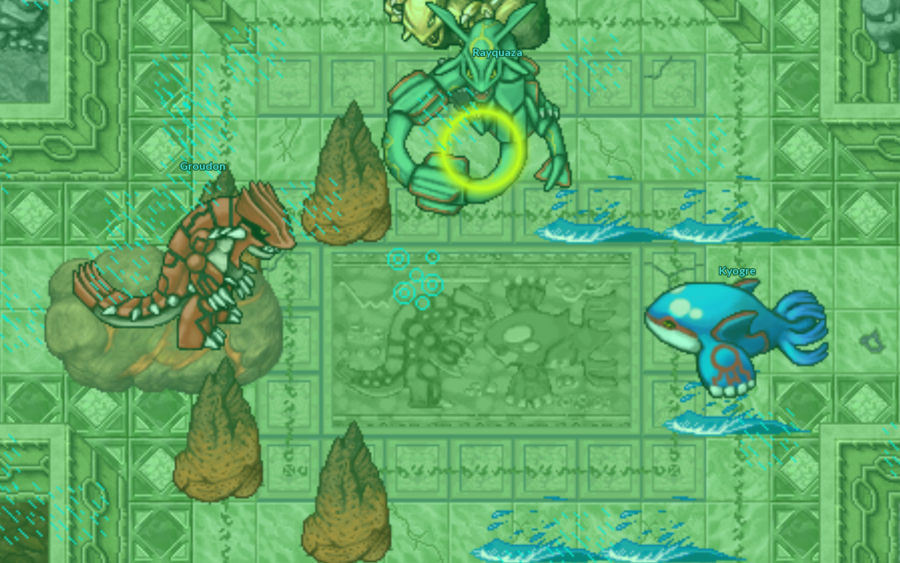
2. Neste andar existem três objetivos:
- Derrotar os 120 inimigos presentes no andar.
- Energizar as 4 placas tectônicas. Ao energizar uma placa, um Boss será liberado e o caminho ficará fechado até ele ser derrotado.
- Por fim, lurar os dois Titans (Groudon
 e Kyogre
  ) para o centro da sala. O andar apenas será finalizado quando os dois jogadores conseguirem trazer os dois Titans para dentro de sua sala.
3. É liberado o uso de Elixires neste andar.
4. É possível utilizar 20 Revives e 175 Potions/Elixires durante o andar.
5. Para liberar os portões, os jogadores deverão resolver um quebra-cabeças localizado no centro da sala.
6. Os seguintes ataques são bloqueados: Spiky Shield, Mimic Wall, Mimic, King's Shield, Reflect, Selfdestruction, Mirror Move, Mirror Coat, Magic Coat, Spirit Bomb e Sturdy.
7. Os seguintes Held Itens não possuem efeito: X-Return e Y-Regeneration.
8. Ao finalizar o andar, cada jogador receberá 50 Wish Points (![]() ) e 1.000.000 (1KK) de experiência.
) e 1.000.000 (1KK) de experiência.
Observação*: Level Cap é um sistema que deixa o jogador em um determinado level. No caso da Tower 6, o jogador ficará no level 450 até que consiga concluir o andar pela primeira vez.
Quebra-cabeça
Ao entrar no 6º andar da Embedded Tower, o jogador deverá organizar as peças de um quebra-cabeça como demonstrado abaixo:
| Quebra-cabeça | |
|---|---|
Antes 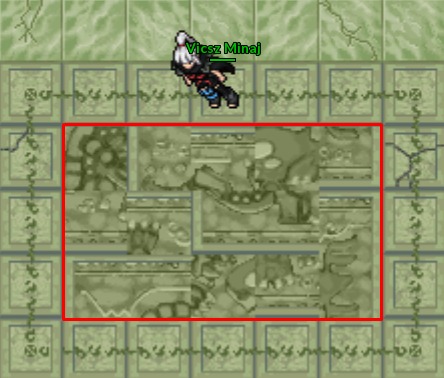
|
Depois 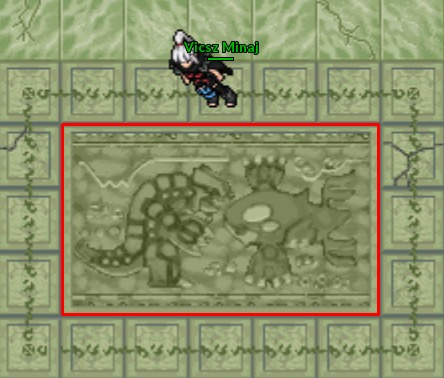
|
Após resolver o quebra-cabeça, os portões se abrirão e os jogadores poderão começar derrotar os Pokémons existentes no mapa.
| Mapa | |
|---|---|

| |
Portões fechados
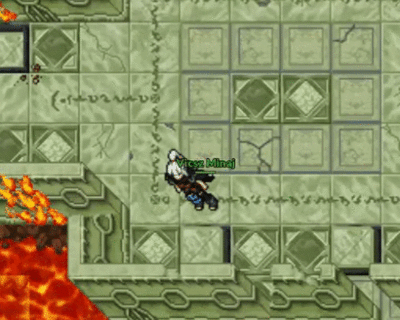
Durante o caminho os jogadores encontrarão diversos locais com portões fechados que impedem a passagem para o outro lado do mapa ou para entrar nas salas especiais onde podem ser encontradas as curas para os Pokémon.
Será possível encontrar dois tipos de portões que ativam de forma diferente:
- Portões que ficam abertos permanentemente após o jogador pisar no local correto.
- Portões que ficam abertos temporariamente apenas enquanto o jogador estiver posicionado no local correto.
Dessa forma, os jogadores deverão encontrar em um local próximo um piso que acione o portão para abri-lo, como no exemplo abaixo:
| Portões fechados | |
|---|---|
Acionando o piso 
|
Portão abrindo 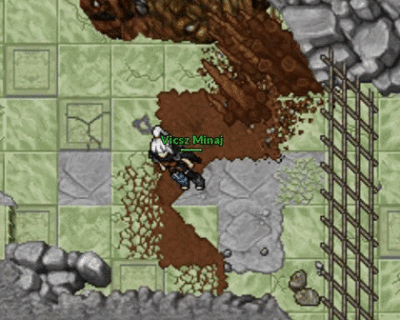
|
Como recuperar os Pokémon
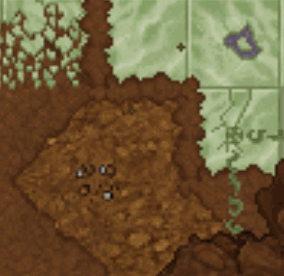
Dentro do 6º andar da Embedded Tower existem algumas salas especiais, e dentro de cada sala existem 4 pisos que poderão curar seus Pokémon ou 3 pedras cairão, podendo causar a morte do personagem.
| Salas especiais | |
|---|---|
Cura 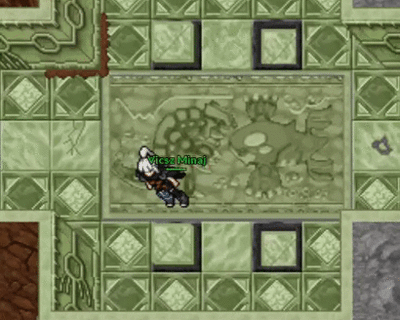
|
Pedras 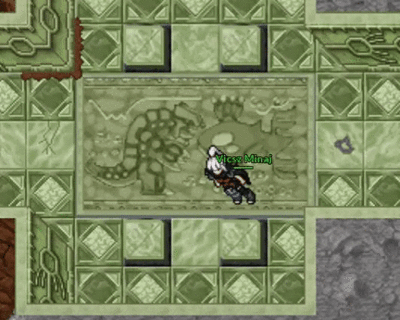
|
Importante: Sempre terão 2 pisos com cura e 2 pisos com pedras em cada sala especial.
Dica 1: Caso o jogador acione as pedras, é possível desviar andando pela diagonal, como no exemplo acima.
Dica 2: Ainda no caso das pedras, se o jogador preferir, pode posicionar seu Pokémon em um dos espaços ao redor e andar neste mesmo local em que o Pokémon está posicionado, pois ali não cairá nenhuma pedra.
Observação: Quando encontrar a cura, todos os Pokémon serão curados completamente, inclusive seus tempo de recarga.
É importante ter cuidado nesse momento, pois caso o jogador seja atingido por todas as pedras ao mesmo tempo, causarão a morte do personagem.
| Pedras | |
|---|---|
| |
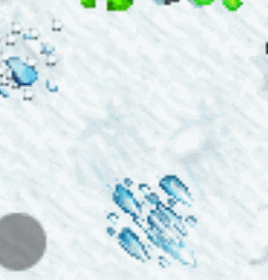
Fontes
Além de derrotar todos os Pokémon existentes no mapa, os jogadores deverão encontrar 4 fontes que estarão espalhadas nas extremidades da torre e então deverão utilizar a placa tectônica correta na fonte para que seja possível energizá-la. ![]()
Será possível encontrar duas fontes azuis e duas vermelhas. Cada jogador deverá utilizar uma de cada cor pra energizar as duas placas tectônicas.
| Fontes | |
|---|---|
Fonte vermelha 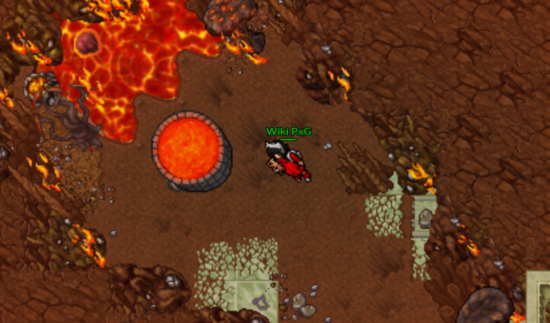
|
Fonte azul 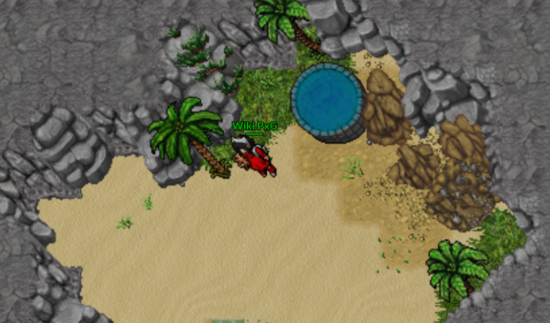
|
Ao utilizar a fonte um boss será invocado e o caminho será fechado. Os jogadores deverão derrotar o boss para que o caminho seja aberto novamente e possam continuar o progresso do andar.
Observação: Esse é um momento importante para utilizar elixires e revives para facilitar derrotar o boss invocado.
O boss invocado é totalmente aleatório, podendo ser qualquer um bosses dos andares 1 a 4 da Embedded Tower.
Quando derrotado, o caminho será reaberto e o jogador que causou mais dano ao boss receberá o item correspondente ao boss derrotado (itens que já podem ser obtidos dos mesmos bosses na Tower 1 a 4)
| Boss | Item |
|---|---|
| Shiny Salamence |
|
| Shiny Magmortar |
|
| Shiny Electivire |
|
| Shiny Scizor |
Importante: Os itens que são adquiridos ao derrotar os bosses serão utilizados na próxima parte da Quest, para ter acesso ao Jirachi ![]() .
.
Armadilhas
Neste andar existem diversas armadilhas que causam dano baseado na vida do personagem e efeitos negativos.
Em cada ambiente será possível encontrar um tipo de armadilha.
| Armadilhas: | Dano e efeitos: |
|---|---|
| Trap Ground Espere as traps aparecerem e depois passe, para evitar o dano e efeito negativo.
|
2,5% da vida máxima por hit, podendo ter até 9 hits, causa SLOW. |
| Trap Ice Semelhante com o ataque Blizzard, caem em locais predeterminados, basta desviar.
|
15% da vida máxima, não causa nenhum status negativo. |
| Trap Water Uma chuva cai em locais predeterminados, basta desviar.
|
15% da vida máxima, causando efeito SILENCE e SLOW. |
| Trap Fire Uma bola de fogo cai em locais predeterminados, basta desviar.
|
15% da vida máxima, não causa nenhum status. |
Energizando as fontes
Depois de derrotar todos os Pokémon existentes, os jogadores deverão ir até a parte central para energizar as fontes centrais e liberar o caminho.
Dessa forma, cada jogador utilizará suas duas placas tectônicas, que já estarão energizadas, nas duas fontes existentes no mapa.
|
Após as fontes estarem energizadas, os jogadores deverão escolher qual caminho seguir:
- O do Groudon e obter a Red Orb

- O da Kyogre e obter a Blue Orb

Os jogadores devem se posicionar em um piso que é facilmente visível para que o caminho seja aberto e possam ir até o final encontrar com o Titan escolhido. Ao chegarem no final do caminho, deverão clicar na Orb.
Observação 1: É indicado que os jogadores cliquem na Orb ao mesmo tempo, para que a corrida comece junto, pois o andar só será concluído se os dois Titans chegarem nas salas centrais da Tower 6.
Observação 2: É necessário ter bastante calma nessa parte. Caso o jogador dê lost no Titan, ele começará voltar para o começo do caminho e o jogador deverá voltar para buscá-lo.
Importante: Após receber a Orb correspondente ao Titan escolhido, não será mais possível trocar, ainda que a dupla falhe durante a tentativa. Ou seja, o jogador deverá escolher com sabedoria qual caminho seguir, pois será este o Pokémon utilizado para o andar seguinte.
Abaixo, clique no texto relacionado ao caminho escolhido para visualizar o caminho correto e algumas dicas:
- Ao clicar na Orb o mapa passará por uma mudança climática, acordando o Groudon, por isso durante toda a corrida começará uma constante chuva de meteoros. Caso o jogador ou Pokémon forem atingidos receberão o efeito STUN e não poderão se mover por alguns segundos, além de causar dano na vida máxima
- O Groudon sempre usará o ataque Ember a cada 5 segundos, portanto, o jogador pode usar a janela desse tempo para utilizar revive ou trocar de Pokémon.
- É recomendado que tenha um Pokémon que possa curar a vida do personagem durante o caminho, caso precise.
 |
- Ao clicar na Orb o mapa passará por uma mudança climática, acordando o Kyogre, e iniciando diversos jatos saindo da água. Caso o jogador ou Pokémon forem atingidos serão jogados para o alto, recebendo o efeito STUN e não poderão se mover, além de causar dano na vida máxima.
- O Kyogre sempre usará o ataque Bubbles a cada 5 segundos, portanto, o jogador pode usar a janela desse tempo para utilizar revive ou trocar de Pokémon.
- É recomendado que tenha um Pokémon que possa curar a vida do personagem durante o caminho, caso precise.

|
Quando ambos os jogadores levarem os dois Titans para a sala central, o objetivo será concluído e o andar finalizado, recebendo sua recompensa.
Ao finalizar, será possível assistir uma cinematic.
Cinematic
![]()
![]()
|
Recompensa: 1.000.000 (1KK) de experiência e 50 Wish Points (![]() ).
).
Continuação do enredo da Embedded Tower
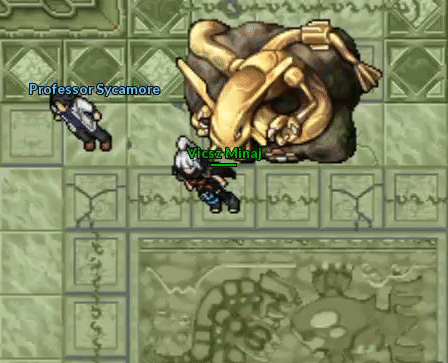
Após finalizar o sexto andar da Embedded Tower, o jogador deverá ir conversar com o Professor Birch para informar qual foi a Orb escolhida para que ele estude a Orb.
Depois disso, deverá conversar com o Professor Sycamore que pede para o jogador investigar a estátua do Rayquaza presente na Embedded Tower. Ao fazer isso, o jogador receberá 6.000.000 (6KK) de experiência e suas Tower Attempts serão resetadas.
Nesse momento o jogador deve clicar para conversar na estátua do Rayquaza conforme demonstrado:
|
Ao iniciar o diálogo, o jogador deverá clicar nas Spheres na seguinte ordem: ![]() Rock Sphere,
Rock Sphere, ![]() Ice Sphere e
Ice Sphere e ![]() Steel Sphere.
Steel Sphere.
A partir daqui, o jogador terá liberado o caminho para encontrar com o Jirachi e continuar a quest.