|
|
| (309 revisões intermediárias por 2 usuários não estão sendo mostradas) |
| Linha 1: |
Linha 1: |
| <span class="mw-customtoggle-myDivision">Botão clicável (pode ser imagem)</span>
| | =Raiz Tutoriais= |
| <div class="mw-collapsible mw-collapsed" id="mw-customcollapsible-myDivision">Conteúdo</div>
| |
| | |
| | |
| ===<span style="color:#660099">'''TABELA PARA PÁGINA DO MERCHANT'''</span>===
| |
| | |
| {| class="wikitable" width="100%"
| |
| ! colspan="2" width="17%" style="background-color: #660099" | <span style="color:white">Item</span>
| |
| ! width="10%" style="background-color: #660099" | <span style="color:white">Preço</span>
| |
| | width="1%" style="border-top-style: hidden; border-width: 1px; border-bottom-style: hidden; border-width: 1px" |
| |
| ! colspan="2" width="17%" style="background-color: #660099" | <span style="color:white">Item</span>
| |
| ! width="10%" style="background-color: #660099" | <span style="color:white">Preço</span>
| |
| |-
| |
| | width="1%" align="center" | [[Arquivo:MetalScraps.png|link=Nightmare Merchant]]|| align="center" | Metal Scraps || align="center" | $2000
| |
| | width="1%" style="border-top-style: hidden; border-width: 1px; border-bottom-style: hidden; border-width: 1px" |
| |
| | width="1%" align="center" | [[Arquivo:Nightmare Gem.png|link=Nightmare Merchant]] || align="center" | Nightmare Gem || align="center" | $216
| |
| | width="1%" style="border-top-style: hidden; border-width: 1px; border-bottom-style: hidden; border-width: 1px" |
| |
| | width="1%" align="center" | [[Arquivo:Compressed Nightmare Gems.png|link=Nightmare Merchant]] || align="center" | Compressed Nightmare Gems || align="center" | $21600
| |
| |-
| |
| | width="1%" align="center" | [[Arquivo:Bagworm Green Leaves.png|link=Nightmare Merchant]] || align="center" | Bagworm Green Leaves || align="center" | $4500
| |
| | width="1%" style="border-top-style: hidden; border-width: 1px; border-bottom-style: hidden; border-width: 1px" |
| |
| | width="1%" align="center" | [[Arquivo:Virtual Tail.png|link=Nightmare Merchant]]|| align="center" | Virtual Tail || align="center" | $4500
| |
| | width="1%" style="border-top-style: hidden; border-width: 1px; border-bottom-style: hidden; border-width: 1px" |
| |
| | width="1%" align="center" | [[Arquivo:Royal Mane.png|link=Nightmare Merchant]] || align="center" | Royal Mane || align="center" | $4500
| |
| |-
| |
| | width="1%" align="center" | [[Arquivo:Cave Nail.png|link=Nightmare Merchant]] || align="center" | Cave Nail || align="center" | $4500
| |
| | width="1%" style="border-top-style: hidden; border-width: 1px; border-bottom-style: hidden; border-width: 1px" |
| |
| | width="1%" align="center" | [[Arquivo:Land Shark Horn.png|link=Nightmare Merchant]] || align="center" | Land Shark Horn || align="center" | $4500
| |
| | width="1%" style="border-top-style: hidden; border-width: 1px; border-bottom-style: hidden; border-width: 1px" |
| |
| | width="1%" align="center" | [[Arquivo:Elefish Fin.png|link=Nightmare Merchant]] || align="center" | Elefish Fin || align="center" | $4500
| |
| |-
| |
| | width="1%" align="center" | [[Arquivo:Mole Hair.png|link=Nightmare Merchant]] || align="center" | Mole Hair || align="center" | $4500
| |
| | width="1%" style="border-top-style: hidden; border-width: 1px; border-bottom-style: hidden; border-width: 1px" |
| |
| | width="1%" align="center" | [[Arquivo:Fire Monkey Hair.png|link=Nightmare Merchant]]|| align="center" | Fire Monkey Hair || align="center" | $4500
| |
| | width="1%" style="border-top-style: hidden; border-width: 1px; border-bottom-style: hidden; border-width: 1px" |
| |
| | width="1%" align="center" | [[Arquivo:Whiskers Fin.png|link=Nightmare Merchant]] || align="center" | Whiskers Fin || align="center" | $4500
| |
| |-
| |
| | width="1%" align="center" | [[Arquivo:Savage Fin.png|link=Nightmare Merchant]] || align="center" | Savage Fin || align="center" | $4500
| |
| | width="1%" style="border-top-style: hidden; border-width: 1px; border-bottom-style: hidden; border-width: 1px" |
| |
| | width="1%" align="center" | [[Arquivo:Black Wool Ball.png|link=Nightmare Merchant]]|| align="center" | Black Wool Ball || align="center" | $3500
| |
| | width="1%" style="border-top-style: hidden; border-width: 1px; border-bottom-style: hidden; border-width: 1px" |
| |
| | width="1%" align="center" | [[Arquivo:Toxic Gosme.png|link=Nightmare Merchant]] || align="center" | Toxic Gosme || align="center" | $3500
| |
| |-
| |
| | width="1%" align="center" | [[Arquivo:Virtual Body.png|link=Nightmare Merchant]]|| align="center" | Virtual Body || align="center" | $37500
| |
| | width="1%" style="border-top-style: hidden; border-width: 1px; border-bottom-style: hidden; border-width: 1px" |
| |
| | width="1%" align="center" | [[Arquivo:Razor Claw.png|link=Nightmare Merchant]] || align="center" | Razor Claw || align="center" | $37500
| |
| | width="1%" style="border-top-style: hidden; border-width: 1px; border-bottom-style: hidden; border-width: 1px" |
| |
| | width="1%" align="center" | [[Arquivo:Bagworm Pink Leaves.png|link=Nightmare Merchant]] || align="center" | Bagworm Pink Leaves || align="center" | $45000
| |
| |-
| |
| | width="1%" align="center" | [[Arquivo:Bagworm Stone.png|link=Nightmare Merchant]]|| align="center" | Bagworm Stone || align="center" | $45000
| |
| | width="1%" style="border-top-style: hidden; border-width: 1px; border-bottom-style: hidden; border-width: 1px" |
| |
| | width="1%" align="center" | [[Arquivo:Alolan Electric Rat Tail.png|link=Nightmare Merchant]] || align="center" | Alolan Electric Rat Tail || align="center" | $45000
| |
| | width="1%" style="border-top-style: hidden; border-width: 1px; border-bottom-style: hidden; border-width: 1px" |
| |
| | width="1%" align="center" | [[Arquivo:Catfish Tail.png|link=Nightmare Merchant]] || align="center" | Catfish Tail || align="center" | $45000
| |
| |-
| |
| | width="1%" align="center" | [[Arquivo:Electric Fish Tail.png|link=Nightmare Merchant]]|| align="center" | Electric Fish Tail || align="center" | $45000
| |
| | width="1%" style="border-top-style: hidden; border-width: 1px; border-bottom-style: hidden; border-width: 1px" |
| |
| | width="1%" align="center" | [[Arquivo:Black Venom Flute.png|link=Nightmare Merchant]] || align="center" | Black Venom Flute || align="center" | $53000
| |
| | width="1%" style="border-top-style: hidden; border-width: 1px; border-bottom-style: hidden; border-width: 1px" |
| |
| | width="1%" align="center" | [[Arquivo:Mount Horn.png|link=Nightmare Merchant]] || align="center" | Mount Horn || align="center" | $53000
| |
| |-
| |
| | width="1%" align="center" | [[Arquivo:Mach Nail.png|link=Nightmare Merchant]]|| align="center" | Mach Nail || align="center" | $53000
| |
| | width="1%" style="border-top-style: hidden; border-width: 1px; border-bottom-style: hidden; border-width: 1px" |
| |
| | width="1%" align="center" | [[Arquivo:Brutal Fin.png|link=Nightmare Merchant|]] || align="center" | Brutal Fin || align="center" | $31000
| |
| | width="1%" style="border-top-style: hidden; border-width: 1px; border-bottom-style: hidden; border-width: 1px" |
| |
| | width="1%" align="center" | [[Arquivo:Gear Thorn.png|link=Nightmare Merchant]] || align="center" | Gear Thorn || align="center" | $31000
| |
| |-
| |
| | width="1%" align="center" | [[Arquivo:Solid Head.png|link=Nightmare Merchant]]|| align="center" | Solid Head || align="center" | $31000
| |
| | width="1%" style="border-top-style: hidden; border-width: 1px; border-bottom-style: hidden; border-width: 1px" |
| |
| | width="1%" align="center" | [[Arquivo:Big Boss Hat.png|link=Nightmare Merchant]] || align="center" | Big Boss Hat || align="center" | $180000
| |
| | width="1%" style="border-top-style: hidden; border-width: 1px; border-bottom-style: hidden; border-width: 1px" |
| |
| | width="1%" align="center" | [[Arquivo:Gleam Tail.png|link=Nightmare Merchant]] || align="center" | Gleam Tail || align="center" | $180000
| |
| |-
| |
| | width="1%" align="center" | [[Arquivo:Blade Horn.png|link=Nightmare Merchant]]|| align="center" | Blade Horn || align="center" | $180000
| |
| | width="1%" style="border-top-style: hidden; border-width: 1px; border-bottom-style: hidden; border-width: 1px" |
| |
| | width="1%" align="center" | [[Arquivo:Continent Thorn.png|link=Nightmare Merchant]] || align="center" | Continent Thorn || align="center" | $180000
| |
| | width="1%" style="border-top-style: hidden; border-width: 1px; border-bottom-style: hidden; border-width: 1px" |
| |
| | width="1%" align="center" | [[Arquivo:Emperor Trident.png|link=Nightmare Merchant]] || align="center" | Emperor Trident || align="center" | $180000
| |
| |-
| |
| | width="1%" align="center" | [[Arquivo:Flame Tail.png|link=Nightmare Merchant]]|| align="center" | Flame Tail || align="center" | $180000
| |
| | width="1%" style="border-top-style: hidden; border-width: 1px; border-bottom-style: hidden; border-width: 1px" |
| |
| | width="1%" align="center" | [[Arquivo:Virtual Head.png|link=Nightmare Merchant]] || align="center" | Virtual Head || align="center" | $180000
| |
| | width="1%" style="border-top-style: hidden; border-width: 1px; border-bottom-style: hidden; border-width: 1px" |
| |
| | width="1%" align="center" | [[Arquivo:Giant Tusk.png|link=Nightmare Merchant]] || align="center" | Giant Tusk || align="center" | $180000
| |
| |-
| |
| | width="1%" align="center" | [[Arquivo:Catfish Whiskers.png|link=Nightmare Merchant]]|| align="center" | Catfish Whiskers || align="center" | $66500
| |
| | width="1%" style="border-top-style: hidden; border-width: 1px; border-bottom-style: hidden; border-width: 1px" |
| |
| | width="1%" align="center" | [[Arquivo:Royal Tail.png|link=Nightmare Merchant]] || align="center" | Royal Tail || align="center" | $66500
| |
| | width="1%" style="border-top-style: hidden; border-width: 1px; border-bottom-style: hidden; border-width: 1px" |
| |
| | width="1%" align="center" | [[Arquivo:Remains Of Gears.png|link=Nightmare Merchant]] || align="center" | Remains Of Gears || align="center" | $66500
| |
| |-
| |
| | width="1%" align="center" | [[Arquivo:Mount Big Horn.png|link=Nightmare Merchant]]|| align="center" | Mount Big Horn || align="center" | $66500
| |
| | width="1%" style="border-top-style: hidden; border-width: 1px; border-bottom-style: hidden; border-width: 1px" |
| |
| | width="1%" align="center" | [[Arquivo:Mole Big Hair.png|link=Nightmare Merchant]] || align="center" | Mole Big Hair || align="center" | $66500
| |
| | width="1%" style="border-top-style: hidden; border-width: 1px; border-bottom-style: hidden; border-width: 1px" |
| |
| | width="1%" align="center" | [[Arquivo:Sun_Piece.png|link=Nightmare Merchant]]|| align="center" | Sun Piece || align="center" | $4500
| |
| |-
| |
| | width="1%" align="center" | [[Arquivo:Moon_Piece.png|link=Nightmare Merchant]]|| align="center" | Moon Piece || align="center" | $4500
| |
| | width="1%" style="border-top-style: hidden; border-width: 1px; border-bottom-style: hidden; border-width: 1px" |
| |
| | width="1%" align="center" | || align="center" | || align="center" |
| |
| | width="1%" style="border-top-style: hidden; border-width: 1px; border-bottom-style: hidden; border-width: 1px" |
| |
| | width="1%" align="center" | || align="center" | || align="center" |
| |
| |}
| |
| | |
| <br><br><br><br><br><br><br><br><br><br>
| |
| | |
|
| |
|
| == '''Guias e Sistemas''' == | | == '''Guias e Sistemas''' == |
|
| |
|
| [[Arquivo:PT-BR.png|link=]] [[Arquivo:EN.png|link=]] | | [[Arquivo:PT-BR.png|link=]] [[Arquivo:EN.png|link=]] |
| | |
| <center>[[arquivo:Banner_tutorial.jpg|link=]]</center><br /> | | <center>[[arquivo:Banner_tutorial.jpg|link=]]</center><br /> |
| | |
| | [Texto Geral sobre os tutoriais] |
|
| |
|
| [[Arquivo:Instagram.png|link=]] Casas <br> | | [[Arquivo:Instagram.png|link=]] Casas <br> |
| *[[Tutoriais:Casas#Vendendo_uma_casa_para_outro_jogador|Vendendo uma casa]] <br>
| |
| *[[Tutoriais:Casas#Funcionamento|Funcionamento do leilão de casas vazias]] <br>
| |
| *[[Tutoriais:Casas#Leil.C3.A3o_ap.C3.B3s_a_fus.C3.A3o_de_servidores|Funcionamento do leilão das casas após fusão de servidores]] <br>
| |
| [[Arquivo:Instagram.png|link=]] Device <br> | | [[Arquivo:Instagram.png|link=]] Device <br> |
| *[[Tutoriais:Device#Improved_Attachment_Device|Improved Attachment Device]] <br>
| |
| *[[Tutoriais:Device#Como_colocar_o_Held_Item_no_Device|Como colocar o Held item no Device]] <br>
| |
| *[[Tutoriais:Device#Como_colocar_o_device_no_Pok.C3.A9mon|Como colocar o device no Pokémon]] <br>
| |
| *[[Tutoriais:Device#Como_remover_o_device_do_Pok.C3.A9mon|Como remover o device do Pokémon]] <br>
| |
| *[[Tutoriais:Device#Como_retirar_o_Held_do_Device|Como retirar o Held do Device]] <br>
| |
| [[Arquivo:Instagram.png|link=]] Guilda <br> | | [[Arquivo:Instagram.png|link=]] Guilda <br> |
| [[Arquivo:Instagram.png|link=]] Headbutt <br> | | [[Arquivo:Instagram.png|link=]] Headbutt <br> |
| [[Arquivo:Instagram.png|link=]] Pesca <br> | | [[Arquivo:Instagram.png|link=]] Pesca <br> |
| *[[Tutoriais:Pesca#Pescando|Como pescar]] <br>
| |
| *[[Tutoriais:Pesca#Iscas|Tipos de iscas]] <br>
| |
| [[Arquivo:Instagram.png|link=]] Poke Party e Team Finder <br> | | [[Arquivo:Instagram.png|link=]] Poke Party e Team Finder <br> |
| * [[Poke_Party_e_Team_Finder#Como_chamar_um_jogador_para_a_Party|Criando uma Party e convidando um Jogador]]
| |
| * [[Poke_Party_e_Team_Finder#Como_aceitar_a_Party|Como aceitar a Party]]
| |
| * [[Poke_Party_e_Team_Finder#Criando_uma_Party_P.C3.BAblica|Como criar uma Party Pública]]
| |
| * [[Poke_Party_e_Team_Finder#Como_entrar_em_um_grupo_p.C3.BAblico|Como entrar em um grupo público]]
| |
| * [[Poke_Party_e_Team_Finder#Aceitando_membros_em_um_grupo_p.C3.BAblico|Como aceitar membros em um grupo público]]
| |
| * [[Poke_Party_e_Team_Finder#Saindo_de_um_grupo|Como sair de um grupo]]
| |
| * [[Poke_Party_e_Team_Finder#Fun.C3.A7.C3.B5es_da_Poke_Party|Configurações de uma Party]]
| |
| * [[Poke_Party_e_Team_Finder#Informa.C3.A7.C3.B5es|Informações adicionais]]
| |
| [[Arquivo:Instagram.png|link=]] Viagens <br> | | [[Arquivo:Instagram.png|link=]] Viagens <br> |
| *[[Tutoriais:Viagens#Metr.C3.B4|Metrô]]
| |
| * [[Tutoriais:Viagens#NPC_Aviator|NPC Aviator (Pidgeot)]] <br>
| |
| * [[Tutoriais:Viagens#NPC_Fastroad_Manager|NPC Fastroad Manager (Moto)]]
| |
| * [[Tutoriais:Viagens#NPC_Nurse_Joy|NPC Nurse Joy (Canoa)]]
| |
| * [[Tutoriais:Viagens#NPC_Tracey|NPC Tracey (Lapras)]]
| |
| * [[Tutoriais:Viagens#Navio|Navio]]
| |
| * [[Tutoriais:Viagens#Submarino|Submarino]]
| |
| [[Arquivo:Instagram.png|link=]] Safari <br> | | [[Arquivo:Instagram.png|link=]] Safari <br> |
| [[Arquivo:Instagram.png|link=]] Sistema de Boost <br> | | [[Arquivo:Instagram.png|link=]] Sistema de Boost <br> |
| Linha 151: |
Linha 21: |
| [[Arquivo:Instagram.png|link=]] Sistema de Segurança <br> | | [[Arquivo:Instagram.png|link=]] Sistema de Segurança <br> |
| [[Arquivo:Instagram.png|link=]] Smeargle <br> | | [[Arquivo:Instagram.png|link=]] Smeargle <br> |
| *[[Tutoriais:Smeargle#Como_usar_um_Sketch|Como escolher os golpes para o seu smeargle]] <br>
| |
| *[[Tutoriais:Smeargle#Como_Resetar_os_Sketchs|Resetando os golpes do smeargle]] <br>
| |
| *[[Tutoriais:Smeargle#Ataques_Bloqueados|Golpes bloqueados]] <br>
| |
|
| |
|
| | ='''up'''= |
|
| |
|
| | = Guia Básico = |
|
| |
|
| | Neste guia, abordaremos algumas opções de locais de caça e Pokémon recomendados, baseados nas faixas de level entre 20 e 50. <br> |
| | Para acessar cada tutorial, '''clique em uma das PokéBalls abaixo''', referente ao tutorial desejado. |
|
| |
|
| | <span class="mw-customtoggle-myDivision7"><font size="2"> [[Arquivo:Pokeball.png|15px|link=]] '''Caçar Pokémon do elemento Grass na floresta de Cerulean''' </font></span> |
| | <div class="mw-collapsible mw-collapsed" id="mw-customcollapsible-myDivision7"> |
|
| |
|
| == Continuação Early Game Quest ==
| | {| class="wikitable" width="50%" |
| | | !align="left" style="background-color: #9d1a64 " colspan="3" | <span style="color:white">Local</span> |
| <center>[[Arquivo:Banner-early-game-temporário.png|link=Early Game Quest]]</center>
| |
| | |
| <span style="color:red">'''Nível necessário:</span> 5 <br>
| |
| <span style="color:red">'''Recompensa: </span> Diversas.<br>
| |
| | |
| ==<font size='4'><span style="color: OrangeRed">'''Pallet'''</span></font>==
| |
| | |
| | |
| Olá Treinador! O Professor Oak recebeu uma carta do pesquisador Bill para ajuda-lo em sua pesquisa de Pokémon e designou você a esta tarefa e pediu para coletar algumas informações com seus assistentes.
| |
| A primeira é a '''Crystal''', que está do lado de fora do laboratório.
| |
| | |
| [[Arquivo:Oak2.PNG|link=Early Game Quest]]
| |
| | |
| Ao aceitar a tarefa, ele vai te entregar uma carta ([[Arquivo:Oak_carta1.png|link=Early Game Quest]])
| |
| | |
| Fale com Crystal, a primeira assistente do professor oak.Ela te dará uma missão, no entanto a partir de uma condição, que você conheça um pouco sobre os Pokémon com ajuda dos moradores da cidade de Pallet.
| |
| Entregue a carta a ela. Sua primeira aula será sobre sobrevivência.
| |
| | |
| [[Arquivo:Cryysstal.png|link=Early Game Quest]]
| |
| | |
| Crystal me disse para visitar '''Daisy Oak''' ao norte daqui, a fim de obter algumas instruções sobre como sobreviver no campo.
| |
| | |
| ===<span style="color: OrangeRed">'''Daisy Oak'''</span>===
| |
| <span style="color:red">'''Obs.:'''</span> Esse NPC só irá oferecer a tarefa/missão, caso já tenha iniciado o dialogo com o [[Early_Game_Quest#Pallet|Professor Oak]]. <br>
| |
| | |
| [[Arquivo:Daisyoak.jpg|link=Early Game Quest]]
| |
| | |
| Após te desejar boas vindas, Dayse reconhece você como um novo treinador do avô dela e decide iniciar o seu treinamento básico, aprender nunca é demais!
| |
| | |
| A coisa mais importante que você precisa saber é sobre '''poções'''!
| |
| | |
| As poções são os melhores recursos para ajuda-lo(a) a ficar mais tempo no campo. Se você não tiver poções, deverá retornar ao Centro Pokémon com frequência para curar seus Pokémon.
| |
| | |
| <span style="color: OrangeRed">'''Poções:'''</span>
| |
| {| class="wikitable" width="40%" | |
| ! width="31%" style="background-color: OrangeRed" | <span style="color:white">Como usar:</span> | |
| | width="3%" style="border-top-style: hidden; border-width: 1px; border-bottom-style: hidden; border-width: 1px" |
| |
| ! width="32%" style="background-color: OrangeRed" | <span style="color:white">Onde Conseguir:</span>
| |
| |- align="center" | | |- align="center" |
| | [[Arquivo:Po.PNG|290px|link=Early Game Quest]] | | | colspan="3" | [[Arquivo:Location GWT.png|link=]] |
| | |
| As poções são muito simples de usar. Basta clicar com o botão direito na poção que deseja usar e, em seguida, clicar no seu pokemon ou no nome dele na aba Batalha com o botão esquerdo.
| |
| | width="4%" style="border-top-style: hidden; border-width: 1px; border-bottom-style: hidden; border-width: 1px" |
| |
| | [[Arquivo:Merc.jpg|300px|link=Early Game Quest]] | |
| | |
| A principal fonte de poções está no Mark, uma loja que há no mundo todo. Você pode simplesmente compra-las conversando com o vendedor.
| |
| | |
| | |
| |-
| |
| |}
| |
| | |
| Ao terminar seu treinamento, você deve voltar até a Crystal.
| |
| | |
| <span style="color: OrangeRed">'''Recompensa:'''</span>
| |
| | |
| {| class="wikitable" style="width: 10%;"
| |
| |-
| |
| ! scope="col" width="10%"| 25 Small Potions
| |
| |- style="width:50px; text-align:center;"
| |
| | [[Arquivo:SmallPotion.png|link=Early Game Quest]]
| |
| |}
| |
| | |
| ===<span style="color: OrangeRed">'''Sr. Steven'''</span>===
| |
| <span style="color:red">'''Obs.:'''</span> Esse NPC só irá oferecer a tarefa/missão, caso já tenha iniciado o dialogo com o [[Early_Game_Quest#Pallet|Professor Oak]]. <br>
| |
| | |
| Sua próxima visita será ao '''Sr Steven'''. Ele era um treinador, então provavelmente será muito útil. Escolha um Pokémon para dar início ao tutorial.
| |
| | |
| [[Arquivo:Steveen.PNG|link=Early Game Quest]]
| |
| | |
| Você receberá algumas dicas sobre as forças e fraquezas do elemento de seu novo parceiro. É muito importante aprender sobre os elementos dos seus Pokémon, pois isso vai facilitar bastante o seu jogo.
| |
| | |
| Para ajudar em suas escolhas de Pokémon, você pode usar sua Pokédex para descobrir quais tipo são efetivos contra seu oponente:
| |
| | |
| <span style="color: OrangeRed">'''Pokédex:'''</span>
| |
| {| class="wikitable" width="40%"
| |
| ! width="31%" style="background-color: OrangeRed" | <span style="color:white">Efetividade:</span>
| |
| | width="3%" style="border-top-style: hidden; border-width: 1px; border-bottom-style: hidden; border-width: 1px" |
| |
| ! width="32%" style="background-color: OrangeRed" | <span style="color:white">Efetividade:</span>
| |
| |- align="center" | | |- align="center" |
| | [[Arquivo:Efetividades1.png|460px|link=Early Game Quest]] | | | '''Level recomendado''': |
| | width="4%" style="border-top-style: hidden; border-width: 1px; border-bottom-style: hidden; border-width: 1px" | | | 20 ao 30 |
| | [[Arquivo:Efetiv.png|460px|link=Early Game Quest]] | | |'''Efetividades''': |
| | [[Arquivo:Fire.png|link=]] [[Arquivo:Flying.png|link=]] [[Arquivo:Poison1.png|link=Malefic]] [[Arquivo:Ice.png|link=Seavell]] [[Arquivo:Bug.png|link=Naturia]] |
| | |'''Pokémon Recomendados''': |
| | [[arquivo:004-Charmander.png|link=Charmander]] [[Arquivo:004-Shiny_Charmander.png|link=Shiny Charmander]] [[arquivo:017-Pidgeotto.png|link=Pidgeotto]] [[arquivo:037-Vulpix.png|link=Vulpix]] [[File:048-Sh_Venonat.png|link=Shiny Venonat]] [[File:072-Sh_Tentacool.png|link=Shiny Tentacool]] [[arquivo:077-Ponyta.png|link=Ponyta]] <br> [[File:088-Sh_Grimer.png|link=Shiny Grimer]] [[File:155-Cyndaquil.png|link=Cyndaquil]] [[Arquivo:155-Shiny_Cyndaquil.png|link=Shiny Cyndaquil]] [[File:255-Torchic.png|link=Torchic]] |
| | [[Arquivo:255-Shiny_Torchic.png|link=Shiny Torchic]] [[File:513.png|link=Pansear]] |
| | [[Arquivo:616-Shelmet.png|link=Shelmet]] |
| |- | | |- |
| | | colspan="3" |[[Arquivo:Attention-icon.png|20px|link=]] '''Atenção''': |
| | * Lembre-se de levar bastante Potions e Medicines, para manter seus Pokémon vivos! |
| |} | | |} |
| | </div> |
|
| |
|
| | <span class="mw-customtoggle-myDivision8"><font size="2"> [[Arquivo:Pokeball.png|15px|link=]] '''Caçar Pokémon do elemento Electric na ilha de Hamlin'''</font></span> |
| | <div class="mw-collapsible mw-collapsed" id="mw-customcollapsible-myDivision8"> |
|
| |
|
| | | {| class="wikitable" width="50%" |
| Caso você tenha escolhido algum dos Pokémon iniciais de Fogo, Charmander ([[Arquivo: 004-Charmander.png|link=Early Game Quest]]),Cyndaquil ([[Arquivo: 155-Cyndaquil.png|link=Early Game Quest]]),Torchic ([[Arquivo: 255-Torchic.png|link=Early Game Quest]]), sua aula será:
| | !align="left" style="background-color: #9d1a64 " colspan="3" | <span style="color:white">Local</span> |
| | |
| [[Arquivo:Fogo_dex.png|link=Early Game Quest]] <br/>
| |
| | |
| Caso você tenha escolhido algum dos Pokémon iniciais de Planta, Bulbasaur ([[Arquivo: 001-Bulbasaur.png|link=Early Game Quest]]), Chikorita ([[Arquivo: 152-Chikorita.png|link=Early Game Quest]]), Treecko ([[Arquivo: 252-Treecko.png|link=Early Game Quest]]), sua aula será:
| |
| | |
| [[Arquivo:Planta_dex.png|link=Early Game Quest]] <br/>
| |
| | |
| Caso você tenha escolhido algum dos Pokémon iniciais de Água, Squirtle ([[Arquivo: 007-Squirtle.png|link=Early Game Quest]]),Totodile ([[Arquivo: 158-Totodile.png|link=Early Game Quest]]),Mudkip ([[Arquivo: 258-Mudkip.png|link=Early Game Quest]]), sua aula será:
| |
| | |
| [[Arquivo:Agua_dex.png|link=Early Game Quest]] <br/>
| |
| | |
| | |
| Sua missão será de captura:
| |
| | |
| Se você escolher um Pokémon tipo '''Água''', terá que capturar um Pidgey ([[Arquivo:016-Pidgey.png|23px|link=Early Game Quest]])
| |
| | |
| Se você escolher um Pokémon tipo '''Planta''', terá que capturar um Geodude ([[Arquivo:074-Geodude.png|30px|link=Early Game Quest]])
| |
| | |
| Se você escolher um Pokémon tipo '''Fogo''', terá que capturar um Bellsprout ([[Arquivo:069-Bellsprout.png|30px|link=Early Game Quest]])
| |
| | |
| | |
| Steven te dá algumas Poké Ball para a missão. Suba as escadas, e pegue-as em uma caixa de papelão (imagem abaixo).
| |
| | |
| * Caixa 1 = Pokémon de <span style="color: #008000">'''Planta'''</span>. <br/>
| |
| * Caixa 2 = Pokémon de <span style="color: #FF0000">'''Fogo'''</span>. <br/>
| |
| * Caixa 3 = Pokémon de <span style="color: #0000FF">'''Água'''</span>. <br/>
| |
| | |
| Após a captura, entregue a missão ao Steven.
| |
| | |
| [[Arquivo:Sssssssss.PNG|350px|link=Early Game Quest]]
| |
| | |
| {| class="wikitable" style="width: 10%;"
| |
| ! scope="col" width="10%"| 20 Empty Poké Balls.
| |
| |- align="center"
| |
| | [[Arquivo:Poke-ball%281%29.png|link=Early Game Quest]]
| |
| |}
| |
| | |
| Você encontrou as pokébolas de que Steven estava falando. Volte até ele agora.
| |
| | |
| Agora que terminou sua visita com Steven, você deve voltar até a Crystal.
| |
| | |
| <span style="color: OrangeRed">'''Recompensa:'''</span>
| |
| | |
| {| class="wikitable" width="10%" | |
| ! scope="col" width="10%" align="center" style="background-color: OrangeRed" padding: 5px;" | <span style="color: white">'''Experiência'''</span> | |
| |- align="center" | | |- align="center" |
| | style="font-weight: bold; ; padding: 5px;" | 1500 de Exp. | | | colspan="3" | [[Arquivo:Location EM.png|link=]] |
| <!--T:28-->
| |
| |}
| |
| | |
| Crystal me disse para visitar '''Delia Ketchum''' em sua casa agora. Isso provavelmente será interessante.
| |
| | |
| ===<span style="color: OrangeRed">'''Delia Ketchum'''</span>===
| |
| <span style="color:red">'''Obs.:'''</span> Esse NPC só irá oferecer a tarefa/missão, caso já tenha iniciado o dialogo com o [[Early_Game_Quest#Pallet|Professor Oak]]. <br>
| |
| | |
| [[Arquivo:Delia_ket.PNG|link=Early Game Quest]]
| |
| | |
| Delia pede para você enfrentar alguns Pokemon ao redor de Pallet. Te entrega algumas Poke ball, que se encontra no andar de cima de sua casa (como mostra a imagem):
| |
| | |
| [[Arquivo:Delia_2andar.PNG|400px|link=Early Game Quest]] | |
| | |
| {| class="wikitable" style="width:10%;"
| |
| ! scope="col" width="10%"| 10 Empty Poké Balls.
| |
| |- align="center" | | |- align="center" |
| | [[Arquivo:Poke-ball%281%29.png|link=Early Game Quest]] | | | '''Level recomendado''': |
| |}
| | 20 ao 30 |
| | | |'''Efetividades''': |
| Sua tarefa agora será '''derrotar''' e '''capturar''' alguns Pokemon.
| | [[Arquivo:Ground.png|link=]] |
| | | |'''Pokémon Recomendados''': |
| <span style="color: OrangeRed">'''Derrotar: (1)'''</span>
| | [[File:027-Sandshrew.png|link=Sandshrew]] [[arquivo:104-Cubone.png|link=Cubone]] [[File:104-Sh_Cubone.png|link=Shiny Cubone]] [[File:328-Trapinch.png|link=Trapinch]] |
| | |
| {| class="wikitable" style="width:12%;"
| |
| |-
| |
| ! scope="col" width="5%"| 7x Bellsprout
| |
| ! scope="col" width="5%"| 7x Caterpie
| |
| |- style="width:50px; text-align:center;"
| |
| | [[Arquivo:069-Bellsprout.png|30px|link=Early Game Quest]]
| |
| | [[Arquivo:010-Caterpie.png|20px|link=Early Game Quest]]
| |
| |}
| |
| | |
| <span style="color: OrangeRed">'''Derrotar: (2)'''</span>
| |
| | |
| {| class="wikitable" style="width:12%;"
| |
| |-
| |
| ! scope="col" width="5%"| 7x Geodude
| |
| ! scope="col" width="5%"| 7x Pidgey
| |
| |- style="width:50px; text-align:center;"
| |
| | [[Arquivo:074-Geodude.png|30px|link=Early Game Quest]]
| |
| | [[Arquivo:016-Pidgey.png|23px|link=Early Game Quest]]
| |
| |}
| |
| | |
| <span style="color: OrangeRed">'''Capturar:'''</span>
| |
| | |
| {| class="wikitable" style="width:10%;"
| |
| |- | | |- |
| ! scope="col" width="2%"| Bellsprout
| | | colspan="3" |[[Arquivo:Attention-icon.png|20px|link=]] '''Atenção''': |
| ! scope="col" width="2%"| Caterpie
| | Lembre-se de levar Potions, para se manter mais tempo no respawn. |
| ! scope="col" width="2%"| Geodude
| |
| ! scope="col" width="2%"| Pidgey
| |
| |- style="width:50px; text-align:center;"
| |
| | [[Arquivo:069-Bellsprout.png|30px|link=Early Game Quest]]
| |
| | [[Arquivo:010-Caterpie.png|20px|link=Early Game Quest]] | |
| | [[Arquivo:074-Geodude.png|30px|link=Early Game Quest]]
| |
| | [[Arquivo:016-Pidgey.png|23px|link=Early Game Quest]]
| |
| |}
| |
| | |
| Ao concluir cada tarefa, volte para Delia Ketchum.
| |
| | |
| <span style="color: OrangeRed">'''Recompensas:'''</span>
| |
| | |
| {| class="wikitable" width="15%"
| |
| ! scope="col" width="10%" align="center" style="background-color: OrangeRed" padding: 5px;" | <span style="color: white">'''Experiência Por Derrotar 1'''</span>
| |
| |- align="center"
| |
| | style="font-weight: bold; ; padding: 5px;" | 780 de Exp.
| |
| <!--T:28-->
| |
| |}
| |
| | |
| {| class="wikitable" width="15%"
| |
| ! scope="col" width="10%" align="center" style="background-color: OrangeRed" padding: 5px;" | <span style="color: white">'''Experiência Por Derrotar 2'''</span>
| |
| |- align="center"
| |
| | style="font-weight: bold; ; padding: 5px;" | 780 de Exp.
| |
| <!--T:28-->
| |
| |}
| |
| | |
| {| class="wikitable" width="15%"
| |
| ! scope="col" width="10%" align="center" style="background-color: OrangeRed" padding: 5px;" | <span style="color: white">'''Experiência Por Capturar'''</span>
| |
| |- align="center"
| |
| | style="font-weight: bold; ; padding: 5px;" | 1500 de Exp.
| |
| <!--T:28-->
| |
| |}
| |
| | |
| Agora que você concluiu seu treinamento com os residentes locais, Crystal te dará o relatório. ([[Arquivo:6_carta.png|link=Early Game Quest]])
| |
| | |
| Vá até a cidade de Viridian e encontre-se com a npc Ruby e dar início a mais uma aventura.
| |
| | |
| ===<span style="color: OrangeRed">'''Localizações'''</span>===
| |
| | |
| [[Arquivo:Loc_pallet.jpg|link=Early Game Quest]]
| |
| | |
| <!--T:15-->
| |
| <b>1 ▸</b> Crystal.
| |
| | |
| <!--T:16-->
| |
| <b>2 ▸</b> Daisy Oak.
| |
| | |
| <!--T:17-->
| |
| <b>3 ▸</b> Sr Steven.
| |
| | |
| <!--T:18-->
| |
| <b>4 ▸</b> Delia Ketchum.
| |
| | |
| ==<font size='4'><span style="color: OrangeRed">'''Viridian'''</span></font>==
| |
| | |
| ===<font size='4'><span style="color: OrangeRed">'''Ruby'''</span></font>===
| |
| | |
| Olá treinador(a)! Em primeiro lugar, Entregue a carta a '''Ruby''' para que ela possa começar a escrever o relatório.
| |
| | |
| {| class="wikitable" width="20%"
| |
| ! scope="col" width="10%" align="center" style="background-color: OrangeRed" padding: 5px;" | <span style="color: white">'''Experiência'''</span>
| |
| |- align="center"
| |
| | style="font-weight: bold; ; padding: 5px;" | 1000 de Exp.
| |
| <!--T:28-->
| |
| |} | | |} |
| | </div> |
|
| |
|
| Ruby recomenda que você visite o Centro Pokémon ao noroeste para curar seus Pokémon. Você terá a localização marcada em seu minimapa.
| | <span class="mw-customtoggle-myDivision9"><font size="2"> [[Arquivo:Pokeball.png|15px|link=]] '''Caçar Pokémon do elemento Fire em Cinnabar (VIP)'''</font></span> |
| | | <div class="mw-collapsible mw-collapsed" id="mw-customcollapsible-myDivision9"> |
| [[Arquivo:Mapa8.PNG|link=Early Game Quest]] | |
| | |
| <!--T:15--> | |
| <b>1 ▸</b> Ruby
| |
|
| |
|
| <!--T:16-->
| |
| <b>2 ▸</b> Centro Pokemon
| |
|
| |
| <!--T:17-->
| |
| <b>3 ▸</b> Mark
| |
|
| |
| <!--T:18-->
| |
| <b>4 ▸</b> NPC Cohen
| |
|
| |
| Você também pode trocar de cidade natal para Viridian, se desejar. Desta forma, você será enviado(a) ao Centro Pokémon de Viridian quando for derrotado (a), em vez de sua cidade natal atual (Pallet). Se você quiser troca-la, fale com NPC Cohen no Centro Pokémon, e ele fará isso por você.
| |
|
| |
| [[Arquivo:1Cohen2.PNG|link=Early Game Quest]]
| |
|
| |
| Provavelmente você ainda não conheça o Mark, Ruby dará uma breve aula de como usa-lo.
| |
|
| |
| <span style="color: OrangeRed">'''Mark:'''</span>
| |
| {| class="wikitable" width="50%" | | {| class="wikitable" width="50%" |
| ! width="35%" style="background-color: OrangeRed" | <span style="color:white">Loja Geral</span> | | !align="left" style="background-color: #9d1a64 " colspan="3" | <span style="color:white">Local</span> |
| | width="1%" style="border-top-style: hidden; border-width: 1px; border-bottom-style: hidden; border-width: 1px" |
| |
| ! width="30%" style="background-color: OrangeRed" | <span style="color:white">Mercado</span>
| |
| |- align="center"
| |
| | [[Arquivo:Market1.PNG|400px|link=Early Game Quest]]
| |
| | |
| Mark é uma loja geral. Aqui você pode vender a maioria de seus produtos e comprar suprimentos mais valiosos e úteis de que precisará em sua viagem. Para começar a comprar, basta falar com o vendedor.
| |
| | |
| | |
| | |
| | width="3%" style="border-top-style: hidden; border-width: 1px; border-bottom-style: hidden; border-width: 1px" |
| |
| | [[Arquivo:4market2.PNG|500px|link=Early Game Quest]]
| |
| | |
| | |
| | |
| | |
| Este também é o lugar onde você pode acessar o mercado e vender ou comprar coisas de outros players. Para acessar o mercado, basta clicar com o direito no painel azul. Tudo o que for comprado ou vendido no mercado será enviado a sua caixa do mercado, que é a caixa azul ao lado do painel. Você também pode acessar a caixa do mercado clicando com o botão direito nela.
| |
| | |
| | |
| | |
| | |
| |-
| |
| |}
| |
| | |
| Ruby indicará alguns cidadãos de Viridian para dar inicio a sua jornada.
| |
| | |
| '''Obs''':Você terá total liberdade de escolher a ordem em que os visitará, mas ela só devolverá a carta após você visitar todos.
| |
| | |
| Os cidadãos que precisa visitar são: <span style="color:OrangeRed"><b>'''Guru''', '''Mia''', '''Arnold''', '''Meiko''', '''Louie''','''Tara''' e '''Paul'''</b></span>. Todas as localizações deles estão marcadas com um ponto de exclamação laranja no seu minimapa, volte a Ruby quando terminar todas as visitas.
| |
| | |
| ===<span style="color:OrangeRed"><b>'''Arnold'''</b></span>===
| |
| <span style="color:red">'''Obs.:'''</span> Esse NPC só irá oferecer a tarefa/missão, caso já tenha iniciado o dialogo com o [[Early_Game_Quest#Pallet|Professor Oak]]. <br>
| |
| | |
| [[Arquivo:Arnold.PNG|link=Early Game Quest]]
| |
| | |
| Arnold pede pra ter muito cuidado com o Mankey, um Pokémon do tipo lutador, que vive em algumas cabanas de madeira na floresta ao oeste.
| |
| | |
| Ele passava por lá quando foi atacado, perdeu um livro muito importante durante o ataque. Arnold marcou o local do ataque no seu minimapa, volte quando concluir a sua missão.
| |
| | |
| {| class="wikitable" width="15%"
| |
| ! width="15%" style="background-color: OrangeRed" | <span style="color:white">Localização do Ataque</span>
| |
| | width="5%" style="border-top-style: hidden; border-width: 1px; border-bottom-style: hidden; border-width: 1px" |
| |
| ! width="15%" style="background-color: OrangeRed" | <span style="color:white">Localização do Livro</span>
| |
| |- align="center" | | |- align="center" |
| | [[Arquivo:Arnold_mapa_01.PNG|link=Early Game Quest]] | | | colspan="3" | [[Arquivo:Location CVP.png|link=]] |
| | width="4%" style="border-top-style: hidden; border-width: 1px; border-bottom-style: hidden; border-width: 1px" |
| |
| | [[Arquivo:Arnold_mapa_02.PNG|link=Early Game Quest]] | |
| |-
| |
| |}
| |
| | |
| | |
| '''Obs''': Será uma missão tripla. Você pode fazer esta missão com seus amigos.
| |
| | |
| <span style="color: OrangeRed">'''Missão:'''</span>
| |
| | |
| | |
| <span style="color: Black">'''Derrotar:'''</span>
| |
| {| class="wikitable" style="width:10%;"
| |
| ! scope="col" width="10%"| 25 Mankeys
| |
| |-
| |
| | [[Arquivo:056-Mankey.png|link=Early Game Quest]]
| |
| |}
| |
| | |
| <span style="color: Black">'''Capturar:'''</span>
| |
| {| class="wikitable" style="width:10%;"
| |
| ! scope="col" width="10%"| Mankey
| |
| |-
| |
| | [[Arquivo:056-Mankey.png|link=Early Game Quest]]
| |
| |}
| |
| | |
| <span style="color: Black">'''Encontrar e Resgatar:'''</span>
| |
| {| class="wikitable" style="width:10%;"
| |
| ! scope="col" width="10%"| Livro
| |
| |-
| |
| | [[Arquivo:Arnold9u.png|link=Early Game Quest]]
| |
| |}
| |
| Volte até Arnold quando terminar a sua missão.
| |
| | |
| Além disso, Arnold te ensinará uma habilidade que o Mankey tem. É chamada Headbutt.
| |
| | |
| <span style="color: OrangeRed">'''Habilidade:'''</span>
| |
| {| class="wikitable" width="15%"
| |
| ! width="15%" style="background-color: OrangeRed" | <span style="color:white">Headbutt</span>
| |
| |- align="center" | | |- align="center" |
| | [[Arquivo:Headbrnold.jpg|290px|link=Early Game Quest]] | | | '''Level recomendado''': |
| | | 20 ao 30 |
| Seu Mankey tem uma habilidade especial chamada “Headbutt”. Ela pode ser usada em algumas arvores para derrubar alguns Pokémon delas.
| | |'''Efetividades''': |
| Para essa habilidade, basta “ordenar” em uma arvore que está movimentando seus galhos e, então, seu Pokémon derrubará alguns Pokémon de lá.
| | [[Arquivo:Water.png|link=Seavell]] [[Arquivo:Ground.png|link=Orebound]] [[Arquivo:Rock.png|link=Orebound]] |
| Seja cuidadoso (a)! Alguns Pokémon dessas arvores podem ser muito fortes!
| | |'''Pokémon Recomendados''': |
| | [[File:007-Squirtle.png|link=Squirtle]] [[Arquivo:007-Shiny_Squirtle.png|link=Shiny Squirtle]] [[File:027-Sandshrew.png|link=Sandshrew]] [[File:072-Sh_Tentacool.png|link=Shiny Tentacool]] [[arquivo:104-Cubone.png|link=Cubone]] <br> |
| | [[File:104-Sh_Cubone.png|link=Shiny Cubone]] [[File:120-Staryu.png|link=Staryu]] [[File:138-Omanyte.png|link=Omanyte]] [[File:158-Totodile.png|link=Totodile]] [[Arquivo:158-Shiny_Totodile.png|link=Shiny Totodile]] <br> |
| | [[File:183-Marill.png|link=Marill]] [[File:194-Wooper.png|link=Wooper]] [[File:258-Mudkip.png|link=Mudkip]] [[Arquivo:258-Shiny_Mudkip.png|link=Shiny Mudkip]] [[File:270-Lotad.png|link=Lotad]] <br> |
| | [[File:283_Surskit_sp.png|link=Surskit]] [[File:318.png|link=Carvanha]] [[File:328-Trapinch.png|link=Trapinch]] [[File:347-Anorith.png|link=Anorith]] [[File:557-Dwebble.png|link=Dwebble]] |
| |- | | |- |
| | | colspan="3" |[[Arquivo:Attention-icon.png|20px|link=]] '''Atenção''': |
| | * Não se esqueça de levar medicines e revives para sua proteção. |
| | * Existe uma missão de derrotar [[Arquivo:037-Vulpix.png|link=Vulpix]] Vulpix e [[Arquivo:077-Ponyta.png|link=Ponyta]] Ponyta, que concederá alguns pontos de experiência ao ser concluída. Para mais informações, veja [[Tasks#Cinnabar|este link]]. |
| |} | | |} |
| | </div> |
|
| |
|
| <span style="color: OrangeRed">'''Recompensas:'''</span> | | <span class="mw-customtoggle-myDivision910"><font size="2"> [[Arquivo:Pokeball.png|15px|link=]] '''Caçar Pokémon do elemento Earth em Vermilion'''</font></span> |
| | <div class="mw-collapsible mw-collapsed" id="mw-customcollapsible-myDivision910"> |
|
| |
|
| {| class="wikitable" width="15%" | | {| class="wikitable" width="50%" |
| ! scope="col" width="5%" align="center" style="background-color: OrangeRed" padding: 5px;" | <span style="color: white">'''Experiência Por Derrotar'''</span> | | !align="left" style="background-color: #9d1a64 " colspan="3" | <span style="color:white">Local</span> |
| |- align="center"
| |
| | style="font-weight: bold; ; padding: 5px;" | 1400 de Exp.
| |
| <!--T:28-->
| |
| |}
| |
| | |
| {| class="wikitable" width="15%"
| |
| ! scope="col" width="5%" align="center" style="background-color: OrangeRed" padding: 5px;" | <span style="color: white">'''Experiência Por Capturar'''</span>
| |
| |- align="center"
| |
| | style="font-weight: bold; ; padding: 5px;" | 1400 de Exp.
| |
| <!--T:28-->
| |
| |}
| |
| | |
| {| class="wikitable" width="20%"
| |
| ! scope="col" width="5%" align="center" style="background-color: OrangeRed" padding: 5px;" | <span style="color: white">'''Recompensa Por Encontrar o Livro'''</span>
| |
| |- align="center" | | |- align="center" |
| | style="font-weight: bold; ; padding: 5px;" | 150 dollars. | | | colspan="3" | [[Arquivo:Location Digletts Vermilion.png|link=]] |
| <!--T:28-->
| |
| |}
| |
| | |
| {| class="wikitable" width="20%"
| |
| ! scope="col" width="5%" align="center" style="background-color: OrangeRed" padding: 5px;" | <span style="color: white">'''Experiência Por Recuperar o Livro'''</span>
| |
| |- align="center"
| |
| | style="font-weight: bold; ; padding: 5px;" | 1400 de Exp.
| |
| <!--T:28-->
| |
| |} | |
| | |
| ===<span style="color:OrangeRed"><b>'''Guru'''</b></span>===
| |
| <span style="color:red">'''Obs.:'''</span> Esse NPC só irá oferecer a tarefa/missão, caso já tenha iniciado o dialogo com o [[Early_Game_Quest#Pallet|Professor Oak]]. <br>
| |
| | |
| [[Arquivo:Guruuuu.PNG|link=Early Game Quest]] | |
| | |
| Guru diz que você deve ter um pouco mais de experiência em pesca primeiro. Pescar é uma boa maneira de obter Pokémon do tipo agua e um Pokémon com a habilidade Surf.
| |
| | |
| <span style="color: OrangeRed">'''Surf'''</span>
| |
| {| class="wikitable" width="40%"
| |
| ! width="31%" style="background-color: OrangeRed" | <span style="color:white">Surf</span>
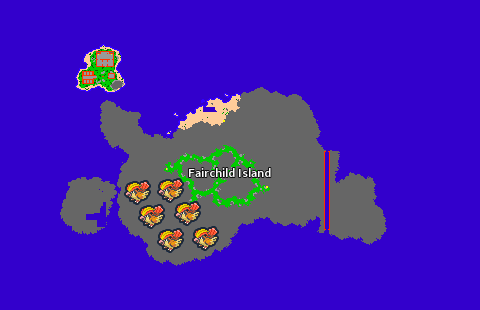
| |
| | width="3%" style="border-top-style: hidden; border-width: 1px; border-bottom-style: hidden; border-width: 1px" |
| |
| ! width="32%" style="background-color: OrangeRed" | <span style="color:white">Mergulho</span>
| |
| |- align="center" | | |- align="center" |
| | [[Arquivo:Surf1.jpg|300px|link=Early Game Quest]] | | | '''Level recomendado''': |
| Surf é uma das três habilidades de transporte, junto com Ride e Fly. Pokémon com habilidade surf pode ser usado como transporte para leva-lo a lugares inacessíveis pelo solo, como ilhas.
| | 20 ao 30 |
| | width="4%" style="border-top-style: hidden; border-width: 1px; border-bottom-style: hidden; border-width: 1px" | | | |'''Efetividades''': |
| | [[Arquivo:Surf2.jpg|300px|link=Early Game Quest]] | | [[Arquivo:Water.png|link=Seavell]] [[Arquivo:Grass.png|link=Naturia]] [[Arquivo:Ice.png|link=Seavell]] |
| | | |'''Pokémon Recomendados''': |
| | | [[File:001-Bulbasaur.png|link=Bulbasaur]] [[Arquivo:001-Shiny_Bulbasaur.png|link=Shiny Bulbasaur]] [[File:007-Squirtle.png|link=Squirtle]] [[Arquivo:007-Shiny_Squirtle.png|link=Shiny Squirtle]] [[File:072-Sh_Tentacool.png|link=Shiny Tentacool]] <br> |
| | | [[File:086-Seel.png|link=Seel]] [[File:120-Staryu.png|link=Staryu]] [[File:152-Chikorita.png|link=Chikorita]] [[Arquivo:152-Shiny_Chikorita.png|link=Shiny Chikorita]] [[File:158-Totodile.png|link=Totodile]] <br> |
| O surf também é útil para acessar alguns locais subaquáticos que exigem mergulho.
| | [[Arquivo:158-Shiny_Totodile.png|link=Shiny Totodile]] [[File:183-Marill.png|link=Marill]] [[File:194-Wooper.png|link=Wooper]] [[File:252-Treecko.png|link=Treecko]] [[Arquivo:252-Shiny_Treecko.png|link=Shiny Treecko]] <br> |
| | | [[File:258-Mudkip.png|link=Mudkip]] [[Arquivo:258-Shiny_Mudkip.png|link=Shiny Mudkip]] [[File:270-Lotad.png|link=Lotad]] [[File:283_Surskit_sp.png|link=Surskit]] [[File:318.png|link=Carvanha]] |
| | |
| |- | | |- |
| | | colspan="3" |[[Arquivo:Attention-icon.png|20px|link=]] '''Atenção''': |
| | * Não se esqueça de levar medicines e revives para sua proteção. |
| | * Os [[File:051-Dugtrio.png|link=Dugtrio]] Dugtrios são encontrados apenas nos andares inferiores. Caso desça, tenha muito cuidado, eles são level 40 e são bem fortes. |
| |} | | |} |
| | </div> |
|
| |
|
| | <span class="mw-customtoggle-myDivision10"><font size="2"> [[Arquivo:Pokeball.png|15px|link=]] '''Caçar Pokémon do elemento Poison na Cerulean Quest'''</font></span> |
| | <div class="mw-collapsible mw-collapsed" id="mw-customcollapsible-myDivision10"> |
|
| |
|
| {| class="wikitable" width="40%" | | {| class="wikitable" width="50%" |
| ! width="31%" style="background-color: OrangeRed" | <span style="color:white">Como entrar</span> | | !align="left" style="background-color: #9d1a64 " colspan="3" | <span style="color:white">Local</span> |
| | width="3%" style="border-top-style: hidden; border-width: 1px; border-bottom-style: hidden; border-width: 1px" |
| |
| ! width="32%" style="background-color: OrangeRed" | <span style="color:white">Como sair</span>
| |
| |- align="center" | | |- align="center" |
| | [[Arquivo:Surf3.jpg|300px|link=Early Game Quest]] | | | colspan="3" | [[Arquivo:Cerulean Swamp.png|link=]] |
| | |
| Para começar a surfar, basta usar “Ordenar” em uma fronteira próxima ao mar. Após fazer isso, o seu Pokémon se moverá à fronteira e se preparará para surfar. Quando o seu Pokémon estiver pronto, basta chegar perto dele, e você começará a surfar.
| |
| | width="4%" style="border-top-style: hidden; border-width: 1px; border-bottom-style: hidden; border-width: 1px" |
| |
| |[[Arquivo:Surf4.jpg|300px|link=Early Game Quest]] | |
| | |
| | |
| | |
| Quando terminar de surfar, você pode sair simplesmente usando “ordenar” em uma borda enquanto fica perto dela.
| |
| | |
| | |
| |-
| |
| |}
| |
| | |
| <span style="color: OrangeRed">'''Pesca'''</span>
| |
| {| class="wikitable" width="40%"
| |
| ! width="31%" style="background-color: OrangeRed" | <span style="color:white">Como Pescar</span>
| |
| | width="3%" style="border-top-style: hidden; border-width: 1px; border-bottom-style: hidden; border-width: 1px" |
| |
| ! width="32%" style="background-color: OrangeRed" | <span style="color:white">Iscas</span>
| |
| |- align="center" | | |- align="center" |
| | [[Arquivo:Pesca1j.jpg|300px|link=Early Game Quest]] | | | '''Level recomendado''': |
| | | 30 ao 49 |
| A pesca é bastante simples. Basta clicar com o botão esquerdo em sua vara de pescar na barra de ações e, em seguida, clicar com o botão esquerdo novamente em um local desejado na agua. A sua isca ficará visível no local que você escolheu. Assim que um peixe a morder, bolhas aparecerão ao redor dela, então pressione o botão da vara mais uma vez para puxar o peixe.
| | |'''Efetividades''': |
| | | [[Arquivo:Ground.png|link=Orebound]] [[Arquivo:Psychic.png|link=Psycraft]] |
| | | |'''Pokémon Recomendados''': |
| | width="4%" style="border-top-style: hidden; border-width: 1px; border-bottom-style: hidden; border-width: 1px" | | | [[File:051-Dugtrio.png|link=Dugtrio]] [[File:064-Kadabra.png|link=Kadabra]] [[File:096-Drowzee.png|link=Drowzee]] [[File:111-Rhyhorn.png|link=Rhyhorn]] <br> |
| | [[Arquivo:Pesca2j.jpg|300px|link=Early Game Quest]] | | [[File:343-Baltoy.png|link=Baltoy]] [[arquivo:436-Bronzor.png|link=Bronzor]] [[File:449-Hippopotas.png|link=Hippopotas]] [[Arquivo:749-Mudbray.png|link=Mudbray]] |
| | |
| | |
| | |
| | |
| | |
| As iscas são usadas para atrair diferentes tipos de Pokémon. Se você não usar iscas, só conseguira atrair Magikarp e Feebas.
| |
| | |
| | |
| | |
| | |
| |- | | |- |
| | | colspan="3" |[[Arquivo:Attention-icon.png|20px|link=]] '''Atenção''': |
| | * É muito comum jogadores utilizarem [[arquivo:436-Bronzor.png|link=Bronzor]] Bronzor neste local de caça por tomar dano nulo do elemento Poison. |
| | * Neste local é recomendado levar muitos revives, pois agilizarão o processo de level up. |
| |} | | |} |
| | </div> |
|
| |
|
| | <span class="mw-customtoggle-myDivision1000"><font size="2"> [[Arquivo:Pokeball.png|15px|link=]] '''Caçar Pokémon do elemento Grass em Valencia Island'''</font></span> |
| | <div class="mw-collapsible mw-collapsed" id="mw-customcollapsible-myDivision1000"> |
|
| |
|
| {| class="wikitable" width="40%" | | {| class="wikitable" width="50%" |
| ! width="31%" style="background-color: OrangeRed" | <span style="color:white">Como usar iscas</span> | | !align="left" style="background-color: #9d1a64 " colspan="3" | <span style="color:white">Local</span> |
| | width="3%" style="border-top-style: hidden; border-width: 1px; border-bottom-style: hidden; border-width: 1px" |
| |
| ! width="32%" style="background-color: OrangeRed" | <span style="color:white">Onde comprar iscas</span>
| |
| |- align="center" | | |- align="center" |
| | [[Arquivo:Pesca3j.jpg|300px|link=Early Game Quest]] | | | colspan="3" | [[Arquivo:Location GVB.png|link=]] |
| | |
| Para colocar uma isca em sua vara, basta clicar com o botão direito na isca desejada. Uma mensagem de confirmação será enviada ao seu canal “Padrão”. Para remover uma isca de sua vara, basta clicar com o botão direito mais uma vez. Uma mensagem de confirmação também será enviada a você.
| |
| | |
| | width="4%" style="border-top-style: hidden; border-width: 1px; border-bottom-style: hidden; border-width: 1px" |
| |
| | [[Arquivo:Pesca4j.jpg|300px|link=Early Game Quest]] | |
| | |
| | |
| | |
| | |
| As iscas podem ser compradas com o Guru, que está disponível em todas as cidades. Para comprar, basta falar com ele e a loja abrirá.
| |
| | |
| | |
| | |
| |-
| |
| |}
| |
| | |
| Para pescar um Poliwag, você precisa nível '''10''' de pesca para usar a isca correta. Fale com Big Ben e Old Roy ao norte, peça algumas lições.
| |
| | |
| {| class="wikitable" width="20%"
| |
| ! width="20%" style="background-color: OrangeRed" | <span style="color:white">Big Ben e Old Roy</span>
| |
| | width="3%" style="border-top-style: hidden; border-width: 1px; border-bottom-style: hidden; border-width: 1px" |
| |
| ! width="20%" style="background-color: OrangeRed" | <span style="color:white">Localização</span>
| |
| |- align="center" | | |- align="center" |
| | [[Arquivo:Ben_roy.PNG|290px|link=Early Game Quest]] | | | '''Level recomendado''': |
| | width="4%" style="border-top-style: hidden; border-width: 1px; border-bottom-style: hidden; border-width: 1px" | | | 40 ao 49 |
| | [[Arquivo:Mapa_ben.PNG|link=Early Game Quest]] | | |'''Efetividades''': |
| | [[Arquivo:Fire.png|link=]] [[Arquivo:Flying.png|link=]] [[Arquivo:Poison1.png|link=Malefic]] [[Arquivo:Ice.png|link=Seavell]] [[Arquivo:Bug.png|link=Naturia]] |
| | |'''Pokémon Recomendados''': |
| | [[File:058-Growlithe.png|link=Growlithe]] [[File:058-Sh_Growlithe.png|link=Shiny Growlithe]] [[File:240-Magby.png|link=Magby]] [[File:276-Taillow.png|link=Taillow]] [[File:361-Snorut.png|link=Snorunt]] <br> |
| | [[File:363-Spheal.png|link=Spheal]] [[Arquivo:661-Fletchling.png|link=Fletchling]] [[File:005-Charmeleon.png|link=Charmeleon]] [[File:042-Golbat.png|link=Golbat]] [[File:156-Quilava.png|link=Quilava]] |
| |- | | |- |
| | | colspan="3" |[[Arquivo:Attention-icon.png|20px|link=]] '''Atenção''': |
| | * É recomendado levar muitos [[Arquivo:Medicine.png|link=]] Medicines ou utilizar uma [[Arquivo:Berrie 23.png|link=Berries]] Lum Berry. Os Pokémon neste local possuem muitos ataques que causam status negativos.<br> |
| | * Existe uma missão de derrotar [[File:045-Vileplume.png|link=Vileplume]] Vileplume e [[File:182-Bellossom.png|link=Bellossom]] Bellossom, que concederá alguns pontos de experiência ao ser concluída. Para mais informações, veja [[Tasks#Valencia_Island|este link]]. |
| |} | | |} |
| | </div> |
|
| |
|
| Certamente '''Big Ben''' pode ajuda-lo a começar a pescar. É muito simples!
| | <span class="mw-customtoggle-myDivision1001"><font size="2"> [[Arquivo:Pokeball.png|15px|link=]] '''Caçar Pokémon do elemento Grass em Kinnow Island (VIP)'''</font></span> |
| | <div class="mw-collapsible mw-collapsed" id="mw-customcollapsible-myDivision1001"> |
|
| |
|
| '''Obs:''' Você pode fazer esta missão com seus amigos.
| | {| class="wikitable" width="50%" |
| | | !align="left" style="background-color: #9d1a64 " colspan="3" | <span style="color:white">Local</span> |
| <span style="color: OrangeRed">'''Derrotar:'''</span>
| |
| | |
| {| class="wikitable"
| |
| |-
| |
| ! scope="col"| 5 Magikarp
| |
| | [[Arquivo:129-Magikarp.png|link=Early Game Quest]]
| |
| |}
| |
| | |
| <span style="color: OrangeRed">'''Capturar:'''</span>
| |
| | |
| {| class="wikitable"
| |
| |-
| |
| ! scope="col"| Magikarp
| |
| | [[Arquivo:129-Magikarp.png|link=Early Game Quest]]
| |
| |}
| |
| | |
| <span style="color: OrangeRed">'''Recompensas:'''</span>
| |
| | |
| {| class="wikitable" width="15%" | |
| ! scope="col" width="5%" align="center" style="background-color: OrangeRed" padding: 5px;" | <span style="color: white">'''Experiência Por Derrotar'''</span> | |
| |- align="center" | | |- align="center" |
| | style="font-weight: bold; ; padding: 5px;" | 150 de Exp. | | | colspan="3" | [[Arquivo:Location BT.png|link=]] |
| <!--T:28-->
| |
| |}
| |
| | |
| {| class="wikitable" width="15%"
| |
| ! scope="col" width="5%" align="center" style="background-color: OrangeRed" padding: 5px;" | <span style="color: white">'''Experiência Por Capturar'''</span>
| |
| |- align="center" | | |- align="center" |
| | style="font-weight: bold; ; padding: 5px;" | 500 de Exp. | | | '''Level recomendado''': |
| <!--T:28-->
| | 40 ao 49 |
| |} | | |'''Efetividades''': |
| | | [[Arquivo:Fire.png|link=]] [[Arquivo:Flying.png|link=]] [[Arquivo:Poison1.png|link=Malefic]] [[Arquivo:Ice.png|link=Seavell]] [[Arquivo:Bug.png|link=Naturia]] |
| '''Old Roy''' pede para você treinar suas habilidades de pesca pescando e derrotando alguns Magikarps. | | |'''Pokémon Recomendados''': |
| | | [[File:058-Growlithe.png|link=Growlithe]] [[File:058-Sh_Growlithe.png|link=Shiny Growlithe]] [[File:240-Magby.png|link=Magby]] [[File:276-Taillow.png|link=Taillow]] [[File:361-Snorut.png|link=Snorunt]] <br> |
| <span style="color: OrangeRed">'''Derrotar:'''</span>
| | [[File:363-Spheal.png|link=Spheal]] [[Arquivo:661-Fletchling.png|link=Fletchling]] [[File:005-Charmeleon.png|link=Charmeleon]] [[File:042-Golbat.png|link=Golbat]] [[File:156-Quilava.png|link=Quilava]] |
| | |
| {| class="wikitable"
| |
| |- | | |- |
| ! scope="col"| 10 Magikarp
| | | colspan="3" |[[Arquivo:Attention-icon.png|20px|link=]] '''Atenção''': |
| | [[Arquivo:129-Magikarp.png|link=Early Game Quest]] | | * É recomendado levar muitos [[Arquivo:Medicine.png|link=]] Medicines ou utilizar uma [[Arquivo:Berrie 23.png|link=Berries]] Lum Berry, pois as [[File:114-Tangela.png|link=Tangela]] Tangela e [[File:182-Bellossom.png|link=Bellossom]] Bellossom possuem muitos ataques que causam status negativos. |
| |} | | |} |
| | </div> |
|
| |
|
| <span style="color: OrangeRed">'''Recompensa:'''</span> | | <span class="mw-customtoggle-myDivision1002"><font size="2"> [[Arquivo:Pokeball.png|15px|link=]] '''Caçar Pokémon do elemento Flying em Leek Island (VIP)''' </font></span> |
| | <div class="mw-collapsible mw-collapsed" id="mw-customcollapsible-myDivision1002"> |
|
| |
|
| {| class="wikitable" width="15%" | | {| class="wikitable" width="50%" |
| ! scope="col" width="5%" align="center" style="background-color: OrangeRed" padding: 5px;" | <span style="color: white">'''Experiência Por Derrotar'''</span> | | !align="left" style="background-color: #9d1a64 " colspan="3" | <span style="color:white">Local</span> |
| |- align="center"
| |
| | style="font-weight: bold; ; padding: 5px;" | 150 de Exp.
| |
| <!--T:28-->
| |
| |}
| |
| Volte ao Guru.
| |
| | |
| Agora que você tem um pouco mais de experiência em pesca, podemos começar a tarefa de conseguir um Pokémon de surf para você.
| |
| | |
| A primeira coisa que você precisa é de algumas iscas. Guru te dará algumas iscas, mas, se você ficar sem iscas, terá que comprar mais do NPC Haru.
| |
| | |
| <span style="color: OrangeRed">'''Voce ganhou:'''</span>
| |
| | |
| {| class="wikitable"
| |
| |-
| |
| ! scope="col"| 100 Worms
| |
| | [[Arquivo:Wooorms.PNG|link=Early Game Quest]]
| |
| |}
| |
| Com estas iscas você poderá pescar, entre outros Pokémon alguns Poliwags. Capture e derrote alguns Pokémon que pescar.
| |
| | |
| | |
| <span style="color: OrangeRed">'''Derrotar:'''</span>
| |
| | |
| {| class="wikitable"
| |
| |-
| |
| ! scope="col"| 10 Poliwags
| |
| ! scope="col"| 5 Horseas
| |
| ! scope="col"| 5 Goldeens
| |
| | |
| |- style="width:50px; text-align:center;"
| |
| | [[Arquivo:060-Poliwag.png|link=Early Game Quest]]
| |
| | [[Arquivo:116-Horsea.png|link=Early Game Quest]]
| |
| | [[Arquivo:118-Goldeen.png|link=Early Game Quest]]
| |
| | |
| |}
| |
| | |
| <span style="color: OrangeRed">'''Recompensas:'''</span>
| |
| | |
| {| class="wikitable" width="20%"
| |
| ! scope="col" width="10%" align="center" style="background-color: OrangeRed" padding: 5px;" | <span style="color: white">'''Recompensa Por Derrotar'''</span>
| |
| ! scope="col" width="10%" align="center" style="background-color: OrangeRed" padding: 5px;" | <span style="color: white">'''Experiência Por Derrotar'''</span>
| |
| |- align="center" | | |- align="center" |
| | style="font-weight: bold; ; padding: 5px;" | 120 dollars. | | | colspan="3" | [[Arquivo:Location FD.png|link=]] |
| | style="font-weight: bold; ; padding: 5px;" | 3800 de Exp.
| |
| <!--T:28-->
| |
| |}
| |
| | |
| <span style="color: OrangeRed">'''Capturar:'''</span>
| |
| | |
| {| class="wikitable"
| |
| |-
| |
| ! scope="col"| Poliwags
| |
| | [[Arquivo:060-Poliwag.png|link=Early Game Quest]] | |
| |}
| |
| <span style="color: OrangeRed">'''Recompensa:'''</span>
| |
| | |
| {| class="wikitable" width="15%"
| |
| ! scope="col" width="5%" align="center" style="background-color: OrangeRed" padding: 5px;" | <span style="color: white">'''Experiência Por Capturar'''</span>
| |
| |- align="center" | | |- align="center" |
| | style="font-weight: bold; ; padding: 5px;" | 1000 de Exp. | | | '''Level recomendado''': |
| <!--T:28-->
| | 30 ao 60 |
| | |'''Efetividades''': |
| | [[Arquivo:Electric.png|link=]] [[Arquivo:Ice.png|link=]] [[Arquivo:Rock.png|link=]] |
| | |'''Pokémon Recomendados''': |
| | [[file:239-Elekid.png|link=Elekid]] [[file:410-Shieldon.png|link=Shieldon]] [[file:172-Pichu.png|link=Pichu]] [[File:363-Spheal.png|link=Spheal]] |
| | |- |
| | | colspan="3" |[[Arquivo:Attention-icon.png|20px|link=]] '''Atenção''': |
| | * É recomendado levar muitos [[Arquivo:Medicine.png|link=]] Medicines. |
| |} | | |} |
| | </div> |
|
| |
|
| ===<span style="color: OrangeRed">'''Louie'''</span>=== | | <span class="mw-customtoggle-myDivision1003"><font size="2"> [[Arquivo:Pokeball.png|15px|link=]] '''Caçar Pokémon do elemento Grass em Butwal Island (VIP)'''</font></span> |
| | <div class="mw-collapsible mw-collapsed" id="mw-customcollapsible-myDivision1003"> |
|
| |
|
| [[Arquivo:Louie.PNG|link=Early Game Quest]]
| | {| class="wikitable" width="50%" |
| | | !align="left" style="background-color: #9d1a64 " colspan="3" | <span style="color:white">Local</span> |
| '''Little Louie''' Precisa coletar algumas ervas na floresta, mas o caminho está cheio de pokemon do tipo inseto, você precisa ajuda-lo.
| |
| | |
| '''Obs:''' Você pode fazer esta missão com seus amigos.
| |
| | |
| <span style="color: OrangeRed">'''Derrotar:'''</span>
| |
| | |
| {| class="wikitable"
| |
| |-
| |
| ! scope="col"| 10 Kakuna
| |
| ! scope="col"| 10 Weedle
| |
|
| |
| |- style="width:50px; text-align:center;"
| |
| | [[Arquivo:014-Kakuna.png|link=Early Game Quest]]
| |
| | [[Arquivo:013-Weedle.png|link=Early Game Quest]]
| |
| | |
| |}
| |
| | |
| <span style="color: OrangeRed">'''Recompensas:'''</span>
| |
| | |
| {| class="wikitable" width="15%" | |
| ! scope="col" width="10%" align="center" style="background-color: OrangeRed" padding: 5px;" | <span style="color: white">'''Recompensa'''</span> | |
| |- align="center" | | |- align="center" |
| | style="font-weight: bold; ; padding: 5px;" | 80 dollars. | | | colspan="3" | [[Arquivo:Location JU.png|link=]] |
| <!--T:28-->
| |
| |}
| |
| | |
| {| class="wikitable" width="15%"
| |
| ! scope="col" width="10%" align="center" style="background-color: OrangeRed" padding: 5px;" | <span style="color: white">'''Experiência Por Derrotar'''</span>
| |
| |- align="center" | | |- align="center" |
| | style="font-weight: bold; ; padding: 5px;" | 1920 de Exp. | | | '''Level recomendado''': |
| <!--T:28-->
| | 40 ao 49 |
| |} | | |'''Efetividades''': |
| | | [[Arquivo:Fire.png|link=]] [[Arquivo:Flying.png|link=]] [[Arquivo:Poison1.png|link=Malefic]] [[Arquivo:Ice.png|link=Seavell]] [[Arquivo:Bug.png|link=Naturia]] |
| ===<font size='4'><span style="color: OrangeRed">'''Meiko'''</span></font>===
| | |'''Pokémon Recomendados''': |
| | | [[File:058-Growlithe.png|link=Growlithe]] [[File:058-Sh_Growlithe.png|link=Shiny Growlithe]] [[File:240-Magby.png|link=Magby]] [[File:276-Taillow.png|link=Taillow]] [[File:361-Snorut.png|link=Snorunt]] <br> |
| [[Arquivo:Meiko2.PNG|link=Early Game Quest]] | | [[File:363-Spheal.png|link=Spheal]] [[Arquivo:661-Fletchling.png|link=Fletchling]] [[File:005-Charmeleon.png|link=Charmeleon]] [[File:042-Golbat.png|link=Golbat]] [[File:156-Quilava.png|link=Quilava]] |
| | |
| '''Meiko''' Estava dormindo na barraca, quando um Caterpie passou pelo rosto dela! Ela odeia insetos e não tem permissão para ir a outro lugar, são ordens dos pais dela. Sua tarefa é afastar esses insetos. | |
| | |
| '''Obs:''' Você pode fazer esta missão com seus amigos.
| |
| | |
| <span style="color: OrangeRed">'''Derrotar:'''</span>
| |
| | |
| {| class="wikitable"
| |
| |- | | |- |
| ! scope="col"| 10 Caterpie
| | | colspan="3" |[[Arquivo:Attention-icon.png|20px|link=]] '''Atenção''': |
| ! scope="col"| 10 Metapod
| | * É recomendado levar muitos [[Arquivo:Medicine.png|link=]] Medicines ou utilizar uma [[Arquivo:Berrie 23.png|link=Berries]] Lum Berry, pois os [[File:189-Jumpluff.png|link=Jumpluff]] Jumpluff possuem muitos ataques que causam status negativos. |
|
| |
| |- style="width:50px; text-align:center;" | |
| | [[Arquivo:010-Caterpie.png|link=Early Game Quest]] | |
| | [[Arquivo:011-Metapod.png|link=Early Game Quest]]
| |
| | |
| |} | | |} |
| | </div> |
|
| |
|
| <span style="color: OrangeRed">'''Recompensas:'''</span> | | <span class="mw-customtoggle-myDivision1004"><font size="2"> [[Arquivo:Pokeball.png|15px|link=]] '''Caçar Pokémon do elemento Fighting em Tangelo Island'''</font></span> |
| | <div class="mw-collapsible mw-collapsed" id="mw-customcollapsible-myDivision1004"> |
|
| |
|
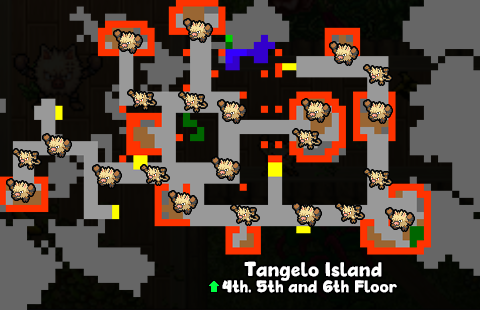
| {| class="wikitable" width="15%" | | {| class="wikitable" width="50%" |
| ! scope="col" width="10%" align="center" style="background-color: OrangeRed" padding: 5px;" | <span style="color: white">'''Recompensa'''</span> | | !align="left" style="background-color: #9d1a64 " colspan="3" | <span style="color:white">Local</span> |
| |- align="center" | | |- align="center" |
| | style="font-weight: bold; ; padding: 5px;" | 80 dollars. | | | colspan="3" | [[Arquivo:Location MAPE.png|link=]] |
| <!--T:28-->
| |
| |}
| |
| | |
| {| class="wikitable" width="15%"
| |
| ! scope="col" width="10%" align="center" style="background-color: OrangeRed" padding: 5px;" | <span style="color: white">'''Experiência Por Derrotar'''</span>
| |
| |- align="center"
| |
| | style="font-weight: bold; ; padding: 5px;" | 1920 de Exp.
| |
| <!--T:28-->
| |
| |}
| |
| | |
| ===<font size='4'><span style="color: OrangeRed">'''Mia'''</span></font>===
| |
| | |
| '''Mia''' Pediu alguns bags of pollen para ajudar a sua Butterfree a ficar mais forte. Voce precisa encontrar uma velha senhora na floresta que possa ter os bags of pollen que ela precisa.
| |
| | |
| [[Arquivo:Mia.PNG|link=Early Game Quest]] | |
| | |
| <span style="color: OrangeRed">'''Vera'''</span> aceitou trocar aguns bags of pollen com você. Entregue 10x pot of moss bug em troca. Pode obte-los derrotando alguns pokemon do tipo inseto na floresta.
| |
| | |
| {| class="wikitable" width="20%"
| |
| ! width="15%" style="background-color: OrangeRed" | <span style="color:white">Vera</span>
| |
| | width="3%" style="border-top-style: hidden; border-width: 1px; border-bottom-style: hidden; border-width: 1px" |
| |
| ! width="15%" style="background-color: OrangeRed" | <span style="color:white">Localização</span>
| |
| |- align="center" | | |- align="center" |
| | [[Arquivo:Vera.PNG|link=Early Game Quest]] | | | '''Level recomendado''': |
| | width="4%" style="border-top-style: hidden; border-width: 1px; border-bottom-style: hidden; border-width: 1px" | | | 20 ao 50 |
| | [[Arquivo:Vera_mapa.PNG|link=Early Game Quest]]
| | |'''Efetividades''': |
| | | [[Arquivo:Flying.png|link=]] |
| | | |'''Pokémon Recomendados''': |
| |- | | [[arquivo:017-Pidgeotto.png|link=Pidgeotto]] [[arquivo:021-Spearow.png|link=Spearow]] [[arquivo:120-Staryu.png|link=Staryu]] [[arquivo:079-Slowpoke.png|link=Slowpoke]] [[arquivo:092-Gastly.png|link=Gastly]] |
| |}
| |
| <span style="color: OrangeRed">'''Trocar:'''</span>
| |
| {| class="wikitable"
| |
| |-
| |
| ! scope="col"| 10x Pots of Moss Bug
| |
| |- style="width:50px; text-align:center;"
| |
| | [[Arquivo:PotOfMossBug.png|link=Early Game Quest]] | |
| |}
| |
| <span style="color: OrangeRed">'''Por:'''</span>
| |
| {| class="wikitable"
| |
| |- | | |- |
| ! scope="col"| 2x Bags of Pollen.
| | | colspan="3" |[[Arquivo:Attention-icon.png|20px|link=]] '''Atenção''': |
| |- style="width:50px; text-align:center;"
| |
| | [[Arquivo:BagOfPollem.png|link=Early Game Quest]] | |
| |}
| |
|
| |
|
| <span style="color: OrangeRed">'''Recompensa:'''</span>
| |
|
| |
| {| class="wikitable" width="15%"
| |
| ! scope="col" width="10%" align="center" style="background-color: OrangeRed" padding: 5px;" | <span style="color: white">'''Experiência'''</span>
| |
| |- align="center"
| |
| | style="font-weight: bold; ; padding: 5px;" | 500 de Exp.
| |
| <!--T:28-->
| |
| |} | | |} |
| | </div> |
|
| |
|
| Agora que tem os bag of pollen, deve leva-los a Mia.
| | = Guia Aprendiz = |
|
| |
|
| <span style="color: OrangeRed">'''Recompensas:'''</span> | | Neste guia, abordaremos algumas opções de locais de caça e Pokémon recomendados, baseados nas faixas de level entre 50 e 79. <br> |
| | Para acessar cada tutorial, '''clique em uma das PokéBalls abaixo''', referente ao tutorial desejado. |
|
| |
|
| {| class="wikitable" width="15%"
| | <span class="mw-customtoggle-myDivision11"><font size="2"> [[Arquivo:Pokeball.png|15px|link=]] '''Caçar Pokémon do elemento Electric na Lightstorm Island (VIP)''' </font></span> |
| ! scope="col" width="10%" align="center" style="background-color: OrangeRed" padding: 5px;" | <span style="color: white">'''Recompensa'''</span>
| | <div class="mw-collapsible mw-collapsed" id="mw-customcollapsible-myDivision11"> |
| |- align="center"
| |
| | style="font-weight: bold; ; padding: 5px;" | 400 dollars.
| |
| <!--T:28-->
| |
| |}
| |
|
| |
|
| {| class="wikitable" width="15%" | | {| class="wikitable" width="50%" |
| ! scope="col" width="10%" align="center" style="background-color: OrangeRed" padding: 5px;" | <span style="color: white">'''Experiência'''</span> | | !align="left" style="background-color: #9d1a64 " colspan="3" | <span style="color:white">Local</span> |
| |- align="center" | | |- align="center" |
| | style="font-weight: bold; ; padding: 5px;" | 2500 de Exp. | | | colspan="3" | [[Arquivo:Location PF.png|link=]] |
| <!--T:28-->
| |
| |}
| |
| | |
| ===<font size='4'><span style="color: OrangeRed">'''Paul'''</span></font>===
| |
| | |
| [[Arquivo:Paul33_1.PNG|link=Early Game Quest]] | |
| | |
| '''Paul''' está com problemas, Rattatas e Zulbats estão roubando sua comida! Ajude-o derrotando alguns deles.
| |
| | |
| '''Obs:''' Você pode fazer esta missão com seus amigos.
| |
| | |
| {| class="wikitable" width="10%"
| |
| ! width="5%" style="background-color: OrangeRed" | <span style="color:white">Localização Respawn</span>
| |
| |- align="center" | | |- align="center" |
| | [[Arquivo:Paul33_2.PNG|link=Early Game Quest]] | | | '''Level recomendado''': |
| | 50 ao 60 |
| | |'''Efetividades''': |
| | [[Arquivo:Ground.png|link=]] |
| | |'''Pokémon Recomendados''': |
| | [[arquivo:051-Dugtrio.png|link=Dugtrio]] [[File:095-Onix.png|link=Onix]] [[Arquivo:105-Marowak.png|link=Marowak]] <BR> |
| | [[arquivo:329-Vibrava.png|link=Vibrava]] [[File:529-Drillbur.png|link=Drilbur]] |
| |- | | |- |
| | | colspan="3" |[[Arquivo:Attention-icon.png|20px|link=]] '''Atenção''': |
| | * Tenha muito cuidado com uma casinha neste respawn, há um [[Arquivo:125-Electabuzz.png|link=Electabuzz]] Electabuzz por lá, pode ser melhor evitá-lo. |
| |} | | |} |
| | </div> |
|
| |
|
| <span style="color: OrangeRed">'''Derrotar:'''</span> | | <span class="mw-customtoggle-myDivision12"><font size="2"> [[Arquivo:Pokeball.png|15px|link=]] '''Caçar Pokémon do elemento Flying em Shamouti Island''' </font></span> |
| | <div class="mw-collapsible mw-collapsed" id="mw-customcollapsible-myDivision12"> |
|
| |
|
| {| class="wikitable" | | {| class="wikitable" width="50%" |
| |-
| | !align="left" style="background-color: #9d1a64 " colspan="3" | <span style="color:white">Local</span> |
| ! scope="col"| 15 Rattatas
| |
| ! scope="col"| 5 Zubats
| |
| |- style="width:50px; text-align:center;"
| |
| | [[Arquivo:019-Rattata.png|link=Early Game Quest]]
| |
| | [[Arquivo:041-Zubat.png|link=Early Game Quest]]
| |
| |}
| |
| | |
| <span style="color: OrangeRed">'''Recompensa:'''</span>
| |
| | |
| {| class="wikitable" width="15%"
| |
| ! scope="col" width="5%" align="center" style="background-color: OrangeRed" padding: 5px;" | <span style="color: white">'''Experiência Por Derrotar'''</span> | |
| |- align="center" | | |- align="center" |
| | style="font-weight: bold; ; padding: 5px;" | 920 de Exp. | | | colspan="3" | [[Arquivo:Location Noctowl.png|link=]] |
| <!--T:28-->
| |
| |}
| |
| | |
| ===<font size='4'><span style="color: OrangeRed">'''Tara'''</span></font>===
| |
| <span style="color:red">'''Obs.:'''</span> Esse NPC só irá oferecer a tarefa/missão, caso já tenha iniciado o dialogo com o [[Early_Game_Quest#Pallet|Professor Oak]]. <br>
| |
| | |
| [[Arquivo:Taara.PNG|link=Early Game Quest]] | |
| | |
| '''Tara''' diz que Nidoran frequentemente formam casais e vivem felizes para sempre, eles tem uma habilidade especial que pode ser muito útil para um treinador (a) como você. Essa habilidade se chama Dig.
| |
| | |
| <span style="color: OrangeRed">'''Habilidade:'''</span>
| |
| {| class="wikitable" width="15%"
| |
| ! width="15%" style="background-color: OrangeRed" | <span style="color:white">Dig</span>
| |
| |- align="center" | | |- align="center" |
| | [[Arquivo:Digg.jpg|290px|link=Early Game Quest]] | | | '''Level recomendado''': |
| | | 55 ao 75 |
| Alguns Pokémon, como o Nidoran, tem uma habilidade especial chamada Dig, permite que você abra pequenas entradas para locais subterrâneos. Para usar o Dig, basta usar “ordenar” para fazer com que seu Pokémon cave um ponto de escavação.
| | |'''Efetividades''': |
| | [[Arquivo:Electric.png|link=]] [[Arquivo:Ice.png|link=Seavell]] [[Arquivo:Rock.png|link=Orebound]] |
| | |'''Pokémon Recomendados''': |
| | [[Arquivo:025-Pikachu.png|link=Pikachu]] [[File:087-Dewgong.png|link=Dewgong]] [[File:225-Delibird.png|link=Delibird]] [[arquivo:239-Elekid.png|link=Elekid]] <br> |
| | [[File:364-Sealeo.png|link=Sealeo]] [[File:522-Blitzle.png|link=Blitzle]] [[File:564-Tirtouga.png|link=Tirtouga]] [[File:613-Cubchoo.png|link=Cubchoo]] |
| |- | | |- |
| | | colspan="3" |[[Arquivo:Attention-icon.png|20px|link=]] '''Dicas essenciais''': |
| | * É possível chegar até a ilha de Shamouti através do [[Viagens|sistema de viagens]]. |
| |} | | |} |
| | </div> |
|
| |
|
| Há dois Nidorans: o masculino e o feminino. Sua missão é capturar ambos, e então Tara estará disposta a trocar um Pokémon dela por um deles com você.
| | <span class="mw-customtoggle-myDivision13"><font size="2"> [[Arquivo:Pokeball.png|15px|link=]] '''Caçar Pokémon do elemento Fighting na Fight Club em Shamouti Island''' </font></span> |
| | <div class="mw-collapsible mw-collapsed" id="mw-customcollapsible-myDivision13"> |
|
| |
|
| <span style="color: OrangeRed">'''Capturar:'''</span>
| | {| class="wikitable" width="50%" |
| | | !align="left" style="background-color: #9d1a64 " colspan="3" | <span style="color:white">Local</span> |
| {| class="wikitable"
| |
| |-
| |
| ! scope="col"| Nidoranfe
| |
| ! scope="col"| Nidoranma
| |
| |- style="width:50px; text-align:center;"
| |
| | [[Arquivo:029-Nidoranfe.png|link=Early Game Quest]]
| |
| | [[Arquivo:032-NidoranMa.png|link=Early Game Quest]]
| |
| |}
| |
| <span style="color: OrangeRed">'''Recompensa'''</span>
| |
| | |
| {| class="wikitable" width="15%" | |
| ! scope="col" width="5%" align="center" style="background-color: OrangeRed" padding: 5px;" | <span style="color: white">'''Experiência Por Capturar'''</span> | |
| |- align="center" | | |- align="center" |
| | style="font-weight: bold; ; padding: 5px;" | 6000 de Exp. | | | colspan="3" | [[Arquivo:Location EH.png|link=]] |
| <!--T:28-->
| |
| |}
| |
| | |
| Qual deles você deseja trocar? Tara te dará um Slugma, um pokemon do tipo fogo.
| |
| | |
| <span style="color: OrangeRed">'''Troca:'''</span>
| |
| {| class="wikitable" width="5%"
| |
| ! scope="col" width="5%" align="center" style="background-color: OrangeRed" padding: 5px;" | <span style="color: white">'''Slugma'''</span>
| |
| |- align="center"
| |
| | style="font-weight: bold; ; padding: 5px;" | [[Arquivo:218-Slugma.png|link=Early Game Quest]]
| |
| <!--T:28-->
| |
| |}
| |
| | |
| Ao completar todas as tarefas, volte a Ruby, ela te entregará o relatório.
| |
| | |
| | |
| Agora você está pronto (a) para viajar a cidade de Pewter. Aqui esta a sua carta ([[Arquivo:Carta_ruby_emeraldy.PNG|link=Early Game Quest]]).
| |
| | |
| '''Obs:''' Ruby tem uma dica para você, Se você ainda não descobriu, alguns pokémon possuem habilidade especial chamada Ride, que permite que você viaje mais rápido, vá ate as montanhas ao sul e encontre a Ma’am Frase, ela pode te ajudar na sua primeira montaria, a localização esta marcada no seu minimapa.
| |
| | |
| ===<font size='4'><span style="color: OrangeRed">'''Claire'''</span></font>===
| |
| | |
| [[Arquivo:Clairees.PNG|link=Early Game Quest]]
| |
| | |
| Bem vindo(a) a Fraser’s Ridge, então você quer um Pokémon para montaria? Certamente vou te ajudar com isso, se você nos ajudar.
| |
| Você deve ter notado alguns Doduos morando ali, Frases Ridge criam ele para que evoluam para Dodrio e decidam seu próprio destino. No entanto, alguns Spearows que vivem nas montanhas ao sul continuam vindo e atacando os Doduos.
| |
| | |
| Sua tarefa é ir ao sul das montanhas e derrotar alguns Spearows.
| |
| | |
| <span style="color: OrangeRed">'''Derrotar:'''</span>
| |
| | |
| {| class="wikitable"
| |
| |-
| |
| ! scope="col"| 20 Spearows
| |
| |- style="width:50px; text-align:center;"
| |
| | [[Arquivo:021-Spearow.png|link=Early Game Quest]]
| |
| |}
| |
| Ao derrotar, volte até Claire.
| |
| | |
| Fale com o '''James''' marido de Claire, que está dentro da casa. Ele te dará um Doduo e te ensinará como montar.
| |
| | |
| [[Arquivo:Jamesa.PNG||link=Early Game Quest]]
| |
| | |
| <span style="color: OrangeRed">'''Habilidade'''</span>
| |
| {| class="wikitable" width="30%"
| |
| ! width="15%" style="background-color: OrangeRed" | <span style="color:white">Ride</span>
| |
| | width="5%" style="border-top-style: hidden; border-width: 1px; border-bottom-style: hidden; border-width: 1px" |
| |
| ! width="15%" style="background-color: OrangeRed" | <span style="color:white">Como usar</span>
| |
| |- align="center" | | |- align="center" |
| | [[Arquivo:Capturar8.jpg|300px|link=Early Game Quest]] | | | '''Level recomendado''': |
| | | 65 ao 79 |
| O Ride é uma das três habilidades de transporte. Ride permite que você mova-se mais rápido no solo. No entanto, Pokémon selvagens podem ataca-lo diretamente enquanto você esta em uma montaria, então tome cuidado.
| | |'''Efetividades''': |
| | width="4%" style="border-top-style: hidden; border-width: 1px; border-bottom-style: hidden; border-width: 1px" | | | [[Arquivo:Flying.png|link=]] [[Arquivo:Psychic.png|link=Psycraft]] [[Arquivo:Fairy.png|link=]] |
| | [[Arquivo:Capturar9.jpg|300px|link=Early Game Quest]] | | |'''Pokémon Recomendados''': |
| | | [[File:022-Fearow.png|link=Fearow]] [[File:083-Farfetch-D.png|link=Farfetch'D]] [[File:097-Hypno.png|link=Hypno]] [[arquivo:164-Noctowl.png|link=Noctowl]] [[File:281-Kirlia.png|link=Kirlia]] <br> |
| Para começar a montar, basta “ordenar” em si mesmo(a) com um Pokémon que tenha habilidade Ride, e você começará a monta-lo! O mesmo processo é usado para parar de montar, após usar o “ordenar” em si mesmo(a) durante a condução, você sairá da montaria.
| | [[File:360-Wynaut.png|link=Wynaut]] [[Arquivo:397-Staravia.png|link=Staravia]] [[File:566-Archen.png|link=Archen]] [[Arquivo:662-Fletchinder.png|link=Fletchinder]] [[Arquivo:670.Floette.png|link=Floette]] |
| |- | | |- |
| | | colspan="3" | [[Arquivo:Attention-icon.png|20px|link=]] '''Atenção''': |
| | * É muito comum jogadores utilizarem [[Arquivo:670.Floette.png|link=Floette]] Floette neste local de caça pelo seu moveset AOE e stun. |
| | * Os Pokémon dentro do Fight Club '''não são capturáveis'''. Para entender como obtê-los, veja [[Pokemon_obtidos_via_NPC|este link]]. |
| |} | | |} |
| | </div> |
|
| |
|
| <span style="color: OrangeRed">'''Recompensa:'''</span> | | <span class="mw-customtoggle-myDivision14"><font size="2"> [[Arquivo:Pokeball.png|15px|link=]] '''Caçar Pokémon do elemento Psychic na Desert Island (VIP)''' </font></span> |
| {| class="wikitable" width="5%"
| | <div class="mw-collapsible mw-collapsed" id="mw-customcollapsible-myDivision14"> |
| ! scope="col" width="5%" align="center" style="background-color: OrangeRed" padding: 5px;" | <span style="color: white">'''Doduo'''</span>
| |
| |- align="center"
| |
| | style="font-weight: bold; ; padding: 5px;" | [[Arquivo:084-Doduo.png|link=Early Game Quest]]
| |
| <!--T:28-->
| |
| |}
| |
|
| |
|
| Ao completar todas as tarefas, volte a Ruby.
| | {| class="wikitable" width="50%" |
| | | !align="left" style="background-color: #9d1a64 " colspan="3" | <span style="color:white">Local</span> |
| {| class="wikitable" width="15%" | |
| ! width="5%" style="background-color: OrangeRed" | <span style="color:white">Localização</span> | |
| |- align="center"
| |
| | [[Arquivo:Mapaclairejames.PNG|link=Early Game Quest]]
| |
| |-
| |
| |}
| |
| | |
| '''Ruby''' diz para seguir a estrada ao norte através da floresta de Viridian, e você encontrara a cidade de Pewter. Procure por '''Emerald''' quando chegar lá, ela também é uma das assistentes do professor e será a responsável por ajuda-lo(a) por lá. Eu marquei a localização dela em seu minimapa. Boa sorte treinador(a)!
| |
| | |
| ===<span style="color: OrangeRed">'''Localizações'''</span>===
| |
| | |
| [[Arquivo:Viridian_npc.PNG|link=Early Game Quest]]
| |
| | |
| <!--T:15-->
| |
| <b>1 ▸</b> Arnold.
| |
| | |
| <!--T:16-->
| |
| <b>2 ▸</b> Guru.
| |
| | |
| <!--T:17-->
| |
| <b>3 ▸</b> Louie.
| |
| | |
| <!--T:18-->
| |
| <b>4 ▸</b> Meiko.
| |
| | |
| <!--T:15-->
| |
| <b>5 ▸</b> Mia.
| |
| | |
| <!--T:16-->
| |
| <b>6 ▸</b> Paul.
| |
| | |
| <!--T:17-->
| |
| <b>7 ▸</b> Tara
| |
| | |
| ==<font size='4'><span style="color: OrangeRed">'''Pewter'''</span></font>==
| |
| ===<span style="color: OrangeRed">'''Emerald'''</span>===
| |
| | |
| Bem-vindo a cidade de Pewter! Você esta prestes a evoluir seu Pokémon inicial para a forma adulta, visite o Centro Pokémon para curar seus Pokémon. Você terá a localização marcada em seu minimapa.
| |
| | |
| [[Arquivo:Emeralddd.PNG|link=Early Game Quest]]
| |
| | |
| Você também pode trocar de cidade natal para Pewter, se desejar. Desta forma, você será enviado(a) ao Centro Pokémon de Pewter quando for derrotado (a), em vez de sua cidade natal atual (Pallet/Viridian). Se você quiser troca-la, fale com NPC Kurt no Centro Pokémon, e ele fará isso por você.
| |
| | |
| [[Arquivo:Kurt_npc.PNG|link=Early Game Quest]]
| |
| | |
| | |
| [[Arquivo:Ppewterrmapanpc.PNG|link=Early Game Quest]]
| |
| | |
| <!--T:15-->
| |
| <b>1 ▸</b> Centro Pokemon/NPC Kurt.
| |
| | |
| <!--T:17-->
| |
| <b>2 ▸</b> Emerald.
| |
|
| |
| '''Obs:''' Para chegar no Centro Pokemon e no NPC Kurt, suba as escadas.
| |
| | |
| Entregue a carta a '''Emerald''' para que ela possa começar a escrever o relatório. Antes de falar sobre a evolução, existem algumas coisas que você precisa saber.
| |
| | |
| <span style="color: OrangeRed">'''Medicine:'''</span>
| |
| {| class="wikitable" width="40%"
| |
| ! width="31%" style="background-color: OrangeRed" | <span style="color:white">Como usar:</span>
| |
| | width="3%" style="border-top-style: hidden; border-width: 1px; border-bottom-style: hidden; border-width: 1px" |
| |
| ! width="32%" style="background-color: OrangeRed" | <span style="color:white">Como conseguir:</span>
| |
| |- align="center" | | |- align="center" |
| | [[Arquivo:Medicine1.PNG|300px|link=Early Game Quest]] | | | colspan="3" | [[Arquivo:Location AKADH.png|link=]] |
| | |
| Os medicines podem ser usados como as poções. Basta clicar com o botão direito do mouse no medicine e, em seguida, clicar no seu Pokémon ou no nome dele na aba Batalha com o botão esquerdo.
| |
| | |
| | width="4%" style="border-top-style: hidden; border-width: 1px; border-bottom-style: hidden; border-width: 1px" |
| |
| | [[Arquivo:Mark22.PNG|310px|link=Early Game Quest]] | |
| | |
| | |
| | |
| | |
| | |
| Assim como as poções, as medicines também podem ser compradas no Mark.
| |
| | |
| | |
| | |
| | |
| | |
| |-
| |
| |}
| |
| | |
| <span style="color: OrangeRed">'''Comida:'''</span>
| |
| {| class="wikitable" width="40%"
| |
| ! width="31%" style="background-color: OrangeRed" | <span style="color:white">Como usar:</span>
| |
| | width="3%" style="border-top-style: hidden; border-width: 1px; border-bottom-style: hidden; border-width: 1px" |
| |
| ! width="32%" style="background-color: OrangeRed" | <span style="color:white">Como conseguir:</span>
| |
| |- align="center" | | |- align="center" |
| | [[Arquivo:Comida111.PNG|300px|link=Early Game Quest]] | | | '''Level recomendado''': |
| | | 60 ao 75 |
| | | |'''Efetividades''': |
| Você pode alimentar a si mesmo e ao seu Polémon simplesmente clicando com o botão direito na comida e, em seguida, clicando com o botão esquerdo em você ou no seu Pokémon.
| | [[Arquivo:Bug.png|link=Naturia]] [[Arquivo:Ghost1.png|link=Malefic]] [[Arquivo:Dark1.png|link=]] |
| | | |'''Pokémon Recomendados''': |
| | | [[File:093-Sh_Haunter.png|link=Shiny Haunter]] [[Arquivo:302-Sableye.png|link=Sableye]] [[File:562.png|link=Yamask]] [[arquivo:570-Zorua.png|link=]] |
| | |
| | width="4%" style="border-top-style: hidden; border-width: 1px; border-bottom-style: hidden; border-width: 1px" | | |
| | [[Arquivo:Comida222222.PNG|310px|link=Early Game Quest]] | |
| | |
| | |
| | |
| | |
| | |
| Comidas são um pouco diferentes de poções e medicines, porque não podem ser compradas no Mark. Há tipos diferentes de comidas por ao, e você pode comprar algumas delas com vendedores locais em cada cidade.
| |
| | |
| | |
| | |
| |- | | |- |
| | | colspan="3" | [[Arquivo:Attention-icon.png|20px|link=]] '''Atenção''': |
| | * Leve um Pokémon com a habilidade Dig para cavar e descer ao subsolo das pirâmides. |
| | * O mais indicado é levar Pokémon do tipo Dark, pois recebe dano nulo de ataques Psychic. |
| |} | | |} |
| | </div> |
|
| |
|
| <span style="color: OrangeRed">'''Fome:'''</span> | | <span class="mw-customtoggle-myDivision15"><font size="2"> [[Arquivo:Pokeball.png|15px|link=]] '''Caçar Pokémon do elemento Flying na Fairchild Island (VIP)''' </font></span> |
| {| class="wikitable" width="40%"
| | <div class="mw-collapsible mw-collapsed" id="mw-customcollapsible-myDivision15"> |
| ! width="31%" style="background-color: OrangeRed" | <span style="color:white">Como verificar (1):</span>
| |
| | width="3%" style="border-top-style: hidden; border-width: 1px; border-bottom-style: hidden; border-width: 1px" |
| |
| ! width="32%" style="background-color: OrangeRed" | <span style="color:white">Como verificar (2):</span>
| |
| | width="3%" style="border-top-style: hidden; border-width: 1px; border-bottom-style: hidden; border-width: 1px" |
| |
| ! width="31%" style="background-color: OrangeRed" | <span style="color:white">Como verificar (3):</span>
| |
| |- align="center"
| |
| | [[Arquivo:Foome1.PNG|300px|link=Early Game Quest]]
| |
| | |
|
| |
|
| | | {| class="wikitable" width="50%" |
| | | !align="left" style="background-color: #9d1a64 " colspan="3" | <span style="color:white">Local</span> |
| Há algumas maneiras de saber quando seu Pokémon está com fome. A primeira é verificando p ícone de fome na barra de vida do Pokémon enquanto o usa. Se o ícone estiver vermelho, o Pokémon está com fome e precisa ser alimentado.
| |
| | |
| | |
| | |
| | |
| | width="4%" style="border-top-style: hidden; border-width: 1px; border-bottom-style: hidden; border-width: 1px" |
| |
| | [[Arquivo:Foome2.PNG|310px|link=Early Game Quest]]
| |
| | |
| | |
| | |
| | |
| | |
| O Proximo é verificando a barra de movimentos. Se o Pokémon estiver com fome, um ícone de fome será mostrado próximo á barra.
| |
| | |
| | |
| | |
| | |
| | |
| | |
| | |
| | |
| | width="4%" style="border-top-style: hidden; border-width: 1px; border-bottom-style: hidden; border-width: 1px" |
| |
| | [[Arquivo:Foome3.PNG|250px|link=Early Game Quest]]
| |
| | |
| | |
| Além disso, quando seu Pokémon entra no estado de fome, aparece um ícone de fome sobre ele.
| |
| | |
| | |
| |-
| |
| |}
| |
| | |
| <span style="color: OrangeRed">'''Revive:'''</span>
| |
| | |
| {| class="wikitable" width="40%" | |
| ! width="31%" style="background-color: OrangeRed" | <span style="color:white">Quando deve usar:</span> | |
| | width="3%" style="border-top-style: hidden; border-width: 1px; border-bottom-style: hidden; border-width: 1px" |
| |
| ! width="32%" style="background-color: OrangeRed" | <span style="color:white">Como usar:</span>
| |
| |- align="center"
| |
| | [[Arquivo:Revive_1.jpg|300px|link=Early Game Quest]]
| |
| | |
| Revives tem um uso diferente de poções e medicines. Eles só podem ser usados se você não tiver um Pokémon fora da pokébola, o que o torna vulnerável a ataques inimigos. Devido a essa vulnerabilidade, você deve ter muito cuidado e estratégia sobre quando usar revives. Quando seu Pokémon é derrotado por um inimigo, a primeira coisa que você deve fazer é chamar outro Pokémon saudável para a batalha. Então, uma vez que lidar com a ameaça, você está seguro(a) para ir em frente e usar o revive.
| |
| | width="4%" style="border-top-style: hidden; border-width: 1px; border-bottom-style: hidden; border-width: 1px" |
| |
| | [[Arquivo:Revive_daisy_2.jpg|300px|link=Early Game Quest]]
| |
| | |
| Há duas maneiras diferentes de usar revives. Em cada uma delas, você deve clicar com o botão direito no revive e, em seguida, clicar com o botão esquerdo no local correspondente ao método.
| |
| | |
| '''1)''' A primeira é usá-lo na pokébola do seu Pokémon derrotado. Lembre-se de que você não pode ter um Pokémon fora da pokébola para usar revives.
| |
| | |
| '''2)''' A segunda é usá-lo na barra de vida do seu Pokémon derrotado.
| |
| | |
| |-
| |
| |}
| |
| | |
| [[Arquivo:Revives_onde_conseguir.png|link=Early Game Quest]]
| |
| | |
| Vamos agora falar sobre a Evolução.
| |
| | |
| No nível 20, seu pokemon baby poderá fazer um “upgrade” á sua forma adulta, claro, com uma pequena ajuda. Há um item peculiar chamado Eviolite ([[Arquivo:Forrestpt2_5.PNG|link=Early Game Quest]]) que pode ajuda-lo(a) neste processo.Além disso, leve esses suprimentos para ajuda-lo(a) em sua jornada.
| |
| | |
| Fale com '''Flint''', ele mora em uma pequena casa ao nordeste da cidade, próximo ao rio. Ele sabe muito sobre pedras peculiares. Localização marcada em seu minimapa.
| |
| | |
| ===<span style="color: OrangeRed">'''Flint'''</span>===
| |
| <span style="color:red">'''Obs.:'''</span> Esse NPC só irá oferecer a tarefa/missão, caso já tenha iniciado o dialogo com o [[Early_Game_Quest#Pallet|Professor Oak]]. <br>
| |
| | |
| Bem vindo (a) jovem treinador(a). Você é um dos novos treinadores de Pallet, Não é?
| |
| | |
| [[Arquivo:Flinnttt.PNG|link=Early Game Quest]]
| |
| | |
| <span style="color: OrangeRed">'''Localização:'''</span>
| |
| | |
| [[Arquivo:Fliiint_mapa1.PNG|link=Early Game Quest]]
| |
| | |
| Flint está disposto a ajuda-lo com o Eviolite. Mas, primeiro, você precisa provar que é digno(a). ele quer que você derrote Forrest, o mais velho dos irmãos de Brock, em uma batalha de Pokémon.Se você derota-lo, te direi onde está o Eviolite.Encontre e desafie Forrest no Ginásio de Pewter.
| |
| | |
| <span style="color: OrangeRed">'''Localização:'''</span>
| |
| | |
| [[Arquivo:Mapaflintt2.PNG|link=Early Game Quest]]
| |
| | |
| '''Obs:''' Para chegar até Forrest, suba e desça as escadas (atrás do Centro Pokémon).
| |
| | |
| Forrest é o irmão de Brock, e aceita seu desafio de batalha como treinamento, mas antes, você receberá dicas importantes sobre batalhas:
| |
| | |
| | |
| <span style="color: OrangeRed">'''Dicas de Batalha:'''</span>
| |
| {| class="wikitable" width="30%"
| |
| ! width="30%" style="background-color: OrangeRed" | <span style="color:white">Pokémon:</span>
| |
| | width="2%" style="border-top-style: hidden; border-width: 1px; border-bottom-style: hidden; border-width: 1px" |
| |
| ! width="30%" style="background-color: OrangeRed" | <span style="color:white">Troca de Pokémon:</span>
| |
| |- align="center"
| |
| | Os duelos geralmente são uma batalha de 1 contra 1. em que cada treinador pode usar 6 Pokémon. No entanto, neste caso, Forrest usará apenas 3. Você pode usar todos os seus 6.
| |
| | width="4%" style="border-top-style: hidden; border-width: 1px; border-bottom-style: hidden; border-width: 1px" |
| |
| | Quando seu Pokémon for derrotado, você tem um limite de tempo para convocar outro. Se não o fizer, perderá a batalha. Este limite de tempo é estabelecido a cada duelo, e, neste caso, será de um minuto.
| |
| |-
| |
| {| class="wikitable" width="30%"
| |
| ! width="30%" style="background-color: OrangeRed" | <span style="color:white">Poções:</span>
| |
| | width="2%" style="border-top-style: hidden; border-width: 1px; border-bottom-style: hidden; border-width: 1px" |
| |
| ! width="30%" style="background-color: OrangeRed" | <span style="color:white">Limite de Tempo:</span>
| |
| |- align="center" | | |- align="center" |
| | A quantidade de poções que você pode usar é definida em cada duelo. Neste caso, nenhuma poção será permitida. | | | colspan="3" | [[Arquivo:Location Pidgeot.png|link=]] |
| | |
| Você pode chamar de volta seu Pokémon em batalha e, então, chamar outro. O Pokémon que você chamar de volta também pode ser usado mais tarde, caso ele não desmaie.
| |
| | width="4%" style="border-top-style: hidden; border-width: 1px; border-bottom-style: hidden; border-width: 1px" |
| |
| | Cada duelo tem um limite de tempo. Neste caso, o limite de tempo é de 10 minutos.
| |
| |}
| |
| | |
| <span style="color: OrangeRed">'''Batalhar contra:'''</span>
| |
| | |
| {| class="wikitable"
| |
| |-
| |
| ! scope="col"| Zubat
| |
| ! scope="col"| Rhyhorn
| |
| ! scope="col"| Steelix
| |
| |- style="width:50px; text-align:center;"
| |
| | [[Arquivo:041-Zubat.png|link=Zubat]] | |
| | [[Arquivo:111-Rhyhorn.png|link=Rhyhorn]]
| |
| | [[Arquivo:208-Steelix.png|link=Steelix]]
| |
| |}
| |
| | |
| Você conseguiu derrotar Forrest em uma batalha pokémon. Volte ao Flint para relatar seu progresso.
| |
| | |
| <span style="color: OrangeRed">'''Recompensas:'''</span>
| |
| | |
| {| class="wikitable"
| |
| |-
| |
| ! scope="col"| Forrest Bottle Cap
| |
| | [[Arquivo:Forrest8.PNG|link=Early Game Quest]]
| |
| |}
| |
| | |
| {| class="wikitable" width="15%"
| |
| ! scope="col" width="5%" align="center" style="background-color: OrangeRed" padding: 5px;" | <span style="color: white">'''Experiência'''</span>
| |
| |- align="center" | | |- align="center" |
| | style="font-weight: bold; ; padding: 5px;" | 8000 de Exp. | | | '''Level recomendado''': |
| <!--T:28-->
| | 60 ao 79 |
| |}
| | |'''Efetividades''': |
| | | [[Arquivo:Electric.png|link=]] [[Arquivo:Ice.png|link=Seavell]] [[Arquivo:Rock.png|link=Orebound]] |
| | | |'''Pokémon Recomendados''': |
| Flint reconhece que você ganhou a batalha, embora Forrest não seja um Líder de ginásio, é ele quem assume o lugar de Brock quando ele precisa sair.
| | [[Arquivo:025-Pikachu.png|link=Pikachu]] [[File:087-Dewgong.png|link=Dewgong]] [[File:091-Cloyster.png|link=Cloyster]] [[File:522-Blitzle.png|link=Blitzle]] [[File:564-Tirtouga.png|link=Tirtouga]] [[File:613-Cubchoo.png|link=Cubchoo]] |
| | |
| Flint é um comerciante de pedras. Naturalmente tem todos os tipos de pedra com ele. Receba agora a sua Eviolite.
| |
| | |
| {| class="wikitable"
| |
| |-
| |
| ! scope="col"| Eviolite
| |
| | [[Arquivo:Forrestpt2_5.PNG|link=Early Game Quest]]
| |
| |}
| |
| | |
|
| |
| Você conseguiu provar a Flint que é digno(a), e ele te deu o Eviolite. Volte á Emerald para relatar seu progresso.
| |
| | |
| Emerald pede que você desafie alguns treinadores para praticar suas habilidades de luta.
| |
| | |
| ===<span style="color: OrangeRed">'''Ron'''</span>===
| |
| <span style="color:red">'''Obs.:'''</span> Esse NPC só irá oferecer a tarefa/missão, caso já tenha iniciado o dialogo com o [[Early_Game_Quest#Pallet|Professor Oak]]. <br>
| |
| | |
| Encontre o Guardião dos Pássaros '''Ron''', no pequeno posto de observação nas montanhas ao sul daqui. Ele é um especialista em pássaros e ficará feliz em ajudá-lo(a) em sua missão. A localização dele está em seu minimapa. Boa sorte!
| |
| | |
| [[Arquivo:Rono.PNG|link=Early Game Quest]] | |
| | |
| <span style="color: OrangeRed">'''Localização:'''</span>
| |
| | |
| [[Arquivo:Ronomap.PNG|link=Early Game Quest]] | |
| | |
| '''Obs:''' suba as escadas. | |
| | |
| Quanto mais forte o Pokémon, mais difícil será captura-lo. Faz sentido, certo? Neste caso, Pidgeotto será um pouco mais difícil de capturar. Certifique-se de ter Pokébolas e suprimentos suficientes para isso. Você também pode tentar usar algumas Pokébolas mais fortes, como Great Balls ([[Arquivo:Great-ball%281%29.png|link=Great Ball]]), que podem ser compradas com o Mark.Alem disto... Pokémon do tipo Elétrico podem ser muito uteis contra eles. Talvez algum cidadão possa ajuda-lo com mais informações sobre um pokémon chamado ‘Magnemite’.
| |
| | |
| Sua missão será a seguinte:
| |
| | |
| <span style="color: OrangeRed">'''Derrotar:'''</span>
| |
| | |
| {| class="wikitable"
| |
| |-
| |
| ! scope="col"| 20 Pidgeotto
| |
| ! scope="col"| 10 Pidgey
| |
| |- style="width:50px; text-align:center;"
| |
| | [[Arquivo: 017-Pidgeotto.png|link=Pidgeotto]] | |
| | [[Arquivo:016-Pidgey.png|link=Pidgey]]
| |
| |}
| |
| | |
| <span style="color: OrangeRed">'''Capturar:'''</span>
| |
| | |
| {| class="wikitable"
| |
| |- | | |- |
| ! scope="col"| Pidgeotto
| | | colspan="3" | [[Arquivo:Attention-icon.png|20px|link=]] '''Atenção''': |
| |- style="width:50px; text-align:center;" | | * O Pokémon mais recomendado para esta área é o Pikachu. Lembre-se de levar muitos revives. |
| | [[Arquivo:017-Pidgeotto.png|link=Early Game Quest]] | | * Ao se aproximar da ilha utilizando Fly, tenha bastante cuidado, há alguns Pidgeot no último andar. |
| |}
| |
| | |
| <span style="color: OrangeRed">'''Registrar na Pokedex:'''</span>
| |
| | |
| {| class="wikitable"
| |
| |-
| |
| ! scope="col"| Pidgey
| |
| ! scope="col"| Pidgeotto
| |
| |- style="width:50px; text-align:center;"
| |
| | [[Arquivo:016-Pidgey.png|link=Pidgey]]
| |
| | [[Arquivo: 017-Pidgeotto.png|link=Pidgeotto]]
| |
| |}
| |
| | |
| <span style="color: OrangeRed">'''Você Ganhou:'''</span>
| |
| | |
| {| class="wikitable"
| |
| |-
| |
| ! scope="col"| 10 Empty Great Balls.
| |
| |- style="width:50px; text-align:center;"
| |
| | [[Arquivo:Great-ball%281%29.png|link=Great Ball]]
| |
| |}
| |
| | |
| '''Dicas''': Você pode encontrar Pidgey e Pidgeotto em uma pequena montanha na floresta, fora do limite da cidade, ao sul.
| |
| | |
| <span style="color: OrangeRed">'''Localização:'''</span>
| |
| | |
| [[Arquivo:Ronomap2.PNG|link=Early Game Quest]]
| |
| | |
| Além disso, há outra montanha onde você pode encontrar pidgey e pidgeotto em grupos maiores ao noroeste da cidade
| |
| | |
| [[Arquivo:Ronpewter.PNG|link=Early Game Quest]]
| |
| | |
| Volte quando concluir.
| |
| | |
| <span style="color: OrangeRed">'''Recompensa:'''</span>
| |
| | |
| {| class="wikitable" width="15%"
| |
| ! scope="col" width="10%" align="center" style="background-color: OrangeRed" padding: 5px;" | <span style="color: white">'''Recompensa pela Captura'''</span>
| |
| |- align="center"
| |
| | style="font-weight: bold; ; padding: 5px;" | 4950 de Exp.
| |
| <!--T:28-->
| |
| |} | | |} |
| | </div> |
|
| |
|
| Volte para Emerald Para concluir sua tarefa:
| |
|
| |
| <span style="color: OrangeRed">'''Recompensa:'''</span>
| |
|
| |
| {| class="wikitable" width="15%"
| |
| ! scope="col" width="10%" align="center" style="background-color: OrangeRed" padding: 5px;" | <span style="color: white">'''Recompensa pela Captura'''</span>
| |
| |- align="center"
| |
| | style="font-weight: bold; ; padding: 5px;" | 5000 de Exp.
| |
| <!--T:28-->
| |
| |}
| |
|
| |
| ===<span style="color: OrangeRed">'''Treinadores Locais'''</span>===
| |
|
| |
| Emerald quer que você derrote alguns treinadores locais para praticar. Eles reúnem-se em torno de uma pequena praça no centro da cidade. Os mais notáveis são '''Azure, Scarlet e June'''. Derrote cada um deles em combate e, depois, volte para Emerald.
| |
|
| |
| [[Arquivo:Npcspewter4.PNG|link=Early Game Quest]]
| |
|
| |
| <span style="color: OrangeRed">'''Localização:'''</span>
| |
|
| |
| [[Arquivo:Mapapewter4.PNG|link=Early Game Quest]]
| |
|
| |
|
| | ='''Daily Catch'''= |
|
| |
|
| '''Obs''': Será uma batalha de '''1''' contra '''1''' na qual cada um poderá usar '''6''' Pokémon.
| | <center>banner</center> |
|
| |
|
| Limite de tempo: '''3''' minutos e '''30''' segundos.
| | == '''Requisitos''' == |
| | '''Nível mínimo:''' 0 <br> |
| | '''É necessário VIP?''' Não é necessário VIP para realizar a Daily Catch, pois o jogador pode optar por capturar um Pokémon que possua respawn em um local Free. |
|
| |
|
| | == '''Funcionamento''' == |
|
| |
|
| <span style="color: OrangeRed">'''Batalhar contra:'''</span>
| | Para conferir as opções disponíveis para a captura diária, o jogador precisará abrir o seu '''Gerenciamento de Captura''', ele pode ser acessado através da tecla de atalho padrão '''"U"''', ou clicando diretamente em seu ícone na barra de acesso superior do jogo, como demonstrado abaixo: <br> |
|
| |
|
| {| class="wikitable" width="15%"
| |
| ! width="5%" style="background-color: OrangeRed" | <span style="color:white">Azure</span>
| |
| |- align="center"
| |
| |
| |
| [[Arquivo:007-Squirtle.png|link=Squirtle]] [[Arquivo: 017-Pidgeotto.png|link=Pidgeotto]] [[Arquivo:064-Kadabra.png|link=Kadabra]] [[Arquivo:058-Sh_Growlithe.png|link=Shiny Growlithe]] [[Arquivo:020-Raticate.png|link=Raticate]] [[Arquivo:102-Exeggcute.png|link=Exeggcute]]
| |
| |}
| |
|
| |
| <span style="color: OrangeRed">'''Batalhar contra:'''</span>
| |
|
| |
| {| class="wikitable" width="15%"
| |
| ! width="5%" style="background-color: OrangeRed" | <span style="color:white">June</span>
| |
| |- align="center"
| |
| |
| |
| [[Arquivo:276-Taillow.png|link=Taillow]] [[Arquivo: 278-Wingull.png|link=Wingull]] [[Arquivo:255-Torchic.png|link=Torchic]] [[Arquivo:218-Slugma.png|link=Slugma]] [[Arquivo:285-Shroomish.png|link=Shroomish]] [[Arquivo:271-Lombre.png|link=Lombre]]
| |
| |}
| |
|
| |
| <span style="color: OrangeRed">'''Batalhar contra:'''</span>
| |
|
| |
| {| class="wikitable" width="15%"
| |
| ! width="5%" style="background-color: OrangeRed" | <span style="color:white">Scarlet</span>
| |
| |- align="center"
| |
| |
| |
| [[Arquivo:446-Munchlax%281%29.png|link=Munchlax]] [[Arquivo:007-Squirtle.png|link=Squirtle]] [[Arquivo:025-Pikachu.png|link=Pikachu]] [[Arquivo:001-Bulbasaur.png|link=Bulbasaur]] [[Arquivo:066-Machop.png|link=Machop]] [[Arquivo:004-Charmander.png|link=Charmander]]
| |
| |}
| |
|
| |
|
| '''Obs''': Não perde bless/exp se morrer nessa batalha. | | <center>[[Arquivo:Interface DailyCatch.gif|link=]]</center> |
| | <center><font size='1'>O item "Sticker Pack 2022" só pode ser obtido durante o evento da Copa.</font></center> |
|
| |
|
| Após a batalha, volte para Emerald resgatar a sua recompensa.
| | <br /> |
|
| |
|
| <span style="color: OrangeRed">'''Recompensa:'''</span>
| | * Ao capturar qualquer dos Pokémon do Gerenciamento de captura, o jogador receberá uma recompensa demonstrada ao lado direito da interface. |
| | * Para as dificuldades '''“Iniciante”, “Muito fácil”''' e '''"Fácil"''', o jogador receberá apenas uma experiência variável. |
| | * Para as dificuldades '''“Médio, Difícil, Muito Difícil e Extremo”''', os jogadores receberão, além da experiência, os seguintes itens como Recompensas Diárias: <br> |
| | <br /> |
|
| |
|
| {| class="wikitable" width="15%" | | <center> |
| ! scope="col" width="10%" align="center" style="background-color: OrangeRed" padding: 5px;" | <span style="color: white">'''Recompensa pela Captura'''</span> | | {| class="wikitable" width="5%"; background-color:#9d1a64"; |
| | ! width="10%" align="center" width="30%" style="background-color: #9d1a64"|<span style="color:white">Catcher Token</span> |
| | ! width="10%" align="center" width="30%" style="background-color: #9d1a64"|<span style="color:white">Bronze Dimensional Key</span> |
| | ! width="10%" align="center" width="30%" style="background-color: #9d1a64"|<span style="color:white">Devoted Token</span> |
| |- align="center" | | |- align="center" |
| | style="font-weight: bold; ; padding: 5px;" | 6000 de Exp. | | |2x [[File:Catcher Token.png|link=]] |
| <!--T:28-->
| | |2x [[Arquivo:BronzeKey.png|link=]] |
| |}
| | |2x [[File:Devotedtoken.png|link=]] |
| | | |} </center> <br> |
| Seu trabalho terminou por aqui. Agora você deve ir a cidade de Cerulean e encontrar '''Amethyst'''! O caminho pode ser bem complicado para um (a) iniciante. Você tem que passar por Mt. Moon e Cerulean Swamp para chegar lá. Mas hoje é um dia de sorte! A líder do Ginásio de Cerulean estava visitando a cidade e está a caminho de lá agora. Se você apressar-se, pode alcança-la. Ela provavelmente estará na entrada de Mt. Moon agora mesmo. Boa sorte!
| |
| | |
| Você recebeu a carta ([[Arquivo:Carta_pewter.PNG|link=Early Game Quest]]) de Emerald Para Amethyst. Sua missão agora é entrega-la.
| |
| | |
| | |
| ===<span style="color: OrangeRed">'''Misty'''</span>===
| |
| | |
| [[Arquivo:Misty Mt.Moon.jpg|link=]] <br >
| |
| | |
| '''Misty''': Olá! Eu sou Misty, Líder de Ginásio da cidade de Cerulean. Como posso ajudá-lo?
| |
| | |
| '''Você''': Diga que Emerald te enviou para conversar com ela.
| |
| | |
| '''Misty''': Oh, eu vejo. Então você está indo para Cerulean para procurar Amethyst, certo? Temo que você não a encontre lá.
| |
| | |
| | |
| <span style="color: OrangeRed">'''Misty informa que não a encontrará em Cerulean, pois o restante da Quest está em desenvolvimento.'''</span>
| |
| | |
| | |
| Então, '''Misty''' lhe dará 3 opções:
| |
| | |
| <font size="3"><b>1 ▸</b> okay, take me to Cerulean. </font><br >
| |
| (Essa opção fará com que você seja teletransportado para o Centro Pokémon de Cerulean.)
| |
| | |
| | |
| <font size="3"><b>2 ▸</b> okay, point me the path to Cerulean.</font><br >
| |
| (Essa opção mostrará um caminho até o Centro Pokémon de Cerulean.)
| |
| | |
| | |
| Em seu caminho até a cidade de Cerulean, você encontrará os seguintes Pokémon:
| |
| | |
| {| class="wikitable" style="width: 3%;"
| |
| |-
| |
| ! scope="col" width="1%"| Zubat
| |
| ! scope="col" width="1%"| Geodude
| |
| ! scope="col" width="1%"| Weedle
| |
| |- style="width:50px; text-align:center;"
| |
| | [[Arquivo:041-Zubat.png|30px|link=Early Game Quest]]
| |
| | [[Arquivo:074-Geodude.png|30px|link=Early Game Quest]] | |
| | [[Arquivo:013-Weedle.png|30px|link=Early Game Quest]] | |
| |} | |
| | |
| | |
| <font size="3"><b>3 ▸</b> okay, i would like to stay.</font><br >
| |
| (Não acontece nada ao escolher essa opção, mas concluirá o diálogo.)
| |
| | |
| <span style="color: OrangeRed; font-size:14px ">'''Localização:'''</span>
| |
| | |
| Você poderá encontrar a '''Misty''' próximo à entrada para o Mt. Moon. <br >
| |
| | |
| [[Arquivo:Misty Mt.Moon2.jpg|link=]]
| |
| | |
| | |
| ===<span style="color: OrangeRed">'''Mr. Gerald'''</span>===
| |
| | |
| Você também pode trocar de cidade natal para Cerulean, se desejar. Desta forma, você será enviado(a) ao Centro Pokémon de Cerulean quando for derrotado (a), em vez de sua cidade natal atual (Pewter). Se você quiser troca-la, fale com NPC Mr. Gerald no Centro Pokémon de Cerulean e ele fará isso por você.
| |
| | |
| [[Arquivo:Gerald npc.jpg|link=]]
| |
| | |
| | |
| Ele pode ser encontrado no Centro Pokémon da cidade de Cerulean.
| |
| | |
| [[Arquivo:Mapa npc mr.gerald.jpg|link=]]
| |
| | |
| | |
| ==<font size='4'><span style="color: OrangeRed">'''Cerulean'''</span></font>==
| |
|
| |
|
| '''No momento é possivel apenas trocar a cidade natal, o restante da missão ainda esta em desenvolvimento e não pode ser concluída no momento. As etapas serão adicionadas em breve!''' | | =='''Observações'''== |
|
| |
|
| <center>[[Arquivo:Em_desenvolvimento.jpg|600px|link=Early Game Quest]]</center>
| | * As Recompensas Diárias poderão ser adquiridas até duas vezes ao dia, além de duas Recompensas Extras em determinadas dificuldades do Gerenciamento de Captura, demonstradas na interface. |
| | * O jogador não receberá recompensa caso repita um Pokémon que já foi capturado na Daily Catch. |
| | * A Daily Catch é reiniciada todos os dias após o retorno do server save, às 07:40 BRT. |
| | * Após realizada a captura, a recompensa é automaticamente enviada ao jogador. Caso o inventário do jogador esteja cheio, as recompensas serão enviadas ao seu Depósito Pokémon (Locker). |
![]()
![]()
![]() Casas
Casas ![]() Device
Device ![]() Guilda
Guilda ![]() Headbutt
Headbutt ![]() Pesca
Pesca ![]() Poke Party e Team Finder
Poke Party e Team Finder ![]() Viagens
Viagens ![]() Safari
Safari ![]() Sistema de Boost
Sistema de Boost ![]() Sistema de Ticket
Sistema de Ticket ![]() Sistema de Segurança
Sistema de Segurança ![]() Smeargle
Smeargle ![]() Caçar Pokémon do elemento Grass na floresta de Cerulean
Caçar Pokémon do elemento Grass na floresta de Cerulean
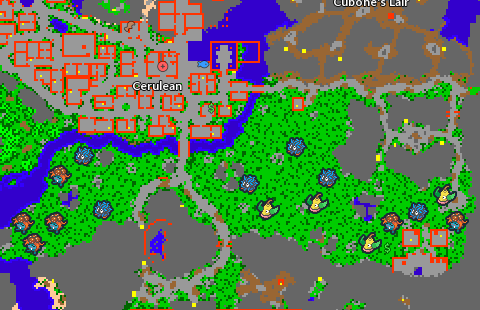
![]() Caçar Pokémon do elemento Electric na ilha de Hamlin
Caçar Pokémon do elemento Electric na ilha de Hamlin
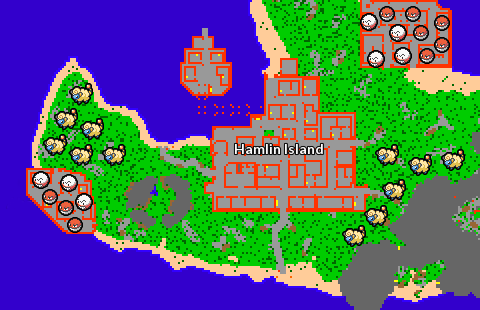
![]() Caçar Pokémon do elemento Fire em Cinnabar (VIP)
Caçar Pokémon do elemento Fire em Cinnabar (VIP)
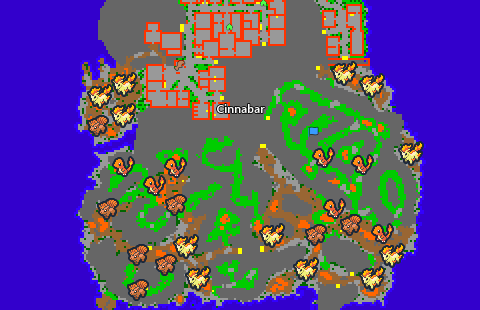
![]() Caçar Pokémon do elemento Earth em Vermilion
Caçar Pokémon do elemento Earth em Vermilion
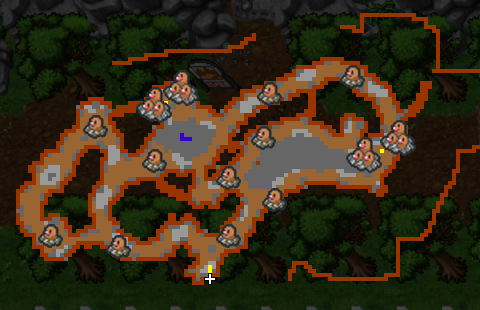
![]() Caçar Pokémon do elemento Poison na Cerulean Quest
Caçar Pokémon do elemento Poison na Cerulean Quest
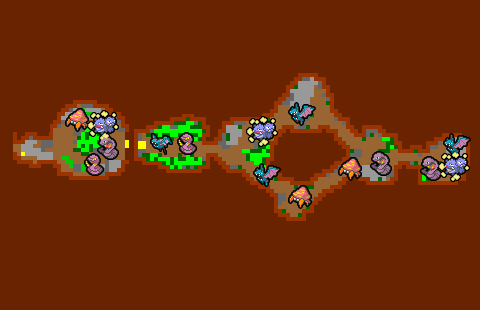
![]() Caçar Pokémon do elemento Grass em Valencia Island
Caçar Pokémon do elemento Grass em Valencia Island
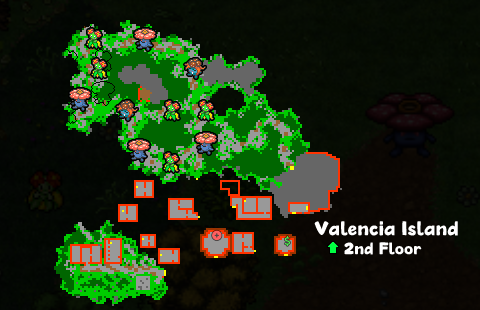
![]() Caçar Pokémon do elemento Grass em Kinnow Island (VIP)
Caçar Pokémon do elemento Grass em Kinnow Island (VIP)
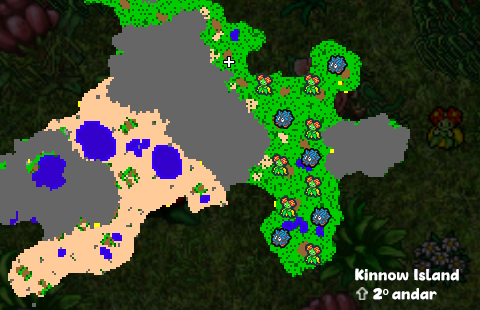
![]() Caçar Pokémon do elemento Flying em Leek Island (VIP)
Caçar Pokémon do elemento Flying em Leek Island (VIP)
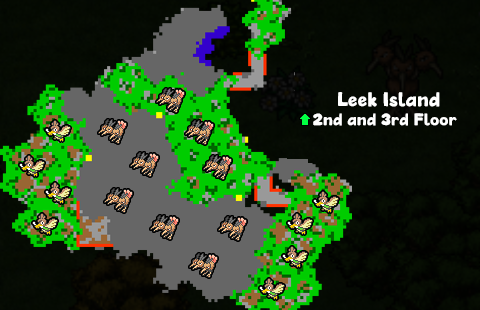
![]() Caçar Pokémon do elemento Grass em Butwal Island (VIP)
Caçar Pokémon do elemento Grass em Butwal Island (VIP)
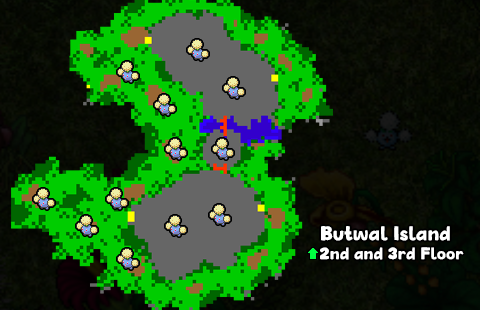
![]() Caçar Pokémon do elemento Fighting em Tangelo Island
Caçar Pokémon do elemento Fighting em Tangelo Island
![]() Caçar Pokémon do elemento Electric na Lightstorm Island (VIP)
Caçar Pokémon do elemento Electric na Lightstorm Island (VIP)
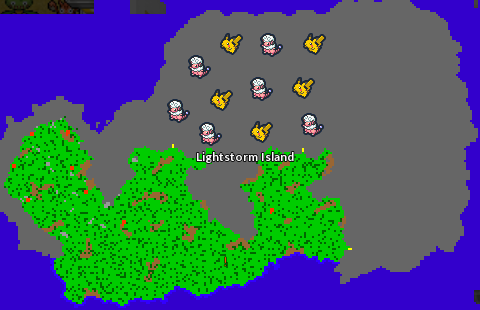
![]() Caçar Pokémon do elemento Flying em Shamouti Island
Caçar Pokémon do elemento Flying em Shamouti Island
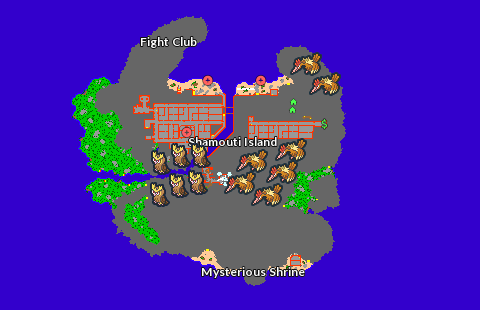
![]() Caçar Pokémon do elemento Fighting na Fight Club em Shamouti Island
Caçar Pokémon do elemento Fighting na Fight Club em Shamouti Island
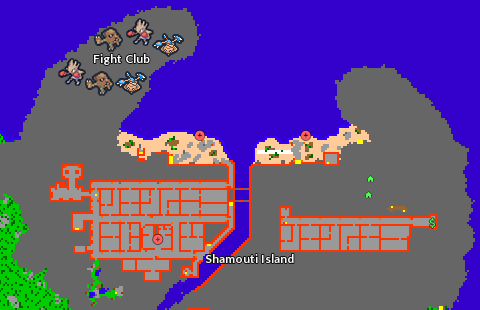
![]() Caçar Pokémon do elemento Psychic na Desert Island (VIP)
Caçar Pokémon do elemento Psychic na Desert Island (VIP)
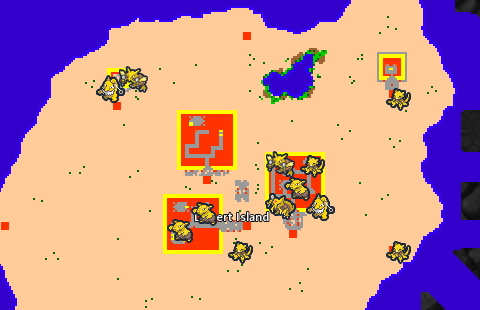
![]() Caçar Pokémon do elemento Flying na Fairchild Island (VIP)
Caçar Pokémon do elemento Flying na Fairchild Island (VIP)
