|
|
| (27 revisões intermediárias por 7 usuários não estão sendo mostradas) |
| Linha 1: |
Linha 1: |
| <center> [[Arquivo:Banner-secret-lab.jpg|link=Secret Lab]]</center> | | <center> [[Arquivo:Banner_Secret-Lab.png|link=]]</center> |
|
| |
|
| <p><font color="red">'''Nível Necessário:</font> 300+''' </p> | | <font color="red">'''Nível Mínimo:</font> 300+''' <br> |
| | <font color="red">'''Nível Recomendado:</font> 400+''' <br> |
| | Observação: No duelo contra o Cyborg Aerodactyl é necessário level 400 ou mais. |
|
| |
|
| <p><font color="red">'''Nível NW Necessário:</font> 0+''' </p>
| | <font color="red">'''Nível NW Necessário:</font> 0+''' |
|
| |
|
| <p><font color="red">'''Recompensa:</font> Apenas uma vez: 12kk EXP e 150k NW XP, Acesso a sala de Craft. <br />
| | <font color="red">'''Recompensa única:</font> 12kk EXP e 150k NW Exp, acesso à sala de Craft. <br /> |
| '''Demais meses: NW Xp Váriavel, Diversos Fragmento de Held Tier 3, 4, 5 e 6, Cyber Cells e Nightmare unusual ores '''</p> | | <font color="red">'''Recompensa demais meses:</font> NW Exp Váriavel, Diversos Fragmentos de Held Tier 3, 4, 5, 6 e 7, Cyber Cells e Nightmare Unusual Ores.''' |
| <br />
| |
|
| |
|
| <p><b>Caso encontre algum erro ou queira acrescentar alguma informação,</b> <font color="red">'''entre em contato com um dos membros da wiki.'''</font></p>
| | <b>Caso encontre algum erro ou queira acrescentar alguma informação,</b> <font color="red">'''entre em contato com um dos membros da wiki.'''</font> |
| <br />
| |
|
| |
|
| ==<span style="color: Purple">'''Introdução'''</span>== | | =Introdução= |
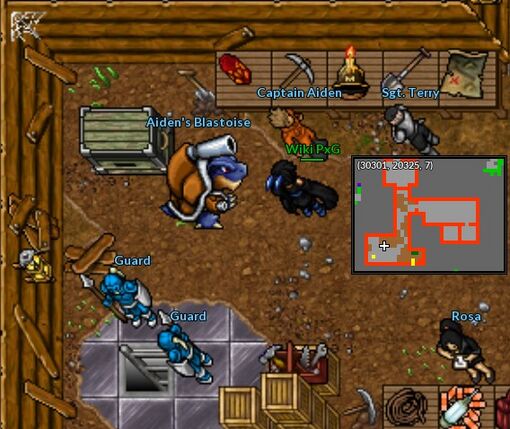
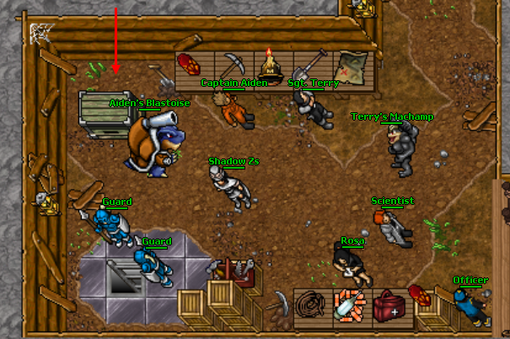
| | | Para iniciar a Quest, o jogador deverá ir até a resistência de Pewter e encontrar o NPC Captain Aiden. Ele pedirá ajuda para invadir o laboratório localizado na fortaleza de Sarkies e derrotar o seu exército de Cyborg Pokémon. |
| Algum tempo após o início do pesadelo, a resistência de Pewter reuniu alguns escavadores sob o comando de Shawn, um engenheiro que estava buscando uma forma de entrar sorrateiramente na fortaleza de Sarkies, visando adquirir informações e talvez planejar um possível contra-ataque. Entretanto, Shawn e os escavadores nunca desistiram.
| | <br> |
| Diante da situação, as resistências se viram na necessidade de realizar um desesperado ataque ao laboratório, almejando impedir que Sarkies conclua seu exército. O embate final de Sarkies contra os sobreviventes está prestes a acontecer.
| | <center> [[Arquivo:Captain_Aiden_-_Localização.jpg|510px|link=]] </center> |
| | |
| ==<span style="color: Purple">'''Como entrar'''</span>==
| |
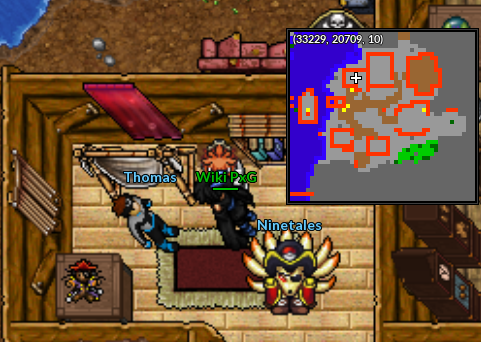
| Para entrar no laboratório, você precisa ir na Resistência de Pewter, descer as escadas e dialogar com os NPCs
| |
| | |
| <center> [[Arquivo:Entrada_Lab.png|link=Secret Lab]] </center>
| |
| | |
| ==<span style="color: Purple">'''Observações'''</span>==
| |
| | |
| - O Secret Lab é uma '''Quest mensal'''<br />
| |
| - Ao morrer em um andar você não perde Experiência e Bless.<br />
| |
| - A primeira tentativa é de graça, as outras 5 primeiras tentativas você terá que pagar 75k (R$75000) para entrar, após as tentativas por dinheiro acabar, será necessário um Rescue Kit ([[Arquivo:Rescue_kit.png|35px|Rescue Kit|link=Secret Lab]]) ele custa '''um Diamond'''([[Arquivo:DD.gif|link=Secret Lab]]) no Diamante Shop.<br />
| |
| - Você pode trocar um Rescue Kit ([[Arquivo:Rescue_kit.png|35px|Rescue Kit|link=Secret Lab]]) mensal com a NPC Rosa por 75 Nightmare Tokens.<br />
| |
| - Após derrotar todos os Pokémon do mapa uma escada irá aparecer para você avançar ao próximo andar.<br />
| |
| - O Secret Lab é dividido em 40 andares de 5 temáticas diferentes de acordo com o Clã/Tipagem do Boss, os últimos 10 andares referente aos bosses Cyborg Crystal Onix e Cyborg Aerodactyl, não apresentam temáticas de clã, contendo Pokémon diversos.<br />
| |
| - Algumas armadilhas possuem efeito sonoro.<br />
| |
| - Se você demorar muito em um andar, Tropas aliadas ao Sarkies irão aparecer. <br />
| |
| - Pokémon Cyborg Mega e Boss são mais fortes que os normais pois são considerados Mini boss.<br />
| |
| - É possível encontrar baús nos andares, cada um poderá dar um tipo de prêmio bom ou ruim.<br />
| |
| <br><br>
| |
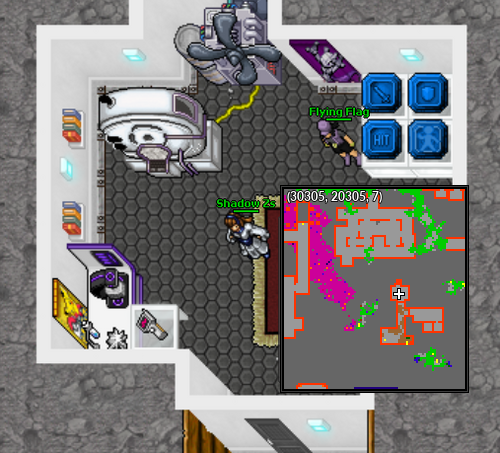
| <center>[[Arquivo:Depot_Lab.png|link=Secret Lab]]</center><br> | |
| - Lembrando que tem um depot na entrada do Secret Lab para trocar de pokémon caso necessite.<br />
| |
| | |
| == <span style="color: Purple">'''Orbs'''</span> ==
| |
| | |
| Os Orbs são novos itens que vão permitir com que o jogador execute novas mecânicas dentro do Secret Lab.
| |
|
| |
|
| | =Informações Gerais= |
| | - O Secret Lab é uma '''Quest mensal''';<br> |
| | - '''Para cada andar completado, o jogador receberá 150k de experiência''';<br> |
| | - Não há penalização de '''Experiência''' ou '''Bless''' ao ser derrotado em qualquer andar;<br> |
| | - A primeira tentativa do mês é de graça e as outras 5 primeiras tentativas jogador terá que pagar uma taxa de [[Arquivo:75k.png|25px|link=]] $75k para entrar. Após as tentativas por dinheiro acabarem, será necessário possuir um [[Arquivo:Rescue_kit.png|35px|Rescue Kit|link=]] Rescue Kit. Ele custa [[Arquivo:DD.gif|link=]] '''um Diamond''' e pode ser obtido no [[Diamond Shop]];<br> |
| | - Mensalmente, o jogador poderá trocar '''75 Nightmare Tokens''' por [[Arquivo:Rescue_kit.png|35px|Rescue Kit|link=]] '''um Rescue Kit''' com a NPC Rosa;<br> |
| | - Após derrotar todos os Pokémon do mapa, uma escada irá aparecer para você avançar ao próximo andar;<br> |
| | - O Secret Lab é dividido em 50 andares com temáticas diferentes de acordo com o Clã/Tipagem do Boss. Os últimos 10 andares, referente aos bosses Cyborg Crystal Onix e Cyborg Aerodactyl, não apresentam temáticas de clã, contendo Pokémon diversos;<br> |
| | - Algumas armadilhas possuem efeito sonoro; <br> |
| | - Se o jogador demorar muito em um andar, Tropas aliadas ao Sarkies irão aparecer; <br> |
| | - Pokémon Cyborg Mega são mais fortes que os normais, pois são considerados '''mini boss''';<br> |
| | - É possível encontrar baús nos andares. Cada um concederá uma recompensa diferente, podendo ser ela boa ou ruim.<br> |
| | <br> |
| | Além disso, há um depot na entrada do Secret Lab para trocar de Pokémon caso necessário. <br> |
| | <center>[[Arquivo:Depot_Lab.png|510px|link=]]</center> |
| | <br> |
| | ==Recursos Exclusivos== |
| | <tabber> |
| | |-|Elixir= |
| | Os elixires são itens que permitem que o jogador execute novas mecânicas dentro do Secret Lab. Estes elixires de uso '''exclusivo''' dentro do Secret Lab e não devem ser confundidos com os elixires craftados na mesa Elixir Lab, apesar de também ser possível utilizá-los na quest. São eles:<br/> |
| | <br> |
| | [[Arquivo:Excalibur_Elixir.png|30px|link=Secret Lab]] '''Excalibur Elixir''': Beber um gole desta deliciosa poção aumentará o ataque de seu Pokémon em 150% por 12 segundos. Cooldown: 3 minutos e 30 segundos. |
| | <br> |
| | [[Arquivo:Aegis_Elixir.png|30px|link=Secret Lab]] '''Aegis Elixir''': Beber um gole desta deliciosa poção aumentará a defesa de seu Pokémon em 85% por 15 segundos. Cooldown: 3 minutos e 30 segundos. |
| | <br> |
| | [[Arquivo:Ambrosia_Elixir.png|30px|link=Secret Lab]] '''Ambrosia Elixir''': Beber um gole desta deliciosa poção recuperará instantaneamente 100% da vida do seu Pokémon e aumentará a defesa ele em 70% por 15 segundos. Cooldown: 3 minutos e 30 segundos. <br/> |
| | <br> |
| | '''Ao sair do Secret Lab ou ser derrotado, os elixires desaparecerão do inventário do jogador.''' |
| | |-|Orbs= |
| | Os Orbs são itens que permitem que o jogador execute novas mecânicas dentro do Secret Lab. Sendo eles:<br/> |
| | <br> |
| [[Arquivo:Escape_Orb.png|30px|link=Secret Lab]] '''Escape Orb''': Permite o jogador realizar uma fuga rápida para o início do andar que se encontra, utilizado geralmente para fugir de inimigos que o emboscaram.<br /> | | [[Arquivo:Escape_Orb.png|30px|link=Secret Lab]] '''Escape Orb''': Permite o jogador realizar uma fuga rápida para o início do andar que se encontra, utilizado geralmente para fugir de inimigos que o emboscaram.<br /> |
| [[Arquivo:Itemizer_Orb.png|30px|link=Secret Lab]] '''Itemizer Orb''': Com a tecnologia de Sarkies, esse item transforma um Cyborg do andar em um baú.<br /> | | [[Arquivo:Itemizer_Orb.png|30px|link=Secret Lab]] '''Itemizer Orb''': Com a tecnologia de Sarkies, esse item transforma um Cyborg do andar em um baú.<br /> |
| Linha 55: |
Linha 61: |
| [[Arquivo:Sandy_Orb.png|30px|link=Secret Lab]] '''Sandy Orb''': Esse Orb fará com que o Pokémon do jogador utilize o ataque Sand Storm.<br /> | | [[Arquivo:Sandy_Orb.png|30px|link=Secret Lab]] '''Sandy Orb''': Esse Orb fará com que o Pokémon do jogador utilize o ataque Sand Storm.<br /> |
| [[Arquivo:One-Shot_Orb.png|30px|link=Secret Lab]] '''One-Shot orb''': Esse Orb eliminará todos os inimigos do andar.<br /> | | [[Arquivo:One-Shot_Orb.png|30px|link=Secret Lab]] '''One-Shot orb''': Esse Orb eliminará todos os inimigos do andar.<br /> |
| | | <br> |
| '''Ao sair do Secret Lab os Orbs em sua bag irão sumir.''' | | '''Ao sair do Secret Lab ou ser derrotado, os Orbs desaparecerão do inventário do jogador.''' |
| | | |-|Baús= |
| == <span style="color: Purple">'''Elixires'''</span> == | | Durante os andares, o jogador poderá encontrar alguns baús pelo caminho com diferentes recompensas, sendo que: |
| | | <br> |
| Os elixires são novos itens que vão permitir com que o jogador execute novas mecânicas dentro do Secret Lab.
| | * Além dos prêmios em cada baú, o jogador terá uma pequena chance de encontrar uma escada que o levará para o próximo andar; <br> |
| | | * Há uma chance de aparecer o Pokémon Golurk como recompensa do baú. Tenha cuidado pois ele é forte; <br> |
| [[Arquivo:Excalibur_Elixir.png|30px|link=Secret Lab]] '''Excalibur Elixir''': Aumenta exponencialmente o ataque do Pokémon.<br /> | | * Os baús poderão estar vazios, ou seja, não dar prêmio algum. <br> |
| [[Arquivo:Aegis_Elixir.png|30px|link=Secret Lab]] '''Aegis Elixir''': Aumenta exponencialmente a defesa do Pokémon.<br /> | | Abaixo segue a lista do que cada baú pode dar: |
| [[Arquivo:Ambrosia_Elixir.png|30px|link=Secret Lab]] '''Ambrosia Elixir''': Cura 100% o Pokémon em combate, além disso aumenta a defesa dele por um período de tempo. | | <br> |
| | | <center> |
| '''Ao sair do Secret Lab os elixires em sua bag irão sumir.'''
| | {| class="wikitable" width="90%" style="text-align: center;" |
| | | |- |
| == <span style="color: Purple">'''Merchant'''</span> == | | ! width="5%" | Baú |
| | | ! width="50%" colspan="10"| Possíveis Recompensas |
| | |- |
| | | rowspan="3" | [[Arquivo:Wooden-chest.png|link=]] |
| | | [[Arquivo:Small_Nightmare_Potion.gif|link=Secret Lab]] <br> Small Nightmare Potion |
| | | [[Arquivo:Nightmare_Revive.png|link=Secret Lab]] <br> Nightmare Revive |
| | | [[Arquivo:Shield_Nightmare_Potion.png|link=Secret Lab]] <br> Shield Nightmare Potion |
| | | [[Arquivo:Excalibur_Elixir.png|30px|link=Secret Lab]] <br> Excalibur Elixir |
| | | [[Arquivo:Aegis_Elixir.png|30px|link=Secret Lab]] <br> Aegis Elixir |
| | | [[Arquivo:Ambrosia_Elixir.png|30px|link=Secret Lab]] <br> Ambrosia Elixir |
| | | [[Arquivo:NW_ore.png|link=Secret Lab]] <br> Nightmare Ore |
| | | [[Arquivo:Luminous_Orb.png|30px|link=Secret Lab]] <br> Luminous Orb |
| | | [[Arquivo:Hail_Orb.png|30px|link=Secret Lab]] <br> Hail Orb |
| | | [[Arquivo:Rainy_Orb.png|30px|link=Secret Lab]] <br> Rainy Orb |
| | |- |
| | | [[Arquivo:Sunny_Orb.png|30px|link=Secret Lab]] <br> Sunny Orb |
| | | [[Arquivo:Sandy_Orb.png|30px|link=Secret Lab]] <br> Sandy Orb |
| | | [[Arquivo:Escape_Orb.png|30px|link=Secret Lab]] <br> Escape Orb |
| | | [[Arquivo:Quick_Orb.png|30px|link=Secret Lab]] <br> Quick Orb |
| | | [[Arquivo:Radar_Orb.png|30px|link=Secret Lab]] <br> Radar Orb |
| | | [[Arquivo:Reviver_Orb.png|30px|link=Secret Lab]] <br> Reviver Orb |
| | | [[Arquivo:Itemizer_Orb.png|30px|link=Secret Lab]] <br> Itemizer Orb |
| | | [[Arquivo:Invisify_Orb.png|30px|link=Secret Lab]] <br> Invisify Orb |
| | | [[Arquivo:Posses_Orb.png|30px|link=Secret Lab]] <br> Posses Orb |
| | | [[Arquivo:Gardeessence.png|link=Secret Lab]] <br> Gardestrike Essence |
| | |- |
| | | [[Arquivo:Ironessence.png|link=Secret Lab]] <br> Ironhard Essence |
| | | [[Arquivo:Maleficessence.png|link=Secret Lab]] <br> Malefic Essence |
| | | [[Arquivo:Natuessence.png|link=Secret Lab]] <br> Naturia Essence |
| | | [[Arquivo:Oreessence.png|link=Secret Lab]] <br> Orebound Essence |
| | | [[Arquivo:Psyessence.png|link=Secret Lab]] <br> Psycraft Essence |
| | | [[Arquivo:Boltessence.png|link=Secret Lab]] <br> Raibolt Essence |
| | | [[Arquivo:Seaessence.png|link=Secret Lab]] <br> Seavell Essence |
| | | [[Arquivo:Volcanicessence.png|link=Secret Lab]] <br> Volcanic Essence |
| | | colspan="2" | [[Arquivo:Wingeon_essence.png|link=Secret Lab]] <br> Wingeon Essence |
| | |- |
| | ! width="5%" colspan="11" | |
| | |- |
| | | rowspan="4" | [[Arquivo:Silver-chest.png|link=Secret Lab]] |
| | | [[Arquivo:Small_Nightmare_Potion.gif|link=Secret Lab]] <br> Small Nightmare Potion |
| | | [[Arquivo:Nightmare_Revive.png|link=Secret Lab]] <br> Nightmare Revive |
| | | [[Arquivo:Shield_Nightmare_Potion.png|link=Secret Lab]] <br> Shield Nightmare Potion |
| | | [[Arquivo:Excalibur_Elixir.png|30px|link=Secret Lab]] <br> Excalibur Elixir |
| | | [[Arquivo:Aegis_Elixir.png|30px|link=Secret Lab]] <br> Aegis Elixir |
| | | [[Arquivo:Ambrosia_Elixir.png|30px|link=Secret Lab]] <br> Ambrosia Elixir |
| | | [[Arquivo:Premier-ball%281%29.png|link=Secret Lab]] <br> Premier Ball |
| | | [[Arquivo:Nightmare_Ball.png|link=Secret Lab]] <br> Nightmare Ball |
| | | [[Arquivo:NW_ore.png|link=Secret Lab]] <br> Nightmare Ore |
| | | [[Arquivo:Gardeessence.png|link=Secret Lab]] <br> Gardestrike Essence |
| | |- |
| | | [[Arquivo:Ironessence.png|link=Secret Lab]] <br> Ironhard Essence |
| | | [[Arquivo:Maleficessence.png|link=Secret Lab]] <br> Malefic Essence |
| | | [[Arquivo:Natuessence.png|link=Secret Lab]] <br> Naturia Essence |
| | | [[Arquivo:Oreessence.png|link=Secret Lab]] <br> Orebound Essence |
| | | [[Arquivo:Psyessence.png|link=Secret Lab]] <br> Psycraft Essence |
| | | [[Arquivo:Boltessence.png|link=Secret Lab]] <br> Raibolt Essence |
| | | [[Arquivo:Seaessence.png|link=Secret Lab]] <br> Seavell Essence |
| | | [[Arquivo:Volcanicessence.png|link=Secret Lab]] <br> Volcanic Essence |
| | | [[Arquivo:Wingeon_essence.png|link=Secret Lab]] <br> Wingeon Essence |
| | | [[Arquivo:Luminous_Orb.png|30px|link=Secret Lab]] <br> Luminous Orb |
| | |- |
| | | [[Arquivo:Hail_Orb.png|30px|link=Secret Lab]] <br> Hail Orb |
| | | [[Arquivo:Rainy_Orb.png|30px|link=Secret Lab]] <br> Rainy Orb |
| | | [[Arquivo:Sunny_Orb.png|30px|link=Secret Lab]] <br> Sunny Orb |
| | | [[Arquivo:Sandy_Orb.png|30px|link=Secret Lab]] <br> Sandy Orb |
| | | [[Arquivo:Escape_Orb.png|30px|link=Secret Lab]] <br> Escape Orb |
| | | [[Arquivo:Quick_Orb.png|30px|link=Secret Lab]] <br> Quick Orb |
| | | [[Arquivo:Radar_Orb.png|30px|link=Secret Lab]] <br> Radar Orb |
| | | [[Arquivo:Reviver_Orb.png|30px|link=Secret Lab]] <br> Reviver Orb |
| | | [[Arquivo:Itemizer_Orb.png|30px|link=Secret Lab]] <br> Itemizer Orb |
| | | [[Arquivo:Invisify_Orb.png|30px|link=Secret Lab]] <br> Invisify Orb |
| | |- |
| | | colspan="5" | [[Arquivo:Posses_Orb.png|30px|link=Secret Lab]] <br> Posses Orb |
| | | colspan="5" | [[Arquivo:One-Shot_Orb.png|30px|link=Secret Lab]] <br> One-Shot Orb |
| | |- |
| | ! width="5%" colspan="11" | |
| | |- |
| | | rowspan="3"| [[Arquivo:Golden-chest.png|link=Secret Lab]] |
| | | [[Arquivo:Small_Nightmare_Potion.gif|link=Secret Lab]] <br> Small Nightmare Potion |
| | | [[Arquivo:Nightmare_Revive.png|link=Secret Lab]] <br> Nightmare Revive |
| | | [[Arquivo:Shield_Nightmare_Potion.png|link=Secret Lab]] <br> Shield Nigthmare Potion |
| | | [[Arquivo:Excalibur_Elixir.png|30px|link=Secret Lab]] <br> Excalibur Elixir |
| | | [[Arquivo:Aegis_Elixir.png|30px|link=Secret Lab]] <br> Aegis Elixir |
| | | [[Arquivo:Ambrosia_Elixir.png|30px|link=Secret Lab]] <br> Ambrosia Elixir |
| | | [[Arquivo:NW_ore.png|link=Secret Lab]] <br> Nightmare Ore |
| | | [[Arquivo:Gardeessence.png|link=Secret Lab]] <br> Gardestrike Essence |
| | | [[Arquivo:Ironessence.png|link=Secret Lab]] <br> Ironhard Essence |
| | | [[Arquivo:Maleficessence.png|link=Secret Lab]] <br> Malefic Essence |
| | |- |
| | | [[Arquivo:Natuessence.png|link=Secret Lab]] <br> Naturia Essence |
| | | [[Arquivo:Oreessence.png|link=Secret Lab]] <br> Orebound Essence |
| | | [[Arquivo:Psyessence.png|link=Secret Lab]] <br> Psycraft Essence |
| | | [[Arquivo:Boltessence.png|link=Secret Lab]] <br> Raibolt Essence |
| | | [[Arquivo:Seaessence.png|link=Secret Lab]] <br> Seavell Essence |
| | | [[Arquivo:Volcanicessence.png|link=Secret Lab]] <br> Volcanic Essence |
| | | [[Arquivo:Wingeon_essence.png|link=Secret Lab]] <br> Wingeon Essence |
| | | [[Arquivo:Hail_Orb.png|30px|link=Secret Lab]] <br> Hail Orb |
| | | [[Arquivo:Rainy_Orb.png|30px|link=Secret Lab]] <br> Rainy Orb |
| | | [[Arquivo:Luminous_Orb.png|30px|link=Secret Lab]] <br> Luminous Orb |
| | |- |
| | | [[Arquivo:Sunny_Orb.png|30px|link=Secret Lab]] <br> Sunny Orb |
| | | [[Arquivo:Sandy_Orb.png|30px|link=Secret Lab]] <br> Sandy Orb |
| | | [[Arquivo:Escape_Orb.png|30px|link=Secret Lab]] <br> Escape Orb |
| | | [[Arquivo:Quick_Orb.png|30px|link=Secret Lab]] <br> Quick Orb |
| | | [[Arquivo:Radar_Orb.png|30px|link=Secret Lab]] <br> Radar Orb |
| | | [[Arquivo:Reviver_Orb.png|30px|link=Secret Lab]] <br> Reviver Orb |
| | | [[Arquivo:Itemizer_Orb.png|30px|link=Secret Lab]] <br> Itemizer Orb |
| | | [[Arquivo:Invisify_Orb.png|30px|link=Secret Lab]] <br> Invisify Orb |
| | | [[Arquivo:Posses_Orb.png|30px|link=Secret Lab]] <br> Posses Orb |
| | | [[Arquivo:One-Shot_Orb.png|30px|link=Secret Lab]] <br> One-Shot Orb |
| | |} |
| | </center> |
| | |-|Merchant= |
| No início de cada andar o Merchant pode aparecer por um tempo vendendo alguns itens. | | No início de cada andar o Merchant pode aparecer por um tempo vendendo alguns itens. |
| | | <br> |
| <center>[[Arquivo:Merchant_-_Negocia_itens.png|link=Secret Lab]]</center> | | <center>[[Arquivo:Merchant_-_Negocia_itens.png|link=Secret Lab]]</center> |
| | | <br> |
| Segue a lista dos itens que ele pode vender. | | Segue a lista dos itens que ele pode vender: |
| | | <br> |
| <center> | | <center> |
| {| class="wikitable" width="100%" style="font-size:13px" | | {| class="wikitable" width="80%" style="text-align: center;" |
| |- | | |- |
| ! width="10% | Medicine | | ! width="10% | Medicine |
| Linha 100: |
Linha 217: |
| | [[Arquivo:Defensee.png|link=Secret Lab]] | | | [[Arquivo:Defensee.png|link=Secret Lab]] |
| | [[Arquivo:Shielders.png|link=Secret Lab]] | | | [[Arquivo:Shielders.png|link=Secret Lab]] |
| |-
| |
| | height="10px" style="border-left-style: hidden; border-width: 1px; border-right-style: hidden; border-width: 1px" |
| |
| |- | | |- |
| ! width="10% | Attack elixir | | ! width="10% | Attack elixir |
| Linha 113: |
Linha 228: |
| ! width="10% | Itemizer Orb | | ! width="10% | Itemizer Orb |
| ! width="10% | Invisify Orb | | ! width="10% | Invisify Orb |
| |- align="center" | | |- |
| | [[Arquivo:Attackelixir.png|link=Secret Lab]] | | | [[Arquivo:Attackelixir.png|link=Secret Lab]] |
| | [[Arquivo:Swordsmans.png|link=Secret Lab]] | | | [[Arquivo:Swordsmans.png|link=Secret Lab]] |
| Linha 124: |
Linha 239: |
| | [[Arquivo:Itemizer_Orb.png|30px|link=Secret Lab]] | | | [[Arquivo:Itemizer_Orb.png|30px|link=Secret Lab]] |
| | [[Arquivo:Invisify_Orb.png|30px|link=Secret Lab]] | | | [[Arquivo:Invisify_Orb.png|30px|link=Secret Lab]] |
| |-
| |
| | height="10px" style="border-left-style: hidden; border-width: 1px; border-right-style: hidden; border-width: 1px" |
| |
| |- | | |- |
| ! width="10% | Luminous Orb | | ! width="10% | Luminous Orb |
| Linha 137: |
Linha 250: |
| ! width="10% | Sandy Orb | | ! width="10% | Sandy Orb |
| ! width="10% | One-Shot Orb | | ! width="10% | One-Shot Orb |
| |- align="center" | | |- |
| | [[Arquivo:Luminous_Orb.png|30px|link=Secret Lab]]
| |
| | [[Arquivo:Posses_Orb.png|30px|link=Secret Lab]]
| |
| | [[Arquivo:Quick_Orb.png|30px|link=Secret Lab]]
| |
| | [[Arquivo:Radar_Orb.png|30px|link=Secret Lab]]
| |
| | [[Arquivo:Reviver_Orb.png|30px|link=Secret Lab]]
| |
| | [[Arquivo:Hail_Orb.png|30px|link=Secret Lab]]
| |
| | [[Arquivo:Rainy_Orb.png|30px|link=Secret Lab]]
| |
| | [[Arquivo:Sunny_Orb.png|30px|link=Secret Lab]]
| |
| | [[Arquivo:Sandy_Orb.png|30px|link=Secret Lab]]
| |
| | [[Arquivo:One-Shot_Orb.png|30px|link=Secret Lab]]
| |
| |}
| |
| </center>
| |
| | |
| == <span style="color: Purple">'''Baús'''</span> ==
| |
| | |
| Durante os andares você poderá encontrar alguns baús pelo caminho que poderão dar prêmios bons ou ruim.
| |
| | |
| Abaixo segue a lista do que cada baú pode dar:
| |
| | |
| * Além dos prêmios em cada baú pode vim uma escada que te leva para o próximo andar.
| |
| * Um prêmio ruim do baú é o pokémon Golurk, cuidado pois ele é forte.
| |
| * Os baús poderão estar vazios, ou seja, não dar prêmio algum.
| |
| | |
| <center>[[Arquivo:Wooden-chest.png|link=Secret Lab]]</center>
| |
| | |
| <center>
| |
| {| class="wikitable" width="100%"
| |
| |-
| |
| ! width="10% |Small Nightmare Potion
| |
| ! width="10% |Nightmare Revive
| |
| ! width="10% |Luminous Orb
| |
| ! width="10% |Hail Orb
| |
| ! width="10% |Rainy Orb
| |
| ! width="10% |Sunny Orb
| |
| ! width="10% |Sandy Orb
| |
| ! width="10% |Gardestrike Essence
| |
| ! width="10% |Ironhard Essence
| |
| ! width="10% |Malefic Essence
| |
| |- align="center"
| |
| | [[Arquivo:Small_Nightmare_Potion.gif|link=Secret Lab]]
| |
| | [[Arquivo:Nightmare_Revive.png|link=Secret Lab]]
| |
| | [[Arquivo:Luminous_Orb.png|30px|link=Secret Lab]] | | | [[Arquivo:Luminous_Orb.png|30px|link=Secret Lab]] |
| | [[Arquivo:Hail_Orb.png|30px|link=Secret Lab]]
| |
| | [[Arquivo:Rainy_Orb.png|30px|link=Secret Lab]]
| |
| | [[Arquivo:Sunny_Orb.png|30px|link=Secret Lab]]
| |
| | [[Arquivo:Sandy_Orb.png|30px|link=Secret Lab]]
| |
| | [[Arquivo:Gardeessence.png|link=Secret Lab]]
| |
| | [[Arquivo:Ironessence.png|link=Secret Lab]]
| |
| | [[Arquivo:Maleficessence.png|link=Secret Lab]]
| |
| |-
| |
| | height="10px" style="border-left-style: hidden; border-width: 1px; border-right-style: hidden; border-width: 1px" |
| |
| |-
| |
| ! width="10% |Shield Nightmare Potion
| |
| ! width="10% |Naturia Essence
| |
| ! width="10% |Orebound Essence
| |
| ! width="10% |Psycraft Essence
| |
| ! width="10% |Raibolt Essence
| |
| ! width="10% |Seavell Essence
| |
| ! width="10% |Volcanic Essence
| |
| ! width="10% |Wingeon Essence
| |
| ! width="10% |Nightmare ore
| |
| ! width="10% |Excalibur Elixir
| |
| |- align="center"
| |
| | [[Arquivo:Shield_Nightmare_Potion.png|link=Secret Lab]]
| |
| | [[Arquivo:Natuessence.png|link=Secret Lab]]
| |
| | [[Arquivo:Oreessence.png|link=Secret Lab]]
| |
| | [[Arquivo:Psyessence.png|link=Secret Lab]]
| |
| | [[Arquivo:Boltessence.png|link=Secret Lab]]
| |
| | [[Arquivo:Seaessence.png|link=Secret Lab]]
| |
| | [[Arquivo:Volcanicessence.png|link=Secret Lab]]
| |
| | [[Arquivo:Wingeon_essence.png|link=Secret Lab]]
| |
| | [[Arquivo:NW_ore.png|link=Secret Lab]]
| |
| | [[Arquivo:Excalibur_Elixir.png|30px|link=Secret Lab]]
| |
| |-
| |
| | height="10px" style="border-left-style: hidden; border-width: 1px; border-right-style: hidden; border-width: 1px" |
| |
| |-
| |
| ! width="10% |Escape Orb
| |
| ! width="10% |Quick Orb
| |
| ! width="10% |Radar Orb
| |
| ! width="10% |Reviver Orb
| |
| ! width="10% |Aegis Elixir
| |
| ! width="10% |Ambrosia Elixir
| |
| ! width="10% |Itemizer Orb
| |
| ! width="10% |Invisify Orb
| |
| ! width="10% |Posses Orb
| |
| |- align="center"
| |
| | [[Arquivo:Escape_Orb.png|30px|link=Secret Lab]]
| |
| | [[Arquivo:Quick_Orb.png|30px|link=Secret Lab]]
| |
| | [[Arquivo:Radar_Orb.png|30px|link=Secret Lab]]
| |
| | [[Arquivo:Reviver_Orb.png|30px|link=Secret Lab]]
| |
| | [[Arquivo:Aegis_Elixir.png|30px|link=Secret Lab]]
| |
| | [[Arquivo:Ambrosia_Elixir.png|30px|link=Secret Lab]]
| |
| | [[Arquivo:Itemizer_Orb.png|30px|link=Secret Lab]]
| |
| | [[Arquivo:Invisify_Orb.png|30px|link=Secret Lab]]
| |
| | [[Arquivo:Posses_Orb.png|30px|link=Secret Lab]] | | | [[Arquivo:Posses_Orb.png|30px|link=Secret Lab]] |
| |}
| |
| </center>
| |
|
| |
| <center>[[Arquivo:Silver-chest.png|link=Secret Lab]]</center>
| |
|
| |
| <center>
| |
| {| class="wikitable" width="100%"
| |
| |-
| |
| ! width="10% |Small Nightmare Potion
| |
| ! width="10% |Nightmare Revive
| |
| ! width="10% |Luminous Orb
| |
| ! width="10% |Hail Orb
| |
| ! width="10% |Rainy Orb
| |
| ! width="10% |Sunny Orb
| |
| ! width="10% |Sandy Orb
| |
| ! width="10% |Gardestrike Essence
| |
| ! width="10% |Ironhard Essence
| |
| ! width="10% |Malefic Essence
| |
| |- align="center"
| |
| | [[Arquivo:Small_Nightmare_Potion.gif|link=Secret Lab]]
| |
| | [[Arquivo:Nightmare_Revive.png|link=Secret Lab]]
| |
| | [[Arquivo:Luminous_Orb.png|30px|link=Secret Lab]]
| |
| | [[Arquivo:Hail_Orb.png|30px|link=Secret Lab]]
| |
| | [[Arquivo:Rainy_Orb.png|30px|link=Secret Lab]]
| |
| | [[Arquivo:Sunny_Orb.png|30px|link=Secret Lab]]
| |
| | [[Arquivo:Sandy_Orb.png|30px|link=Secret Lab]]
| |
| | [[Arquivo:Gardeessence.png|link=Secret Lab]]
| |
| | [[Arquivo:Ironessence.png|link=Secret Lab]]
| |
| | [[Arquivo:Maleficessence.png|link=Secret Lab]]
| |
| |-
| |
| | height="10px" style="border-left-style: hidden; border-width: 1px; border-right-style: hidden; border-width: 1px" |
| |
| |-
| |
| ! width="10% |Shield Nightmare Potion
| |
| ! width="10% |Naturia Essence
| |
| ! width="10% |Orebound Essence
| |
| ! width="10% |Psycraft Essence
| |
| ! width="10% |Raibolt Essence
| |
| ! width="10% |Seavell Essence
| |
| ! width="10% |Volcanic Essence
| |
| ! width="10% |Wingeon Essence
| |
| ! width="10% |Nightmare ore
| |
| ! width="10% |Nightmare Ball
| |
| |- align="center"
| |
| | [[Arquivo:Shield_Nightmare_Potion.png|link=Secret Lab]]
| |
| | [[Arquivo:Natuessence.png|link=Secret Lab]]
| |
| | [[Arquivo:Oreessence.png|link=Secret Lab]]
| |
| | [[Arquivo:Psyessence.png|link=Secret Lab]]
| |
| | [[Arquivo:Boltessence.png|link=Secret Lab]]
| |
| | [[Arquivo:Seaessence.png|link=Secret Lab]]
| |
| | [[Arquivo:Volcanicessence.png|link=Secret Lab]]
| |
| | [[Arquivo:Wingeon_essence.png|link=Secret Lab]]
| |
| | [[Arquivo:NW_ore.png|link=Secret Lab]]
| |
| | [[Arquivo:Nightmare_Ball.png|link=Secret Lab]]
| |
| |-
| |
| | height="10px" style="border-left-style: hidden; border-width: 1px; border-right-style: hidden; border-width: 1px" |
| |
| |-
| |
| ! width="10% |Excalibur Elixir
| |
| ! width="10% |Escape Orb
| |
| ! width="10% |Quick Orb
| |
| ! width="10% |Radar Orb
| |
| ! width="10% |Reviver Orb
| |
| ! width="10% |Premier Ball
| |
| ! width="10% |Aegis Elixir
| |
| ! width="10% |Ambrosia Elixir
| |
| ! width="10% |Itemizer Orb
| |
| ! width="10% |Invisify Orb
| |
| |- align="center"
| |
| | [[Arquivo:Excalibur_Elixir.png|30px|link=Secret Lab]]
| |
| | [[Arquivo:Escape_Orb.png|30px|link=Secret Lab]]
| |
| | [[Arquivo:Quick_Orb.png|30px|link=Secret Lab]] | | | [[Arquivo:Quick_Orb.png|30px|link=Secret Lab]] |
| | [[Arquivo:Radar_Orb.png|30px|link=Secret Lab]] | | | [[Arquivo:Radar_Orb.png|30px|link=Secret Lab]] |
| | [[Arquivo:Reviver_Orb.png|30px|link=Secret Lab]] | | | [[Arquivo:Reviver_Orb.png|30px|link=Secret Lab]] |
| | [[Arquivo:Premier-ball%281%29.png|link=Secret Lab]]
| |
| | [[Arquivo:Aegis_Elixir.png|30px|link=Secret Lab]]
| |
| | [[Arquivo:Ambrosia_Elixir.png|30px|link=Secret Lab]]
| |
| | [[Arquivo:Itemizer_Orb.png|30px|link=Secret Lab]]
| |
| | [[Arquivo:Invisify_Orb.png|30px|link=Secret Lab]]
| |
| |-
| |
| | height="10px" style="border-left-style: hidden; border-width: 1px; border-right-style: hidden; border-width: 1px" |
| |
| |-
| |
| ! width="10% |Posses Orb
| |
| ! width="10% |One-Shot Orb
| |
| |- align="center"
| |
| | [[Arquivo:Posses_Orb.png|30px|link=Secret Lab]]
| |
| | [[Arquivo:One-Shot_Orb.png|30px|link=Secret Lab]]
| |
| |}
| |
| </center>
| |
|
| |
| <center>[[Arquivo:Golden-chest.png|link=Secret Lab]]</center>
| |
|
| |
| <center>
| |
| {| class="wikitable" width="100%"
| |
| |-
| |
| ! width="10% |Small Nightmare Potion
| |
| ! width="10% |Nightmare Revive
| |
| ! width="10% |Luminous Orb
| |
| ! width="10% |Hail Orb
| |
| ! width="10% |Rainy Orb
| |
| ! width="10% |Sunny Orb
| |
| ! width="10% |Sandy Orb
| |
| ! width="10% |Gardestrike Essence
| |
| ! width="10% |Ironhard Essence
| |
| ! width="10% |Malefic Essence
| |
| |- align="center"
| |
| | [[Arquivo:Small_Nightmare_Potion.gif|link=Secret Lab]]
| |
| | [[Arquivo:Nightmare_Revive.png|link=Secret Lab]]
| |
| | [[Arquivo:Luminous_Orb.png|30px|link=Secret Lab]]
| |
| | [[Arquivo:Hail_Orb.png|30px|link=Secret Lab]] | | | [[Arquivo:Hail_Orb.png|30px|link=Secret Lab]] |
| | [[Arquivo:Rainy_Orb.png|30px|link=Secret Lab]] | | | [[Arquivo:Rainy_Orb.png|30px|link=Secret Lab]] |
| | [[Arquivo:Sunny_Orb.png|30px|link=Secret Lab]] | | | [[Arquivo:Sunny_Orb.png|30px|link=Secret Lab]] |
| | [[Arquivo:Sandy_Orb.png|30px|link=Secret Lab]] | | | [[Arquivo:Sandy_Orb.png|30px|link=Secret Lab]] |
| | [[Arquivo:Gardeessence.png|link=Secret Lab]]
| |
| | [[Arquivo:Ironessence.png|link=Secret Lab]]
| |
| | [[Arquivo:Maleficessence.png|link=Secret Lab]]
| |
| |-
| |
| | height="10px" style="border-left-style: hidden; border-width: 1px; border-right-style: hidden; border-width: 1px" |
| |
| |-
| |
| ! width="10% |Shield Nightmare Potion
| |
| ! width="10% |Naturia Essence
| |
| ! width="10% |Orebound Essence
| |
| ! width="10% |Psycraft Essence
| |
| ! width="10% |Raibolt Essence
| |
| ! width="10% |Seavell Essence
| |
| ! width="10% |Volcanic Essence
| |
| ! width="10% |Wingeon Essence
| |
| ! width="10% | Nightmare ore
| |
| ! width="10% |Excalibur Elixir
| |
| |- align="center"
| |
| | [[Arquivo:Shield_Nightmare_Potion.png|link=Secret Lab]]
| |
| | [[Arquivo:Natuessence.png|link=Secret Lab]]
| |
| | [[Arquivo:Oreessence.png|link=Secret Lab]]
| |
| | [[Arquivo:Psyessence.png|link=Secret Lab]]
| |
| | [[Arquivo:Boltessence.png|link=Secret Lab]]
| |
| | [[Arquivo:Seaessence.png|link=Secret Lab]]
| |
| | [[Arquivo:Volcanicessence.png|link=Secret Lab]]
| |
| | [[Arquivo:Wingeon_essence.png|link=Secret Lab]]
| |
| | [[Arquivo:NW_ore.png|link=Secret Lab]]
| |
| | [[Arquivo:Excalibur_Elixir.png|30px|link=Secret Lab]]
| |
| |-
| |
| | height="10px" style="border-left-style: hidden; border-width: 1px; border-right-style: hidden; border-width: 1px" |
| |
| |-
| |
| ! width="10% |Escape Orb
| |
| ! width="10% |Quick Orb
| |
| ! width="10% |Radar Orb
| |
| ! width="10% |Reviver Orb
| |
| ! width="10% |Aegis Elixir
| |
| ! width="10% |Ambrosia Elixir
| |
| ! width="10% |Itemizer Orb
| |
| ! width="10% |Invisify Orb
| |
| ! width="10% |Posses Orb
| |
| ! width="10% |One-Shot Orb
| |
| |- align="center"
| |
| | [[Arquivo:Escape_Orb.png|30px|link=Secret Lab]]
| |
| | [[Arquivo:Quick_Orb.png|30px|link=Secret Lab]]
| |
| | [[Arquivo:Radar_Orb.png|30px|link=Secret Lab]]
| |
| | [[Arquivo:Reviver_Orb.png|30px|link=Secret Lab]]
| |
| | [[Arquivo:Aegis_Elixir.png|30px|link=Secret Lab]]
| |
| | [[Arquivo:Ambrosia_Elixir.png|30px|link=Secret Lab]]
| |
| | [[Arquivo:Itemizer_Orb.png|30px|link=Secret Lab]]
| |
| | [[Arquivo:Invisify_Orb.png|30px|link=Secret Lab]]
| |
| | [[Arquivo:Posses_Orb.png|30px|link=Secret Lab]]
| |
| | [[Arquivo:One-Shot_Orb.png|30px|link=Secret Lab]] | | | [[Arquivo:One-Shot_Orb.png|30px|link=Secret Lab]] |
| |} | | |} |
| </center> | | </center> |
| | </tabber> |
|
| |
|
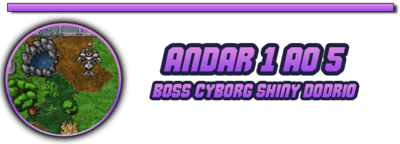
| == <span style="color: Purple">'''Andares'''</span> == | | =Spoiler dos Andares= |
| | | Clique no banner desejado para acessar ao spoiler dos andares. |
| === <font size='5'><span style="color: Purple">'''Wingeon'''</span></font> ===
| | <center class=hover-minimize> |
| | | [[Arquivo:Indice_Boss_ShDodrio.png|400px|link=Andar_1_a_5_(Secret_Lab)]] |
| <span style="color: Purple">'''Mapa'''</span>
| | [[Arquivo:Indice_Boss_ShAriados.png|400px|link=Andar_6_a_10_(Secret_Lab)]] |
| | |
| {| class="wikitable" width="100%"
| |
| ! width="31%" style="background-color: #660099" | <span style="color:white">Andar 1 a 4 [1]</span>
| |
| | width="3%" style="border-top-style: hidden; border-width: 1px; border-bottom-style: hidden; border-width: 1px" |
| |
| ! width="32%" style="background-color: #660099" | <span style="color:white">Andar 1 a 4 [2]</span>
| |
| |- align="center"
| |
| | [[Arquivo:Andar_1_a_4_(1).jpg|250px|link=Secret Lab]]
| |
| | width="4%" style="border-top-style: hidden; border-width: 1px; border-bottom-style: hidden; border-width: 1px" |
| |
| | [[Arquivo:Andar_1_a_4_(2).jpg|250px|link=Secret Lab]]
| |
| |-
| |
| | height="30px" style="border-left-style: hidden; border-width: 1px; border-right-style: hidden; border-width: 1px" |
| |
| |-
| |
| ! style="background-color: #660099" | <span style="color:white">Andar 1 a 4 [3]</span>
| |
| | style="border-top-style: hidden; border-width: 1px; border-bottom-style: hidden; border-width: 1px" |
| |
| ! style="background-color: #660099" | <span style="color:white">Andar 1 a 4 [4]</span>
| |
| |- align="center"
| |
| | [[Arquivo:Andar_1_a_4_(3).jpg|250px|link=Secret Lab]]
| |
| | width="4%" style="border-top-style: hidden; border-width: 1px; border-bottom-style: hidden; border-width: 1px" |
| |
| | [[Arquivo:Andar_1_a_4_(4).jpg|250px|link=Secret Lab]]
| |
| |-
| |
| | height="30px" style="border-left-style: hidden; border-width: 1px; border-right-style: hidden; border-width: 1px" |
| |
| |-
| |
| ! style="background-color: #660099" | <span style="color:white">Andar 1 a 4 [5]</span>
| |
| | style="border-top-style: hidden; border-width: 1px; border-bottom-style: hidden; border-width: 1px" |
| |
| ! style="background-color: #660099" | <span style="color:white">Andar 1 a 4 [6]</span>
| |
| |- align="center"
| |
| | [[Arquivo:Andar_1_a_4_(5).jpg|250px|link=Secret Lab]]
| |
| | width="4%" style="border-top-style: hidden; border-width: 1px; border-bottom-style: hidden; border-width: 1px" |
| |
| | [[Arquivo:Andar_1_a_4_(6).jpg|250px|link=Secret Lab]]
| |
| |-
| |
| | height="30px" style="border-left-style: hidden; border-width: 1px; border-right-style: hidden; border-width: 1px" |
| |
| |-
| |
| ! style="background-color: #660099" | <span style="color:white">Andar 1 a 4 [7]</span>
| |
| | style="border-top-style: hidden; border-width: 1px; border-bottom-style: hidden; border-width: 1px" |
| |
| ! style="background-color: #660099" | <span style="color:white">Andar 1 a 4 [8]</span>
| |
| |- align="center"
| |
| | [[Arquivo:Andar_1_a_4_(7).jpg|250px|link=Secret Lab]]
| |
| | width="4%" style="border-top-style: hidden; border-width: 1px; border-bottom-style: hidden; border-width: 1px" |
| |
| | [[Arquivo:Andar_1_a_4_(8).jpg|250px|link=Secret Lab]]
| |
| |-
| |
| |}
| |
| | |
| <span style="color: Purple">'''Inimigos'''</span>
| |
| <center>
| |
| <table border="0" cellpadding="3" cellspacing="1" class="modernTable" style="padding: 0px; border: 0px; font-size: 10.88px; width: 700px;">
| |
| <tr>
| |
| <td style="text-align: center; width: 200px;>[[Arquivo: 006-Charizard.png |link=Charizard]]</td>
| |
| <td style="text-align: center; width: 200px;">''' Cyborg Charizard'''</td>
| |
| <td style="text-align: center; width: 200px;>[[Arquivo: 227-Skarmory.png |link=Skarmory]]</td>
| |
| <td style="text-align: center; width: 200px;"> ''' Cyborg Skarmory'''</td>
| |
| <td style="text-align: center; width: 200px;>[[Arquivo: 357-Tropius.png |link=Tropius]]</td>
| |
| <td style="text-align: center; width: 200px;"> ''' Cyborg Tropius'''</td>
| |
| <td style="text-align: center; width: 200px;>[[Arquivo: 006-MegaCharizardY.png |link=Mega Charizard Y]]</td><br />
| |
| <td style="text-align: center; width: 200px;"> '''Cyborg Mega Charizard Y'''</td>
| |
| </tr>
| |
| </table>
| |
| </center>
| |
| | |
| <span style="color: Purple">'''Armadilha'''</span>
| |
| | |
| Esse andar a armadilha são máquinas que produzem ventos, você e seu pokémon levam dano, além de ser empurrado
| |
| | |
| <center> [[Arquivo:Armadilha_wingeon.png|link=Secret Lab]] </center>
| |
| | |
| <span style="color: Purple">'''Boss'''</span>
| |
| | |
| O boss do andar Wingeon é o Cyborg Shiny Dodrio ([[Arquivo:085-shDodrio.png|link=Shiny Dodrio]]), sua mecânica consiste em ataca-lo e correr dos redemoinhos que são soltos durante a batalha.
| |
| | |
| <center> [[Arquivo:Boss_Wingeon.png|link=Secret Lab]] </center>
| |
| | |
| '''Dica''': <br />
| |
| - O redemoinho tem um dano alto, então corra deles para não levar dano.
| |
| | |
| | |
| | |
| <span style="color: Purple">'''Loot'''</span>
| |
| | |
| <center>
| |
| {| class="wikitable"
| |
| |-
| |
| ! scope="col"| 2 Nightmare unusual ores
| |
| ! scope="col"| 25 Technological Crystals (Tier: 3)
| |
| ! scope="col"| Cyborg Cell (Flying)
| |
| ! scope="col"| Moderate Nightmare experience candy
| |
| ! scope="col"| Small Nightmare experience candy
| |
| |- style="width:50px; text-align:center;"
| |
| | [[Arquivo:NW_unusual_ore.png|Nightmare unusual ore|link=Secret Lab]]
| |
| | [[Arquivo:Frag_tier_3.png|Technological Crystals (Tier: 3)|link=Secret Lab]]
| |
| | [[Arquivo:Cyborg_Cell_(Flying)..png|Cyborg Cell (Flying)|link=Secret Lab]]
| |
| | [[Arquivo:Moderate_Nightmare_experience_candy..png|Moderate Nightmare experience candy|link=Secret Lab]]
| |
| | [[Arquivo:Small_Nightmare_experience_candy..png|Small Nightmare experience candy|link=Secret Lab]]
| |
| | |
| |}
| |
| </center>
| |
| | |
| === <font size='5'><span style="color: Purple">'''Naturia'''</span></font> ===
| |
| | |
| <span style="color: Purple">'''Mapa'''</span>
| |
| | |
| {| class="wikitable" width="100%"
| |
| ! width="31%" style="background-color: #660099" | <span style="color:white">Andar 6 a 9 [1]</span>
| |
| | width="3%" style="border-top-style: hidden; border-width: 1px; border-bottom-style: hidden; border-width: 1px" |
| |
| ! width="32%" style="background-color: #660099" | <span style="color:white">Andar 6 a 9 [2]</span>
| |
| |- align="center"
| |
| | [[Arquivo:Andar_6_a_9_(1).jpg|250px|link=Secret Lab]]
| |
| | width="4%" style="border-top-style: hidden; border-width: 1px; border-bottom-style: hidden; border-width: 1px" |
| |
| | [[Arquivo:Andar_6_a_9_(2).jpg|250px|link=Secret Lab]]
| |
| |-
| |
| | height="30px" style="border-left-style: hidden; border-width: 1px; border-right-style: hidden; border-width: 1px" |
| |
| |-
| |
| ! style="background-color: #660099" | <span style="color:white">Andar 6 a 9 [3]</span>
| |
| | style="border-top-style: hidden; border-width: 1px; border-bottom-style: hidden; border-width: 1px" |
| |
| ! style="background-color: #660099" | <span style="color:white">Andar 6 a 9 [4]</span>
| |
| |- align="center"
| |
| | [[Arquivo:Andar_6_a_9_(3).jpg|250px|link=Secret Lab]]
| |
| | width="4%" style="border-top-style: hidden; border-width: 1px; border-bottom-style: hidden; border-width: 1px" |
| |
| | [[Arquivo:Andar_6_a_9_(4).jpg|250px|link=Secret Lab]]
| |
| |-
| |
| | height="30px" style="border-left-style: hidden; border-width: 1px; border-right-style: hidden; border-width: 1px" |
| |
| |-
| |
| ! style="background-color: #660099" | <span style="color:white">Andar 6 a 9 [5]</span>
| |
| | style="border-top-style: hidden; border-width: 1px; border-bottom-style: hidden; border-width: 1px" |
| |
| ! style="background-color: #660099" | <span style="color:white">Andar 6 a 9 [6]</span>
| |
| |- align="center"
| |
| | [[Arquivo:Andar_6_a_9_(5).jpg|250px|link=Secret Lab]]
| |
| | width="4%" style="border-top-style: hidden; border-width: 1px; border-bottom-style: hidden; border-width: 1px" |
| |
| | [[Arquivo:Andar_6_a_9_(6).jpg|250px|link=Secret Lab]]
| |
| |-
| |
| | height="30px" style="border-left-style: hidden; border-width: 1px; border-right-style: hidden; border-width: 1px" |
| |
| |-
| |
| ! style="background-color: #660099" | <span style="color:white">Andar 6 a 9 [7]</span>
| |
| | style="border-top-style: hidden; border-width: 1px; border-bottom-style: hidden; border-width: 1px" |
| |
| ! style="background-color: #660099" | <span style="color:white">Andar 6 a 9 [8]</span>
| |
| |- align="center"
| |
| | [[Arquivo:Andar_6_a_9_(7).jpg|250px|link=Secret Lab]]
| |
| | width="4%" style="border-top-style: hidden; border-width: 1px; border-bottom-style: hidden; border-width: 1px" |
| |
| | [[Arquivo:Andar_6_a_9_(8).jpg|250px|link=Secret Lab]]
| |
| |-
| |
| |}
| |
| | |
| <span style="color: Purple">'''Inimigos'''</span>
| |
| <center>
| |
| <table border="0" cellpadding="3" cellspacing="1" class="modernTable" style="padding: 0px; border: 0px; font-size: 10.88px; width: 700px;">
| |
| <tr>
| |
| <td style="text-align: center; width: 200px;>[[Arquivo:003-Venusaur.png|link=Venusaur]]</td>
| |
| <td style="text-align: center; width: 200px;">''' Cyborg Venusaur'''</td>
| |
| <td style="text-align: center; width: 200px;>[[Arquivo:154-Meganium.png|link=Meganium]]</td>
| |
| <td style="text-align: center; width: 200px;"> ''' Cyborg Meganium'''</td>
| |
| <td style="text-align: center; width: 200px;>[[Arquivo:348-Armaldo.png|link=Armaldo]]</td>
| |
| <td style="text-align: center; width: 200px;"> ''' Cyborg Armaldo'''</td>
| |
| <td style="text-align: center; width: 200px;>[[Arquivo:003-MegaVenusaur.png|link=Mega Venusaur]]</td><br />
| |
| <td style="text-align: center; width: 200px;"> '''Cyborg Mega Venusaur'''</td>
| |
| </tr>
| |
| </table>
| |
| </center>
| |
| | |
| <span style="color: Purple">'''Armadilha'''</span>
| |
| | |
| Esse andar as armadilhas são plantas que estão no chão. Existe 4 tipos de planta, são essas:
| |
| | |
| <center> [[Arquivo:Armadilha_natu.png|link=Secret Lab]]
| |
| | |
| <span style="color: Black">'''X'''</span>: Planta que causa dano e lentidão. <br />
| |
| <span style="color: Red">'''X'''</span>: Planta que cura o personagem ou pokémon. <br />
| |
| <span style="color: Green">'''X'''</span>: Planta que causa dano. <br />
| |
| <span style="color: Blue">'''X'''</span>: Planta onde você pode passar por cima, pois ela não causa nada. <br />
| |
| </center>
| |
| | |
| <span style="color: Purple">'''Boss'''</span>
| |
| | |
| O boss do andar Naturia é a Cyborg Shiny Ariados ([[Arquivo:Sh_ariados.png|link=Shiny Ariados]]), de tempo em tempo é jogado um efeito semelhante ao poison na arena inteira onde o jogador fica recebendo dano até clicar em uma das plantas curandeira (exemplo circulado no mapa abaixo), são '''três''' plantas que curam o poison, após achar as três fique rotacionando entre elas e atacando a ariados até derrota-la. <br />
| |
| <center> [[Arquivo:Sala_ari.png|link=Secret Lab]] </center>
| |
| | |
| | |
| '''Dica''': <br />
| |
| - Cuidado para não clicar na planta sem precisão, pois elas têm um tempo para ser utilizada novamente.<br />
| |
| - Mesmo com o boss derrotado o poison continua aparecendo. <br />
| |
| - Lembre-se que '''TODO''' item que você encontrar, pode ser uma das plantas. Portanto, clique em tudo que você ver para conseguir encontrar as plantas para parar o poison.
| |
| | |
| <span style="color: Purple">'''Loot'''</span>
| |
| | |
| <center>
| |
| {| class="wikitable"
| |
| |-
| |
| ! scope="col"| 2 Nightmare unusual ores
| |
| ! scope="col"| 25 Technological Crystals (Tier: 3)
| |
| ! scope="col"| Cyborg Cell (Bug)
| |
| ! scope="col"| 2 Moderate Nightmare experience candy
| |
| |- style="width:50px; text-align:center;"
| |
| | [[Arquivo:NW_unusual_ore.png|Nightmare unusual ore|link=Secret Lab]]
| |
| | [[Arquivo:Frag_tier_3.png|Technological Crystals (Tier: 3)|link=Secret Lab]]
| |
| | [[Arquivo:Cyborg_Cell_(Bug)..png|Cyborg Cell (Bug)|link=Secret Lab]]
| |
| | [[Arquivo:Moderate_Nightmare_experience_candy..png|Moderate Nightmare experience candy|link=Secret Lab]]
| |
| |}
| |
| </center>
| |
| | |
| === <font size='5'><span style="color: Purple">'''Orebound'''</span></font> ===
| |
| | |
| <span style="color: Purple">'''Mapa'''</span>
| |
| | |
| {| class="wikitable" width="100%"
| |
| ! width="31%" style="background-color: #660099" | <span style="color:white">Andar 11 a 14 [1]</span>
| |
| | width="3%" style="border-top-style: hidden; border-width: 1px; border-bottom-style: hidden; border-width: 1px" |
| |
| ! width="32%" style="background-color: #660099" | <span style="color:white">Andar 11 a 14 [2]</span>
| |
| |- align="center"
| |
| | [[Arquivo:Andar_11_a_14_(1).jpg|250px|link=Secret Lab]]
| |
| | width="4%" style="border-top-style: hidden; border-width: 1px; border-bottom-style: hidden; border-width: 1px" |
| |
| | [[Arquivo:Andar_11_a_14_(2).jpg|250px|link=Secret Lab]]
| |
| |-
| |
| | height="30px" style="border-left-style: hidden; border-width: 1px; border-right-style: hidden; border-width: 1px" |
| |
| |-
| |
| ! style="background-color: #660099" | <span style="color:white">Andar 11 a 14 [3]</span>
| |
| | style="border-top-style: hidden; border-width: 1px; border-bottom-style: hidden; border-width: 1px" |
| |
| ! style="background-color: #660099" | <span style="color:white">Andar 11 a 14 [4]</span>
| |
| |- align="center"
| |
| | [[Arquivo:Andar_11_a_14_(3).jpg|250px|link=Secret Lab]]
| |
| | width="4%" style="border-top-style: hidden; border-width: 1px; border-bottom-style: hidden; border-width: 1px" |
| |
| | [[Arquivo:Andar_11_a_14_(4).jpg|250px|link=Secret Lab]]
| |
| |-
| |
| | height="30px" style="border-left-style: hidden; border-width: 1px; border-right-style: hidden; border-width: 1px" |
| |
| |-
| |
| ! style="background-color: #660099" | <span style="color:white">Andar 11 a 14 [5]</span>
| |
| | style="border-top-style: hidden; border-width: 1px; border-bottom-style: hidden; border-width: 1px" |
| |
| ! style="background-color: #660099" | <span style="color:white">Andar 11 a 14 [6]</span>
| |
| |- align="center"
| |
| | [[Arquivo:Andar_11_a_14_(5).jpg|250px|link=Secret Lab]]
| |
| | width="4%" style="border-top-style: hidden; border-width: 1px; border-bottom-style: hidden; border-width: 1px" |
| |
| | [[Arquivo:Andar_11_a_14_(6).jpg|250px|link=Secret Lab]]
| |
| |-
| |
| | height="30px" style="border-left-style: hidden; border-width: 1px; border-right-style: hidden; border-width: 1px" |
| |
| |-
| |
| ! style="background-color: #660099" | <span style="color:white">Andar 11 a 14 [7]</span>
| |
| | style="border-top-style: hidden; border-width: 1px; border-bottom-style: hidden; border-width: 1px" |
| |
| ! style="background-color: #660099" | <span style="color:white">Andar 11 a 14 [8]</span>
| |
| |- align="center"
| |
| | [[Arquivo:Andar_11_a_14_(7).jpg|250px|link=Secret Lab]]
| |
| | width="4%" style="border-top-style: hidden; border-width: 1px; border-bottom-style: hidden; border-width: 1px" |
| |
| | [[Arquivo:Andar_11_a_14_(8).jpg|250px|link=Secret Lab]]
| |
| |-
| |
| |}
| |
| | |
| <span style="color: Purple">'''Inimigos'''</span>
| |
| <center>
| |
| <table border="0" cellpadding="3" cellspacing="1" class="modernTable" style="padding: 0px; border: 0px; font-size: 10.88px; width: 700px;">
| |
| <tr>
| |
| <td style="text-align: center; width: 200px;>[[Arquivo:323-Camerupt.png|link=Camerupt]]</td>
| |
| <td style="text-align: center; width: 200px;">''' Cyborg Camerupt'''</td>
| |
| <td style="text-align: center; width: 200px;>[[Arquivo:344-Claydol.png|link=Claydol]]</td>
| |
| <td style="text-align: center; width: 200px;"> ''' Cyborg Claydol'''</td>
| |
| <td style="text-align: center; width: 200px;>[[Arquivo:348-Armaldo.png|link=Armaldo]]</td>
| |
| <td style="text-align: center; width: 200px;"> ''' Cyborg Armaldo'''</td>
| |
| <td style="text-align: center; width: 200px;>[[Arquivo:248-MegaTyranitar.png|link=Mega Tyranitar]]</td><br />
| |
| <td style="text-align: center; width: 200px;"> '''Cyborg Mega Tyranitar'''</td>
| |
| </tr>
| |
| </table>
| |
| </center>
| |
| | |
| <span style="color: Purple">'''Armadilha'''</span>
| |
| | |
| Esse andar as armadilhas são minas terrestres espalhadas pelo chão, são ativadas após alguém passar por cima (Personagem e o seu Pokémon ou selvagem).
| |
| | |
| <center> [[Arquivo:Armadilha_ore.png|link=Secret Lab]]</center>
| |
| | |
| <span style="color: Purple">'''Boss'''</span>
| |
| | |
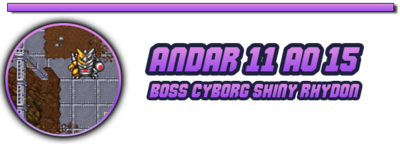
| O boss do andar Orebound é o Cyborg Shiny Rhydon ([[Arquivo:Shinyrh.png|link=Shiny Rhydon]]), a mecânica desse boss é evitar levar dano do Tectonic Rage.
| |
| | |
| '''Dica''': <br />
| |
| - Cuidado com os Tectonic Rage ficam um bom tempo no campo de batalha.<br />
| |
| | |
| <span style="color: Purple">'''Loot'''</span>
| |
| | |
| <center>
| |
| {| class="wikitable"
| |
| |-
| |
| ! scope="col"| 2 Nightmare unusual ores
| |
| ! scope="col"| 50 Technological Crystals (Tier: 3)
| |
| ! scope="col"| Cyborg Cell (Earth)
| |
| ! scope="col"| 2 Moderate Nightmare experience candy
| |
| ! scope="col"| Small Nightmare experience candy
| |
| |- style="width:50px; text-align:center;"
| |
| | [[Arquivo:NW_unusual_ore.png|Nightmare unusual ore|link=Secret Lab]]
| |
| | [[Arquivo:Frag_tier_3.png|Technological Crystals (Tier: 3)|link=Secret Lab]]
| |
| | [[Arquivo:Cyborg_Cell_(Earth).png|Cyborg Cell (Earth)|link=Secret Lab]]
| |
| | [[Arquivo:Moderate_Nightmare_experience_candy..png|Moderate Nightmare experience candy|link=Secret Lab]]
| |
| | [[Arquivo:Small_Nightmare_experience_candy..png|Small Nightmare experience candy|link=Secret Lab]]
| |
| | |
| |}
| |
| </center>
| |
| | |
| === <font size='5'><span style="color: Purple">'''Gardestrike'''</span></font> ===
| |
| | |
| <span style="color: Purple">'''Mapa'''</span>
| |
| | |
| {| class="wikitable" width="100%"
| |
| ! width="31%" style="background-color: #660099" | <span style="color:white">Andar 16 a 19 [1]</span>
| |
| | width="3%" style="border-top-style: hidden; border-width: 1px; border-bottom-style: hidden; border-width: 1px" |
| |
| ! width="32%" style="background-color: #660099" | <span style="color:white">Andar 16 a 19 [2]</span>
| |
| |- align="center"
| |
| | [[Arquivo:Andar_16_a_19_(1).jpg|250px|link=Secret Lab]]
| |
| | width="4%" style="border-top-style: hidden; border-width: 1px; border-bottom-style: hidden; border-width: 1px" |
| |
| | [[Arquivo:Andar_16_a_19_(2).jpg|250px|link=Secret Lab]]
| |
| |-
| |
| | height="30px" style="border-left-style: hidden; border-width: 1px; border-right-style: hidden; border-width: 1px" |
| |
| |-
| |
| ! style="background-color: #660099" | <span style="color:white">Andar 16 a 19 [3]</span>
| |
| | style="border-top-style: hidden; border-width: 1px; border-bottom-style: hidden; border-width: 1px" |
| |
| ! style="background-color: #660099" | <span style="color:white">Andar 16 a 19 [4]</span>
| |
| |- align="center"
| |
| | [[Arquivo:Andar_16_a_19_(3).jpg|250px|link=Secret Lab]]
| |
| | width="4%" style="border-top-style: hidden; border-width: 1px; border-bottom-style: hidden; border-width: 1px" |
| |
| | [[Arquivo:Andar_16_a_19_(4).jpg|250px|link=Secret Lab]]
| |
| |-
| |
| | height="30px" style="border-left-style: hidden; border-width: 1px; border-right-style: hidden; border-width: 1px" |
| |
| |-
| |
| ! style="background-color: #660099" | <span style="color:white">Andar 16 a 19 [5]</span>
| |
| | style="border-top-style: hidden; border-width: 1px; border-bottom-style: hidden; border-width: 1px" |
| |
| ! style="background-color: #660099" | <span style="color:white">Andar 16 a 19 [6]</span>
| |
| |- align="center"
| |
| | [[Arquivo:Andar_16_a_19_(5).jpg|250px|link=Secret Lab]]
| |
| | width="4%" style="border-top-style: hidden; border-width: 1px; border-bottom-style: hidden; border-width: 1px" |
| |
| | [[Arquivo:Andar_16_a19_(6).jpg|250px|link=Secret Lab]]
| |
| |-
| |
| | height="30px" style="border-left-style: hidden; border-width: 1px; border-right-style: hidden; border-width: 1px" |
| |
| |-
| |
| ! style="background-color: #660099" | <span style="color:white">Andar 16 a 19 [7]</span>
| |
| | style="border-top-style: hidden; border-width: 1px; border-bottom-style: hidden; border-width: 1px" |
| |
| ! style="background-color: #660099" | <span style="color:white">Andar 16 a 19 [8]</span>
| |
| |- align="center"
| |
| | [[Arquivo:Andar_16_a_19_(7).jpg|250px|link=Secret Lab]]
| |
| | width="4%" style="border-top-style: hidden; border-width: 1px; border-bottom-style: hidden; border-width: 1px" |
| |
| | [[Arquivo:Andar_16_a_19_(8).jpg|250px|link=Secret Lab]]
| |
| |-
| |
| |}
| |
| | |
| <span style="color: Purple">'''Inimigos'''</span>
| |
| <center>
| |
| <table border="0" cellpadding="3" cellspacing="1" class="modernTable" style="padding: 0px; border: 0px; font-size: 10.88px; width: 700px;">
| |
| <tr>
| |
| <td style="text-align: center; width: 200px;>[[Arquivo:067-Machoke.png|link=Machoke]]</td>
| |
| <td style="text-align: center; width: 200px;">''' Cyborg Machoke'''</td>
| |
| <td style="text-align: center; width: 200px;>[[Arquivo:143-Snorlax.png|link=Snorlax]]</td>
| |
| <td style="text-align: center; width: 200px;"> ''' Cyborg Snorlax'''</td>
| |
| <td style="text-align: center; width: 200px;>[[Arquivo:454-Toxicroak.png|link=Toxicroak]]</td>
| |
| <td style="text-align: center; width: 200px;"> ''' Cyborg Toxicroak'''</td>
| |
| <td style="text-align: center; width: 200px;>[[Arquivo:068-Sh_Machamp.png|link=Shiny Machamp]]</td><br />
| |
| <td style="text-align: center; width: 200px;"> '''Cyborg Shiny Machamp'''</td>
| |
| </tr>
| |
| </table>
| |
| </center>
| |
| | |
| <span style="color: Purple">'''Armadilha'''</span>
| |
| | |
| Esse andar as armadilhas são minas terrestres e uma armadilha que cria Clones.
| |
| | |
| <center>[[Arquivo:Armadilha_Gardes.png|link=Secret Lab]]
| |
| | |
| <span style="color: Green">'''X'''</span>: Essa armadilha são as que criam Clones. <br />
| |
| <span style="color: Red">'''X'''</span>: Essa armadilha são as minas terrestres, semelhante ao andar Orebound. <br /></center>
| |
| | |
| <span style="color: Purple">'''Boss'''</span>
| |
| | |
| O boss do andar Gardestrike é o Cyborg Shiny Stantler ([[Arquivo:234-shStantler.png|link=Shiny Stantler]]), a mecânica desse andar consiste em não bater no Boss quando ele invoca as ilusões, pois isso aumenta a sua força e defesa. <br />
| |
| | |
| '''Dica''': <br />
| |
| - Você pode utilizar as paredes da sala para trocar de Pokemon e utilizar poções.<br />
| |
| | |
| <span style="color: Purple">'''Loot'''</span>
| |
| | |
| <center>
| |
| {| class="wikitable"
| |
| |-
| |
| ! scope="col"| 3 Nightmare unusual ores
| |
| ! scope="col"| 75 Technological Crystals (Tier: 3)
| |
| ! scope="col"| Cyborg Cell (Normal)
| |
| ! scope="col"| 3 Moderate Nightmare experience candy
| |
| |- style="width:50px; text-align:center;"
| |
| | [[Arquivo:NW_unusual_ore.png|Nightmare unusual ore|link=Secret Lab]]
| |
| | [[Arquivo:Frag_tier_3.png|Technological Crystals (Tier: 3)|link=Secret Lab]]
| |
| | [[Arquivo:Cyborg_Cell_(Normal).png|Cyborg Cell (Normal)|link=Secret Lab]]
| |
| | [[Arquivo:Moderate_Nightmare_experience_candy..png|Moderate Nightmare experience candy|link=Secret Lab]]
| |
| |}
| |
| </center>
| |
| | |
| === <font size='5'><span style="color: Purple">'''Seavell'''</span></font> ===
| |
| | |
| <span style="color: Purple">'''Mapa'''</span>
| |
| | |
| {| class="wikitable" width="100%"
| |
| ! width="31%" style="background-color: #660099" | <span style="color:white">Andar 21 a 24 [1]</span>
| |
| | width="3%" style="border-top-style: hidden; border-width: 1px; border-bottom-style: hidden; border-width: 1px" |
| |
| ! width="32%" style="background-color: #660099" | <span style="color:white">Andar 21 a 24 [2]</span>
| |
| |- align="center"
| |
| | [[Arquivo:Andar_21_a_24_(1).jpg|250px|link=Secret Lab]]
| |
| | width="4%" style="border-top-style: hidden; border-width: 1px; border-bottom-style: hidden; border-width: 1px" |
| |
| | [[Arquivo:Andar_21_a_24_(2).jpg|250px|link=Secret Lab]]
| |
| |-
| |
| | height="30px" style="border-left-style: hidden; border-width: 1px; border-right-style: hidden; border-width: 1px" |
| |
| |-
| |
| ! style="background-color: #660099" | <span style="color:white">Andar 21 a 24 [3]</span>
| |
| | style="border-top-style: hidden; border-width: 1px; border-bottom-style: hidden; border-width: 1px" |
| |
| ! style="background-color: #660099" | <span style="color:white">Andar 21 a 24 [4]</span>
| |
| |- align="center"
| |
| | [[Arquivo:Andar_21_a_24_(3).jpg|250px|link=Secret Lab]]
| |
| | width="4%" style="border-top-style: hidden; border-width: 1px; border-bottom-style: hidden; border-width: 1px" |
| |
| | [[Arquivo:Andar_21_a_24_(4).jpg|250px|link=Secret Lab]]
| |
| |-
| |
| | height="30px" style="border-left-style: hidden; border-width: 1px; border-right-style: hidden; border-width: 1px" |
| |
| |-
| |
| ! style="background-color: #660099" | <span style="color:white">Andar 21 a 24 [5]</span>
| |
| | style="border-top-style: hidden; border-width: 1px; border-bottom-style: hidden; border-width: 1px" |
| |
| ! style="background-color: #660099" | <span style="color:white">Andar 21 a 24 [6]</span>
| |
| |- align="center"
| |
| | [[Arquivo:Andar_21_a_24_(5).jpg|250px|link=Secret Lab]]
| |
| | width="4%" style="border-top-style: hidden; border-width: 1px; border-bottom-style: hidden; border-width: 1px" |
| |
| | [[Arquivo:Andar_21_a_24_(6).jpg|250px|link=Secret Lab]]
| |
| |-
| |
| | height="30px" style="border-left-style: hidden; border-width: 1px; border-right-style: hidden; border-width: 1px" |
| |
| |-
| |
| ! style="background-color: #660099" | <span style="color:white">Andar 21 a 24 [7]</span>
| |
| | style="border-top-style: hidden; border-width: 1px; border-bottom-style: hidden; border-width: 1px" |
| |
| ! style="background-color: #660099" | <span style="color:white">Andar 21 a 24 [8]</span>
| |
| |- align="center"
| |
| | [[Arquivo:Andar_21_a_24_(7).jpg|250px|link=Secret Lab]]
| |
| | width="4%" style="border-top-style: hidden; border-width: 1px; border-bottom-style: hidden; border-width: 1px" |
| |
| | [[Arquivo:Andar_21_a_24_(8).jpg|250px|link=Secret Lab]]
| |
| |-
| |
| |}
| |
| | |
| <span style="color: Purple">'''Inimigos'''</span>
| |
| <center>
| |
| <table border="0" cellpadding="3" cellspacing="1" class="modernTable" style="padding: 0px; border: 0px; font-size: 10.88px; width: 700px;">
| |
| <tr>
| |
| <td style="text-align: center; width: 200px;>[[Arquivo:0009-Blastoise.png|link=Blastoise]]</td>
| |
| <td style="text-align: center; width: 200px;">''' Cyborg Blastoise'''</td>
| |
| <td style="text-align: center; width: 200px;>[[Arquivo:160-Feraligatr.png|link=Feraligatr]]</td>
| |
| <td style="text-align: center; width: 200px;"> ''' Cyborg Feraligatr'''</td>
| |
| <td style="text-align: center; width: 200px;>[[Arquivo:342-Crawdaunt.png|link=Crawdaunt]]</td>
| |
| <td style="text-align: center; width: 200px;"> ''' Cyborg Crawdaunt'''</td>
| |
| <td style="text-align: center; width: 200px;>[[Arquivo:MegaBlastoise.png|link=Mega Blastoise]]</td><br />
| |
| <td style="text-align: center; width: 200px;"> '''Cyborg Mega Blastoise'''</td>
| |
| </tr>
| |
| </table>
| |
| </center>
| |
| | |
| <span style="color: Purple">'''Armadilha'''</span>
| |
| | |
| As armadilhas desse andar são Chuvas que caem em algumas partes do mapa causando dano e lentidão, além de redemoinhos de água que podem puxar seu personagem e causar o efeito Sleep, para sair dele você deve usar medicine no personagem e andar saindo do redemoinho.
| |
| | |
| <center>[[Arquivo:Trap1toed.png|link=Secret Lab]]<br />
| |
| [[Arquivo:Trap2toed.png|link=Secret Lab]]</center>
| |
| | |
| <span style="color: Purple">'''Boss'''</span>
| |
| | |
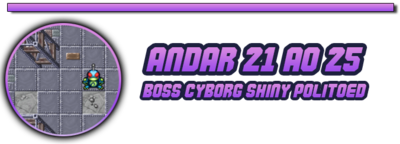
| O boss do andar Seavell é o Cyborg Shiny Politoed ([[Arquivo:186-shPolitoed.png|link=Shiny Politoed]]), a mecânica desse boss é evitar levar dano do Waterfall pois ele dá Hit kill.
| |
| | |
| <center>[[Arquivo:Toed.png|link=Secret Lab]]</center>
| |
| | |
| '''Dica''': <br />
| |
| - Fique atrás de um dos quatro pilares para não levar dano do Waterfall<br />
| |
| - No campo de batalha cai chuvas semelhante ao Rain Dance, causando silence.<br />
| |
| - Cuidado no último estágio do Cyborg Shiny Politoed, pois ele pode puxar seu pokémon.
| |
| | |
| <span style="color: Purple">'''Loot'''</span>
| |
| | |
| <center> | |
| {| class="wikitable"
| |
| |-
| |
| ! scope="col"| 3 Nightmare unusual ores
| |
| ! scope="col"| 100 Technological Crystals (Tier: 3)
| |
| ! scope="col"| Cyborg Cell (Water)
| |
| ! scope="col"| 3 Moderate Nightmare experience candy
| |
| ! scope="col"| Small Nightmare experience candy
| |
| |- style="width:50px; text-align:center;"
| |
| | [[Arquivo:NW_unusual_ore.png|Nightmare unusual ore|link=Secret Lab]]
| |
| | [[Arquivo:Frag_tier_3.png|Technological Crystals (Tier: 3)|link=Secret Lab]]
| |
| | [[Arquivo:Cyborg_Cell_(Water)..png|Cyborg Cell (Water)|link=Secret Lab]]
| |
| | [[Arquivo:Moderate_Nightmare_experience_candy..png|Moderate Nightmare experience candy|link=Secret Lab]]
| |
| | [[Arquivo:Small_Nightmare_experience_candy..png|Small Nightmare experience candy|link=Secret Lab]]
| |
| | |
| |}
| |
| </center>
| |
| | |
| === <font size='5'><span style="color: Purple">'''Raibolt e Ironhard'''</span></font>===
| |
| | |
| <span style="color: Purple">'''Mapa'''</span>
| |
| | |
| {| class="wikitable" width="100%"
| |
| ! width="31%" style="background-color: #660099" | <span style="color:white">Andar 26 a 29 [1]</span>
| |
| | width="3%" style="border-top-style: hidden; border-width: 1px; border-bottom-style: hidden; border-width: 1px" |
| |
| ! width="32%" style="background-color: #660099" | <span style="color:white">Andar 26 a 29 [2]</span>
| |
| |- align="center"
| |
| | [[Arquivo:26_-_29_(1).jpg|250px|link=Secret Lab]]
| |
| | width="4%" style="border-top-style: hidden; border-width: 1px; border-bottom-style: hidden; border-width: 1px" |
| |
| | [[Arquivo:26_-_29_(6).jpg|250px|link=Secret Lab]]
| |
| |-
| |
| | height="30px" style="border-left-style: hidden; border-width: 1px; border-right-style: hidden; border-width: 1px" |
| |
| |-
| |
| ! style="background-color: #660099" | <span style="color:white">Andar 26 a 29 [3]</span>
| |
| | style="border-top-style: hidden; border-width: 1px; border-bottom-style: hidden; border-width: 1px" |
| |
| ! style="background-color: #660099" | <span style="color:white">Andar 26 a 29 [4]</span>
| |
| |- align="center"
| |
| | [[Arquivo:26_-_29_(8).jpg|250px|link=Secret Lab]]
| |
| | width="4%" style="border-top-style: hidden; border-width: 1px; border-bottom-style: hidden; border-width: 1px" |
| |
| | [[Arquivo:26_-29_(5).jpg|250px|link=Secret Lab]]
| |
| |-
| |
| | height="30px" style="border-left-style: hidden; border-width: 1px; border-right-style: hidden; border-width: 1px" |
| |
| |-
| |
| ! style="background-color: #660099" | <span style="color:white">Andar 26 a 29 [5]</span>
| |
| | style="border-top-style: hidden; border-width: 1px; border-bottom-style: hidden; border-width: 1px" |
| |
| ! style="background-color: #660099" | <span style="color:white">Andar 26 a 29 [6]</span>
| |
| |- align="center"
| |
| | [[Arquivo:26-29_(2).jpg|250px|link=Secret Lab]]
| |
| | width="4%" style="border-top-style: hidden; border-width: 1px; border-bottom-style: hidden; border-width: 1px" |
| |
| | [[Arquivo:26-29_(3).jpg|250px|link=Secret Lab]]
| |
| |-
| |
| | height="30px" style="border-left-style: hidden; border-width: 1px; border-right-style: hidden; border-width: 1px" |
| |
| |-
| |
| ! style="background-color: #660099" | <span style="color:white">Andar 26 a 29 [7]</span>
| |
| | style="border-top-style: hidden; border-width: 1px; border-bottom-style: hidden; border-width: 1px" |
| |
| ! style="background-color: #660099" | <span style="color:white">Andar 26 a 29 [8]</span>
| |
| |- align="center"
| |
| | [[Arquivo:26-29_(4).jpg|250px|link=Secret Lab]]
| |
| | width="4%" style="border-top-style: hidden; border-width: 1px; border-bottom-style: hidden; border-width: 1px" |
| |
| | [[Arquivo:26 - 29 (7).jpg|250px|link=Secret Lab]]
| |
| |-
| |
| |}
| |
| | |
| <span style="color: Purple">'''Inimigos'''</span>
| |
| <center>
| |
| <table border="0" cellpadding="3" cellspacing="1" class="modernTable" style="padding: 0px; border: 0px; font-size: 10.88px; width: 700px;">
| |
| <tr>
| |
| <td style="text-align: center; width: 200px;>[[Arquivo:125-Electabuzz.png|link=Electabuzz]]</td>
| |
| <td style="text-align: center; width: 200px;">''' Cyborg Electabuzz'''</td>
| |
| <td style="text-align: center; width: 200px;>[[Arquivo:Scizor.png|link=Scizor]]</td>
| |
| <td style="text-align: center; width: 200px;"> ''' Cyborg Scizor'''</td>
| |
| <td style="text-align: center; width: 200px;>[[Arquivo:101-Sh_Electrode.png|link=Shiny Electrode]]</td>
| |
| <td style="text-align: center; width: 200px;"> ''' Cyborg Shiny Electrode'''</td>
| |
| <td style="text-align: center; width: 200px;>[[Arquivo:376-Metagross.png|link=Metagross]]</td><br />
| |
| <td style="text-align: center; width: 200px;"> '''Cyborg Metagross'''</td>
| |
| </tr>
| |
| </table>
| |
| </center>
| |
| | |
| <span style="color: Purple">'''Armadilha'''</span>
| |
| | |
| As armadilhas desse andar são Lasers que que emite uma mira no chão indicando onde vai atacar, dando Hit kill se pegar no personagem e não dá dano no seu pokémon.
| |
| | |
| <center>[[Arquivo:Armadilha_eletrica.png|link=Secret Lab]]</center>
| |
| | |
| <span style="color: Purple">'''Boss'''</span>
| |
| | |
| O boss do andar Raibolt e Ironhard é o Cyborg Shiny Magneton ([[Arquivo:082-Sh_Magneton.png|link=Shiny Magneton]]), a mecânica desse boss consiste em, quando o Cyborg Shiny Magneton spawna Magnet Minion você deve colocar os Minion nas fumaças que tem no campo de batalha, quando todos os Minion forem derrotados você poderá dar dano no Shiny Cyborg Magneton.
| |
| | |
| <center> [[Arquivo:BossEletrico.jpg]] </center>
| |
| | |
| '''Dica''': <br />
| |
| - Você consegue dar Lost nesse Boss, podendo bater potion facilmente.
| |
| | |
| <span style="color: Purple">'''Loot'''</span>
| |
| | |
| <center>
| |
| {| class="wikitable"
| |
| |-
| |
| ! scope="col"| 3 Nightmare unusual ores
| |
| ! scope="col"| 100 Technological Crystals (Tier: 3)
| |
| ! scope="col"| Cyborg Cell (Electric)
| |
| ! scope="col"| 4 Moderate Nightmare experience candy
| |
| |- style="width:50px; text-align:center;"
| |
| | [[Arquivo:NW_unusual_ore.png|Nightmare unusual ore|link=Secret Lab]]
| |
| | [[Arquivo:Frag_tier_3.png|Technological Crystals (Tier: 3)|link=Secret Lab]]
| |
| | [[Arquivo:Cyborg_Cell_(Electric)..png|Cyborg Cell (Electric)|link=Secret Lab]]
| |
| | [[Arquivo:Moderate_Nightmare_experience_candy..png|Moderate Nightmare experience candy|link=Secret Lab]]
| |
| |}
| |
| </center>
| |
| | |
| === <font size='5'><span style="color: Purple">'''Psycraft e Malefic'''</span></font> ===
| |
| | |
| <span style="color: Purple">'''Mapa'''</span>
| |
| | |
| {| class="wikitable" width="100%"
| |
| ! width="31%" style="background-color: #660099" | <span style="color:white">Andar 31 e 33 [1]</span>
| |
| | width="3%" style="border-top-style: hidden; border-width: 1px; border-bottom-style: hidden; border-width: 1px" |
| |
| ! width="32%" style="background-color: #660099" | <span style="color:white">Andar 31 e 33 [2]</span>
| |
| |- align="center"
| |
| | [[Arquivo:31_e_33_(1).jpg|250px|link=Secret Lab]]
| |
| | width="4%" style="border-top-style: hidden; border-width: 1px; border-bottom-style: hidden; border-width: 1px" |
| |
| | [[Arquivo:31e_33_(2).jpg|250px|link=Secret Lab]]
| |
| |-
| |
| | height="30px" style="border-left-style: hidden; border-width: 1px; border-right-style: hidden; border-width: 1px" |
| |
| |-
| |
| ! style="background-color: #660099" | <span style="color:white">Andar 31 e 33 [3]</span>
| |
| | style="border-top-style: hidden; border-width: 1px; border-bottom-style: hidden; border-width: 1px" |
| |
| ! style="background-color: #660099" | <span style="color:white">Andar 31 e 33 [4]</span>
| |
| |- align="center"
| |
| | [[Arquivo:31_e_33_(3).jpg|250px|link=Secret Lab]]
| |
| | width="4%" style="border-top-style: hidden; border-width: 1px; border-bottom-style: hidden; border-width: 1px" |
| |
| | [[Arquivo:31_e_33_(4).jpg|250px|link=Secret Lab]]
| |
| |-
| |
| | height="30px" style="border-left-style: hidden; border-width: 1px; border-right-style: hidden; border-width: 1px" |
| |
| |-
| |
| ! style="background-color: #660099" | <span style="color:white">Andar 32 e 34 [1]</span>
| |
| | style="border-top-style: hidden; border-width: 1px; border-bottom-style: hidden; border-width: 1px" |
| |
| ! style="background-color: #660099" | <span style="color:white">Andar 32 e 34 [2]</span>
| |
| |- align="center"
| |
| | [[Arquivo:32_e_34_(1).jpg|250px|link=Secret Lab]]
| |
| | width="4%" style="border-top-style: hidden; border-width: 1px; border-bottom-style: hidden; border-width: 1px" |
| |
| | [[Arquivo:32_e_34_(2).jpg|250px|link=Secret Lab]]
| |
| |-
| |
| | height="30px" style="border-left-style: hidden; border-width: 1px; border-right-style: hidden; border-width: 1px" |
| |
| |-
| |
| ! style="background-color: #660099" | <span style="color:white">Andar 32 e 34 [3]</span>
| |
| | style="border-top-style: hidden; border-width: 1px; border-bottom-style: hidden; border-width: 1px" |
| |
| ! style="background-color: #660099" | <span style="color:white">Andar 32 e 34 [4]</span>
| |
| |- align="center"
| |
| | [[Arquivo:32_e_34_(3).jpg|250px|link=Secret Lab]]
| |
| | width="4%" style="border-top-style: hidden; border-width: 1px; border-bottom-style: hidden; border-width: 1px" |
| |
| | [[Arquivo:32_e_34_(4).jpg|250px|link=Secret Lab]]
| |
| |-
| |
| |}
| |
| | |
| <span style="color: Purple">'''Inimigos'''</span>
| |
| <center>
| |
| <table border="0" cellpadding="3" cellspacing="1" class="modernTable" style="padding: 0px; border: 0px; font-size: 10.88px; width: 700px;">
| |
| <tr>
| |
| <td style="text-align: center; width: 200px;>[[Arquivo:065-Alakazam.png|link=Alakazam]]</td>
| |
| <td style="text-align: center; width: 200px;">''' Cyborg Alakazam'''</td>
| |
| <td style="text-align: center; width: 200px;>[[Arquivo:344-Claydol.png|link=Claydol]]</td>
| |
| <td style="text-align: center; width: 200px;"> ''' Cyborg Claydol'''</td>
| |
| <td style="text-align: center; width: 200px;>[[Arquivo:437-Bronzong.png|link=Bronzong]]</td>
| |
| <td style="text-align: center; width: 200px;"> ''' Cyborg Bronzong'''</td>
| |
| <td style="text-align: center; width: 200px;>[[Arquivo:065-MegaAlakazam.png|link=Mega Alakazam]]</td>
| |
| <td style="text-align: center; width: 200px;"> '''Cyborg Mega Alakazam'''</td>
| |
| <td style="text-align: center; width: 200px;>[[Arquivo:094-Gengar.png|link=Gengar]]</td>
| |
| <td style="text-align: center; width: 200px;"> '''Cyborg Gengar'''</td>
| |
| <td style="text-align: center; width: 200px;>[[Arquivo:342-Crawdaunt.png|link=Crawdaunt]]</td>
| |
| <td style="text-align: center; width: 200px;"> '''Cyborg Crawdaunt'''</td>
| |
| <td style="text-align: center; width: 200px;>[[Arquivo:454-Toxicroak.png|link=Toxicroak]]</td>
| |
| <td style="text-align: center; width: 200px;"> '''Cyborg Toxicroak'''</td>
| |
| <td style="text-align: center; width: 200px;>[[Arquivo:094-MegaGengar.png|link=Mega Gengar]]</td>
| |
| <td style="text-align: center; width: 200px;"> '''Cyborg Mega Gengar'''</td>
| |
| </tr>
| |
| </table>
| |
| </center>
| |
| | |
| <span style="color: Purple">'''Armadilha'''</span>
| |
| <center>
| |
| [[Arquivo:ArmPsy1.png|link=Secret Lab]]<br>
| |
| Essa armadilha causa Hit Kill ao andar em cima dos pontos amarelos, tenha bastante atenção no caminho.
| |
| | |
| <br> | | <br> |
| | | [[Arquivo:Indice_Boss_ShRhydon.png|400px|link=Andar_11_a_15_(Secret_Lab)]] |
| [[Arquivo:ArmPsy2.png|link=Secret Lab]]<br> | | [[Arquivo:Indice_Boss_ShStantler.png|400px|link=Andar_16_a_20_(Secret_Lab)]] |
| A armadilha das plantas causa stun e dano, medicine não tira o efeito. Você pode ficar no meio da armadilha que não levará stun e dano.
| |
| | |
| <br> | | <br> |
| | | [[Arquivo:Indice_Boss_ShPolitoed.png|400px|link=Andar_21_a_25_(Secret_Lab)]] |
| | | [[Arquivo:Indice_Boss_ShMagneton.png|400px|link=Andar_26_a_30_(Secret_Lab)]] |
| [[Arquivo:ArmPsy3.png|link=Secret Lab]]<br> | |
| Essa armadilha causa dano e um efeito semelhante ao Confusion.<br>
| |
| | |
| <br> | | <br> |
| | | [[Arquivo:Indice_Boss_ShEspeonUmbreon.png|400px|link=Andar_31_a_35_(Secret_Lab)]] |
| | | [[Arquivo:Indice_Boss_ShNinetales.png|400px|link=Andar_36_a_40_(Secret_Lab)]] |
| [[Arquivo:ArmPsy4.png|link=Secret Lab]]<br> | |
| De tempo em tempo essa armadilha abre um caminho, semelhante ao da foto acima. Tenha atenção nessa armadilha pois ela causa Hit Kill.
| |
| | |
| <br> | | <br> |
| | | [[Arquivo:Indice_Boss_COnix.png|400px|link=Andar_41_a_45_(Secret_Lab)]] |
| | | [[Arquivo:Indice_Boss_Aerodactyl.png|400px|link=Andar_46_a_50_(Secret_Lab)]] |
| [[Arquivo:ArmPsy5.png|link=Secret Lab]]<br> | |
| Essa armadilha lança efeitos que causam danos.
| |
| | |
| <br> | | <br> |
| </center> | | </center> |
|
| |
|
| <span style="color: Purple">'''Boss'''</span>
| | =Entregando o Diário= |
| | '''Requisito''': Ter realizado algumas etapas da '''Koga Quest'''. |
|
| |
|
| O boss do andar Psycraft e Malefic são o Cyborg Shiny Espeon e Umbreon ([[Arquivo:196-shEspeon.png|link=Shiny Espeon]] e [[Arquivo:197-Sh_Umbreon.png|link=Shiny Umbreon]]), a mecânica desses bosses consiste em separar eles para que evitem se healar e buffar um ao outro.
| | Com os documentos que você coletou no armário do Andar 50, vá para o Continente de Hoenn. Lá dirija-se ao esconderijo dos sobreviventes. |
|
| |
|
| <center>[[Arquivo:BossPsy-Lab.png|link=Secret Lab]]</center>
| | * Nessa parte é necessário a senha que dropa nos Slaking da região. |
|
| |
|
| '''Dica''': <br />
| | <center>[[Arquivo:EsconderijoHoenn1.jpg|450px|link=]] [[Arquivo:EsconderijoHoenn2.jpg|450px|link=]]</center> |
| - Leve cada boss para uma das extremidades da sala (norte e sul) e mate um por vez.<br />
| |
| | |
| <span style="color: Purple">'''Loot'''</span>
| |
|
| |
|
| | Dentro do esconderijo encontre Thomas e entregue os documentos que ele pede. |
| <center> | | <center> |
| {| class="wikitable"
| | [[Arquivo:Thomas_Hoenn.png|link=]]</center> <br> |
| |-
| | <br> |
| ! scope="col"| 4 Nightmare unusual ores
| | Recompensa por entregar os documentos: 12.000.000 de EXP e 150.000 de NW EXP. |
| ! scope="col"| 25 Technological Crystals (Tier: 3)
| | <br> |
| ! scope="col"| 25 Technological Crystals (Tier: 4)
| |
| ! scope="col"| Cyborg Cell (Psychic)
| |
| ! scope="col"| Cyborg Cell (Dark)
| |
| ! scope="col"| 4 Moderate Nightmare experience candy
| |
| ! scope="col"| 2 Small Nightmare experience candy
| |
| |- style="width:50px; text-align:center;"
| |
| | [[Arquivo:NW_unusual_ore.png|Nightmare unusual ore|link=Secret Lab]]
| |
| | [[Arquivo:Frag_tier_3.png|Technological Crystals (Tier: 3)|link=Secret Lab]]
| |
| | [[Arquivo:Frag_tier_4.png|Technological Crystals (Tier: 4)|link=Secret Lab]]
| |
| | [[Arquivo:Cyborg_Cell_(Psychic).png|Cyborg Cell (Psychic)|link=Secret Lab]]
| |
| | [[Arquivo:Cyborg_Cell_(Dark).png|Cyborg Cell (Dark)|link=Secret Lab]]
| |
| | [[Arquivo:Moderate_Nightmare_experience_candy..png|Moderate Nightmare experience candy|link=Secret Lab]]
| |
| | [[Arquivo:Small_Nightmare_experience_candy..png|Small Nightmare experience candy|link=Secret Lab]]
| |
| |}
| |
| </center> | |
| | |
| === <font size='5'><span style="color: Purple">'''Volcanic'''</span></font> ===
| |
| | |
| <span style="color: Purple">'''Mapa'''</span>
| |
| | |
| {| class="wikitable" width="100%"
| |
| ! width="31%" style="background-color: #660099" | <span style="color:white">Andar 36 a 39 [1]</span>
| |
| | width="3%" style="border-top-style: hidden; border-width: 1px; border-bottom-style: hidden; border-width: 1px" |
| |
| ! width="32%" style="background-color: #660099" | <span style="color:white">Andar 36 a 39 [2]</span>
| |
| |- align="center"
| |
| | [[Arquivo:36_-_39_(1).jpg|250px|link=Secret Lab]]
| |
| | width="4%" style="border-top-style: hidden; border-width: 1px; border-bottom-style: hidden; border-width: 1px" |
| |
| | [[Arquivo:36_-_39_(2).jpg|250px|link=Secret Lab]]
| |
| |-
| |
| | height="30px" style="border-left-style: hidden; border-width: 1px; border-right-style: hidden; border-width: 1px" |
| |
| |-
| |
| ! style="background-color: #660099" | <span style="color:white">Andar 36 a 39 [3]</span>
| |
| | style="border-top-style: hidden; border-width: 1px; border-bottom-style: hidden; border-width: 1px" |
| |
| ! style="background-color: #660099" | <span style="color:white">Andar 36 a 39 [4]</span>
| |
| |- align="center"
| |
| | [[Arquivo:36_-_39_(3).jpg|250px|link=Secret Lab]]
| |
| | width="4%" style="border-top-style: hidden; border-width: 1px; border-bottom-style: hidden; border-width: 1px" |
| |
| | [[Arquivo:36_-_39_(4).jpg|250px|link=Secret Lab]]
| |
| |-
| |
| | height="30px" style="border-left-style: hidden; border-width: 1px; border-right-style: hidden; border-width: 1px" |
| |
| |-
| |
| ! style="background-color: #660099" | <span style="color:white">Andar 36 a 39 [5]</span>
| |
| | style="border-top-style: hidden; border-width: 1px; border-bottom-style: hidden; border-width: 1px" |
| |
| ! style="background-color: #660099" | <span style="color:white">Andar 36 a 39 [6]</span>
| |
| |- align="center"
| |
| | [[Arquivo:36_-_39_(5).jpg|250px|link=Secret Lab]]
| |
| | width="4%" style="border-top-style: hidden; border-width: 1px; border-bottom-style: hidden; border-width: 1px" |
| |
| | [[Arquivo:36_-_39_(6).jpg|250px|link=Secret Lab]]
| |
| |-
| |
| | height="30px" style="border-left-style: hidden; border-width: 1px; border-right-style: hidden; border-width: 1px" |
| |
| |-
| |
| ! style="background-color: #660099" | <span style="color:white">Andar 36 a 39 [7]</span>
| |
| | style="border-top-style: hidden; border-width: 1px; border-bottom-style: hidden; border-width: 1px" |
| |
| ! style="background-color: #660099" | <span style="color:white">Andar 36 a 39 [8]</span>
| |
| |- align="center"
| |
| | [[Arquivo:36_-_39_(7).jpg|250px|link=Secret Lab]]
| |
| | width="4%" style="border-top-style: hidden; border-width: 1px; border-bottom-style: hidden; border-width: 1px" |
| |
| | [[Arquivo:36_-_39_(8).jpg|250px|link=Secret Lab]]
| |
| |-
| |
| |}
| |
| | |
| <span style="color: Purple">'''Inimigos'''</span>
| |
| <center> | | <center> |
| <table border="0" cellpadding="3" cellspacing="1" class="modernTable" style="padding: 0px; border: 0px; font-size: 10.88px; width: 700px;"> | | <table class="seeMore"> |
| <tr> | | <tr> |
| <td style="text-align: center; width: 200px;>[[Arquivo:006-Charizard.png|link=Charizard]]</td> | | <td class="seeMore__image">[[Arquivo:Telekinetic-compass.gif|link=]]</td> |
| <td style="text-align: center; width: 200px;"> ''' Cyborg Charizard'''</td>
| | <td> '''Veja mais:''' [[Koga Quest]] </td> |
| <td style="text-align: center; width: 200px;>[[Arquivo:038-Ninetales.png|link=Ninetales]]</td>
| | </tr> |
| <td style="text-align: center; width: 200px;">''' Cyborg Ninetales'''</td> | | </table> |
| <td style="text-align: center; width: 200px;>[[Arquivo:157-Typhlosion.png|link=Typhlosion]]</td>
| |
| <td style="text-align: center; width: 200px;"> ''' Cyborg Typhlosion'''</td>
| |
| <td style="text-align: center; width: 200px;>[[Arquivo:006-MegaCharizardX.png|link=Mega Charizard X]]</td>
| |
| <td style="text-align: center; width: 200px;"> ''' Cyborg Mega Charizard X'''</td>
| |
| </tr> | |
| </table> | |
| </center>
| |
| | |
| <span style="color: Purple">'''Armadilha'''</span>
| |
| | |
| As armadilhas desse tema são, estátuas de Ninetales que soltam fire blast de tempo em tempo além de um vulcão que solta lavas girando em sentido horário, ambas as armadilhas dão Hit kill no personagem e no pokémon.
| |
| | |
| <center>
| |
| [[Arquivo:Armadilha_Fire1.jpg|link=Secret Lab]]
| |
| | |
| [[Arquivo:Armadilha_Fire2.jpg|link=Secret lab]]
| |
| </center> | | </center> |
|
| |
|
| <span style="color: Purple">'''Boss'''</span>
| | =Crafts= |
| | | Nesse local está localizada a máquina para craft de Helds com os Fragmentos de cada Tier obtidos durante a Quest, bem como craftar alguns addons exclusivos. Também é possível craftar ou utilizar a Workshop de essences elementares. Para ter acesso a essa sala, você deve entrar no Lab através do NPC Aiden pelo menos uma vez. |
| O boss do andar Volcanic é o Cyborg Shiny Ninetales ([[Arquivo:038-Sh_Ninetales.png|link=Shiny Ninetales]]). Haverá 9 Pilares onde você deve destruir apenas clicando nele, assim o Boss não levará Buff.
| |
| | |
| <center>[[Arquivo:Lab-Tales.png|link=Secret Lab]]</center>
| |
|
| |
|
| '''Dica''': <br />
| | <center> [[Arquivo:Sala_dos_work.png|500px|link=]] </center> |
| - Destrua os 9 pilares na ordem de 1 para 3, caso erre algum, deverá esperar 10 segundos.<br />
| |
|
| |
|
| <span style="color: Purple">'''Loot'''</span> | | <tabber> |
| | |-|Held Itens= |
|
| |
|
| <center> | | <center> |
| {| class="wikitable" | | {| class="wikitable" width="100%" align="center" |
| | ! colspan="6" width="1%" | Craft dos Helds |
| |- | | |- |
| ! scope="col"| 2 Nightmare unusual ores | | ! align="center" width="1%" | Imagem |
| ! scope="col"| 25 Technological Crystals (Tier: 4)
| | ! align="center" width="1%" | Nome |
| ! scope="col"| 10 Technological Crystals (Tier: 5) | | ! align="center" colspan="4" | Requisitos |
| ! scope="col"| Cyborg Cell (Fire)
| |
| ! scope="col"| Very Large Nightmare experience candy
| |
| ! scope="col"| Small Nightmare experience candy
| |
| |- style="width:50px; text-align:center;"
| |
| | [[Arquivo:NW_unusual_ore.png|Nightmare unusual ore|link=Secret Lab]]
| |
| | [[Arquivo:Frag_tier_4.png|Technological Crystals (Tier: 4)|link=Secret Lab]]
| |
| | [[Arquivo:Frag_tier_5.png|Technological Crystals (Tier: 5)|link=Secret Lab]]
| |
| | [[Arquivo:Cyborg_Cell_(Fire)..png|Cyborg Cell (Fire)|link=Secret Lab]]
| |
| | [[Arquivo:Very_large_Nightmare_experience_candy.png|Very large Nightmare experience candy|link=Secret Lab]]
| |
| | [[Arquivo:Small_Nightmare_experience_candy..png|Small Nightmare experience candy|link=Secret Lab]]
| |
| |}
| |
| </center>
| |
| | |
| === <font size='5'><span style="color: Purple">'''Cyborg Crystal Onix'''</span></font> ===
| |
| | |
| <span style="color: Purple">'''Mapa'''</span>
| |
| | |
| {| class="wikitable" width="100%"
| |
| ! width="31%" style="background-color: #660099" | <span style="color:white">Andar 41 a 44 [1]</span>
| |
| | width="3%" style="border-top-style: hidden; border-width: 1px; border-bottom-style: hidden; border-width: 1px" |
| |
| ! width="32%" style="background-color: #660099" | <span style="color:white">Andar 41 a 44 [2]</span> | |
| |- align="center"
| |
| | [[Arquivo:41_-_44_(1).jpg|250px|link=Secret Lab]]
| |
| | width="4%" style="border-top-style: hidden; border-width: 1px; border-bottom-style: hidden; border-width: 1px" |
| |
| | [[Arquivo:41_-_44_(2).jpg|250px|link=Secret Lab]]
| |
| |- | | |- |
| | height="30px" style="border-left-style: hidden; border-width: 1px; border-right-style: hidden; border-width: 1px" | | | | align="center" width="1%"| [[Arquivo:Junto.png|link=Held Itens]] |
| | | align="center" | '''Tier: 8''' |
| | | align="center" width="12%" | 100 [[Arquivo:Sarkies_Advanced_Stone.png|link=Secret Lab]] <br/> Sarkies Advanced Stones |
| | | align="center" width="10%" colspan="2" |30 [[Arquivo:NW_unusual_ore.png|Nightmare unusual ore|link=Secret Lab]] <br/> Nightmare Unusual Ore |
| | | align="center" width="10%"|250 [[Arquivo:NW_ore.png|Nightmare Ore|link=Secret Lab]] <br/> Nightmare Ore |
| |- | | |- |
| ! style="background-color: #660099" | <span style="color:white">Andar 41 a 44 [3]</span>
| | | align="center" width="1%"| [[Arquivo:X-Upgrade-Tier-8.gif|link=Secret Lab]] |
| | style="border-top-style: hidden; border-width: 1px; border-bottom-style: hidden; border-width: 1px" | | | | align="center" | '''X-Upgrade (Tier: 8)''' |
| ! style="background-color: #660099" | <span style="color:white">Andar 41 a 44 [4]</span>
| | | align="center" width="12%"|100 [[Arquivo:Frag_tier8.png|Technological Crystal (Tier: 8)|link=Secret Lab]] <br/> Technological Crystal (Tier: 8) |
| |- align="center" | | | align="center" width="10%" |20 [[Arquivo:NW_unusual_ore.png|Nightmare unusual ore|link=Secret Lab]] <br/> Nightmare Unusual Ore |
| | [[Arquivo:41_-_44_(3).jpg|250px|link=Secret Lab]] | | | align="center" width="10%"|48 [[Arquivo:NW_ore.png|Nightmare Ore|link=Secret Lab]] <br/> Nightmare Ore |
| | width="4%" style="border-top-style: hidden; border-width: 1px; border-bottom-style: hidden; border-width: 1px" | | | | align="center" width="10%"|400 [[Arquivo:Compressed_Nightmare_Gems.png|Compressed Nightmare Gems|link=Secret Lab]] <br/> Compressed Nightmare Gem |
| | [[Arquivo:41_-_44_(4).jpg|250px|link=Secret Lab]]
| |
| |- | | |- |
| | height="30px" style="border-left-style: hidden; border-width: 1px; border-right-style: hidden; border-width: 1px" | | | | align="center" width="1%"| [[Arquivo:X-upgrade-tier-7.gif|link=Secret Lab]] |
| | | align="center" | '''X-Upgrade (Tier: 7)''' |
| | | align="center" width="12%"|100 [[Arquivo:Frag_tier_7.png|Technological Crystal (Tier: 7)|link=Secret Lab]] <br/> Technological Crystal (Tier: 7) |
| | | align="center" width="10%" |20 [[Arquivo:NW_unusual_ore.png|Nightmare unusual ore|link=Secret Lab]] <br/> Nightmare Unusual Ore |
| | | align="center" width="10%"|48 [[Arquivo:NW_ore.png|Nightmare Ore|link=Secret Lab]] <br/> Nightmare Ore |
| | | align="center" width="10%"|200 [[Arquivo:Compressed_Nightmare_Gems.png|Compressed Nightmare Gems|link=Secret Lab]] <br/> Compressed Nightmare Gem |
| |- | | |- |
| ! style="background-color: #660099" | <span style="color:white">Andar 41 a 44 [5]</span>
| | | align="center" width="1%"| [[Arquivo:X-upgrade-tier-6.gif|link=Secret Lab]] |
| | style="border-top-style: hidden; border-width: 1px; border-bottom-style: hidden; border-width: 1px" | | | | align="center" | '''X-Upgrade (Tier: 6)''' |
| ! style="background-color: #660099" | <span style="color:white">Andar 41 a 44 [6]</span>
| | | align="center" width="12%"|100 [[Arquivo:Frag_tier_6.png|Technological Crystal (Tier: 6)|link=Secret Lab]] <br/> Technological Crystal (Tier: 6) |
| |- align="center" | | | align="center" width="10%" |5 [[Arquivo:NW_unusual_ore.png|Nightmare unusual ore|link=Secret Lab]] <br/> Nightmare Unusual Ore |
| | [[Arquivo:41_-_44_(5).jpg|250px|link=Secret Lab]] | | | align="center" width="10%"|12 [[Arquivo:NW_ore.png|Nightmare Ore|link=Secret Lab]] <br/> Nightmare Ore |
| | width="4%" style="border-top-style: hidden; border-width: 1px; border-bottom-style: hidden; border-width: 1px" | | | | align="center" width="10%"|100 [[Arquivo:Compressed_Nightmare_Gems.png|Compressed Nightmare Gems|link=Secret Lab]] <br/> Compressed Nightmare Gem |
| | [[Arquivo:41_-_44_(6).jpg|250px|link=Secret Lab]]
| |
| |- | | |- |
| | height="30px" style="border-left-style: hidden; border-width: 1px; border-right-style: hidden; border-width: 1px" | | | | align="center" width="1%"| [[Arquivo:Held5_3.png|link=Held Itens]]<br/>[[Arquivo:Held5_lista.png|link=Held Itens]]<br/>[[Arquivo:Lista_held5.png|link=Held Itens]]<br/>[[Arquivo:Ultima_t5.png|link=Held Itens]] |
| | | align="center" | '''Tier: 5''' |
| | | align="center" width="12%"|100 [[Arquivo:Frag_tier_5.png|Technological Crystal (Tier: 5)|link=Secret Lab]] <br/> Technological Crystal (Tier: 5) |
| | | align="center" width="10%" |3 [[Arquivo:NW_unusual_ore.png|Nightmare unusual ore|link=Secret Lab]] <br/> Nightmare Unusual Ore |
| | | align="center" width="10%"|8 [[Arquivo:NW_ore.png|Nightmare Ore|link=Secret Lab]] <br/> Nightmare Ore |
| | | align="center" width="10%"|50 [[Arquivo:Compressed_Nightmare_Gems.png|Compressed Nightmare Gems|link=Secret Lab]] <br/> Compressed Nightmare Gem |
| |- | | |- |
| ! style="background-color: #660099" | <span style="color:white">Andar 41 a 44 [7]</span>
| | | align="center" width="1%"| [[Arquivo:Held4_lista.png|link=Held Itens]]<br/>[[Arquivo:Held4..png|link=Held Itens]]<br/>[[Arquivo:Lista4_3.png|link=Held Itens]] |
| | style="border-top-style: hidden; border-width: 1px; border-bottom-style: hidden; border-width: 1px" | | | | align="center" | '''Tier: 4''' |
| ! style="background-color: #660099" | <span style="color:white">Andar 41 a 44 [8]</span>
| | | align="center" width="10%" colspan="2" |100 [[Arquivo:Frag_tier_4.png|Technological Crystal (Tier:4)|link=Secret Lab]] <br/> Technological Crystal (Tier: 4) |
| |- align="center"
| | | align="center" width="12%" colspan="2"|20 [[Arquivo:Compressed_Nightmare_Gems.png|Compressed Nightmare Gems|link=Secret Lab]] <br/> Compressed Nightmare Gem |
| | [[Arquivo:41_-_44_(7).jpg|250px|link=Secret Lab]] | |
| | width="4%" style="border-top-style: hidden; border-width: 1px; border-bottom-style: hidden; border-width: 1px" | | |
| | [[Arquivo:41_-_44_(8).jpg|250px|link=Secret Lab]]
| |
| |- | | |- |
| |} | | | align="center" width="1%"| [[Arquivo:Ghost.png|link=Secret Lab]] |
| | | | align="center" | '''Y-Ghost (Tier: 3)''' |
| <span style="color: Purple">'''Inimigos'''</span>
| | | align="center" width="12%" colspan="2"|100 [[Arquivo:Frag_tier_3.png|Technological Crystal (Tier:3)|link=Secret Lab]] <br/> Technological Crystal (Tier: 3) |
| <center>
| | | align="center" width="10%" colspan="2"|10 [[Arquivo:Compressed_Nightmare_Gems.png|Compressed Nightmare Gems|link=Secret Lab]] <br/> Compressed Nightmare Gem |
| <table border="0" cellpadding="3" cellspacing="1" class="modernTable" style="padding: 0px; border: 0px; font-size: 10.88px; width: 700px;">
| |
| <tr>
| |
| | |
| <td style="text-align: center; width: 200px;>[[Arquivo:0009-Blastoise.png|link=Blastoise]]</td>
| |
| <td style="text-align: center; width: 200px;">''' Cyborg Blastoise'''</td>
| |
| <td style="text-align: center; width: 200px;>[[Arquivo:003-Venusaur.png|link=Venusaur]]</td>
| |
| <td style="text-align: center; width: 200px;">''' Cyborg Venusaur'''</td>
| |
| <td style="text-align: center; width: 200px;>[[Arquivo:006-Charizard.png|link=Charizard]]</td>
| |
| <td style="text-align: center; width: 200px;">''' Cyborg Charizard'''</td>
| |
| <td style="text-align: center; width: 200px;>[[Arquivo:038-Ninetales.png|link=Ninetales]]</td>
| |
| <td style="text-align: center; width: 200px;">''' Cyborg Ninetales'''</td>
| |
| <td style="text-align: center; width: 200px;>[[Arquivo:065-Alakazam.png|link=Alakazam]]</td>
| |
| <td style="text-align: center; width: 200px;">''' Cyborg Alakazam'''</td>
| |
| <td style="text-align: center; width: 200px;>[[Arquivo:067-Machoke.png|link=Machoke]]</td>
| |
| <td style="text-align: center; width: 200px;">''' Cyborg Machoke'''</td>
| |
| <td style="text-align: center; width: 200px;>[[Arquivo:094-Gengar.png|link=Gengar]]</td>
| |
| <td style="text-align: center; width: 200px;">''' Cyborg Gengar'''</td>
| |
| <td style="text-align: center; width: 200px;>[[Arquivo:101-Sh_Electrode.png|link=Shiny Electrode]]</td>
| |
| <td style="text-align: center; width: 200px;">''' Cyborg Shiny Electrode'''</td>
| |
| <td style="text-align: center; width: 200px;>[[Arquivo:125-Electabuzz.png|link=Electabuzz]]</td>
| |
| <td style="text-align: center; width: 200px;">''' Cyborg Electabuzz'''</td>
| |
| <td style="text-align: center; width: 200px;>[[Arquivo:143-Snorlax.png|link=Snorlax]]</td>
| |
| <td style="text-align: center; width: 200px;">''' Cyborg Snorlax'''</td>
| |
| <td style="text-align: center; width: 200px;>[[Arquivo:154-Meganium.png|link=Meganium]]</td>
| |
| <td style="text-align: center; width: 200px;">''' Cyborg Meganium'''</td>
| |
| <td style="text-align: center; width: 200px;>[[Arquivo:157-Typhlosion.png|link=Typhlosion]]</td>
| |
| <td style="text-align: center; width: 200px;">''' Cyborg Typhlosion'''</td>
| |
| </tr>
| |
| </table>
| |
| </center>
| |
| | |
| <center>
| |
| <table border="0" cellpadding="3" cellspacing="1" class="modernTable" style="padding: 0px; border: 0px; font-size: 10.88px; width: 700px;">
| |
| <tr>
| |
| | |
| <td style="text-align: center; width: 200px;>[[Arquivo:160-Feraligatr.png|link=Feraligatr]]</td>
| |
| <td style="text-align: center; width: 200px;">''' Cyborg Feraligatr'''</td>
| |
| <td style="text-align: center; width: 200px;>[[Arquivo:Scizor.png|link=Scizor]]</td>
| |
| <td style="text-align: center; width: 200px;">''' Cyborg Scizor'''</td>
| |
| <td style="text-align: center; width: 200px;>[[Arquivo:227-Skarmory.png |link=Skarmory]]</td>
| |
| <td style="text-align: center; width: 200px;">''' Cyborg Skarmory'''</td>
| |
| <td style="text-align: center; width: 200px;>[[Arquivo:323-Camerupt.png|link=Camerupt]]</td>
| |
| <td style="text-align: center; width: 200px;">''' Cyborg Camerupt'''</td>
| |
| <td style="text-align: center; width: 200px;>[[Arquivo:342-Crawdaunt.png|link=Crawdaunt]]</td>
| |
| <td style="text-align: center; width: 200px;">''' Cyborg Crawdaunt'''</td>
| |
| <td style="text-align: center; width: 200px;>[[Arquivo:344-Claydol.png|link=Claydol]]</td>
| |
| <td style="text-align: center; width: 200px;">''' Cyborg Claydol'''</td>
| |
| <td style="text-align: center; width: 200px;>[[Arquivo:348-Armaldo.png|link=Armaldo]]</td>
| |
| <td style="text-align: center; width: 200px;">''' Cyborg Armaldo'''</td>
| |
| <td style="text-align: center; width: 200px;>[[Arquivo:357-Tropius.png |link=Tropius]]</td>
| |
| <td style="text-align: center; width: 200px;">''' Cyborg Tropius'''</td>
| |
| <td style="text-align: center; width: 200px;>[[Arquivo:437-Bronzong.png|link=Bronzong]]</td>
| |
| <td style="text-align: center; width: 200px;">''' Cyborg Bronzong'''</td>
| |
| <td style="text-align: center; width: 200px;>[[Arquivo:454-Toxicroak.png|link=Toxicroak]]</td>
| |
| <td style="text-align: center; width: 200px;">''' Cyborg Toxicroak'''</td>
| |
| <td style="text-align: center; width: 200px;>[[Arquivo:003-MegaVenusaur.png|link=Mega Venusaur]]</td>
| |
| <td style="text-align: center; width: 200px;">''' Cyborg Mega Venusaur'''</td>
| |
| <td style="text-align: center; width: 200px;>[[Arquivo:006-MegaCharizardX.png|link=Mega Charizard X]]</td>
| |
| <td style="text-align: center; width: 200px;">''' Cyborg Mega Charizard X'''</td>
| |
| | |
| </tr>
| |
| </table>
| |
| </center>
| |
| | |
| <center>
| |
| <table border="0" cellpadding="3" cellspacing="1" class="modernTable" style="padding: 0px; border: 0px; font-size: 10.88px; width: 700px;">
| |
| <tr>
| |
| | |
| <td style="text-align: center; width: 200px;>[[Arquivo:006-MegaCharizardY.png|link=Mega Charizard Y]]</td>
| |
| <td style="text-align: center; width: 200px;">''' Cyborg Mega Charizard Y'''</td>
| |
| <td style="text-align: center; width: 200px;>[[Arquivo:MegaBlastoise.png|link=Mega Blastoise]]</td>
| |
| <td style="text-align: center; width: 200px;">''' Cyborg Mega Blastoise'''</td>
| |
| <td style="text-align: center; width: 200px;>[[Arquivo:065-MegaAlakazam.png|link=Mega Alakazam]]</td>
| |
| <td style="text-align: center; width: 200px;">''' Cyborg Mega Alakazam'''</td>
| |
| <td style="text-align: center; width: 200px;>[[Arquivo:068-Sh_Machamp.png|link=Shiny Machamp]]</td>
| |
| <td style="text-align: center; width: 200px;">''' Cyborg Shiny Machamp'''</td>
| |
| <td style="text-align: center; width: 200px;>[[Arquivo:094-MegaGengar.png|link=Mega Gengar]]</td>
| |
| <td style="text-align: center; width: 200px;">''' Cyborg Mega Gengar'''</td>
| |
| <td style="text-align: center; width: 200px;>[[Arquivo:248-MegaTyranitar.png|link=Mega Tyranitar]]</td>
| |
| <td style="text-align: center; width: 200px;">''' Cyborg Mega Tyranitar'''</td>
| |
| <td style="text-align: center; width: 200px;>[[Arquivo:376-Metagross.png|link=Metagross]]</td>
| |
| <td style="text-align: center; width: 200px;">''' Cyborg Metagross'''</td>
| |
| </tr>
| |
| </table>
| |
| </center>
| |
| | |
| <span style="color: Purple">'''Armadilha'''</span>
| |
| | |
| As armadilhas desse andar são rochas caindo semelhante ao ataque Falling Rocks, é possível desviar e não da Hit kill e em algumas partes do mapa Lasers igual ao andar Raibolt e Ironhard. Além disso em algumas partes do mapa pode haver armadilhas que ao pisar emite um ponto de exclamação e um efeito sonoro.
| |
| | |
| <center> [[Arquivo:Trap_c.o.png|link=Secret Lab]] </center>
| |
| | |
| <span style="color: Purple">'''Boss'''</span>
| |
| | |
| O boss do andar é o Cyborg Crystal Onix ([[Arquivo:095-CrystalOnix.png|link=Crystal Onix]]). Sua mecânica consiste em matar os 5 Crystal em campo e desviar dos espinhos que irão aparecer no chão, enquanto desvia você deve ir derrotando o Boss.
| |
| | |
| <center>[[Arquivo:Bossonix1.jpg|link=Secret Lab]]</center>
| |
| | |
| '''Dica''': <br />
| |
| | |
| - O Crystal marcado com o <span style="color: Red">'''X'''</span> deverá ser o último a morrer, pois ele não leva dano caso os outros estiverem vivos. <br />
| |
| - Os espinhos aparecem em três parte do mapa, deixando uma vazia para você ficar livre. Ele segue o sentido horário e anti-horário indicado pelas setas na imagem acima.
| |
| | |
| <span style="color: Purple">'''Loot'''</span>
| |
| <center>
| |
| {| class="wikitable"
| |
| |-
| |
| ! scope="col"| 3 Nightmare unusual ores
| |
| ! scope="col"| 50 Technological Crystals (Tier: 4)
| |
| ! scope="col"| 10 Technological Crystals (Tier: 5)
| |
| ! scope="col"| Cyborg Cell (Crystal)
| |
| ! scope="col"| Very Large Nightmare experience candy
| |
| ! scope="col"| Moderate Nightmare experience candy
| |
| |- style="width:50px; text-align:center;"
| |
| | [[Arquivo:NW_unusual_ore.png|Nightmare unusual ore|link=Secret Lab]]
| |
| | [[Arquivo:Frag_tier_4.png|Technological Crystals (Tier: 4)|link=Secret Lab]]
| |
| | [[Arquivo:Frag_tier_5.png|Technological Crystals (Tier: 5)|link=Secret Lab]]
| |
| | [[Arquivo:Cyborg_Cell_(Crystal)..png|Cyborg Cell (Crystal)|link=Secret Lab]] | |
| | [[Arquivo:Very_large_Nightmare_experience_candy.png|Very large Nightmare experience candy|link=Secret Lab]]
| |
| | [[Arquivo:Moderate_Nightmare_experience_candy..png|Moderate Nightmare experience candy|link=Secret Lab]]
| |
| |}
| |
| </center>
| |
| | |
| === <font size='5'><span style="color: Purple">'''Cyborg Aerodactyl'''</span></font> ===
| |
| | |
| <span style="color: Purple">'''Mapa'''</span>
| |
| | |
| {| class="wikitable" width="100%"
| |
| ! width="31%" style="background-color: #660099" | <span style="color:white">Andar 46 a 49 [1]</span>
| |
| | width="3%" style="border-top-style: hidden; border-width: 1px; border-bottom-style: hidden; border-width: 1px" |
| |
| ! width="32%" style="background-color: #660099" | <span style="color:white">Andar 46 a 49 [2]</span>
| |
| |- align="center"
| |
| | [[Arquivo:46_-_49_(1).jpg|250px|link=Secret Lab]]
| |
| | width="4%" style="border-top-style: hidden; border-width: 1px; border-bottom-style: hidden; border-width: 1px" |
| |
| | [[Arquivo:46_-_49_(2).jpg|250px|link=Secret Lab]]
| |
| |-
| |
| | height="30px" style="border-left-style: hidden; border-width: 1px; border-right-style: hidden; border-width: 1px" |
| |
| |-
| |
| ! style="background-color: #660099" | <span style="color:white">Andar 46 a 49 [3]</span>
| |
| | style="border-top-style: hidden; border-width: 1px; border-bottom-style: hidden; border-width: 1px" |
| |
| ! style="background-color: #660099" | <span style="color:white">Andar 46 a 49 [4]</span>
| |
| |- align="center"
| |
| | [[Arquivo:46_-_49_(3).jpg|250px|link=Secret Lab]]
| |
| | width="4%" style="border-top-style: hidden; border-width: 1px; border-bottom-style: hidden; border-width: 1px" |
| |
| | [[Arquivo:46_-_49_(4).jpg|250px|link=Secret Lab]]
| |
| |-
| |
| | height="30px" style="border-left-style: hidden; border-width: 1px; border-right-style: hidden; border-width: 1px" |
| |
| |-
| |
| ! style="background-color: #660099" | <span style="color:white">Andar 46 a 49 [5]</span>
| |
| | style="border-top-style: hidden; border-width: 1px; border-bottom-style: hidden; border-width: 1px" |
| |
| ! style="background-color: #660099" | <span style="color:white">Andar 46 a 49 [6]</span>
| |
| |- align="center"
| |
| | [[Arquivo:46_-_49_(5).jpg|250px|link=Secret Lab]]
| |
| | width="4%" style="border-top-style: hidden; border-width: 1px; border-bottom-style: hidden; border-width: 1px" |
| |
| | [[Arquivo:46_-_49_(6).jpg|250px|link=Secret Lab]]
| |
| |-
| |
| | height="30px" style="border-left-style: hidden; border-width: 1px; border-right-style: hidden; border-width: 1px" |
| |
| |-
| |
| ! style="background-color: #660099" | <span style="color:white">Andar 46 a 49 [7]</span>
| |
| | style="border-top-style: hidden; border-width: 1px; border-bottom-style: hidden; border-width: 1px" |
| |
| ! style="background-color: #660099" | <span style="color:white">Andar 46 a 49 [8]</span>
| |
| |- align="center"
| |
| | [[Arquivo:46_-_49_(7).jpg|250px|link=Secret Lab]]
| |
| | width="4%" style="border-top-style: hidden; border-width: 1px; border-bottom-style: hidden; border-width: 1px" |
| |
| | [[Arquivo:46_-_49_(8).jpg|250px|link=Secret Lab]]
| |
| |- | | |- |
| |} | | |} |
| | | </center> |
| <span style="color: Purple">'''Inimigos'''</span>
| | * Embora não ganhe Fragmentos Tier: 8 durante o Secret Lab, os helds podem ser craftados no mesmo Workshop. |
| <center>
| | |-|Costumes= |
| <table border="0" cellpadding="3" cellspacing="1" class="modernTable" style="padding: 0px; border: 0px; font-size: 10.88px; width: 700px;">
| | {| class="wikitable" width="100%" style="text-align: center;" |
| <tr>
| | ! colspan="14" width="1%" | Craft dos Costumes |
| | |
| <td style="text-align: center; width: 200px;>[[Arquivo:0009-Blastoise.png|link=Blastoise]]</td>
| |
| <td style="text-align: center; width: 200px;">''' Cyborg Blastoise'''</td>
| |
| <td style="text-align: center; width: 200px;>[[Arquivo:065-Alakazam.png|link=Alakazam]]</td>
| |
| <td style="text-align: center; width: 200px;">''' Cyborg Alakazam'''</td>
| |
| <td style="text-align: center; width: 200px;>[[Arquivo:094-Gengar.png|link=Gengar]]</td>
| |
| <td style="text-align: center; width: 200px;">''' Cyborg Gengar'''</td>
| |
| <td style="text-align: center; width: 200px;>[[Arquivo:125-Electabuzz.png|link=Electabuzz]]</td>
| |
| <td style="text-align: center; width: 200px;">''' Cyborg Electabuzz'''</td>
| |
| <td style="text-align: center; width: 200px;>[[Arquivo:143-Snorlax.png|link=Snorlax]]</td>
| |
| <td style="text-align: center; width: 200px;">''' Cyborg Snorlax'''</td>
| |
| <td style="text-align: center; width: 200px;>[[Arquivo:Scizor.png|link=Scizor]]</td>
| |
| <td style="text-align: center; width: 200px;">''' Cyborg Scizor'''</td>
| |
| <td style="text-align: center; width: 200px;>[[Arquivo:227-Skarmory.png|link=Skarmory]]</td>
| |
| <td style="text-align: center; width: 200px;">''' Cyborg Skarmory'''</td>
| |
| <td style="text-align: center; width: 200px;>[[Arquivo:323-Camerupt.png|link=Camerupt]]</td>
| |
| <td style="text-align: center; width: 200px;">''' Cyborg Camerupt'''</td>
| |
| <td style="text-align: center; width: 200px;>[[Arquivo:348-Armaldo.png|link=Armaldo]]</td>
| |
| <td style="text-align: center; width: 200px;">''' Cyborg Armaldo'''</td>
| |
| <td style="text-align: center; width: 200px;>[[Arquivo:357-Tropius.png|link=Tropius]]</td>
| |
| <td style="text-align: center; width: 200px;">''' Cyborg Tropius'''</td>
| |
| <td style="text-align: center; width: 200px;>[[Arquivo:437-Bronzong.png|link=Bronzong]]</td>
| |
| <td style="text-align: center; width: 200px;">''' Cyborg Bronzong'''</td>
| |
| </tr>
| |
| </table>
| |
| </center>
| |
| | |
| <center>
| |
| <table border="0" cellpadding="3" cellspacing="1" class="modernTable" style="padding: 0px; border: 0px; font-size: 10.88px; width: 700px;">
| |
| <tr>
| |
| | |
| <td style="text-align: center; width: 200px;>[[Arquivo:454-Toxicroak.png|link=Toxicroak]]</td>
| |
| <td style="text-align: center; width: 200px;">''' Cyborg Toxicroak'''</td>
| |
| <td style="text-align: center; width: 200px;>[[Arquivo:101-Sh_Electrode.png|link=Shiny Electrode]]</td>
| |
| <td style="text-align: center; width: 200px;">''' Cyborg Shiny Electrode'''</td>
| |
| <td style="text-align: center; width: 200px;>[[Arquivo:003-MegaVenusaur.png|link=Mega Venusaur]]</td>
| |
| <td style="text-align: center; width: 200px;">''' Cyborg Mega Venusaur'''</td>
| |
| <td style="text-align: center; width: 200px;>[[Arquivo:006-MegaCharizardX.png|link=Mega Charizard X]]</td>
| |
| <td style="text-align: center; width: 200px;">''' Cyborg Mega Charizard X'''</td>
| |
| <td style="text-align: center; width: 200px;>[[Arquivo:006-MegaCharizardY.png|link=Mega Charizard Y]]</td>
| |
| <td style="text-align: center; width: 200px;">''' Cyborg Mega Charizard Y'''</td>
| |
| <td style="text-align: center; width: 200px;>[[Arquivo:MegaBlastoise.png|link=Mega Blastoise]]</td>
| |
| <td style="text-align: center; width: 200px;">''' Cyborg Mega Blastoise'''</td>
| |
| <td style="text-align: center; width: 200px;>[[Arquivo:065-MegaAlakazam.png|link=Mega Alakazam]]</td>
| |
| <td style="text-align: center; width: 200px;">''' Cyborg Mega Alakazam'''</td>
| |
| <td style="text-align: center; width: 200px;>[[Arquivo:068-Sh_Machamp.png|link=Shiny Machamp]]</td>
| |
| <td style="text-align: center; width: 200px;">''' Cyborg Shiny Machamp'''</td>
| |
| <td style="text-align: center; width: 200px;>[[Arquivo:094-MegaGengar.png|link=Mega Gengar]]</td>
| |
| <td style="text-align: center; width: 200px;">''' Cyborg Mega Gengar'''</td>
| |
| <td style="text-align: center; width: 200px;>[[Arquivo:248-MegaTyranitar.png|link=Mega Tyranitar]]</td>
| |
| <td style="text-align: center; width: 200px;">''' Cyborg Mega Tyranitar'''</td>
| |
| <td style="text-align: center; width: 200px;>[[Arquivo:376-Metagross.png|link=Metagross]]</td>
| |
| <td style="text-align: center; width: 200px;">''' Cyborg Metagross'''</td>
| |
| </tr>
| |
| </table>
| |
| </center>
| |
| | |
| <span style="color: Purple">'''Armadilha'''</span>
| |
| | |
| As armadilhas desse andar são pedras que persegue o personagem por um período de tempo não dá dano no seu pokémon e não da Hit kill em você. Além disso em algumas partes do mapa pode haver armadilhas que ao pisar emite um ponto de exclamação e um efeito sonoro.
| |
| | |
| <center> [[Arquivo:Trap_Aero.png|link=Secret Lab]] </center>
| |
| | |
| ==<span style="color: Purple">'''Liberando o Boss Cyborg Aerodactyl'''</span>==
| |
| | |
| | |
| * Essa parte é necessário fazer apenas uma vez, '''exceto''' a parte de minerar os fósseis e abrir o portal que deverá ser feito toda vez que quiser derrotar o Cyborg Aerodactyl
| |
| | |
| Ao chegar no andar 50 você irá cair em uma sala vazia, clique no armário indicado na imagem abaixo para ganhar uns documentos.
| |
| | |
| <center> [[Arquivo:Andar50.png|link=Secret Lab]] </center>
| |
| | |
| Saia do andar pela corda que tem ao Norte e fale com os NPCs.
| |
| | |
| Fora do Nightmare World você deverá ir na Kabuto Fossil Island na parte das escavações e falar com o NPC Albert, mostre os documentos a ele.<br />
| |
| | |
| <center> [[Arquivo:Alb1.1.png|link=Secret Lab]] [[Arquivo:Alb2.png|link=Secret Lab]] <br />
| |
| [[Arquivo:Alb3.png|link=Secret Lab]]
| |
| </center>
| |
| | |
| Em uma parte do dialogo Albert irá perguntar um nome, digite a palavra '''Thommy''' e prossiga.
| |
| | |
| | |
| Após dialogar com Albert ele irá pedir os seguintes itens:
| |
| | |
| <center>
| |
| {| class="wikitable"
| |
| |- | | |- |
| ! scope="col"| 600 Horn Drill | | ! width="1%" | Imagem |
| ! scope="col"| 500 Compressed Steel | | ! width="10%"| Nome |
| ! scope="col"| 20 Rock Stone
| | ! width="50%" colspan="12"| Requisitos |
| ! scope="col"| 30 Steelix Tail | |
| ! scope="col"| 25 Metal Stone
| |
| ! scope="col"| 20 Mystic Star
| |
| ! scope="col"| 15 Ancient Stone
| |
| ! scope="col"| 20 Crystal Stone
| |
| |- style="width:50px; text-align:center;"
| |
| | [[Arquivo:Horn_Drill.png|Horn Drill|link=Secret Lab]]
| |
| | [[Arquivo:CompressedSteel.png|Compressed Steel|link=Secret Lab]]
| |
| | [[Arquivo:Rock-stone.gif|Rock Stone|link=Secret Lab]]
| |
| | [[Arquivo:Steelix_Tail.png|Steelix Tail|link=Secret Lab]]
| |
| | [[Arquivo:MetalStone.png|Metal Stone|link=Secret Lab]]
| |
| | [[Arquivo:GUc8LUi.png|Mystic Star|link=Secret Lab]]
| |
| | [[Arquivo:Ancient-stone.gif|Ancient Stone|link=Secret Lab]]
| |
| | [[Arquivo:Crystal-stone.gif|Crystal Stone|link=Secret Lab]]
| |
| |}
| |
| </center>
| |
| | |
| Entregando os itens para Albert, ele irá pedir para você falar com o NPC Seth que fica no prédio da Silph Co ao lado do CP de Saffron.<br />
| |
| | |
| <center>[[Arquivo:Seth.png|link=Secret Lab]] </center>
| |
| | |
| Seth irá contar sua história e falar que foi roubado, ele te contará a localização do item que Albert pediu a ele. Agora você deve ir na Cidade abandonada de Hamlin
| |
| | |
| <center>[[Arquivo:Hamlin_loc.png|link=Secret Lab]] </center>
| |
| | |
| No local terá alguns NPC, após derrotar todos clique na caixa indicada na imagem abaixo para coletar o item de Seth.
| |
| | |
| <center>[[Arquivo:Item_biker.png|link=Secret Lab]]</center>
| |
| | |
| Retorne para Saffron e fale com Seth, ele irá mandar você falar com o Albert. <br/>
| |
| Albert irá dar uma picareta '''apenas uma vez''', então você deverá comprar outras 8 com o Albert para coletar os fósseis. <br/>
| |
| Nas próximas vezes você deverá comprar 9.
| |
| | |
| [[Arquivo:Picareta_alb.png|link=Secret Lab]] R$ 50000 (50k)
| |
| | |
| === <span style="color: Purple">'''Localização dos Fósseis'''</span> ===
| |
| | |
| * Nessa etapa é necessário um pokémon com a habilidade '''Light'''.
| |
| * O tempo de respawn dos fósseis é de 1 hora após coletado.
| |
| | |
| {| class="wikitable" width="48%%" style="float:left"
| |
| |- | | |- |
| ! width="24%" align="center" | <b>Respawn Aerodactyl (Kanto)</b><br>[[Arquivo:Membranous_wing..png|link=Secret Lab]] Membranous Wing
| | |[[file:Mecha_bighorn.png|link=]] |
| | |'''Mecha: BIG HORN''' |
| | | [[Arquivo:Recipe.png|link=]] Mecha Costume (Recipe) <br> |
| | [[Arquivo:Cyborg_Cell_(Normal).png|Cyborg Cell (Normal)|link=Secret Lab]] 5 Cyborg Cell (Normal) <br> |
| | [[Arquivo:NW_ore.png|link=]] 5 Nightmare Ores <br> |
| | [[Arquivo:Compressed_Nightmare_Gem.png|link=]] 5 Compressed Nightmare Gems<br> |
| | [[Arquivo:Metal_Scraps.png|link=]] 5 Metal Scraps |
| |- | | |- |
| | width="24%" align="center" | [[Arquivo:Fossil_Aero.jpg|link=Secret Lab]] | | |[[file:Mecha_crystalsnake.png|link=]] |
| |} | | |'''Mecha: CRYSTAL SNAKE''' |
| | | | [[Arquivo:Recipe.png|link=]] Mecha Costume (Recipe) <br> |
| {| class="wikitable" width="48%%" style="float:right"
| | [[Arquivo:Cyborg_Cell_(Crystal)..png|Cyborg Cell (Crystal)|link=Secret Lab]] 5 Cyborg Cell (Crystal) <br> |
| | [[Arquivo:NW_ore.png|link=]] 5 Nightmare Ores <br> |
| | [[Arquivo:Compressed_Nightmare_Gem.png|link=]] 5 Compressed Nightmare Gems<br> |
| | [[Arquivo:Metal_Scraps.png|link=]] 5 Metal Scraps |
| |- | | |- |
| ! width="24%" align="center" | <b>Respawn Omastar (Kanto)</b><br> [[Arquivo:Helix-spiraled_shell..png|link=Secret Lab]] Helix-spiraled Shell
| | |[[file:Mecha_drill.png|link=]] |
| | |'''Mecha: DRILL''' |
| | | [[Arquivo:Recipe.png|link=]] Mecha Costume (Recipe) <br> |
| | [[Arquivo:Cyborg_Cell_(Earth).png|Cyborg Cell (Earth)|link=Secret Lab]] 5 Cyborg Cell (Earth) <br> |
| | [[Arquivo:NW_ore.png|link=]] 5 Nightmare Ores <br> |
| | [[Arquivo:Compressed_Nightmare_Gem.png|link=]] 5 Compressed Nightmare Gems<br> |
| | [[Arquivo:Metal_Scraps.png|link=]] 5 Metal Scraps |
| |- | | |- |
| | width="24%" align="center" | [[Arquivo:Fossil_Omastar.jpg|link=Secret lab]] | | |[[file:Mecha_fossil.png|link=]] |
| |} | | |'''Mecha: FOSSIL''' |
| | | | [[Arquivo:Recipe.png|link=]] Mecha Costume (Recipe) <br> |
| | | [[Arquivo:Cell_rock.png|Cyborg Cell (Rock)|link=Secret Lab]] 5 Cyborg Cell (Rock) <br> |
| {| width="100%"
| | [[Arquivo:NW_ore.png|link=]] 5 Nightmare Ores <br> |
| | | | [[Arquivo:Compressed_Nightmare_Gem.png|link=]] 5 Compressed Nightmare Gems<br> |
| |} | | [[Arquivo:Metal_Scraps.png|link=]] 5 Metal Scraps |
| | |
| {| class="wikitable" width="48%%" style="float:left"
| |
| |- | | |- |
| ! width="24%" align="center" | <b>Respawn Kabuto (Kanto)</b><br> [[Arquivo:Horseshoe_crab_shell..png|link=Secret Lab]] Horseshoe Crab Shell
| | |[[file:Mecha_fox.png|link=]] |
| | |'''Mecha: FOX''' |
| | | [[Arquivo:Recipe.png|link=]] Mecha Costume (Recipe) <br> |
| | [[Arquivo:Cyborg_Cell_(Fire)..png|Cyborg Cell (Fire)|link=Secret Lab]] 5 Cyborg Cell (Fire) <br> |
| | [[Arquivo:NW_ore.png|link=]] 5 Nightmare Ores <br> |
| | [[Arquivo:Compressed_Nightmare_Gem.png|link=]] 5 Compressed Nightmare Gems<br> |
| | [[Arquivo:Metal_Scraps.png|link=]] 5 Metal Scraps |
| |- | | |- |
| | width="24%" align="center" | [[Arquivo:Fossivel_kabuto.jpg|link=Secret Lab]] | | |[[file:Mecha_frog.png|link=]] |
| |} | | |'''Mecha: FROG''' |
| | | | [[Arquivo:Recipe.png|link=]] Mecha Costume (Recipe) <br> |
| {| class="wikitable" width="48%%" style="float:right"
| | [[Arquivo:Cyborg_Cell_(Water)..png|Cyborg Cell (Water)|link=Secret Lab]] 5 Cyborg Cell (Water) <br> |
| | [[Arquivo:NW_ore.png|link=]] 5 Nightmare Ores <br> |
| | [[Arquivo:Compressed_Nightmare_Gem.png|link=]] 5 Compressed Nightmare Gems<br> |
| | [[Arquivo:Metal_Scraps.png|link=]] 5 Metal Scraps |
| |- | | |- |
| ! width="24%" align="center" | <b>Respawn Bastiodon (Ilhas Laranja)</b><br> [[Arquivo:Elliptical_shield..png|link=Secret Lab]] Elliptical Shield
| | |[[file:Mecha_longleg.png|link=]] |
| | |'''Mecha: LONG LEG''' |
| | | [[Arquivo:Recipe.png|link=]] Mecha Costume (Recipe) <br> |
| | [[Arquivo:Cyborg_Cell_(Bug)..png|Cyborg Cell (Bug)|link=Secret Lab]] 5 Cyborg Cell (Bug) <br> |
| | [[Arquivo:NW_ore.png|link=]] 5 Nightmare Ores <br> |
| | [[Arquivo:Compressed_Nightmare_Gem.png|link=]] 5 Compressed Nightmare Gems<br> |
| | [[Arquivo:Metal_Scraps.png|link=]] 5 Metal Scraps |
| |- | | |- |
| | width="24%" align="center" | [[Arquivo:Fossil_Bastiodon.jpg|link=Secret Lab]] | | |[[file:Mecha_magnet.png|link=]] |
| |} | | |'''Mecha: MAGNET''' |
| | | | [[Arquivo:Recipe.png|link=]] Mecha Costume (Recipe) <br> |
| {| width="100%"
| | [[Arquivo:Cyborg_Cell_(Electric)..png|Cyborg Cell (Electric)|link=Secret Lab]] 5 Cyborg Cell (Electric) <br> |
| | | | [[Arquivo:NW_ore.png|link=]] 5 Nightmare Ores <br> |
| |} | | [[Arquivo:Compressed_Nightmare_Gem.png|link=]] 5 Compressed Nightmare Gems<br> |
| | | [[Arquivo:Metal_Scraps.png|link=]] 5 Metal Scraps |
| {| class="wikitable" width="48%%" style="float:left"
| |
| |- | | |- |
| ! width="24%" align="center" | <b>Respawn Armaldo (Phenac)</b><br> [[Arquivo:Arthropod_shell..png|link=Secret Lab]] Arthropod Shell
| | |[[file:Mecha_moon.png|link=]] |
| | |'''Mecha: MOON''' |
| | | [[Arquivo:Recipe.png|link=]] Mecha Costume (Recipe) <br> |
| | [[Arquivo:Cyborg_Cell_(Dark).png|Cyborg Cell (Dark)|link=Secret Lab]] 5 Cyborg Cell (Dark) <br> |
| | [[Arquivo:NW_ore.png|link=]] 5 Nightmare Ores <br> |
| | [[Arquivo:Compressed_Nightmare_Gem.png|link=]] 5 Compressed Nightmare Gems<br> |
| | [[Arquivo:Metal_Scraps.png|link=]] 5 Metal Scraps |
| |- | | |- |
| | width="24%" align="center" | [[Arquivo:Fossil_Armaldo.jpg|link=Secret Lab]] | | |[[file:Mecha_sun.png|link=]] |
| |} | | |'''Mecha: SUN''' |
| | | | [[Arquivo:Recipe.png|link=]] Mecha Costume (Recipe) <br> |
| {| class="wikitable" width="48%%" style="float:right"
| | [[Arquivo:Cyborg_Cell_(Psychic).png|Cyborg Cell (Psychic)|link=Secret Lab]] 5 Cyborg Cell (Psychic) <br> |
| | [[Arquivo:NW_ore.png|link=]] 5 Nightmare Ores <br> |
| | [[Arquivo:Compressed_Nightmare_Gem.png|link=]] 5 Compressed Nightmare Gems<br> |
| | [[Arquivo:Metal_Scraps.png|link=]] 5 Metal Scraps |
| |- | | |- |
| ! width="24%" align="center" | <b>Respawn Cradily (Agate)</b><br> [[Arquivo:Strange_shell..png|link=Secret Lab]] Strange Shell
| | |[[file:Mecha_triplebird.png|link=]] |
| | |'''Mecha: TRIPLE BIRD''' |
| | | [[Arquivo:Recipe.png|link=]] Mecha Costume (Recipe) <br> |
| | [[Arquivo:Cyborg_Cell_(Flying)..png|Cyborg Cell (Flying)|link=Secret Lab]] 5 Cyborg Cell (Flying) <br> |
| | [[Arquivo:NW_ore.png|link=]] 5 Nightmare Ores <br> |
| | [[Arquivo:Compressed_Nightmare_Gem.png|link=]] 5 Compressed Nightmare Gems<br> |
| | [[Arquivo:Metal_Scraps.png|link=]] 5 Metal Scraps |
| |- | | |- |
| | width="24%" align="center" | [[Arquivo:Fossil_Cradily.jpg|link=Secret Lab]]
| |
| |} | | |} |
| | | |-|Elemental Workshop= |
| {| width="100%"
| |
| |
| |
| |}
| |
| | |
| {| class="wikitable" width="48%%" style="float:left"
| |
| |-
| |
| ! width="24%" align="center" | <b>Entrada Archeops (Safari Artificial)</b><br> [[Arquivo:Clawed_wing..png|link=Secret Lab]] Clawed Wing
| |
| |-
| |
| | width="24%" align="center" | [[Arquivo:Fossivel_Archeops.jpg|link=Secret Lab]]
| |
| |}
| |
| | |
| {| class="wikitable" width="48%%" style="float:right"
| |
| |-
| |
| ! width="24%" align="center" | <b>Entrada Carracosta (Safari Artificial)</b><br> [[Arquivo:Black_shell..png|link=Secret Lab]] Black Shell
| |
| |-
| |
| | width="24%" align="center" | [[Arquivo:Fossil_Carracosta.jpg|link=Secret Lab]]
| |
| |}
| |
| | |
| {| width="100%"
| |
| |
| |
| |}
| |
| | |
| {| class="wikitable" width="48%%" style="float:left"
| |
| |-
| |
| ! width="24%" align="center" | <b>Respawn Cranidos (Nightmare World)</b><br> [[Arquivo:Dome-shaped_piece_of_head..png|link=Secret Lab]] Dome-shaped Piece of Head
| |
| |- | |
| | width="100%" align="center" | [[Arquivo:Fossil_Cranidos.jpg|link=Secret Lab]]
| |
| |}
| |
| | |
| {| width="100%"
| |
| | | |
| |}
| |
| | |
| === <span style="color: Purple">'''Abrindo o Portal'''</span> ===
| |
| | |
| Com os 9 fósseis em mãos você irá retornar ao andar 50, jogue eles no chão conforme a imagem abaixo, clique na Alavanca para entrar no Portal que leva ao local do Cyborg Aerodactyl.
| |
| | |
| <center> [[Arquivo:Secret-lab-andar-50_1.jpg|1100px|link=Secret Lab]]</center>
| |
| | |
| <span style="color: Purple">'''Boss'''</span>
| |
| | |
| O boss do andar é o Cyborg Aerodactyl ([[Arquivo:142-Aerodactyl.png|link=Aerodactyl]]). Ao entrar na sala você deverá buscar o Cyborg Aerodactyl (indicado na foto abaixo pelo ponto de exclamação <span style="color:red">!</span>). No primeiro estágio, você deverá mover o seu pokémon nos espinhos que caem no chão enquanto o Cyborg Aerodactyl fica em um efeito semelhante ao ataque Fly, quando ele descer irá causar dano no pokémon e caso esteja em cima do espinho o Cyborg Aerodactyl também levará dano, no segundo estágio ele começará a levar dano dos pokémons e no terceiro estágio começará enviar pedras semelhante a armadilha do andar.
| |
| | |
| <center>[[Arquivo:MapAero.jpg|link=Secret Lab]]</center>
| |
| | |
| '''Dica''': <br />
| |
| - No mapa haverá armadilhas como mina terrestre, lasers e pedra assassina (semelhante ao da Embedded Tower).<br />
| |
| - Existe algumas partes do mapa onde não tem armadilha, como esse indicado na foto acima. <br />
| |
| - Mate o Cyborg Aerodactyl e saia pela corda que tem no mesmo local onde ele estava no começo.
| |
| | |
| <span style="color: Purple">'''Loot'''</span>
| |
| | |
| <center> | | <center> |
| {| class="wikitable" | | {| class="wikitable" width="100%" style="text-align: center;" |
| | ! colspan="14" width="1%" | Craft do Elemental Workshop |
| |- | | |- |
| ! scope="col"| 3 Nightmare unusual ores | | ! width="1%" | Imagem |
| ! scope="col"| 50 Technological Crystals (Tier: 5)
| | ! width="10%"| Nome |
| ! scope="col"| 50 Technological Crystals (Tier: 6).
| | ! width="50%" colspan="12"| Requisitos |
| ! scope="col"| Cyborg Cell (Rock)
| |
| ! scope="col"| Very Large Nightmare experience candy
| |
| ! scope="col"| 2 Moderate Nightmare experience candy
| |
| ! scope="col"| Key of Sarkies factory
| |
| |- style="width:50px; text-align:center;"
| |
| | [[Arquivo:NW_unusual_ore.png|Nightmare unusual ore|link=Secret Lab]]
| |
| | [[Arquivo:Frag_tier_5.png|Technological Crystals (Tier: 5)|link=Secret Lab]]
| |
| | [[Arquivo:Frag_tier_6.png|Technological Crystals (Tier: 6)|link=Secret Lab]]
| |
| | [[Arquivo:Cell_rock.png|Cyborg Cell (Rock)|link=Secret Lab]]
| |
| | [[Arquivo:Very_large_Nightmare_experience_candy.png|Very large Nightmare experience candy|link=Secret Lab]]
| |
| | [[Arquivo:Moderate_Nightmare_experience_candy..png|Moderate Nightmare experience candy|link=Secret Lab]]
| |
| | [[Arquivo:Key_of_Sarkies_factory..png|Key of Sarkies factory|link=Secret Lab]]
| |
| |}
| |
| </center>
| |
| | |
| == <font size='5'><span style="color: Purple">'''Entregando o Diário'''</span></font> ==
| |
| | |
| Com os documentos que você coletou no armário do Andar 50, vá para o Continente de Hoenn quando chegar se dirija ao esconderijo dos sobreviventes
| |
| | |
| * Nessa parte é necessário a senha que dropa nos Slaking da região.
| |
| | |
| <center>[[Arquivo:EsconderijoHoenn.png|link=Secret Lab]] <br/>
| |
| | |
| | |
| [[Arquivo:9abGysW.png|link=Secret Lab]]</center>
| |
| | |
| Dentro do esconderijo encontre Thomas e entregue os documentos que ele pede.
| |
| <center>
| |
| [[Arquivo:Thomas.jpg|link=Secret Lab]]</center>
| |
| | |
| Recompensa por entregar os documentos: 12.000.000 de EXP e 150.000 de NW EXP.
| |
| | |
| == <span style="color: Purple">'''Crafts'''</span> ==
| |
| | |
| Nesse local tem a opção de craftar Helds com os Fragmentos referente a cada Tier. Para ter acesso a essa sala, você deve entrar no Lab através do Aiden pelo menos uma vez.
| |
| | |
| <center> [[Arquivo:Sala_dos_work.png|link=Secret Lab]] </center>
| |
| | |
| ===<span style="color: Purple"> '''Helds'''</span> ===
| |
| | |
| <center>
| |
| {| class="wikitable" width="100%"
| |
| ! colspan="7" width="1%" style="background-color: #660099" | <span style="color:white">Craft dos Helds</span>
| |
| |-
| |
| ! align="center" width="1%" style="background-color: #b19cd9" | '''Imagem''' || align="center" style="background-color: #b19cd9" width="10%" | '''Nome''' || align="center" style="background-color: #b19cd9" width="50%" colspan="4" | '''Requisitos''' | |
| |-
| |
| | align="center" width="1%"| [[Arquivo:Junto.png|link=Held Itens]]|| align="center" | '''Tier 8''' || align="center" width="12%"|100 [[Arquivo:Frag_tier8.png|Technological Crystal (Tier: 8)|link=Secret Lab]] <br/> Technological Crystal (Tier: 8)
| |
| | align="center" width="10%" colspan="2" |30 [[Arquivo:NW_unusual_ore.png|Nightmare unusual ore|link=Secret Lab]] <br/> Nightmare Unusual Ore
| |
| | align="center" width="10%"|250 [[Arquivo:NW_ore.png|Nightmare Ore|link=Secret Lab]] <br/> Nightmare Ore
| |
| |-
| |
| | align="center" width="1%"| [[Arquivo:X-upgrade-tier-6.gif|link=Secret Lab]]|| align="center" | '''X-Upgrade (Tier: 6)''' || align="center" width="12%"|100 [[Arquivo:Frag_tier_6.png|Technological Crystal (Tier: 6)|link=Secret Lab]] <br/> Technological Crystal (Tier: 6)
| |
| | align="center" width="10%" |5 [[Arquivo:NW_unusual_ore.png|Nightmare unusual ore|link=Secret Lab]] <br/> Nightmare Unusual Ore
| |
| | align="center" width="10%"|12 [[Arquivo:NW_ore.png|Nightmare Ore|link=Secret Lab]] <br/> Nightmare Ore
| |
| | align="center" width="10%"|184 [[Arquivo:Compressed_Nightmare_Gems.png|Compressed Nightmare Gems|link=Secret Lab]] <br/> Compressed Nightmare Gem
| |
| |- | | |- |
| | align="center" width="1%"| [[Arquivo:Held5_3.png|link=Held Itens]]<br/>[[Arquivo:Held5_lista.png|link=Held Itens]]<br/>[[Arquivo:Lista_held5.png|link=Held Itens]]<br/>[[Arquivo:Ultima_t5.png|link=Held Itens]]|| align="center" | '''Tier 5''' || align="center" width="12%"|100 [[Arquivo:Frag_tier_5.png|Technological Crystal (Tier: 5)|link=Secret Lab]] <br/> Technological Crystal (Tier: 5) | | | width="1%"| [[Arquivo:Workshop.png|100px|link=Secret Lab]] |
| | align="center" width="10%" |3 [[Arquivo:NW_unusual_ore.png|Nightmare unusual ore|link=Secret Lab]] <br/> Nightmare Unusual Ore
| | | '''Elemental Workshop''' |
| | align="center" width="10%"|8 [[Arquivo:NW_ore.png|Nightmare Ore|link=Secret Lab]] <br/> Nightmare Ore
| | | colspan="12"|20 [[Arquivo:Diamond.png|link=]] Diamond |
| | align="center" width="10%"|84 [[Arquivo:Compressed_Nightmare_Gems.png|Compressed Nightmare Gems|link=Secret Lab]] <br/> Compressed Nightmare Gem
| |
| |- | | |- |
| | align="center" width="1%"| [[Arquivo:Held4_lista.png|link=Held Itens]]<br/>[[Arquivo:Held4..png|link=Held Itens]]<br/>[[Arquivo:Lista4_3.png|link=Held Itens]]|| align="center" | '''Tier 4''' || align="center" width="12%"|100 [[Arquivo:Frag_tier_4.png|Technological Crystal (Tier:4)|link=Secret Lab]] <br/> Technological Crystal (Tier: 4) | | | width="1%"| [[Arquivo:Neutral dvc.png|link=Secret Lab]]|| align="center" | '''Neutralizer Device*''' |
| | align="center" width="10%" colspan="3"|24 [[Arquivo:Compressed_Nightmare_Gems.png|Compressed Nightmare Gems|link=Secret Lab]] <br/> Compressed Nightmare Gem | | | width="5%"|2 [[Arquivo:Azure_Shard.png|link=Drop de Itens]] <br/> Azure Shard |
| | | width="5%"|2 [[Arquivo:Cerise_Shard.png|link=Drop de Itens]] <br/> Cerise Shard |
| | | width="5%"|2 [[Arquivo:Damson_Shard.png|link=Drop de Itens]] <br/> Damson Shard |
| | | width="5%"|2 [[Arquivo:Harlequin_Shard.png|link=Drop de Itens]] <br/> Harlequin Shard |
| | | width="5%"|2 [[Arquivo:Indigo_Shard.png|link=Drop de Itens]] <br/> Indigo Shard |
| | | width="5%"|2 [[Arquivo:Kermes_Shard.png|link=Drop de Itens]] <br/> Kermes Shard |
| | | width="5%"|2 [[Arquivo:Scarlet_Shard.png|link=Drop de Itens]] <br/> Scarlet Shard |
| | | width="5%"|2 [[Arquivo:Shell_Shard.png|link=Drop de Itens]] <br/> Shell Shard |
| | | width="5%"|2 [[Arquivo:Slate_Shard.png|link=Drop de Itens]] <br/> Slate Shard |
| | | width="5%"|2 [[Arquivo:Sunflower_Shard.png|link=Drop de Itens]] <br/> Sunflower Shard |
| | | width="5%"|75 [[Arquivo:Ncs-transparent.gif.gif|30px|link=Secret Lab]] <br/> Nightmare Corruption Stone |
| | | width="5%"|4 [[Arquivo:NW_unusual_ore.png|link=Secret Lab]] <br/> Nightmare Unusual Ores |
| |- | | |- |
| | align="center" width="1%"| [[Arquivo:Lista_3_do_held_3.png|link=Held Itens]]<br/>[[Arquivo:Lista_Held3.png|link=Held Itens]]<br/>[[Arquivo:Listahel32.0.png|link=Held Itens]]<br/>[[Arquivo:Ultima_t3.png|link=Held Itens]]|| align="center" | '''Tier 3''' || align="center" width="12%"|100 [[Arquivo:Frag_tier_3.png|Technological Crystal (Tier:3)|link=Secret Lab]] <br/> Technological Crystal (Tier: 3)
| | | [[Arquivo:Gardeessence.png|link=Drop de Itens]] |
| | align="center" width="10%" colspan="3"|10 [[Arquivo:Compressed_Nightmare_Gems.png|Compressed Nightmare Gems|link=Secret Lab]] <br/> Compressed Nightmare Gem | | | '''Gardestrike Essence''' |
| | | colspan="12"|2 [[Arquivo:Neutral_essence.png|link=Secret Lab]] Neutral Essence |
| |- | | |- |
| |}
| | | [[Arquivo:Ironessence.png|link=Drop de Itens]] |
| </center>
| | | '''Ironhard Essence''' |
| | | | colspan="12"|2 [[Arquivo:Neutral_essence.png|link=Secret Lab]] Neutral Essence |
| * Embora não ganhe Fragmentos tier 8 durante o Secret Lab, os helds podem ser craftados no mesmo Workshop.
| |
| | |
| ===<span style="color: Purple">'''Elemental Workshop'''</span>===
| |
| | |
| <center>
| |
| {| class="wikitable" width="100%"
| |
| ! colspan="15" width="1%" style="background-color: #660099" | <span style="color:white">Craft do Elemental Workshop</span>
| |
| |-
| |
| ! align="center" width="1%" style="background-color: #b19cd9"| '''Imagem''' || align="center" style="background-color: #b19cd9" width="10%"| '''Nome''' || align="center" style="background-color: #b19cd9" width="50%" colspan="12"| '''Requisitos'''
| |
| |-
| |
| | align="center" width="1%"| [[Arquivo:Workshop.png|150px|link=Secret Lab]]|| align="center" | '''Elemental Workshop''' || align="center" colspan="12"|20 [[Arquivo:Diamond.png|link=Secret Lab]] Diamond
| |
| |-
| |
| | align="center" width="1%"| [[Arquivo:Neutral dvc.png|link=Secret Lab]]|| align="center" | '''Neutralizer Device''' || align="center" width="5%"|2 [[Arquivo:Azure_Shard.png|link=Drop de Itens]] <br/> Azure Shard
| |
| | align="center" width="5%"|2 [[Arquivo:Cerise_Shard.png|link=Drop de Itens]] <br/> Cerise Shard
| |
| | align="center" width="5%"|2 [[Arquivo:Damson_Shard.png|link=Drop de Itens]] <br/> Damson Shard
| |
| | align="center" width="5%"|2 [[Arquivo:Harlequin_Shard.png|link=Drop de Itens]] <br/> Harlequin Shard
| |
| | align="center" width="5%"|2 [[Arquivo:Indigo_Shard.png|link=Drop de Itens]] <br/> Indigo Shard
| |
| | align="center" width="5%"|2 [[Arquivo:Kermes_Shard.png|link=Drop de Itens]] <br/> Kermes Shard
| |
| | align="center" width="5%"|2 [[Arquivo:Scarlet_Shard.png|link=Drop de Itens]] <br/> Scarlet Shard
| |
| | align="center" width="5%"|2 [[Arquivo:Shell_Shard.png|link=Drop de Itens]] <br/> Shell Shard
| |
| | align="center" width="5%"|2 [[Arquivo:Slate_Shard.png|link=Drop de Itens]] <br/> Slate Shard
| |
| | align="center" width="5%"|2 [[Arquivo:Sunflower_Shard.png|link=Drop de Itens]] <br/> Sunflower Shard
| |
| | align="center" width="5%"|75 [[Arquivo:Ncs-transparent.gif.gif|30px|link=Secret Lab]] <br/> Nightmare Corruption Stone
| |
| | align="center" width="5%"|4 [[Arquivo:NW_unusual_ore.png|link=Secret Lab]] <br/> Nightmare Unusual Ores
| |
| |-
| |
| | align="center" | [[Arquivo:Gardeessence.png|link=Drop de Itens]]|| align="center" | '''Gardestrike Essence''' || align="center" colspan="12"|2 [[Arquivo:Neutral_essence.png|link=Secret Lab]] Neutral Essence
| |
| |-
| |
| | align="center" | [[Arquivo:Ironessence.png|link=Drop de Itens]]|| align="center" | '''Ironhard Essence''' || align="center" colspan="12"|2 [[Arquivo:Neutral_essence.png|link=Secret Lab]] Neutral Essence
| |
| |- | | |- |
| | align="center" | [[Arquivo:Maleficessence.png|link=Drop de Itens]]|| align="center" | '''Malefic Essence''' || align="center" colspan="12"|2 [[Arquivo:Neutral_essence.png|link=Secret Lab]] Neutral Essence
| | | [[Arquivo:Maleficessence.png|link=Drop de Itens]] |
| | | '''Malefic Essence''' |
| | | colspan="12"|2 [[Arquivo:Neutral_essence.png|link=Secret Lab]] Neutral Essence |
| |- | | |- |
| | align="center" | [[Arquivo:Natuessence.png|link=Drop de Itens]]|| align="center" | '''Naturia Essence''' || align="center" colspan="12"|2 [[Arquivo:Neutral_essence.png|link=Secret Lab]] Neutral Essence
| | | [[Arquivo:Natuessence.png|link=Drop de Itens]] |
| | | '''Naturia Essence''' |
| | | colspan="12"|2 [[Arquivo:Neutral_essence.png|link=Secret Lab]] Neutral Essence |
| |- | | |- |
| | align="center" | [[Arquivo:Oreessence.png|link=Drop de Itens]]|| align="center" | '''Orebound Essence''' || align="center" colspan="12"|2 [[Arquivo:Neutral_essence.png|link=Secret Lab]] Neutral Essence
| | | [[Arquivo:Oreessence.png|link=Drop de Itens]] |
| | | '''Orebound Essence''' |
| | | colspan="12"|2 [[Arquivo:Neutral_essence.png|link=Secret Lab]] Neutral Essence |
| |- | | |- |
| | align="center" | [[Arquivo:Psyessence.png|link=Drop de Itens]]|| align="center" | '''Psycraft Essence''' || align="center" colspan="12"|2 [[Arquivo:Neutral_essence.png|link=Secret Lab]] Neutral Essence
| | | [[Arquivo:Psyessence.png|link=Drop de Itens]] |
| | | '''Psycraft Essence''' |
| | | colspan="12"|2 [[Arquivo:Neutral_essence.png|link=Secret Lab]] Neutral Essence |
| |- | | |- |
| | align="center" | [[Arquivo:Boltessence.png|link=Drop de Itens]]|| align="center" | '''Raibolt Essence''' || align="center" colspan="12"|2 [[Arquivo:Neutral_essence.png|link=Secret Lab]] Neutral Essence
| | | [[Arquivo:Boltessence.png|link=Drop de Itens]] |
| | | '''Raibolt Essence''' |
| | | colspan="12"|2 [[Arquivo:Neutral_essence.png|link=Secret Lab]] Neutral Essence |
| |- | | |- |
| | align="center" | [[Arquivo:Seaessence.png|link=Drop de Itens]]|| align="center" | '''Seavell Essence''' || align="center" colspan="12"|2 [[Arquivo:Neutral_essence.png|link=Secret Lab]] Neutral Essence
| | | [[Arquivo:Seaessence.png|link=Drop de Itens]] |
| | | '''Seavell Essence''' |
| | | colspan="12"|2 [[Arquivo:Neutral_essence.png|link=Secret Lab]] Neutral Essence |
| |- | | |- |
| | align="center" | [[Arquivo:Volcanicessence.png|link=Drop de Itens]]|| align="center" | '''Volcanic Essence''' || align="center" colspan="12"|2 [[Arquivo:Neutral_essence.png|link=Secret Lab]] Neutral Essence
| | | [[Arquivo:Volcanicessence.png|link=Drop de Itens]] |
| | | '''Volcanic Essence''' |
| | | colspan="12"|2 [[Arquivo:Neutral_essence.png|link=Secret Lab]] Neutral Essence |
| |- | | |- |
| | align="center" | [[Arquivo:Wingeon_essence.png|link=Drop de Itens]]|| align="center" | '''Wingeon Essence''' || align="center" colspan="12"|2 [[Arquivo:Neutral_essence.png|link=Secret Lab]] Neutral Essence
| | | [[Arquivo:Wingeon_essence.png|link=Drop de Itens]] |
| | | '''Wingeon Essence''' |
| | | colspan="12"|2 [[Arquivo:Neutral_essence.png|link=Secret Lab]] Neutral Essence |
| |- | | |- |
| |} | | |} |
| </center> | | </center> |
| | | <br> |
| * Neutralizer Device, este dispositivo pode ser usado para neutralizar propriedades elementares em pequena escala. | | *'''Neutralizer Device''': Este dispositivo pode ser utilizado para neutralizar essences elementares em pequena escala. |
| | </tabber> |