|
|
| Linha 93: |
Linha 93: |
| | style="width:50px; text-align:center;" | <b>[[Arquivo:374-Beldum.png|link=Beldum]]</b> | | | style="width:50px; text-align:center;" | <b>[[Arquivo:374-Beldum.png|link=Beldum]]</b> |
| | style="width:150px; text-align:center;" | <b>'''[[Beldum]]'''</b> | | | style="width:150px; text-align:center;" | <b>'''[[Beldum]]'''</b> |
| |}
| |
|
| |
| =Shiny Metang=
| |
|
| |
| [[Arquivo:375-Shiny_Metang.png|link=Shiny Metang]]
| |
|
| |
| == '''Informações Gerais''' ==
| |
|
| |
| '''Nome:''' Shiny Metang<br />
| |
| '''Level:''' 100<br />
| |
| '''Elemento:''' Steel / Psychic<br />
| |
| '''Habilidades:''' Rock Smash, Teleport, Cut e Headbutt.<br />
| |
| '''Boost:''' Enigma Stone (2)<br />
| |
| '''Materia:''' Ironhard Superior ou Psycraft Superior<br />
| |
|
| |
| == '''Evoluções''' ==
| |
|
| |
| '''Shiny Beldum''' precisa de Level 40.<br />
| |
| '''Shiny Metang''' precisa de Level 100.
| |
|
| |
| == '''Descrição:''' ==
| |
| É formado pela união de dois Beldum. Seus dois cérebros estão ligados, ampliando seu poder psíquico..
| |
|
| |
| == '''Movimentos''' ==
| |
|
| |
| === '''Moveset PVP''' ===
| |
|
| |
| {| border="0" style="border-collapse:collapse"
| |
| |- align="center" style="background-color: #E6E6FA;"
| |
| ! rowspan="2" | M1
| |
| | width="10px" |
| |
| | align="left" | Iron Head (20s)
| |
| | width="50px" rowspan="2" |
| |
| | rowspan="2" align="right" | [[Arquivo:Target.png|Target]] [[Arquivo:Damage.png|Damage]]
| |
| | rowspan="2" | [[Arquivo:Steel.png|Steel|link=Ironhard]]
| |
| |- align="center" style="background-color: #E6E6FA;"
| |
| | width="10px" |
| |
| | align="left" | Level 100
| |
|
| |
| |- align="center"
| |
| ! rowspan="2" | M2
| |
| | width="10px" |
| |
| | align="left" | Psy Pulse (12s)
| |
| | width="50px" rowspan="2" |
| |
| | rowspan="2" align="right" | [[Arquivo:Target.png|Target]] [[Arquivo:Damage.png|Damage]]
| |
| | rowspan="2" | [[Arquivo:Psychic.png|Psychic|link=Psycraft]]
| |
| |- align="center"
| |
| | width="10px" |
| |
| | align="left" | Level 100
| |
|
| |
| |- align="center" style="background-color: #E6E6FA;"
| |
| ! rowspan="2" | M3
| |
| | width="10px" |
| |
| | align="left" | Zen Headbutt (55s)
| |
| | width="50px" rowspan="2" |
| |
| | rowspan="2" align="right" | [[Arquivo:Target.png|Target]] [[Arquivo:Damage.png|Damage]] [[Arquivo:Stun.png|Stun]]
| |
| | rowspan="2" | [[Arquivo:Psychic.png|Psychic|link=Psycraft]]
| |
| |- align="center" style="background-color: #E6E6FA;"
| |
| | width="10px" |
| |
| | align="left" | Level 100
| |
|
| |
| |- align="center"
| |
| ! rowspan="2" | M4
| |
| | width="10px" |
| |
| | align="left" | Metal Claw (45s)
| |
| | width="50px" rowspan="2" |
| |
| | rowspan="2" align="right" | [[Arquivo:AOE.png|AOE]] [[Arquivo:Damage.png|Damage]] [[Arquivo:Buff.png|Buff]]
| |
| | rowspan="2" | [[Arquivo:Steel.png|Steel|link=Ironhard]]
| |
| |- align="center"
| |
| | width="10px" |
| |
| | align="left" | Level 107
| |
|
| |
| |- align="center" style="background-color: #E6E6FA;"
| |
| ! rowspan="2" | M5
| |
| | width="10px" |
| |
| | align="left" | Psychic (30s)
| |
| | width="50px" rowspan="2" |
| |
| | rowspan="2" align="right" | [[Arquivo:AOE.png|AOE]] [[Arquivo:Damage.png|Damage]]
| |
| | rowspan="2" | [[Arquivo:Psychic.png|Psychic|link=Psycraft]]
| |
| |- align="center" style="background-color: #E6E6FA;"
| |
| | width="10px" |
| |
| | align="left" | Level 100
| |
|
| |
| |- align="center"
| |
| ! rowspan="2" | M6
| |
| | width="10px" |
| |
| | align="left" | Psyshock (28s)
| |
| | width="50px" rowspan="2" |
| |
| | rowspan="2" align="right" | [[Arquivo:AOE.png|AOE]] [[Arquivo:Damage.png|Damage]]
| |
| | rowspan="2" | [[Arquivo:Psychic.png|Psychic|link=Psycraft]]
| |
| |- align="center"
| |
| | width="10px" |
| |
| | align="left" | Level 108
| |
|
| |
| |- align="center" style="background-color: #E6E6FA;"
| |
| ! rowspan="2" | M7
| |
| | width="10px" |
| |
| | align="left" | Meteor Mash (50s)
| |
| | width="50px" rowspan="2" |
| |
| | rowspan="2" align="right" | [[Arquivo:AOE.png|AOE]] [[Arquivo:Damage.png|Damage]] [[Arquivo:Slow.png|Slow]] [[Arquivo:Nevermiss.png|Nevermiss]]
| |
| | rowspan="2" | [[Arquivo:Steel.png|Steel|link=Ironhard]]
| |
| |- align="center" style="background-color: #E6E6FA;"
| |
| | width="10px" |
| |
| | align="left" | Level 100
| |
|
| |
| |- align="center"
| |
| ! rowspan="2" | M8
| |
| | width="10px" |
| |
| | align="left" | Flash Cannon (60s)
| |
| | width="50px" rowspan="2" |
| |
| | rowspan="2" align="right" | [[Arquivo:AOE.png|AOE]] [[Arquivo:Damage.png|Damage]]
| |
| | rowspan="2" | [[Arquivo:Steel.png|Steel|link=Ironhard]]
| |
| |- align="center"
| |
| | width="10px" |
| |
| | align="left" | Level 108
| |
|
| |
| |- align="center" style="background-color: #E6E6FA;"
| |
| ! rowspan="2" | M9
| |
| | width="10px" |
| |
| | align="left" | Iron Defense (70s)
| |
| | width="50px" rowspan="2" |
| |
| | rowspan="2" align="right" | [[Arquivo:Self.png|Self]] [[Arquivo:Buff.png|Buff]]
| |
| | rowspan="2" | [[Arquivo:Steel.png|Steel|link=Ironhard]]
| |
| |- align="center" style="background-color: #E6E6FA;"
| |
| | width="10px" |
| |
| | align="left" | Level 104
| |
|
| |
| |- align="center"
| |
| ! rowspan="2" | M10
| |
| | width="10px" |
| |
| | align="left" | Miracle Eye (15s)
| |
| | width="50px" rowspan="2" |
| |
| | rowspan="2" align="right" | [[Arquivo:Self.png|Self]] [[Arquivo:Buff.png|Buff]]
| |
| | rowspan="2" | [[Arquivo:Psychic.png|Psychic|link=Psycraft]]
| |
| |- align="center"
| |
| | width="10px" |
| |
| | align="left" | Level 1020
| |
|
| |
| |- align="center" style="background-color: #E6E6FA;"
| |
| ! rowspan="2" | P
| |
| | width="10px" |
| |
| | align="left" | Iron Body
| |
| | width="50px" rowspan="2" |
| |
| | rowspan="2" align="right" | [[Arquivo:Buff.png|Buff]]
| |
| | rowspan="2" | [[Arquivo:Steel.png|Steel|link=Ironhard]]
| |
| |- align="center" style="background-color: #E6E6FA;"
| |
| | width="10px" |
| |
| | align="left" |
| |
|
| |
| |- align="center"
| |
| ! rowspan="2" | P
| |
| | width="10px" |
| |
| | align="left" | Clear Body
| |
| | width="50px" rowspan="2" |
| |
| | rowspan="2" align="right" | [[Arquivo:Buff.png|Buff]]
| |
| | rowspan="2" | [[Arquivo:Steel.png|Steel|link=Ironhard]]
| |
| |- align="center"
| |
| | width="10px" |
| |
| | align="left" |
| |
|
| |
| |}
| |
|
| |
| === '''Moveset PVE''' ===
| |
|
| |
| {| border="0" style="border-collapse:collapse"
| |
| |- align="center" style="background-color: #E6E6FA;"
| |
| ! rowspan="2" | M1
| |
| | width="10px" |
| |
| | align="left" | Iron Head (20s)
| |
| | width="50px" rowspan="2" |
| |
| | rowspan="2" align="right" | [[Arquivo:Target.png|Target]] [[Arquivo:Damage.png|Damage]]
| |
| | rowspan="2" | [[Arquivo:Steel.png|Steel|link=Ironhard]]
| |
| |- align="center" style="background-color: #E6E6FA;"
| |
| | width="10px" |
| |
| | align="left" | Level 100
| |
|
| |
| |- align="center"
| |
| ! rowspan="2" | M2
| |
| | width="10px" |
| |
| | align="left" | Psy Pulse (12s)
| |
| | width="50px" rowspan="2" |
| |
| | rowspan="2" align="right" | [[Arquivo:Target.png|Target]] [[Arquivo:Damage.png|Damage]]
| |
| | rowspan="2" | [[Arquivo:Psychic.png|Psychic|link=Psycraft]]
| |
| |- align="center"
| |
| | width="10px" |
| |
| | align="left" | Level 100
| |
|
| |
| |- align="center" style="background-color: #E6E6FA;"
| |
| ! rowspan="2" | M3
| |
| | width="10px" |
| |
| | align="left" | Zen Headbutt (40s)
| |
| | width="50px" rowspan="2" |
| |
| | rowspan="2" align="right" | [[Arquivo:Target.png|Target]] [[Arquivo:Damage.png|Damage]] [[Arquivo:Stun.png|Stun]]
| |
| | rowspan="2" | [[Arquivo:Psychic.png|Psychic|link=Psycraft]]
| |
| |- align="center" style="background-color: #E6E6FA;"
| |
| | width="10px" |
| |
| | align="left" | Level 100
| |
|
| |
| |- align="center"
| |
| ! rowspan="2" | M4
| |
| | width="10px" |
| |
| | align="left" | Metal Claw (35s)
| |
| | width="50px" rowspan="2" |
| |
| | rowspan="2" align="right" | [[Arquivo:AOE.png|AOE]] [[Arquivo:Damage.png|Damage]] [[Arquivo:Buff.png|Buff]]
| |
| | rowspan="2" | [[Arquivo:Steel.png|Steel|link=Ironhard]]
| |
| |- align="center"
| |
| | width="10px" |
| |
| | align="left" | Level 107
| |
|
| |
| |- align="center" style="background-color: #E6E6FA;"
| |
| ! rowspan="2" | M5
| |
| | width="10px" |
| |
| | align="left" | Psychic (30s)
| |
| | width="50px" rowspan="2" |
| |
| | rowspan="2" align="right" | [[Arquivo:AOE.png|AOE]] [[Arquivo:Damage.png|Damage]]
| |
| | rowspan="2" | [[Arquivo:Psychic.png|Psychic|link=Psycraft]]
| |
| |- align="center" style="background-color: #E6E6FA;"
| |
| | width="10px" |
| |
| | align="left" | Level 100
| |
|
| |
| |- align="center"
| |
| ! rowspan="2" | M6
| |
| | width="10px" |
| |
| | align="left" | Psyshock (28s)
| |
| | width="50px" rowspan="2" |
| |
| | rowspan="2" align="right" | [[Arquivo:AOE.png|AOE]] [[Arquivo:Damage.png|Damage]]
| |
| | rowspan="2" | [[Arquivo:Psychic.png|Psychic|link=Psycraft]]
| |
| |- align="center"
| |
| | width="10px" |
| |
| | align="left" | Level 108
| |
|
| |
| |- align="center" style="background-color: #E6E6FA;"
| |
| ! rowspan="2" | M7
| |
| | width="10px" |
| |
| | align="left" | Meteor Mash (40s)
| |
| | width="50px" rowspan="2" |
| |
| | rowspan="2" align="right" | [[Arquivo:AOE.png|AOE]] [[Arquivo:Damage.png|Damage]] [[Arquivo:Slow.png|Slow]] [[Arquivo:Nevermiss.png|Nevermiss]]
| |
| | rowspan="2" | [[Arquivo:Steel.png|Steel|link=Ironhard]]
| |
| |- align="center" style="background-color: #E6E6FA;"
| |
| | width="10px" |
| |
| | align="left" | Level 100
| |
|
| |
| |- align="center"
| |
| ! rowspan="2" | M8
| |
| | width="10px" |
| |
| | align="left" | Flash Cannon (40s)
| |
| | width="50px" rowspan="2" |
| |
| | rowspan="2" align="right" | [[Arquivo:AOE.png|AOE]] [[Arquivo:Damage.png|Damage]]
| |
| | rowspan="2" | [[Arquivo:Steel.png|Steel|link=Ironhard]]
| |
| |- align="center"
| |
| | width="10px" |
| |
| | align="left" | Level 108
| |
|
| |
| |- align="center" style="background-color: #E6E6FA;"
| |
| ! rowspan="2" | M9
| |
| | width="10px" |
| |
| | align="left" | Iron Defense (40s)
| |
| | width="50px" rowspan="2" |
| |
| | rowspan="2" align="right" | [[Arquivo:Self.png|Self]] [[Arquivo:Buff.png|Buff]]
| |
| | rowspan="2" | [[Arquivo:Steel.png|Steel|link=Ironhard]]
| |
| |- align="center" style="background-color: #E6E6FA;"
| |
| | width="10px" |
| |
| | align="left" | Level 104
| |
|
| |
| |- align="center"
| |
| ! rowspan="2" | M10
| |
| | width="10px" |
| |
| | align="left" | Miracle Eye (15s)
| |
| | width="50px" rowspan="2" |
| |
| | rowspan="2" align="right" | [[Arquivo:Self.png|Self]] [[Arquivo:Buff.png|Buff]]
| |
| | rowspan="2" | [[Arquivo:Psychic.png|Psychic|link=Psycraft]]
| |
| |- align="center"
| |
| | width="10px" |
| |
| | align="left" | Level 1020
| |
|
| |
| |- align="center" style="background-color: #E6E6FA;"
| |
| ! rowspan="2" | P
| |
| | width="10px" |
| |
| | align="left" | Iron Body
| |
| | width="50px" rowspan="2" |
| |
| | rowspan="2" align="right" | [[Arquivo:Buff.png|Buff]]
| |
| | rowspan="2" | [[Arquivo:Steel.png|Steel|link=Ironhard]]
| |
| |- align="center" style="background-color: #E6E6FA;"
| |
| | width="10px" |
| |
| | align="left" |
| |
|
| |
| |- align="center"
| |
| ! rowspan="2" | P
| |
| | width="10px" |
| |
| | align="left" | Clear Body
| |
| | width="50px" rowspan="2" |
| |
| | rowspan="2" align="right" | [[Arquivo:Buff.png|Buff]]
| |
| | rowspan="2" | [[Arquivo:Steel.png|Steel|link=Ironhard]]
| |
| |- align="center"
| |
| | width="10px" |
| |
| | align="left" |
| |
|
| |
| |}
| |
|
| |
| == '''Efetividades''' ==
| |
| '''Efetivo:''' Fire, Groud, Ghost e Dark.<br />
| |
| '''Normal:''' Water, Electric, Fighting, Bug e Crystal.<br />
| |
| '''Inefetivo:''' Normal, Grass, Ice, Flying, Rock, Dragon, Steel e Fairy.<br />
| |
| '''Muito Inefetivo:''' Psychic.<br />
| |
| '''Nulo:''' Poison.<br />
| |
|
| |
| == '''Outras Versões''' ==
| |
|
| |
| {| class="wikitable"
| |
| |- style="vertical-align:top; text-align=center;"
| |
| | style="width:50px; text-align:center;" | <b>[[Arquivo:375-Metang.png|link=Metang]]</b>
| |
| | style="width:150px; text-align:center;" | <b>'''[[Metang]]'''</b>
| |
| |} | | |} |
|
| |
|
Shiny Beldum

Informações Gerais
Nome: Shiny Beldum
Level: 40
Elemento: Steel / Psychic
Habilidades: Rock Smash, Teleport e Headbutt.
Boost: Enigma Stone (4)
Materia: Ironhard ou Psycraft
Pedra de Evolução: Metal Stone e Enigma Stone
Evoluções
Shiny Beldum precisa de Level 40.
Shiny Metang precisa de Level 100.
Descrição:
Ele conversa com os outros por pulsos magnéticos. Em um enxame, eles se movem em perfeito uníssono..
Movimentos
| M1
|
|
Iron Head (20s)
|
|
 
|

|
|
|
Level 40
|
| M2
|
|
Psy Pulse (8s)
|
|
|

|
|
|
Level 40
|
| M3
|
|
Hammer Arm (40s)
|
|
 
|

|
|
|
Level 40
|
| M4
|
|
Psychic (35s)
|
|
|
|
|
|
Level 40
|
| M5
|
|
Metal Claw (35s)
|
|

|
|
|
|
Level 47
|
Efetividades
Efetivo: Fire, Groud, Ghost e Dark.
Normal: Water, Electric, Fighting, Bug e Crystal.
Inefetivo: Normal, Grass, Ice, Flying, Rock, Dragon, Steel e Fairy.
Muito Inefetivo: Psychic.
Nulo: Poison.
Outras Versões
Tasks
Local da Task
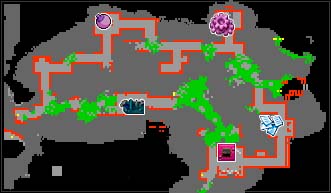
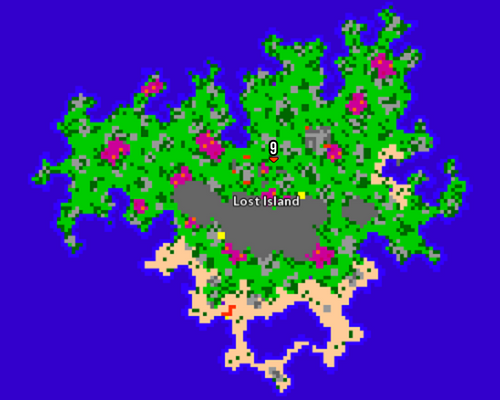
Lost Island
Nightmare Pewter
Grubbin
Informações Gerais
Nome: Grubbin
Level: 1
Elemento: Bug
Habilidades: Dig.
Boost: Cocoon Stone (30)
Materia: Naturia
Pedra de Evolução: Cocoon Stone
Evoluções
Grubbin precisa de Level 1.
Charjabug precisa de Level 40.
Vikavolt precisa de Level 100.
Descrição:
Normalmente, vive no subsolo. Ele usa sua mandíbula como uma arma, uma ferramenta para cavar e extrair seiva das árvores..
Movimentos
| M1
|
|
String Shot (12s)
|
|

|

|
|
|
Level 1
|
| M2
|
|
Mud-Slap (25s)
|
|
 
|

|
|
|
Level 3
|
| M3
|
|
Bug Bite (10s)
|
|
|
|
|
|
Level 1
|
| M4
|
|
Spark (15s)
|
|
|

|
|
|
Level 1
|
Efetividades
Muito Efetivo: Fire, Flying e Rock.
Normal: Normal, Water, Electric, Ice, Poison, Psychic, Bug, Ghost, Dragon, Steel, Dark, Crystal e Fairy.
Muito Inefetivo: Grass, Fighting e Ground.
Charjabug
Informações Gerais
Nome: Charjabug
Level: 40
Elemento: Bug / Electric
Habilidades: Dig.
Boost: Cocoon Stone (7)
Materia: Naturia ou Raibolt
Pedra de Evolução: Cocoon Stone (2x)
Evoluções
Grubbin precisa de Level 1.
Charjabug precisa de Level 40.
Vikavolt precisa de Level 100.
Descrição:
Geralmente, é encontrado meio enterrado na terra ou nas folhas, mastigando húmus. Em seu corpo, há uma bolsa elétrica usada para armazenar a eletricidade gerada pela digestão dos alimentos.
Movimentos
| M1
|
|
String Shot (5s)
|
|
|
|
|
|
Level 40
|
| M2
|
|
Bug Bite (10s)
|
|
|
|
|
|
Level 40
|
| M3
|
|
Bite (15s)
|
|
|

|
|
|
Level 40
|
| M4
|
|
Spark (20s)
|
|
|
|
|
|
Level 40
|
| M5
|
|
Thunderbolt (20s)
|
|
|
|
|
|
Level 42
|
Efetividades
Efetivo: Fire e Rock.
Normal: Normal, Water, Ice, Poison, Ground, Flying, Psychic, Bug, Ghost, Dragon, Dark, Crystal e Fairy.
Inefetivo: Grass, Electric, Fighting e Steel.
Vikavolt
Informações Gerais
Nome: Vikavolt
Level: 100
Elemento: Bug / Electric
Habilidades: Dig.
Boost: Cocoon Stone ou Thunder Stone (3)
Materia: Naturia Superior ou Raibolt Superior
Evoluções
Grubbin precisa de Level 1.
Charjabug precisa de Level 40.
Vikavolt precisa de Level 100.
Descrição:
Produz eletricidade com um órgão em seu abdômen e a controla com suas enormes mandíbulas para disparar poderosos feixes elétricos.
Movimentos
| M1
|
|
Charge (15s)
|
|

|
|
|
|
Level 100
|
| M2
|
|
Spark (10s)
|
|
|
|
|
|
Level 100
|
| M3
|
|
Thunderbolt (20s)
|
|
|
|
|
|
Level 100
|
| M4
|
|
Guillotine (40s)
|
|
|

|
|
|
Level 110
|
| M5
|
|
Vise Grip (35s)
|
|
 
|
|
|
|
Level 100
|
| M6
|
|
Eerie Impulse (35s)
|
|

|
|
|
|
Level 104
|
| M7
|
|
Bug Buzz (35s)
|
|
|
|
|
|
Level 104
|
| M8
|
|
Zap Cannon (45s)
|
|
|
|
|
|
Level 100
|
| M9
|
|
Discharge (70s)
|
|
|
|
|
|
Level 105
|
| M10
|
|
Agility (40s)
|
|
|
|
|
|
Level 100
|
| M11
|
|
Battle Armor (0s)
|
|
|
|
|
|
Level 0
|
| M12
|
|
Levitate (0s)
|
|
|

|
|
|
Level 0
|
Efetividades
Efetivo: Fire e Rock.
Normal: Normal, Water, Ice, Poison, Ground, Flying, Psychic, Bug, Ghost, Dragon, Dark, Crystal e Fairy.
Inefetivo: Grass, Electric, Fighting e Steel.