|
|
| Linha 1: |
Linha 1: |
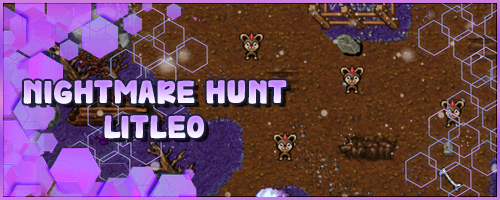
| =Druddigon= | | = Nightmare Hunt - Litleo = |
| == '''Informações Gerais''' == | | <center>[[file:Nightmare_Hunt_Littleo.png|link=]]</center> |
|
| |
|
| '''Nome:''' Druddigon<br /> | | '''Dificuldade''': Baixa.<br> |
| '''Level:''' 80<br />
| | '''Resistência''': Fuchsia.<br> |
| '''Elemento:''' Dragon<br /> | | '''Clãs indicados''': [[Arquivo:Gardestrike1.png|link=Gardestrike]] Gardestrike e [[Arquivo:Orebound1.png|link=Orebound]] Orebound. <br> |
| '''Habilidades:''' Dig, Rock Smash, Headbutt e Fly.<br /> | |
| '''Boost:''' Crystal Stone (50)<br /> | |
| '''Materia:''' Wingeon Enhanced<br />
| |
|
| |
|
| == '''Evoluções''' == | | == Informações importantes == |
|
| |
|
| '''Druddigon ''' precisa de Level 80. | | Este local de caça é de baixa dificuldade e indicado para jogadores que estão iniciando no Nightmare World. <br> |
| | |
| | * O [[Arquivo:Shiny snorlax.png|link=Shiny Snorlax]] Shiny Snorlax é o Shiny encontrado neste local e é mais forte que os Pokémon normais, exigindo cuidado ao enfrentá-lo. Ele é um Pokémon Tier 1 A, muito raro e valioso. |
| | * O [[Arquivo:667-Litleo.png|link=Litleo]] Angry Litleo é o Pokémon Angry deste local e exige cuidado devido à sua força e agressividade. Esse Angry pode dropar o item [[Arquivo:Solidified-Aura.gif|link=]] Solified Aura e é possível trocar com o NPC '''The Duke (Resistance)''' por itens raros exclusivos do Nightmare World. |
| | * É recomendado o uso de [[Arquivo: Shield_Nightmare_Potion.png|link=]] Nightmare Shield Elixir para aumentar a defesa do personagem. |
| | * A [[Arquivo:Berrie_23.png|link=Berries]] '''Lum Berry''' pode ser útil devido aos status negativos que usam. |
| | * A [[Arquivo:Berrie_11.png|link=Berries]] '''Chilan Berry''' ajuda para resistir ao elemento [[Arquivo:Normal1.png|link=]] Normal. |
| | * O [[Arquivo:667-Litleo.png|link=Litleo]] Litleo também utiliza golpes do tipo [[Arquivo:Fire.png|link=]] Fire, portanto, [[Arquivo:Berrie 16.png|link=Berries]] '''Occa Berry''' pode ser útil. |
| | * Quando um Pokémon deste local é derrotado, existe uma pequena possibilidade de surgir um [[Arquivo:Minor nightmare crystal.png|32px|link=]] Minor Nightmare Crystal em seu lugar. |
| | * Após o nível 450, a experiência e o loot obtidos diminuem a cada nível em 1%. Ao atingir o nível 550, não será mais possível receber experiência ou loot. |
|
| |
|
| == '''Descrição:''' == | | <table class="seeMore"> |
| Ele aquece seu corpo absorvendo a luz do sol com suas asas. Quando a temperatura de seu corpo cai, não pode mais se mover.
| | <tr> |
| | <td class="seeMore__image">[[Arquivo:Telekinetic-compass.gif|link=]]</td> |
| | <td> '''Veja mais: [[The Duke (Resistance)]] - [[Nightmare Crystal]]'''</td> |
| | </tr> |
| | </table> |
|
| |
|
| == '''Movimentos PvE''' == | | == Efetividades == |
|
| |
|
| {| border="0" style="border-collapse:collapse"
| | Os [[Arquivo:667-Litleo.png|link=Litleo]] Litleo são dos elementos [[Arquivo:Normal1.png|link=]] NORMAL e [[Arquivo:Fire.png|link=]] FIRE. <br> |
| |- align="center" style="background-color: #E6E6FA;"
| |
| ! rowspan="2" | M1
| |
| | width="10px" |
| |
| | align="left" | Hone Claws (40s)
| |
| | width="50px" rowspan="2" |
| |
| | rowspan="2" align="right" | [[Arquivo:Self.png|Self]] [[Arquivo:Buff.png|Buff]] [[Arquivo:Nevermiss.png|Nevermiss]]
| |
| | rowspan="2" | [[Arquivo:Dark1.png|Dark|link=Malefic]]
| |
| |- align="center" style="background-color: #E6E6FA;"
| |
| | width="10px" |
| |
| | align="left" | Level 80
| |
| | |
| |- align="center"
| |
| ! rowspan="2" | M2
| |
| | width="10px" |
| |
| | align="left" | Scratch (12s)
| |
| | width="50px" rowspan="2" |
| |
| | rowspan="2" align="right" | [[Arquivo:Target.png|Target]] [[Arquivo:Damage.png|Damage]]
| |
| | rowspan="2" | [[Arquivo:Dragon.png|Dragon|link=Wingeon]]
| |
| |- align="center"
| |
| | width="10px" |
| |
| | align="left" | Level 80
| |
| | |
| |- align="center" style="background-color: #E6E6FA;"
| |
| ! rowspan="2" | M3
| |
| | width="10px" |
| |
| | align="left" | Dragon Tail (12s)
| |
| | width="50px" rowspan="2" |
| |
| | rowspan="2" align="right" | [[Arquivo:Target.png|Target]] [[Arquivo:Damage.png|Damage]]
| |
| | rowspan="2" | [[Arquivo:Dragon.png|Dragon|link=Wingeon]]
| |
| |- align="center" style="background-color: #E6E6FA;"
| |
| | width="10px" |
| |
| | align="left" | Level 80
| |
| | |
| |- align="center"
| |
| ! rowspan="2" | M4
| |
| | width="10px" |
| |
| | align="left" | Scale Shot (22s)
| |
| | width="50px" rowspan="2" |
| |
| | rowspan="2" align="right" | [[Arquivo:Target.png|Target]] [[Arquivo:Damage.png|Damage]]
| |
| | rowspan="2" | [[Arquivo:Dragon.png|Dragon|link=Wingeon]]
| |
| |- align="center"
| |
| | width="10px" |
| |
| | align="left" | Level 80
| |
| | |
| |- align="center" style="background-color: #E6E6FA;"
| |
| ! rowspan="2" | M5
| |
| | width="10px" |
| |
| | align="left" | Dragon Claw (40s)
| |
| | width="50px" rowspan="2" |
| |
| | rowspan="2" align="right" | [[Arquivo:Target.png|Target]] [[Arquivo:Damage.png|Damage]]
| |
| | rowspan="2" | [[Arquivo:Dragon.png|Dragon|link=Wingeon]]
| |
| |- align="center" style="background-color: #E6E6FA;"
| |
| | width="10px" |
| |
| | align="left" | Level 80
| |
| | |
| |- align="center"
| |
| ! rowspan="2" | M6
| |
| | width="10px" |
| |
| | align="left" | Draco Meteor (50s)
| |
| | width="50px" rowspan="2" |
| |
| | rowspan="2" align="right" | [[Arquivo:AOE.png|AOE]] [[Arquivo:Damage.png|Damage]]
| |
| | rowspan="2" | [[Arquivo:Dragon.png|Dragon|link=Wingeon]]
| |
| |- align="center"
| |
| | width="10px" |
| |
| | align="left" | Level 82
| |
| | |
| |- align="center" style="background-color: #E6E6FA;"
| |
| ! rowspan="2" | M7
| |
| | width="10px" |
| |
| | align="left" | Outrage (50s)
| |
| | width="50px" rowspan="2" |
| |
| | rowspan="2" align="right" | [[Arquivo:AOE.png|AOE]] [[Arquivo:Damage.png|Damage]] [[Arquivo:Buff.png|Buff]] [[Arquivo:Nevermiss.png|Nevermiss]]
| |
| | rowspan="2" | [[Arquivo:Dragon.png|Dragon|link=Wingeon]]
| |
| |- align="center" style="background-color: #E6E6FA;"
| |
| | width="10px" |
| |
| | align="left" | Level 95
| |
| | |
| |- align="center"
| |
| ! rowspan="2" | M8
| |
| | width="10px" |
| |
| | align="left" | Roar (40s)
| |
| | width="50px" rowspan="2" |
| |
| | rowspan="2" align="right" | [[Arquivo:AOE.png|AOE]] [[Arquivo:Stun.png|Stun]] [[Arquivo:NeverBoost.png|Neverboost]]
| |
| | rowspan="2" | [[Arquivo:Dragon.png|Dragon|link=Wingeon]]
| |
| |- align="center"
| |
| | width="10px" |
| |
| | align="left" | Level 88
| |
| | |
| |- align="center" style="background-color: #E6E6FA;"
| |
| ! rowspan="2" | P
| |
| | width="10px" |
| |
| | align="left" | Sheer Force
| |
| | width="50px" rowspan="2" |
| |
| | rowspan="2" align="right" | [[Arquivo:Buff.png|Buff]]
| |
| | rowspan="2" | [[Arquivo:Dragon.png|Dragon|link=Wingeon]]
| |
| |- align="center" style="background-color: #E6E6FA;"
| |
| | width="10px" |
| |
| | align="left" | Level 80
| |
|
| |
|
| | <center> |
| | '''Elementos que causam dano efetivo neste local''' |
| | {|class="wikitable" width="10%" style="text-align:center" |
| | ! colspan="4" | Elementos |
| | |- |
| | |[[Arquivo:Water.png|link=]] || Water |
| | |- |
| | |[[Arquivo:Fighting.png|link=]] || Fighting |
| | |- |
| | |[[Arquivo:Ground.png|link=]]|| Ground |
| | |- |
| | |[[Arquivo:Rock.png|link=]] || Rock |
| |} | | |} |
| | </center> |
|
| |
|
| == '''Movimentos PvP''' == | | == Localização == |
| | |
| {| border="0" style="border-collapse:collapse"
| |
| |- align="center" style="background-color: #E6E6FA;"
| |
| ! rowspan="2" | M1
| |
| | width="10px" |
| |
| | align="left" | Hone Claws (50s)
| |
| | width="50px" rowspan="2" |
| |
| | rowspan="2" align="right" | [[Arquivo:Self.png|Self]] [[Arquivo:Buff.png|Buff]] [[Arquivo:Nevermiss.png|Nevermiss]]
| |
| | rowspan="2" | [[Arquivo:Dark1.png|Dark|link=Malefic]]
| |
| |- align="center" style="background-color: #E6E6FA;"
| |
| | width="10px" |
| |
| | align="left" | Level 80
| |
| | |
| |- align="center"
| |
| ! rowspan="2" | M2
| |
| | width="10px" |
| |
| | align="left" | Scratch (12s)
| |
| | width="50px" rowspan="2" |
| |
| | rowspan="2" align="right" | [[Arquivo:Target.png|Target]] [[Arquivo:Damage.png|Damage]]
| |
| | rowspan="2" | [[Arquivo:Dragon.png|Dragon|link=Wingeon]]
| |
| |- align="center"
| |
| | width="10px" |
| |
| | align="left" | Level 80
| |
| | |
| |- align="center" style="background-color: #E6E6FA;"
| |
| ! rowspan="2" | M3
| |
| | width="10px" |
| |
| | align="left" | Dragon Tail (12s)
| |
| | width="50px" rowspan="2" |
| |
| | rowspan="2" align="right" | [[Arquivo:Target.png|Target]] [[Arquivo:Damage.png|Damage]]
| |
| | rowspan="2" | [[Arquivo:Dragon.png|Dragon|link=Wingeon]]
| |
| |- align="center" style="background-color: #E6E6FA;"
| |
| | width="10px" |
| |
| | align="left" | Level 80
| |
|
| |
|
| |- align="center"
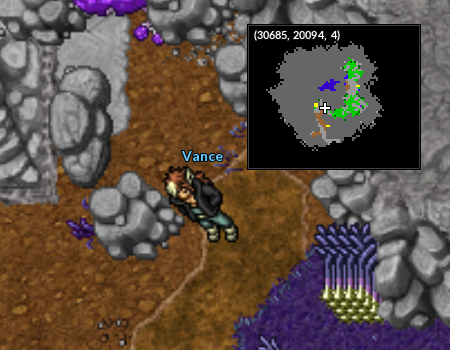
| | Este local de caça fica localizado na resistência de Fuchsia, dentro de onde seria o Safari. <br> |
| ! rowspan="2" | M4
| |
| | width="10px" |
| |
| | align="left" | Scale Shot (22s)
| |
| | width="50px" rowspan="2" |
| |
| | rowspan="2" align="right" | [[Arquivo:Target.png|Target]] [[Arquivo:Damage.png|Damage]]
| |
| | rowspan="2" | [[Arquivo:Dragon.png|Dragon|link=Wingeon]]
| |
| |- align="center"
| |
| | width="10px" |
| |
| | align="left" | Level 80
| |
|
| |
|
| |- align="center" style="background-color: #E6E6FA;"
| |
| ! rowspan="2" | M5
| |
| | width="10px" |
| |
| | align="left" | Dragon Claw (40s)
| |
| | width="50px" rowspan="2" |
| |
| | rowspan="2" align="right" | [[Arquivo:Target.png|Target]] [[Arquivo:Damage.png|Damage]]
| |
| | rowspan="2" | [[Arquivo:Dragon.png|Dragon|link=Wingeon]]
| |
| |- align="center" style="background-color: #E6E6FA;"
| |
| | width="10px" |
| |
| | align="left" | Level 80
| |
|
| |
|
| |- align="center"
| | <center> |
| ! rowspan="2" | M6
| | [[file:Minimap - Locais de Caça (Litleo) 1.webp|link=]] [[Arquivo:Minimap_-_Locais_de_Caça_(Litleo).png|link=]] |
| | width="10px" |
| | </center> |
| | align="left" | Draco Meteor (60s)
| |
| | width="50px" rowspan="2" |
| |
| | rowspan="2" align="right" | [[Arquivo:AOE.png|AOE]] [[Arquivo:Damage.png|Damage]]
| |
| | rowspan="2" | [[Arquivo:Dragon.png|Dragon|link=Wingeon]]
| |
| |- align="center"
| |
| | width="10px" |
| |
| | align="left" | Level 82
| |
|
| |
|
| |- align="center" style="background-color: #E6E6FA;"
| |
| ! rowspan="2" | M7
| |
| | width="10px" |
| |
| | align="left" | Outrage (60s)
| |
| | width="50px" rowspan="2" |
| |
| | rowspan="2" align="right" | [[Arquivo:AOE.png|AOE]] [[Arquivo:Damage.png|Damage]] [[Arquivo:Buff.png|Buff]] [[Arquivo:Nevermiss.png|Nevermiss]]
| |
| | rowspan="2" | [[Arquivo:Dragon.png|Dragon|link=Wingeon]]
| |
| |- align="center" style="background-color: #E6E6FA;"
| |
| | width="10px" |
| |
| | align="left" | Level 95
| |
|
| |
|
| |- align="center"
| | '''Observação:''' Os Pokémon da imagem acima não representam o local exato de cada Pokémon. |
| ! rowspan="2" | M8
| |
| | width="10px" |
| |
| | align="left" | Roar (40s)
| |
| | width="50px" rowspan="2" |
| |
| | rowspan="2" align="right" | [[Arquivo:AOE.png|AOE]] [[Arquivo:Stun.png|Stun]] [[Arquivo:NeverBoost.png|Neverboost]]
| |
| | rowspan="2" | [[Arquivo:Dragon.png|Dragon|link=Wingeon]]
| |
| |- align="center"
| |
| | width="10px" |
| |
| | align="left" | Level 88
| |
|
| |
|
| |- align="center" style="background-color: #E6E6FA;"
| | == Tasks == |
| ! rowspan="2" | P
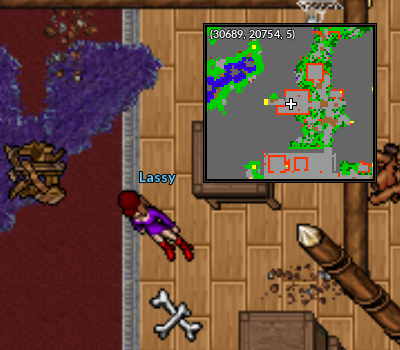
| | Neste local, a única task disponível é a task da '''NPC Lassy''', que consiste em derrotar '''160 [[Arquivo:667-Litleo.png|link=Litleo]] Litleos'''.<br> |
| | width="10px" |
| |
| | align="left" | Sheer Force
| |
| | width="50px" rowspan="2" |
| |
| | rowspan="2" align="right" | [[Arquivo:Buff.png|Buff]]
| |
| | rowspan="2" | [[Arquivo:Dragon.png|Dragon|link=Wingeon]]
| |
| |- align="center" style="background-color: #E6E6FA;"
| |
| | width="10px" |
| |
| | align="left" | Level 80
| |
|
| |
|
| | <center> |
| | [[file:Localização NPC Lassy.png|link=]] |
| | {| class="wikitable" style="text-align:center" width="25.3%" |
| | ! colspan="2" | Recompensa |
| | |- |
| | | [[Arquivo:Exp icon.png|30px|link=]] || 1.756.800 de Experiencia |
| | |- |
| | |[[Arquivo:Exp icon nw.png|30px|link=]] || 11.000 de Experiencia da NW |
| | |- |
| | |[[Arquivo:Cyan Nightmare Gem.png|link=Nightmare_Tasks]] || 11 Cyan Nightmare Gem |
| | |- |
| |} | | |} |
| | </center> |
|
| |
|
| == '''Efetividades''' ==
| | Além disso, você pode pegar a missão diária com o '''NPC Falkner''', localizado na '''Resistência de Cerulean''', dentro do Centro Pokémon. |
| | |
| '''Muito Efetivo:''' Ice, Dragon, Fairy.<br />
| |
| '''Normal:''' Normal, Fighting, Poison, Ground, Flying, Psychic, Bug, Rock, Ghost, Steel, Dark, Crystal.<br /> | |
| '''Muito Inefetivo:''' Fire, Water, Grass, Electric.<br /> | |
| | |
| =Shiny Druddigon=
| |
| == '''Informações Gerais''' ==
| |
| | |
| '''Nome:''' Shiny Druddigon<br />
| |
| '''Level:''' 100<br />
| |
| '''Elemento:''' Dragon<br /> | |
| '''Habilidades:''' Dig, Rock Smash, Headbutt e Fly.<br />
| |
| '''Boost:''' Crystal Stone (30)<br />
| |
| '''Materia:''' Wingeon Superior<br />
| |
| | |
| == '''Evoluções''' ==
| |
| | |
| '''Druddigon ''' precisa de Level 100.
| |
| | |
| == '''Descrição:''' ==
| |
| Ele aquece seu corpo absorvendo a luz do sol com suas asas. Quando a temperatura de seu corpo cai, não pode mais se mover.
| |
| | |
| == '''Movimentos PvE''' ==
| |
| | |
| {| border="0" style="border-collapse:collapse"
| |
| |- align="center" style="background-color: #E6E6FA;"
| |
| ! rowspan="2" | M1
| |
| | width="10px" |
| |
| | align="left" | Dragon Rage (40s)
| |
| | width="50px" rowspan="2" |
| |
| | rowspan="2" align="right" | [[Arquivo:Self.png|Self]] [[Arquivo:AOE.png|AOE]] [[Arquivo:Damage.png|Damage]] [[Arquivo:Buff.png|Buff]] [[Arquivo:Nevermiss.png|Nevermiss]]
| |
| | rowspan="2" | [[Arquivo:Dragon.png|Dragon|link=Wingeon]]
| |
| |- align="center" style="background-color: #E6E6FA;"
| |
| | width="10px" |
| |
| | align="left" | Level 115
| |
| | |
| |- align="center"
| |
| ! rowspan="2" | M2
| |
| | width="10px" |
| |
| | align="left" | Scratch (10s)
| |
| | width="50px" rowspan="2" |
| |
| | rowspan="2" align="right" | [[Arquivo:Target.png|Target]] [[Arquivo:Damage.png|Damage]]
| |
| | rowspan="2" | [[Arquivo:Dragon.png|Dragon|link=Wingeon]]
| |
| |- align="center"
| |
| | width="10px" |
| |
| | align="left" | Level 100
| |
| | |
| |- align="center" style="background-color: #E6E6FA;"
| |
| ! rowspan="2" | M3
| |
| | width="10px" |
| |
| | align="left" | Dragon Tail (10s)
| |
| | width="50px" rowspan="2" |
| |
| | rowspan="2" align="right" | [[Arquivo:Target.png|Target]] [[Arquivo:Damage.png|Damage]]
| |
| | rowspan="2" | [[Arquivo:Dragon.png|Dragon|link=Wingeon]]
| |
| |- align="center" style="background-color: #E6E6FA;"
| |
| | width="10px" |
| |
| | align="left" | Level 100
| |
| | |
| |- align="center"
| |
| ! rowspan="2" | M4
| |
| | width="10px" |
| |
| | align="left" | Scale Shot (18s)
| |
| | width="50px" rowspan="2" |
| |
| | rowspan="2" align="right" | [[Arquivo:Target.png|Target]] [[Arquivo:Damage.png|Damage]]
| |
| | rowspan="2" | [[Arquivo:Dragon.png|Dragon|link=Wingeon]]
| |
| |- align="center"
| |
| | width="10px" |
| |
| | align="left" | Level 10
| |
| | |
| |- align="center" style="background-color: #E6E6FA;"
| |
| ! rowspan="2" | M5
| |
| | width="10px" |
| |
| | align="left" | Dragon Claw (35s)
| |
| | width="50px" rowspan="2" |
| |
| | rowspan="2" align="right" | [[Arquivo:Target.png|Target]] [[Arquivo:Damage.png|Damage]]
| |
| | rowspan="2" | [[Arquivo:Dragon.png|Dragon|link=Wingeon]]
| |
| |- align="center" style="background-color: #E6E6FA;"
| |
| | width="10px" |
| |
| | align="left" | Level 100
| |
| | |
| |- align="center"
| |
| ! rowspan="2" | M6
| |
| | width="10px" |
| |
| | align="left" | Draco Meteor (45s)
| |
| | width="50px" rowspan="2" |
| |
| | rowspan="2" align="right" | [[Arquivo:AOE.png|AOE]] [[Arquivo:Damage.png|Damage]]
| |
| | rowspan="2" | [[Arquivo:Dragon.png|Dragon|link=Wingeon]]
| |
| |- align="center"
| |
| | width="10px" |
| |
| | align="left" | Level 102
| |
| | |
| |- align="center" style="background-color: #E6E6FA;"
| |
| ! rowspan="2" | M7
| |
| | width="10px" |
| |
| | align="left" | Outrage (50s)
| |
| | width="50px" rowspan="2" |
| |
| | rowspan="2" align="right" | [[Arquivo:AOE.png|AOE]] [[Arquivo:Damage.png|Damage]] [[Arquivo:Buff.png|Buff]] [[Arquivo:Nevermiss.png|Nevermiss]]
| |
| | rowspan="2" | [[Arquivo:Dragon.png|Dragon|link=Wingeon]]
| |
| |- align="center" style="background-color: #E6E6FA;"
| |
| | width="10px" |
| |
| | align="left" | Level 115
| |
|
| |
|
| |- align="center"
| | <table class="seeMore"> |
| ! rowspan="2" | M8
| | <tr> |
| | width="10px" |
| | <td class="seeMore__image">[[Arquivo:Telekinetic-compass.gif|link=]]</td> |
| | align="left" | Roar (40s)
| | <td> '''Veja mais: [[Nightmare_Falkner|NPC Falkner]]'''</td> |
| | width="50px" rowspan="2" |
| | </tr> |
| | rowspan="2" align="right" | [[Arquivo:AOE.png|AOE]] [[Arquivo:Stun.png|Stun]] [[Arquivo:NeverBoost.png|Neverboost]]
| | </table> |
| | rowspan="2" | [[Arquivo:Dragon.png|Dragon|link=Wingeon]]
| |
| |- align="center"
| |
| | width="10px" |
| |
| | align="left" | Level 108
| |
|
| |
|
| |- align="center" style="background-color: #E6E6FA;"
| | == Experiência == |
| ! rowspan="2" | P
| |
| | width="10px" |
| |
| | align="left" | Sheer Force
| |
| | width="50px" rowspan="2" |
| |
| | rowspan="2" align="right" | [[Arquivo:Buff.png|Buff]]
| |
| | rowspan="2" | [[Arquivo:Dragon.png|Dragon|link=Wingeon]]
| |
| |- align="center" style="background-color: #E6E6FA;"
| |
| | width="10px" |
| |
| | align="left" | Level 100
| |
|
| |
|
| | Conforme a tabela abaixo, ao derrotar um Pokémon e ganhar, por exemplo, 100 de experiência, a quantidade obtida varia de acordo com o nível do personagem. <br><br> |
| | |
| | <center> |
| | {|class="wikitable" style="text-align:center" width="25%" |
| | |- |
| | ! width="15%" |Level |
| | ! width="15%" |Porcentagem Recebida |
| | |- |
| | | 200 até 249 || 10% |
| | |- |
| | | 250 até 299 || 70% |
| | |- |
| | | 300 até 349 || 100% |
| | |- |
| | | 350 até 399 || 90% |
| | |- |
| | | 400 até 424 || 50% |
| | |- |
| | | 425 até 449 || 40% |
| | |- |
| |} | | |} |
| | </center><br> |
| | |
| | '''Exemplo''': Entre os níveis 200 e 249, são obtidos 10% da experiência total, equivalente a 10. Nos níveis 300 a 349, o valor recebido é de 100%, ou seja, 100. Já entre os níveis 400 e 424, é concedido 50% da experiência, resultando em 50. <br> |
|
| |
|
| == '''Movimentos PvP''' == | | = Nightmare Hunt - Galarian Farfetch'd = |
| | | <center>[[file:Nightmare_Hunt_Galarian_Farfetchd.png|link=]]</center> |
| {| border="0" style="border-collapse:collapse"
| | '''Dificuldade''': Baixa.<br> |
| |- align="center" style="background-color: #E6E6FA;"
| | '''Resistência''': Cerulean.<br> |
| ! rowspan="2" | M1
| | '''Clãs indicados''': [[Arquivo:Wingeon1.png|link=Wingeon]] Wingeon e [[Arquivo:Psycraft1.png|link=Psycraft]] Psycraft. <br> |
| | width="10px" |
| |
| | align="left" | Dragon Rage (40s)
| |
| | width="50px" rowspan="2" |
| |
| | rowspan="2" align="right" | [[Arquivo:Self.png|Self]] [[Arquivo:AOE.png|AOE]] [[Arquivo:Damage.png|Damage]] [[Arquivo:Buff.png|Buff]] [[Arquivo:Nevermiss.png|Nevermiss]]
| |
| | rowspan="2" | [[Arquivo:Dragon.png|Dragon|link=Wingeon]]
| |
| |- align="center" style="background-color: #E6E6FA;"
| |
| | width="10px" |
| |
| | align="left" | Level 115
| |
| | |
| |- align="center"
| |
| ! rowspan="2" | M2
| |
| | width="10px" |
| |
| | align="left" | Scratch (10s)
| |
| | width="50px" rowspan="2" |
| |
| | rowspan="2" align="right" | [[Arquivo:Target.png|Target]] [[Arquivo:Damage.png|Damage]]
| |
| | rowspan="2" | [[Arquivo:Dragon.png|Dragon|link=Wingeon]]
| |
| |- align="center"
| |
| | width="10px" |
| |
| | align="left" | Level 100
| |
| | |
| |- align="center" style="background-color: #E6E6FA;"
| |
| ! rowspan="2" | M3
| |
| | width="10px" |
| |
| | align="left" | Dragon Tail (10s)
| |
| | width="50px" rowspan="2" |
| |
| | rowspan="2" align="right" | [[Arquivo:Target.png|Target]] [[Arquivo:Damage.png|Damage]]
| |
| | rowspan="2" | [[Arquivo:Dragon.png|Dragon|link=Wingeon]]
| |
| |- align="center" style="background-color: #E6E6FA;"
| |
| | width="10px" |
| |
| | align="left" | Level 100
| |
| | |
| |- align="center"
| |
| ! rowspan="2" | M4
| |
| | width="10px" |
| |
| | align="left" | Scale Shot (18s)
| |
| | width="50px" rowspan="2" |
| |
| | rowspan="2" align="right" | [[Arquivo:Target.png|Target]] [[Arquivo:Damage.png|Damage]]
| |
| | rowspan="2" | [[Arquivo:Dragon.png|Dragon|link=Wingeon]]
| |
| |- align="center"
| |
| | width="10px" |
| |
| | align="left" | Level 10
| |
|
| |
|
| |- align="center" style="background-color: #E6E6FA;"
| | == Informações importantes == |
| ! rowspan="2" | M5
| |
| | width="10px" |
| |
| | align="left" | Dragon Claw (35s)
| |
| | width="50px" rowspan="2" |
| |
| | rowspan="2" align="right" | [[Arquivo:Target.png|Target]] [[Arquivo:Damage.png|Damage]]
| |
| | rowspan="2" | [[Arquivo:Dragon.png|Dragon|link=Wingeon]]
| |
| |- align="center" style="background-color: #E6E6FA;"
| |
| | width="10px" |
| |
| | align="left" | Level 100
| |
|
| |
|
| |- align="center"
| | Este local de caça é de baixa dificuldade e indicado para jogadores que estão iniciando no Nightmare World. <br> |
| ! rowspan="2" | M6
| | |
| | width="10px" | | | * O [[Arquivo:083-shFarfetch-D.png|link=Elite Farfetch'D]] Elite Farfetch'D é o Boss encontrado neste local e é mais forte que os Pokémon normais, exigindo cuidado ao enfrentá-lo. Esse Pokémon utiliza ataques do tipo [[Arquivo:Flying.png|link=]] Flying. |
| | align="left" | Draco Meteor (50s) | | * O [[Arquivo:865-Sirfetch'd.png|link=Sirfetch'd]] Sirfetch'd é o Pokémon Angry deste local e exige cuidado devido à sua força e agressividade. É uma ótima oportunidade para tentar a captura deste Pokémon. Esse Angry pode dropar o item [[Arquivo:Solidified-Aura.gif|link=]] Solified Aura e é possível trocar com o NPC '''The Duke (Resistance)''' por itens raros exclusivos do Nightmare World. |
| | width="50px" rowspan="2" | | | * É recomendado o uso de [[Arquivo: Shield_Nightmare_Potion.png|link=]] Nightmare Shield Elixir para aumentar a defesa do personagem. |
| | rowspan="2" align="right" | [[Arquivo:AOE.png|AOE]] [[Arquivo:Damage.png|Damage]] | | * A [[Arquivo:Berrie_23.png|link=Berries]] '''Lum Berry''' pode ser útil devido aos status negativos que usam. |
| | rowspan="2" | [[Arquivo:Dragon.png|Dragon|link=Wingeon]]
| | * A [[Arquivo:Berrie 9.png|link=Berries]] '''Chople Berry''' ajuda para resistir ao elemento [[Arquivo:Fighting.png|link=]] Fighting. |
| |- align="center"
| | * Quando um Pokémon deste local é derrotado, existe uma pequena possibilidade de surgir um [[Arquivo:Minor nightmare crystal.png|32px|link=]] Minor Nightmare Crystal em seu lugar. |
| | width="10px" |
| | * Após o nível 450, a experiência e o loot obtidos diminuem a cada nível em 1%. Ao atingir o nível 550, não será mais possível receber experiência ou loot. |
| | align="left" | Level 102
| |
|
| |
|
| |- align="center" style="background-color: #E6E6FA;"
| | <table class="seeMore"> |
| ! rowspan="2" | M7
| | <tr> |
| | width="10px" |
| | <td class="seeMore__image">[[Arquivo:Telekinetic-compass.gif|link=]]</td> |
| | align="left" | Outrage (50s)
| | <td> '''Veja mais: [[The Duke (Resistance)]] - [[Nightmare Crystal]]'''</td> |
| | width="50px" rowspan="2" |
| | </tr> |
| | rowspan="2" align="right" | [[Arquivo:AOE.png|AOE]] [[Arquivo:Damage.png|Damage]] [[Arquivo:Buff.png|Buff]] [[Arquivo:Nevermiss.png|Nevermiss]]
| | </table> |
| | rowspan="2" | [[Arquivo:Dragon.png|Dragon|link=Wingeon]]
| |
| |- align="center" style="background-color: #E6E6FA;"
| |
| | width="10px" |
| |
| | align="left" | Level 115
| |
|
| |
|
| |- align="center"
| | == Efetividades == |
| ! rowspan="2" | M8
| |
| | width="10px" |
| |
| | align="left" | Roar (40s)
| |
| | width="50px" rowspan="2" |
| |
| | rowspan="2" align="right" | [[Arquivo:AOE.png|AOE]] [[Arquivo:Stun.png|Stun]] [[Arquivo:NeverBoost.png|Neverboost]]
| |
| | rowspan="2" | [[Arquivo:Dragon.png|Dragon|link=Wingeon]]
| |
| |- align="center"
| |
| | width="10px" |
| |
| | align="left" | Level 108
| |
|
| |
|
| |- align="center" style="background-color: #E6E6FA;"
| | Os [[Arquivo:083-Galarian_FarfetchD.png|link=Galarian Farfetch'D]] Galarian Farfetch'D são do elemento [[Arquivo:Fighting.png|link=]] FIGHTHING. <br> |
| ! rowspan="2" | P
| |
| | width="10px" |
| |
| | align="left" | Sheer Force
| |
| | width="50px" rowspan="2" |
| |
| | rowspan="2" align="right" | [[Arquivo:Buff.png|Buff]]
| |
| | rowspan="2" | [[Arquivo:Dragon.png|Dragon|link=Wingeon]]
| |
| |- align="center" style="background-color: #E6E6FA;"
| |
| | width="10px" |
| |
| | align="left" | Level 100
| |
|
| |
|
| | <center> |
| | '''Elementos que causam dano super efetivo neste local''' |
| | {|class="wikitable" width="10%" style="text-align:center" |
| | ! colspan="4" | Elementos |
| | |- |
| | |[[Arquivo:Flying.png|link=]] || Flying |
| | |- |
| | |[[Arquivo:Psychic.png|link=]] || Psychic |
| | |- |
| | |[[Arquivo:Fairy.png|link=]]|| Fairy |
| |} | | |} |
| | </center> |
|
| |
|
| == '''Efetividades''' == | | == Localização == |
| | |
| '''Muito Efetivo:''' Ice, Dragon, Fairy.<br />
| |
| '''Normal:''' Normal, Fighting, Poison, Ground, Flying, Psychic, Bug, Rock, Ghost, Steel, Dark, Crystal.<br />
| |
| '''Muito Inefetivo:''' Fire, Water, Grass, Electric.<br />
| |
| | |
| =Carbink=
| |
| <center>[[Arquivo:703-Carbink.png|link=]]</center>
| |
| == '''Informações Gerais''' ==
| |
|
| |
|
| '''Nome:''' Carbink<br />
| | Este local de caça fica localizado na Hurricane Island, tendo como resistência mais próxima a de Cerulean. Para chegar até lá, é necessário utilizar o transporte com o NPC Boatman. <br> |
| '''Level:''' 60<br />
| |
| '''Elemento:''' Rock e Fairy<br />
| |
| '''Habilidades:''' none.<br />
| |
| '''Boost:''' Ancient Stone (50)<br />
| |
| '''Materia:''' Orebound ou Psycraft<br />
| |
|
| |
|
| == '''Evoluções''' == | | <table class="seeMore"> |
| | <tr> |
| | <td class="seeMore__image">[[Arquivo:Telekinetic-compass.gif|link=]]</td> |
| | <td> '''Veja mais: [[Nightmare Transportes#Cerulean - Ilhas|Como chegar até Hurricane Island]]'''</td> |
| | </tr> |
| | </table> |
|
| |
|
| '''Carbink''' precisa de Level 60. | | <center> |
| | [[Arquivo:Minimap_-_Locais_de_Caça_(Galarian_Darumaka)_1.webp|link=]] [[file:Minimap - Locais de Caça (Galarian Farfetch'd) 2.webp|link=]] <br> |
|
| |
|
| == '''Descrição:''' ==
| | [[file:Minimap - Locais de Caça (Galarian Farfetch'd) 3.webp|link=]] [[file:Minimap - Locais de Caça (Galarian Farfetch'd) 4.webp|link=]] <br> |
| Nascido de temperaturas e pressões no subsolo. Ele dispara raios da pedra em sua cabeça.
| |
|
| |
|
| == '''Movimentos''' == | | [[file:Minimap - Locais de Caça (Galarian Farfetch'd) 5.webp|link=]] [[file:Minimap - Locais de Caça (Galarian Farfetch'd) 6.webp|link=]] <br> |
| | </center> |
| | <br> |
| | '''Observação:''' Os Pokémon da imagem acima não representam o local exato de cada Pokémon. |
|
| |
|
| {| border="0" style="border-collapse:collapse"
| | == Tasks == |
| |- align="center" style="background-color: #E6E6FA;"
| | Neste local, a única task disponível é a task da '''NPC Vance''', que consiste em derrotar '''200 [[Arquivo:083-Galarian_FarfetchD.png|link=Galarian Farfetch'D]] Galarian Farfetch'D'''.<br> |
| ! rowspan="2" | M1
| |
| | width="10px" |
| |
| | align="left" | Charm (80s)
| |
| | width="50px" rowspan="2" |
| |
| | rowspan="2" align="right" | [[Arquivo:Self.png|Self]] [[Arquivo:Buff.png|Buff]]
| |
| | rowspan="2" | [[Arquivo:Fairy.png|Fairy|link=Psycraft]]
| |
| |- align="center" style="background-color: #E6E6FA;"
| |
| | width="10px" |
| |
| | align="left" | Level 60
| |
| | |
| |- align="center"
| |
| ! rowspan="2" | M2
| |
| | width="10px" |
| |
| | align="left" | Dazzling Gleam (15s)
| |
| | width="50px" rowspan="2" |
| |
| | rowspan="2" align="right" | [[Arquivo:Target.png|Target]] [[Arquivo:Damage.png|Damage]]
| |
| | rowspan="2" | [[Arquivo:Fairy.png|Fairy|link=Psycraft]]
| |
| |- align="center"
| |
| | width="10px" |
| |
| | align="left" | Level 64
| |
| | |
| |- align="center" style="background-color: #E6E6FA;"
| |
| ! rowspan="2" | M3
| |
| | width="10px" |
| |
| | align="left" | Stone Edge (20s)
| |
| | width="50px" rowspan="2" |
| |
| | rowspan="2" align="right" | [[Arquivo:Target.png|Target]] [[Arquivo:Damage.png|Damage]]
| |
| | rowspan="2" | [[Arquivo:Rock.png|Rock|link=Orebound]]
| |
| |- align="center" style="background-color: #E6E6FA;"
| |
| | width="10px" |
| |
| | align="left" | Level 60
| |
| | |
| |- align="center"
| |
| ! rowspan="2" | M4
| |
| | width="10px" |
| |
| | align="left" | Power Gem (30s)
| |
| | width="50px" rowspan="2" |
| |
| | rowspan="2" align="right" | [[Arquivo:AOE.png|AOE]] [[Arquivo:Damage.png|Damage]]
| |
| | rowspan="2" | [[Arquivo:Rock.png|Rock|link=Orebound]]
| |
| |- align="center"
| |
| | width="10px" |
| |
| | align="left" | Level 60
| |
| | |
| |- align="center" style="background-color: #E6E6FA;"
| |
| ! rowspan="2" | M5
| |
| | width="10px" |
| |
| | align="left" | Dazzling Burst (35s)
| |
| | width="50px" rowspan="2" |
| |
| | rowspan="2" align="right" | [[Arquivo:AOE.png|AOE]] [[Arquivo:Damage.png|Damage]]
| |
| | rowspan="2" | [[Arquivo:Fairy.png|Fairy|link=Psycraft]]
| |
| |- align="center" style="background-color: #E6E6FA;"
| |
| | width="10px" |
| |
| | align="left" | Level 60
| |
| | |
| |- align="center"
| |
| ! rowspan="2" | M6
| |
| | width="10px" |
| |
| | align="left" | Stealth Rock (60s)
| |
| | width="50px" rowspan="2" |
| |
| | rowspan="2" align="right" | [[Arquivo:AOE.png|AOE]] [[Arquivo:Damage.png|Damage]] [[Arquivo:Nevermiss.png|Nevermiss]]
| |
| | rowspan="2" | [[Arquivo:Rock.png|Rock|link=Orebound]]
| |
| |- align="center"
| |
| | width="10px" |
| |
| | align="left" | Level 70
| |
| | |
| |- align="center" style="background-color: #E6E6FA;"
| |
| ! rowspan="2" | M7
| |
| | width="10px" |
| |
| | align="left" | Moonblast (60s)
| |
| | width="50px" rowspan="2" |
| |
| | rowspan="2" align="right" | [[Arquivo:AOE.png|AOE]] [[Arquivo:Damage.png|Damage]] [[Arquivo:Silence.png|Silence]]
| |
| | rowspan="2" | [[Arquivo:Fairy.png|Fairy|link=Psycraft]]
| |
| |- align="center" style="background-color: #E6E6FA;"
| |
| | width="10px" |
| |
| | align="left" | Level 72
| |
| | |
| |- align="center"
| |
| ! rowspan="2" | M8
| |
| | width="10px" |
| |
| | align="left" | Misty Explosion (60s)
| |
| | width="50px" rowspan="2" |
| |
| | rowspan="2" align="right" | [[Arquivo:AOE.png|AOE]] [[Arquivo:Damage.png|Damage]] [[Arquivo:Blind.png|Blind]]
| |
| | rowspan="2" | [[Arquivo:Fairy.png|Fairy|link=Psycraft]]
| |
| |- align="center"
| |
| | width="10px" |
| |
| | align="left" | Level 72
| |
| | |
| |- align="center" style="background-color: #E6E6FA;"
| |
| ! rowspan="2" | M9
| |
| | width="10px" |
| |
| | align="left" | Sharpen (40s)
| |
| | width="50px" rowspan="2" |
| |
| | rowspan="2" align="right" | [[Arquivo:AOE.png|AOE]] [[Arquivo:Damage.png|Damage]] [[Arquivo:Buff.png|Buff]] [[Arquivo:Nevermiss.png|Nevermiss]]
| |
| | rowspan="2" | [[Arquivo:Normal1.png|Normal|link=Gardestrike]]
| |
| |- align="center" style="background-color: #E6E6FA;"
| |
| | width="10px" |
| |
| | align="left" | Level 60
| |
| | |
| |- align="center"
| |
| ! rowspan="2" | P
| |
| | width="10px" |
| |
| | align="left" | Clear Body
| |
| | width="50px" rowspan="2" |
| |
| | rowspan="2" align="right" | [[Arquivo:Buff.png|Buff]]
| |
| | rowspan="2" | [[Arquivo:Steel.png|Steel|link=Ironhard]]
| |
| |- align="center"
| |
| | width="10px" |
| |
| | align="left" | Level 60
| |
|
| |
|
| | <center> |
| | [[file:Localização NPC Vance.png|link=]] |
| | {| class="wikitable" style="text-align:center" width="25.3%" |
| | ! colspan="2" | Recompensa |
| | |- |
| | | [[Arquivo:Exp icon.png|30px|link=]] || 2.196.800 de Experiencia |
| | |- |
| | |[[Arquivo:Exp icon nw.png|30px|link=]] || 12.000 de Experiencia da NW |
| | |- |
| | |[[Arquivo:Cyan Nightmare Gem.png|link=Nightmare_Tasks]] || 17 Cyan Nightmare Gem |
| | |- |
| |} | | |} |
| | </center> |
|
| |
|
| == '''Efetividades''' ==
| | Além disso, você pode pegar a missão diária com o '''NPC Falkner''', localizado na '''Resistência de Cerulean''', dentro do Centro Pokémon. |
| | |
| '''Muito Efetivo:''' Steel.<br />
| |
| '''Efetivo:''' Water, Grass, Ground.<br />
| |
| '''Normal:''' Electric, Ice, Fighting, Poison, Psychic, Rock, Ghost, Crystal, Fairy.<br /> | |
| '''Inefetivo:''' Normal, Fire, Flying, Bug, Dark.<br /> | |
| '''Nulo:''' Dragon.<br />
| |
| | |
| =Shiny Carbink=
| |
| | |
| == '''Informações Gerais''' ==
| |
| | |
| '''Nome:''' Shiny Carbink<br />
| |
| '''Level:''' 100<br />
| |
| '''Elemento:''' Rock e Fairy<br />
| |
| '''Habilidades:''' none.<br />
| |
| '''Boost:''' Ancient Stone (30)<br />
| |
| '''Materia:''' Orebound Superior e Psycraft Superior. <br />
| |
| | |
| == '''Evoluções''' ==
| |
| | |
| '''Carbink''' precisa de Level 100.
| |
| | |
| == '''Descrição:''' ==
| |
|
| |
|
| Ele aquece seu corpo absorvendo a luz do sol com suas asas. Quando a temperatura de seu corpo cai, não pode mais se mover.
| | <table class="seeMore"> |
| | <tr> |
| | <td class="seeMore__image">[[Arquivo:Telekinetic-compass.gif|link=]]</td> |
| | <td> '''Veja mais: [[Nightmare_Falkner|NPC Falkner]]'''</td> |
| | </tr> |
| | </table> |
|
| |
|
| == '''Movimentos PvE''' == | | == Experiência == |
| | |
| {| border="0" style="border-collapse:collapse"
| |
| |- align="center" style="background-color: #E6E6FA;"
| |
| ! rowspan="2" | M1
| |
| | width="10px" |
| |
| | align="left" | Charm (80s)
| |
| | width="50px" rowspan="2" |
| |
| | rowspan="2" align="right" | [[Arquivo:Self.png|Self]] [[Arquivo:Buff.png|Buff]]
| |
| | rowspan="2" | [[Arquivo:Fairy.png|Fairy|link=Psycraft]]
| |
| |- align="center" style="background-color: #E6E6FA;"
| |
| | width="10px" |
| |
| | align="left" | Level 100
| |
| | |
| |- align="center"
| |
| ! rowspan="2" | M2
| |
| | width="10px" |
| |
| | align="left" | Dazzling Gleam (12s)
| |
| | width="50px" rowspan="2" |
| |
| | rowspan="2" align="right" | [[Arquivo:Target.png|Target]] [[Arquivo:Damage.png|Damage]]
| |
| | rowspan="2" | [[Arquivo:Fairy.png|Fairy|link=Psycraft]]
| |
| |- align="center"
| |
| | width="10px" |
| |
| | align="left" | Level 104
| |
| | |
| |- align="center" style="background-color: #E6E6FA;"
| |
| ! rowspan="2" | M3
| |
| | width="10px" |
| |
| | align="left" | Stone Edge (15s)
| |
| | width="50px" rowspan="2" |
| |
| | rowspan="2" align="right" | [[Arquivo:Target.png|Target]] [[Arquivo:Damage.png|Damage]]
| |
| | rowspan="2" | [[Arquivo:Rock.png|Rock|link=Orebound]]
| |
| |- align="center" style="background-color: #E6E6FA;"
| |
| | width="10px" |
| |
| | align="left" | Level 100
| |
| | |
| |- align="center"
| |
| ! rowspan="2" | M4
| |
| | width="10px" |
| |
| | align="left" | Power Gem (22s)
| |
| | width="50px" rowspan="2" |
| |
| | rowspan="2" align="right" | [[Arquivo:AOE.png|AOE]] [[Arquivo:Damage.png|Damage]]
| |
| | rowspan="2" | [[Arquivo:Rock.png|Rock|link=Orebound]]
| |
| |- align="center"
| |
| | width="10px" |
| |
| | align="left" | Level 100
| |
| | |
| |- align="center" style="background-color: #E6E6FA;"
| |
| ! rowspan="2" | M5
| |
| | width="10px" |
| |
| | align="left" | Dazzling Burst (32s)
| |
| | width="50px" rowspan="2" |
| |
| | rowspan="2" align="right" | [[Arquivo:AOE.png|AOE]] [[Arquivo:Damage.png|Damage]]
| |
| | rowspan="2" | [[Arquivo:Fairy.png|Fairy|link=Psycraft]]
| |
| |- align="center" style="background-color: #E6E6FA;"
| |
| | width="10px" |
| |
| | align="left" | Level 100
| |
| | |
| |- align="center"
| |
| ! rowspan="2" | M6
| |
| | width="10px" |
| |
| | align="left" | Stealth Rock (60s)
| |
| | width="50px" rowspan="2" |
| |
| | rowspan="2" align="right" | [[Arquivo:AOE.png|AOE]] [[Arquivo:Damage.png|Damage]] [[Arquivo:Nevermiss.png|Nevermiss]]
| |
| | rowspan="2" | [[Arquivo:Rock.png|Rock|link=Orebound]]
| |
| |- align="center"
| |
| | width="10px" |
| |
| | align="left" | Level 110
| |
| | |
| |- align="center" style="background-color: #E6E6FA;"
| |
| ! rowspan="2" | M7
| |
| | width="10px" |
| |
| | align="left" | Moonblast (60s)
| |
| | width="50px" rowspan="2" |
| |
| | rowspan="2" align="right" | [[Arquivo:AOE.png|AOE]] [[Arquivo:Damage.png|Damage]] [[Arquivo:Silence.png|Silence]]
| |
| | rowspan="2" | [[Arquivo:Fairy.png|Fairy|link=Psycraft]]
| |
| |- align="center" style="background-color: #E6E6FA;"
| |
| | width="10px" |
| |
| | align="left" | Level 112
| |
| | |
| |- align="center"
| |
| ! rowspan="2" | M8
| |
| | width="10px" |
| |
| | align="left" | Misty Explosion (60s)
| |
| | width="50px" rowspan="2" |
| |
| | rowspan="2" align="right" | [[Arquivo:AOE.png|AOE]] [[Arquivo:Damage.png|Damage]] [[Arquivo:Blind.png|Blind]]
| |
| | rowspan="2" | [[Arquivo:Fairy.png|Fairy|link=Psycraft]]
| |
| |- align="center"
| |
| | width="10px" |
| |
| | align="left" | Level 112
| |
| | |
| |- align="center" style="background-color: #E6E6FA;"
| |
| ! rowspan="2" | M9
| |
| | width="10px" |
| |
| | align="left" | Sharpen (40s)
| |
| | width="50px" rowspan="2" |
| |
| | rowspan="2" align="right" | [[Arquivo:AOE.png|AOE]] [[Arquivo:Damage.png|Damage]] [[Arquivo:Buff.png|Buff]] [[Arquivo:Nevermiss.png|Nevermiss]]
| |
| | rowspan="2" | [[Arquivo:Normal1.png|Normal|link=Gardestrike]]
| |
| |- align="center" style="background-color: #E6E6FA;"
| |
| | width="10px" |
| |
| | align="left" | Level 100
| |
| | |
| |- align="center"
| |
| ! rowspan="2" | M10
| |
| | width="10px" |
| |
| | align="left" | Ally Switch (40s)
| |
| | width="50px" rowspan="2" |
| |
| | rowspan="2" align="right" | [[Arquivo:AOE.png|AOE]] [[Arquivo:Buff.png|Buff]] [[Arquivo:Nevermiss.png|Nevermiss]]
| |
| | rowspan="2" | [[Arquivo:Psychic.png|Psychic|link=Psycraft]]
| |
| |- align="center"
| |
| | width="10px" |
| |
| | align="left" | Level 100
| |
| | |
| |- align="center" style="background-color: #E6E6FA;"
| |
| ! rowspan="2" | P
| |
| | width="10px" |
| |
| | align="left" | Clear Body
| |
| | width="50px" rowspan="2" |
| |
| | rowspan="2" align="right" | [[Arquivo:Buff.png|Buff]]
| |
| | rowspan="2" | [[Arquivo:Steel.png|Steel|link=Ironhard]]
| |
| |- align="center" style="background-color: #E6E6FA;"
| |
| | width="10px" |
| |
| | align="left" | Level 100
| |
|
| |
|
| | Conforme a tabela abaixo, ao derrotar um Pokémon e ganhar, por exemplo, 100 de experiência, a quantidade obtida varia de acordo com o nível do personagem. <br><br> |
| | |
| | <center> |
| | {|class="wikitable" style="text-align:center" width="25%" |
| | |- |
| | ! width="15%" |Level |
| | ! width="15%" |Porcentagem Recebida |
| | |- |
| | | 200 até 249 || 10% |
| | |- |
| | | 250 até 299 || 70% |
| | |- |
| | | 300 até 349 || 100% |
| | |- |
| | | 350 até 399 || 90% |
| | |- |
| | | 400 até 424 || 50% |
| | |- |
| | | 425 até 449 || 40% |
| | |- |
| |} | | |} |
| | | </center><br> |
| == '''Movimentos PvP''' ==
| | |
| | | '''Exemplo''': Entre os níveis 200 e 249, são obtidos 10% da experiência total, equivalente a 10. Nos níveis 300 a 349, o valor recebido é de 100%, ou seja, 100. Já entre os níveis 400 e 424, é concedido 50% da experiência, resultando em 50. <br> |
| {| border="0" style="border-collapse:collapse"
| |
| |- align="center" style="background-color: #E6E6FA;"
| |
| ! rowspan="2" | M1
| |
| | width="10px" |
| |
| | align="left" | Charm (50s)
| |
| | width="50px" rowspan="2" |
| |
| | rowspan="2" align="right" | [[Arquivo:Self.png|Self]] [[Arquivo:Buff.png|Buff]]
| |
| | rowspan="2" | [[Arquivo:Fairy.png|Fairy|link=Psycraft]]
| |
| |- align="center" style="background-color: #E6E6FA;"
| |
| | width="10px" |
| |
| | align="left" | Level 100
| |
| | |
| |- align="center"
| |
| ! rowspan="2" | M2
| |
| | width="10px" |
| |
| | align="left" | Dazzling Gleam (12s)
| |
| | width="50px" rowspan="2" |
| |
| | rowspan="2" align="right" | [[Arquivo:Target.png|Target]] [[Arquivo:Damage.png|Damage]]
| |
| | rowspan="2" | [[Arquivo:Fairy.png|Fairy|link=Psycraft]]
| |
| |- align="center"
| |
| | width="10px" |
| |
| | align="left" | Level 104
| |
| | |
| |- align="center" style="background-color: #E6E6FA;"
| |
| ! rowspan="2" | M3
| |
| | width="10px" |
| |
| | align="left" | Stone Edge (15s)
| |
| | width="50px" rowspan="2" |
| |
| | rowspan="2" align="right" | [[Arquivo:Target.png|Target]] [[Arquivo:Damage.png|Damage]]
| |
| | rowspan="2" | [[Arquivo:Rock.png|Rock|link=Orebound]]
| |
| |- align="center" style="background-color: #E6E6FA;"
| |
| | width="10px" |
| |
| | align="left" | Level 100
| |
| | |
| |- align="center"
| |
| ! rowspan="2" | M4
| |
| | width="10px" |
| |
| | align="left" | Power Gem (22s)
| |
| | width="50px" rowspan="2" |
| |
| | rowspan="2" align="right" | [[Arquivo:AOE.png|AOE]] [[Arquivo:Damage.png|Damage]]
| |
| | rowspan="2" | [[Arquivo:Rock.png|Rock|link=Orebound]]
| |
| |- align="center"
| |
| | width="10px" |
| |
| | align="left" | Level 100
| |
| | |
| |- align="center" style="background-color: #E6E6FA;"
| |
| ! rowspan="2" | M5
| |
| | width="10px" |
| |
| | align="left" | Dazzling Burst (32s)
| |
| | width="50px" rowspan="2" |
| |
| | rowspan="2" align="right" | [[Arquivo:AOE.png|AOE]] [[Arquivo:Damage.png|Damage]]
| |
| | rowspan="2" | [[Arquivo:Fairy.png|Fairy|link=Psycraft]]
| |
| |- align="center" style="background-color: #E6E6FA;"
| |
| | width="10px" |
| |
| | align="left" | Level 100
| |
| | |
| |- align="center"
| |
| ! rowspan="2" | M6
| |
| | width="10px" |
| |
| | align="left" | Stealth Rock (60s)
| |
| | width="50px" rowspan="2" |
| |
| | rowspan="2" align="right" | [[Arquivo:AOE.png|AOE]] [[Arquivo:Damage.png|Damage]] [[Arquivo:Nevermiss.png|Nevermiss]]
| |
| | rowspan="2" | [[Arquivo:Rock.png|Rock|link=Orebound]]
| |
| |- align="center"
| |
| | width="10px" |
| |
| | align="left" | Level 110
| |
| | |
| |- align="center" style="background-color: #E6E6FA;"
| |
| ! rowspan="2" | M7
| |
| | width="10px" |
| |
| | align="left" | Moonblast (60s)
| |
| | width="50px" rowspan="2" |
| |
| | rowspan="2" align="right" | [[Arquivo:AOE.png|AOE]] [[Arquivo:Damage.png|Damage]] [[Arquivo:Silence.png|Silence]]
| |
| | rowspan="2" | [[Arquivo:Fairy.png|Fairy|link=Psycraft]]
| |
| |- align="center" style="background-color: #E6E6FA;"
| |
| | width="10px" |
| |
| | align="left" | Level 112
| |
| | |
| |- align="center"
| |
| ! rowspan="2" | M8
| |
| | width="10px" |
| |
| | align="left" | Misty Explosion (60s)
| |
| | width="50px" rowspan="2" |
| |
| | rowspan="2" align="right" | [[Arquivo:AOE.png|AOE]] [[Arquivo:Damage.png|Damage]] [[Arquivo:Blind.png|Blind]]
| |
| | rowspan="2" | [[Arquivo:Fairy.png|Fairy|link=Psycraft]]
| |
| |- align="center"
| |
| | width="10px" |
| |
| | align="left" | Level 112
| |
| | |
| |- align="center" style="background-color: #E6E6FA;"
| |
| ! rowspan="2" | M9
| |
| | width="10px" |
| |
| | align="left" | Sharpen (40s)
| |
| | width="50px" rowspan="2" |
| |
| | rowspan="2" align="right" | [[Arquivo:AOE.png|AOE]] [[Arquivo:Damage.png|Damage]] [[Arquivo:Buff.png|Buff]] [[Arquivo:Nevermiss.png|Nevermiss]]
| |
| | rowspan="2" | [[Arquivo:Normal1.png|Normal|link=Gardestrike]]
| |
| |- align="center" style="background-color: #E6E6FA;"
| |
| | width="10px" |
| |
| | align="left" | Level 100
| |
| | |
| |- align="center"
| |
| ! rowspan="2" | M10
| |
| | width="10px" |
| |
| | align="left" | Ally Switch (40s)
| |
| | width="50px" rowspan="2" |
| |
| | rowspan="2" align="right" | [[Arquivo:AOE.png|AOE]] [[Arquivo:Buff.png|Buff]] [[Arquivo:Nevermiss.png|Nevermiss]]
| |
| | rowspan="2" | [[Arquivo:Psychic.png|Psychic|link=Psycraft]]
| |
| |- align="center"
| |
| | width="10px" |
| |
| | align="left" | Level 100
| |
| | |
| |- align="center" style="background-color: #E6E6FA;"
| |
| ! rowspan="2" | P
| |
| | width="10px" |
| |
| | align="left" | Clear Body
| |
| | width="50px" rowspan="2" |
| |
| | rowspan="2" align="right" | [[Arquivo:Buff.png|Buff]]
| |
| | rowspan="2" | [[Arquivo:Steel.png|Steel|link=Ironhard]]
| |
| |- align="center" style="background-color: #E6E6FA;"
| |
| | width="10px" |
| |
| | align="left" | Level 100
| |
| | |
| |}
| |
| | |
| == '''Efetividades''' ==
| |
| | |
| '''Muito Efetivo:''' Steel.<br />
| |
| '''Efetivo:''' Water, Grass, Ground.<br />
| |
| '''Normal:''' Electric, Ice, Fighting, Poison, Psychic, Rock, Ghost, Crystal, Fairy.<br />
| |
| '''Inefetivo:''' Normal, Fire, Flying, Bug, Dark.<br />
| |
| '''Nulo:''' Dragon.<br />
| |
| | |
| =Togedemaru=
| |
| == '''Informações Gerais''' ==
| |
| | |
| '''Nome:''' Togedemaru<br />
| |
| '''Level:''' 80<br />
| |
| '''Elemento:''' Electric e Steel<br />
| |
| '''Habilidades:''' none.<br />
| |
| '''Boost:''' Thunder Stone (3)<br />
| |
| '''Materia:''' Raibolt Enhanced ou Ironhard Enhanced.<br />
| |
| | |
| == '''Evoluções''' ==
| |
| | |
| '''Togedemaru''' precisa de Level 80. | |
| | |
| == '''Descrição:''' ==
| |
| Quando está em apuros, ele se enrola em uma bola, deixa seus pelos eriçados e, então, descarrega eletricidade indiscriminadamente..
| |
| | |
| == '''Movimentos''' ==
| |
| | |
| {| border="0" style="border-collapse:collapse"
| |
| |- align="center" style="background-color: #E6E6FA;"
| |
| ! rowspan="2" | M1
| |
| | width="10px" |
| |
| | align="left" | Charge (50s)
| |
| | width="50px" rowspan="2" |
| |
| | rowspan="2" align="right" | [[Arquivo:Self.png|Self]] [[Arquivo:Buff.png|Buff]]
| |
| | rowspan="2" | [[Arquivo:Electric.png|Electric|link=Raibolt]]
| |
| |- align="center" style="background-color: #E6E6FA;"
| |
| | width="10px" |
| |
| | align="left" | Level 80
| |
| | |
| |- align="center"
| |
| ! rowspan="2" | M2
| |
| | width="10px" |
| |
| | align="left" | Spark (10s)
| |
| | width="50px" rowspan="2" |
| |
| | rowspan="2" align="right" | [[Arquivo:Target.png|Target]] [[Arquivo:Damage.png|Damage]]
| |
| | rowspan="2" | [[Arquivo:Electric.png|Electric|link=Raibolt]]
| |
| |- align="center"
| |
| | width="10px" |
| |
| | align="left" | Level 80
| |
| | |
| |- align="center" style="background-color: #E6E6FA;"
| |
| ! rowspan="2" | M3
| |
| | width="10px" |
| |
| | align="left" | Thunderbolt (80s)
| |
| | width="50px" rowspan="2" |
| |
| | rowspan="2" align="right" | [[Arquivo:Target.png|Target]] [[Arquivo:Damage.png|Damage]]
| |
| | rowspan="2" | [[Arquivo:Electric.png|Electric|link=Raibolt]]
| |
| |- align="center" style="background-color: #E6E6FA;"
| |
| | width="10px" |
| |
| | align="left" | Level 15
| |
| | |
| |- align="center"
| |
| ! rowspan="2" | M4
| |
| | width="10px" |
| |
| | align="left" | Nuzzle (30s)
| |
| | width="50px" rowspan="2" |
| |
| | rowspan="2" align="right" | [[Arquivo:AOE.png|AOE]] [[Arquivo:Damage.png|Damage]] [[Arquivo:Buff.png|Buff]]
| |
| | rowspan="2" | [[Arquivo:Electric.png|Electric|link=Raibolt]]
| |
| |- align="center"
| |
| | width="10px" |
| |
| | align="left" | Level 85
| |
| | |
| |- align="center" style="background-color: #E6E6FA;"
| |
| ! rowspan="2" | M5
| |
| | width="10px" |
| |
| | align="left" | Zing Zap (20s)
| |
| | width="50px" rowspan="2" |
| |
| | rowspan="2" align="right" | [[Arquivo:Target.png|Target]] [[Arquivo:Damage.png|Damage]]
| |
| | rowspan="2" | [[Arquivo:Electric.png|Electric|link=Raibolt]]
| |
| |- align="center"
| |
| | width="10px" |
| |
| | align="left" | Level 90
| |
| | |
| |- align="center"
| |
| ! rowspan="2" | M6
| |
| | width="10px" |
| |
| | align="left" | Charge Beam (25s)
| |
| | width="50px" rowspan="2" |
| |
| | rowspan="2" align="right" | [[Arquivo:AOE.png|AOE]] [[Arquivo:Damage.png|Damage]]
| |
| | rowspan="2" | [[Arquivo:Electric.png|Electric|link=Raibolt]]
| |
| |- align="center"
| |
| | width="10px" |
| |
| | align="left" | Level 80
| |
| | |
| |- align="center" style="background-color: #E6E6FA;"
| |
| ! rowspan="2" | M7
| |
| | width="10px" |
| |
| | align="left" | Thunder (50s)
| |
| | width="50px" rowspan="2" |
| |
| | rowspan="2" align="right" | [[Arquivo:AOE.png|AOE]] [[Arquivo:Damage.png|Damage]] [[Arquivo:Paralyze.png|Paralyze]]
| |
| | rowspan="2" | [[Arquivo:Electric.png|Electric|link=Raibolt]]
| |
| |- align="center" style="background-color: #E6E6FA;"
| |
| | width="10px" |
| |
| | align="left" | Level 80
| |
| | |
| |- align="center"
| |
| ! rowspan="2" | M8
| |
| | width="10px" |
| |
| | align="left" | Discharge (70s)
| |
| | width="50px" rowspan="2" |
| |
| | rowspan="2" align="right" | [[Arquivo:AOE.png|AOE]] [[Arquivo:Damage.png|Damage]]
| |
| | rowspan="2" | [[Arquivo:Electric.png|Electric|link=Raibolt]]
| |
| |- align="center"
| |
| | width="10px" |
| |
| | align="left" | Level 85
| |
| | |
| |- align="center" style="background-color: #E6E6FA;"
| |
| ! rowspan="2" | M9
| |
| | width="10px" |
| |
| | align="left" | Spiky Shield (70s)
| |
| | width="50px" rowspan="2" |
| |
| | rowspan="2" align="right" | [[Arquivo:Self.png|Self]] [[Arquivo:Buff.png|Buff]]
| |
| | rowspan="2" | [[Arquivo:Grass.png|Grass|link=Naturia]]
| |
| |- align="center" style="background-color: #E6E6FA;"
| |
| | width="10px" |
| |
| | align="left" | Level 80
| |
| | |
| |}
| |
| | |
| == '''Efetividades''' ==
| |
| | |
| '''Muito Efetivo:''' Ground.<br />
| |
| '''Efetivo:''' Fire, Fighting.<br />
| |
| '''Normal:''' Water, Ghost, Dark, Crystal.<br />
| |
| '''Inefetivo:''' Normal, Grass, Electric, Ice, Psychic, Bug, Rock, Dragon, Fairy.<br />
| |
| '''Muito Inefetivo:''' Flying, Steel.<br />
| |
| '''Nulo:''' Poison.<br />
| |
| | |
| =Shiny Togedemaru=
| |
| | |
| == '''Informações Gerais''' ==
| |
| | |
| '''Nome:''' Shiny Togedemaru<br />
| |
| '''Level:''' 100<br />
| |
| '''Elemento:''' Electric e Steel<br />
| |
| '''Habilidades:''' none.<br />
| |
| '''Boost:''' Thunder Stone (2)<br />
| |
| '''Materia:''' Raibolt Superior ou Ironhard Superior<br />
| |
| | |
| == '''Evoluções''' ==
| |
| | |
| '''Togedemaru''' precisa de Level 100.
| |
| | |
| == '''Descrição:''' ==
| |
| Quando está em apuros, ele se enrola em uma bola, deixa seus pelos eriçados e, então, descarrega eletricidade indiscriminadamente..
| |
| | |
| == '''Movimentos PvE''' ==
| |
| | |
| {| border="0" style="border-collapse:collapse"
| |
| |- align="center" style="background-color: #E6E6FA;"
| |
| ! rowspan="2" | M1
| |
| | width="10px" |
| |
| | align="left" | Charge (40s)
| |
| | width="50px" rowspan="2" |
| |
| | rowspan="2" align="right" | [[Arquivo:Self.png|Self]] [[Arquivo:Buff.png|Buff]]
| |
| | rowspan="2" | [[Arquivo:Electric.png|Electric|link=Raibolt]]
| |
| |- align="center" style="background-color: #E6E6FA;"
| |
| | width="10px" |
| |
| | align="left" | Level 100
| |
| | |
| |- align="center"
| |
| ! rowspan="2" | M2
| |
| | width="10px" |
| |
| | align="left" | Spark (8s)
| |
| | width="50px" rowspan="2" |
| |
| | rowspan="2" align="right" | [[Arquivo:Target.png|Target]] [[Arquivo:Damage.png|Damage]]
| |
| | rowspan="2" | [[Arquivo:Electric.png|Electric|link=Raibolt]]
| |
| |- align="center"
| |
| | width="10px" |
| |
| | align="left" | Level 100
| |
| | |
| |- align="center" style="background-color: #E6E6FA;"
| |
| ! rowspan="2" | M3
| |
| | width="10px" |
| |
| | align="left" | Thunderbolt (8s)
| |
| | width="50px" rowspan="2" |
| |
| | rowspan="2" align="right" | [[Arquivo:Target.png|Target]] [[Arquivo:Damage.png|Damage]]
| |
| | rowspan="2" | [[Arquivo:Electric.png|Electric|link=Raibolt]]
| |
| |- align="center" style="background-color: #E6E6FA;"
| |
| | width="10px" |
| |
| | align="left" | Level 100
| |
| | |
| |- align="center"
| |
| ! rowspan="2" | M4
| |
| | width="10px" |
| |
| | align="left" | Nuzzle (60s)
| |
| | width="50px" rowspan="2" |
| |
| | rowspan="2" align="right" | [[Arquivo:AOE.png|AOE]] [[Arquivo:Damage.png|Damage]] [[Arquivo:Buff.png|Buff]]
| |
| | rowspan="2" | [[Arquivo:Electric.png|Electric|link=Raibolt]]
| |
| |- align="center"
| |
| | width="10px" |
| |
| | align="left" | Level 100
| |
| | |
| |- align="center" style="background-color: #E6E6FA;"
| |
| ! rowspan="2" | M5
| |
| | width="10px" |
| |
| | align="left" | Zing Zap (30s)
| |
| | width="50px" rowspan="2" |
| |
| | rowspan="2" align="right" | [[Arquivo:Target.png|Target]] [[Arquivo:Damage.png|Damage]]
| |
| | rowspan="2" | [[Arquivo:Electric.png|Electric|link=Raibolt]]
| |
| |- align="center" style="background-color: #E6E6FA;"
| |
| | width="10px" |
| |
| | align="left" | Level 110
| |
| | |
| |- align="center"
| |
| ! rowspan="2" | M6
| |
| | width="10px" |
| |
| | align="left" | Charge Beam (20s)
| |
| | width="50px" rowspan="2" |
| |
| | rowspan="2" align="right" | [[Arquivo:AOE.png|AOE]] [[Arquivo:Damage.png|Damage]]
| |
| | rowspan="2" | [[Arquivo:Electric.png|Electric|link=Raibolt]]
| |
| |- align="center"
| |
| | width="10px" |
| |
| | align="left" | Level 100
| |
| | |
| |- align="center" style="background-color: #E6E6FA;"
| |
| ! rowspan="2" | M7
| |
| | width="10px" |
| |
| | align="left" | Wish (8s)
| |
| | width="50px" rowspan="2" |
| |
| | rowspan="2" align="right" | [[Arquivo:AOE.png|AOE]] [[Arquivo:HealingStatus.png|Healing]] [[Arquivo:Nevermiss.png|Nevermiss]]
| |
| | rowspan="2" | [[Arquivo:NeutralICON.png|Neutral|link=Clãs]]
| |
| |- align="center" style="background-color: #E6E6FA;"
| |
| | width="10px" |
| |
| | align="left" | Level 104
| |
| | |
| |- align="center"
| |
| ! rowspan="2" | M8
| |
| | width="10px" |
| |
| | align="left" | Present (20s)
| |
| | width="50px" rowspan="2" |
| |
| | rowspan="2" align="right" | [[Arquivo:AOE.png|AOE]] [[Arquivo:HealingStatus.png|Healing]]
| |
| | rowspan="2" | [[Arquivo:NeutralICON.png|Neutral|link=Clãs]]
| |
| |- align="center"
| |
| | width="10px" |
| |
| | align="left" | Level 104
| |
| | |
| |- align="center" style="background-color: #E6E6FA;"
| |
| ! rowspan="2" | M9
| |
| | width="10px" |
| |
| | align="left" | Spiky Shield (60s)
| |
| | width="50px" rowspan="2" |
| |
| | rowspan="2" align="right" | [[Arquivo:Self.png|Self]] [[Arquivo:Buff.png|Buff]]
| |
| | rowspan="2" | [[Arquivo:Grass.png|Grass|link=Naturia]]
| |
| |- align="center" style="background-color: #E6E6FA;"
| |
| | width="10px" |
| |
| | align="left" | Level 100
| |
| | |
| |}
| |
| | |
| == '''Movimentos PvP''' ==
| |
| | |
| {| border="0" style="border-collapse:collapse"
| |
| |- align="center" style="background-color: #E6E6FA;"
| |
| ! rowspan="2" | M1
| |
| | width="10px" |
| |
| | align="left" | Charge (40s)
| |
| | width="50px" rowspan="2" |
| |
| | rowspan="2" align="right" | [[Arquivo:Self.png|Self]] [[Arquivo:Buff.png|Buff]]
| |
| | rowspan="2" | [[Arquivo:Electric.png|Electric|link=Raibolt]]
| |
| |- align="center" style="background-color: #E6E6FA;"
| |
| | width="10px" |
| |
| | align="left" | Level 100
| |
| | |
| |- align="center"
| |
| ! rowspan="2" | M2
| |
| | width="10px" |
| |
| | align="left" | Spark (10s)
| |
| | width="50px" rowspan="2" |
| |
| | rowspan="2" align="right" | [[Arquivo:Target.png|Target]] [[Arquivo:Damage.png|Damage]]
| |
| | rowspan="2" | [[Arquivo:Electric.png|Electric|link=Raibolt]]
| |
| |- align="center"
| |
| | width="10px" |
| |
| | align="left" | Level 100
| |
| | |
| |- align="center" style="background-color: #E6E6FA;"
| |
| ! rowspan="2" | M3
| |
| | width="10px" |
| |
| | align="left" | Thunderbolt (15s)
| |
| | width="50px" rowspan="2" |
| |
| | rowspan="2" align="right" | [[Arquivo:Target.png|Target]] [[Arquivo:Damage.png|Damage]]
| |
| | rowspan="2" | [[Arquivo:Electric.png|Electric|link=Raibolt]]
| |
| |- align="center" style="background-color: #E6E6FA;"
| |
| | width="10px" |
| |
| | align="left" | Level 100
| |
| | |
| |- align="center"
| |
| ! rowspan="2" | M4
| |
| | width="10px" |
| |
| | align="left" | Nuzzle (25s)
| |
| | width="50px" rowspan="2" |
| |
| | rowspan="2" align="right" | [[Arquivo:AOE.png|AOE]] [[Arquivo:Damage.png|Damage]] [[Arquivo:Buff.png|Buff]]
| |
| | rowspan="2" | [[Arquivo:Electric.png|Electric|link=Raibolt]]
| |
| |- align="center"
| |
| | width="10px" |
| |
| | align="left" | Level 100
| |
| | |
| |- align="center" style="background-color: #E6E6FA;"
| |
| ! rowspan="2" | M5
| |
| | width="10px" |
| |
| | align="left" | Zing Zap (20s)
| |
| | width="50px" rowspan="2" |
| |
| | rowspan="2" align="right" | [[Arquivo:Target.png|Target]] [[Arquivo:Damage.png|Damage]]
| |
| | rowspan="2" | [[Arquivo:Electric.png|Electric|link=Raibolt]]
| |
| |- align="center" style="background-color: #E6E6FA;"
| |
| | width="10px" |
| |
| | align="left" | Level 110
| |
| | |
| |- align="center"
| |
| ! rowspan="2" | M6
| |
| | width="10px" |
| |
| | align="left" | Charge Beam (20s)
| |
| | width="50px" rowspan="2" |
| |
| | rowspan="2" align="right" | [[Arquivo:AOE.png|AOE]] [[Arquivo:Damage.png|Damage]]
| |
| | rowspan="2" | [[Arquivo:Electric.png|Electric|link=Raibolt]]
| |
| |- align="center"
| |
| | width="10px" |
| |
| | align="left" | Level 100
| |
| | |
| |- align="center" style="background-color: #E6E6FA;"
| |
| ! rowspan="2" | M7
| |
| | width="10px" |
| |
| | align="left" | Wish (80s)
| |
| | width="50px" rowspan="2" |
| |
| | rowspan="2" align="right" | [[Arquivo:AOE.png|AOE]] [[Arquivo:HealingStatus.png|Healing]] [[Arquivo:Nevermiss.png|Nevermiss]]
| |
| | rowspan="2" | [[Arquivo:NeutralICON.png|Neutral|link=Clãs]]
| |
| |- align="center" style="background-color: #E6E6FA;"
| |
| | width="10px" |
| |
| | align="left" | Level 104
| |
| | |
| |- align="center"
| |
| ! rowspan="2" | M8
| |
| | width="10px" |
| |
| | align="left" | Present (60s)
| |
| | width="50px" rowspan="2" |
| |
| | rowspan="2" align="right" | [[Arquivo:AOE.png|AOE]] [[Arquivo:HealingStatus.png|Healing]]
| |
| | rowspan="2" | [[Arquivo:NeutralICON.png|Neutral|link=Clãs]]
| |
| |- align="center"
| |
| | width="10px" |
| |
| | align="left" | Level 104
| |
| | |
| |- align="center" style="background-color: #E6E6FA;"
| |
| ! rowspan="2" | M9
| |
| | width="10px" |
| |
| | align="left" | Spiky Shield (60s)
| |
| | width="50px" rowspan="2" |
| |
| | rowspan="2" align="right" | [[Arquivo:Self.png|Self]] [[Arquivo:Buff.png|Buff]]
| |
| | rowspan="2" | [[Arquivo:Grass.png|Grass|link=Naturia]]
| |
| |- align="center" style="background-color: #E6E6FA;"
| |
| | width="10px" |
| |
| | align="left" | Level 100
| |
| | |
| |}
| |
| | |
| == '''Efetividades''' ==
| |
| | |
| '''Muito Efetivo:''' Ground.<br />
| |
| '''Efetivo:''' Fire, Fighting.<br />
| |
| '''Normal:''' Water, Ghost, Dark, Crystal.<br />
| |
| '''Inefetivo:''' Normal, Grass, Electric, Ice, Psychic, Bug, Rock, Dragon, Fairy.<br />
| |
| '''Muito Inefetivo:''' Flying, Steel.<br />
| |
| '''Nulo:''' Poison.<br />
| |
 Shiny Snorlax é o Shiny encontrado neste local e é mais forte que os Pokémon normais, exigindo cuidado ao enfrentá-lo. Ele é um Pokémon Tier 1 A, muito raro e valioso.
 Angry Litleo é o Pokémon Angry deste local e exige cuidado devido à sua força e agressividade. Esse Angry pode dropar o item
  Solified Aura e é possível trocar com o NPC The Duke (Resistance) por itens raros exclusivos do Nightmare World.
 Nightmare Shield Elixir para aumentar a defesa do personagem.
 Lum Berry pode ser útil devido aos status negativos que usam.
 Chilan Berry ajuda para resistir ao elemento
  Normal.
 Fire, portanto,
  Occa Berry pode ser útil.
 Minor Nightmare Crystal em seu lugar.


 Elite Farfetch'D é o Boss encontrado neste local e é mais forte que os Pokémon normais, exigindo cuidado ao enfrentá-lo. Esse Pokémon utiliza ataques do tipo
  Flying.
 Sirfetch'd é o Pokémon Angry deste local e exige cuidado devido à sua força e agressividade. É uma ótima oportunidade para tentar a captura deste Pokémon. Esse Angry pode dropar o item
  Chople Berry ajuda para resistir ao elemento
  Fighting.