|
|
| (25 revisões intermediárias por 7 usuários não estão sendo mostradas) |
| Linha 1: |
Linha 1: |
| <center> [[Arquivo:Em_desenvolvimento.jpg|link=]] </center> <br /><br /> | | <center>[[file:Banner Clã Orebound.png|link=]]<br></center> |
|
| |
|
| <center>[[Arquivo:Ore.png|link=Orebound Tasks]]</center>
| | =Introdução= |
| | Para escolher seu clã, o jogador deve ir até os portais na área norte do Trade Center. Pode acessar dessa forma, ou subindo as escadas após a seção de profissões. O portal para os domínios do clã '''Orebound''' é representado por um Steelix. |
|
| |
|
| ==<center>Tasks Rank 1 ao 2 (Level 90)</center>==
| |
| <br />
| |
| <center> | | <center> |
| {|class="wikitable" width="40%" align="center" text-align="center" | | <br> |
| ! colspan="2" style="background-color: #802b00" | <span style="color: white">'''Coletar'''</span> | | [[Arquivo:Porta Clãs.gif|link=]] |
| |-style="width:50px; text-align:center;" | | </center> |
| ! | Quantidade
| | |
| ! | Item | | <br> |
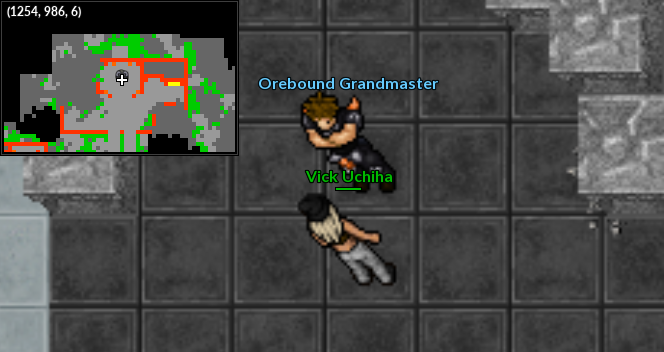
| |-style="width:50px; text-align:center;" | | Ao atravessar o portal, o jogador deve encontrar o NPC '''Orebound Grandmaster''', responsável pelo recrutamento de novos membros. Ao ingressar no clã, o jogador receberá o título de '''Orebound Sand''', o primeiro dos cinco rankings disponíveis. |
| | '''2.000''' | | |
| | Small Stones | | <center> |
| |-style="width:50px; text-align:center;" | | <br> |
| | '''2.000''' | | [[Arquivo:NPC Orebound Grandmaster.png|link=]] |
| | Earth Balls | | </center> |
| |-style="width:50px; text-align:center;" | | |
| | '''10''' | | ==Tasks== |
| | Piece of Diglett | | |
| | Para progredir no clã escolhido, o jogador deve concluir uma série de tarefas divididas em etapas. Essas etapas incluem coletar itens, capturar Pokémon, derrotar Pokémon selvagens com o Pokémon capturado e, por fim, enfrentar as Danger Rooms. O jogador deve conversar com os treinadores de cada ranking para receber suas missões. Não é possível pular etapas, a progressão segue a ordem: '''Sand''', '''Rock''', '''Solid''', '''Hardskin''' e, por fim, o ranking máximo, '''Hero/Heroine''' (dependendo do gênero do personagem). |
| | |
| | <center> |
| | <br> |
| | {| class="wikitable" style="width: 30%; text-align: center" |
| | |- |
| | ! colspan="2" | Requisitos |
| | |- |
| | ! style="width: 50%" | Task |
| | ! style="width: 50%" | Nível |
| | |- |
| | | Rank 1 ao 2 || 90 |
| | |- |
| | | Rank 2 ao 3 || 100 |
| | |- |
| | | Rank 3 ao 4 || 110 |
| | |- |
| | | Rank 4 ao 5 || 120 |
| | |} |
| | |
| | </center> |
| | |
| | <br> |
| | '''Dicas''': |
| | * Os itens solicitados na primeira etapa de cada tarefa podem ser comprados de outros jogadores. |
| | * Durante a etapa de captura, a taxa de captura de todas as Pokéballs é igualada. Portanto, recomenda-se o uso de Pokéballs comuns para evitar gastos desnecessários. |
| | * Na etapa de combate contra Pokémon selvagens, é possível utilizar uma cópia do Pokémon capturado feita com um Ditto ou Shiny Ditto. Há também a possibilidade de utilizar um Pokémon com boost e/ou held item para facilitar a task durante esta etapa. |
| | * Não é possível equipar helds nem boosts nos Pokémon capturados com a task do clã. |
| | * Para a etapa de combate contra Pokémon selvagens, há a opção de derrotar Pokémon na Outland e no continente de Orre para completar a tarefa. |
| | |
| | <tabber> |
| | |-|Rank 1 ao 2= |
| | |
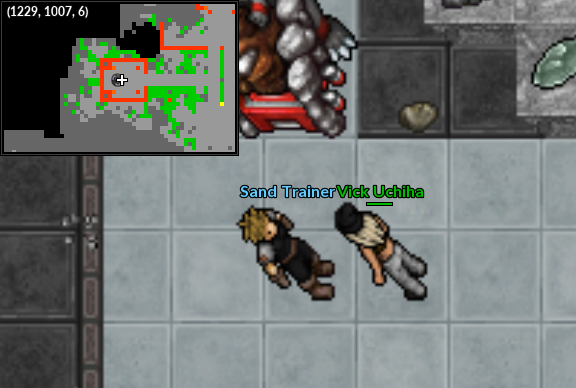
| | Para iniciar a primeira tarefa, o jogador deve conversar com o NPC Sand Trainer, localizado a oeste da área do clã Orebound. |
| | |
| | <center> <br> |
| | [[Arquivo:NPC Orebound Sand Trainer.png|link=]] |
| | </center> |
| | |
| | <center> |
| | <br> |
| | {|class="wikitable" width="45%" align="center" style="text-align:center;" |
| | ! colspan="2" style="background-color: #E84B16" | <span>'''Etapa 1 - Coletar'''</span> |
| | |- |
| | ! width="50%" | Quantidade |
| | ! width="50%" | Item |
| | |- |
| | | '''1.500''' || [[Arquivo:Smallstone.png|link=Drop de Itens]] Small Stones |
| | |- |
| | | '''1.500''' || [[Arquivo:EarthBall.png|link=Drop de Itens]] Earth Balls |
| | |- |
| | | '''5''' || [[Arquivo:Piece_Of_Diglett.png|link=Drop de Itens]] Piece of Diglett |
| |} | | |} |
| <br /> | | </center> |
| {|class="wikitable" width="40%" align="center" text-align="center" | | |
| ! colspan="2" style="background-color: #802b00" | <span style="color: white">'''Capturar'''</span> | | <center> |
| |-style="width:50px; text-align:center;" | | <br> |
| ! width="20%" |
| | {|class="wikitable" width="45%" align="center" text-align="center" |
| ! | Pokémon
| | ! colspan="2" style="background-color: #E84B16" | <span>'''Etapa 2 - Capturar'''</span> |
| |-style="width:50px; text-align:center;"
| | |-style="width:40px; text-align:center;" |
| | [[Arquivo:105-Marowak.png|link=Marowak]] | | |
| | Marowak
| | | width="33%" | [[Arquivo:105-Marowak.png|link=Marowak]]<br />Marowak |
| |} | | |} |
| <br /> | | </center> |
| {|class="wikitable" width="40%" align="center" text-align="center" | | |
| ! colspan="3" style="background-color: #802b00" | <span style="color: white">'''Derrotar (1ª Lista)'''</span> | | <center> |
| |-style="width:50px; text-align:center;" | | <br> |
| | [[Arquivo:095-Onix.png|link=Onix]]<br />'''60''' Onix | | {|class="wikitable" width="45%" align="center" text-align="center" |
| | [[Arquivo:082-Magneton.png|link=Magneton]]<br />'''60''' Magneton | | ! colspan="2" style="background-color: #E84B16" | <span>'''Etapa 3 - Derrotar (1ª Lista)'''</span> |
| | [[Arquivo:078-Rapidash.png|link=Rapidash]]<br />'''30''' Rapidash | | |-style="text-align:center;" |
| |-style="width:50px; text-align:center;" | | | width="50%" | [[Arquivo:025-Pikachu.png|link=Pikachu]]<br />'''45''' Pikachu |
| | [[Arquivo:005-Charmeleon.png|link=Charmeleon]]<br />'''80''' Charmeleon | | | width="50%" | [[Arquivo:156-Quilava.png|link=Quilava]]<br />'''45''' Quilava |
| | [[Arquivo:024-Arbok.png|link=Arbok]]<br />'''80''' Arbok | | |-style="text-align:center;" |
| | | width="50%" | [[Arquivo:005-Charmeleon.png|link=Charmeleon]]<br />'''40''' Charmeleon |
| | | width="50%" | [[Arquivo:024-Arbok.png|link=Arbok]]<br />'''20''' Arbok |
| |} | | |} |
| <br /> | | </center> |
| {|class="wikitable" width="40%" align="center" text-align="center" | | |
| ! colspan="2" style="background-color: #802b00" | <span style="color: white">'''Derrotar (2ª Lista)'''</span> | | <center> |
| |-style="width:50px; text-align:center;" | | <br> |
| | [[Arquivo:034-Nidoking.png|link=Nidoking]]<br />'''35''' Nidoking | | {|class="wikitable" width="45%" align="center" text-align="center" |
| | [[Arquivo:031-Nidoqueen.png|link=Nidoqueen]]<br />'''35''' Nidoqueen | | ! colspan="2" style="background-color: #E84B16" | <span>'''Etapa 4 - Derrotar (2ª Lista)'''</span> |
| |-style="width:50px; text-align:center;" | | |-style="text-align:center;" |
| | [[Arquivo:125-Electabuzz.png|link=Electabuzz]]<br />'''60''' Electabuzz | | | width="50%" | [[Arquivo:026-Raichu.png|link=Raichu]]<br />'''30''' Raichu |
| | [[Arquivo:038-Ninetales.png|link=Ninetales]]<br />'''50''' Ninetales | | | width="50%" | [[Arquivo:181-Ampharos.png|link=Ampharos]]<br />'''30''' Ampharos |
| | |-style="text-align:center;" |
| | | width="50%" | [[Arquivo:076-Golem.png|link=Golem]]<br />'''25''' Golem |
| | | width="50%" | [[Arquivo:082-Magneton.png|link=Magneton]]<br />'''25''' Magneton |
| |} | | |} |
| <br /> | | </center> |
| {|class="wikitable" width="40%" align="center" text-align="center" | | |
| ! colspan="3" style="background-color: #802b00" | <span style="color: white">'''Danger Room Team'''</span> | | <br>Depois dessas etapas, você deve ir até o portal da [[Danger Room]] e completar duas salas diferentes. |
| |-style="width:50px; text-align:center;" | | * O jogador poderá usar revives infinitos dentro da dungeon. |
| | [[Arquivo:305-Lairon.png|link=Lairon]]<br />Lairon | | * Para passar pelo portal, o jogador deve deixar os Pokémon no locker. Há um próximo ao portal. |
| | [[Arquivo:195-Quagsire.png|link=Quagsire]]<br />Quagsire | | * O jogador poderá usar ajudantes dentro da Danger Room, como o Mew/Mewtwo Card ou outros ajudantes. |
| | [[Arquivo:105-Marowak.png|link=Marowak]]<br />Marowak | | * Ao entrar, o jogador receberá os Pokémon da Danger Room para essa etapa. |
| |-style="width:50px; text-align:center;" | | |
| | [[Arquivo:051-Dugtrio.png|link=Dugtrio]]<br />Dugtrio | | <br> |
| | [[Arquivo:095-Onix.png|link=Onix]]<br />Onix | | <center> |
| | [[Arquivo:111-Rhyhorn.png|link=Rhyhorn]]<br />Rhyhorn | | [[Arquivo:DR Clã Orebound.png|link=]] |
| | </center> |
| | |
| | <center> |
| | {|class="wikitable" width="45%" align="center" text-align="center" |
| | ! colspan="3" style="background-color: #E84B16" | <span>'''Danger Room Team'''</span> |
| | |-style="text-align:center;" |
| | | width="33%" | [[Arquivo:305-Lairon.png|link=Lairon]]<br />Lairon |
| | | width="33%" | [[Arquivo:195-Quagsire.png|link=Quagsire]]<br />Quagsire |
| | | width="33%" | [[Arquivo:105-Marowak.png|link=Marowak]]<br />Marowak |
| | |-style="text-align:center;" |
| | | width="33%" | [[Arquivo:329-Vibrava.png|link=Vibrava]]<br />Vibrava |
| | | width="33%" | [[Arquivo:095-Onix.png|link=Onix]]<br />Onix |
| | | width="33%" | [[Arquivo:247-Pupitar.png|link=Pupitar]]<br />Pupitar |
| |} | | |} |
| </center> | | </center> |
|
| | |
|
| | <br>Após concluir duas salas da Danger Room e conversar com o NPC Trainer do clã, o jogador receberá '''100.000''' de experiência e uma [[Arquivo:Earth-stone.gif|link=Pedras de Evolução]] Earth Stone. |
| ==<center>Tasks Rank 2 ao 3 (Level 100)</center>==
| | |
| <br /> | | |-|Rank 2 ao 3= |
| | |
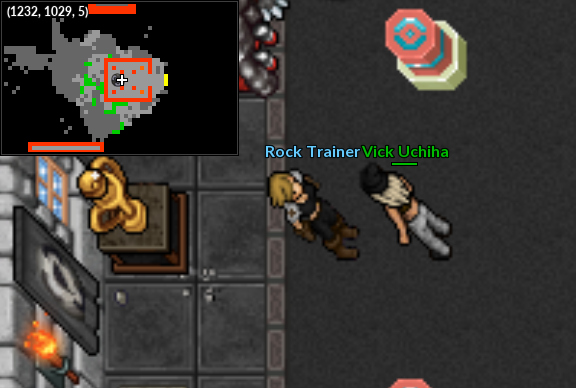
| | Para iniciar a segunda tarefa, o jogador deve conversar com o NPC Rock Trainer. |
| | |
| | <center> <br> |
| | [[Arquivo:NPC Orebound Rock Trainer.png|link=]] |
| | </center> |
| | |
| <center> | | <center> |
| {|class="wikitable" width="40%" align="center" text-align="center" | | <br> |
| ! colspan="2" style="background-color: #802b00" | <span style="color: white">'''Coletar'''</span> | | {|class="wikitable" width="45%" align="center" style="text-align:center;" |
| |-style="width:50px; text-align:center;" | | ! colspan="2" style="background-color: #E84B16" | <span>'''Etapa 1 - Coletar'''</span> |
| ! | Quantidade
| | |- |
| ! | Item | | ! width="50%" | Quantidade |
| |-style="width:50px; text-align:center;" | | ! width="50%" | Item |
| | '''2.500''' | | |- |
| | Small Stones | | | '''2.000''' || [[Arquivo:Smallstone.png|link=Drop de Itens]] Small Stones |
| |-style="width:50px; text-align:center;" | | |- |
| | '''2.500''' | | | '''2.000''' || [[Arquivo:EarthBall.png|link=Drop de Itens]] Earth Balls |
| | Earth Balls | | |- |
| |-style="width:50px; text-align:center;" | | | '''10''' || [[Arquivo:Bone.png|link=Drop de Itens]] Bones |
| | '''15''' | |
| | Bones | |
| |} | | |} |
| <br /> | | </center> |
| {|class="wikitable" width="40%" align="center" text-align="center" | | |
| ! colspan="2" style="background-color: #802b00" | <span style="color: white">'''Capturar'''</span> | | <center> |
| |-style="width:50px; text-align:center;" | | <br> |
| ! width="20%" |
| | {|class="wikitable" width="45%" align="center" text-align="center" |
| ! | Pokémon
| | ! colspan="2" style="background-color: #E84B16" | <span>'''Etapa 2 - Capturar'''</span> |
| |-style="width:50px; text-align:center;"
| | |-style="width:40px; text-align:center;" |
| | [[Arquivo:095-Onix.png|link=Onix]] | | |
| | Onix
| | | width="33%" | [[Arquivo:028-Sandslash.png|link=Sandslash]]<br />Sandslash |
| |} | | |} |
| <br /> | | </center> |
| {|class="wikitable" width="40%" align="center" text-align="center" | | |
| ! colspan="2" style="background-color: #802b00" | <span style="color: white">'''Derrotar (1ª Lista)'''</span> | | <br>Em 15/12/2021, a lista de Pokémon exigidos para as tarefas de clã foi atualizada. Jogadores que já estavam nessa fase antes da alteração deverão entregar um [[Arquivo:095-Onix.png|link=Onix]] '''Onix''' em vez de um [[Arquivo:028-Sandslash.png|link=Sandslash]] '''Sandslash'''. |
| |-style="width:50px; text-align:center;" | | |
| | [[Arquivo:049-Venomoth.png|link=Venomoth]]<br />'''60''' Venomoth | | <center> |
| | [[Arquivo:093-Haunter.png|link=Haunter]]<br />'''75''' Haunter | | <br> |
| |-style="width:50px; text-align:center;" | | {|class="wikitable" width="45%" align="center" text-align="center" |
| | [[Arquivo:075-Graveler.png|link=Graveler]]<br />'''100''' Graveler | | ! colspan="2" style="background-color: #E84B16" | <span>'''Etapa 3 - Derrotar (1ª Lista)'''</span> |
| | [[Arquivo:064-Kadabra.png|link=Kadabra]]<br />'''100''' Kadabra | | |-style="text-align:center;" |
| | | width="50%" | [[Arquivo:038-Ninetales.png|link=Ninetales]]<br />'''30''' Ninetales |
| | | width="50%" | [[Arquivo:157-Typhlosion.png|link=Typhlosion]]<br />'''40''' Typhlosion |
| | |-style="text-align:center;" |
| | | width="50%" | [[Arquivo:219-Magcargo.png|link=Magcargo]]<br />'''40''' Magcargo |
| | | width="50%" | [[Arquivo:089-Muk.png|link=Muk]]<br />'''40''' Muk |
| |} | | |} |
| <br /> | | </center> |
| {|class="wikitable" width="40%" align="center" text-align="center" | | |
| ! colspan="2" style="background-color: #802b00" | <span style="color: white">'''Derrotar (2ª Lista)'''</span> | | <center> |
| |-style="width:50px; text-align:center;" | | <br> |
| | [[Arquivo:065-Alakazam.png|link=Alakazam]]<br />'''45''' Alakazam | | {|class="wikitable" width="45%" align="center" text-align="center" |
| | [[Arquivo:112-Rhydon.png|link=Rhydon]]<br />'''50''' Rhydon | | ! colspan="2" style="background-color: #E84B16" | <span>'''Etapa 4 - Derrotar (2ª Lista)'''</span> |
| |-style="width:50px; text-align:center;" | | |-style="text-align:center;" |
| | [[Arquivo:076-Golem.png|link=Golem]]<br />'''50''' Golem | | | width="50%" | [[Arquivo:028-Sandslash.png|link=Sandslash]]<br />'''30''' Sandslash |
| | [[Arquivo:105-Marowak.png|link=Marowak]]<br />'''45''' Marowak | | | width="50%" | [[Arquivo:237-Hitmontop.png|link=Hitmontop]]<br />'''40''' Hitmontop |
| | |-style="text-align:center;" |
| | | width="50%" | [[Arquivo:107-HitmonchanNormal.png|link=Hitmonchan]]<br />'''40''' Hitmonchan |
| | | width="50%" | [[Arquivo:106-HitmonleeNormal.png|link=Hitmonlee]]<br />'''40''' Hitmonlee |
| |} | | |} |
| <br /> | | </center> |
| {|class="wikitable" width="40%" align="center" text-align="center" | | |
| ! colspan="3" style="background-color: #802b00" | <span style="color: white">'''Danger Room Team'''</span> | | <br>Depois dessas etapas, você deve ir até o portal da [[Danger Room]] e completar duas salas diferentes. |
| | * O jogador poderá usar revives infinitos dentro da dungeon. |
| | * Para passar pelo portal, o jogador deve deixar os Pokémon no locker. Há um próximo ao portal. |
| | * O jogador poderá usar ajudantes dentro da Danger Room, como o Mew/Mewtwo Card ou outros ajudantes. |
| | * Ao entrar, o jogador receberá os Pokémon da Danger Room para essa etapa. |
| | |
| | <br> |
| | <center> |
| | [[Arquivo:DR Clã Orebound.png|link=]] |
| | </center> |
| | |
| | <center> |
| | <br> |
| | {|class="wikitable" width="45%" align="center" text-align="center" |
| | ! colspan="3" style="background-color: #E84B16" | <span>'''Danger Room Team'''</span> |
| |-style="width:50px; text-align:center;" | | |-style="width:50px; text-align:center;" |
| | [[Arquivo:028-Sandslash.png|link=Sandslash]]<br />Sandslash | | | [[Arquivo:221-Piloswine.png|link=Piloswine]]<br />Piloswine |
| | [[Arquivo:139-Omastar.png|link=Omastar]]<br />Omastar | | | [[Arquivo:139-Omastar.png|link=Omastar]]<br />Omastar |
| | [[Arquivo:141-Kabutops.png|link=Kabutops]]<br />Kabutops | | | [[Arquivo:141-Kabutops.png|link=Kabutops]]<br />Kabutops |
| Linha 128: |
Linha 224: |
| |} | | |} |
| </center> | | </center> |
|
| | |
| ==<center>Tasks Rank 3 ao 4 (Level 110)</center>== | | <br>Após concluir duas salas da Danger Room e conversar com o NPC Trainer do clã, o jogador receberá '''200.000''' de experiência, uma [[Arquivo:Earth-stone.gif|link=Pedras de Evolução]] Earth Stone e uma [[Arquivo:Rock-stone.gif|link=Pedras de Evolução]] Rock Stone. |
| <br /> | | |
| | |-|Rank 3 ao 4= |
| | |
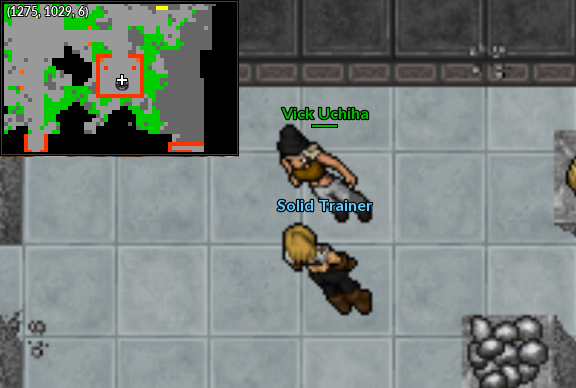
| | Para iniciar a terceira tarefa, o jogador deve conversar com o NPC Solid Trainer. |
| | |
| | <center> <br> |
| | [[Arquivo:NPC Orebound Solid Trainer.png|link=]] |
| | </center> |
| | |
| <center> | | <center> |
| {|class="wikitable" width="40%" align="center" text-align="center" | | <br> |
| ! colspan="2" style="background-color: #802b00" | <span style="color: white">'''Coletar'''</span> | | {|class="wikitable" width="45%" align="center" style="text-align:center;" |
| |-style="width:50px; text-align:center;" | | ! colspan="2" style="background-color: #E84B16" | <span>'''Etapa 1 - Coletar'''</span> |
| ! | Quantidade
| | |- |
| ! | Item | | ! width="50%" | Quantidade |
| |-style="width:50px; text-align:center;" | | ! width="50%" | Item |
| | '''3.000''' | | |- |
| | Small Stones | | | '''2.500''' || [[Arquivo:Smallstone.png|link=Drop de Itens]] Small Stones |
| |-style="width:50px; text-align:center;" | | |- |
| | '''3.000''' | | | '''2.500''' || [[Arquivo:EarthBall.png|link=Drop de Itens]] Earth Balls |
| | Earth Balls | | |- |
| |-style="width:50px; text-align:center;" | | | '''15''' || [[Arquivo:Strange_Rock.png|link=Drop de Itens]] Strange Rock |
| | '''20''' | |
| | Onix Tail | |
| |} | | |} |
| <br /> | | </center> |
| {|class="wikitable" width="40%" align="center" text-align="center" | | |
| ! colspan="2" style="background-color: #802b00" | <span style="color: white">'''Capturar'''</span> | | <center> |
| |-style="width:50px; text-align:center;" | | <br> |
| ! width="20%" |
| | {|class="wikitable" width="45%" align="center" text-align="center" |
| ! | Pokémon
| | ! colspan="2" style="background-color: #E84B16" | <span>'''Etapa 2 - Capturar'''</span> |
| |-style="width:50px; text-align:center;"
| | |-style="width:40px; text-align:center;" |
| | [[Arquivo:028-Sandslash.png|link=Sandslash]] | | |
| | Sandslash
| | | width="33%" | [[Arquivo:076-Golem.png|link=Golem]]<br />Golem |
| |} | | |} |
| <br /> | | </center> |
| {|class="wikitable" width="40%" align="center" text-align="center" | | |
| ! colspan="3" style="background-color: #802b00" | <span style="color: white">'''Derrotar (1ª Lista)'''</span> | | <br>Em 15/12/2021, a lista de Pokémon exigidos para as tarefas de clã foi atualizada. Jogadores que já estavam nessa fase antes da alteração deverão entregar um [[Arquivo:028-Sandslash.png|link=Sandslash]] '''Sandslash''' em vez de um [[Arquivo:076-Golem.png|link=Golem]] '''Golem'''. |
| |-style="width:50px; text-align:center;" | | |
| | [[Arquivo:034-Nidoking.png|link=Nidoking]]<br />'''56''' Nidoking | | <center> |
| | [[Arquivo:065-Alakazam.png|link=Alakazam]]<br />'''56''' Alakazam | | <br> |
| |-style="width:50px; text-align:center;" | | {|class="wikitable" width="45%" align="center" text-align="center" |
| | [[Arquivo:115-Kangaskhan.png|link=Kangaskhan]]<br />'''60''' Kangaskhan | | ! colspan="3" style="background-color: #E84B16" | <span>'''Etapa 3 - Derrotar (1ª Lista)'''</span> |
| | [[Arquivo:068-Machamp.png|link=Machamp]]<br />'''100''' Machamp | | |-style="text-align:center;" |
| | | width="33%" | [[Arquivo:124-Jynx.png|link=Jynx]]<br />'''100''' Jynx |
| | | width="33%" | [[Arquivo:210-Granbull.png|link=Granbull]]<br />'''50''' Granbull |
| | | width="33%" | [[Arquivo:036-Clefable.png|link=Clefable]]<br />'''50''' Clefable |
| |} | | |} |
| <br /> | | </center> |
| {|class="wikitable" width="40%" align="center" text-align="center" | | |
| ! colspan="2" style="background-color: #802b00" | <span style="color: white">'''Derrotar (2ª Lista)'''</span> | | <center> |
| |-style="width:50px; text-align:center;" | | <br> |
| | [[Arquivo:045-Vileplume.png|link=Vileplume]]<br />'''70''' Vileplume | | {|class="wikitable" width="45%" align="center" text-align="center" |
| | [[Arquivo:008-Wartortle.png|link=Wartortle]]<br />'''100''' Wartortle | | ! colspan="2" style="background-color: #E84B16" | <span>'''Etapa 4 - Derrotar (2ª Lista)'''</span> |
| |-style="width:50px; text-align:center;" | | |-style="text-align:center;" |
| | [[Arquivo:055-Golduck.png|link=Golduck]]<br />'''45''' Golduck | | | width="50%" | [[Arquivo:241-Miltank.png|link=Miltank]]<br />'''50''' Miltank |
| | [[Arquivo:091-Cloyster.png|link=Cloyster]]<br />'''50''' Cloyster | | | width="50%" | [[Arquivo:203-Girafarig.png|link=Girafarig]]<br />'''50''' Girafarig |
| | |-style="text-align:center;" |
| | | width="50%" | [[Arquivo:065-Alakazam.png|link=Alakazam]]<br />'''50''' Alakazam |
| | | width="50%" | [[Arquivo:094-Gengar.png|link=Gengar]]<br />'''50''' Gengar |
| |} | | |} |
| <br /> | | </center> |
| {|class="wikitable" width="40%" align="center" text-align="center" | | |
| ! colspan="3" style="background-color: #802b00" | <span style="color: white">'''Danger Room Team'''</span> | | <br>Depois dessas etapas, você deve ir até o portal da [[Danger Room]] e completar duas salas diferentes. |
| |-style="width:50px; text-align:center;" | | * O jogador poderá usar revives infinitos dentro da dungeon. |
| | [[Arquivo:323-Camerupt.png|link=Camerupt]]<br />Camerupt | | * Para passar pelo portal, o jogador deve deixar os Pokémon no locker. Há um próximo ao portal. |
| | [[Arquivo:330-Flygon.png|link=Flygon]]<br />Flygon | | * O jogador poderá usar ajudantes dentro da Danger Room, como o Mew/Mewtwo Card ou outros ajudantes. |
| | [[Arquivo:185-Sudowoodo.png|link=Sudowoodo]]<br />Sudowoodo | | * Ao entrar, o jogador receberá os Pokémon da Danger Room para essa etapa. |
| |-style="width:50px; text-align:center;" | | |
| | [[Arquivo:344-Claydol.png|link=Claydol]]<br />Claydol | | <br> |
| | [[Arquivo:306-Aggron.png|link=Aggron]]<br />Aggron | | <center> |
| | [[Arquivo:208-Steelix.png|link=Steelix]]<br />Steelix | | [[Arquivo:DR Clã Orebound.png|link=]] |
| | </center> |
| | |
| | <center> |
| | <br> |
| | {|class="wikitable" width="45%" align="center" text-align="center" |
| | ! colspan="3" style="background-color: #E84B16" | <span>'''Danger Room Team'''</span> |
| | |-style="text-align:center;" |
| | | width="33%" | [[Arquivo:248-Tyranitar.png|link=Tyranitar]]<br />Tyranitar |
| | | width="33%" | [[Arquivo:348-Armaldo.png|link=Armaldo]]<br />Armaldo |
| | | width="33%" | [[Arquivo:185-Sudowoodo.png|link=Sudowoodo]]<br />Sudowoodo |
| | |-style="text-align:center;" |
| | | width="33%" | [[Arquivo:346-Cradily.png|link=Cradily]]<br />Cradily |
| | | width="33%" | [[Arquivo:306-Aggron.png|link=Aggron]]<br />Aggron |
| | | width="33%" | [[Arquivo:208-Steelix.png|link=Steelix]]<br />Steelix |
| |} | | |} |
| </center> | | </center> |
|
| |
|
| ==<center>Tasks Rank 4 ao 5 (Level 120)</center>== | | <br>Após concluir duas salas da Danger Room e conversar com o NPC Trainer do clã, o jogador receberá '''400.000''' de experiência, duas [[Arquivo:Earth-stone.gif|link=Pedras de Evolução]] Earth Stone e uma [[Arquivo:Rock-stone.gif|link=Pedras de Evolução]] Rock Stone. |
| <br /> | | |
| | |-|Rank 4 ao 5= |
| | |
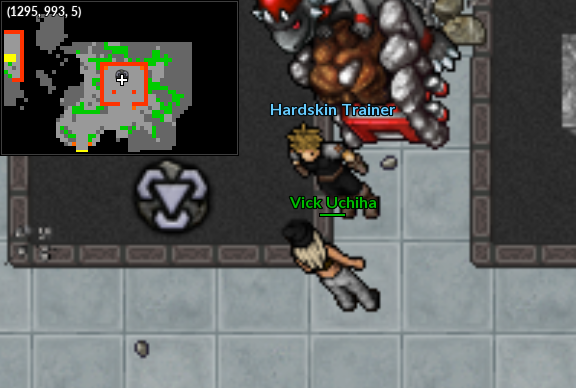
| | Para iniciar a quarta tarefa, o jogador deve conversar com o NPC Hardskin Trainer. |
| | |
| | <center> |
| | [[Arquivo:NPC NPC Hardskin Trainer.png|link=]] |
| | </center> |
| | |
| <center> | | <center> |
| {|class="wikitable" width="40%" align="center" text-align="center" | | <br> |
| ! colspan="2" style="background-color: #802b00" | <span style="color: white">'''Coletar'''</span> | | {|class="wikitable" width="45%" align="center" style="text-align:center;" |
| |-style="width:50px; text-align:center;" | | ! colspan="2" style="background-color: #E84B16" | <span>'''Etapa 1 - Coletar'''</span> |
| ! | Quantidade
| | |- |
| ! | Item | | ! width="50%" | Quantidade |
| |-style="width:50px; text-align:center;" | | ! width="50%" | Item |
| | '''3.800''' | | |- |
| | Small Stones | | | '''3.000''' || [[Arquivo:Smallstone.png|link=Drop de Itens]] Small Stones |
| |-style="width:50px; text-align:center;" | | |- |
| | '''3.800''' | | | '''3.000''' || [[Arquivo:EarthBall.png|link=Drop de Itens]] Earth Balls |
| | Earth Balls | | |- |
| |-style="width:50px; text-align:center;" | | | '''20''' || [[Arquivo:Horn_Drill.png|link=Drop de Itens]] Horn Drill |
| | '''35''' | |
| | Strange Rock | |
| |-style="width:50px; text-align:center;" | |
| | '''5'''
| |
| | Horn Drill | |
| |} | | |} |
| <br /> | | </center> |
| {|class="wikitable" width="40%" align="center" text-align="center" | | |
| ! colspan="2" style="background-color: #802b00" | <span style="color: white">'''Capturar'''</span> | | <center> |
| |-style="width:50px; text-align:center;" | | <br> |
| ! width="20%" |
| | {|class="wikitable" width="45%" align="center" text-align="center" |
| ! | Pokémon
| | ! colspan="2" style="background-color: #E84B16" | <span>'''Etapa 2 - Capturar'''</span> |
| |-style="width:50px; text-align:center;"
| | |-style="width:40px; text-align:center;" |
| | [[Arquivo:112-Rhydon.png|link=Rhydon]] | | |
| | Rhydon
| | | width="33%" | [[Arquivo:248-Tyranitar.png|link=Tyranitar]]<br />Tyranitar |
| |} | | |} |
| <br /> | | </center> |
| {|class="wikitable" width="40%" align="center" text-align="center" | | |
| ! colspan="3" style="background-color: #802b00" | <span style="color: white">'''Derrotar (1ª Lista)'''</span> | | <br>Em 15/12/2021, a lista de Pokémon exigidos para as tarefas de clã foi atualizada. Jogadores que já estavam nessa fase antes da alteração deverão entregar um [[Arquivo:112-Rhydon.png|link=Rhydon]] '''Rhydon''' em vez de um [[Arquivo:248-Tyranitar.png|link=Tyranitar]] '''Tyranitar'''. |
| | |
| | <center> |
| | <br> |
| | {|class="wikitable" width="45%" align="center" text-align="center" |
| | ! colspan="2" style="background-color: #E84B16" | <span>'''Etapa 3 - Derrotar (1ª Lista)'''</span> |
| |-style="width:50px; text-align:center;" | | |-style="width:50px; text-align:center;" |
| | [[Arquivo:045-Vileplume.png|link=Vileplume]]<br />'''87''' Vileplume | | | [[Arquivo:126-Magmar.png|link=Magmar]]<br />'''40''' Magmar |
| | [[Arquivo:008-Wartortle.png|link=Wartortle]]<br />'''125''' Wartortle | | | [[Arquivo:059-Arcanine.png|link=Arcanine]]<br />'''30''' Arcanine |
| |-style="width:50px; text-align:center;" | | |-style="width:50px; text-align:center;" |
| | [[Arquivo:055-Golduck.png|link=Golduck]]<br />'''56''' Golduck | | | [[Arquivo:127-Pinsir.png|link=Pinsir]]<br />'''115''' Pinsir |
| | [[Arquivo:091-Cloyster.png|link=Cloyster]]<br />'''62''' Cloyster | | | [[Arquivo:006-Charizard.png|link=Charizard]]<br />'''115''' Charizard |
| |} | | |} |
| <br /> | | </center> |
| {|class="wikitable" width="40%" align="center" text-align="center" | | |
| ! colspan="2" style="background-color: #802b00" | <span style="color: white">'''Derrotar (2ª Lista)'''</span> | | <center> |
| | <br> |
| | {|class="wikitable" width="45%" align="center" text-align="center" |
| | ! colspan="2" style="background-color: #E84B16" | <span>'''Etapa 4 - Derrotar (2ª Lista)'''</span> |
| |-style="width:50px; text-align:center;" | | |-style="width:50px; text-align:center;" |
| | [[Arquivo:003-Venusaur.png|link=Venusaur]]<br />'''60''' Venusaur | | | [[Arquivo:082-Magneton.png|link=Magneton]]<br />'''40''' Magneton |
| | [[Arquivo:130-Gyarados.png|link=Gyarados]]<br />'''80''' Gyarados | | | [[Arquivo:068-Machamp.png|link=Machamp]]<br />'''35''' Machamp |
| |-style="width:50px; text-align:center;" | | |-style="width:50px; text-align:center;" |
| | [[Arquivo:073-Tentacruel.png|link=Tentacruel]]<br />'''50''' Tentacruel | | | [[Arquivo:112-Rhydon.png|link=Rhydon]]<br />'''35''' Rhydon |
| | [[Arquivo:009-Blastoise.png|link=Blastoise]]<br />'''40''' Blastoise | | | [[Arquivo:062-Poliwrath.png|link=Poliwrath]]<br />'''40''' Poliwrath |
| |} | | |} |
| <br /> | | </center> |
| {|class="wikitable" width="40%" align="center" text-align="center" | | |
| ! colspan="3" style="background-color: #802b00" | <span style="color: white">'''Danger Room Team'''</span> | | <br>Depois dessas etapas, você deve ir até o portal da [[Danger Room]] e completar duas salas diferentes. |
| |-style="width:50px; text-align:center;" | | * O jogador poderá usar revives infinitos dentro da dungeon. |
| | [[Arquivo:105-Sh Marowak.png|link=Shiny Marowak]]<br />Shiny Marowak | | * Para passar pelo portal, o jogador deve deixar os Pokémon no locker. Há um próximo ao portal. |
| | [[Arquivo:219-Sh Magcargo.png|link=Shiny Magcargo]]<br />Shiny Magcargo | | * O jogador poderá usar ajudantes dentro da Danger Room, como o Mew/Mewtwo Card ou outros ajudantes. |
| | [[Arquivo:185-Sudowoodo.png|link=Sudowoodo]]<br />Sudowoodo | | * Ao entrar, o jogador receberá os Pokémon da Danger Room para essa etapa. |
| |-style="width:50px; text-align:center;" | | |
| | [[Arquivo:247-Sh Pupitar.png|link=Shiny Pupitar]]<br />Shiny Pupitar | | <br> |
| | [[Arquivo:248-Tyranitar.png|link=Tyranitar]]<br />Tyranitar | | <center> |
| | [[Arquivo:208-Steelix.png|link=Steelix]]<br />Steelix | | [[Arquivo:DR Clã Orebound.png|link=]] |
| | </center> |
| | |
| | <center> |
| | <br> |
| | {|class="wikitable" width="45%" align="center" text-align="center" |
| | ! colspan="3" style="background-color: #E84B16" | <span>'''Danger Room Team'''</span> |
| | |-style="text-align:center;" |
| | | style="width:33%;" | [[Arquivo:105-Sh_Marowak.png|link=Shiny Marowak]]<br />Shiny Marowak |
| | | style="width:33%;" | [[Arquivo:142-Aerodactyl.png|link=Aerodactyl]]<br />Aerodactyl |
| | | style="width:33%;" | [[Arquivo:112-Sh_Rhydon.png|link=Shiny Rhydon]]<br />Shiny Rhydon |
| | |-style="text-align:center;" |
| | | style="width:33%;" | [[Arquivo:247-Sh_Pupitar.png|link=Shiny Pupitar]]<br />Shiny Pupitar |
| | | style="width:33%;" | [[Arquivo:219-Sh Magcargo.png|link=Shiny Magcargo]]<br />Shiny Magcargo |
| | | style="width:33%;" | [[Arquivo:185-GoldenSudowoodo.png|link=Golden Sudowoodo]]<br />Golden Sudowoodo |
| |} | | |} |
| </center> | | </center> |
| | |
| | <br>Após concluir duas salas da Danger Room e conversar com o NPC Trainer do clã, o jogador receberá '''600.000''' de experiência, uma [[Arquivo:Earth-stone.gif|link=Pedras de Evolução]] Earth Stone e três [[Arquivo:Rock-stone.gif|link=Pedras de Evolução]] Rock Stone. |
| | |
| | </tabber> |
| | |
| | <table class="seeMore"> |
| | <tr> |
| | <td class="seeMore__image">[[Arquivo:Telekinetic-compass.gif|link=]]</td> |
| | <td> '''Veja mais: [[Coordenadas]] | [[Danger Room]]'''</td> |
| | </tr> |
| | </table> |