Predefinição:Teste11: mudanças entre as edições
Ir para navegação
Ir para pesquisar
Sem resumo de edição |
|||
| Linha 1: | Linha 1: | ||
==Pagina do Snow== | ==Pagina do Snow== | ||
==Updates== | ==Updates== | ||
Edição das 18h22min de 24 de agosto de 2022
Pagina do Snow
Updates
2022
Updates e Sistemas em Geral
| Título | Updates | Data | Link |
|---|---|---|---|
| Nova missão no Creation Studio e remake visual de algumas skills | Agora o NPC Teedzada fornece uma missão no Estúdio de Criação, atualizado o efeito visual dos ataques Hyper Beam, Charge Beam e Luster Purge, o efeito visual dos ataques Mirror Shot e Heavy Metal foram levemente suavizados. | 27/07/2022 | Changelog |
| Nova missão na Cleopatra Island | Uma nova missão para obtenção do Champion Poliwrath foi adicionada na Cleopatra Island, alterado a descrição de alguns trajes no Diamond Shop para informar melhor as características diferentes de alguns deles. | 13/07/2022 | Changelog |
| Liberação de T1B na World Transfer e Remake Visual no Lucario | Foi liberado a transferência de Pokémon T1B pelo sistema de World Transfer, foi realizado um remake visual no Lucario, Mega Lucario e Shiny Lucario. | 29/06/2022 | Changelog |
| Workshops portáteis, Tower Attempt e Nova missão no Creation Studio | Agora os workshops portáteis de profissão podem ser abertos em qualquer lugar, porém, se o jogador estiver fora de uma casa, do Trade Center ou de uma cidade, o item coletado será enviado ao Centro Pokémon, adicionado um novo produto na Loja de Diamantes que reseta as Tower Attempts do jogador, adicionado uma nova missão do criador de conteúdo Alemaosao no Estúdio de Criação. | 22/06/2022 | Changelog |
| Novo pacote de consumíveis relacionados a Dimensional Zone e alteração na gruta da Chosen | Foi adicionado um novo pacote de consumíveis relacionados a Dimensional Zone na Loja de Diamantes, ele pode ser adquirido uma vez por mês e sempre será redefinido no primeiro dia do mês, alterado a frequência de aparição de alguns inimigos na gruta da The Chosen One Quest para corresponder a quantidade de essências dropadas. | 15/06/2022 | Changelog |
| Novo sistema de Casamento | Adicionado novo sistema de casamento no jogo disponível na Valencia Island, foi adicionada uma zona de proteção na entrada da Dungeon do Shiny Giant Tentacruel para possibilitar a troca do modo do device. | 08/06/2022 | Changelog |
| Mudanças na The Chosen One Quest | Alterado diversas partes da The Chosen One Quest, em destaque para a Moltres Dungeon, Zapdos Dungeon e Articuno Dungeon, uma nova missão diária foi adicionada na gruta, novo Boss Fight com o Shiny Giant Tentacruel na gruta, ela pode ser feita a cada 6 dias em um grupo de 2 a 3 pessoas. | 27/05/2022 | Atualização |
| Alterações na Pokémon League Quest e na Firefighter Quest | Agora não é mais necessário vencer os Líderes de Ginásio após perder na Pokémon League, a recompensa ao vencer um Líder de Ginásio foi aumentada pois o jogador só pode vencer uma vez, o tempo entre as tentativas da Firefighter Quest foi reduzida de 1 hora para 5 minutos. | 25/05/2022 | Changelog |
| Alterações em requisitos de quests e no sistema de T1H | O requisito de 10 participações em duelos oficiais para liberar a Mewtwo Clones e a Light Ball Quest foi removido, agora é possível remover o held do device do Pokémon apertando Ctrl com Botão Direito no Pokémon com o device, alterado a forma com que funciona a primeira task do T1H (T1H do respawn, sem ser shiny/mega), agora qualquer Pokémon derrotado contará para a task, uma recompensa de 500 brokes/Megas derrotados foi adicionada junto com a recompensa final da task de T1H, afeta apenas jogadores que não receberam a Nightmare Box como recompensa, essa recompensa adicional soma um valor ao seu sistema de mérito a fim de acelerar o processo de obtenção do primeiro T1H, o limite de catch/drop dos T1H foi levemente reduzido. | 11/05/2022 | Changelog |
| Novo Traje Friend Cosplay e Sistema de Portal Hunt temporário | Adicionado um novo traje para jogadores que indicarem pelo menos 2 amigos que adquirirem VIP, adicionado temporariamente o sistema de Portal Hunt como teste e feedback sobre lures de 8 na Nightmare World. | 29/04/2022 | Changelog |
| Atualização na Emilia Quest | Foram alterados algumas etapas do funcionamento da Emilia Quest, adicionada uma nova opção de "andar inteligente", possibilitando configurar um tempo de espera para que o cliente do jogo aguarde outra tecla ser pressionada, e, assim, realizar o passo em diagonal. | 27/04/2022 | Changelog |
| Melhoria em Sistemas e alterações em locais de caça | Melhorado o sistema de drop de itens especiais de missões como o Krabby Club Quest ou Dirty McNasty Quest, adicionado um local de caça fixo de Bunnelby no mapa, melhorado o local de caça de Diggersby na Easter Island. | 14/04/2022 | Changelog |
| Nova interface das Poké Ball Capsule | Nova interface para troca de Capsule dos Pokémon, clicando com CTRL e Botão Direito do mouse no Pokémon, bloqueada a possibilidade de boostar Pokémon da linha evolutiva dos iniciais, mesmo que eles fossem únicos. | 13/04/2022 | Changelog |
| Alteração de Velocidade de Pokémon na neve e mudanças no Boss Charm | Aumentada a velocidade de todos Pokémon ao andar no gelo ou neve, agora o boss charm suporta até 10.000 cargas, alterado o método para ativar/desativar o boss charm, agora é necessário clicar com CTRL e Botão Direito nele para alterar o modo. | 06/04/2022 | Changelog |
| Update de Loot da NW | Alteração geral do Loot de todos Pokémon da Nightmare World e o bloqueio do uso das paredes com o Pokémon mais de 1 sqm dentro dela. | 30/03/2022 | Atualização |
| Alterações Gerais | Adicionado novamente os NPCs de Rank 5 aos lares dos Cães Lendários na Outland, alterado a localização dos Bikers da quest The Chosen One, liberado o uso de pokédex em alguns Pokémon, removido o tempo de espera ao ser derrotado por um dos NPCs da Elite Four Bruno e adicionado uma taxa no lugar, agora, após as finalizações de eventos, itens como Tokens, Keys e itens de missões do evento serão convertidos em um item sem uso para venda no NPC Cameron. | 23/03/2022 | Changelog |
| Nova opção de cancelar diária de T1H e cópia do Ditto | Agora é possível cancelar a tarefa diária de T1H em Cosmic Island, a partir de agora será possível copiar com um Ditto e utilizar a pokédex em Pokémon que estão em um Holder, removida a lentidão causada por alguns pisos de terra. | 16/03/2022 | Changelog |
| Alteração na Nightmare Clones, Sistemas Diversos, Alteração de Cópia do Ditto e Catch da Master Ball | Alterado alguns Pokémon que podem vir nos tubos da Nightmare Clones, alterado o visual da máquina de boost, adicionado uma nova condição negativa chamada STUCK, alterado as sprites do Improved Attachment Device para ter uma cor específica em cada modo, alterado o nome do item Ditto Memory para Shiny Ditto Memory para ficar explícito que não funciona no Ditto normal, liberado diversos Pokémon para cópia com Ditto e Shiny Ditto, liberado o uso da Master Ball em diversos Pokémon. | 23/02/2022 | Changelog |
| Modificado etapas da Dr. Proctor Quest e Sistema de Troca de Nome | Alterado algumas etapas da Dr. Proctor Quest, alterado o sistema de troca de nome para que o jogador consiga utilizar nomes que não estão mais sendo utilizados, a menos que seja o nome original de algum outro jogador (Se o nome para o qual o jogador deseja trocar for seu próprio nome original, a troca será permitida), alterado o tempo limite para conclusão do Minigame da Memória na Unown Challenges. | 16/02/2022 | Changelog |
| Alteração no Sistema de Look e Gerais | Agora, em caso de união de servidores, o dono da casa recebe o item Builder Kit de volta caso o piso esteja alterado (aplica-se em versões especiais de eventos), melhorado a exibição do tempo restante de Berries na nova janela de Look, adicionado uma pré-visualização dos primeiros itens que estão em uma mochila na janela de Look. | 11/02/2022 | Changelog |
| World Transfer | Lançamento do sistema de World Transfer, que possibilita a transferência de personagens entre mundos, com algumas regras e taxas. | 10/02/2022 | World Transfer |
| Novo sistema de Look | Novo sistema e interface de Look no jogo, possibilitando a visualização de vários aspectos de itens e dos Pokémon, por exemplo quais addons estão nele, se tem Particle Aura ou não e vários outros. | 03/02/2022 | Sistema de Look |
| Lançamento da ilha Leaf Forest | Lançamento da ilha Leaf Forest, que conta com algumas novas tarefas e novos locais de caça de Exeguttor e Xatu com Wobuffets, melhorado o efeito de LOCKED do golpe Glacial Spikes, desativados os comandos "!invite, !door e !viceowner" da house, agora o uso delas serão exclusivos da interface da casa. | 02/02/2022 | Changelog |
| Alteração de uso de alguns Golpes e Novo Craft do TG | Alterado o uso dos golpes Poison Bomb, Sacred Fire, Shadow Sphere e Thunder Sphere para que possam ser usados sem um alvo, com isso o golpe será usado na localização do Pokémon caso não tenha um alvo, adicionado um novo craft na oficina do Torneio Global, onde será possível trocar 50 TG Tokens por 1 Global Arena Superior Token. | 26/01/2022 | Changelog |
| Nova Quest para obtenção do Vanilluxe e Mimikyu | Adicionado novas missões para obtenção dos Pokémon Mimikyu e Vanilluxe. | 19/01/2022 | Changelog |
| Modificações de Sistema na Nightmare Clones e Nova opção de Level Cap em duelos de rua | Adicionado um transporte instantâneo para a Mewtwo Island na Nightmare World para jogadores que já concluiram a questline da Nightmare Mewtwo Clones, adicionado mais instâncias para a Nightmare Clones, adicionada uma opção para configurar o level cap em duelos de rua. | 12/01/2022 | Changelog |
| Melhorias na Pokédex | Agora, a Pokédex contém as informações de ataques que não podem ser usados no PvE, ataques que podem ser usados apenas na Nightmare World, ataques que só podem ser usados por determinado clã no PvP, adicionado uma opção para cancelar a tarefa diária da NPC Officer Jenny, mas os Pokémon da diária não serão redefinidos e o progresso será perdido, o jogador pode escolher outro Pokémon a ser derrotado dentre os Pokémon oferecidos inicialmente. | 05/01/2022 | Changelog |
Patchs de Balanceamento
| Título | Updates | Data | Link |
|---|---|---|---|
| Patch 03/08/2022 | Agora o Weavile selvagem utiliza o ataque Swords Dance, alterações gerais nos Pokémon Elite Hitmontop e Champion Poliwrath (PvE), alterações maiores em Pokémon T1H, agora não possuem mais nenhuma skill de status secundário (miss), tendo apenas o SILENCE ou STUN, adicionado um novo ataque para compensar a perda de uma skill, o HP foi rebalanceado e alguns tiveram suas forças rebalanceadas. | 03/08/2022 | Changelog |
| Patch 11.8 | A duração do ataque Ice Ball foi aumentada para 3 segundos, diversos ataques de cura tiveram seus tempos de recarga padronizados em 150 segundos, alterado alguns ataques e força dos Pokémon Mega Swampert, Mega Charizard X, Tyranitar, Shiny Lanturn, Shiny Muk, alterações apenas PvP nos Pokémon Florges, Beartic, Mightyena, Shiny Kingler, Wobbuffet e Vanilluxe. (Patch 26/07) alterações em alguns ataques do Porygon-Z. | 16/07/2022 | Changelog |
| Patch 11.7 | Agora o ataque Grass Chop cancela o ataque Magnitude, o Pokémon Shiny Raichu sofreu um rework, alterações nos Pokémon Mamoswine, Shiny Espeon, Shiny Gyarados, Golden Steelix, Mega Charizard Y, Mega Mawile, Mawile, Blissey, Shiny Togetic, Shiny Shuckle, Lapras e Poliwrath, lançamento do novo Pokémon Champion Poliwrath. | 08/07/2022 | Spotlight Champion Poliwrath Changelog |
| Patch 11.6 | O tempo de duração dos ataques Earthquake, Swamp Mist, Belch, Whirlpool, Hurricane, Rollout, Flame Wheel, Catastropika e Curse foram reduzidos pela metade (apenas PvE) e a força deles foram compensadas em outros ataques no moveset, o ataque Confide não concede mais bônus de velocidade, a velocidade de movimento do Shiny Fearow foi reduzida, alterações leves nos Pokémon Fearow, Cofagrigus, Light Ball Pikachu, Shiny Lucario, Mega Lucario, Alolan Raichu, Feraligatr, Shiny Typhlosion, Mega Manectric e Shiny Manectric, alterações maiores nos Pokémon Shiny Noctowl e Shiny Mawile, o Shiny Shuckle sofreu um rework completo e agora é apenas do elemento Bug, o Shiny Electrode sofreu um rework e agora é parte da rotação Raibolt PvE como DPS Tier 2, alterações gerais em Pokémon de todas rotações. | 30/06/2022 | Changelog |
| Patch 11.5 | O ataque Selfdestruction não pode ser mais usado no PvP, o held Y-Antiself não pode ser mais obtido, o NPC Dende, responsável por remover o antigo held Y-Blur agora remove também o held Y-Antiself, a área de efeito de alguns ataques de cura foi reduzida, o Pokémon Shiny Torkoal não aparece mais na área de caça de Nightmare Magby e Pansear, os Pokémon Tangrowth e Shiny Torkoal passaram por uma modificação completa, os Pokémon Alolan Exeguttor, Bisharp, Simisear, Magcargo, Whiscash, Meganium, Electivire, Mega Blaziken, Accelgor (Apenas PvP), Torkoal, Minun and Plusple, Shiny Togetic, Blissey, Shiny Nidoqueen, Castform Rainy, Castform Snowy, Mega Camerupt e Camerupt tiveram alterações em vários ataques e tempos de cooldown. | 23/06/2022 | Changelog |
| Patch 11.4 | Alterações PvP principalmente em vários Pokémon Malefic, alterações maiores nos Pokémon Misdreavus, Shiny Muk, Drapion, Shiny Nidoking e em todos Rotom, alterações mais leves no Shiny Gengar, Mega Gengar, Chandelure, Honchkrow, Shiny Honchkrow, Dragalge, Mega Gardevoir, Rapidash, Kingdra, Magnezone e Shiny Copperajah, agora o ataque Frozen Armor presente nos Pokémon Abomasnow, Weavile, Castform e Rotom Ice se tornou uma passiva e foi reformulado. | 01/06/2022 | Changelog |
| Patch 18/05/2022 | Os portal hunts foram removidos, o diálogo e localização do NPC Richie (Dr. Proctor e Light Ball Quest) foram alterados, o Pokémon Dusclops passou por uma atualização, promovido a tier 2 e agora é Tanker Ghost de Malefic. | 18/05/2022 | Changelog |
| Patch 11.3 | Aumentada a força geral dos ataques em área dos Off-Tankers de tier 3, os Pokémon Electabuzz, Garchomp e Alakazam tiveram vários ataques alterados, alterações menores no Gyarados, Shiny Rampardos e Typhlosion. | 13/05/2022 | Changelog |
| Patch 11.2 | Vários ataques foram alterados, ajustes em vários Pokémon PvP, como Carracosta, Shiny Magnezone, Shiny Delphox, Porygon 2 e vários outros, a aparição do Shiny Ambipom nos T1H foi reduzida, a Dimensional Zone do Big Onix foi reformulada, e alterações leves em algumas hunts da Nightmare World. | 04/05/2022 | Changelog |
| Patch 11.1 | Algumas skills foram alteradas, atualização do Pangoro, mudanças de efetividade no Crystal Onix e mudanças em vários Pokémon PvP e PvE. | 20/04/2022 | Changelog |
| Patch 01/04/2022 | Lançamento do Sirfetch'd, atualização dos Pokémon Shiny Kingler, Mr. Mime e Shiny Beedrill, ajustes em alguns outros Pokémon PvP e PvE e algumas skills foram alteradas. | 01/04/2022 | Changelog |
| Patch 11/03/2022 | Alterado a área de efeito do ataque Mystical Fire do Pokémon Shiny Delphox, a duração desse ataque foi reduzida, mas ainda causa o mesmo dano total que anteriormente. | 11/03/2022 | Changelog |
| Patch 09/03/2022 | Alterado para qualquer jogador poder utilizar qualquer Pokémon exclusivo no PvE, sendo bloqueado somente no PvP a partir de agora, alterações em força de algumas hunts da Nightmare World, atualização dos Pokémon Mightyena, Darmanitan, Tropius e Gyarados e redução de cooldown de vários Pokémon no PvE. | 09/03/2022 | Changelog |
| Patch 23/02/2022 | Alteração em inimigos da Nightmare Clones, liberado o uso de Ditto e Shiny Ditto para copiar alguns Pokémon bloqueados anteriormente, e liberado o uso de Master Ball em vários Pokémon que eram bloqueados. | 23/02/2022 | Changelog |
| Patch 09/02/2022 | Os Pokémon Shiny Sceptile, Sceptile e Togetic tiveram alguns de seus golpes alterados, alterações na força de algumas hunts da Nightmare World. | 09/02/2022 | Changelog |
| Patch 25/01/2022 | Alterado o requirimento de nível de alguns golpes da Mega Lopunny, bloqueado a opção de soltar o Pokémon antes do início de um torneio ou duelo ranqueado, alterado alguns golpes do Pokémon Umbreon. | 25/01/2022 | Changelog |
| Patch 21/01/2022 | Lançamento do novo Pokémon Accelgor, junto com sua Dimensional Zone de categoria Bronze. | 21/01/2022 | Spotlight |
| Patch 15/01/2022 | Lançamento do Mismagius como parte da rotação Malefic, alterações em vários Pokémon PvP, como Shiny Arcanine, Shiny Tangela, Giant Galvantula, Froslass, Umbreon, Shiny Glaceon, Shiny Ariados e Shiny Pupitar, além de alterações menores em outros Pokémon. | 15/01/2022 | Spotlight Mismagius Changelog |
2021
Updates e Sistemas em Geral
| Título | Updates | Data | Link |
|---|---|---|---|
| Nova forma de plantar berries | Alterado a maneira de plantar berries, agora basta usar a função "usar com" na semente, e selecionar o SQM que deseja plantar, o empty vase será consumido automaticamente para plantar a semente, sem a necessidade de colocá-lo no chão. | 17/12/2021 | Changelog |
| Y-Ghost em Mega, Outland Main Quest, Stack de Totem e Tasks de Clã | Agora é possível utilizar Held Y nos Mega Pokémon normalmente, agora será possível stackar totems e alguns itens especiais, foi alterado os requisitos necessários para iniciar a Outland Main Quest, onde agora será necessário de 6 até 9 jogadores de clãs distintos invez de 9, e o clã Ironhard não é mais um coringa, foi alterado quase todas as tasks de clã, as tasks atualizadas podem ser conferidas aqui. | 15/12/2021 | Atualização |
| Nova task e velocidade no gelo | Adicionado uma nova tarefa de criador de conteúdo do NPC Piipeex no Estúdio de Criação, removido a funcionalidade do item Winter Shoes, a velocidade padrão dos jogadores andando na neve foi aumentada para ser equivalente ao que era usando a Winter Shoes. | 01/12/2021 | Changelog |
| Cancelar Diárias e Semanais na Nightmare World | Agora será possível cancelar as diárias e semanais dos NPCs Falkner, Bruno e Lorelei na Nightmare World, quando cancelado, o progresso será perdido e poderá escolher outro Pokémon para derrotar, a velocidade do Excadrill na Nightmare World foi aumentada para jogadores que possuem um boost de viagem, aumentada a velocidade do Magikarp Submarine que leva o jogador para Hoenn na Nightmare. | 17/11/2021 | Changelog |
| Alteração em uso de alguns Golpes target | A partir de agora será possível utilizar os ataques Fireball, Waterball, Mirror Shot e Fell Stinger sem um alvo, ao ser utilizado dessa forma, o golpe será utilizado centrado no Pokémon, em vez de ser centrado no alvo. | 04/11/2021 | Changelog |
| Desativado a venda de Pokémon na NPC Heather por texto | A partir de agora, só será possível vender Pokémon na NPC Heather por meio da interface da loja. | 22/10/2021 | Changelog |
| Modificação no NPC da diária de T1H e remakes visuais | Foi feito um rework visual nos Pokémon Gastly, Haunter e Seaking e nos bosses Underworld Gengar e Giant Underworld Gengar da Dimensional Zone da Agatha, movido o NPC Raven da diária de T1H para o subsolo da ilha, próximo ao NPC Merchant, agora o efeito FREEZE se chama LOCKED. | 21/10/2021 | Changelog |
| Atualizado o sistema de anti-rollback e tarefas mistas na diária de T1H | Atualizado o sistema de anti-rollback, de agora em diante, haverá a devolução de experiência obtida por derrotar NPCs da Brotherhood da Nightmare World e fora dela, e do item Friendly Aura do PokéPark, agora o sistema de tarefas mistas está disponível para a diária de T1H. | 22/09/2021 | Changelog |
| Atualizado a lista de Pokémon da daily catch e daily kill | Reduzido o tempo limite do sétimo andar da Embedded Tower em 25 minutos, adicionado vários Pokémon para serem derrotados na diária da Officer Jenny, e diversos para serem capturados na diária do Gary Oak, adicionado um novo NPC com missão de derrotar Manectric e Electrike. | 14/09/2021 | Changelog |
| Major Update de Orre | -- | 11/09/2021 | Update |
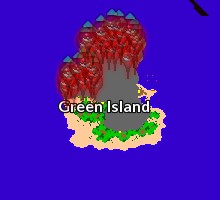
| Reformulação da Green Island e leilões de fusão | A partir de agora, é possível utilizar o comando "!auctionaccept" que permite, após uma união de servidores, finalizar o leilão de uma casa antes do prazo de 15 dias, o mapa da Green Island foi alterado, agora é um local de caça focado em Venusaur e Victreebel, foi realizado algumas mudanças leves no menu de Team Finder. | 01/09/2021 | Changelog |
| Novos sons no jogo, tarefas mistas (diárias e semanais da NW), reformulação da Jungle Island e interface de loja para venda de Pokémon em NPC | Adicionado diversos efeitos sonoros para diversas interações: Montarias, pescaria, poções, Poké Bola, revives e habilidades (cut por exemplo), implementado um novo sistema de tarefas mistas, que torna possível derrotar qualquer Pokémon da lista de opções para a contagem geral da tarefa, a mudança foi aplicada nas tarefas diárias e semanais da Nightmare World, afetando os NPCs Falkner, Bruno, Lorelei, Barry e Bernadette, foi reformulada Jungle Island, o mapa foi refeito e adicionados novas missões, alterado o sistema de venda de Pokémon na NPC Heather, de agora em diante, isso é feito através da janela de Loja do NPC, assim como os outros. | 18/08/2021 | Changelog |
| Novo team finder e nova missão no Creation Studio | Foi implementado um novo sistema para encontrar equipes, o Team Finder, a janela de grupos sofreu algumas alterações por causa desse sistema, adicionada uma nova missão do streamer Hidare no Estúdio de Criação, a NPC Liza da Cosmic Quest teve sua localização alterada, para evitar mortes após vencer o duelo contra ela. | 04/08/2021 | Team Finder Changelog |
| Alterações na Pokédex e efeitos sonoros | Adicionado na Pokédex um ícone nos golpes no qual informa se os mesmos são bloqueados para serem copiados pelo Smeargle, adicionado diversos sons de interação com o ambiente, alterado o mapa das dungeons dos Pokémon Crystal Onix, Shiny Ariados e Shiny Politoed, para que o jogador consiga ir diretamente à saída após derrotar todos os Pokémon, removido alguns enfeites da missão "Unown Challenges", que estavam atrapalhando a visão do jogador. | 28/07/2021 | Changelog |
| Adicionados meios de viagens entre algumas ilhas e ignorar notificações | Adicionado dois novos meios de viagens que levam o jogador da ilha Mandarin à ilha Valencia e da ilha Valencia à ilha Tangelo, adicionado opções de ignorar as notificações do PokéPark e Golden Arena, alterado o sistema de mapa de aventureiro, agora os mapas são gerados automaticamente, portanto, não será mais necessário atualizá-los quando alguma área do mapa sofrer alterações, reorganizado a prioridade de listagem das câmeras de TV. | 21/07/2021 | Changelog |
| Alterações no quinto andar da Embedded Tower | Agora o andar é instanciado, tornando possível que mais de uma equipe faça ao mesmo tempo, adicionado uma recompensa de experiência ao finalizar o andar, alterado a força dos inimigos, agora, o uso de elixires é liberado (também afeta os andares 1 ao 4, exceto contra bosses), aumentado a chance de aquisição da Ice e Steel Spheres, agora, é possível adquirir a Rock Sphere nesse andar, agora, os bosses Regice, Registeel e Regirock têm seus elementos reais. | 01/07/2021 | Changelog |
| Alterações nos andares 1 ao 4 da Embedded Tower | Dobrado o número de pontos recebidos por tentativa, entretanto, foi reduzido pela metade o número de tentativas diárias, facilitado a chance de encontrar os fragmentos dos tables nos andares, agora, não há mais penalidade de experiência ao morrer nesses andares, agora, o jogador ganhará uma quantidade de experiência ao concluir esses andares (existe a mesma redução de experiência da Brotherhood), rebalanceado os bosses dos andares 1 ao 4 e seus movesets foram atualizados, agora, os bosses desses andares possuem elemento neutro apenas dentro da Embedded Tower, agora, ao concluir esses andares, o jogador terá uma chance de dropar um item específico que representa cada um desses bosses. | 18/06/2021 | Changelog |
| Modificações no PokéPark | Reduzido a quantidade de Tokens para resgatar os seguintes Pokémon: Starly, Staravia, Staraptor, Mudbray, Mudsdale, Fletchinder, Fletchling e Talonflame, diminuído a quantidade máxima de jogadores por instância, agora, os novos Pokémon nascem em todos locais do PokéPark, para evitar concentrações em determinados locais, facilitado a captura de Starly, Mudbray e Fletchling, adicionado mais alguns Pokémon nas áreas de elemento Fire, Flying, Water, Ice e Dragon, ampliado levemente o mapa da área dos elementos Steel (agora, é possível encontrar Pokémon Electric nesse local), Ice e Dragon, removido respawns de Pokémon Electric da área florestal, no seu lugar, foi adicionado respawn de Pokémon Normal e Poison. | 17/06/2021 | Changelog |
| Nova Shadow Potion e removido a diária de Nightmare Crystal | Adicionado uma nova poção no Mark da Nightmare World, a Shadow Potion, essa poção cria fraquezas no oponente, fazendo com que ataques que ele seria imune passem a causar dano inefetivo, removido a diária de Crystal na Nightmare World, agora ao derrotar um Crystal, o jogador ganhará 300.000 Experiência e 2.000 Experiência Nightmare, adicionado uma mensagem informando o saque do Shiny Ambipom, adicionado um ícone de planeta no calendário para os eventos diários. | 16/06/2021 | Changelog |
| Alterações no Novo Cliente e no PokéPark | Agora, os Pokémon com Mega Stone não possuem mais preço ao dar "look", atualizado diversas músicas, adicionado sons para utilizarem o canal de música "Ambiente", que complementarão as músicas de ambientação, removido os Pokémon Weezing, Koffing, Electrode e Voltorb do PokéPark, revisado a força dos Pokémon de nível 0 a 40 no parque, aprimorado levemente os respawns das áreas Normal e Steel no parque. | 09/06/2021 | Changelog |
| Modificação no Nightmare Disk e no sistema de viagem automática, novos Pokémon no PokéPark | De agora em diante, a redução do tempo de recarga do Nightmare Disk funcionará apenas quando o personagem estiver online, aprimorado o sistema de viagem automática (Magikarp submarine, Caiaque da Nurse Joy, Pidgeot de Cerulean e outros), para que a movimentação seja fluida, também foi revisado a velocidade dos Magikarp Submarines, para que tenham uma velocidade mais agradável na viagem, novos Pokémon disponíveis: Starly, Staravia e Staraptor, esses Pokémon nascerão nas áreas do tipo Voador e Normal do PokéPark. | 02/06/2021 | Spotlight Staraptor Changelog |
| Alterações na Sphinx Quest, no sistema de shiny de clã da NW e PokéPark | Adicionado um novo NPC na pirâmide da ilha Sphinx, que enviará o jogador para a entrada do desafio do quebra-cabeça da Quest, caso ele tenha sido derrotado por um boss ou durante a montagem do quebra-cabeça, reduzido o tempo de espera para completar o quebra-cabeça, adicionado a NPC Julie na Nightmare World, pagando uma taxa, ela será responsável por transformar as pokébolas dos Pokémon shiny de clã em Premier Ball, agora, também é possível fazer o shiny de clã da Nightmare mais de uma vez, adicionado um novo NPC que ao pagar uma taxa, transformará as Park Balls de Pokémon em Premier Balls, novos Pokémon para captura no PokéPark: Mudbray e Mudsdale, reduzido a quantidade de pontos adquiridos por alguns Pokémon do PokéPark. | 27/05/2021 | Spotlight Mudsdale Changelog |
| Modificações e melhorias na Loja de Diamantes | Foi adicionado a opção de doar por Pix diretamente pela Loja de Diamantes, adicionado um botão para sacar os Diamantes da conta para o personagem sem precisar abrir o site, adicionado uma notificação quando os Diamantes da doação são creditados na conta, foi mudado a biblioteca de sons do jogo, que corrige a flauta da The Chosen One Quest, e permite usar mais canais de música. | 26/05/2021 | Changelog |
| Nova missão no Creation Studio e adicionado o Safari Escape Rope | Nova missão do Streamer Cat of Athenaa no Estúdio de Criação, agora, o jogador receberá o item Safari Escape Rope ao entrar no Safari, que ao utilizá-lo, o jogador sairá desse local, reduzido o tempo em que o metro de Mandarin leva para chegar a cidade de Phenac e vice-versa, adicionado um Locker na New Island, adicionado um sistema de baús na Sarkies Factory da Nightmare com local aleatório, onde serão entregues chaves de bronze da Dimensional Zone para jogadores de nível 400 ou superior, o jogador poderá pegá-las semanalmente. | 19/05/2021 | Changelog |
| Lançamento do PokéPark e da Tangelo Island, novo sistema de Leilão de Casas | Nova ilha chamada Tangelo Island, a ilha tem uma nova cidade, que contém novas casas e missões, nela podem ser encontrados alguns respawn de Pokémon, e é lá que acontece o evento PokéPark, um novo evento de captura esportiva de Pokémon, o jogador pode ver os detalhes do funcionamento do evento no tópico oficial do fórum, alterações na Brotherhood Quest, adicionado um novo contrato em Tangelo, porém o limite continua sendo de 12 contratos diários, agora, o jogador não perde mais os contratos ao deslogar, agora, o Poké Phone informa quantos Pokémon do NPC foram derrotados, semelhente ao da Nightmare World, o jogador poderá cancelar um contrato a qualquer momento, caso queira, novo sistema de leilão de casas, agora, quando uma casa ficar desabitada, começará um leilão para sua aquisição, e não será mais possível comprar casas pelo método antigo. | 12/05/2021 | Atualização Tangelo e PokéPark Leilão de Casas Changelog |
| Alterações na Pewter Quest e Rock Tunnel | Revisado a dificuldade geral da Pewter Quest, alguns Pokémon no percurso foram substituídos e o posicionamento alterado para melhorar a progressão de dificuldade, revisado a força e experiência do Golem selvagem, adicionado uma nova missão de baú para nível 35 no Rock Tunnel, a maioria dos andares foram modificados e os Pokémon alterados ou reposicionados. | 05/05/2021 | Changelog |
| Modificações no sistema de Boost, sistema de Totems e na Cosmic Quest | Agora, é possível boostar os Pokémon com duas pedras, caso o mesmo seja de duplo elemento, isso não afeta os Pokémon que utilizam Mirror, Dimensional, Crystal, Ancient, Metal Stones e Mystic Star como boost, de agora em diante, ao ocorrer um shutdown agengado, o totem é devolvido com o tempo restante, só sendo possível utilizá-los após o shutdown, de agora em diante, o totem permanecerá no local ao deslogar, e o tempo continua contando, alterado os horários de disponibilidade para acessar a Dungeon do Solrock e Lunatone na Cosmic Quest, agora, é possível trocar um item raro por 10 Beautiful Scales com a NPC Stacy, alterações o mapa da Cinnabar Mansion para evitar alguns casos de grr que ocorriam devido as janelas. | 05/05/2021 | Changelog |
| Novo Upgrade do Device, setas de itens raros e efeito visual nos ataques de T1H | Novo upgrade do attachment device, esse device possui dois modos, o modo padrão que funciona com helds ofensivos e utilitários, e o modo defensivo que funciona apenas com helds defensivos, o jogador pode alterar entre esses dois modos em uma zona de proteção, adicionada uma nova missão envolvendo o Device, através dela será possível obter o Improved Attachment Device, o NPC Morison que removia gratuitamente o held do device foi removido, pois o held será removido gratuitamente durante a missão, foram adicionados novas setas de drops dos Pokémon para itens raros, como Mega Stones, mochilas, urnas de clã, cubos da Cyber World, itens valiosos como formas de Rotom, itens dos chefes de orre, Mini Wings e Tech Ball, e diversos itens valiosos na Nightmare World, de agora em diante, os Pokémon T1H possuem diferenças visuais nas cores de suas habilidades, adicionado uma barra de pesquisa nas oficinas de craft, adicionado uma separação de abas por categoria em algumas oficinas de craft. | 23/04/2021 | Atualização Device Changelog |
| Alterações gerais no Early Game | Agora, o bloqueio de respawn só funcionará para jogadores de nível 15 ou superior, a missão da NPC Delia Ketchum foi reformulada, o guia de efetividades do NPC Stevan passou por algumas mudanças, aprimorado o guia sobre poções da NPC Daisy Oak, aprimorado alguns tutoriais presentes no Early Game Quest, alterado o respawn da floresta de Pallet. | 12/03/2021 | Changelog |
| Modificações na Unown Challenges e Mewtwo Main Quest | Alterado a velocidade de movimento base de todos os jogadores (running shoes manteve a velocidade, a fashion shoes teve um leve acréscimo de velocidade), não há mais limites de tentativas diárias para a realização dos desafios da Unown Challenges, tempo de utilização do Unown Relic diminuido para 1 hora, adicionado um locker dentro da dungeon de Unown, revisada a chance de captura do Unown e adicionado um sistema de mérito que facilitará a captura do primeiro Unown de cada letra, revisado diversos desafios, principalmente os mais complexos, removido a chance de batalhar com o MissingNo ao capturar um Unown, mudanças gerais na Mewtwo Main Quest, as forças dos clones iniciais foram reduzidas em 20% cada, reduzida a quantidade de Pokémon por wave, a quantia de waves foi reduzida para 10, duração da perseguição no Mew reduzida pela metade, agora, não é mais possível adicionar Held Item no Mew ou utilizar outros Pokémon no duelo final, agora, o mewtwo só usará o ataque Psystrike em quantidades fixas de HP, duelo final contra o Mewtwo rebalanceado. | 10/03/2021 | Changelog |
| Nova Golden Arena | A Golden Survival Arena passou por uma reformulação, agora ela é feita em instâncias, após a abertura da Golden Arena, os jogadores terão 15 minutos para fazer a inscrição no evento, reduzido o tempo de espera para a próxima wave para 15 segundos, é necessário pelo menos nível 30 para participar da Golden Arena, adicionada a NPC Daisy no Trade Center que teleportará os jogadores para a Golden Arena quando as inscrições estiverem abertas, durante os eventos de aniversário, a Golden Arena estará com uma versão especial. | 26/02/2021 | |
| Alteração no transporte da Nightmare World | Agora, é necessário ser VIP para utilizar o Excadrill na Nightmare World, agora, o NPC Aureo informa o tempo restante até entregar a próxima chave, adicionado indicativos visuais nas opções de diálogo dos NPCs Carmilla, Gary Oak e Officer Jenny. | 25/02/2021 | Changelog |
| Modificações no sistema de Troca de T1H e bosses do Secret Lab | Agora, ao utilizar a opção de colocar um T1H na Premier Ball em seu respectivo NPC, o T1H em questão manterá seu Held e Boost original (se aplica somente a um mesmo tipo de Pokémon, exemplo: Shiny Sceptile por Shiny Sceptile), a partir de agora, os bosses do Secret Lab que possuem e mecânica de teleportar até o jogador, caso o mesmo fique fora do seu campo de visão por um tempo, irão priorizar teleportar no seu Pokémon que estiver sendo utilizado, agora, o held de maior tier terá efetividade caso o jogador possua o mesmo held em seu Pokémon e no device. | 07/01/2021 | Changelog |
Patchs de Balanceamento
| Título | Updates | Data | Link |
|---|---|---|---|
| Patch 30/10/2021 | Alterações no balanceamento do Pokémon Shiny Froslass na Ice Dungeon da The Chosen One Quest. | 30/10/2021 | Changelog |
| Patch 18/12/2021 | Alterações em tempos de cooldown dos ataques dos Pokémon Ampharos e Shiny Ampharos no PvE. | 18/12/2021 | Changelog |
| Patch 15/12/2021 | Lançamento dos Pokémon Vanillite, Vanillish e o Vanilluxe como parte da rotação Ice de Seavell. | 15/12/2021 | Spotlight Vanilluxe |
| Patch 08/12/2021 | Reduzido o tempo de espera para entrar na Dimensional Zone de 8 para 4 minutos, de agora em diante é possível trocar 1 Big Fortune Totem em 3 Jade Fortune Totems, alterações em Pokémon PvE como Flareon, Shiny Elekid, Dragonite, Crobat, Ampharos, Shiny Grumpig, Mega Glalie, Shiny Arbok e Seviper. | 08/12/2021 | Changelog |
| Patch 05/11/2021 | Alterações no Pokémon Dragonite, o Pokémon inteiro passou por uma atualização. | 05/11/2021 | Changelog |
| Patch 29/10/2021 | Lançamento dos Pokémon Solrock na rotação rock de orebound como DPS, e o Lunatone como Suporte para PvP de orebound, tiveram alterações leves os Pokémon: Blastoise, Shiny Giant Magikarp, Shiny Vaporeon, Shiny Klinklang, Klinklang, Poliwrath, Mega Lopunny, Sawk, Shiny Golem e Omastar, Champion Primeape rebaixado para Tier 3, Elite Hitmontop teve seu STUN removido e adicionado SILENCE, mudanças no stun do Shiny Rampardos e Rampardos, a defesa dos T1Hs foi rebalanceada e alguns tiveram suas skills alteradas, modificação no mapa e balanceamento das hunts de Nightmare Magby e Pansear, Nightmare Ghost, Nightmare Ice e Nightmare Steel, novas hunts de Nightmare Snorunt, Solrock e Lunatone, a força dos Pokémon da hunt de Nightmare Farfetch'd foi rebalanceada. | 29/10/2021 | Spotlight Solrock e Lunatone Changelog |
| Patch 25/07/2021 | Refeito a animação do golpe Predict, para não ser mais confundido com a Particle Aura, alterações gerais em ataques e forças de Pokémon PvP, como: Blissey, Chansey, Shiny Tauros, Shiny Mr. Mime, Shiny Arcanine, Shiny Manectric, Shiny Sylveon e Mega Gardevoir. | 25/07/2021 | Changelog |
| Patch 24/07/2021 | Alterações no Pokémon Drapion, alterado o visual do Shiny Mega Charizard Y. | 24/07/2021 | Changelog |
| Patch 19/07/2021 | Os Pokémon Beartic e Florges tiveram alterações significativas apenas no PvP. | 19/07/2021 | Changelog |
| Patch 16/07/2021 | Alterações apenas PvP nos Pokémon: Shiny Mr. Mime, Shiny Meganium e Elite Farfetch'd. | 16/07/2021 | Changelog |
| Patch 14/07/2021 | Reformulado a Dimensional Zone do Shiny Noctowl e King Raticate, para ambas, o mapa foi reformulado e reduzido consideravelmente, revisado a recompensa em todas dificuldades, reduzido a quantidade de inimigos, reduzido a quantidade de jogadores necessários de 4 para 3, e a força dos inimigos foi rebalanceada, alterado um ataque do Pokémon Noctowl, para a alteração na Dimensional Zone e no local de caça da Outland. | 14/07/2021 | Changelog |
| Patch 09/07/2021 | Novo efeito negativo adicionado ao jogo chamado Anti-Blink, que faz com que o Pokémon afetado não consiga utilizar a habilidade Blink por um tempo, alterado o funcionamento de diversos ataques de Pokémon Suporte, alteração no ataque Bone Rush, que agora tem a volta acelerada, os Pokémon Shiny Venusaur e Shiny Meganium passaram por um rework, alterações gerais nos Pokémon Shiny Tentacruel, Meganium, Shiny Alakazam e Miltank. | 09/07/2021 | Changelog |
| Patch 28/05/2021 | Agora o ataque Hail aplica 6 segundos de Freeze em todos Pokémon que o possui, o ataque Payback foi reformulado, adicionado a passiva Ice Body no Beartic, alterações leves nos Pokémon Shiny Alakazam e Purugly, alterações maiores no Armaldo e Shiny Hypno. | 28/05/2021 | Changelog |
| Patch 19/05/2021 | Alteração em locais de caça, na Nightmare Rock: Agora existem dois locais de caça de dificuldade alta, uma contém apenas Nightmare Tyranitar e a outra contém Nightmare Sudowoodo e Nightmare Rampardos, o mapa do respawn sul de cranidos localizado no térreo foi reformulado e agora será um local de caça propriamente dito, o respawn norte de Cranidos localizado no térreo também passou por mudanças, mas por enquanto será considerado apenas um ambiente de transição para os demais locais de caça, os Pokémon presentes nesses locais foram rebalanceados. | 19/05/2021 | Changelog |
| Patch 05/05/2021 | Modificado a frequência de uso do ataque Wing Attack do Nightmare Honchkrow, alterações no Pokémon Shiny Magby, Magmar, Togekiss, Togetic, Lucario e Shiny Lucario, foi dado rework nos Pokémon Magneton, Dark Abra e Light Abra que tiveram seus elementos alterados de Fantasma/Psíquico para Noturno/Psíquico. | 05/05/2021 | Changelog |
| Patch 16/04/2021 | Adicionado uma segunda instância para o Subject #14 na Nightmare World, adicionado um botão para poder ocultar Pokémon de outros jogadores do grupo no battle, alterações nos Pokémon Muk, Alolan Muk, Seviper e Shiny Hariyama. | 16/04/2021 | Changelog |
| Patch 08/04/2021 | Alterado algumas etapas da Early Game Quest e do tutorial 2.0, alteração nas hunts de Alolan Meowth, agora os dois respawns foram unidos e o local foi rebalanceado, adicionado um novo local no andar inferior, o mapa da hunt de Alolan Persian foi modificado, o local foi rebalanceado, a hunt de Nightmare Honchkrow foi alterada para um andar superior ao de Alolan Meowth, o local foi rebalanceado, Nightmare Torterra teve seus posicionamentos removidos ou alterados, Nightmare Gogoat teve seus posicionamentos removidos ou alterados, a frequência e uso de golpes pelo Nightmare Dragonite foi rebalanceado, Nightmare Gallade teve seus posicionamentos removidos ou alterados e a força dos Pokémon rebalanceada, os Pokémon Raichu, Sceptile, Clefable e Light Ball Pikachu foram modificados. | 08/04/2021 | Changelog |
| Patch 17/03/2021 | Os respawns de Nightmare Empoleon, Nightmare Sharpedo, Nightmare Carvanha, Nightmare Whishcash e Nightmare Barbach tiveram seus mapas modificados e os Pokémon rebalanceados, o respawn de Nightmare Mantine, Nightmare Mantyke, Nightmare Garchomp, Nightmare Pidgeot, Nightmare Rhydon, Nightmare Phanpy, Nightmare Gogoat, Nightmare Gible e Gabite, tiveram seus Pokémon rebalanceados, os Pokémon Raichu, Gogoat, Light Ball Pikachu, Alolan Ninetales, Shiny Dodrio, Shiny Xatu, Mega Aggron e Exploud foram rebalanceados e tiveram seus ataques modificados ou rebalanceados. | 17/03/2021 | Changelog |
| Patch 27/02/2021 | O mapa das hunts Electric da Nightmare World foi reformulado, o respawn de Nightmare Elekid, Nightmare Manectric, Nightmare Raichu, Nightmare Luxray, Nightmare Eelektross, Nightmare Tynamo e Eelektrik foram reformulados e rebalanceados, os respawn de Alolan Raichu, Nightmare Gallade, Nightmare Honchkrow e Nightmare Empoleon tiveram seus Pokémon rebalanceados, os Pokémon Shiny Espeon, Glalie e Shiny Gengar tiveram seus cooldowns modificados apenas no PvE, os Pokémon Gengar, e Shiny Elekid tiveram seus golpes alterados, modificado alguns estágios da Golden Arena. | 27/02/2021 | Changelog |
| Patch 26/01/2021 | A duração do efeito do golpe Stealth Rock foi reduzido de 25 para 15 segundos, alterado os Pokémon Mega Swampert, Shiny Eelektross, Forretress, Mega Steelix, Alolan Golem, Blissey, Shiny Arcanine e Cradily. | 26/01/2021 | Changelog |
| Patch 22/01/2021 | Hotfix para o TG, a Alolan Persian teve o tempo de seus ataques Snarl e Protect aumentado para 50 segundos apenas no PvP, e a força dos ataques Night Slash e Quash reduzidos apenas no PvP. | 22/01/2021 | Changelog |
| Patch 18/01/2021 | Alterado os Pokémon Shiny Stantler, Lickilicky, Shiny Honchkrow e Magnezone. | 18/01/2021 | Changelog |
| Patch 13/01/2021 | Agora o efeito do ataque Circle Throw foi alterado para STUN neverboost, o ataque Phantom Force não pode mais ser refletido, os Pokémon Rotom Ice, Shiny Pinsir, Flygon, Haxorus, Castform Fire, Castform Water, Castform Ice, Alolan Exeguttor e Shiny Magcargo foram alterados. | 13/01/2021 | Changelog |
Localização
Localização
Tier 1B
| Shiny Growlithe | Shiny Arcanine | Shiny Gengar | Shiny Tauros | Shiny Dratini | Shiny Dragonair | Shiny Larvitar | Shiny Pupitar | Mega Aggron | Shiny Manectric | Shiny Leafeon | Shiny Glaceon | Shiny Sylveon |
|---|---|---|---|---|---|---|---|---|---|---|---|---|
Pokédex
Informações Gerais
Nome: Venusaur
Level: 80
Elemento: Grass / Poison
Habilidades: Cut, Ride and Headbutt.
Boost: Leaf Stone ou Venom Stone (3)
Materia: Naturia Enhanced ou Malefic Enhanced
Evoluções
Bulbasaur precisa de Level 20.
Ivysaur precisa de Level 40.
Venusaur precisa de level 80.
Descrição:
Há uma grande flor nas costas do Venusaur. Diz-se que a flor adquire cores vivas, caso receba muita nutrição e luz solar. O aroma da flor acalma as emoções das pessoas.
Movimentos
Moveset PVP
| M1 | Tackle (15s) | ||||
|---|---|---|---|---|---|
| Level 80 | |||||
| M2 | Razor Leaf (10s) | ||||
| Level 80 | |||||
| M3 | Vine Whip (20s) | ||||
| Level 80 | |||||
| M4 | Headbut (15s) | ||||
| Level 80 | |||||
| M5 | Leech Seed (15s) | ||||
| Level 80 | |||||
| M6 | Bullet Seed (35s) | ||||
| Level 80 | |||||
| M7 | Solar Beam (60s) | ||||
| Level 80 | |||||
| M8 | Giga Drain (60s) | ||||
| Level 85 | |||||
| M9 | Sleep Powder (60s) | ||||
| Level 80 | |||||
| M10 | Poison Powder (20s) | ||||
| Level 80 | |||||
| M11 | Leaf Storm (70s) | ||||
| Level 90 | |||||
| P | Thick Fat |
Moveset PVE
| M1 | Tackle (15s) | ||||
|---|---|---|---|---|---|
| Level 80 | |||||
| M2 | Razor Leaf (10s) | ||||
| Level 80 | |||||
| M3 | Vine Whip (20s) | ||||
| Level 80 | |||||
| M4 | Headbut (15s) | ||||
| Level 80 | |||||
| M5 | Leech Seed (15s) | ||||
| Level 80 | |||||
| M6 | Bullet Seed (35s) | ||||
| Level 80 | |||||
| M7 | Solar Beam (45s) | ||||
| Level 80 | |||||
| M8 | Giga Drain (60s) | ||||
| Level 85 | |||||
| M9 | Sleep Powder (40s) | ||||
| Level 80 | |||||
| M10 | Poison Powder (20s) | ||||
| Level 80 | |||||
| M11 | Leaf Storm (60s) | ||||
| Level 90 | |||||
| P | Thick Fat |
Efetividades
Efetivo: Fire, Ice, Flying and Psychic.
Normal: Normal, Poison, Ground, Bug, Rock, Ghost, Dragon, Steel, Dark and Crystal.
Inefetivo: Water, Electric, Fighting and Fairy.
Muito Inefetivo: Grass.
Loot
| Item | Quantidade | % Normal | % Outland |
|---|---|---|---|
| 1-21 | 80.0% | 80.0% | |
| 1-21 | 80.0% | 80.0% | |
| 1-1 | 45.5% | 100.0% | |
| 1-1 | 25.5% | 63.8% | |
| 1-1 | 4.3% | 40.8% | |
| 1-1 | RARO | RARO | |
| 1-1 | RARO | RARO |
Localizações Abrangentes
| Green Island |
|---|
|
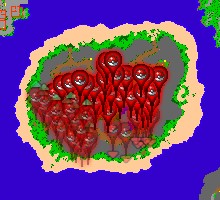
| Jungle Island |
|---|
|
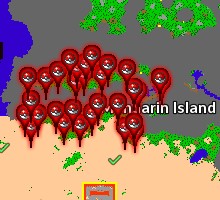
| Mandarin Island |
|---|
|
| Outland North |
|---|
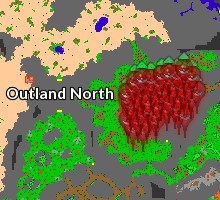
|
OU
Green Island Jungle Island Mandarin Island Outland North
Registro de Alterações
02/11/2019
- ● Tempo de recarga do ataque Leaf Storm reduzido de 70 para 60 segundos (Somente no PvE).
- ● Tempo de recarga do ataque Solarbeam reduzido de 50 para 45 segundos (Somente no PvE).
Outras Versões
| Shiny Venusaur | |
| Mega Venusaur | |
| Shiny Mega Venusaur |