|
|
| Linha 1: |
Linha 1: |
| = Ninja Village = | | = Dragon Sky Mythical Rift = |
|
| |
|
| <center> [[Arquivo:Banner_Ninja_Village.png|link=]] </center> <br> | | <center> [[Arquivo:Banner Dragon Sky.png|link=]] </center> <br> |
|
| |
|
| '''Nível mínimo:''' 400. <br> | | '''Nível mínimo:''' 525. <br> |
| '''Custo de Entrada:''' Ninja Village Rift Crystal. <br> | | '''Custo de Entrada:''' Dragon Sky Rift Crystal. <br> |
| '''Quantidade de jogadores:''' 2. <br> | | '''Quantidade de jogadores:''' 2. <br> |
| '''Boss:''' Snorlax. <br> | | '''Boss:''' Shiny Giant Dragonite. <br> |
| '''Boss alternativo:''' Big Snorlax. <br> | | '''Tempo Limite:''' 1 hora. |
|
| |
|
| == Localização da Rift == | | == Localização da Rift == |
|
| |
|
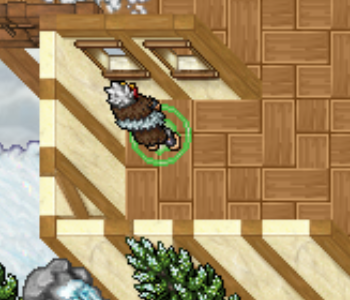
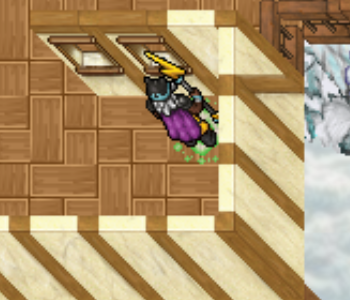
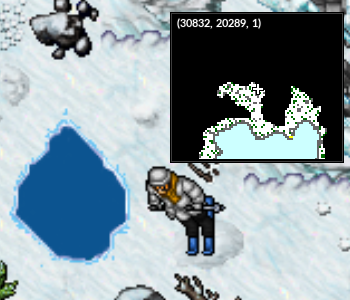
| A entrada da Ninja Village Rift fica localizada no local de caça de [[Arquivo:185-Sudowoodo.png|link=Sudowoodo]] Sudowoodo e [[Arquivo:409-Rampardos(1).png|link=Rampardos]] Rampardos. É necessário voar com o Mecha para chegar no local. <br> | | A entrada da Dragon Sky Rift está localizada no topo da Dragon Tunnel de Lavender. Para acessá-la, o jogador deve possuir um Mecha e ter concluído a Mecha Fly Quest. <br> |
|
| |
|
| | <center> [[Arquivo:entrada dragon sky.png|link=]]</center> <br> |
|
| |
|
| <center> [[Arquivo:Localização_Ninja_Village.png|link=]] </center> <br> | | <table class="seeMore"> |
| | <tr> |
| | <td class="seeMore__image">[[Arquivo:Telekinetic-compass.gif|link=]]</td> |
| | <td> '''Veja mais: [[Mecha]] - [[Mecha Fly Quest]]'''</td> |
| | </tr> |
| | </table> |
|
| |
|
| == Minimapa da Rift == | | == Minimap da Rift == |
| <br>
| |
| | |
| <center> [[Arquivo:Ninja_Village_Minimap.png|link=]] </center> <br>
| |
| | |
| == Informações importantes ==
| |
| | |
| Para acessar o Boss final os jogadores deverão derrotar 34 Pokémon e depois atravessar um caminho repleto de armadilhas. <br>
| |
| Durante o caminho será possível encontrar os seguintes Pokémon: <br>
| |
| | |
| | |
| <center>
| |
| {| class="wikitable" width="25%"
| |
| |-
| |
| | align="center" width="20%" | [[Arquivo:0009-Blastoise.png|link=Blastoise]]
| |
| | align="center" width="80%" | '''[[Blastoise]]'''
| |
| |-
| |
| | align="center" width="20%" | [[Arquivo:Shiny starmie.png|link=Shiny Starmie]]
| |
| | align="center" width="80%" | '''[[Shiny Starmie]]'''
| |
| |-
| |
| | align="center" width="20%" | [[Arquivo:565-Carracosta.png|link=Carracosta]]
| |
| | align="center" width="80%" | '''[[Carracosta]]'''
| |
| |-
| |
| | align="center" width="20%" | [[Arquivo:617-Accelgor.png|link=Accelgor]]
| |
| | align="center" width="80%" | '''[[Accelgor]]'''
| |
| |-
| |
| | align="center" width="20%" | [[Arquivo:291-Ninjask.png|link=Ninjask]]
| |
| | align="center" width="80%" | '''[[Ninjask]]'''
| |
| |-
| |
| | align="center" width="20%" | [[Arquivo:346-Cradily.png|link=Cradily]]
| |
| | align="center" width="80%" | '''[[Cradily]]'''
| |
| |-
| |
| | align="center" width="20%" | [[Arquivo:Scizor.png|link=Scizor]]
| |
| | align="center" width="80%" | '''[[Scizor]]'''
| |
| |-
| |
| | align="center" width="20%" | [[Arquivo:157-Typhlosion.png|link=Typhlosion]]
| |
| | align="center" width="80%" | '''[[Typhlosion]]'''
| |
| |-
| |
| | align="center" width="20%" | [[Arquivo:185-Sudowoodo.png|link=Sudowoodo]]
| |
| | align="center" width="80%" | '''[[Sudowoodo]]'''
| |
| |-
| |
| |}
| |
| </center>
| |
| | |
| <br>
| |
|
| |
|
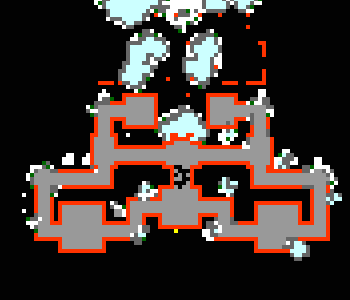
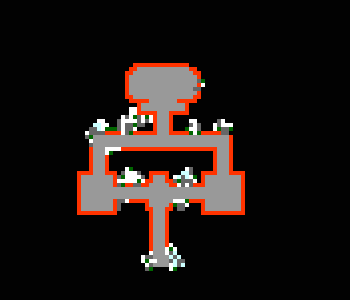
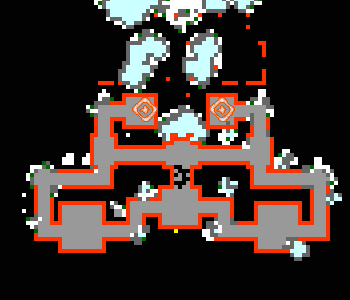
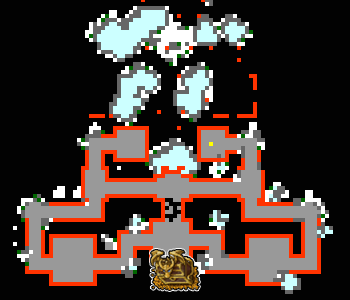
| == Armadilhas == | | <center> [[Arquivo:Minimap rift dragon sky.png|link=]] [[Arquivo:Minimap rift dragon sky 2 andar.png|link=]]</center> <br> |
|
| |
|
| Depois de derrotar os Pokémon o jogador deverá atravessar diversas armadilhas. Se o personagem for atingido, receberá dano e alguns efeitos. <br>
| | == Liberando os portões == |
|
| |
|
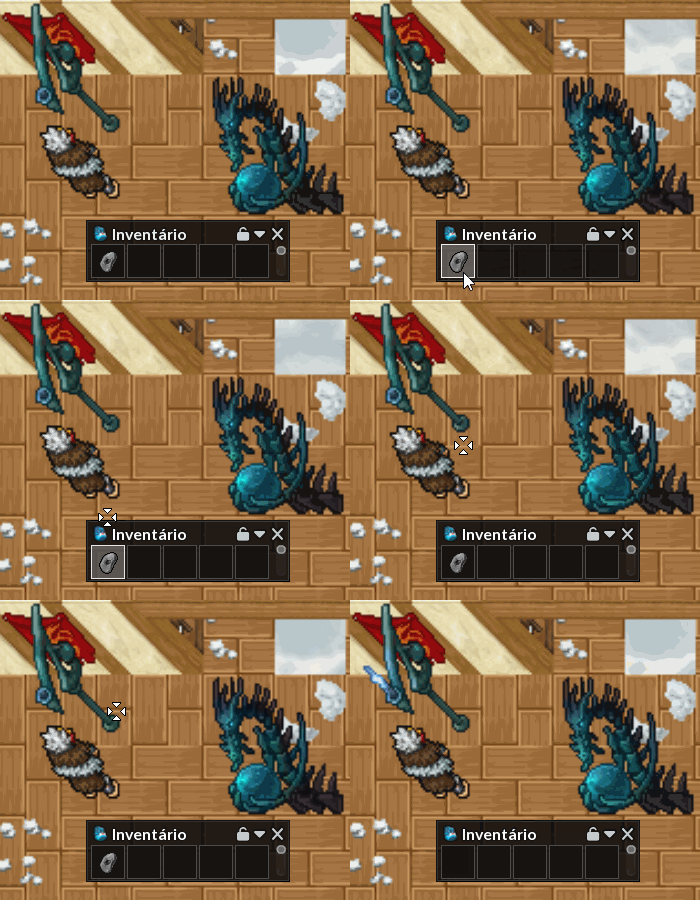
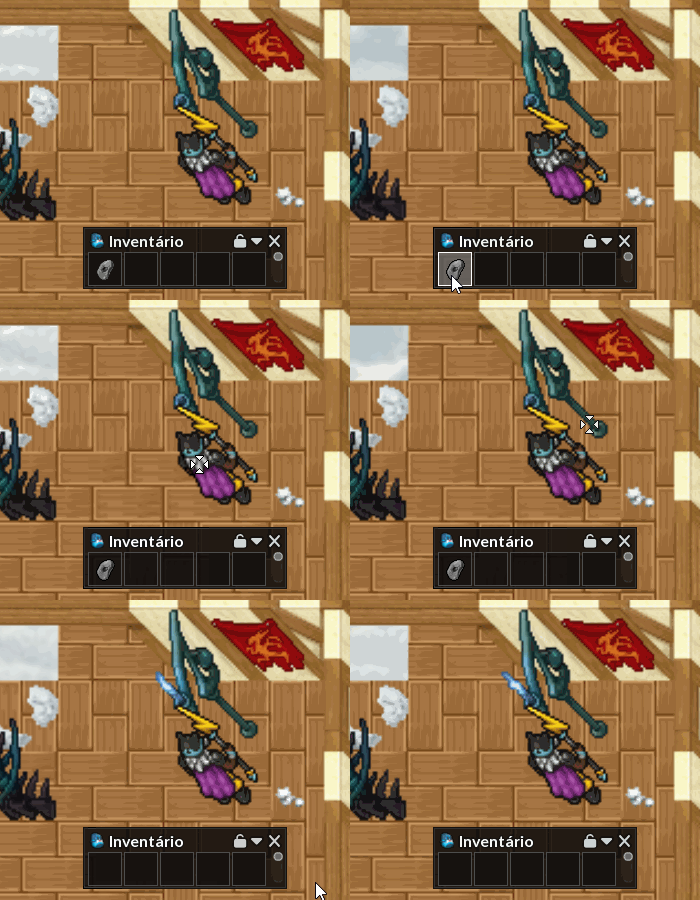
| | Ao entrar na Rift, cada jogador deve clicar na dragon statue no centro da sala para receber uma [[file:Flint (Dragon Sky).png|link=]] '''Flint'''. Para abrir os portões basta utilizar sua '''Flint''' em uma das tochas nas laterais da sala. |
|
| |
|
| <center> [[Arquivo:Trap Farf Ninja Village.gif|link=]] [[Arquivo:Trap Kingler e Electabuzz Ninja Village.gif|link=]] <br> <br> | | <center> [[Arquivo:tocha 1 dragon sky.gif|link=]] [[Arquivo:tocha 2 dragon sky.gif|link=]]</center> |
| [[Arquivo:Trap Tauros Ninja Village.gif|link=]] [[Arquivo:Trap Muk Ninja Village.gif|link=]] </center> <br>
| |
|
| |
|
| | == Primeira etapa == |
|
| |
|
| Passando por todas as armadilhas o jogador deverá seguir o caminho para enfrentar o Boss. <br>
| | Os jogadores devem derrotar os '''20 Pokémon''' espalhados pela Rift. |
|
| |
|
| == Boss == | | <center>[[file:dragon sky passo 1.png|link=]]</center> |
|
| |
|
| Depois de passar pelos arbustos será possível enfrentar o [[Arquivo:143-Snorlax.png|link=Snorlax]] Boss Snorlax. Em alguns momentos ela recebe bônus de ataque, que é possível visualizar por sinais no Pokémon. Além disso, usará o habilidade Protect quando chegar em uma certa quantidade de vida. <br>
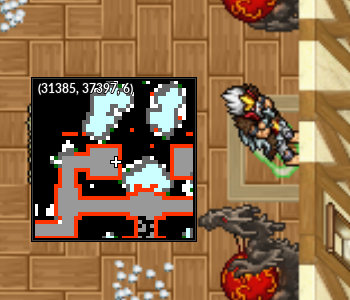
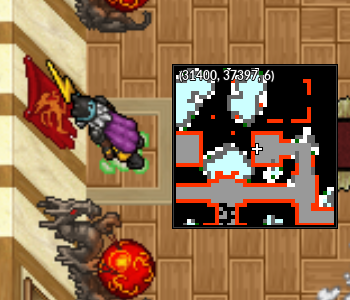
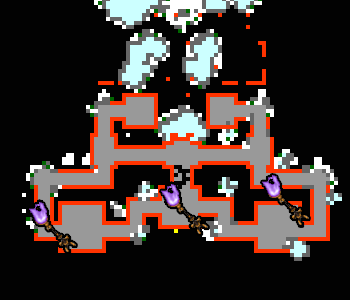
| | Após derrotar os Pokémon, os jogadores devem se encontrar nas marcas que estão no mapa acima e pisar ao mesmo tempo nos lados opostos para liberar o caminho do meio e o Boss Salamence. |
|
| |
|
| | <center>[[file:marca 1 dragon sky.png|link=]] [[file:marca 2 dragon sky.png|link=]]</center> |
|
| |
|
| <center> [[Arquivo:Snorlax_Ninja_Village.png|link=]] </center> <br>
| | == Boss Mega Salamence == |
|
| |
|
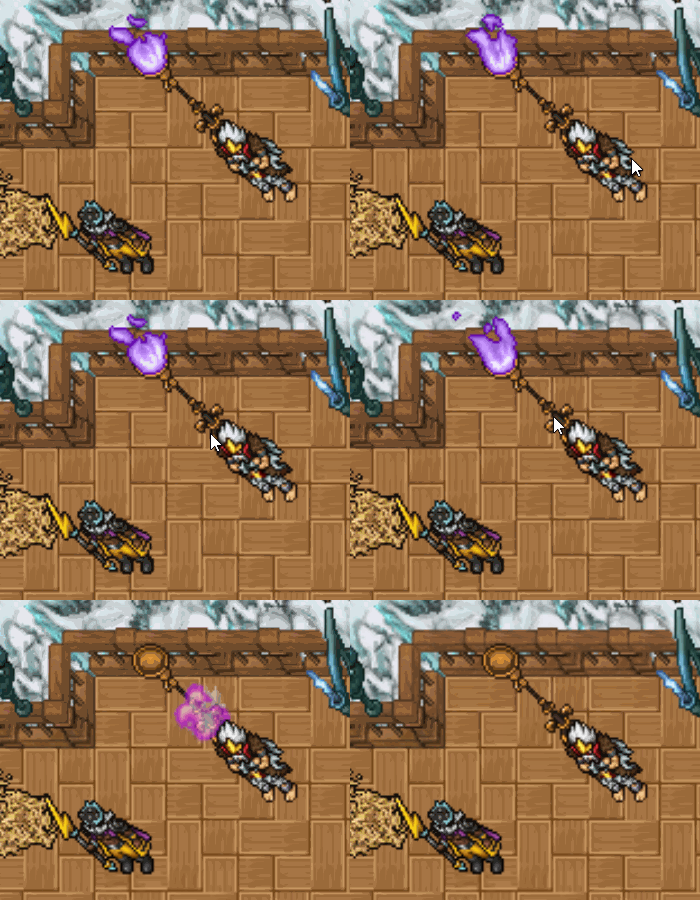
| | Para invocar o Boss Salamence os jogadores devem se encontrar no caminho do meio que foi liberado ao concluir as etapas anteriores. Ao clicar na tocha, outras três serão invocadas junto do [[file:Mega_Salamencee.png|link=]] '''Boss Mega Salamence'''. |
|
| |
|
| Depois de derrotá-lo basta ir até o local indicado e clicar no Rift Portal para concluir a Rift.<br>
| | <center>[[file:tocha salamence dragon sky.gif|link=]]</center> |
|
| |
|
| | *Quebrar a tocha reduz a defesa do Boss Salamence por um minuto. |
| | *O Boss Salamence tem efetividade |
| | <br> |
| | Localização das tochas a serem quebradas: |
|
| |
|
| <center> [[Arquivo:Saída_Ninja_Village.png|link=]] </center> <br> | | <center>[[file:tochas salamence dragon sky.png|link=]]</center> |
| | |
| == Boss Alternativo - Big Snorlax ==
| |
|
| |
|
| Com sorte, é possível que o [[Arquivo:143-Snorlax.png|link=Snorlax]] Boss Snorlax seja '''substituído''' pelo [[Arquivo:143-BigSnorlax.png|30px|link=Big Snorlax]] Big Snorlax. Os jogadores que o derrotam recebem uma recompensa extra. <br>
| | == Segredo == |
| É possível saber que isso acontecerá ao entrar na Rift e a tela balançar. <br>
| |
|
| |
|
| | Após derrotar o Boss Salamence, os jogadores devem fazer o segredo da Rift que fica ao sul da sala central indicado por um baú do tesouro no mapa abaixo: |
|
| |
|
| <center> [[Arquivo:Big_Snorlax_Ninja_Village.png|link=]] </center> <br> | | <center>[[Arquivo:Segredo dragon sky rift.png|link=]]</center> |
|
| |
|
| | Ao clicar no bau, os jogadores irão receber a mensagem: |
|
| |
|
| O [[Arquivo:143-BigSnorlax.png|30px|link=Big Snorlax]] Big Snorlax troca de alvo a cada alguns segundos, então é importante prestar atenção. <br>
| | '''Você encontrou o tesouro de um dragão, mas deve superar os desafios para sair daqui com ele.''' |
| Ao derrotá-lo, terá garantido o drop do [[Arquivo:Giant Hamburger.png|link=]] '''Giant Hamburger''' como recompensa extra. Este item é importante para crafts relacionados à Voidmania.
| |
|
| |
|
| == Recompensas ==
| | Caso o jogador complete a rift tendo feito o segredo, receberá os itens abaixo: |
|
| |
|
| <center> | | <center> |
| {| class="wikitable" width="25%" | | {| class="wikitable" |
| | ! colspan ="2" | Item !! Raridade |
| |- | | |- |
| ! colspan="2" | Item
| | |[[file:Faceted Quartz.png|link=]] || Faceted Quartz || Comum |
| ! Raridade
| |
| |- | | |- |
| | align="center" | [[Arquivo:Random_Ancient_Relics.png|link=]]
| | |[[file:Strange Halite Ore.png|link=]] || Strange Halite Ore || Raro |
| |align="left" style="border-left-style: hidden; | Random Ancient Relics | |
| | align="center" |Comum | |
| |- | | |- |
| | align="center" | [[Arquivo:Random_Bones.png|link=]]
| | |} |
| |align="left" style="border-left-style: hidden; | Random Bones
| |
| |align="center" | Comum
| |
| |-
| |
| | align="center" | [[Arquivo:Heart-stone.gif|link=]]
| |
| |align="left" style="border-left-style: hidden; | Heart Stone
| |
| | align="center" |Comum
| |
| |-
| |
| | align="center" | [[Arquivo:Corrupted-Scizor-Claw.gif|link=]]
| |
| |align="left" style="border-left-style: hidden; | Corrupted Scizor Claw
| |
| | align="center" |Comum
| |
| |-
| |
| | align="center" | [[Arquivo:Corrupted-Tree-Branch.gif|link=]]
| |
| |align="left" style="border-left-style: hidden; | Corrupted Tree Branch
| |
| | align="center" |Comum
| |
| |-
| |
| | align="center" | [[Arquivo:Corrupted-Gem-Star.gif|link=]]
| |
| |align="left" style="border-left-style: hidden; | Corrupted Gem Star
| |
| | align="center" |Comum
| |
| |-
| |
| | align="center" | [[Arquivo:Random_Skulls.png|link=]]
| |
| |align="left" style="border-left-style: hidden; | Random Skull
| |
| | align="center" |Raro
| |
| |-
| |
| | align="center" | [[Arquivo:Rift Mitica.png|link=]]
| |
| |align="left" style="border-left-style: hidden; | Rift Crystal (Mítico)
| |
| | align="center" |Raro
| |
| |-
| |
| | align="center" | [[Arquivo:Recipe.png|link=]]
| |
| |align="left" style="border-left-style: hidden; | Ninja Addon (Recipe)
| |
| | align="center" |Épico
| |
| |-
| |
| | align="center" | [[Arquivo:Book_Rifts_-_Ninja_Village.png|link=]]
| |
| |align="left" style="border-left-style: hidden; | Book: Rifts - Ninja Village
| |
| | align="center" |Épico
| |
| |-
| |
| ! colspan="3" | [[Arquivo:Exp_icon.png|30px|link=]] Experiência: 300.000 <br> [[Arquivo:Exp_icon_nw.png|30px|link=]] Experiência: 1.000
| |
| |} | |
| </center> | | </center> |
| | '''Observação''': O jogador sempre receberá um [[file:Strange Halite Ore.png|link=]] Strange Halite Ore caso complete 10 vezes tendo feito o segredo. <br><br> |
|
| |
|
| = Lost Mines = | | == Segunda etapa == |
|
| |
|
| <center> [[Arquivo:Banner_Lost_Mines.png|link=]] </center> <br>
| | Após fazer o segredo, os jogadores devem, novamente, se encontrar na parte central do mapa e clicar na '''dragon statue''' para prosseguir. |
|
| |
|
| '''Nível mínimo:''' 400. <br>
| | <center>[[Arquivo:Dragon sky estatua.png|link=]]</center> |
| '''Custo de Entrada:''' Lost Mines Rift Crystal. <br>
| |
| '''Quantidade de jogadores:''' 2. <br>
| |
| '''Boss:''' Leader Excadrill. <br>
| |
| '''Boss alternativo:''' Giant Rhydon. <br>
| |
|
| |
|
| == Localização da Rift ==
| | Ao clicar na estátua, os jogadores serão teletransportados para a segunda parte, onde devem coletar as estátuas das versões Shiny de Dratini, Dragonair e Dragonite. |
|
| |
|
| A entrada da Lost Mines Rift fica localizada no local de caça de [[Arquivo:844-Sandaconda.png|link=Sandaconda]] Sandaconda.<br>
| | <center>[[Arquivo:Shiny dratini dragon sky.png|link=]] [[Arquivo:Shiny dragonair dragon sky.png|link=]] [[Arquivo:Shiny dragonite dragon sky.png|link=]]</center> |
| | |
| | |
| <center> [[Arquivo:Localização_Lost_Mines.png|link=]] </center> <br>
| |
| | |
| == Minimapa da Rift ==
| |
| <br> | | <br> |
| | Os jogadores devem colocá-los em '''três altares''' espalhados pela rift como nas imagens abaixo: |
|
| |
|
| <center> [[Arquivo:Lost_Mines_Minimap_1.png|link=]][[Arquivo:Lost_Mines_Minimap_2.png|link=]] </center> | | <center>[[Arquivo:Shiny dratini dragon sky 2.png|link=]] [[Arquivo:Shiny dragonair dragon sky 2.png|link=]] [[Arquivo:Shiny dragonite dragon sky 2.png|link=]]</center> |
| <center> [[Arquivo:Lost_Mines_Minimap_3.png|link=]][[Arquivo:Lost_Mines_Minimap_4.png|link=]] </center>
| |
| | |
| == Informações importantes ==
| |
| | |
| Para chegar ao final os jogadores deverão derrotar 30 Pokémon e escapar de algumas armadilhas no mapa. <br>
| |
| Durante o caminho será possível encontrar os seguintes Pokémon: <br>
| |
| | |
| | |
| <center>
| |
| {| class="wikitable" width="25%"
| |
| |-
| |
| | align="center" width="20%" | [[Arquivo:050-AlolanDiglett.png|link=Alolan Diglett]]
| |
| | align="center" width="80%" | '''[[Alolan Diglett]]'''
| |
| |-
| |
| | align="center" width="20%" | [[Arquivo:051-AlolanDugtrio.png|link=Alolan Dugtrio]]
| |
| | align="center" width="80%" | '''[[Alolan Dugtrio]]'''
| |
| |-
| |
| | align="center" width="20%" | [[Arquivo:112-Rhydon.png|link=Rhydon]]
| |
| | align="center" width="80%" | '''[[Rhydon]]'''
| |
| |-
| |
| | align="center" width="20%" | [[Arquivo:027-Shiny Sandshrew.png|link=Shiny Sandshrew]]
| |
| | align="center" width="80%" | '''[[Shiny Sandshrew]]'''
| |
| |-
| |
| | align="center" width="20%" | [[Arquivo:028-Shiny Sandslash.png|link=Shiny Sandslash]]
| |
| | align="center" width="80%" | '''[[Shiny Sandslash]]'''
| |
| |-
| |
| | align="center" width="20%" | [[Arquivo:529-Drillbur.png|link=Drilbur]]
| |
| | align="center" width="80%" | '''[[Drilbur]]'''
| |
| |-
| |
| | align="center" width="20%" | [[Arquivo:530-Excadrill.png|link=Excadrill]]
| |
| | align="center" width="80%" | '''[[Excadrill]]'''
| |
| |-
| |
| |}
| |
| </center> | |
|
| |
|
| <br> | | <br> |
| | Após colocá-los, os jogadores terão acesso aos dois shiny dragonite guardiões do boss '''Shiny Giant Dragonite'''. |
|
| |
|
| == Armadilhas ==
| | *Cuidado com os guardiões, quando eles estão com a vida baixa conseguem facilmente matar o tanque apenas com ataques básicos. |
| | | *Utilize elixires de defesa e guarde o protect para o final. |
| Algumas pedras caem e podem atingir os jogadores. Caso o jogador ou Pokémon for atingido, receberá dano. <br>
| |
| | |
| | |
| <center> [[Arquivo:Trap_Lost_Mines.gif|link=]] <br> </center>
| |
| | |
| == Boss ==
| |
| | |
| Depois de derrotar todos os Pokémon será possível enfrentar o [[Arquivo:530-Excadrill.png|link=Excadrill]] '''Leader Excadrill''', que fica logo ao descer as escadas. Em um certo momento, recebe aumento de ataque e fica bem forte, portanto, é importante tomar cuidado. <br>
| |
| | |
| | |
| <center> [[Arquivo:Excadrill_Lost_Mines.png|link=]] </center> <br>
| |
| | |
| | |
| Depois de derrotá-lo basta ir até o local indicado e clicar no carrinho para sair da Rift.<br>
| |
|
| |
|
| | Após derrotar os guardiões, os jogadores terão acesso ao boss Shiny Giant Dragonite. |
|
| |
|
| <center> [[Arquivo:Saída_Lost_Mines.gif|link=]] </center> <br>
| | == Shiny Giant Dragonite == |
|
| |
|
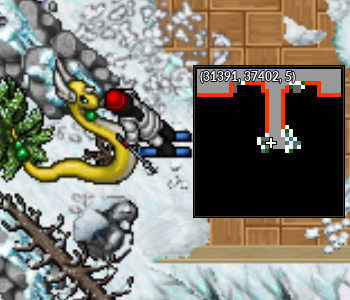
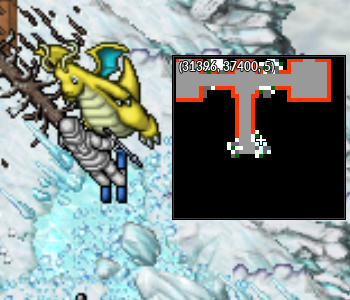
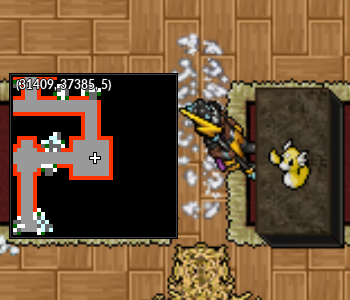
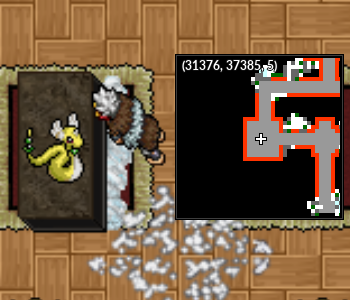
| == Boss Alternativo - Giant Rhydon == | | A luta com o boss [[file:Shiny_Dragonite.png|link=]] '''Shiny Giant Dragonite''' é no modo PokéView e os jogadores poderão trocar de Pokémon normalmente. |
|
| |
|
| Com sorte, é possível que o [[Arquivo:530-Excadrill.png|link=Excadrill]] Leader Excadrill seja '''substituído''' pelo [[Arquivo:112-Giant-Rhydon.png|30px|link=Rhydon]] Giant Rhydon. Os jogadores que o derrotam recebem uma recompensa extra. <br>
| | Para iniciar o combate, basta os dois jogadores se posicionarem em cima da marca em cada canto da sala. |
| É possível saber que isso acontecerá ao entrar na Rift e a tela balançar. <br>
| |
|
| |
|
| | <center>[[file:marca 3 dragon sky.png|link=]] [[file:marca 4 dragon sky.png|link=]]</center> |
|
| |
|
| <center> [[Arquivo:Giant_Rhydon_Lost_Mines.png|link=]] </center> <br>
| | Auto Ataque |
|
| |
|
| | Habilidades |
|
| |
|
| O [[Arquivo:112-Giant-Rhydon.png|30px|link=Rhydon]] Giant Rhydon troca de alvo a cada alguns segundos, então é importante prestar atenção. <br>
| | Chuva |
| Ao derrotá-lo, terá garantido o drop do [[Arquivo:Big_Rock_Tail.png|link=]] '''Big Rock Tail''' como recompensa extra. Este item é importante para crafts relacionados à Voidmania.
| |
|
| |
|
| == Recompensas == | | == Recompensas == |
|
| |
|
| <center> | | <center> |
| Linha 252: |
Linha 127: |
| | align="center" |Comum | | | align="center" |Comum |
| |- | | |- |
| | align="center" | [[Arquivo:Random_Bones.png|link=]]
| | | align="center" | [[Arquivo:Corrupted-Dragon-Tooth.gif|link=]] |
| |align="left" style="border-left-style: hidden; | Random Bones
| | |align="left" style="border-left-style: hidden; | Corrupted Dragon Tooth |
| |align="center" | Comum
| |
| |-
| |
| | align="center" | [[Arquivo:Earth-stone.gif|link=]] | |
| |align="left" style="border-left-style: hidden; | Earth Stone
| |
| | align="center" |Comum
| |
| |-
| |
| | align="center" | [[Arquivo:Rock-stone.gif|link=]]
| |
| |align="left" style="border-left-style: hidden; | Rock Stone | |
| | align="center" |Comum
| |
| |-
| |
| | align="center" | [[Arquivo:Mole_Hair.png|link=]]
| |
| |align="left" style="border-left-style: hidden; | Mole Hair
| |
| | align="center" |Comum
| |
| |-
| |
| | align="center" | [[Arquivo:Mole Big Hair.png|link=]]
| |
| |align="left" style="border-left-style: hidden; | Mole Big Hair
| |
| | align="center" |Comum
| |
| |-
| |
| | align="center" | [[Arquivo:Random_Skulls.png|link=]]
| |
| |align="left" style="border-left-style: hidden; | Random Skull
| |
| | align="center" |Raro
| |
| |-
| |
| | align="center" | [[Arquivo:Rift Mitica.png|link=]]
| |
| |align="left" style="border-left-style: hidden; | Rift Crystal (Mítico)
| |
| | align="center" |Raro
| |
| |-
| |
| | align="center" | [[Arquivo:Book_Dungeons_-_Lost_Mines.png|link=]]
| |
| |align="left" style="border-left-style: hidden; | Book: Rifts - Lost Mines
| |
| | align="center" |Épico
| |
| |-
| |
| ! colspan="3" | [[Arquivo:Exp_icon.png|30px|link=]] Experiência: 300.000 <br> [[Arquivo:Exp_icon_nw.png|30px|link=]] Experiência: 1.000
| |
| |}
| |
| </center>
| |
| | |
| | |
| = Forgotten Fortress =
| |
| | |
| <center> [[Arquivo:Banner_Forgotten Fortress.png|link=]] </center> <br>
| |
| | |
| '''Nível mínimo:''' 400. <br>
| |
| '''Custo de Entrada:''' Forgotten Fortress Rift Crystal. <br>
| |
| '''Quantidade de jogadores:''' 3. <br>
| |
| '''Habilidades necessárias:''' Light e Pokémon com ataque do tipo Fire. <br>
| |
| '''Boss:''' Aegislash. <br>
| |
| | |
| == Localização da Rift ==
| |
| | |
| A entrada da Forgotten Fortress Rift fica localizada no local de caça de [[Arquivo:443-Gible.png|link=Gible]] Gible e [[Arquivo:444-Gabite.png|link=Gabite]] Gabite.<br>
| |
| | |
| | |
| <center> [[Arquivo:Localização_Forgotten Fortress.png|link=]] </center> <br>
| |
| | |
| == Minimapa da Rift ==
| |
| <br>
| |
| | |
| <center> [[Arquivo:Forgotten Fortress Minimap_1.png|link=]][[Arquivo:Forgotten Fortress Minimap_2.png|link=]] </center>
| |
| | |
| == Informações importantes ==
| |
| | |
| '''Atenção:''' É importante que um dos jogadores leve um Pokémon com um golpe do tipo Fire e a habilidade '''light''' para uma parte da Rift. <br>
| |
| | |
| É o local ideal para tentar a captura do Pokémon [[Arquivo:429-Mismagius.png|link=Mismagius]] Mismagius. <br>
| |
| Para chegar ao final os jogadores deverão derrotar 47 Pokémon e escapar de algumas armadilhas no mapa. <br>
| |
| Em um certo momento, os jogadores deverão se separar. Um jogador deverá "cair" no caminho com vários [[Arquivo:316-Gulpin.png|link=Gulpin]] Gulpin e [[Arquivo:317-Swalot.png|link=Swalot]] Swalot, enquanto os outros continuarão o caminho normalmente. <br>
| |
| | |
| | |
| <center> [[Arquivo:Caindo_Swalot_Forgotten_Fortress.gif|link=]] </center> <br>
| |
| | |
| | |
| O jogador que seguir esse caminho deverá derrotar todos os Pokémon do local e também clicar na engrenagem no local indicado abaixo, para ativar uma ponte em outro local da Rift: <br>
| |
| | |
| | |
| <center> [[Arquivo:Ativando_Ponte_1_Forgotten_Fortress.png|link=]] </center> <br>
| |
| | |
| | |
| No final do caminho haverá um portão fechado, que dependerá dos outros jogadores para que seja aberto. <br>
| |
| Os outros dois jogadores continuarão o caminho normalmente e deverão derrotar os Pokémon que encontrarem. No final, deverão usar a habilidade '''Light''' para abrir um caminho secreto: <br>
| |
| | |
| | |
| <center> [[Arquivo:Light_Forgotten_Fortress.gif|link=]] </center> <br>
| |
| | |
| | |
| Dentro desse local, um dos jogadores deverá utilizar uma habilidade do tipo '''Fire''' para acender uma tocha: <br>
| |
| | |
| | |
| <center> [[Arquivo:Fogo_Forgotten_Fortress.gif|link=]] </center> <br>
| |
| | |
| | |
| Após isso, os jogadores deverão voltar um pouco e ir para a esquerda do local, onde será possível encontrar um Bisharp. Ele é bem forte e deverá ser derrotado para que o portão que prende o jogador que estava nos Swalot seja aberto e ele possa se juntar aos outros. <br>
| |
| | |
| | |
| <center> [[Arquivo:Bisharp_Forgotten_Fortress.png|link=]] </center> <br>
| |
| | |
| | |
| '''Observação:''' Bisharp é mais forte que os Pokémon do local e troca de alvo em alguns momentos. <br>
| |
| | |
| | |
| Depois de derrotar o Bisharp os jogadores poderão se encontrar para seguir o caminho, onde encontrarão uma ponte que está pela metade. Para que a ponte fique completa, deverão clicar em outra engrenagem, conforme imagem a seguir:
| |
| | |
| | |
| <center> [[Arquivo:Ativando_Ponte_2_Forgotten_Fortress.png|link=]] </center> <br>
| |
| | |
| | |
| Após liberar o acesso pela ponte, basta continuar o caminho até encontrar o Boss.
| |
| | |
| <br>
| |
| | |
| == Armadilhas ==
| |
| | |
| Algumas espadas caem pelo mapa, causando dano em quem for atingido. <br>
| |
| | |
| | |
| <center> [[Arquivo:Trap 1 Forgotten Fortress.gif|link=]] <br> </center>
| |
| | |
| | |
| Em vários locais existem gosmas que podem jogar quem pisar para cima ou empurrar para outros locais. Não causa dano, mas pode atrapalhar em alguns momentos. <Br>
| |
| | |
| | |
| <center> [[Arquivo:Trap 2 Forgotten Fortress.gif|link=]] <br> </center>
| |
| | |
| == Boss ==
| |
| | |
| Depois de derrotar todos os Pokémon será possível enfrentar o '''Ghost Warrior''', que usa um [[Arquivo:681-Aegislash.png|link=Aegislash]] '''Aegislash'''. Para isso, basta clicar no baú no norte do local. <br>
| |
| | |
| | |
| <center> [[Arquivo:Baú Ghost Warrior_Forgotten_Fortress.png|link=]] </center> <br>
| |
| | |
| | |
| O Aegislash é bem forte e troca de alvo depois de alguns segundos. Além disso, em uma certa quantidade de vida ele usa a habilidade '''Aerial Ace''' no centro da arena, então é necessário tomar cuidado. <br>
| |
| | |
| | |
| <center> [[Arquivo:Aegislash_Forgotten_Fortress.png|link=]] </center> <br>
| |
| | |
| | |
| No final, ele começa utilizar a habilidade '''King's Shield''', que deixa o Pokémon imune e retorna '''dano alto''' a quem tentar causar. É necessário aguardar a habilidade acabar para continuar atacando e ele poderá usar isso diversas vezes. <br>
| |
| | |
| | |
| <center> [[Arquivo:Kings_Shield_Aegislash_Forgotten_Fortress.png|link=]] </center> <br>
| |
| | |
| | |
| | |
| Depois de derrotá-lo basta clicar no baú para finalizar a Rift. <br>
| |
| | |
| | |
| <center> [[Arquivo:Saída_Forgotten_Fortress.png|link=]] </center> <br>
| |
| | |
| == Recompensas ==
| |
| | |
| <center>
| |
| {| class="wikitable" width="25%"
| |
| |-
| |
| ! colspan="2" | Item
| |
| ! Raridade
| |
| |-
| |
| | align="center" | [[Arquivo:Random_Ancient_Relics.png|link=]]
| |
| |align="left" style="border-left-style: hidden; | Random Ancient Relics
| |
| | align="center" |Comum | | | align="center" |Comum |
| |- | | |- |
| Linha 416: |
Linha 135: |
| |align="center" | Comum | | |align="center" | Comum |
| |- | | |- |
| | align="center" | [[Arquivo:Venom-stone.gif|link=]] | | | align="center" | [[Arquivo:Crystal-stone.gif|link=]] |
| |align="left" style="border-left-style: hidden; | Venom Stone | | |align="left" style="border-left-style: hidden; | Crystal Stone |
| | align="center" |Comum | | |align="center" | Comum |
| |-
| |
| | align="center" | [[Arquivo:HrnVNwK.png|link=]]
| |
| |align="left" style="border-left-style: hidden; | Darkness Stone
| |
| | align="center" |Comum
| |
| |-
| |
| | align="center" | [[Arquivo:Corrupted-Doll-Star.gif|link=]]
| |
| |align="left" style="border-left-style: hidden; | Corrupted Doll Star
| |
| | align="center" |Comum
| |
| |-
| |
| | align="center" | [[Arquivo:Corrupted-Miss-Traces.gif|link=]]
| |
| |align="left" style="border-left-style: hidden; | Corrupted Miss Traces
| |
| | align="center" |Comum
| |
| |-
| |
| | align="center" | [[Arquivo:Random_Skulls.png|link=]]
| |
| |align="left" style="border-left-style: hidden; | Random Skull
| |
| | align="center" |Raro
| |
| |-
| |
| | align="center" | [[Arquivo:Rift Mitica.png|link=]]
| |
| |align="left" style="border-left-style: hidden; | Rift Crystal (Mítico)
| |
| | align="center" |Raro
| |
| |-
| |
| | align="center" | [[Arquivo:Book_Rifts_-_Forgotten Fortress.png|link=]]
| |
| |align="left" style="border-left-style: hidden; | Book: Rifts - Forgotten Fortress
| |
| | align="center" |Épico
| |
| |-
| |
| ! colspan="3" | [[Arquivo:Exp_icon.png|30px|link=]] Experiência: 300.000 <br> [[Arquivo:Exp_icon_nw.png|30px|link=]] Experiência: 1.000
| |
| |}
| |
| </center>
| |
| | |
| = Drowned City =
| |
| | |
| <center> [[Arquivo:Banner_Drowned City.png|link=]] </center> <br>
| |
| | |
| '''Nível mínimo:''' 400. <br>
| |
| '''Custo de Entrada:''' Drowned City Rift Crystal. <br>
| |
| '''Quantidade de jogadores:''' 3. <br>
| |
| '''Boss:''' Shiny Gyarados, Shiny Tentacruel e Alomomola. <br>
| |
| '''Boss Alternativo:''' Giant Shiny Tentacruel
| |
| | |
| == Localização da Rift ==
| |
| | |
| A entrada da Drowned City Rift fica localizada no local de caça de Mantyke, na Wildwind Island.<br>
| |
| | |
| | |
| <center> [[Arquivo:Localização_Drowned City.png|link=]] </center> <br>
| |
| | |
| == Minimapa da Rift ==
| |
| <br>
| |
| | |
| <center> [[Arquivo:Drowned City Minimap_1.png|link=]] [[Arquivo:Drowned City Minimap_2.png|link=]] </center>
| |
| | |
| == Informações importantes ==
| |
| | |
| Em resumo, a Drowned City Rift possui 3 Bosses que devem ser derrotados na seguinte ordem: Shiny Tentacruel, Alomomola e Shiny Gyarados. Além disso, é o local ideal para os jogadores que precisam capturar um [[Arquivo:594-Alomomola.png|link=Alomomola]] Alomomola. <br>
| |
| No total, é necessário derrotar 32 Pokémon que estão dentro da Rift. Logo ao entrar os jogadores deverão enfrentar 12 [[Arquivo:594-Alomomola.png|link=Alomomola]] Alomomolas. Depois de derrotá-los, basta usar o impulso d'água para subir para o próximo andar. <br>
| |
| | |
| | |
| <center> [[Arquivo:Subida 1 Drowned City.png|link=]] </center> <br>
| |
| | |
| | |
| Agora já será possível se dirigir para o primeiro boss, o Shiny Tentacruel. Para isso os jogadores deverão ir para o norte e usar o impulso d'água para descer um andar e, depois disso, continuar o caminho até encontrar uma escada, que dará acesso ao Shiny Tentacruel. <br>
| |
| | |
| | |
| <center> [[Arquivo:Descida 1 Drowned City.png|link=]] </center> <br>
| |
| | |
| | |
| Nesse momento os jogadores deverão derrotá-lo para dar continuidade à Rift. Em alguns momentos, o Shiny Tentacruel mudará de alvo, bem como puxará todos jogadores para o meio da arena. Além disso, em um certo momento invocará diversos Tentacool e Shiny Tentacool para atrapalhar os jogadores. <br>
| |
| | |
| | |
| <center> [[Arquivo:Boss Shiny Tentacruel Drowned City.png|link=]] </center> <br>
| |
| | |
| | |
| Depois de derrotá-lo, muitas armadilhas aparecerão no mapa. Os jogadores deverão voltar o caminho feito para acessar a batalha e entrar no impulso d'água para subir para o outro andar. <br>
| |
| | |
| | |
| <center> [[Arquivo:Bolhas Drowned City.gif|link=]] [[Arquivo:Subida 2 Drowned City.png|link=]] </center> <br>
| |
| | |
| | |
| Agora é importante terminar de derrotar todos os Pokémon presentes na Rift. Ao total, são 32 e a contagem aparecerá no canal Padrão do jogo. <br>
| |
| O acesso ao local do [[Arquivo:594-Alomomola.png|link=Alomomola]] Alomomola também já estará aberto. Sendo assim, os jogadores podem ir derrotá-lo. <br>
| |
| | |
| | |
| <center> [[Arquivo:Entrada Alomomola Drowned City.png|link=]] </center> <br>
| |
| | |
| | |
| Para libertá-lo, basta clicar no baú que estará no meio da arena. <br>
| |
| | |
| | |
| <center> [[Arquivo:Liberando Alomomola Drowned City.png|link=]] </center> <br>
| |
| | |
| | |
| O Alomomola também possui algumas mecânicas básicas para atrapalhar os jogadores como mudança de alvo, bem como invocar outros Pokémon. <br>
| |
| | |
| '''Observação:''' Depois de derrotá-lo, novamente as armadilhas de água aparecerão para atrapalhar os jogadores. É necessário sair do local e ir para a entrada do último boss, o Shiny Gyarados. <br>
| |
| | |
| | |
| <center> [[Arquivo:Entrada Shiny Gyarados Drowned City.png|link=]] </center> <br>
| |
| | |
| | |
| O Shiny Gyarados é bem forte e muda de alvo em alguns momentos. Além disso, invoca alguns inimigos para atrapalhar os jogadores. <br>
| |
| | |
| Depois de derrotá-lo, basta sair do local e será possível perceber que o caminho está repleto de armadilhas de água para atrapalhar, basta desviar e ir para o final da Rift. <br>
| |
| | |
| | |
| <center> [[Arquivo:Saída 1 Drowned City.png|link=]] [[Arquivo:Saída 2 Drowned City.png|link=]] </center> <br>
| |
| | |
| <br>
| |
| | |
| == Boss Alternativo - Shiny Giant Tentacruel ==
| |
| | |
| Com sorte, é possível que tenha um [[Arquivo:078_Giant_Shiny_Tentacruel.png|Giant Shiny Tentacruel|link=|30px]] Giant Shiny Tentacruel dentro da Rift. Os jogadores que o derrotam recebem uma recompensa extra. <br>
| |
| É possível saber que isso acontecerá ao entrar na Rift e a tela balançar. <br>
| |
| | |
| | |
| <center> [[Arquivo:Shiny_Giant_Tentacruel_Drowned_City.png|link=]] </center> <br>
| |
| | |
| | |
| O [[Arquivo:078_Giant_Shiny_Tentacruel.png|Giant Shiny Tentacruel|link=|30px]] Giant Shiny Tentacruel troca de alvo a cada alguns segundos, então é importante prestar atenção. <br>
| |
| Ao derrotá-lo, terá garantido o drop do [[Arquivo:10.000_carat_emerald.png|30px|link=]] '''10.000 Carat Emerald''' como recompensa extra. Este item é importante criar o [[Arquivo:Alolan_Egg.png|link=]] Alolan Egg.
| |
| | |
| == Recompensas ==
| |
| | |
| <center>
| |
| {| class="wikitable" width="25%"
| |
| |- | | |- |
| ! colspan="2" | Item
| | | align="center" | [[Arquivo:Anciente Dragonite Idol.png|link=]] |
| ! Raridade
| | |align="left" style="border-left-style: hidden; | Ancient Dragonite Idol |
| |-
| |
| | align="center" | [[Arquivo:Random_Ancient_Relics.png|link=]] | |
| |align="left" style="border-left-style: hidden; | Random Ancient Relics | |
| | align="center" |Comum
| |
| |-
| |
| | align="center" | [[Arquivo:Random_Bones.png|link=]]
| |
| |align="left" style="border-left-style: hidden; | Random Bones
| |
| |align="center" | Comum | | |align="center" | Comum |
| |- | | |- |
| | align="center" | [[Arquivo:Water-stone.gif|link=]] | | | align="center" |[[Arquivo:Dragon_Wings.png|link=]] |
| |align="left" style="border-left-style: hidden; | Water Stone | | |align="left" style="border-left-style: hidden; | Dragon Wings |
| | align="center" |Comum | | | align="center" |Comum |
| |- | | |- |
| | align="center" | [[Arquivo:Crystal-stone.gif|link=]]
| |
| |align="left" style="border-left-style: hidden; | Crystal Stone
| |
| | align="center" |Comum
| |
| |-
| |
| | align="center" | [[file:Pink Fins.png|link=]]
| |
| |align="left" style="border-left-style: hidden; | Pink Fins
| |
| | align="center" |Comum
| |
| |-
| |
| | align="center" | [[Arquivo:Random_Skulls.png|link=]] | | | align="center" | [[Arquivo:Random_Skulls.png|link=]] |
| |align="left" style="border-left-style: hidden; | Random Skull | | |align="left" style="border-left-style: hidden; | Random Skull |
| | align="center" |Raro | | | align="center" |Raro |
| |- | | |- |
| | align="center" | [[Arquivo:Rift Mitica.png|link=]] | | | align="center" | [[Arquivo:Dragonite Television.png|link=]] |
| |align="left" style="border-left-style: hidden; | Rift Crystal (Mítico) | | |align="left" style="border-left-style: hidden; | Dragonite Television |
| | align="center" |Raro | | | align="center" |Raro |
| |- | | |- |
| | align="center" | [[Arquivo:Book_Dungeons_-_Drowned_City.png|link=]] | | | align="center" | [[Arquivo:Dragonite TV Camera.webp|link=]] |
| |align="left" style="border-left-style: hidden; | Book: Rifts - Drowned City
| | |align="left" style="border-left-style: hidden; | Dragonite TV Camera |
| | align="center" |Épico
| |
| |-
| |
| | align="center" | [[Arquivo:Recipe.png|link=]]
| |
| |align="left" style="border-left-style: hidden; | Laryngeal Mask Addon (Recipe)
| |
| | align="center" |Lendário
| |
| |-
| |
| | align="center" | [[Arquivo:Packaged_Large_Aquarium.png|link=]]
| |
| |align="left" style="border-left-style: hidden; | Large Aquarium
| |
| | align="center" |Lendário
| |
| |-
| |
| ! colspan="3" | [[Arquivo:Exp_icon.png|30px|link=]] Experiência: 300.000 <br> [[Arquivo:Exp_icon_nw.png|30px|link=]] Experiência: 1.000
| |
| |}
| |
| </center>
| |
| | |
| | |
| = Kong Island =
| |
| | |
| <center> [[Arquivo:Kong_island_banner.png|link=]] </center> <br>
| |
| | |
| '''Nível mínimo:''' 400. <br>
| |
| '''Custo de Entrada:''' Kong Island Rift Crystal. <br>
| |
| '''Quantidade de jogadores:''' 3. <br>
| |
| '''Habilidades necessárias:''' Light. <br>
| |
| '''Boss:''' Slaking. <br>
| |
| | |
| == Localização da Rift ==
| |
| | |
| A entrada da Kong Island Rift está localizada dentro do Safari em um andar superior, portanto '''o uso de Mecha é necessário'''. <br>
| |
| | |
| | |
| <center> [[Arquivo:Localização_Kong_Island.png|link=]] </center> <br>
| |
| | |
| == Minimapa da Rift==
| |
| <center>
| |
| {| class="wikitable" width="25%" style="text-align:center"
| |
| |-
| |
| ! Andar 1 !! Andar 2 !! Andar 3
| |
| |-
| |
| |[[Arquivo:Mapa Kong Island 1.png|link=]] || [[Arquivo:Mapa Kong Island 2.png|link=]] || [[Arquivo:Mapa Kong Island 3.png|link=]]
| |
| |}</center>
| |
| | |
| <center>
| |
| {| class="wikitable" width="25%" style="text-align:center"
| |
| |-
| |
| ! Andar 4 !! Andar 5
| |
| |-
| |
| |[[Arquivo:Mapa Kong Island 4.png|link=]] || [[Arquivo:Mapa Kong Island 5.png|link=]]
| |
| |}</center> <br>
| |
| | |
| == Informações importantes==
| |
| | |
| Os jogadores encontrarão Pokémon aleatórios na Rift, porém não é necessário matá-los para chegar ao Boss. <br>
| |
| | |
| | |
| <center>
| |
| {| class="wikitable" width="25%"
| |
| |-
| |
| | align="center" width="20%" | [[Arquivo:287-Slakoth.png|link=Slakoth]]
| |
| | align="center" width="80%" | '''[[Slakoth]]'''
| |
| |-
| |
| | align="center" width="20%" | [[Arquivo:038-Ninetales.png|link=Ninetales]]
| |
| | align="center" width="80%" | '''[[Ninetales]]'''
| |
| |-
| |
| | align="center" width="20%" | [[Arquivo:230-Kingdra.png|link=Kingdra]]
| |
| | align="center" width="80%" | '''[[Kingdra]]'''
| |
| |-
| |
| | align="center" width="20%" | [[Arquivo:110-Weezing.png|link=Weezing]]
| |
| | align="center" width="80%" | '''[[Weezing]]'''
| |
| |-
| |
| | align="center" width="20%" | [[Arquivo:091-Cloyster.png|link=Cloyster]]
| |
| | align="center" width="80%" | '''[[Cloyster]]'''
| |
| |-
| |
| | align="center" width="20%" | [[Arquivo:026-Raichu.png|link=Raichu]]
| |
| | align="center" width="80%" | '''[[Raichu]]'''
| |
| |-
| |
| |}
| |
| </center>
| |
| | |
| == Quebra-Cabeça ==
| |
| | |
| Durante o caminho, o jogador deverá acender '''tochas''', acionar '''alavancas''' e interagir com '''objetos''' que abrirão passagem e permitirão que este avance. <br>
| |
| * As primeiras '''tochas''' são intuitivas, e liberam o caminho para a primeira alavanca.
| |
| <center>
| |
| {| class="wikitable" width="85%" style="text-align:center"
| |
| |-
| |
| ! Tocha 1 !! Tocha 2 !! Tocha 3
| |
| |-
| |
| |<br>[[Arquivo:Kong_Island_Tocha_1.png|link=]] ||<br> [[Arquivo:Kong_Island_Tocha_2.png|link=]] ||<br> [[Arquivo:Kong_Island_Tocha_3.png|link=]]
| |
| |}</center> <br>
| |
| | |
| Ao clicar na '''alavanca''', o caminho para o piso especial estará livre. Ao se posicionar no '''piso''', outro jogador deverá ir até a '''Tocha 4''' para que o quebra-cabeça prossiga.
| |
| | |
| <center>
| |
| {| class="wikitable" width="85%" style="text-align:center"
| |
| |-
| |
| ! Alavanca !! Piso !! Tocha 4
| |
| |-
| |
| | <br>[[Arquivo:Kong_Island_Alavanca.png|link=]] || <br>[[Arquivo:Kong_Island_Piso.png|link=]] || <br>[[Arquivo:Kong_Island_Tocha_4.png|link=]]
| |
| |}</center><br>
| |
| | |
| Ainda seguindo a ordem das imagens, ao chegar na '''caveira''', o jogador precisa clicar no SQM em que a caveira está posicionada.
| |
| | |
| <center>
| |
| {| class="wikitable" width="85%" style="text-align:center"
| |
| |-
| |
| ! Tocha 5 !! Tocha 6 !! Caveira
| |
| |-
| |
| | [[Arquivo:Kong_Island_Tocha_5.png|link=]] || [[Arquivo:Kong_Island_Tocha_6.png|link=]] || <br> [[Arquivo:Kong_Island_Caveira2.gif|link=]] <br> ('''A alavanca desta sala não precisa ser ativada''')
| |
| |} </center> <br>
| |
| | |
| Ao finalizar o quebra cabeça, o jogador poderá clicar no '''barril''' da imagem, e acessar o boss [[Arquivo:289-Slaking.png|link=]] '''Slaking''' através da '''escada''' indicada
| |
| | |
| <center> [[Arquivo:Kong_Island_Entrada_Boss.png|link=]] [[Arquivo:Kong_Island_Escada_boss.png|link=]] </center> <br>
| |
| | |
| == Boss ==
| |
| | |
| O Boss da Kong Island Rift é o [[Arquivo:289-Slaking.png|link=Slaking]] Slaking. <br>
| |
| | |
| <center>[[Arquivo:Boss Slaking.png|link=]]</center>
| |
| | |
| * As mecânicas do boss são simples, em dois momentos, durante a batalha, Slaking irá ficar inalvejável e barris cairão do céu causando dano no jogador e em seus Pokémon. <br>
| |
| * Ao final dessa mecânica, o boss voltará ao campo (causando dano na área de queda), e reiniciará o ciclo, ativando a mecânica posteriormente pela segunda vez. <br>
| |
| | |
| <center>[[Arquivo:Boss Slaking Mecânica.gif|400px|link=]]</center>
| |
| | |
| * Ao observar um círculo rosa piscando ao redor do Slaking, tome cuidado, pois ele poderá focar em outro jogador.
| |
| | |
| Ao concluir a Rift, os jogadores serão colocados para fora da rift, recebendo as recompensas.
| |
| | |
| == Recompensas ==
| |
| | |
| <center>
| |
| {| class="wikitable" width="25%"
| |
| |-
| |
| ! colspan="2" | Item
| |
| ! Raridade
| |
| |-
| |
| | align="center" | [[Arquivo:Random_Ancient_Relics.png|link=]]
| |
| |align="left" style="border-left-style: hidden; | Random Ancient Relics
| |
| | align="center" |Comum
| |
| |-
| |
| | align="center" | [[Arquivo:Random_Bones.png|link=]]
| |
| |align="left" style="border-left-style: hidden; | Random Bones
| |
| |align="center" | Comum
| |
| |-
| |
| | align="center" | [[Arquivo:Heart-stone.gif|link=]]
| |
| |align="left" style="border-left-style: hidden; | Heart Stone
| |
| | align="center" |Comum
| |
| |-
| |
| | align="center" | [[Arquivo:Corrupted-Venom-Flute.gif|link=]]
| |
| |align="left" style="border-left-style: hidden; | Corrupted Venom Flute
| |
| | align="center" |Comum
| |
| |-
| |
| | align="center" | [[Arquivo:Leather.png|link=]]
| |
| |align="left" style="border-left-style: hidden; | Leather
| |
| | align="center" |Comum
| |
| |-
| |
| | align="center" | [[Arquivo:Random_Skulls.png|link=]]
| |
| |align="left" style="border-left-style: hidden; | Random Skull
| |
| | align="center" |Raro
| |
| |-
| |
| | align="center" | [[Arquivo:Rift Mitica.png|link=]]
| |
| |align="left" style="border-left-style: hidden; | Rift Crystal (Mítico) | |
| | align="center" |Raro | | | align="center" |Raro |
| |- | | |- |
| | align="center" | [[Arquivo:Book_Rifts_-_Kong Island.png|link=]] | | | align="center" | [[Arquivo:Shiny Dragonite Statue.png|65px|link=]] |
| |align="left" style="border-left-style: hidden; | Book: Rifts - Kong Island | | |align="left" style="border-left-style: hidden; | Shiny Dragonite Statue |
| | align="center" |Épico | | | align="center" |Épico |
| |- | | |- |
| | align="center" | [[Arquivo:Slakong Backpack.png|link=]] | | | align="center" | [[Arquivo:Book_Rifts_-_Dragon Sky.png|link=]] |
| |align="left" style="border-left-style: hidden; | Slakong Backpack
| | |align="left" style="border-left-style: hidden; | Book: Rifts - Dragon Sky |
| | align="center" |Lendário
| |
| |-
| |
| | align="center" | [[Arquivo:Slakong Backpack2.png|link=]]
| |
| |align="left" style="border-left-style: hidden; | Slakong Backpack
| |
| | align="center" |Lendário
| |
| |-
| |
| | align="center" | [[Arquivo:Recipe.png|link=]]
| |
| |align="left" style="border-left-style: hidden; | Kong Necktie Addon (Recipe)
| |
| | align="center" |Lendário
| |
| |-
| |
| ! colspan="3" | [[Arquivo:Exp_icon.png|30px|link=]] Experiência: 300.000 <br> [[Arquivo:Exp_icon_nw.png|30px|link=]] Experiência: 1.000
| |
| |}
| |
| </center>
| |
| | |
| | |
| = Frozen Tunnels =
| |
| | |
| <center> [[Arquivo:Frozen_Tunnels_Banner.png|link=]] </center> <br>
| |
| | |
| '''Nível mínimo:''' 400. <br>
| |
| '''Custo de Entrada:''' Frozen Tunnels Rift Crystal. <br>
| |
| '''Quantidade de jogadores:''' 2. <br>
| |
| '''Boss:''' Abomasnow. <br>
| |
| | |
| == Localização da Rift ==
| |
| | |
| A entrada da Frozen Tunnels Rift está localizada no local de caça de Snorunt, ao norte de Lavender. <br>
| |
| | |
| | |
| <center> [[Arquivo:Localização_Frozen_Tunnels.png|link=]] </center> <br>
| |
| | |
| == Minimapa da Rift ==
| |
| <br>
| |
| | |
| <center> [[Arquivo:Frozen_Tunnels_Minimap_1.png|link=]] [[Arquivo:Frozen_Tunnels_Minimap_2.png|link=]] </center> <br>
| |
| | |
| == Informações importantes ==
| |
| | |
| Os jogadores deverão derrotar '''29 Pokémon''' para que seja possível concluir a Rift. Abaixo a lista de possíveis Pokémon do local: <br>
| |
| | |
| | |
| <center>
| |
| {| class="wikitable" width="25%"
| |
| |-
| |
| | align="center" width="20%" | [[Arquivo:712-Bergmite.png|link=Bergmite]]
| |
| | align="center" width="80%" | '''[[Bergmite]]'''
| |
| |-
| |
| | align="center" width="20%" | [[Arquivo:713-Avalugg.png|link=Avalugg]]
| |
| | align="center" width="80%" | '''[[Avalugg]]'''
| |
| |-
| |
| | align="center" width="20%" | [[Arquivo:459-Snover.png|link=Snover]]
| |
| | align="center" width="80%" | '''[[Snover]]'''
| |
| |-
| |
| | align="center" width="20%" | [[Arquivo:460-Abomasnow.png|link=Abomasnow]]
| |
| | align="center" width="80%" | '''[[Abomasnow]]'''
| |
| |-
| |
| | align="center" width="20%" | [[Arquivo:131-Lapras.png|link=Lapras]]
| |
| | align="center" width="80%" | '''[[Lapras]]'''
| |
| |-
| |
| | align="center" width="20%" | [[Arquivo:365-Walrein.png|link=Walrein]]
| |
| | align="center" width="80%" | '''[[Walrein]]'''
| |
| |-
| |
| |}
| |
| </center>
| |
| | |
| == Armadilhas ==
| |
| | |
| Durante o caminho haverá algumas armadilhas. Estátuas de [[Arquivo:148-Dragonair.png|link=Dragonair]] Dragonair e [[Arquivo:149-Dragonite.png|link=Dragonite]] Dragonite soltam partículas de gelo que causam dano aos jogadores e Pokémon que forem atingidos. <br>
| |
| | |
| | |
| <center> [[Arquivo:Frozen_Tunnels_Trap_1.gif|link=]] </center> <br>
| |
| | |
| | |
| Além disso, vórtices de gelo estarão espalhadas pela dungeon. Caso o jogador ou o Pokémon entrem em contato com o vórtice, receberão dano por segundo. <br>
| |
| | |
| | |
| <center> [[Arquivo:Frozen_Tunnels_Trap_3.gif|link=]] </center> <br>
| |
| | |
| | |
| Por fim, o jogador deverá se atentar à chuva de gelo que assola a dungeon. <br>
| |
| | |
| | |
| <center> [[Arquivo:Frozen_Tunnels_Trap_4.gif|link=]] </center> <br>
| |
| | |
| == Boss ==
| |
| | |
| O Boss da Frozen Tunnels Rift é o [[Arquivo:460-Abomasnow.png|link=Abomasnow]] Abomasnow. No início da batalha e em alguns momentos posteriores ele invocará alguns [[Arquivo:459-Snover.png|link=Snover]] Snover, mas trata-se de uma batalha simples.
| |
| * Em alguns momentos, o Abomasnow trocará de target. Esse movimento será indicado por um círculo roxo em volta do boss.
| |
| * Abomasnow usará a skill '''Snow Warning''', que cura uma parte da vida dele e congela os jogadores
| |
| | |
| <center> [[Arquivo:Frozen_Tunnels_Snow_Warning.gif|link=]] </center>
| |
| | |
| * Abomasnow usará também a skill '''Sheer Cold''', que o torna imune e depois causa dano e stun aos Pokémon ou jogadores atingidos.
| |
| | |
| <center> [[Arquivo:Frozen_Tunnels_Sheer_Cold.gif|link=]] </center>
| |
| | |
| * Depois de derrotar o Boss, basta ir para o portal de saída da Rift. <br>
| |
| | |
| <center> [[Arquivo:Frozen_Tunnels_Saída.png|link=]] </center> <br>
| |
| | |
| == Recompensas ==
| |
| | |
| <center>
| |
| {| class="wikitable" width="25%"
| |
| |-
| |
| ! colspan="2" | Item
| |
| ! Raridade
| |
| |-
| |
| | align="center" | [[Arquivo:Random_Ancient_Relics.png|link=]]
| |
| |align="left" style="border-left-style: hidden; | Random Ancient Relics
| |
| | align="center" |Comum
| |
| |-
| |
| | align="center" | [[Arquivo:Random_Bones.png|link=]]
| |
| |align="left" style="border-left-style: hidden; | Random Bones
| |
| |align="center" | Comum
| |
| |-
| |
| | align="center" | [[Arquivo:Water-stone.gif|link=]]
| |
| |align="left" style="border-left-style: hidden; | Water Stone
| |
| | align="center" |Comum
| |
| |-
| |
| | align="center" | [[Arquivo:Ice-stone.gif|link=]]
| |
| |align="left" style="border-left-style: hidden; | Ice Stone
| |
| | align="center" |Comum
| |
| |-
| |
| | align="center" | [[Arquivo:Frosty_Tail.png|link=]]
| |
| |align="left" style="border-left-style: hidden; | Frosty Tail
| |
| | align="center" |Comum
| |
| |-
| |
| | align="center" | [[Arquivo:Frosty_Hand.png|link=]]
| |
| |align="left" style="border-left-style: hidden; | Frosty Hand
| |
| | align="center" |Comum
| |
| |-
| |
| | align="center" | [[Arquivo:Random_Skulls.png|link=]]
| |
| |align="left" style="border-left-style: hidden; | Random Skull
| |
| | align="center" |Raro
| |
| |-
| |
| | align="center" | [[Arquivo:Rift Mitica.png|link=]]
| |
| |align="left" style="border-left-style: hidden; | Rift Crystal (Mítico)
| |
| | align="center" |Raro
| |
| |-
| |
| | align="center" | [[Arquivo:Book_Dungeons_-_Frozen Tunnels.png|link=]]
| |
| |align="left" style="border-left-style: hidden; | Book: Rifts - Frozen Tunnels | |
| | align="center" |Épico | | | align="center" |Épico |
| |- | | |- |
| | align="center" | [[Arquivo:Recipe.png|link=]] | | | align="center" | [[Arquivo:Recipe.png|link=]] |
| |align="left" style="border-left-style: hidden; | MECHA: FROST TREE Addon (Recipe) | | |align="left" style="border-left-style: hidden; | Dragonite Cosplay Male (Recipe) |
| | align="center" |Épico | | | align="center" |Épico |
| |- | | |- |
| ! colspan="3" | [[Arquivo:Exp_icon.png|30px|link=]] Experiência: 300.000 <br> [[Arquivo:Exp_icon_nw.png|30px|link=]] Experiência: 1.000 | | ! colspan="3" | [[Arquivo:Exp_icon.png|30px|link=]] Experiência: 1.500.000 <br> [[Arquivo:Exp_icon_nw.png|30px|link=]] Experiência: 6.000 |
| |} | | |} |
| </center> | | </center> |
![]() Flint. Para abrir os portões basta utilizar sua Flint em uma das tochas nas laterais da sala.
Flint. Para abrir os portões basta utilizar sua Flint em uma das tochas nas laterais da sala.
![]() Boss Mega Salamence.
Boss Mega Salamence.
![]() Strange Halite Ore caso complete 10 vezes tendo feito o segredo.
Strange Halite Ore caso complete 10 vezes tendo feito o segredo. 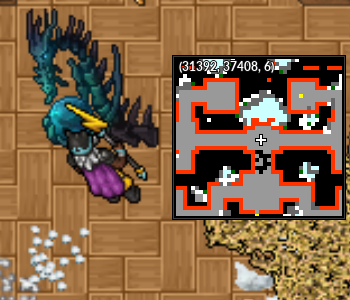
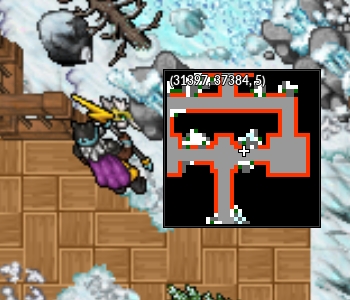
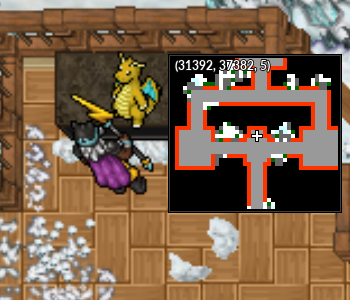
![]() Shiny Giant Dragonite é no modo PokéView e os jogadores poderão trocar de Pokémon normalmente.
Shiny Giant Dragonite é no modo PokéView e os jogadores poderão trocar de Pokémon normalmente.
