|
|
| Linha 24: |
Linha 24: |
|
| |
|
| <!-- Tag: minigame; desafio; acertar pokémon; onde está o pokémon; profissão;--> | | <!-- Tag: minigame; desafio; acertar pokémon; onde está o pokémon; profissão;--> |
|
| |
| =Medicham=
| |
| {| border="0" style="border-collapse:collapse"
| |
| |- align="center" style="background-color: #E6E6FA;"
| |
| ! rowspan="2" | M1
| |
| | width="10px" |
| |
| | align="left" | Low Kick (10s)
| |
| | width="50px" rowspan="2" |
| |
| | rowspan="2" align="right" | [[Arquivo:Target.png|Target]] [[Arquivo:Damage.png|Damage]]
| |
| | rowspan="2" | [[Arquivo:Fighting.png|Fighting|link=Gardestrike]]
| |
| |- align="center" style="background-color: #E6E6FA;"
| |
| | width="10px" |
| |
| | align="left" | Level 80
| |
|
| |
| |- align="center"
| |
| ! rowspan="2" | M2
| |
| | width="10px" |
| |
| | align="left" | Thunder Punch (18s)
| |
| | width="50px" rowspan="2" |
| |
| | rowspan="2" align="right" | [[Arquivo:Target.png|Target]] [[Arquivo:Damage.png|Damage]]
| |
| | rowspan="2" | [[Arquivo:Electric.png|Electric|link=Raibolt]]
| |
| |- align="center"
| |
| | width="10px" |
| |
| | align="left" | Level 80
| |
|
| |
| |- align="center" style="background-color: #E6E6FA;"
| |
| ! rowspan="2" | M3
| |
| | width="10px" |
| |
| | align="left" | Zen Headbutt (45s)
| |
| | width="50px" rowspan="2" |
| |
| | rowspan="2" align="right" | [[Arquivo:Target.png|Target]] [[Arquivo:Damage.png|Damage]] [[Arquivo:Stun.png|Stun]]
| |
| | rowspan="2" | [[Arquivo:Psychic.png|Psychic|link=Psycraft]]
| |
| |- align="center" style="background-color: #E6E6FA;"
| |
| | width="10px" |
| |
| | align="left" | Level 80
| |
|
| |
| |- align="center"
| |
| ! rowspan="2" | M4
| |
| | width="10px" |
| |
| | align="left" | Low Sweep (40s)
| |
| | width="50px" rowspan="2" |
| |
| | rowspan="2" align="right" | [[Arquivo:AOE.png|AOE]] [[Arquivo:Damage.png|Damage]] [[Arquivo:Stun.png|Stun]]
| |
| | rowspan="2" | [[Arquivo:Fighting.png|Fighting|link=Gardestrike]]
| |
| |- align="center"
| |
| | width="10px" |
| |
| | align="left" | Level 80
| |
|
| |
| |- align="center" style="background-color: #E6E6FA;"
| |
| ! rowspan="2" | M5
| |
| | width="10px" |
| |
| | align="left" | Psychic (30s)
| |
| | width="50px" rowspan="2" |
| |
| | rowspan="2" align="right" | [[Arquivo:AOE.png|AOE]] [[Arquivo:Damage.png|Damage]]
| |
| | rowspan="2" | [[Arquivo:Psychic.png|Psychic|link=Psycraft]]
| |
| |- align="center" style="background-color: #E6E6FA;"
| |
| | width="10px" |
| |
| | align="left" | Level 80
| |
|
| |
| |- align="center"
| |
| ! rowspan="2" | M6
| |
| | width="10px" |
| |
| | align="left" | High Jump Kick (50s)
| |
| | width="50px" rowspan="2" |
| |
| | rowspan="2" align="right" | [[Arquivo:AOE.png|AOE]] [[Arquivo:Damage.png|Damage]]
| |
| | rowspan="2" | [[Arquivo:Fighting.png|Fighting|link=Gardestrike]]
| |
| |- align="center"
| |
| | width="10px" |
| |
| | align="left" | Level 80
| |
|
| |
| |- align="center" style="background-color: #E6E6FA;"
| |
| ! rowspan="2" | M7
| |
| | width="10px" |
| |
| | align="left" | Meditate (50s)
| |
| | width="50px" rowspan="2" |
| |
| | rowspan="2" align="right" | [[Arquivo:Self.png|Self]] [[Arquivo:Buff.png|Buff]] [[Arquivo:Debuff.png|Debuff]] [[Arquivo:Nevermiss.png|Nevermiss]]
| |
| | rowspan="2" | [[Arquivo:Psychic.png|Psychic|link=Psycraft]]
| |
| |- align="center" style="background-color: #E6E6FA;"
| |
| | width="10px" |
| |
| | align="left" | Level 90
| |
|
| |
| |- align="center"
| |
| ! rowspan="2" | M8
| |
| | width="10px" |
| |
| | align="left" | Focus Energy (50s)
| |
| | width="50px" rowspan="2" |
| |
| | rowspan="2" align="right" | [[Arquivo:Self.png|Self]] [[Arquivo:Buff.png|Buff]]
| |
| | rowspan="2" | [[Arquivo:Normal1.png|Normal|link=Gardestrike]]
| |
| |- align="center"
| |
| | width="10px" |
| |
| | align="left" | Level 90
| |
|
| |
| |- align="center" style="background-color: #E6E6FA;"
| |
| ! rowspan="2" | M9
| |
| | width="10px" |
| |
| | align="left" | Miracle Eye (15s)
| |
| | width="50px" rowspan="2" |
| |
| | rowspan="2" align="right" | [[Arquivo:Self.png|Self]] [[Arquivo:Buff.png|Buff]]
| |
| | rowspan="2" | [[Arquivo:Psychic.png|Psychic|link=Psycraft]]
| |
| |- align="center" style="background-color: #E6E6FA;"
| |
| | width="10px" |
| |
| | align="left" | Level 1000
| |
|
| |
| |- align="center"
| |
| ! rowspan="2" | P
| |
| | width="10px" |
| |
| | align="left" | Evasion
| |
| | width="50px" rowspan="2" |
| |
| | rowspan="2" align="right" | [[Arquivo:Passive.png|Passive]] [[Arquivo:Buff.png|Buff]]
| |
| | rowspan="2" | [[Arquivo:Normal1.png|Normal|link=Gardestrike]]
| |
| |- align="center"
| |
| | width="10px" |
| |
| | align="left" |
| |
|
| |
| |- align="center" style="background-color: #E6E6FA;"
| |
| ! rowspan="2" | P
| |
| | width="10px" |
| |
| | align="left" | Foresight
| |
| | width="50px" rowspan="2" |
| |
| | rowspan="2" align="right" | [[Arquivo:Passive.png|Passive]] [[Arquivo:Buff.png|Buff]]
| |
| | rowspan="2" | [[Arquivo:Fighting.png|Fighting|link=Gardestrike]]
| |
| |- align="center" style="background-color: #E6E6FA;"
| |
| | width="10px" |
| |
| | align="left" |
| |
|
| |
| |}
| |
Minigames de Profissão
Coleta de recursos em Kanto, Ilhas Laranja, Orre e Outland
Aventureiro
Ao encontrar um baú, seja ele de madeira, ouro ou prata, o Aventureiro precisa abri-lo com uma lockpick. Ao usar o item no baú, uma janela se abre com a fechadura dele para que o jogador acerte a posição correta, posicionando a chave com o mouse e utilizando a barra de espaço para virar. Caso a posição esteja incorreta, a chave fica vermelha e a lockpick quebra, e o jogador precisa recomeçar. Ao acertar a posição, o baú se abre e a recompensa é recebida no inventário.
Coleta de recursos na Nightmare World
Aventureiro
Cozinheiro
Hacker
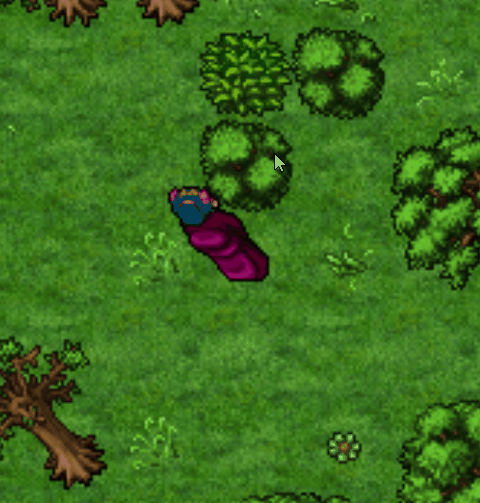
Desafio: Onde está o Pokémon?
Durante a coleta de recurso, o jogador pode encontrar este desafio aleatório. Para compensar o tempo gasto para resolvê-lo, o jogador é recompensado com três vezes mais recursos do que receberia numa coleta comum. Este desafio aparece nas coletas de todas as profissões, nos seguintes recursos: minérios (iron ore, platinum ore e corrupted iron ore), eletronic scraps, tech data, arbustos, style e fashion points, madeira (logs), hidden relics, food bags, (adicionar nome dos outros). Caso o jogador esteja utilizando um Profession Ressource Boost o bônus de coleta também se aplica na coleta do desafio.
O desafio consiste em identificar qual o Pokémon escolhido e localizar a respectiva pokébola depois de ter sido embaralhada. Após o fim do embaralhamento o jogador deve clicar na pokébola correta e a coleta do recurso será iniciada. Caso o jogador clique na pokébola errada, nada acontece, e ao tentar coletar o recurso novamente, o desafio será reiniciado com novos Pokémon.