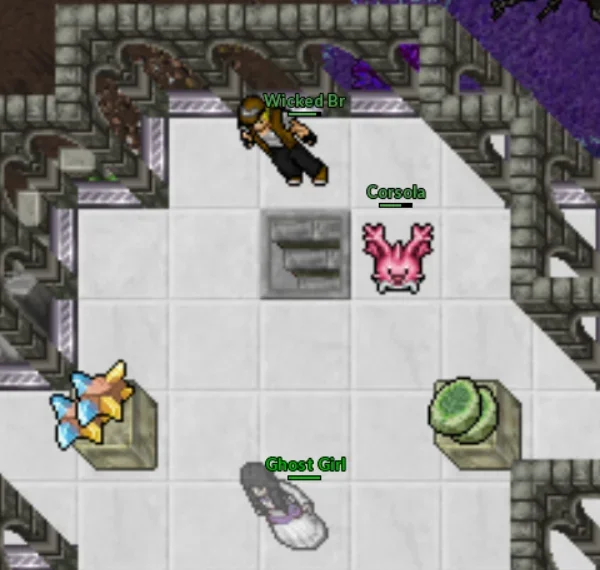
| Localização | Item |
|---|---|
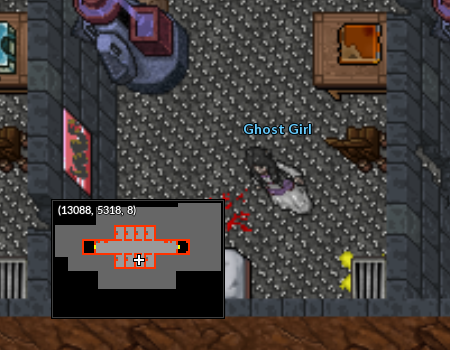 13088, 5318, 8 |
Flutter Mane backpack |
Predefinição:Teste24: mudanças entre as edições
(→Pewter) Etiqueta: Reversão manual |
|||
| Linha 1: | Linha 1: | ||
= | = Under = | ||
== Ghost World == | |||
Depois de entregar os artefatos ao Klefki, será necessário sair pelo Strange Portal. Quando voltar, o mapa mudará e a escada que leva ao andar de baixo ficará visível. Depois disso, é só falar com o Wikstrom e pegar a chave para o Ghost World. | |||
Ele indicará o jogador para entrar no portal do Ghost World para investigar por que os Pokémon fantasmas estão agindo de forma estranha. | |||
<center>[[Arquivo:gw_strange_portal.webp]]</center> | |||
Passando pelo portal, você será transportado para o Ghost World. Seu personagem não terá Pokémon algum e será preciso encontrar seus ajudantes ao longo de sua jornada. | |||
<center>[[Arquivo:gw_ntroducao.webp]]</center> | |||
|- | === Encontrando Burmy === | ||
Logo após a entrada, os desafios começarão. O primeiro desafio será o de enfrentar são os [[Arquivo:355-Duskull.png|link=Duskull]] [[Duskull]]. Eles estão acorrentados e não irão na direção seu personagem, porém, ao passar próximo a eles, seu personagem receberá dano baseado em porcentagem de vida. | |||
| | |||
| | <center>[[Arquivo:gw_duskull.webp]]</center> | ||
| | |||
| | |||
| | Haverá uma espécie de labirinto que deverá ser percorrido, desviando de obstáculos e dos Pokémon que ali estão. | ||
| | |||
<center>[[Arquivo:Gw_labirinto.webp]]</center> | |||
Ao terminar este labirinto, você encontrará o seu primeiro ajudante: o [[Arquivo:412-Burmy(1).png|link=Burmy]] [[Burmy]] . | |||
<center>[[Arquivo:gw_encontrando_burmy.webp]]</center> | |||
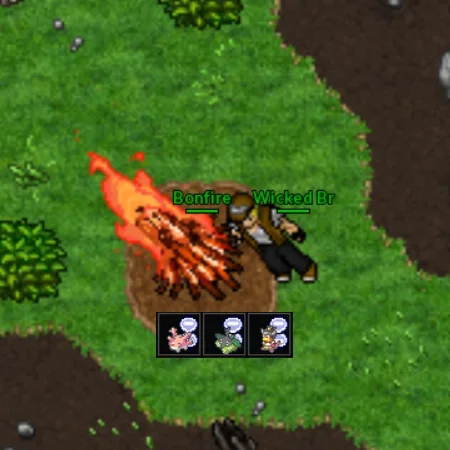
Após pegar o seu primeiro ajudante, seguirá o caminho e encontrará uma fogueira. Esta fogueira será responsável por curar sua vida e a vida de seus Pokémon, além de ter um savepoint, para caso seja derrotado ou tenha que sair. | |||
<center>[[Arquivo:gw_primeira_bonfire.webp]]</center> | |||
'''Observação:''' Caso saia ou seja derrotado, haverá uma taxa de 3 [[Arquivo:Darkness Stone.gif|link=Darkness Stone]] Darkness Stones para retornar ao último savepoint. | |||
<br> | |||
=== Encontrando Slowpoke === | |||
Seguindo o caminho, você irá ao encontro do seu outro ajudante, o [[Arquivo:079-Slowpoke.png|link=Slowpoke]] [[Slowpoke]] . Haverá alguns [[Arquivo:353-Shuppet.png|link=Shuppet]] [[Shuppet]] pelo caminho que atacarão o seu personagem e será necessário criar algumas estratégias para fugir deles e ir até o fim do mapa. | |||
<center>[[Arquivo:gw_caminho_shuppet.webp]]</center> | |||
Algumas dicas são válidas, como despistar o Pokémon utilizando as pedras do mapa, utilizar o electric web ou utilizar o protect do [[Arquivo:412-Burmy(1).png|link=Burmy]] [[Burmy]]. | |||
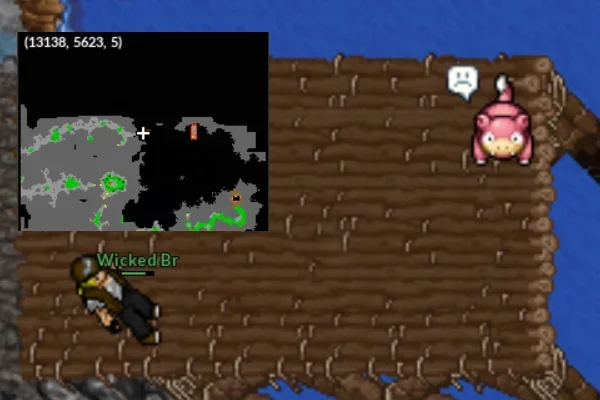
Terminando o caminho, o segundo ajudante desta jornada será encontrado. | |||
<center>[[Arquivo:gw_encontrando_slowpoke.webp]]</center> | |||
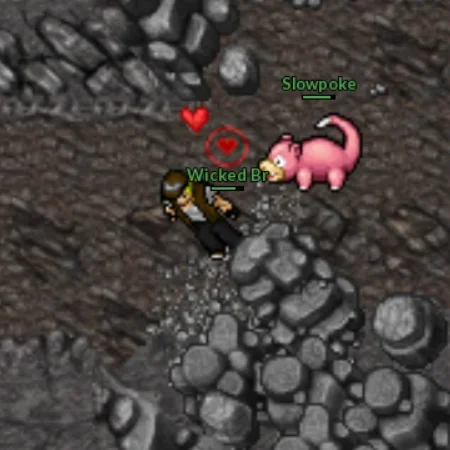
Com o novo ajudante, será possível derrotar os [[Arquivo:353-Shuppet.png|link=Shuppet]] [[Shuppet]] que estão atrás de você. Derrotando-os, seus corpos virarão corações para curar tanto a vida de seu personagem quanto a vida de seus Pokémon. | |||
<center>[[Arquivo:gq_heal_1.webp]] [[Arquivo:gq_heal_2.webp]] </center> | |||
Continuando com sua jornada, encontrará os [[Arquivo:622-Golett.png|link=Golett]] [[Golett]] que estão travando as passagens para seu personagem. | |||
<center>[[Arquivo:gq_golett.webp]]</center> | |||
Seguindo o caminho, serão encontrados alguns outros Pokémon que você derrotará até chegar a mais um desafio. Desta vez, estará numa escada onde há o respawn de 3 [[Arquivo:200-Misdreavus.png|link=Misdreavus]] [[Misdreavus]] . | |||
<center>[[Arquivo:gw_misd_escada.webp]]</center> | |||
Caso tente passar correndo, encontrará a passagem bloqueada por uma lápide, e, para liberá-la, deverá derrotar ao menos 1 [[Arquivo:200-Misdreavus.png|link=Misdreavus]] [[Misdreavus]] . | |||
<center>[[Arquivo:gw_misd_block.webp]] [[Arquivo:gw_misd_open.webp]]</center> | |||
Ao continuar o caminho, encontrará mais uma bonfire para restaurar o personagem e salvar seu progresso. | |||
<center>[[Arquivo:gw_segunda_bonfire.webp]] [[Arquivo:gw_segunda_bonfire3.png]]</center> | |||
=== Encontrando Corsola === | |||
Já com o time recuperado, será a hora de encontrar o terceiro ajudante, o [[Arquivo:222-Corsola.png|link=Corsola]] [[Corsola]] , que será fundamental para sua progressão, pois ele possui a habilidade '''rock smash''', que abrirá novos caminhos que estavam fechados por pedras. | |||
<center>[[Arquivo:gw_way_to_corsola.webp]] [[Arquivo:gw_encontrando_corsola.webp]]]</center> | |||
Com o [[Arquivo:222-Corsola.png|link=Corsola]] [[Corsola]] em mãos, seguirá para sudeste até encontrar esta escada. | |||
<center>[[Arquivo:gw_cont_corsola.webp]]</center> | |||
No novo caminho, haverá diversos Pokémon que deverão ser derrotados. É possível despistá-los, mas torna-se perigoso fazer isso, pois seu time está muito fraco ainda. | |||
[talvez pegar imagem de vários pokes naquele local] | |||
Novamente, ao final deste local terá outra bonfire para que possa registrar seu progresso e restaurar seus Pokémon. | |||
<center>[[Arquivo:gw_terceira_bonfire.webp]]</center> | |||
À direita do savepoint, haverá um castelo onde a Ghost Girl foi vista. Derrote os Pokémon em volta e prossiga. Um aviso ao lado da escada indicará o local que deverá ser acessado. | |||
<center>[[Arquivo:gw_boss_gengar.webp]]</center> | |||
Subindo as escadas, a batalha será contra o Boss [[Arquivo:094-Gengar.png|link=Gengar]] [[Gengar]]. Ele ataca à distância, o que pode dificultará um pouco a batalha. Contudo, devido ao lick, esta distância será encurtada, possibilitando que seja utilizado o combo dos seus Pokémon, principalmente o [[Arquivo:222-Corsola.png|link=Corsola]] [[Corsola]]. | |||
<center>[[Arquivo:Gw_gengar.webp]]</center> | |||
Uma dica para esta batalha é despistar o Pokémon e se esconder ao norte ou ao sul da sala enquanto recupera o tempo de recarga dos Pokémon. | |||
<center>[[Arquivo:gw_dica_gengar.webp]]</center> | |||
Concluindo este desafio, outra escada aparecerá e dará acesso à Ghost Girl, que conversará com você e entregará pedras de evolução para o [[Arquivo:412-Burmy(1).png|link=Burmy]] [[Burmy]] e para o [[Arquivo:079-Slowpoke.png|link=Slowpoke]] [[Slowpoke]] . Com isso, ela o expulsará do Ghost World e terá que pagar 3 [[Arquivo:Darkness Stone.gif|link=Darkness Stone]] Darkness Stones para prosseguir. | |||
<center>[[Arquivo:gw_derrota_gengar.webp]]<br> | |||
[[Arquivo:gw_reward_gengar.webp]]<br> | |||
[[Arquivo:gw_evoluindo.webp]]<br> | |||
</center> | |||
=== Encontrando Sneasel === | |||
Agora, com o time atualizado, o desafio continua. Há um atalho em que poderá ser utilizada a habilidade '''dig''' com o [[Arquivo:413-WormadamPlantCloak.png|link=Wormadam]] [[Wormadam]] para retornar ao caminho da quest. | |||
<center>[[Arquivo:gw_sequencia_dig.webp]]</center> | |||
Para progredir, será necessário retornar próximo ao local do segundo ajudante e quebrar as pedras para acessar uma outra caverna. | |||
<center>[[Arquivo:gw_sequencia_rocksmash.webp]]</center> | |||
Neste local, haverá diversos [[Arquivo:292-Shedinja.png|link=Shedinja]] [[Shedinja]]. No primeiro momento, o jogador acredita que deverá derrotá-los, assim como outros Pokémon que são encontrados no caminho, porém, será necessário utilizar a habilidade '''control minds''' do [[Arquivo:199-Slowking.png|link=Slowking]] [[Slowking]] e controlar a mente dos [[Arquivo:292-Shedinja.png|link=Shedinja]] [[Shedinja]] para utilizar a habilidade '''cut''', visto que no seu time não há ninguém que possa fazer isso. | |||
<center>[[Arquivo:Gw_controlmind.gif]]</center> | |||
Cortando os arbustos, uma nova passagem será liberada. | |||
Ao final desta passagem, haverá uma nova bonfire para registrar seu progresso e restaurar seus Pokémon antes de enfrentar o próximo Boss. | |||
<center>[[Arquivo:Gw_sexta_bonfire.webp]]</center> | |||
[[Arquivo: | O chefe desta sala será o [[Arquivo:477-Dusknoir.png|link=Dusknoir]] [[Dusknoir]]. | ||
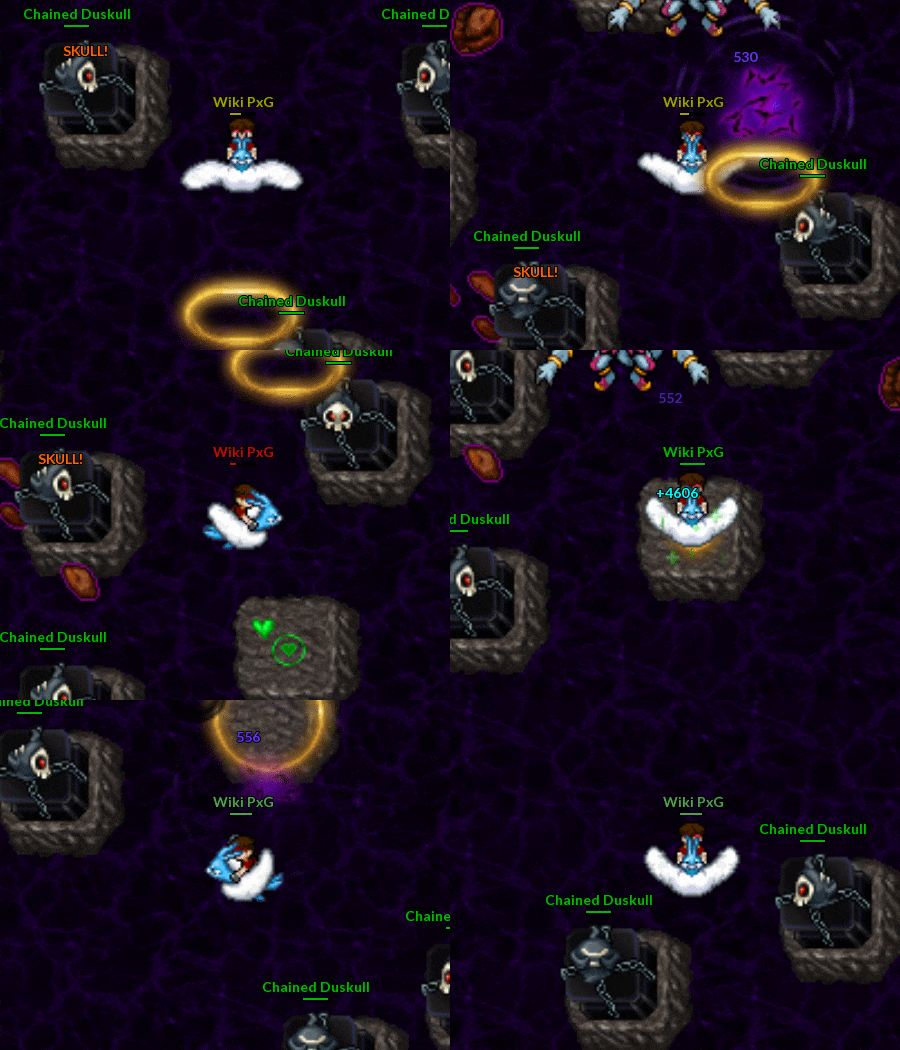
== | Com base na porcentagem de vida, ele invoca alguns [[Arquivo:355-Duskull.png|link=Duskull]] Duskulls para atacarem você. Enquanto os [[Arquivo:355-Duskull.png|link=Duskull]] Duskulls estiverem em campo, o [[Arquivo:477-Dusknoir.png|link=Dusknoir]] Dusknoir estará invulnerável. Uma alternativa para derrotá-lo com mais facilidade é despistá-los para o norte ou para o sul. | ||
<center>[[Arquivo:gw_duel_dusk.webp]] [[Arquivo:gw_summon_dusk.webp]] | |||
[[Arquivo:gw_dica_dusknoir.webp]]</center> | |||
=== ''' | Finalizando a batalha, um novo ajudante se juntará ao time. O [[Arquivo:215-Sneasel.png|link=Sneasel]] [[Sneasel]] será muito importante para as próximas etapas, pois ele possui a habilidade cut, liberando novas passagens e alguns segredos do mapa. | ||
<center>[[Arquivo:gw_encontrando_sneasel.webp]]</center> | |||
<table class="seeMore"> | |||
<tr> | |||
<td class="seeMore__image">[[Arquivo:Telekinetic-compass.gif|link=]]</td> | |||
<td> '''Veja mais:''' [[Segredos do Mapa - Elite Four Main Quest]]. </td> | |||
</tr> | |||
</table> | |||
== Segredos do Mapa - Ghost World == | |||
Durante a etapa do Ghost World, na Elite Four Main Quest, há alguns itens escondidos que podem ser encontrados pelos jogadores. Enquanto o jogador estiver no Ghost World, será possível retornar aos locais indicados e resgatar os itens escondidos. Porém, caso o jogador vá para a batalha final, a única maneira de resgatar os itens é com o '''[[NPC Ghost Girl]]'''. | |||
=== Dice === | |||
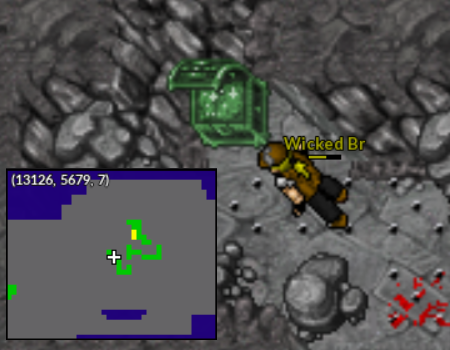
O primeiro segredo do mapa está escondido próximo à passagem onde foi preciso utilizar a habilidade control minds. Com o [[Arquivo:215-Sneasel.png|link=Sneasel]] [[Sneasel]], utilize cut nestes arbustos e entre na caverna. Ela estará repleta de [[Arquivo:292-Shedinja.png|link=Shedinja]] [[Shedinja]]. Eles serão derrotados apenas por golpes efetivos, lembre-se disso. Após derrotar todos os Pokémon da sala, o primeiro baú será encontrado. Sua recompensa é um [[Arquivo:Dice.png]] '''dado''' decorativo que você poderá interagir fazendo rolagens. | |||
<center>[[Arquivo:Gw_egg_cut.png]] [[Arquivo:Gw_egg_dice.png]]</center> | |||
=== Flutter Mane backpack === | |||
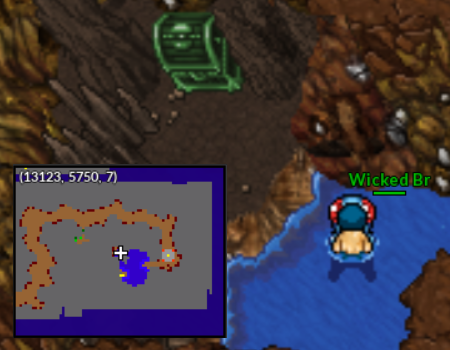
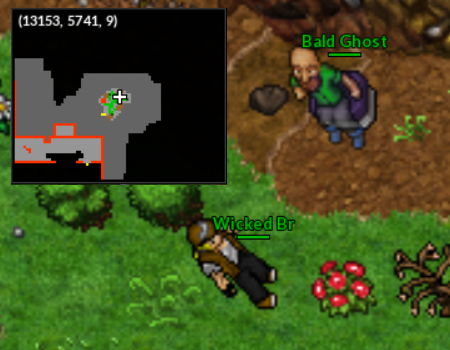
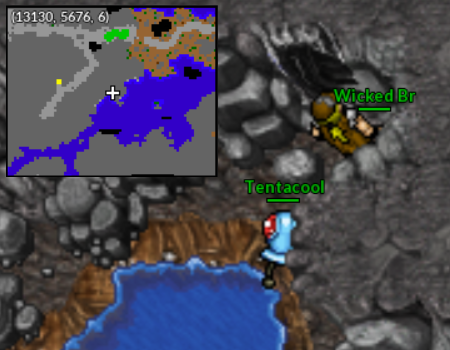
O primeiro segredo do mapa que você acessará com o [[Arquivo:072-Tentacool.png|link=Tentacool]] [[Tentacool]] é a peruca do Bald Ghost. Entre abaixo da cachoeira próxima ao respawn de Sableye e clique no baú. Após receber a peruca, devolva-a para o Bald Ghost. Como recompensa, ele entregará a [[Arquivo:Flutter_Mane_Backpack.png|link=Mochilas]] '''Flutter Mane backpack'''. | |||
<center>[[Arquivo:Gw_egg_peruca.png]] [[Arquivo:Gw_egg_bald.png]]</center> | |||
=== Alolan Marowak skull === | |||
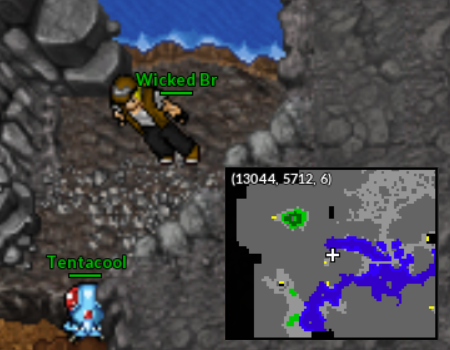
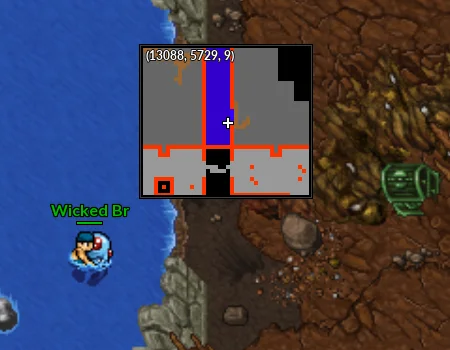
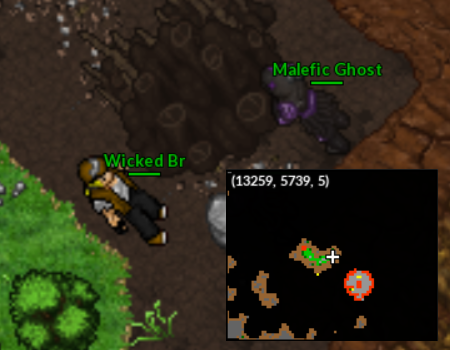
Outro segredo que pode ser acessado a partir do surf é o diário do Malefic Ghost. Entre nesta caverna e quebre as pedras. | |||
<center>[[Arquivo:Gw_egg_surf1.png]]</center> | |||
Tenha cuidado com o [[Arquivo:479-Rotom.png|link=Rotom]] [[Rotom]], pois ele poderá derrotar o seu [[Arquivo:222-Corsola.png|link=Corsola]] [[Corsola]]. Coloque outro Pokémon para despistá-lo e utilize o surf para acessar o baú escondido. Retorne para o Malefic Ghost e devolva seu diário. Como recompensa, ele entregará um [[Arquivo:Alolan_Marowak_skull.png]] '''Alolan Marowak skull'''. | |||
<center>[[Arquivo:Gw_egg_livro.png]] [[Arquivo:Gw_maleficghost.png]]</center> | |||
=== Premier ball === | |||
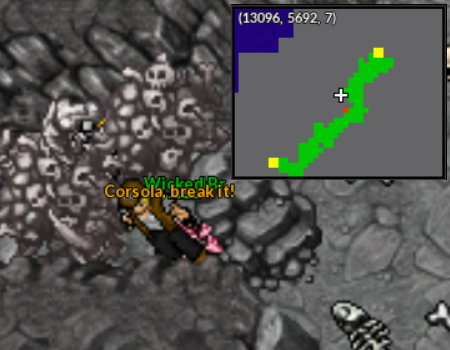
Retornando para o início, haverá uma caverna em que será necessário utilizar o rock smash do [[Arquivo:222-Corsola.png|link=Corsola]] [[Corsola]] para liberar uma escada. Descendo por ela, haverá um baú com [[Arquivo:Premier-ball(1).png|link=Pokébolas]] '''20 Empty Premier balls''' não únicas. | |||
<center>[[Arquivo:Gw_egg_rochsmash.png]] [[Arquivo:Gw_egg_premier.png]]</center> | |||
=== Alolan Marowak tapestry === | |||
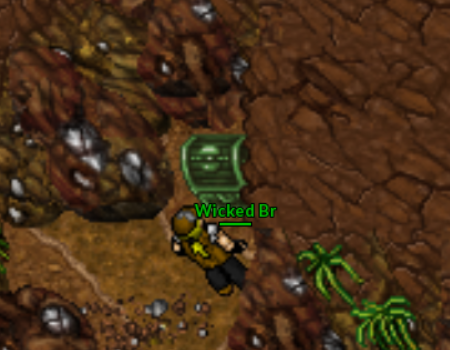
Antes de seguir para a última fogueira, há uma caverna ao sul que fica um pouco escondida. Após quebrar as pedras e escapar das armadilhas, o baú concederá um [[Arquivo:Alolan_Marowak_tapestry.png ]] '''Alolan Marowak tapestry'''. | |||
<center>[[Arquivo:Gw_egg_surf2.png]] [[Arquivo:Gw_egg_tapestry.png]]</center> | |||
=== Duskull TV Camera === | |||
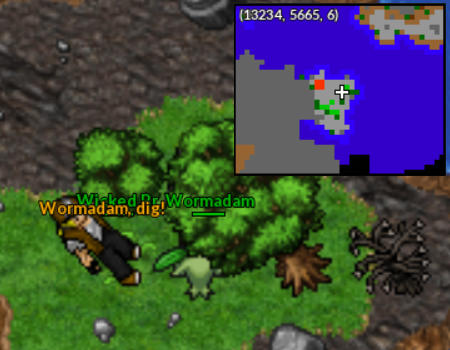
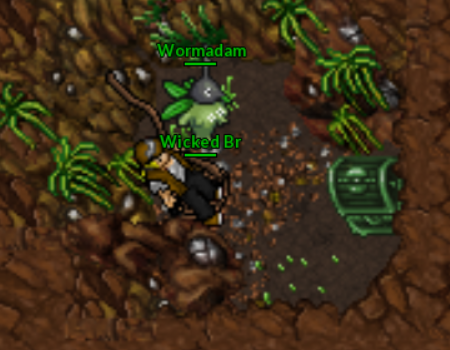
O último baú escondido será no local da última fogueira. Utilize o dig próximo a esta árvore para acessar o local. | |||
<center>[[Arquivo:Gw_egg_dig.png]] [[Arquivo:Gw_egg_camera.png]]</center> | |||
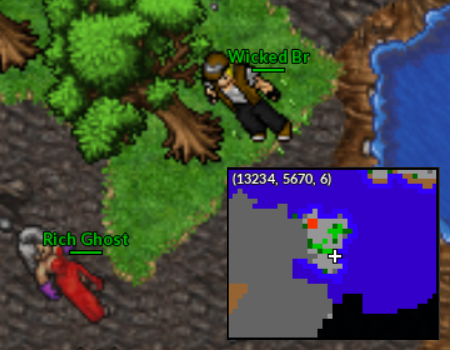
Pegue o old necklace e entregue-o para a Rich Ghost. Como recompensa, ela entregará uma [[Arquivo:Duskull TV Camera.gif|link=Câmeras]]'''Duskull TV Camera'''. | |||
''' | |||
<center>[[Arquivo:Gw_richghost.png]]</center> | |||
= | Caso tenha concluído a Quest e deixou algum item decorativo para trás, é possível comprá-los com o [[Arquivo:Ghost_girl.png]] '''NPC Ghost Girl'''. | ||
<table class="seeMore"> | |||
<tr> | |||
<td class="seeMore__image">[[Arquivo:Telekinetic-compass.gif|link=]]</td> | |||
<td> '''Veja mais:''' [[NPC Ghost Girl]]. </td> | |||
</tr> | |||
</table> | |||
== | == Ghost Girl == | ||
<center>[[Arquivo:Ghost_girl.png|link=]]</center> | |||
Este NPC estará disponível para os jogadores que concluíram a '''Elite Four Main Quest.''' Sua localização é no respawn de Klefki e estará em um local diferente a depender dos dias da semana. Sua função é vender itens decorativos que os jogadores que concluíram a Quest tenham deixado para trás.<br><br>'''Observações:''' Os itens custarão um valor fixo de $2.000.000 (2KK).<br>Caso o jogador tenha coletado durante a Quest ou comprado alguns dos itens com o NPC, a loja não ativará. | |||
===Localização=== | |||
<tabber> | |||
|-|Quinta= | |||
<center> | <center> | ||
{| class="wikitable bg-none border-0" width="40%" style="text-align:center;" | |||
{| class="wikitable" width=" | ! width="30%" | Localização !! width="30%" | Item | ||
! | |||
! | |||
! | |||
|- | |- | ||
| | | [[Arquivo:Ghost_girl_quinta.png]]<br>13088, 5318, 8 | ||
| [[Arquivo:Flutter_Mane_Backpack.png|link=Mochilas]]<br>Flutter Mane backpack | |||
|} | |||
| [[Arquivo: | </center> | ||
|-|Sexta-feira= | |||
<center> | |||
{| class="wikitable bg-none border-0" width="40%" style="text-align:center;" | |||
! width="30%" | Localização !! width="30%" | Item | |||
|- | |- | ||
| | | [[Arquivo:Ghost_girl_sexta.png]]<br>13121, 5308, 9 | ||
| [[Arquivo:Duskull TV Camera.gif|link=Câmeras]]<br>Duskull TV Camera | |||
|} | |||
| [[Arquivo: | </center> | ||
|-|Sábado= | |||
<center> | |||
{| class="wikitable bg-none border-0" width="40%" style="text-align:center;" | |||
! width="30%" | Localização !! width="30%" | Item | |||
|- | |- | ||
| | | [[Arquivo:Ghost_girl_sábado.png]]<br>13092, 5248, 10 | ||
| [[Arquivo:Alolan_Marowak_tapestry.png ]]<br>Alolan Marowak tapestry | |||
|} | |||
| [[Arquivo: | </center> | ||
|-|Domingo= | |||
<center> | |||
{| class="wikitable bg-none border-0" width="40%" style="text-align:center;" | |||
! width="30%" | Localização !! width="30%" | Item | |||
|- | |- | ||
| | | [[Arquivo:Ghost_girl_domingo.png]]<br>13018, 5284, 10 | ||
| [[Arquivo:Alolan_Marowak_skull.png]]<br>Alolan Marowak skull | |||
|} | |||
| [[Arquivo: | </center> | ||
|-|Segunda-feira= | |||
<center> | |||
|- | {| class="wikitable bg-none border-0" width="40%" style="text-align:center;" | ||
| | ! width="30%" | Localização !! width="30%" | Item | ||
| | |||
|- | |- | ||
| [[Arquivo:Ghost_girl_segunda.png]]<br>13021, 5311, 9 | |||
| [[Arquivo:Dice.png]]<br>Dice | |||
|} | |} | ||
</center> | </center> | ||
</tabber> | |||
== Continuando == | |||
=== Encontrando Tentacool === | |||
Com o Sneasel no time, retorne para a segunda bonfire e utilize o cut no arbusto próximo a ela para prosseguir com a quest. | |||
<center>[[Arquivo:gw_sequencia_cut.webp]]</center> | |||
Neste local, você encontrará alguns Sableyes para derrotar e deverá seguir o caminho até o final. Tenha cuidado com o Mega Sableye que há no local, pois ele é muito forte. Ele faz a ronda ao redor da rocha. Aproveite o tempo para passar por lá sem enfrentá-lo. | |||
<center>[[Arquivo:gw_sableye.webp]] | |||
[[Arquivo:Gw_sableye_ronda.gif]]</center> | |||
Passando por tudo isso, haverá outra bonfire para ser seu save point. | |||
<center>[[Arquivo:gw_quarta_bonfire.webp]]</center> | |||
Seguindo para a esquerda, haverá alguns Golurks e Doublades que deverão ser derrotados. | |||
<center>[[Arquivo:gw_golurk.webp]]</center> | |||
Seu próximo ajudante estará esperando para ser resgatado dentro de uma caverna, abaixo do local em que os Golurks e Doublades estavam. | |||
<center>[[Arquivo:gw_encontrando_tentacool.webp]]</center> | |||
O Tentacool será muito importante para acessar alguns '''[https://wiki.pokexgames.com/index.php/Segredos%20do%20Mapa%20-%20Elite%20Four%20Main%20Quest segredos do mapa]'''. | |||
<table class="seeMore"> | |||
<tr> | |||
<td class="seeMore__image">[[Arquivo:Telekinetic-compass.gif|link=]]</td> | |||
<td> '''Veja mais:''' [[Segredos do Mapa - Elite Four Main Quest]]. </td> | |||
</tr> | |||
</table> | |||
=== Encontrando Swablu === | |||
Agora com o Tentacool em seu time, siga para o início do Ghost World. À direita haverá outra bonfire para que você possa salvar seu progresso e restaurar seus pokémon. | |||
Neste local, também haverá outros '''[https://wiki.pokexgames.com/index.php/Segredos%20do%20Mapa%20-%20Elite%20Four%20Main%20Quest segredos do mapa]'''. | |||
<center>[[Arquivo:gw_quinta_bonfire.webp]]</center> | |||
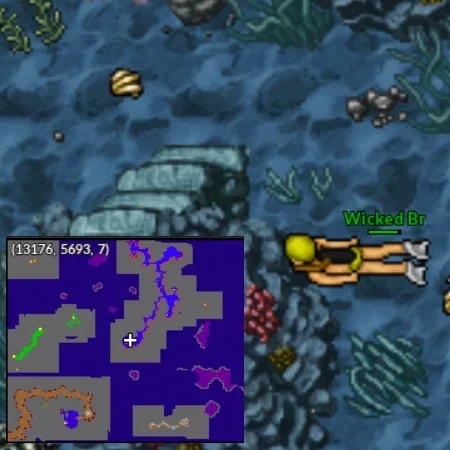
Vá para noroeste, entrando no redemoinho abaixo do navio naufragado. | |||
<center>[[Arquivo:gw_sequencia_surf.webp]]</center> | |||
Aqui haverá alguns [[arquivo:222-Galarian Corsola.png|link=]] Corsolas que você deverá despistar para continuar o caminho. Eles não atacam de longe, apenas tem o Whirpool como golpe. Utilize seu [[Arquivo:222-Corsola.png|link=Corsola]] [[Corsola]] para atraí-los para longe da passagem e seguir. | |||
Há alguns locais em que você pode acumular os Pokémon. Não existe lugar certo para isso, então, escolha o mais confortável. | |||
<center>[[Arquivo:gw_sequencia_corsola.webp]]</center> | |||
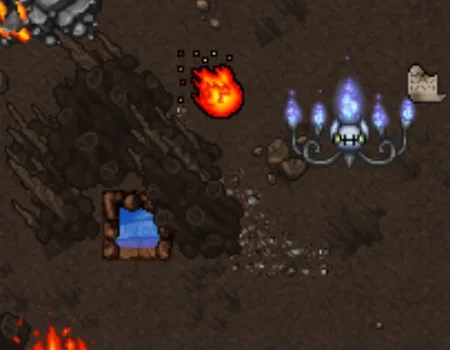
Após os [[arquivo:222-Galarian Corsola.png|link=]] Corsolas, suba as escadas. Tenha cuidado pois haverá um [[Arquivo:609-Chandelure.png|link=Chandelure]] [[Chandelure]] à espreita. | |||
<center>[[Arquivo:gw_chandelure.webp]]</center> | |||
Depois de enfrentar todos os [[Arquivo:609-Chandelure.png|link=Chandelure]] Chandelures, o último Boss estará pronto para a batalha. | |||
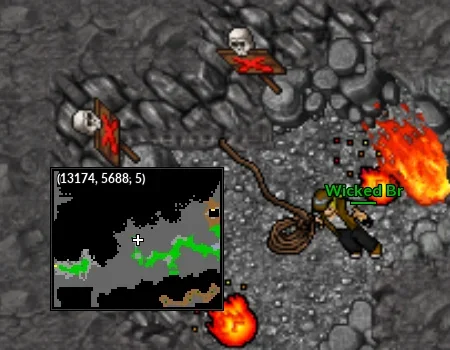
<center>[[Arquivo:gw_marowak_corda.webp]]</center> | |||
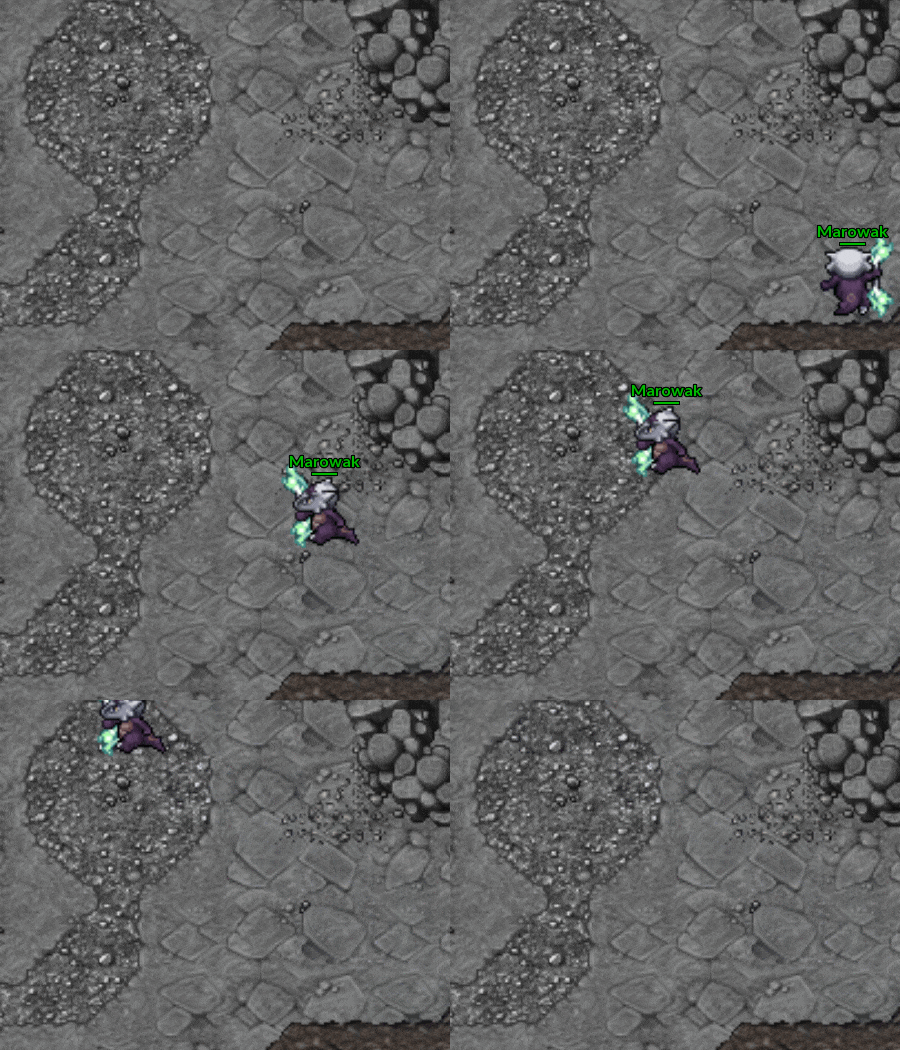
O [[Arquivo:105-AlolaMarowak.png|link=Alolan Marowak]] [[Alolan Marowak]] é o último desafio antes da batalha final. Ele faz ronda por todo o mapa. Então, aguarde até que ele se afaste para subir pela corda. | |||
<center>[[Arquivo:gw_marowak_ronda.gif]]</center> | |||
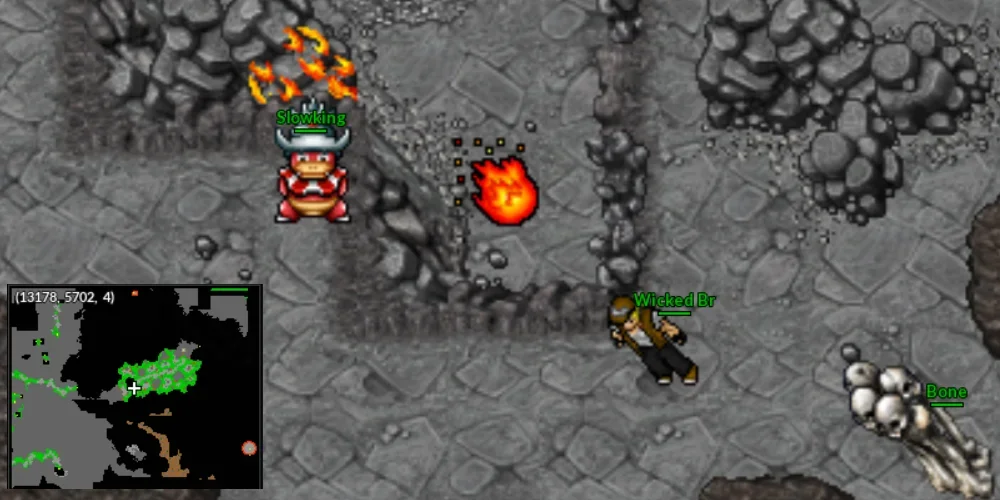
Uma dica para enfrentá-lo é deixar o [[Arquivo:199-Slowking.png|link=Slowking]] [[Slowking]] e o seu personagem posicionados desta maneira. Quando o [[Arquivo:105-AlolaMarowak.png|link=Alolan Marowak]] [[Alolan Marowak]] vier em sua direção, dê o combo completo e corra para o norte, para despistá-lo. | |||
<center>[[Arquivo:gw_dica_wak.webp]]</center> | |||
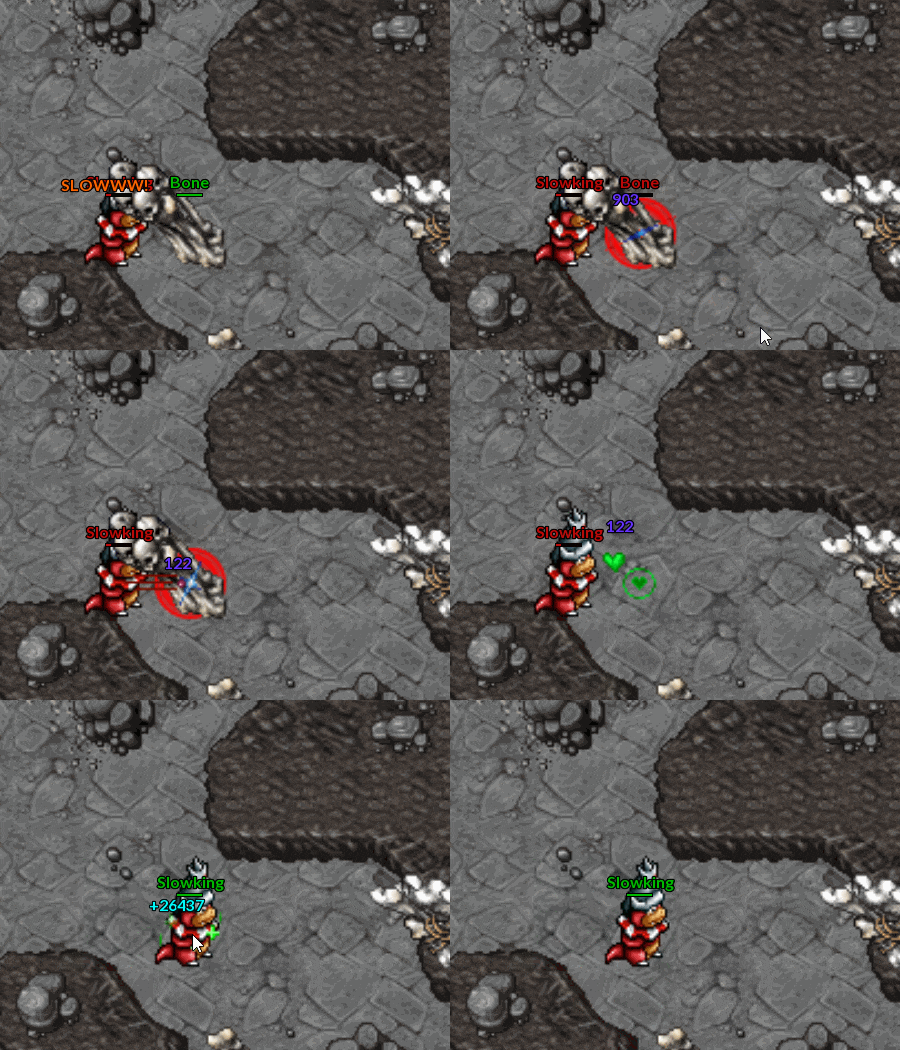
Nesta batalha também haverá alguns pontos de cura. Basta derrotar as caveiras e curar seus Pokémon. | |||
<center>[[Arquivo:gw_skull.gif]]</center> | |||
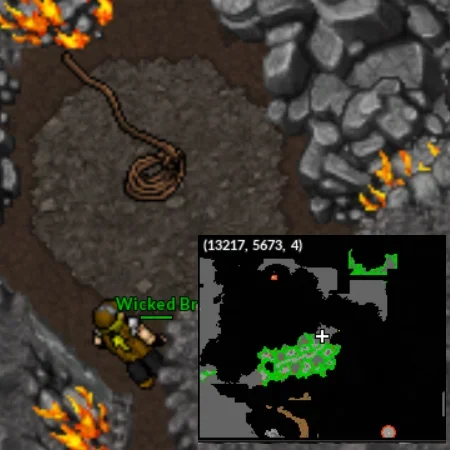
Derrotando o [[Arquivo:105-AlolaMarowak.png|link=Alolan Marowak]] [[Alolan Marowak]], suba a corda na passagem que abrirá ao final e vá em direção ao último ajudante. | |||
<center>[[Arquivo:gw_done_wak.webp]]</center> | |||
O [[Arquivo:333-Swablu.png|link=Swablu]] [[Swablu]] se juntará ao seu time para a batalha final. | |||
<center>[[Arquivo:gw_encontrando_swablu.webp]]</center> | |||
Após pegá-lo, desça pelo tronco e vá para nordeste da bonfire. Utilize as habilidades dos seus Pokémon e libere o caminho para o desafio final. | |||
<center>[[Arquivo:gw_surf_final.webp]]</center> | |||
'''Importante:''' Caso o jogador inicie a etapa final, não será possível retornar para resgatar os '''[https://wiki.pokexgames.com/index.php/Segredos%20do%20Mapa%20-%20Elite%20Four%20Main%20Quest segredos do mapa]'''. | |||
<table class="seeMore"> | |||
<tr> | |||
<td class="seeMore__image">[[Arquivo:Telekinetic-compass.gif|link=]]</td> | |||
<td> '''Veja mais:''' [[Segredos do Mapa - Elite Four Main Quest]]. </td> | |||
</tr> | |||
</table> | |||
== Batalha final == | |||
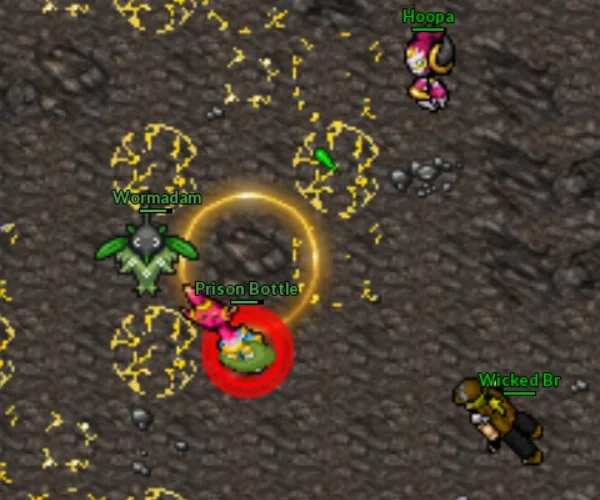
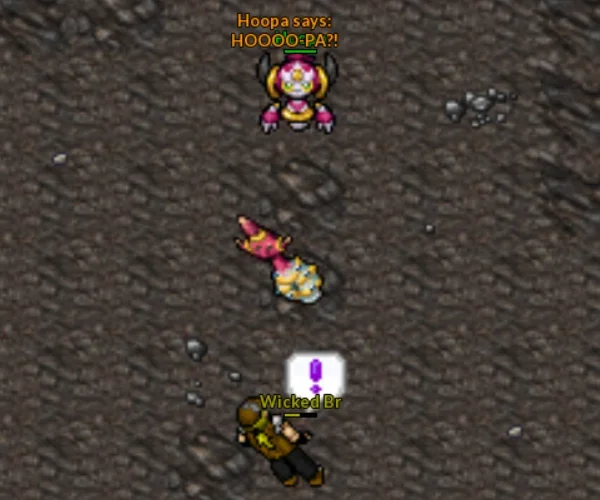
Com seus Pokémon evoluídos, você enfrentará o [[Arquivo:720-Hoopa.png|link=Hoopa]] [[Hoopa]]. O Objetivo será derrotar a Poison Bottle. Porém, não será tão fácil assim. | |||
<center>[[Arquivo:gw_battle_hoopa.webp]]</center> | |||
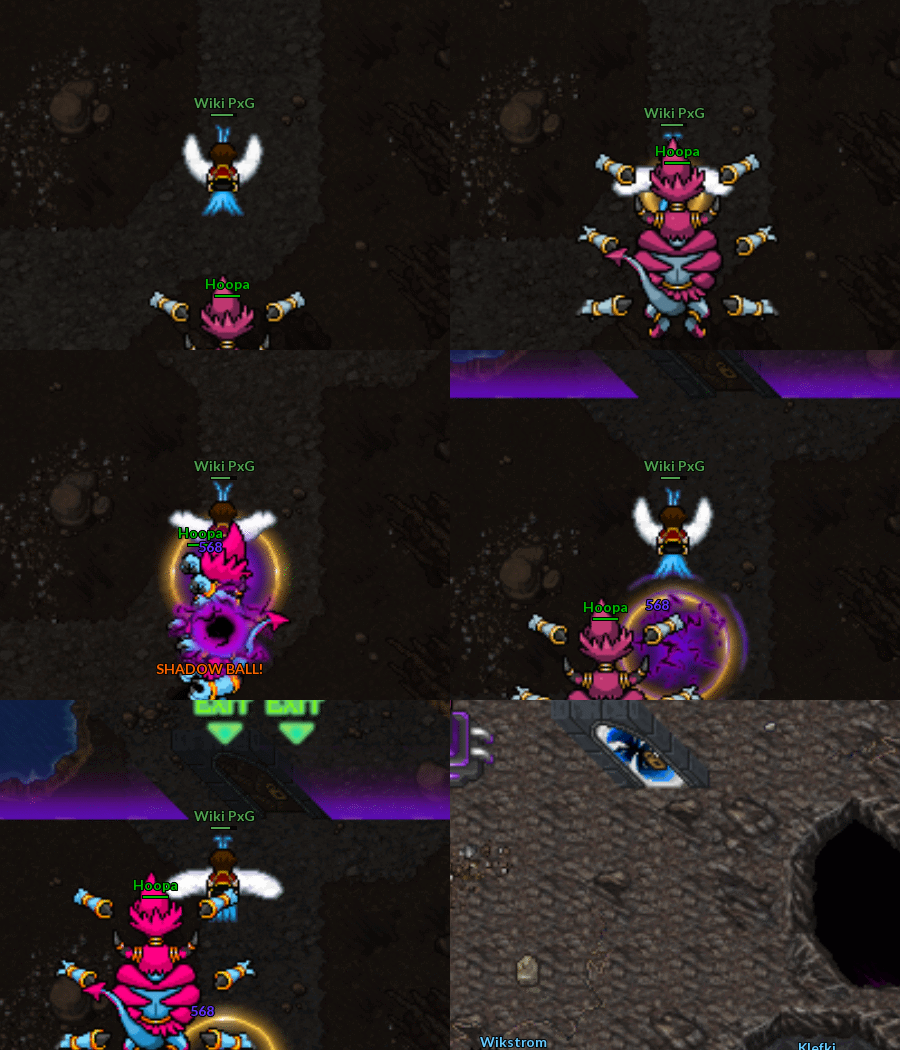
Durante o confronto, [[Arquivo:720-Hoopa.png|link=Hoopa]] [[Hoopa]] atacará com alguns golpes. | |||
<center>[[Arquivo:]]</center> | |||
<center>[[Arquivo:]]</center> | |||
Além disso, ele também usará alguns anéis para serem destruídos e você curar seu pokémon e sua vida, caso seja necessário. | |||
<center>[[Arquivo:]]</center> | |||
Derrotando a Poison Bottle, o jogador é transportado para outra área e deverá fugir do [[Arquivo:720-Hoopa.png|link=Hoopa]] [[Hoopa]]. Haverá alguns obstáculos pelo caminho e alguns pontos de cura. | |||
<center>[[Arquivo:gw_defeat_hoopa.webp]]</center> | |||
<center>[[Arquivo:Gw_start_hoopa.gif ]]</center> | |||
Terminando a corrida, você finalizará a Quest. | |||
<center>[[Arquivo:Gw_end_hoopa.gif]]</center> | |||
Fale com o Wikstrom e receba sua recompensa. | |||
== Recompensas == | |||
<center> | <center> | ||
{| class="wikitable" width="55%" | |||
{| class="wikitable" width=" | |- align="center" | ||
!align=" | !align="center" width="1%" colspan="10" style="background-color: #660099" |'''Recompensas'''</span> | ||
!align=" | |- | ||
!align=" | !align="center" width="1%" style="background-color: #4682B4" |'''25kk EXP''' | ||
!align=" | !align="center" width="1%" style="background-color: #4682B4" |'''2x inactive held X (Pokémon T3)''' | ||
!align="center" width="1%" style="background-color: #4682B4" |'''2x inactive held X (Pokémon T2)''' | |||
| ''' | !align="center" width="2%" style="background-color: #4682B4" |'''3x inactive held Y''' | ||
| ''' | !align="center" width="1%" style="background-color: #4682B4" |'''Acesso ao respawn de Klefki''' | ||
| | !align="center" width="2%" style="background-color: #4682B4" |'''Registro Hoopa na Pokédex''' | ||
| [[Arquivo: | |- align="center" | ||
[[Arquivo: | | [[Arquivo:Exp_icon.png|30px|link=]] | ||
[[Arquivo: | | [[Arquivo:Heldinativot3.png|link=]] | ||
| | | [[Arquivo:Heldinativot2.png|link=]] | ||
| [[Arquivo:Heldinativoy.png|link=]] | |||
| [[Arquivo:707-Klefki.png|link=Klefki]] | |||
| [[Arquivo:PokedexIcon.png|link=]][[Arquivo:720-Hoopa.png|link=Hoopa]] | |||
|} | |||
</center> | </center> | ||
<table class="seeMore"> | |||
<tr> | |||
<td class="seeMore__image">[[Arquivo:Telekinetic-compass.gif|link=]]</td> | |||
<td> '''Veja mais:''' [[NPC Wikstrom]] e [[Held Itens]]. </td> | |||
</tr> | |||
</table> | |||
Edição atual tal como às 07h18min de 27 de fevereiro de 2025
Under
Ghost World
Depois de entregar os artefatos ao Klefki, será necessário sair pelo Strange Portal. Quando voltar, o mapa mudará e a escada que leva ao andar de baixo ficará visível. Depois disso, é só falar com o Wikstrom e pegar a chave para o Ghost World.
Ele indicará o jogador para entrar no portal do Ghost World para investigar por que os Pokémon fantasmas estão agindo de forma estranha.
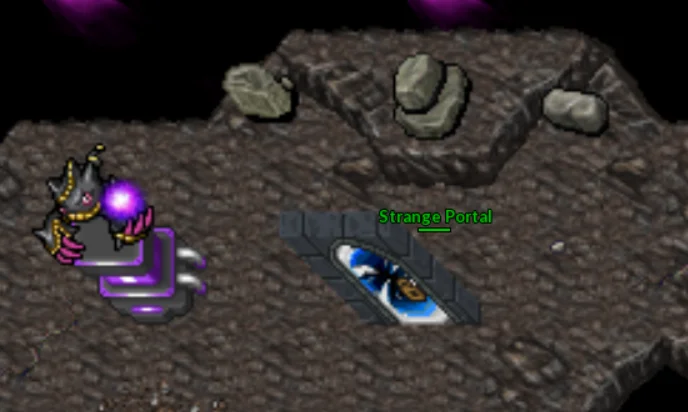
Passando pelo portal, você será transportado para o Ghost World. Seu personagem não terá Pokémon algum e será preciso encontrar seus ajudantes ao longo de sua jornada.
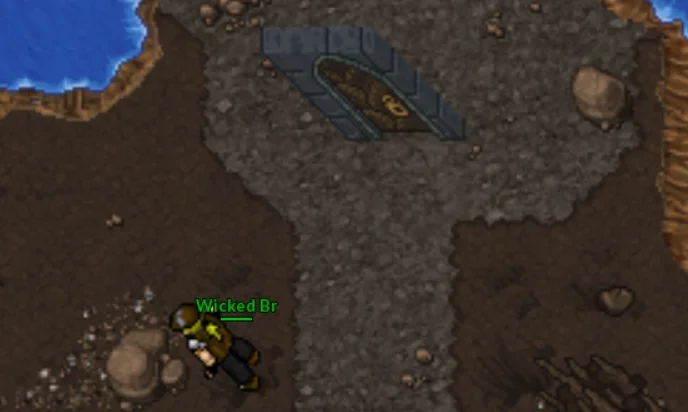
Encontrando Burmy
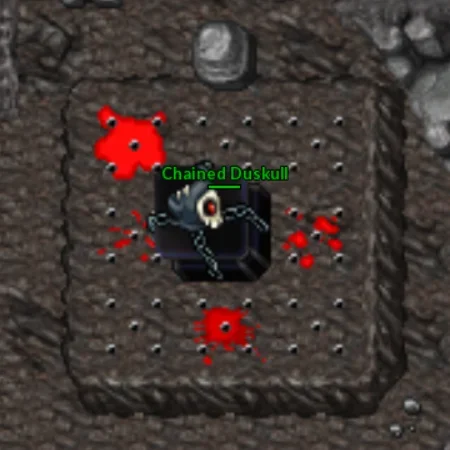
Logo após a entrada, os desafios começarão. O primeiro desafio será o de enfrentar são os ![]() Duskull. Eles estão acorrentados e não irão na direção seu personagem, porém, ao passar próximo a eles, seu personagem receberá dano baseado em porcentagem de vida.
Duskull. Eles estão acorrentados e não irão na direção seu personagem, porém, ao passar próximo a eles, seu personagem receberá dano baseado em porcentagem de vida.
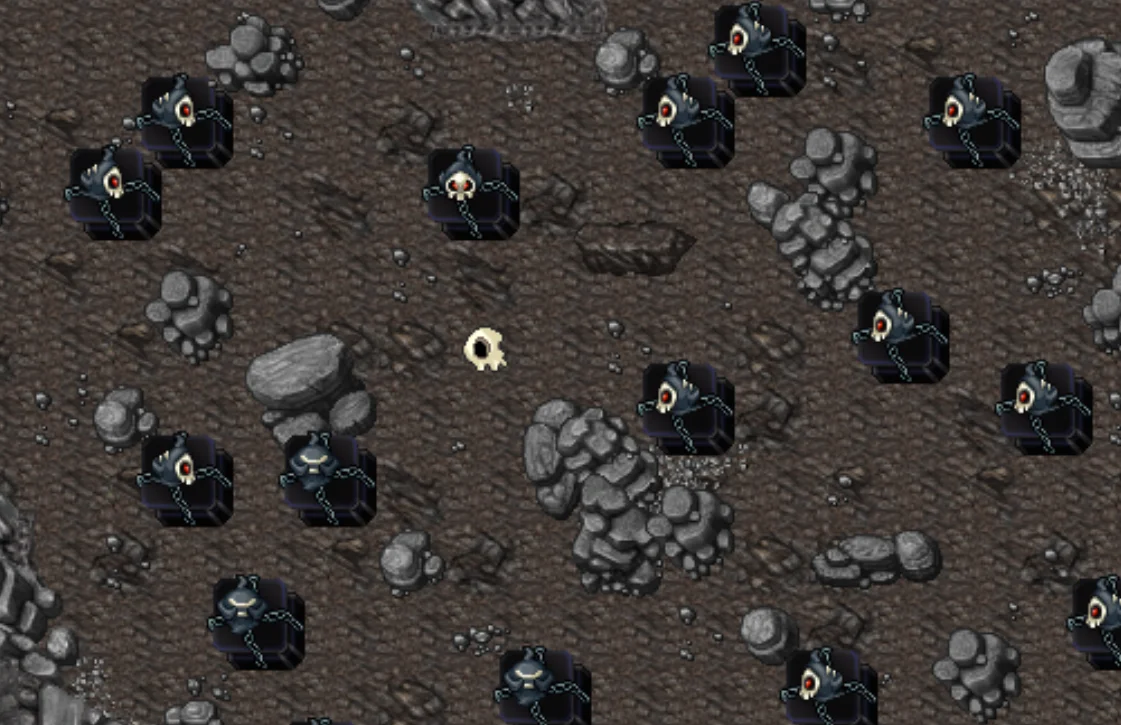
Haverá uma espécie de labirinto que deverá ser percorrido, desviando de obstáculos e dos Pokémon que ali estão.
Ao terminar este labirinto, você encontrará o seu primeiro ajudante: o ![]() Burmy .
Burmy .
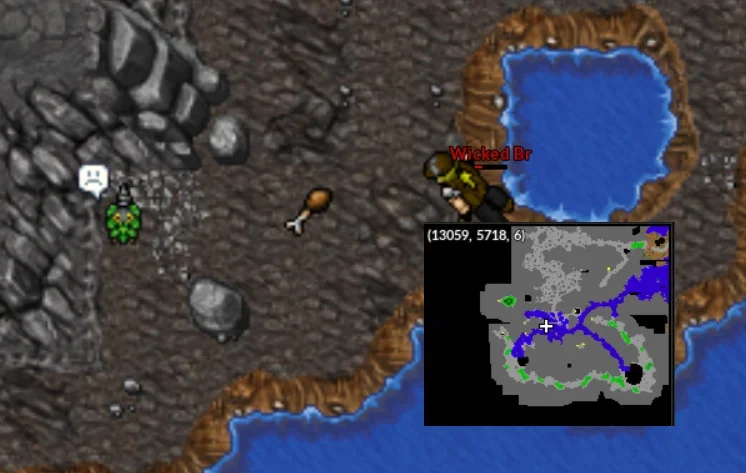
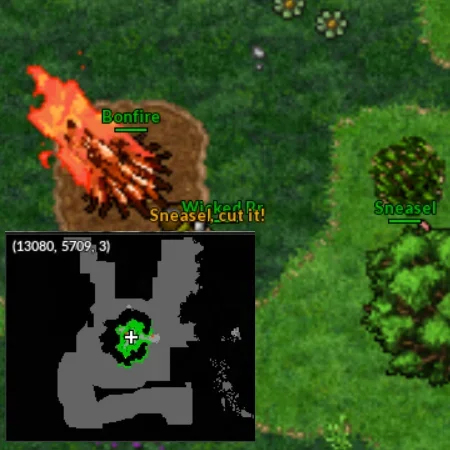
Após pegar o seu primeiro ajudante, seguirá o caminho e encontrará uma fogueira. Esta fogueira será responsável por curar sua vida e a vida de seus Pokémon, além de ter um savepoint, para caso seja derrotado ou tenha que sair.
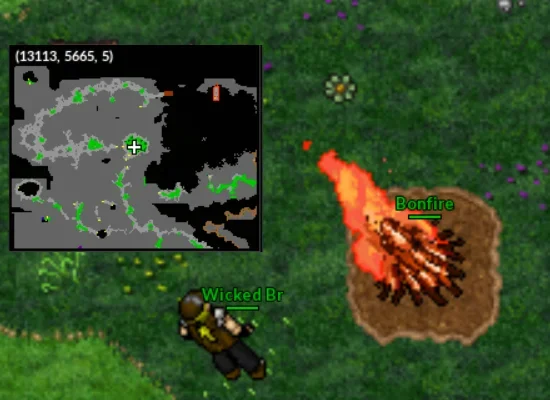
Observação: Caso saia ou seja derrotado, haverá uma taxa de 3 ![]() Darkness Stones para retornar ao último savepoint.
Darkness Stones para retornar ao último savepoint.
Encontrando Slowpoke
Seguindo o caminho, você irá ao encontro do seu outro ajudante, o ![]() Slowpoke . Haverá alguns
Slowpoke . Haverá alguns ![]() Shuppet pelo caminho que atacarão o seu personagem e será necessário criar algumas estratégias para fugir deles e ir até o fim do mapa.
Shuppet pelo caminho que atacarão o seu personagem e será necessário criar algumas estratégias para fugir deles e ir até o fim do mapa.
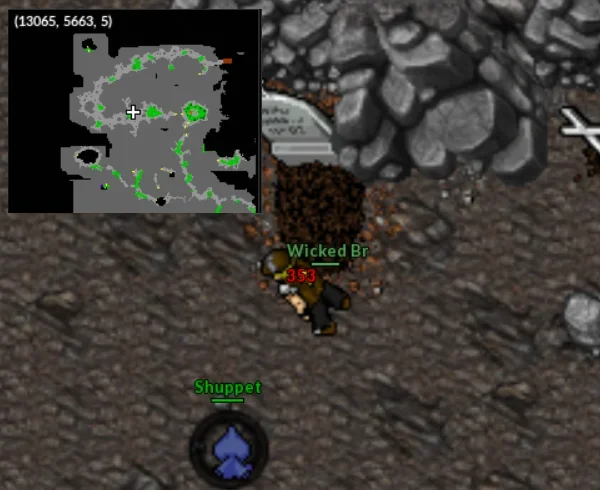
Algumas dicas são válidas, como despistar o Pokémon utilizando as pedras do mapa, utilizar o electric web ou utilizar o protect do ![]() Burmy.
Burmy.
Terminando o caminho, o segundo ajudante desta jornada será encontrado.
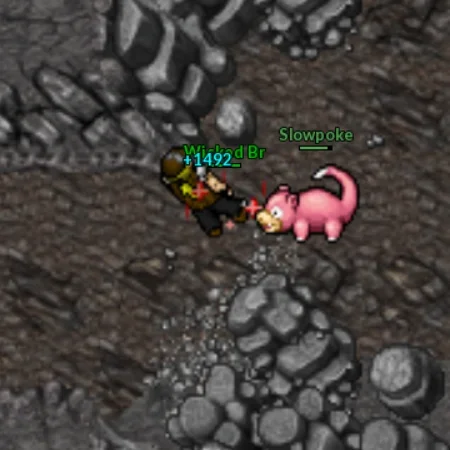
Com o novo ajudante, será possível derrotar os ![]() Shuppet que estão atrás de você. Derrotando-os, seus corpos virarão corações para curar tanto a vida de seu personagem quanto a vida de seus Pokémon.
Shuppet que estão atrás de você. Derrotando-os, seus corpos virarão corações para curar tanto a vida de seu personagem quanto a vida de seus Pokémon.
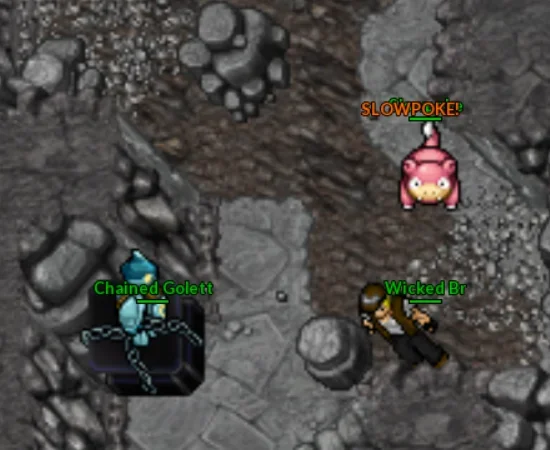
Continuando com sua jornada, encontrará os ![]() Golett que estão travando as passagens para seu personagem.
Golett que estão travando as passagens para seu personagem.
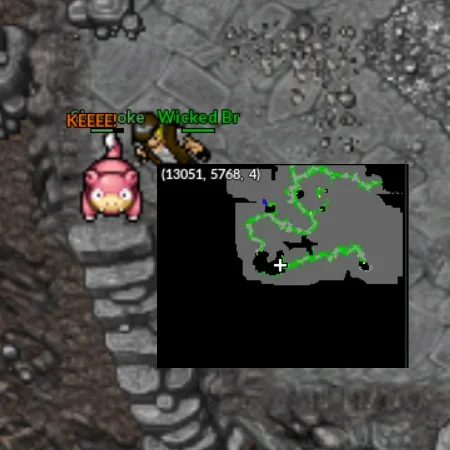
Seguindo o caminho, serão encontrados alguns outros Pokémon que você derrotará até chegar a mais um desafio. Desta vez, estará numa escada onde há o respawn de 3 ![]() Misdreavus .
Misdreavus .
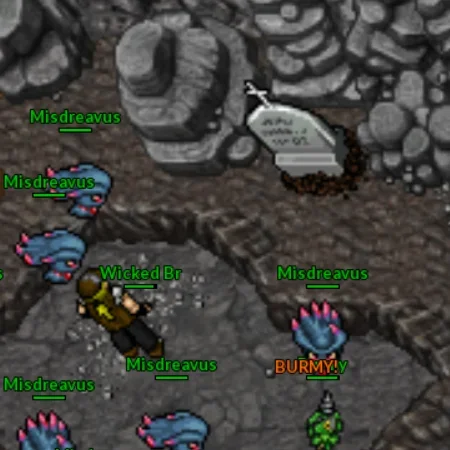
Caso tente passar correndo, encontrará a passagem bloqueada por uma lápide, e, para liberá-la, deverá derrotar ao menos 1 ![]() Misdreavus .
Misdreavus .
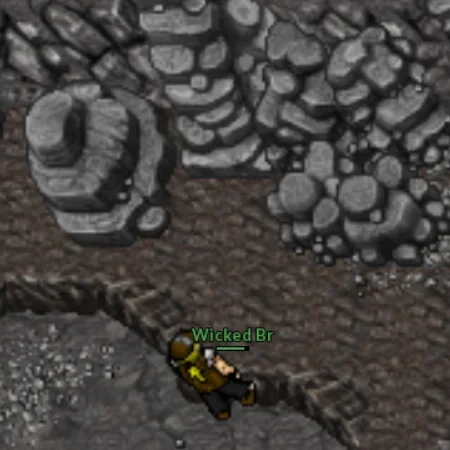
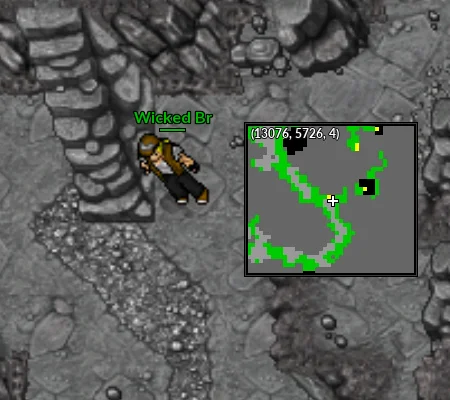
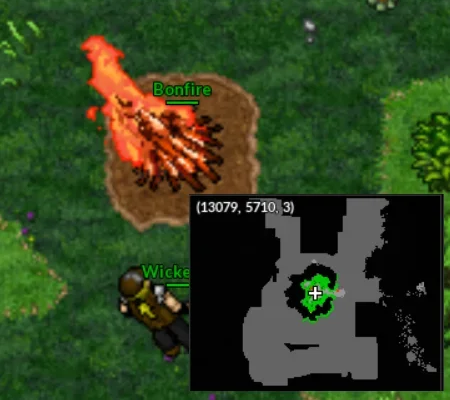
Ao continuar o caminho, encontrará mais uma bonfire para restaurar o personagem e salvar seu progresso.
Encontrando Corsola
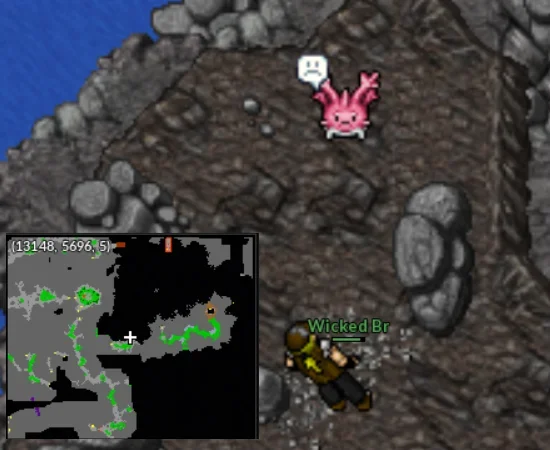
Já com o time recuperado, será a hora de encontrar o terceiro ajudante, o ![]() Corsola , que será fundamental para sua progressão, pois ele possui a habilidade rock smash, que abrirá novos caminhos que estavam fechados por pedras.
Corsola , que será fundamental para sua progressão, pois ele possui a habilidade rock smash, que abrirá novos caminhos que estavam fechados por pedras.

 ]
]
Com o ![]() Corsola em mãos, seguirá para sudeste até encontrar esta escada.
Corsola em mãos, seguirá para sudeste até encontrar esta escada.
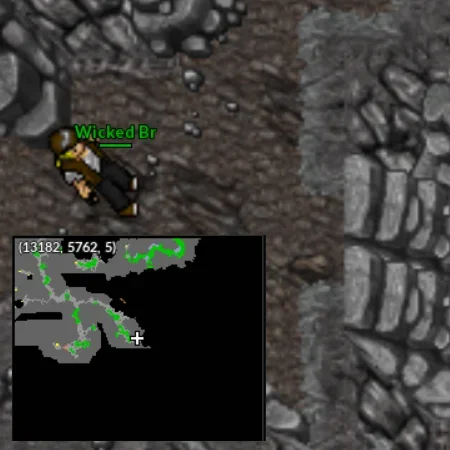
No novo caminho, haverá diversos Pokémon que deverão ser derrotados. É possível despistá-los, mas torna-se perigoso fazer isso, pois seu time está muito fraco ainda.
[talvez pegar imagem de vários pokes naquele local]
Novamente, ao final deste local terá outra bonfire para que possa registrar seu progresso e restaurar seus Pokémon.
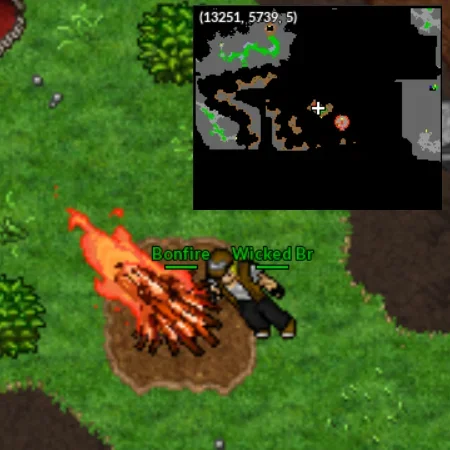
À direita do savepoint, haverá um castelo onde a Ghost Girl foi vista. Derrote os Pokémon em volta e prossiga. Um aviso ao lado da escada indicará o local que deverá ser acessado.
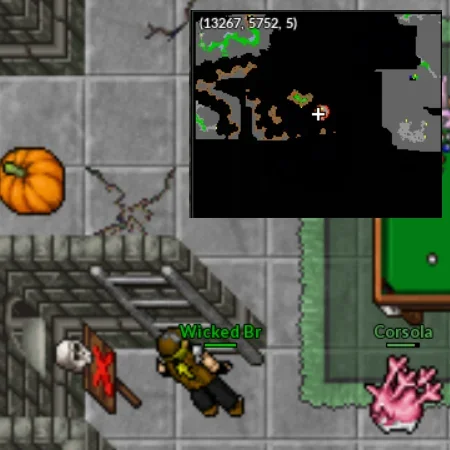
Subindo as escadas, a batalha será contra o Boss ![]() Gengar. Ele ataca à distância, o que pode dificultará um pouco a batalha. Contudo, devido ao lick, esta distância será encurtada, possibilitando que seja utilizado o combo dos seus Pokémon, principalmente o
Gengar. Ele ataca à distância, o que pode dificultará um pouco a batalha. Contudo, devido ao lick, esta distância será encurtada, possibilitando que seja utilizado o combo dos seus Pokémon, principalmente o ![]() Corsola.
Corsola.
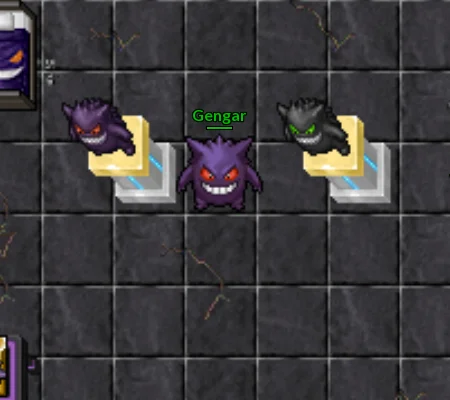
Uma dica para esta batalha é despistar o Pokémon e se esconder ao norte ou ao sul da sala enquanto recupera o tempo de recarga dos Pokémon.
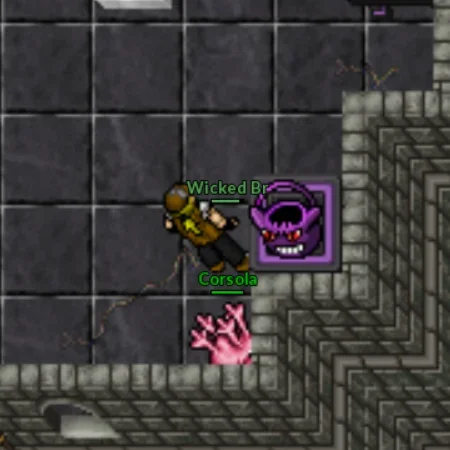
Concluindo este desafio, outra escada aparecerá e dará acesso à Ghost Girl, que conversará com você e entregará pedras de evolução para o ![]() Burmy e para o
Burmy e para o ![]() Slowpoke . Com isso, ela o expulsará do Ghost World e terá que pagar 3
Slowpoke . Com isso, ela o expulsará do Ghost World e terá que pagar 3 ![]() Darkness Stones para prosseguir.
Darkness Stones para prosseguir.
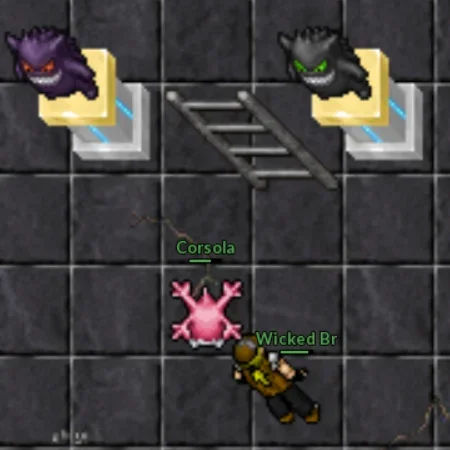
Encontrando Sneasel
Agora, com o time atualizado, o desafio continua. Há um atalho em que poderá ser utilizada a habilidade dig com o ![]() Wormadam para retornar ao caminho da quest.
Wormadam para retornar ao caminho da quest.
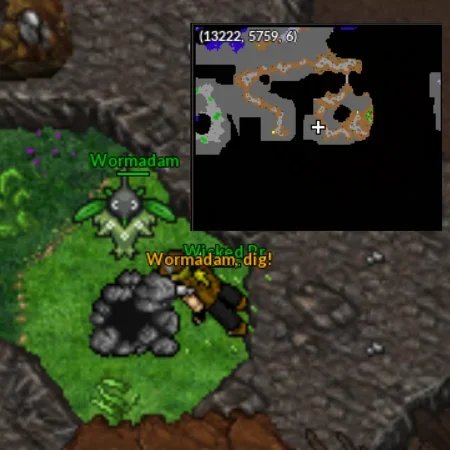
Para progredir, será necessário retornar próximo ao local do segundo ajudante e quebrar as pedras para acessar uma outra caverna.
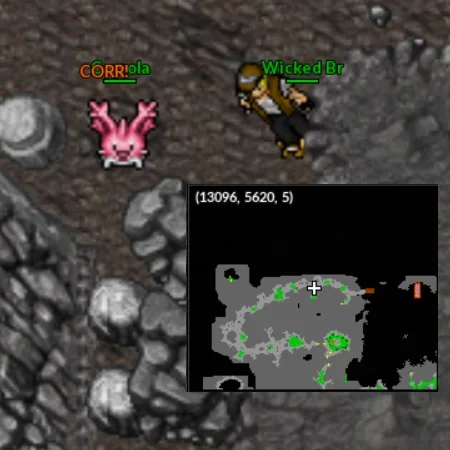
Neste local, haverá diversos ![]() Shedinja. No primeiro momento, o jogador acredita que deverá derrotá-los, assim como outros Pokémon que são encontrados no caminho, porém, será necessário utilizar a habilidade control minds do
Shedinja. No primeiro momento, o jogador acredita que deverá derrotá-los, assim como outros Pokémon que são encontrados no caminho, porém, será necessário utilizar a habilidade control minds do ![]() Slowking e controlar a mente dos
Slowking e controlar a mente dos ![]() Shedinja para utilizar a habilidade cut, visto que no seu time não há ninguém que possa fazer isso.
Shedinja para utilizar a habilidade cut, visto que no seu time não há ninguém que possa fazer isso.
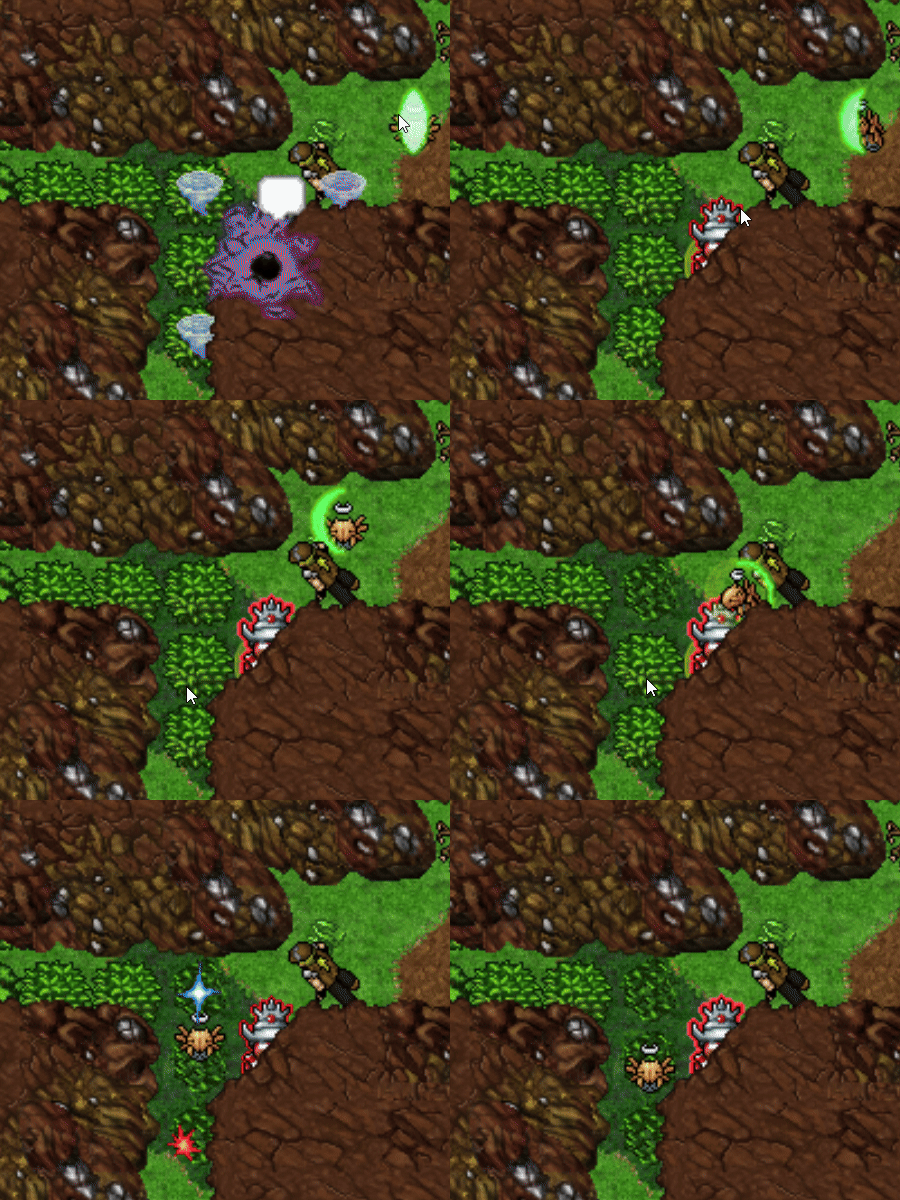
Cortando os arbustos, uma nova passagem será liberada.
Ao final desta passagem, haverá uma nova bonfire para registrar seu progresso e restaurar seus Pokémon antes de enfrentar o próximo Boss.
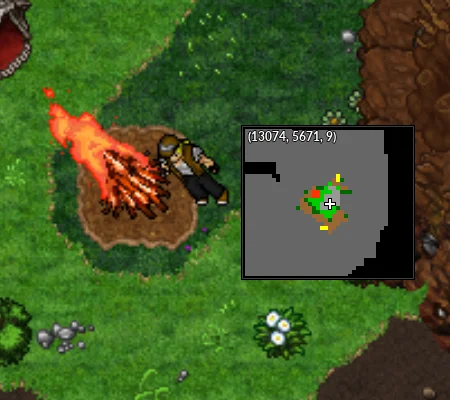
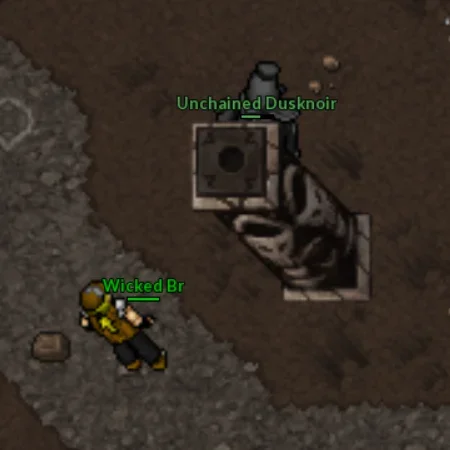
O chefe desta sala será o ![]() Dusknoir.
Dusknoir.
Com base na porcentagem de vida, ele invoca alguns ![]() Duskulls para atacarem você. Enquanto os
Duskulls para atacarem você. Enquanto os ![]() Duskulls estiverem em campo, o
Duskulls estiverem em campo, o ![]() Dusknoir estará invulnerável. Uma alternativa para derrotá-lo com mais facilidade é despistá-los para o norte ou para o sul.
Dusknoir estará invulnerável. Uma alternativa para derrotá-lo com mais facilidade é despistá-los para o norte ou para o sul.
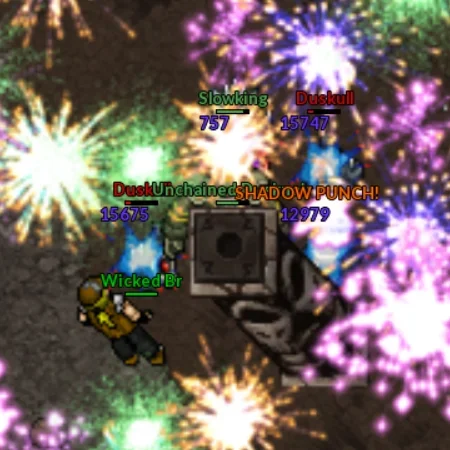
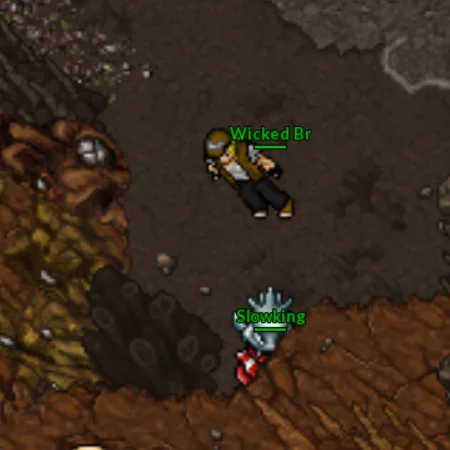
Finalizando a batalha, um novo ajudante se juntará ao time. O ![]() Sneasel será muito importante para as próximas etapas, pois ele possui a habilidade cut, liberando novas passagens e alguns segredos do mapa.
Sneasel será muito importante para as próximas etapas, pois ele possui a habilidade cut, liberando novas passagens e alguns segredos do mapa.
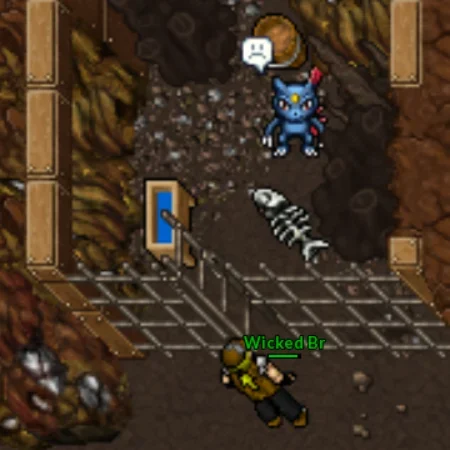
| Veja mais: Segredos do Mapa - Elite Four Main Quest. |
Segredos do Mapa - Ghost World
Durante a etapa do Ghost World, na Elite Four Main Quest, há alguns itens escondidos que podem ser encontrados pelos jogadores. Enquanto o jogador estiver no Ghost World, será possível retornar aos locais indicados e resgatar os itens escondidos. Porém, caso o jogador vá para a batalha final, a única maneira de resgatar os itens é com o NPC Ghost Girl.
Dice
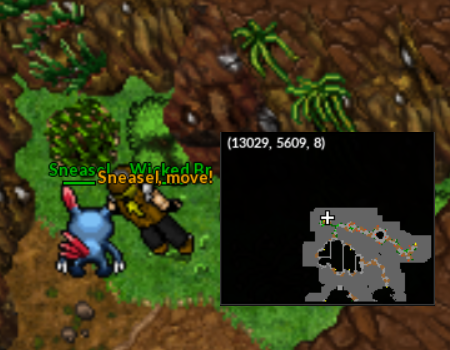
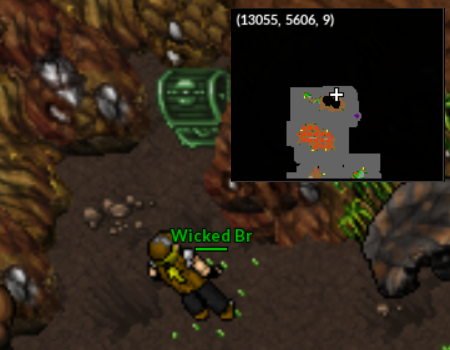
O primeiro segredo do mapa está escondido próximo à passagem onde foi preciso utilizar a habilidade control minds. Com o ![]() Sneasel, utilize cut nestes arbustos e entre na caverna. Ela estará repleta de
Sneasel, utilize cut nestes arbustos e entre na caverna. Ela estará repleta de ![]() Shedinja. Eles serão derrotados apenas por golpes efetivos, lembre-se disso. Após derrotar todos os Pokémon da sala, o primeiro baú será encontrado. Sua recompensa é um
Shedinja. Eles serão derrotados apenas por golpes efetivos, lembre-se disso. Após derrotar todos os Pokémon da sala, o primeiro baú será encontrado. Sua recompensa é um ![]() dado decorativo que você poderá interagir fazendo rolagens.
dado decorativo que você poderá interagir fazendo rolagens.
Flutter Mane backpack
O primeiro segredo do mapa que você acessará com o ![]() Tentacool é a peruca do Bald Ghost. Entre abaixo da cachoeira próxima ao respawn de Sableye e clique no baú. Após receber a peruca, devolva-a para o Bald Ghost. Como recompensa, ele entregará a
Tentacool é a peruca do Bald Ghost. Entre abaixo da cachoeira próxima ao respawn de Sableye e clique no baú. Após receber a peruca, devolva-a para o Bald Ghost. Como recompensa, ele entregará a ![]() Flutter Mane backpack.
Flutter Mane backpack.
Alolan Marowak skull
Outro segredo que pode ser acessado a partir do surf é o diário do Malefic Ghost. Entre nesta caverna e quebre as pedras.
Tenha cuidado com o ![]() Rotom, pois ele poderá derrotar o seu
Rotom, pois ele poderá derrotar o seu ![]() Corsola. Coloque outro Pokémon para despistá-lo e utilize o surf para acessar o baú escondido. Retorne para o Malefic Ghost e devolva seu diário. Como recompensa, ele entregará um
Corsola. Coloque outro Pokémon para despistá-lo e utilize o surf para acessar o baú escondido. Retorne para o Malefic Ghost e devolva seu diário. Como recompensa, ele entregará um ![]() Alolan Marowak skull.
Alolan Marowak skull.
Premier ball
Retornando para o início, haverá uma caverna em que será necessário utilizar o rock smash do ![]() Corsola para liberar uma escada. Descendo por ela, haverá um baú com
Corsola para liberar uma escada. Descendo por ela, haverá um baú com ![]() 20 Empty Premier balls não únicas.
20 Empty Premier balls não únicas.
Alolan Marowak tapestry
Antes de seguir para a última fogueira, há uma caverna ao sul que fica um pouco escondida. Após quebrar as pedras e escapar das armadilhas, o baú concederá um ![]() Alolan Marowak tapestry.
Alolan Marowak tapestry.
Duskull TV Camera
O último baú escondido será no local da última fogueira. Utilize o dig próximo a esta árvore para acessar o local.
Pegue o old necklace e entregue-o para a Rich Ghost. Como recompensa, ela entregará uma ![]() Duskull TV Camera.
Duskull TV Camera.
Caso tenha concluído a Quest e deixou algum item decorativo para trás, é possível comprá-los com o  NPC Ghost Girl.
| Veja mais: NPC Ghost Girl. |
Ghost Girl

Este NPC estará disponível para os jogadores que concluíram a Elite Four Main Quest. Sua localização é no respawn de Klefki e estará em um local diferente a depender dos dias da semana. Sua função é vender itens decorativos que os jogadores que concluíram a Quest tenham deixado para trás.
Observações: Os itens custarão um valor fixo de $2.000.000 (2KK).
Caso o jogador tenha coletado durante a Quest ou comprado alguns dos itens com o NPC, a loja não ativará.
Localização
| Localização | Item |
|---|---|
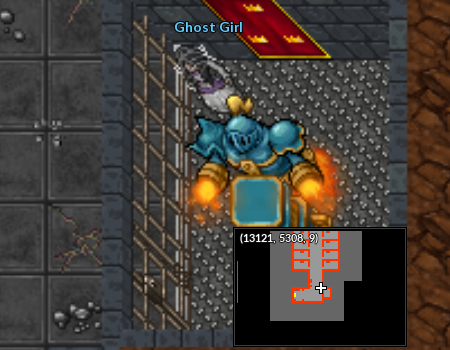 13121, 5308, 9 |
Duskull TV Camera |
| Localização | Item |
|---|---|
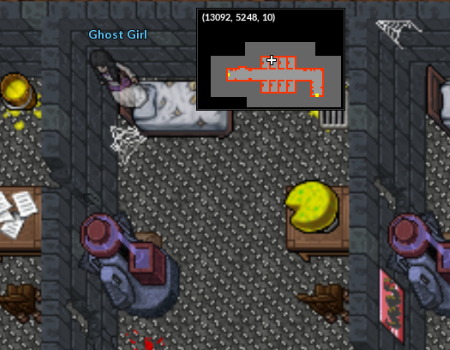 13092, 5248, 10 |
Alolan Marowak tapestry |
| Localização | Item |
|---|---|
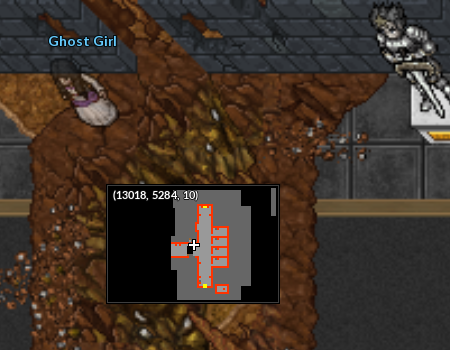 13018, 5284, 10 |
Alolan Marowak skull |
| Localização | Item |
|---|---|
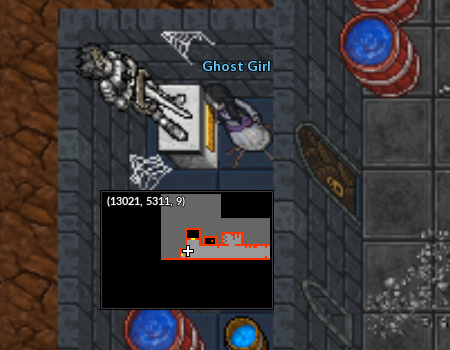 13021, 5311, 9 |
Dice |
Continuando
Encontrando Tentacool
Com o Sneasel no time, retorne para a segunda bonfire e utilize o cut no arbusto próximo a ela para prosseguir com a quest.
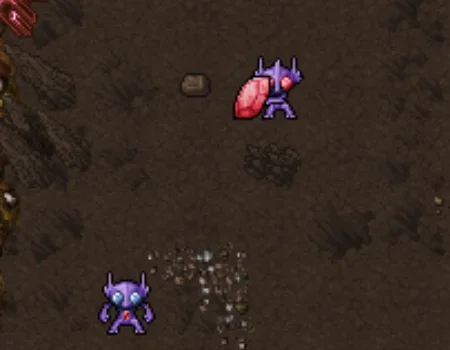
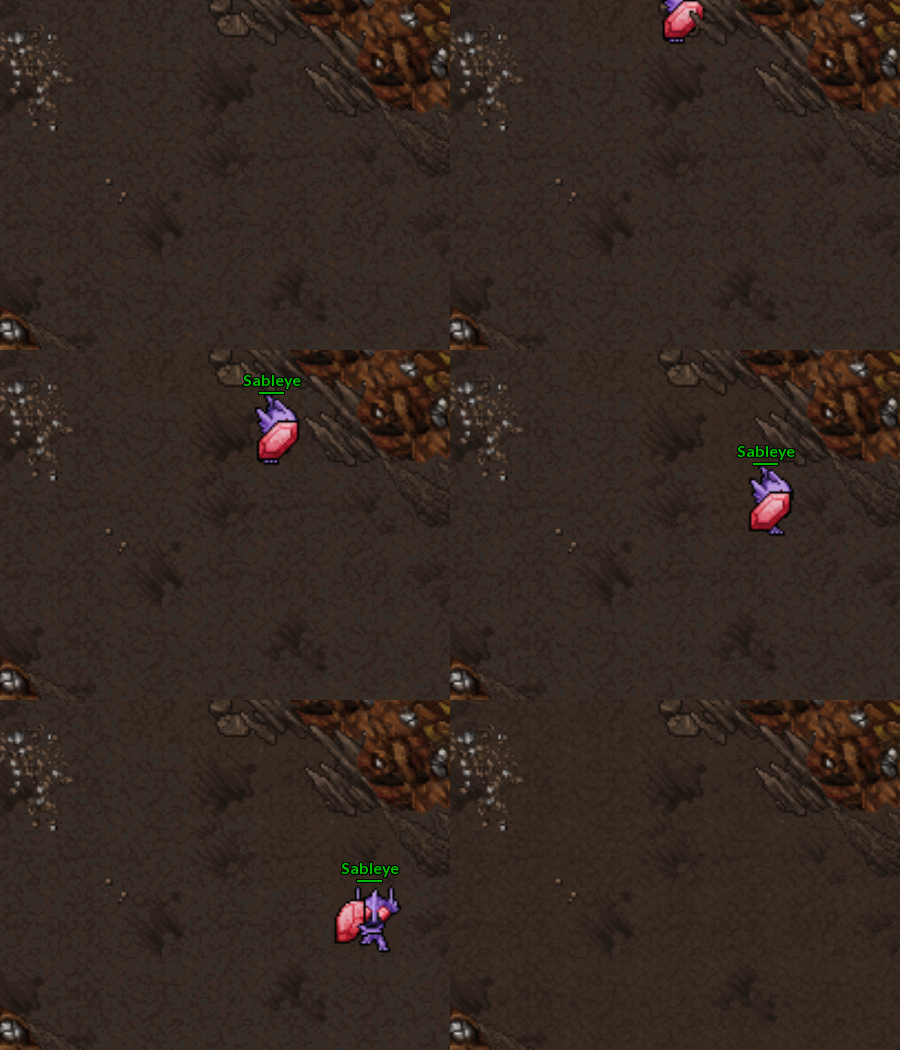
Neste local, você encontrará alguns Sableyes para derrotar e deverá seguir o caminho até o final. Tenha cuidado com o Mega Sableye que há no local, pois ele é muito forte. Ele faz a ronda ao redor da rocha. Aproveite o tempo para passar por lá sem enfrentá-lo.
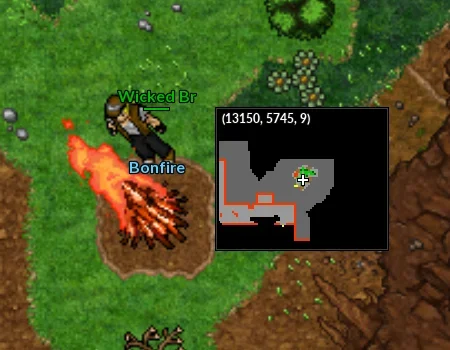
Passando por tudo isso, haverá outra bonfire para ser seu save point.
Seguindo para a esquerda, haverá alguns Golurks e Doublades que deverão ser derrotados.
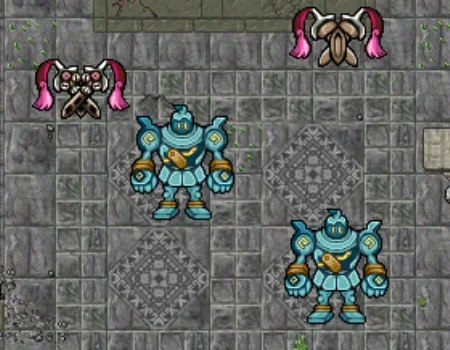
Seu próximo ajudante estará esperando para ser resgatado dentro de uma caverna, abaixo do local em que os Golurks e Doublades estavam.
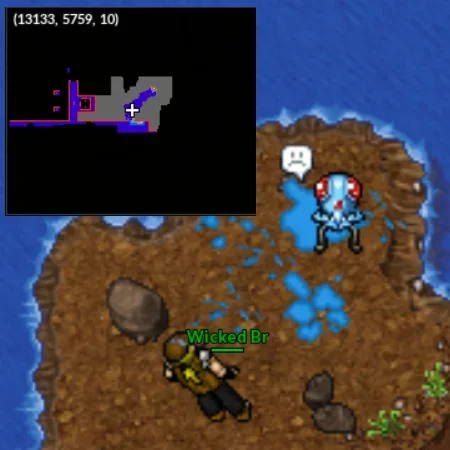
O Tentacool será muito importante para acessar alguns segredos do mapa.
| Veja mais: Segredos do Mapa - Elite Four Main Quest. |
Encontrando Swablu
Agora com o Tentacool em seu time, siga para o início do Ghost World. À direita haverá outra bonfire para que você possa salvar seu progresso e restaurar seus pokémon. Neste local, também haverá outros segredos do mapa.
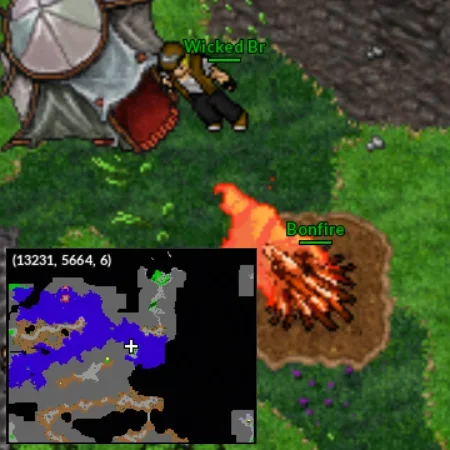
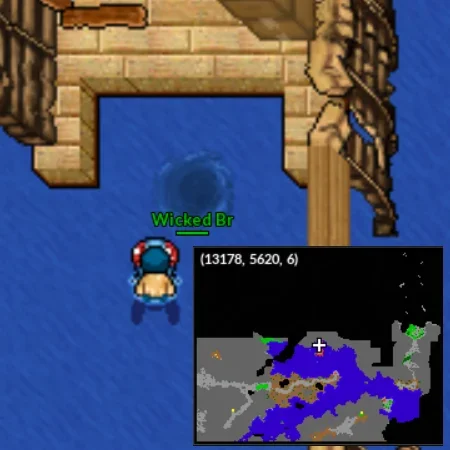
Vá para noroeste, entrando no redemoinho abaixo do navio naufragado.
Aqui haverá alguns ![]() Corsolas que você deverá despistar para continuar o caminho. Eles não atacam de longe, apenas tem o Whirpool como golpe. Utilize seu
Corsolas que você deverá despistar para continuar o caminho. Eles não atacam de longe, apenas tem o Whirpool como golpe. Utilize seu ![]() Corsola para atraí-los para longe da passagem e seguir.
Corsola para atraí-los para longe da passagem e seguir.
Há alguns locais em que você pode acumular os Pokémon. Não existe lugar certo para isso, então, escolha o mais confortável.
Após os ![]() Corsolas, suba as escadas. Tenha cuidado pois haverá um
Corsolas, suba as escadas. Tenha cuidado pois haverá um ![]() Chandelure à espreita.
Chandelure à espreita.
Depois de enfrentar todos os ![]() Chandelures, o último Boss estará pronto para a batalha.
Chandelures, o último Boss estará pronto para a batalha.
O ![]() Alolan Marowak é o último desafio antes da batalha final. Ele faz ronda por todo o mapa. Então, aguarde até que ele se afaste para subir pela corda.
Alolan Marowak é o último desafio antes da batalha final. Ele faz ronda por todo o mapa. Então, aguarde até que ele se afaste para subir pela corda.
Uma dica para enfrentá-lo é deixar o ![]() Slowking e o seu personagem posicionados desta maneira. Quando o
Slowking e o seu personagem posicionados desta maneira. Quando o ![]() Alolan Marowak vier em sua direção, dê o combo completo e corra para o norte, para despistá-lo.
Alolan Marowak vier em sua direção, dê o combo completo e corra para o norte, para despistá-lo.
Nesta batalha também haverá alguns pontos de cura. Basta derrotar as caveiras e curar seus Pokémon.
Derrotando o ![]() Alolan Marowak, suba a corda na passagem que abrirá ao final e vá em direção ao último ajudante.
Alolan Marowak, suba a corda na passagem que abrirá ao final e vá em direção ao último ajudante.
O ![]() Swablu se juntará ao seu time para a batalha final.
Swablu se juntará ao seu time para a batalha final.
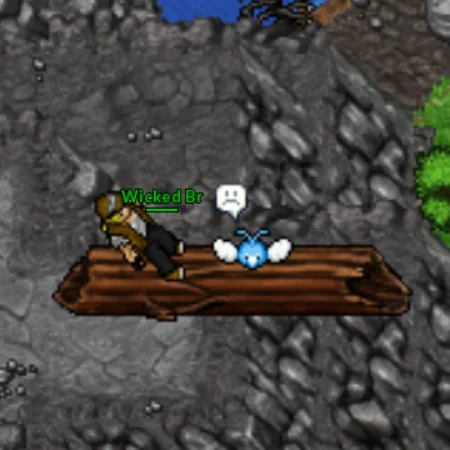
Após pegá-lo, desça pelo tronco e vá para nordeste da bonfire. Utilize as habilidades dos seus Pokémon e libere o caminho para o desafio final.
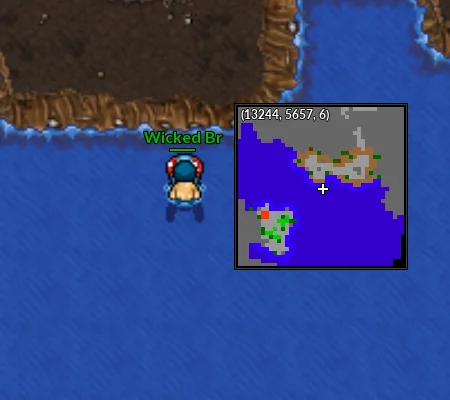
Importante: Caso o jogador inicie a etapa final, não será possível retornar para resgatar os segredos do mapa.
| Veja mais: Segredos do Mapa - Elite Four Main Quest. |
Batalha final
Com seus Pokémon evoluídos, você enfrentará o ![]() Hoopa. O Objetivo será derrotar a Poison Bottle. Porém, não será tão fácil assim.
Hoopa. O Objetivo será derrotar a Poison Bottle. Porém, não será tão fácil assim.
Durante o confronto, ![]() Hoopa atacará com alguns golpes.
Hoopa atacará com alguns golpes.
Além disso, ele também usará alguns anéis para serem destruídos e você curar seu pokémon e sua vida, caso seja necessário.
Derrotando a Poison Bottle, o jogador é transportado para outra área e deverá fugir do ![]() Hoopa. Haverá alguns obstáculos pelo caminho e alguns pontos de cura.
Hoopa. Haverá alguns obstáculos pelo caminho e alguns pontos de cura.
Terminando a corrida, você finalizará a Quest.
Fale com o Wikstrom e receba sua recompensa.
Recompensas
| Recompensas | |||||||||
|---|---|---|---|---|---|---|---|---|---|
| 25kk EXP | 2x inactive held X (Pokémon T3) | 2x inactive held X (Pokémon T2) | 3x inactive held Y | Acesso ao respawn de Klefki | Registro Hoopa na Pokédex | ||||
| Veja mais: NPC Wikstrom e Held Itens. |
