|
|
| Linha 1: |
Linha 1: |
| Renee
| | == Primeira Etapa == |
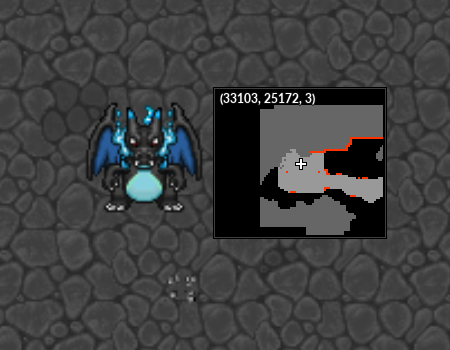
| <center>[[Arquivo:Banner tower.jpg|link=Embedded Tower]]<br></center> | | Ao entrar na dungeon o Charizard X irá aparecer após alguns segundos <br><br> |
|
| |
|
| | <center> [[Arquivo:Magma_Maze_Path_CharizardX.png|link=]] </center><br> |
|
| |
|
|
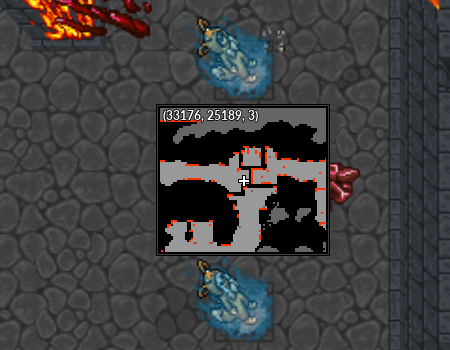
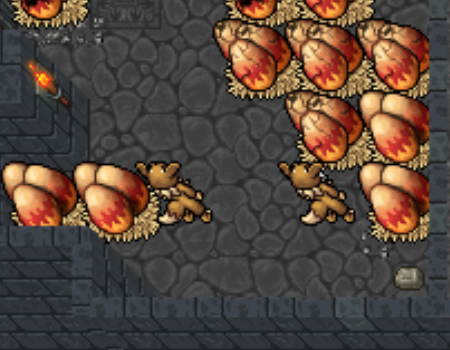
| | Nesta etapa os jogadores devem ignorar o Charizard X e seguir até as chamas pelas pedras na lava, essa etapa só estará concluída quando os 4 jogadores estiverem pisando nas chamas. <br><br> |
| <span style="color:red">'''Nível Necessário:</span> - <br>
| |
| <span style="color:red">'''Nível Recomendado:</span> 150+ <br>
| |
| <span style="color:red">'''Recompensa:</span> - (imagem do painel de recompensas da torre)
| |
|
| |
|
| <b>Caso encontre algum erro ou queira acrescentar alguma informação,</b> <span style="color:red">'''entre em contato com um dos membros da wiki.</span> | | <center> [[Arquivo:Magma_Maze_Path_CharizardX_1.png|link=]] </center><br> |
|
| |
|
| |
|
| | '''Observação:''' O Charizard ficará patrulhando o andar por isso, não demore para chegar ate as chamas. <br> |
|
| |
|
| ==<b>Como conseguir acesso a Embedded Tower?</b>== <!--T:4-->
| |
|
| |
|
| |
|
| Primeiramente o jogador deve ir até Phenac e falar com o Professor Syncamore. Ele dirá que está fazendo uma pesquisa na torre e que não conseguiu avançar por causa da existência de Pokémon com uma força maior que o normal. Em seguida, ele conta que o último pesquisador que entrou na torre se machucou ao sair e que não havia mais ninguém para enviar. Ele irá propor um acordo oferecendo uma premiação caso você consiga ajudá-lo.
| | == Segunda Etapa == |
|
| |
|
|
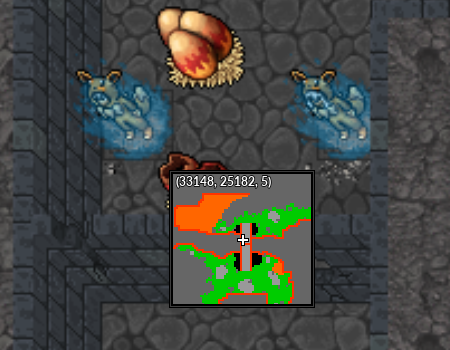
| | Ao serem movidos, os jogadores devem seguir o caminho ao oeste matando todas as criaturas existentes no andar e clicando nos ovos necessários para liberar o caminho. Cada ovo invocará um [[Arquivo:004-Charmander.png|link=Charmander]] '''Charmander''' ou [[Arquivo:004-Shiny_Charmander.png|link=Shiny Charmander]] '''Shiny Charmander''' <br> |
| <center>[[Arquivo:Syncamore12.jpg|link=Embedded_Tower]]</center>
| | '''Obs:''' Essas criaturas não tomam nenhum tipo de '''STUN''' |
|
| |
|
|
| | Após finalizar essa etapa os jogadores devem pisar no fogo e aguardar até que a outra equipe também pise. |
| *Após isso, o Professor irá pedir para que fale com um de seus pesquisadores que está no deserto ao leste de Phenac, fazendo pesquisas. O nome dele é Barry e ele irá te ajudar a entrar na torre.
| |
|
| |
|
|
| | <center> [[Arquivo:Magma Maze Path CharizardX2.png|link=]] </center><br> |
| <center>[[Arquivo:Barry.png|link=Embedded_Tower]]</center> | |
|
| |
|
| | == Terceira Etapa == |
|
| |
|
|
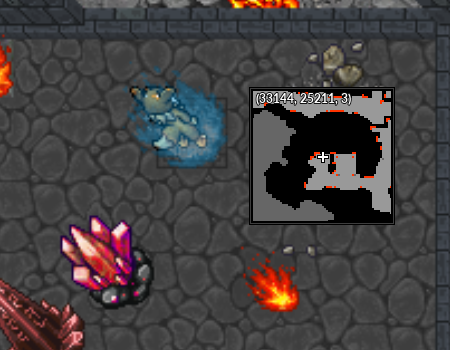
| | Estejam preparados para enfrentar criaturas sumonadas pelos '''Firestone Crystal''' presentes na sala. Cada crystal invocará 3 Pokémon entre eles [[Arquivo:004-Charmander.png|link=Charmander]] '''Charmander''', [[Arquivo:004-Shiny_Charmander.png|link=Shiny Charmander]] '''Shiny Charmander''' e [[Arquivo:005-Charmeleon.png|link=Charmeleon]] '''Charmeleon'''. <br> |
| *Barry dirá que perdeu sua mochila e irá pedir que procure, ela se encontra em um destes locais:
| | '''Obs:''' Após certo tempo os cristais sumonam as criaturas novamente. |
|
| |
|
| <center> | | <br>O Charizard X estará patrulhando todo o caminho, o ideal é que vocês fujam dele até a outra equipe derrotar todos os Pokémon presentes no andar. |
| {| class="wikitable" width="60%"
| |
| ! width="31%" style="background-color: #483D8B" | <span style="color:white">Possíveis locais onde a bag pode aparecer ou já foi encontrada:</span>
| |
| | width="3%" style="border-top-style: hidden; border-width: 1px; border-bottom-style: hidden; border-width: 1px" |
| |
| ! width="32%" style="background-color: #483D8B" | <span style="color:white">Possíveis locais onde a bag pode aparecer ou já foi encontrada:</span>
| |
| |- align="center"
| |
| | [[Arquivo:Possivel 1.png|link=Embedded Tower]]
| |
| | width="4%" style="border-top-style: hidden; border-width: 1px; border-bottom-style: hidden; border-width: 1px" |
| |
| | [[Arquivo:Possivel 2.png|link=Embedded Tower]]
| |
| |-
| |
| | height="30px" style="border-left-style: hidden; border-width: 1px; border-right-style: hidden; border-width: 1px" |
| |
| |-
| |
| ! style="background-color: #483D8B" | <span style="color:white">Possíveis locais onde a bag pode aparecer ou já foi encontrada:</span>
| |
| | style="border-top-style: hidden; border-width: 1px; border-bottom-style: hidden; border-width: 1px" |
| |
| ! style="background-color: #483D8B" | <span style="color:white">Possíveis locais onde a bag pode aparecer ou já foi encontrada:</span>
| |
| |- align="center"
| |
| | [[Arquivo:Possivel 3.png|link=Embedded Tower]]
| |
| | width="4%" style="border-top-style: hidden; border-width: 1px; border-bottom-style: hidden; border-width: 1px" |
| |
| | [[Arquivo:Possivel 4.png|link=Embedded Tower]]
| |
| |-
| |
| | height="30px" style="border-left-style: hidden; border-width: 1px; border-right-style: hidden; border-width: 1px" |
| |
| |-
| |
| ! style="background-color: #483D8B" | <span style="color:white">Possíveis locais onde a bag pode aparecer ou já foi encontrada:</span>
| |
| | style="border-top-style: hidden; border-width: 1px; border-bottom-style: hidden; border-width: 1px" |
| |
| ! style="background-color: #483D8B" | <span style="color:white">Possíveis locais onde a bag pode aparecer ou já foi encontrada:</span>
| |
| |- align="center"
| |
| | [[Arquivo:Possivel 5.png|link=Embedded Tower]]
| |
| | width="4%" style="border-top-style: hidden; border-width: 1px; border-bottom-style: hidden; border-width: 1px" |
| |
| | [[Arquivo:Possivel 6.png|link=Embedded Tower]]
| |
| |-
| |
| | height="30px" style="border-left-style: hidden; border-width: 1px; border-right-style: hidden; border-width: 1px" |
| |
| |-
| |
| ! style="background-color: #483D8B" | <span style="color:white">Possíveis locais onde a bag pode aparecer ou já foi encontrada:</span>
| |
| | style="border-top-style: hidden; border-width: 1px; border-bottom-style: hidden; border-width: 1px" |
| |
| ! style="background-color: #483D8B" | <span style="color:white">Possíveis locais onde a bag pode aparecer ou já foi encontrada:</span>
| |
| |- align="center"
| |
| | [[Arquivo:Possivel 7.png|link=Embedded Tower]]
| |
| | width="4%" style="border-top-style: hidden; border-width: 1px; border-bottom-style: hidden; border-width: 1px" |
| |
| | [[Arquivo:Possivel 8.png|link=Embedded Tower]]
| |
| |-
| |
| |}
| |
|
| |
|
| </center> | | <br>Nessa etapa os jogadores devem aguardar a outra equipe pisar no fogo para ir até os spots destinados localizados na direita. |
|
| | <center> [[Arquivo:Magma Maze Path CharizardX 3.png|link=]] [[Arquivo:Magma Maze Path CharizardX 4.png|link=]] </center><br> |
| *Depois disto, retorne ao Berry para entregar a sua mochila e ele lhe entregará o Sky Pillar emblem:
| |
|
| |
|
|
| | == Quarta Etapa == |
| <center>[[Arquivo:Sky Pillar emblem1.png|link=Embedded_Tower]]</center>
| |
|
| |
|
| | Os jogadores devem seguir o caminho ao norte, clicando nos ovos necessários para abrir e continuar o caminho. Cada ovo invocará um [[Arquivo:004-Charmander.png|link=Charmander]] '''Charmander''' ou [[Arquivo:004-Shiny_Charmander.png|link=Shiny Charmander]] '''Shiny Charmander''' <br> |
| | <center> [[Arquivo:Magma Maze Path CharizardX 5.png|link=]] </center><br> |
|
| |
|
| *Conversando com o NPC Professor Sycamore, ele irá continuar a história da Embedded Tower e liberando-a, assim como pedir para que recupere alguns fragmentos do artefato de cada um dos andares da Tower.
| | Após finalizar essa etapa os jogadores devem pisar no fogo e aguardar até que a outra equipe também pise. |
| | | <br>Muito cuidado com as armadilhas enquanto esperam. Há uma grande chance de surgir [[Arquivo:006-shCharizard.png|link=Shiny Charizard]] '''Shiny Charizards''' quando a outra equipe concluir o minigame. |
| ==<b>Funcionamento geral da Embbeded Tower</b>==
| | <center> [[Arquivo:Magma Maze Path CharizardX 6.png|link=]] </center><br> |
| A Embbeded Tower é um conteúdo semanal, sendo possível realizar a qualquer momento durante toda semana, resetando sempre toda '''Segunda Feira ás 07:40 da manhã'''. o sistema possui 15 tentativas semanais, sendo consumidas ao entrar porém o numero de tentativas consumidas pela tower varia de acordo com os andares e em caso de falha na torre o sistema devolve algumas tentativas variando conforme tabela abaixo:
| |
|
| |
| <center>
| |
| {| class="wikitable" width="31%"
| |
| ! width="4%" style="background-color: #483D8B" | <span style="color:white">Andar</span>
| |
| ! width="7%" style="background-color: #483D8B" | <span style="color:white">Tentativas necessárias</span>
| |
| ! width="7%" style="background-color: #483D8B" | <span style="color:white">Tentativas devolvidas</span>
| |
| |-
| |
| | align="center" | '''1° ao 5º Andar'''
| |
| | align="center" | '''2 Tentativas'''
| |
| | align="center" | '''1 Tentativa'''
| |
| |-
| |
| | align="center" | '''6º Andar'''
| |
| | align="center" | '''6 Tentativas'''
| |
| | align="center" | '''4 Tentativas'''
| |
| |-
| |
| | align="center" | '''7º Andar'''
| |
| | align="center" | '''8 Tentativas'''
| |
| | align="center" | '''6 Tentativas'''
| |
| |-
| |
| |}
| |
| </center>
| |
| | |
| Os andares possuem uma experiência variada e uma pontuação fixa sendo os Tower Points ('''[[Arquivo:Tower Points.png|29px|link=]]''') do 1° ao 5º Andar e Wish Points ('''[[Arquivo:Wish_Points.png|22px|link=]]''') no 6º Andar e 7º Andar.
| |
| | |
| <center>
| |
| {| class="wikitable" width="55%"
| |
| ! width="4%" style="background-color: #483D8B" | <span style="color:white">Andar</span>
| |
| ! width="6%" style="background-color: #483D8B" | <span style="color:white">Nível necessário</span>
| |
| ! width="8%" style="background-color: #483D8B" | <span style="color:white">Experiência obtida [[Arquivo:XP Normal.png|26px|link=]]</span>
| |
| ! width="7%" style="background-color: #483D8B" | <span style="color:white"> Pontos </span>
| |
| |-
| |
| | align="center" | '''1° Andar'''
| |
| | align="center" | ''' 1 ao 424 '''<br> ''' 425 ao 449'''<br> ''' 450 ao 600 '''
| |
| | align="center" | ''' 150.000 de XP '''<br> '''37.500 de XP '''<br> ''' 18.750 de XP '''
| |
| | align="center" | '''[[Arquivo:Tower Points.png|29px|link=]]'''<br> '''40 Tower Points '''
| |
| |-
| |
| | align="center" | '''2° Andar'''
| |
| | align="center" | '''1 ao 424'''<br> '''425 ao 449 '''<br> '''450 ao 600'''
| |
| | align="center" | '''200.000 de XP '''<br> '''50.000 de XP '''<br> '''25.000 de XP '''
| |
| | align="center" | '''[[Arquivo:Tower Points.png|29px|link=]]'''<br> '''80 Tower Points '''
| |
| |-
| |
| | align="center" | '''3° Andar'''
| |
| | align="center" | '''1 ao 424'''<br> '''425 ao 449'''<br> '''450 ao 600'''
| |
| | align="center" | '''250.000 de XP '''<br> '''62.500 de XP '''<br> '''31.250 de XP '''
| |
| | align="center" | '''[[Arquivo:Tower Points.png|29px|link=]]'''<br> '''120 Tower Points '''
| |
| |-
| |
| |-
| |
| | align="center" | '''4° Andar'''
| |
| | align="center" | '''1 ao 424'''<br> '''425 ao 449'''<br> '''450 ao 600'''
| |
| | align="center" | '''300.000 de XP '''<br> '''75.000 de XP '''<br> '''37.500 de XP '''
| |
| | align="center" | '''[[Arquivo:Tower Points.png|29px|link=]]'''<br> '''160 Tower Points '''
| |
| |-
| |
| |-
| |
| | align="center" | '''5° Andar'''
| |
| | align="center" | '''1 ao 424'''<br> '''425 ao 449 '''<br> '''450 ao 600'''
| |
| | align="center" | '''600.000 de XP '''<br> '''150.000 de XP '''<br> '''75.000 de XP '''
| |
| | align="center" | '''[[Arquivo:Tower Points.png|29px|link=]]'''<br> '''500 Tower Points ''' <br> '''300 Tower Points '''
| |
| |-
| |
| |-
| |
| | align="center" | '''6° Andar'''
| |
| | align="center" | '''450 ao 600 '''
| |
| | align="center" | '''1.000.000 de XP '''
| |
| | align="center" | '''[[Arquivo:Wish_Points.png|22px|link=]]''' <br> '''50 Wish Points '''
| |
| |-
| |
| |-
| |
| | align="center" | '''7° Andar'''
| |
| | align="center" | '''525 ao 600'''
| |
| | align="center" | '''6.000.000 de XP '''
| |
| | align="center" | '''[[Arquivo:Wish_Points.png|22px|link=]]''' <br> '''150 Wish Points '''
| |
| |-
| |
| |-
| |
| |}
| |
| </center>
| |
| Dentro dos andares há um limite de recursos.
| |
| <center>
| |
| {| class="wikitable" width="35%"
| |
| ! width="1%" style="background-color: #483D8B" | <span style="color:white">Andar</span>
| |
| ! width="1%" style="background-color: #483D8B" | <span style="color:white">Poções e Elixirs</span>
| |
| ! width="1%" style="background-color: #483D8B" | <span style="color:white">Revive</span>
| |
| ! width="1%" style="background-color: #483D8B" | <span style="color:white">Medicine</span>
| |
| ! width="1%" style="background-color: #483D8B" | <span style="color:white">Penalidades por mortes</span>
| |
| ! width="1%" style="background-color: #483D8B" | <span style="color:white">Berries</span>
| |
| |-
| |
| |-
| |
| | align="center" | '''1º Andar'''
| |
| | align="center" | '''80'''
| |
| | align="center" | '''12'''
| |
| | align="center" | '''[[Arquivo:Comvip.png|link=]]'''
| |
| | align="center" | '''[[Arquivo:Semvip.png|link=]]'''
| |
| | align="center" | '''[[Arquivo:Semvip.png|link=]]'''
| |
| |-
| |
| |-
| |
| | align="center" | '''2º Andar'''
| |
| | align="center" | '''80'''
| |
| | align="center" | '''12'''
| |
| | align="center" | '''[[Arquivo:Comvip.png|link=]]'''
| |
| | align="center" | '''[[Arquivo:Semvip.png|link=]]'''
| |
| | align="center" | '''[[Arquivo:Semvip.png|link=]]'''
| |
| |-
| |
| |-
| |
| | align="center" | '''3º Andar'''
| |
| | align="center" | '''80'''
| |
| | align="center" | '''12'''
| |
| | align="center" | '''[[Arquivo:Comvip.png|link=]]'''
| |
| | align="center" | '''[[Arquivo:Semvip.png|link=]]'''
| |
| | align="center" | '''[[Arquivo:Semvip.png|link=]]'''
| |
| |-
| |
| |-
| |
| | align="center" | '''4º Andar'''
| |
| | align="center" | '''80'''
| |
| | align="center" | '''12'''
| |
| | align="center" | '''[[Arquivo:Comvip.png|link=]]'''
| |
| | align="center" | '''[[Arquivo:Semvip.png|link=]]'''
| |
| | align="center" | '''[[Arquivo:Semvip.png|link=]]'''
| |
| |-
| |
| |-
| |
| | align="center" | '''5º Andar'''
| |
| | align="center" | '''?'''
| |
| | align="center" | '''?'''
| |
| | align="center" | '''[[Arquivo:Comvip.png|link=]]'''
| |
| | align="center" | '''[[Arquivo:Semvip.png|link=]]'''
| |
| | align="center" | '''[[Arquivo:Semvip.png|link=]]'''
| |
| |-
| |
| |-
| |
| | align="center" | '''6º Andar'''
| |
| | align="center" | '''?'''
| |
| | align="center" | '''?'''
| |
| | align="center" | '''[[Arquivo:Comvip.png|link=]]'''
| |
| | align="center" | '''[[Arquivo:Semvip.png|link=]]'''
| |
| | align="center" | '''[[Arquivo:Semvip.png|link=]]'''
| |
| |-
| |
| |-
| |
| | align="center" | '''7º Andar'''
| |
| | align="center" | '''[[Arquivo:Semvip.png|link=]]'''
| |
| | align="center" | '''[[Arquivo:Semvip.png|link=]]'''
| |
| | align="center" | '''[[Arquivo:Semvip.png|link=]]'''
| |
| | align="center" | '''[[Arquivo:Semvip.png|link=]]'''
| |
| | align="center" | '''[[Arquivo:Semvip.png|link=]]'''
| |
| |-
| |
| {|
| |
| </center>
| |
| | |
| === Como liberar os andares ? ===
| |
| Tower Points ('''[[Arquivo:Tower Points.png|29px|link=]]''') são usados para resgatar parte das recompensas disponíveis, porem seu principal uso é para o desbloqueio de andares.
| |
| <center>
| |
| {| class="wikitable" width="25%"
| |
| ! width="3%" style="background-color: #483D8B" | <span style="color:white">Item</span>
| |
| ! width="3%" style="background-color: #483D8B" | <span style="color:white">Pontos necessários</span>
| |
| | |
| |-
| |
| | align="center" | '''[[Arquivo:Shinysalamence.png|Shiny Salamence|link=]] ''' <br>'''1º Andar'''
| |
| | align="center" | '''Liberado'''
| |
| |-
| |
| |-
| |
| | align="center" | '''[[Arquivo:Shinymagmortar.png|Shiny Magmortar|link=]]''' <br>'''2º Andar'''
| |
| | align="center" | '''50 Tower Points'''
| |
| |-
| |
| |-
| |
| | align="center" | '''[[Arquivo:Shinyelectivire.png|Shiny Electivire|link=]]''' <br>'''3º Andar'''
| |
| | align="center" | '''75 Tower Points'''
| |
| |-
| |
| |-
| |
| | align="center" | '''[[Arquivo:Shinyscizor.png|Shiny Scizor|link=]]''' <br>'''4º Andar'''
| |
| | align="center" | '''150 Tower Points'''
| |
| |-
| |
| |-
| |
| | align="center" | '''[[Arquivo:Regis.png|Regigigas, Regirock, Registeel e Regice|link=]]''' <br>'''5º Andar'''
| |
| | align="center" | '''300 Tower Points'''
| |
| |-
| |
| |-
| |
| | align="center" | '''[[Arquivo:Groudon_e_Kyogre.png|Groudon e Kyogre|link=]]''' <br>'''6º Andar'''
| |
| | align="center" | '''600 Tower Points'''
| |
| |-
| |
| |-
| |
| | align="center" | '''[[Arquivo:Rayquaza.png|Rayquaza|link=]]''' <br>'''7º Andar'''
| |
| | align="center" | '''1200 Tower Points'''
| |
| |-
| |
| |}
| |
| </center>
| |
| | |
| == <b>Tower Points e Wish Points</b>==
| |
| | |
| As recompensas da torre diferente de outros conteúdos, não te limitam a finalizar todos os andares para resgatar sua recompensa, com exceção dos Wish Points que são obtidos no 6° e 7° andar, no qual é necessário ter finalizado o 7° andar pelo menos uma vez para ter acesso a parte das recompensas.
| |
|
| |
| | |
| <center><b>Possiveis Resgates com Tower Points</b>
| |
| | |
| {| class="wikitable" width="30%"
| |
| ! width="3%" style="background-color: #483D8B" | <span style="color:white">Item</span>
| |
| ! width="3%" style="background-color: #483D8B" | <span style="color:white">Pontos Necessários</span>
| |
| ! width="1%" style="background-color: #483D8B" | <span style="color:white">Possível Vender</span>
| |
| |-
| |
| |-
| |
| | align="center" | [[Arquivo:GUc8LUi.png|Mystic Star|link=]] <br>'''Mystic Star'''
| |
| | align="center" | '''300 Pontos'''
| |
| | align="center" | '''[[Arquivo:Comvip.png|link=]]'''
| |
| |-
| |
| |-
| |
| | align="center" |[[Arquivo:Teleport_Tower.png|30px|link=]] <br>''' Teleport Tower '''
| |
| | align="center" | '''1000 Pontos'''
| |
| | align="center" | '''[[Arquivo:Semvip.png|link=]]'''
| |
| |-
| |
| |-
| |
| | align="center" | [[Arquivo:Flying_License.png|Flying License|link=]] <br> '''Flying License'''
| |
| | align="center" | '''1500 Pontos'''
| |
| | align="center" | '''[[Arquivo:Semvip.png|link=]]'''
| |
| |-
| |
| |-
| |
| | align="center" | [[Arquivo:Smeargle_Reset.png|Smeargle Reset|link=]] <br>''' Smeargle Reset '''
| |
| | align="center" | '''1500 Pontos'''
| |
| | align="center" | '''[[Arquivo:Comvip.png|link=]]'''
| |
| |-
| |
| |-
| |
| | align="center" | [[Arquivo:Shiny_ditto_memory.png|Shiny Ditto Memory|link=]] <br>''' Shiny Ditto Memory '''
| |
| | align="center" | '''3000 Pontos'''
| |
| | align="center" | '''[[Arquivo:Comvip.png|link=]]'''
| |
| |-
| |
| |-
| |
| | align="center" | [[Arquivo:Embedded-Tower2.gif|Embedded Box|link=]] <br>''' Embedded Box '''
| |
| | align="center" | '''18000 Pontos'''
| |
| | align="center" | '''[[Arquivo:Comvip.png|link=]]'''
| |
| |-
| |
| |-
| |
| |-
| |
| | align="center" | [[Arquivo:Tyranitarite.png|Tyranitarite|link=]] <br>''' Tyranitarite '''
| |
| | align="center" | '''18000 Pontos'''
| |
| | align="center" | '''[[Arquivo:Comvip.png|link=]]'''
| |
| |-
| |
| |-
| |
| | align="center" | [[Arquivo:Venusaurite.png|Venusaurite|link=]] <br>''' Venusaurite '''
| |
| | align="center" | '''18000 Pontos'''
| |
| | align="center" | '''[[Arquivo:Comvip.png|link=]]'''
| |
| |-
| |
| |-
| |
| | align="center" | [[Arquivo:Blastoisinite.png|Blastoisinite|link=]] <br>''' Blastoisinite '''
| |
| | align="center" | '''18000 Pontos'''
| |
| | align="center" | '''[[Arquivo:Comvip.png|link=]]'''
| |
| |-
| |
| |-
| |
| | align="center" | [[Arquivo:Charizardite_Y.png|Charizardite Y|link=]] <br>''' Charizardite Y '''
| |
| | align="center" | '''18000 Pontos'''
| |
| | align="center" | '''[[Arquivo:Comvip.png|link=]]'''
| |
| |-
| |
| |-
| |
| | align="center" | [[Arquivo:Charizardite_X.png|Charizardite X|link=]] <br>''' Charizardite X '''
| |
| | align="center" | '''18000 Pontos'''
| |
| | align="center" | '''[[Arquivo:Comvip.png|link=]]'''
| |
| |-
| |
| |-
| |
| | align="center" | [[Arquivo:Alakazite.png|Alakazite|link=]] <br>'''Alakazite'''
| |
| | align="center" | '''18000 Pontos'''
| |
| | align="center" | '''[[Arquivo:Comvip.png|link=]]'''
| |
| |-
| |
| |-
| |
| | align="center" | [[Arquivo:Ampharosite.png|Ampharosite|link=]] <br>'''Ampharosite'''
| |
| | align="center" | '''18000 Pontos'''
| |
| | align="center" | '''[[Arquivo:Comvip.png|link=]]'''
| |
| |-
| |
| |-
| |
| | align="center" | [[Arquivo:Gengarite.png|Gengarite|link=]] <br>'''Gengarite'''
| |
| | align="center" | '''18000 Pontos'''
| |
| | align="center" | '''[[Arquivo:Comvip.png|link=]]'''
| |
| |-
| |
| |-
| |
| | align="center" | [[Arquivo:Mawilite.png|Mawilite|link=]] <br>'''Mawilite'''
| |
| | align="center" | '''18000 Pontos'''
| |
| | align="center" | '''[[Arquivo:Comvip.png|link=]]'''
| |
| |-
| |
| |-
| |
| | align="center" | [[Arquivo:Kangaskhanite.png|Kangaskhanite|link=]] <br>'''Kangaskhanite'''
| |
| | align="center" | '''18000 Pontos'''
| |
| | align="center" | '''[[Arquivo:Comvip.png|link=]]'''
| |
| |-
| |
| |}
| |
| </center>
| |
| | |
| Diferente dos Tower Points, Os Wish Points só podem ser usados após a finalização da Tower7 e a compra de Alpha e Omega Antidote após a finalização da [[Wes Quest]].
| |
| | |
| <center><b>Possíveis resgates com Wish Points</b>
| |
| | |
| {| class="wikitable" width="30%"
| |
| ! width="3%" style="background-color: #483D8B" | <span style="color:white">Item</span>
| |
| ! width="3%" style="background-color: #483D8B" | <span style="color:white">Pontos necessários</span>
| |
| ! width="1%" style="background-color: #483D8B" | <span style="color:white">Possível vender</span>
| |
| |-
| |
| |-
| |
| | align="center" | [[Arquivo:Timer_essence.png|Timer Essence|link=]] <br>'''Timer Essence'''
| |
| | align="center" | '''10 Pontos'''
| |
| | align="center" | '''[[Arquivo:Semvip.png|link=]]'''
| |
| |-
| |
| |-
| |
| | align="center" |[[Arquivo:Timer_Ball_schematics.png|Timer Ball Schematics|link=]] <br>'''Timer Ball Schematics'''
| |
| | align="center" | '''10 Pontos'''
| |
| | align="center" | '''[[Arquivo:Semvip.png|link=]]'''
| |
| |-
| |
| |-
| |
| | align="center" | [[Arquivo:Groudon.png|Groudon|link=]] <br>'''Troca do titã lendário para Groudon'''
| |
| | align="center" | '''10 Pontos'''
| |
| | align="center" | '''[[Arquivo:Semvip.png|link=]]'''
| |
| |-
| |
| |-
| |
| | align="center" | [[Arquivo:Kyogre.png|Kyogre|link=]] <br>'''Troca do titã lendário para Kyogre'''
| |
| | align="center" | '''10 Pontos'''
| |
| | align="center" | '''[[Arquivo:Semvip.png|link=]]'''
| |
| |-
| |
| |-
| |
| | align="center" | [[Arquivo:Alpha_Antidote.png|Alpha Antidote|link=]] <br>'''Alpha Antidote'''
| |
| | align="center" | '''10 Pontos'''
| |
| | align="center" | '''[[Arquivo:Semvip.png|link=]]'''
| |
| |-
| |
| |-
| |
| | align="center" | [[Arquivo:Omega_Antidote.png|Omega Antidote|link=]] <br>'''Omega Antidote'''
| |
| | align="center" | '''50 Pontos'''
| |
| | align="center" | '''[[Arquivo:Semvip.png|link=]]'''
| |
| |-
| |
| |-
| |
| | align="center" | [[Arquivo:Lorekeeper_Logo.png|Lorekeeper Logo|link=]] <br>'''Lorekeeper Taunt'''
| |
| | align="center" | '''300 Pontos'''
| |
| | align="center" | '''[[Arquivo:Semvip.png|link=]]'''
| |
| |-
| |
| |-
| |
| | align="center" | [[Arquivo:Wish_Box.gif|Wish Box|link=]] <br>'''Wish Box'''
| |
| | align="center" | '''3000 Pontos'''
| |
| | align="center" | '''[[Arquivo:Comvip.png|link=]]'''
| |
| |-
| |
| |-
| |
| | align="center" | [[Arquivo:445-MegaGarchomp.png|Mega Garchomp|link=]] <br>''' Mega Garchomp'''
| |
| | align="center" | '''3000 Pontos'''
| |
| | align="center" | '''[[Arquivo:Comvip.png|link=]]'''
| |
| |-
| |
| |-
| |
| | align="center" | [[Arquivo:130-Megagyarados.png|Mega Gyarados|link=]] <br>''' Mega Gyarados'''
| |
| | align="center" | '''3000 Pontos'''
| |
| | align="center" | '''[[Arquivo:Comvip.png|link=]]'''
| |
| |-
| |
| |-
| |
| | align="center" | [[Arquivo:478-ShinyFroslass.png|Shiny Froslass|link=]] <br>''' Shiny Froslass'''
| |
| | align="center" | '''3000 Pontos'''
| |
| | align="center" | '''[[Arquivo:Comvip.png|link=]]'''
| |
| |-
| |
| |-
| |
| | align="center" | [[Arquivo:479-ShinyRotomMow.png|Shiny Rotom Mow|link=]] <br>''' Shiny Rotom Mow '''
| |
| | align="center" | '''3000 Pontos'''
| |
| | align="center" | '''[[Arquivo:Comvip.png|link=]]'''
| |
| |-
| |
| |-
| |
| | align="center" | [[Arquivo:531-MegaAudino.png|Mega Audino|link=]] <br>''' Mega Audino '''
| |
| | align="center" | '''3000 Pontos'''
| |
| | align="center" | '''[[Arquivo:Comvip.png|link=]]'''
| |
| |-
| |
| |-
| |
| | align="center" | [[Arquivo:623-Shiny_Golurk.png|Shiny Golurk|link=]] <br>'''Shiny Golurk'''
| |
| | align="center" | '''3000 Pontos'''
| |
| | align="center" | '''[[Arquivo:Comvip.png|link=]]'''
| |
| |-
| |
| |-
| |
| | align="center" | [[Arquivo:655-ShinyDelphox.png|Shiny Delphox|link=]] <br>'''Shiny Delphox'''
| |
| | align="center" | '''3000 Pontos'''
| |
| | align="center" | '''[[Arquivo:Comvip.png|link=]]'''
| |
| |-
| |
| |-
| |
| | align="center" | [[Arquivo:738-ShinyVikavolt.png|Shiny Vikavolt|link=]] <br>'''Shiny Vikavolt'''
| |
| | align="center" | '''3000 Pontos'''
| |
| | align="center" | '''[[Arquivo:Comvip.png|link=]]'''
| |
| |-
| |
| |-
| |
| | align="center" | [[Arquivo:879-ShinyCopperajah.png|Shiny Copperajah|link=]] <br>'''Shiny Copperajah'''
| |
| | align="center" | '''3000 Pontos'''
| |
| | align="center" | '''[[Arquivo:Comvip.png|link=]]'''
| |
| |-
| |
| |-
| |
| | align="center" | [[Arquivo:815-ShinyCinderace.png|Shiny Cinderace|link=]] <br>'''Shiny Cinderace'''
| |
| | align="center" | '''3000 Pontos'''
| |
| | align="center" | '''[[Arquivo:Comvip.png|link=]]'''
| |
| |-
| |
| |}
| |
| </center>
| |
| | |
| = '''1° ao 4º Andar''' =
| |
|
| |
| '''Informações importantes'''<br>
| |
|
| |
| Os quatro primeiros andares tem o mesmo mapa, A cada andar, o nível dos pokémon aumentará e a partir do terceiro andar, existirão pokémon diferentes e mais fortes que dos dois andares anteriores. Seu objetivo é derrotar todos os Pokémon do local e, após isso, o boss (chefe) do local.
| |
| Na Batalha contra o boss não é possível usar poções ou revives.<br>
| |
| As armadilhas da torre causam dano em porcentagem '''fixa''', ou seja, não importa seu level ou se possui itens que aumentem a vida de seu personagem, pois a armadilha irá tratar todos os jogadores igualmente. <br>
| |
| O Jogador possui tem 1hora para finalizar o andar. <br>
| |
| *'''obs:''' Os bosses são de elemento '''neutro''' nesses andares.<br>
| |
| | |
| == '''Fragmentos''' ==
| |
| Durante o andar é possível encontrar fragmentos escondidos, por isso preste bastante atenção nos cantos do mapa, alguns fragmentos ficam bem escondidos, como por exemplo:
| |
| | |
| <center>
| |
| [[Arquivo:Fragmento_Escondido.png|Greenclaw Fragment|link=]]
| |
| | |
| </center>
| |
| Ao encontrar os 4 fragmentos do andar, volte ao NPC Syncamore e entregue os fragmentos a ele para formar o Tablet do andar coletado.
| |
| Dialógo:
| |
| | |
| '''Jogador''': Hi <br>
| |
| NPC Syncamore: <br>
| |
| '''Jogador''': Blackwing Fragment <br>
| |
| NPC Syncamore: <br>
| |
| '''Jogador''': yes <br>
| |
| | |
| O Jogador só poderá entregar os fragmentos da Tower em ordem. Exemplo: Para entregar os fragmentos do nível 2 o jogador deverá antes entregar os do nível 1.<br>
| |
| | |
| Abaixo o mapa dos 4 primeiros andares, com os possíveis locais que podem aparecer fragmento:
| |
| <center>
| |
|
| |
|
| |
| [[Arquivo:Mapa 1a 4.png|link=]]
| |
| </center>
| |
| Abaixo você poderá conferir os bosses dos andares, seus fragmentos, seus drops e a XP e pontuação recebida ao finalizar o andar:<br>
| |
|
| |
| <center>
| |
| {| class="wikitable" width="45%"
| |
| ! width="3%" style="background-color: #483D8B" | <span style="color:white">Andar</span>
| |
| ! width="1%" style="background-color: #483D8B" | <span style="color:white">Boss</span>
| |
| ! width="1%" style="background-color: #483D8B" | <span style="color:white">Item</span>
| |
| ! width="1%" style="background-color: #483D8B" | <span style="color:white">Fragmento</span>
| |
| ! width="1%" style="background-color: #483D8B" | <span style="color:white">Experiência Obtida</span>
| |
| ! width="3%" style="background-color: #483D8B" | <span style="color:white">Pontos</span>
| |
| ! width="1%" style="background-color: #483D8B" | <span style="color:white">Tablet</span>
| |
| |-
| |
| | align="center" | '''1º Shiny Salamence'''
| |
| | align="center" | '''[[Arquivo:Shinysalamence.png|Shiny Salamence|link=]]'''
| |
| | align="center" | '''[[Arquivo:Blue wings.png|Blue Wings|link=]]'''
| |
| | align="center" | '''[[Arquivo:JJYlsjR.png|link=]]'''
| |
| | align="center" | '''1.000.000 de XP'''
| |
| | align="center" | '''1000 Tower Points'''
| |
| | align="center" | '''[[Arquivo:IVH6wXz.png|link=]]'''
| |
| |-
| |
| |-
| |
| | align="center" | '''2º Shiny Magmortar'''
| |
| | align="center" | '''[[Arquivo:Shinymagmortar.png|Shiny Magmortar|link=]]'''
| |
| | align="center" | '''[[Arquivo:Cyan topknot.png|link=]]'''
| |
| | align="center" | '''[[Arquivo:RJNlJDI.png|link=]]'''
| |
| | align="center" | '''2.000.000 de XP'''
| |
| | align="center" | '''1200 Tower Points'''
| |
| | align="center" | '''[[Arquivo:S67DFYX.png|link=]]'''
| |
| |-
| |
| |-
| |
| | align="center" | '''3º Shiny Electivire'''
| |
| | align="center" | '''[[Arquivo:Shinyelectivire.png|Shiny Electivire|link=]]'''
| |
| | align="center" | '''[[Arquivo:White volt paw.png|link=]]'''
| |
| | align="center" | '''[[Arquivo:QuhiFgP.png|link=]]'''
| |
| | align="center" | '''3.000.000 de XP'''
| |
| | align="center" | '''1400 Tower Points'''
| |
| | align="center" | '''[[Arquivo:RcoPfpy.png|link=]]'''
| |
| |-
| |
| |-
| |
| | align="center" | '''4º Shiny Scizor'''
| |
| | align="center" | '''[[Arquivo:Shinyscizor.png|Shiny Scizor|link=]]'''
| |
| | align="center" | '''[[Arquivo:Green scizor claw.png|link=]]'''
| |
| | align="center" | '''[[Arquivo:W05BAp2.png|link=]]'''
| |
| | align="center" | '''4.000.000 de XP'''
| |
| | align="center" | '''2000 Tower Points'''
| |
| | align="center" | '''[[Arquivo:QEaziaz.png|link=]]'''
| |
| |-
| |
| |-
| |
| |}
| |
|
| |
| </center>
| |
| | |
| == '''Luta contra o Boss''' ==
| |
| | |
| Durante a luta contra o Boss os jogadores podem optar por diversas estratégias, como Smeargle para Tower ou até mesmo Pokémon com CDs rápidos do próprio clã e uma das possíveis estratégias é demonstrada na GIF abaixo:
| |
| | |
| <center>
| |
| {| class="wikitable" width="45%"
| |
| ! width="3%" style="background-color: #483D8B" | <span style="color:white">Dica</span>
| |
| |-
| |
| | align="center" | [[Arquivo:Dica-Tower.gif|link=]]
| |
| |-
| |
| |-
| |
| |}
| |
| | |
| | |
| </center>
| |
| | |
| A base da estratégia é carregar seus cooldowns enquanto o Boss tenta chegar até seu Pokémon.
| |
| | |
| == '''Armadilhas''' ==
| |
|
| |
| | |
| Em todos os andares existem armadilhas, sendo elas:
| |
| <center>
| |
| {| class="wikitable" width="60%"
| |
| ! width="31%" style="background-color: #483D8B" | <span style="color:white">Armadilhas:</span>
| |
| ! width="15%" style="background-color: #483D8B" | <span style="color:white">Dano Causado:</span>
| |
| |-
| |
| | align="center" | '''Redemoinhos'''<br> Espere eles baterem e passe, um pouco antes de sumir para evitar o dano.<br>[[Arquivo:Trap1.gif|link=]]
| |
| | align="center" | 20% da vida máxima por hit, até 2 hits
| |
| |-
| |
| |-
| |
| | align="center" | '''Geysers'''<br> Eles irão intercalar o dano, sempre batendo uma vez no centro e uma vez nas pontas.<br>[[Arquivo:Trap2.gif|link=]]
| |
| | align="center" | 30% da vida máxima por hit
| |
| |-
| |
| |-
| |
| | align="center" | '''Explosões de Gelo''' <br> Durante o percurso, terá pequenas partes com grama, que servirão para sua segurança e é onde deve derrotar os Pokémon, o dano só aparece após a luz central acender.<br> [[Arquivo:Trap3.gif|link=]]
| |
| | align="center" | 50% da vida máxima por hit
| |
| |-
| |
| |-
| |
| | align="center" | '''Ondas de Fogo'''<br> Batem apenas em 1 SQM, desvie e caso seja necessário espere bater para passar por elas.<br>[[Arquivo:Trap5.gif|link=]]
| |
| | align="center" | 60% da vida máxima por hit
| |
| |-
| |
| |-
| |
| | align="center" | '''Pedras Assassinas'''<br> Espere ela bater e passe, fique atento a todas as pedras.<br>[[Arquivo:Trap4.gif|link=]]
| |
| | align="center" | 100% da vida máxima por hit
| |
| |-
| |
| |-
| |
| | align="center" | '''Explosões de fogo'''<br> O Jogador pode evitar essa trap dando a volta ou espere ela bater e passe, porém será perigoso.<br>[[Arquivo:Trap6.gif|link=]]
| |
| | align="center" | 100% da vida máxima por hit
| |
| |}
| |
| </center>
| |
| *Ao entregar todos os fragmentos e obter os 4 tablets, o Sycamore pedirá que o jogador fale com o Professor Birch que fica no andar inferior da Tower.
| |
|
| |
|
| |
|
| |
| <center> | |
| [[Arquivo:Andar 14.png|link=Embedded_Tower]] | |
| </center> | |
| | |
| ==<b>Tower 5</b>==
| |
| | |
| '''Informações importantes'''<br>
| |
| | |
| Nesse andar o jogador tem 1hora e 30 minutos para completar o andar. <br>
| |
| As armadilhas da torre causam dano em porcentagem '''fixa''', ou seja, não importa seu nível ou se possui itens que aumentem a vida de seu personagem, pois a armadilha irá tratar todos os jogadores igualmente. <br>
| |
| Para Completar o andar é necessário derrotar todos os Pokémon encontrados no andar e não é necessário derrotar o Regigigas. <br>
| |
| Para iniciar o andar é necessário enviar a frase '''DEATH BY THE GOLEMS IS INEVITABLE''' no SQM indicado abaixo. <br>
| |