Shiny Infernape: mudanças entre as edições
Ir para navegação
Ir para pesquisar
| (22 revisões intermediárias por 9 usuários não estão sendo mostradas) | |||
| Linha 8: | Linha 8: | ||
'''Habilidades:''' Dig, rock smash, cut and headbutt<br /> | '''Habilidades:''' Dig, rock smash, cut and headbutt<br /> | ||
'''Boost:''' Fire stone (2)<br /> | '''Boost:''' Fire stone (2)<br /> | ||
'''Materia''': Volcanic Mastered ou Gardestrike Mastered.<br /> | '''Materia''': Volcanic Mastered ou Gardestrike Mastered.<br><br> | ||
<b>Este Pokémon é EXCLUSIVO dos clãs Volcanic e Gardestrike em batalhas PvP</b>. | |||
== '''Evoluções''' == | == '''Evoluções''' == | ||
'''Infernape''' precisa de Level 100.<br /> | '''Infernape''' precisa de Level 100.<br /> | ||
== '''Descrição:''' == | |||
Ele lança seus inimigos com agilidade. Ele usa todos os seus membros para lutar em seu próprio estilo único. | |||
== '''Movimentos''' == | == '''Movimentos''' == | ||
=== | ==='''Movimentos PvP'''=== | ||
{| border="0" style="border-collapse:collapse" | {| border="0" style="border-collapse:collapse" | ||
| Linha 40: | Linha 44: | ||
|- align="center" style="background-color:#E6E6FA; | |- align="center" style="background-color:#E6E6FA; | ||
| width="10px" | | | width="10px" | | ||
| align="left" | Level | | align="left" | Level 100 | ||
|- align="center" | |- align="center" | ||
| Linha 47: | Linha 51: | ||
| align="left" | Double Kick (20s) | | align="left" | Double Kick (20s) | ||
| width="50px" rowspan="2" | | | width="50px" rowspan="2" | | ||
| rowspan="2" align="right" | [[Arquivo:Target.png|Target]][[Arquivo:Damage.png|Damage]][[Arquivo:Stun.png|Stun]] | | rowspan="2" align="right" | [[Arquivo:Target.png|Target]] [[Arquivo:Focus Blocked.png|Focus Blocked]][[Arquivo:Damage.png|Damage]][[Arquivo:Stun.png|Stun]] [[Arquivo:NeverBoost.png|Neverboost]] | ||
| rowspan="2" | [[Arquivo:fighting.png|Fighting|link=Gardestrike]] | | rowspan="2" | [[Arquivo:fighting.png|Fighting|link=Gardestrike]] | ||
|- align="center" | |- align="center" | ||
| Linha 58: | Linha 62: | ||
| align="left" | Close Combat (20s) | | align="left" | Close Combat (20s) | ||
| width="50px" rowspan="2" | | | width="50px" rowspan="2" | | ||
| rowspan="2" align="right" | [[Arquivo:Target.png|Target]][[Arquivo:Damage.png|Damage]][[Arquivo:Buff.png|Buff]] | | rowspan="2" align="right" | [[Arquivo:Target.png|Target]] [[Arquivo:Damage.png|Damage]][[Arquivo:Buff.png|Buff]] | ||
| rowspan="2" | [[Arquivo:fighting.png|Fighting|link=Gardestrike]] | | rowspan="2" | [[Arquivo:fighting.png|Fighting|link=Gardestrike]] | ||
|- align="center" style="background-color:#E6E6FA; | |- align="center" style="background-color:#E6E6FA; | ||
| Linha 67: | Linha 71: | ||
! rowspan="2" | M5 | ! rowspan="2" | M5 | ||
| width="10px" | | | width="10px" | | ||
| align="left" | Backflip ( | | align="left" | Backflip (25s) | ||
| width="50px" rowspan="2" | | | width="50px" rowspan="2" | | ||
| rowspan="2" align="right" | [[Arquivo:Self.png|Self]][[Arquivo:Buff.png|Buff]][[Arquivo:Nevermiss.png|Nevermiss]] | | rowspan="2" align="right" | [[Arquivo:Self.png|Self]] [[Arquivo:Focus Blocked.png|Focus Blocked]][[Arquivo:Buff.png|Buff]][[Arquivo:Nevermiss.png|Nevermiss]] | ||
| rowspan="2" | [[Arquivo:Flying.png|Flying|link=Wingeon]] | | rowspan="2" | [[Arquivo:Flying.png|Flying|link=Wingeon]] | ||
|- align="center" | |- align="center" | ||
| width="10px" | | | width="10px" | | ||
| align="left" | Level | | align="left" | Level 100 | ||
|- align="center" style="background-color:#E6E6FA; | |- align="center" style="background-color:#E6E6FA; | ||
| Linha 91: | Linha 95: | ||
| align="left" | Focus Blast (35s) | | align="left" | Focus Blast (35s) | ||
| width="50px" rowspan="2" | | | width="50px" rowspan="2" | | ||
| rowspan="2" align="right" | [[Arquivo:AOE.png|AOE]][[Arquivo:Damage.png|Damage]] | | rowspan="2" align="right" | [[Arquivo:AOE.png|AOE]] [[Arquivo:Damage.png|Damage]] | ||
| rowspan="2" | [[Arquivo:fighting.png|Fighting|link=Gardestrike]] | | rowspan="2" | [[Arquivo:fighting.png|Fighting|link=Gardestrike]] | ||
|- align="center" | |- align="center" | ||
| Linha 106: | Linha 110: | ||
|- align="center" style="background-color:#E6E6FA; | |- align="center" style="background-color:#E6E6FA; | ||
| width="10px" | | | width="10px" | | ||
| align="left" | Level | | align="left" | Level 100 | ||
|- align="center" | |- align="center" | ||
| Linha 113: | Linha 117: | ||
| align="left" | Bulk Up (50s) | | align="left" | Bulk Up (50s) | ||
| width="50px" rowspan="2" | | | width="50px" rowspan="2" | | ||
| rowspan="2" align="right" | [[Arquivo:Self.png|Self]][[Arquivo:Buff.png|Buff]] | | rowspan="2" align="right" | [[Arquivo:Self.png|Self]] [[Arquivo:Focus Blocked.png|Focus Blocked]][[Arquivo:Buff.png|Buff]] | ||
| rowspan="2" | [[Arquivo:fighting.png|Fighting|link=Gardestrike]] | | rowspan="2" | [[Arquivo:fighting.png|Fighting|link=Gardestrike]] | ||
|- align="center" | |- align="center" | ||
| Linha 122: | Linha 126: | ||
! rowspan="2" | P | ! rowspan="2" | P | ||
| width="10px" | | | width="10px" | | ||
| align="left" | | | align="left" | Jungle Fury | ||
| width="50px" rowspan="2" | | | width="50px" rowspan="2" | | ||
| rowspan="2" align="right" | [[Arquivo:Passive.png|Passive]][[Arquivo:Buff.png|Buff]] | | rowspan="2" align="right" | [[Arquivo:Passive.png|Passive]][[Arquivo:Buff.png|Buff]] | ||
| Linha 128: | Linha 132: | ||
|- align="center" style="background-color:#E6E6FA; | |- align="center" style="background-color:#E6E6FA; | ||
| width="10px" | | | width="10px" | | ||
| align="left" | | | align="left" | | ||
|} | |} | ||
=== | ==='''Movimentos PvE'''=== | ||
{| border="0" style="border-collapse:collapse" | {| border="0" style="border-collapse:collapse" | ||
| Linha 150: | Linha 143: | ||
! rowspan="2" | M1 | ! rowspan="2" | M1 | ||
| width="10px" | | | width="10px" | | ||
| align="left" | Low Kick ( | | align="left" | '''Low Kick (12s)''' | ||
| width="50px" rowspan="2" | | | width="50px" rowspan="2" | | ||
| rowspan="2" align="right" | [[Arquivo:target.png|Target]][[Arquivo:Damage.png|Damage]] | | rowspan="2" align="right" | [[Arquivo:target.png|Target]][[Arquivo:Damage.png|Damage]] | ||
| Linha 161: | Linha 154: | ||
! rowspan="2" | M2 | ! rowspan="2" | M2 | ||
| width="10px" | | | width="10px" | | ||
| align="left" | Mega Kick ( | | align="left" | '''Mega Kick (10s)''' | ||
| width="50px" rowspan="2" | | | width="50px" rowspan="2" | | ||
| rowspan="2" align="right" | [[Arquivo:Target.png|Target]][[Arquivo:Damage.png|Damage]] | | rowspan="2" align="right" | [[Arquivo:Target.png|Target]][[Arquivo:Damage.png|Damage]] | ||
| Linha 167: | Linha 160: | ||
|- align="center" style="background-color:#E6E6FA; | |- align="center" style="background-color:#E6E6FA; | ||
| width="10px" | | | width="10px" | | ||
| align="left" | Level | | align="left" | Level 100 | ||
|- align="center" | |- align="center" | ||
! rowspan="2" | M3 | ! rowspan="2" | M3 | ||
| width="10px" | | | width="10px" | | ||
| align="left" | Double Kick ( | | align="left" | '''Double Kick (12s)''' | ||
| width="50px" rowspan="2" | | | width="50px" rowspan="2" | | ||
| rowspan="2" align="right" | [[Arquivo:Target.png|Target]][[Arquivo:Damage.png|Damage]][[Arquivo:Stun.png|Stun]] | | rowspan="2" align="right" | [[Arquivo:Target.png|Target]] [[Arquivo:Focus Blocked.png|Focus Blocked]][[Arquivo:Damage.png|Damage]][[Arquivo:Stun.png|Stun]][[Arquivo:NeverBoost.png|Neverboost]] | ||
| rowspan="2" | [[Arquivo:fighting.png|Fighting|link=Gardestrike]] | | rowspan="2" | [[Arquivo:fighting.png|Fighting|link=Gardestrike]] | ||
|- align="center" | |- align="center" | ||
| Linha 183: | Linha 176: | ||
! rowspan="2" | M4 | ! rowspan="2" | M4 | ||
| width="10px" | | | width="10px" | | ||
| align="left" | Close Combat ( | | align="left" | '''Close Combat (40s)''' | ||
| width="50px" rowspan="2" | | | width="50px" rowspan="2" | | ||
| rowspan="2" align="right" | [[Arquivo:Target.png|Target]][[Arquivo:Damage.png|Damage]][[Arquivo:Buff.png|Buff]] | | rowspan="2" align="right" | [[Arquivo:Target.png|Target]] [[Arquivo:Damage.png|Damage]][[Arquivo:Buff.png|Buff]] | ||
| rowspan="2" | [[Arquivo:fighting.png|Fighting|link=Gardestrike]] | | rowspan="2" | [[Arquivo:fighting.png|Fighting|link=Gardestrike]] | ||
|- align="center" style="background-color:#E6E6FA; | |- align="center" style="background-color:#E6E6FA; | ||
| Linha 194: | Linha 187: | ||
! rowspan="2" | M5 | ! rowspan="2" | M5 | ||
| width="10px" | | | width="10px" | | ||
| align="left" | Backflip ( | | align="left" | '''Backflip (50s)''' | ||
| width="50px" rowspan="2" | | | width="50px" rowspan="2" | | ||
| rowspan="2" align="right" | [[Arquivo:Self.png|Self]][[Arquivo:Buff.png|Buff]][[Arquivo:Nevermiss.png|Nevermiss]] | | rowspan="2" align="right" | [[Arquivo:Self.png|Self]] [[Arquivo:Focus Blocked.png|Focus Blocked]][[Arquivo:Buff.png|Buff]][[Arquivo:Nevermiss.png|Nevermiss]] | ||
| rowspan="2" | [[Arquivo:Flying.png|Flying|link=Wingeon]] | | rowspan="2" | [[Arquivo:Flying.png|Flying|link=Wingeon]] | ||
|- align="center" | |- align="center" | ||
| width="10px" | | | width="10px" | | ||
| align="left" | Level | | align="left" | Level 100 | ||
|- align="center" style="background-color:#E6E6FA; | |- align="center" style="background-color:#E6E6FA; | ||
! rowspan="2" | M6 | ! rowspan="2" | M6 | ||
| width="10px" | | | width="10px" | | ||
| align="left" | Mach Punch ( | | align="left" | '''Mach Punch (50s)''' | ||
| width="50px" rowspan="2" | | | width="50px" rowspan="2" | | ||
| rowspan="2" align="right" | [[Arquivo:AOE.png|AOE]][[Arquivo:Damage.png|Damage]][[Arquivo:Buff.png|Buff]][[Arquivo:Debuff.png|Debuff]] | | rowspan="2" align="right" | [[Arquivo:AOE.png|AOE]][[Arquivo:Damage.png|Damage]][[Arquivo:Buff.png|Buff]][[Arquivo:Debuff.png|Debuff]] | ||
| Linha 216: | Linha 209: | ||
! rowspan="2" | M7 | ! rowspan="2" | M7 | ||
| width="10px" | | | width="10px" | | ||
| align="left" | Focus Blast ( | | align="left" | '''Focus Blast (40s)''' | ||
| width="50px" rowspan="2" | | | width="50px" rowspan="2" | | ||
| rowspan="2" align="right" | [[Arquivo:AOE.png|AOE]][[Arquivo:Damage.png|Damage]] | | rowspan="2" align="right" | [[Arquivo:AOE.png|AOE]] [[Arquivo:Damage.png|Damage]] | ||
| rowspan="2" | [[Arquivo:fighting.png|Fighting|link=Gardestrike]] | | rowspan="2" | [[Arquivo:fighting.png|Fighting|link=Gardestrike]] | ||
|- align="center" | |- align="center" | ||
| Linha 227: | Linha 220: | ||
! rowspan="2" | M8 | ! rowspan="2" | M8 | ||
| width="10px" | | | width="10px" | | ||
| align="left" | Vacuum Wave ( | | align="left" | '''Vacuum Wave (25s)''' | ||
| width="50px" rowspan="2" | | | width="50px" rowspan="2" | | ||
| rowspan="2" align="right" | [[Arquivo:AOE.png|AOE]][[Arquivo:Damage.png|Damage]] | | rowspan="2" align="right" | [[Arquivo:AOE.png|AOE]][[Arquivo:Damage.png|Damage]] | ||
| Linha 233: | Linha 226: | ||
|- align="center" style="background-color:#E6E6FA; | |- align="center" style="background-color:#E6E6FA; | ||
| width="10px" | | | width="10px" | | ||
| align="left" | Level | | align="left" | Level 100 | ||
|- align="center" | |- align="center" | ||
! rowspan="2" | M9 | ! rowspan="2" | M9 | ||
| width="10px" | | | width="10px" | | ||
| align="left" | Bulk Up (40s) | | align="left" | '''Bulk Up (40s)''' | ||
| width="50px" rowspan="2" | | | width="50px" rowspan="2" | | ||
| rowspan="2" align="right" | [[Arquivo:Self.png|Self]][[Arquivo:Buff.png|Buff]] | | rowspan="2" align="right" | [[Arquivo:Self.png|Self]] [[Arquivo:Focus Blocked.png|Focus Blocked]][[Arquivo:Buff.png|Buff]] | ||
| rowspan="2" | [[Arquivo:fighting.png|Fighting|link=Gardestrike]] | | rowspan="2" | [[Arquivo:fighting.png|Fighting|link=Gardestrike]] | ||
|- align="center" | |- align="center" | ||
| Linha 246: | Linha 239: | ||
| align="left" | Level 100 | | align="left" | Level 100 | ||
|- align="center" style="background-color:#E6E6FA; | |- align="center" style="background-color:#E6E6FA; | ||
! rowspan="2" | P | ! rowspan="2" | P | ||
| width="10px" | | | width="10px" | | ||
| Linha 264: | Linha 246: | ||
| rowspan="2" align="right" | [[Arquivo:Passive.png|Passive]][[Arquivo:Buff.png|Buff]] | | rowspan="2" align="right" | [[Arquivo:Passive.png|Passive]][[Arquivo:Buff.png|Buff]] | ||
| rowspan="2" | [[Arquivo:normal1.png|Normal|link=Gardestrike]] | | rowspan="2" | [[Arquivo:normal1.png|Normal|link=Gardestrike]] | ||
|- align="center" | |- align="center" style="background-color:#E6E6FA; | ||
| width="10px" | | | width="10px" | | ||
| align="left" | | | align="left" | | ||
|} | |} | ||
| Linha 283: | Linha 264: | ||
| style="width:50px; text-align:center;" | <b>[[Arquivo:392-Infernape.png|link=Infernape]]</b> | | style="width:50px; text-align:center;" | <b>[[Arquivo:392-Infernape.png|link=Infernape]]</b> | ||
| style="width:150px; text-align:center;" | <b>'''[[Infernape]]'''</b> | | style="width:150px; text-align:center;" | <b>'''[[Infernape]]'''</b> | ||
|- style="vertical-align:top; text-align=center;" | |||
| style="width:50px; text-align:center;" | <b>[[Arquivo:Shiny_Infernape.png|link=Shiny Infernape (TM)]]</b> | |||
| style="width:150px; text-align:center;" | <b>'''[[Shiny Infernape (TM)]]'''</b> | |||
|} | |||
Edição atual tal como às 14h23min de 7 de julho de 2026
Informações Gerais
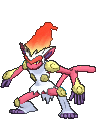
Nome: Shiny Infernape
Level: 100
Elemento: Fire/Fighting
Habilidades: Dig, rock smash, cut and headbutt
Boost: Fire stone (2)
Materia: Volcanic Mastered ou Gardestrike Mastered.
Este Pokémon é EXCLUSIVO dos clãs Volcanic e Gardestrike em batalhas PvP.
Evoluções
Infernape precisa de Level 100.
Descrição:
Ele lança seus inimigos com agilidade. Ele usa todos os seus membros para lutar em seu próprio estilo único.
Movimentos
Movimentos PvP
| M1 | Low Kick (8s) | ||||
|---|---|---|---|---|---|
| Level 100 | |||||
| M2 | Mega Kick (22s) | ||||
| Level 100 | |||||
| M3 | Double Kick (20s) | ||||
| Level 100 | |||||
| M4 | Close Combat (20s) | ||||
| Level 100 | |||||
| M5 | Backflip (25s) | ||||
| Level 100 | |||||
| M6 | Mach Punch (28s) | ||||
| Level 100 | |||||
| M7 | Focus Blast (35s) | ||||
| Level 100 | |||||
| M8 | Vacuum Wave (50s) | ||||
| Level 100 | |||||
| M9 | Bulk Up (50s) | ||||
| Level 100 | |||||
| P | Jungle Fury | ||||
Movimentos PvE
| M1 | Low Kick (12s) | ||||
|---|---|---|---|---|---|
| Level 100 | |||||
| M2 | Mega Kick (10s) | ||||
| Level 100 | |||||
| M3 | Double Kick (12s) | ||||
| Level 100 | |||||
| M4 | Close Combat (40s) | ||||
| Level 100 | |||||
| M5 | Backflip (50s) | ||||
| Level 100 | |||||
| M6 | Mach Punch (50s) | ||||
| Level 100 | |||||
| M7 | Focus Blast (40s) | ||||
| Level 100 | |||||
| M8 | Vacuum Wave (25s) | ||||
| Level 100 | |||||
| M9 | Bulk Up (40s) | ||||
| Level 100 | |||||
| P | Jungle Fury | ||||
Efetividades
Efetivo: Water, ground, flying and psychic.
Normal: Normal, electric, fighting, poison, rock, ghost, dragon, crystal and fairy.
Inefetivo: Fire, grass, ice, steel and dark.
Muito Inefetivo: Bug.
Outras Versões
| Infernape | |
| Shiny Infernape (TM) |