|
|
| (362 revisões intermediárias por 3 usuários não estão sendo mostradas) |
| Linha 1: |
Linha 1: |
| <center>[[Arquivo:Banner_Pokémon-T1H.png|link=]]</center>
| | =Missões de acadêmico= |
|
| |
|
| =Introdução=
| | Nesta página o jogador poderá encontrar todas as missões de acadêmico disponíveis de forma detalhada.<br> |
| | São 10 missões aleatórias de acadêmico por dia, o jogador tem 3 redefinições diárias pra mudar a missão. |
|
| |
|
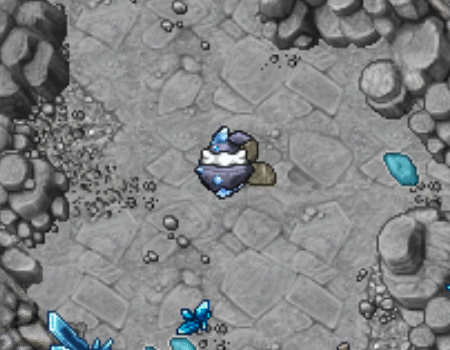
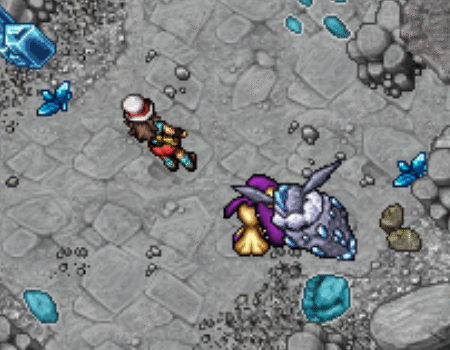
| Os Pokémon '''T1H''' são indispensáveis para uma hunt de alta qualidade no nightmare world.
| | ---- |
|
| |
|
| Atualmente, duas quests possibilitam que o jogador capture estes T1H, a '''Cosmic Quest '''e a''' Desert Quest.'''
| | <center class=hover-minimize> |
| | [[Arquivo:Covil_de_froslass_card.png|link=Covil_de_Froslass]] |
| | [[Arquivo:Templo_de_bronzong_card.png|link=Templo_de_Bronzong]] |
| | [[Arquivo:Caverna_shoal_card.png|link=Caverna Shoal]]<br> |
| | <br> |
| | [[Arquivo:Casa_da_jynx_card.png|link=Casa da Jynx]] |
| | [[Arquivo:Caverna_de_drilbur_card.png|link=Caverna de Drilbur]] |
| | [[Arquivo:Caverna_de_galvantula_card.png|link=Caverna de Galvantula]]<br> |
| | <br> |
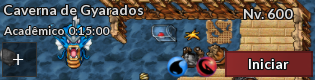
| | [[Arquivo:Caverna_de_gyarados_card.png|link=Caverna de Gyarados]] |
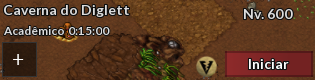
| | [[Arquivo:Caverna_do_diglett_card.png|link=Cavern do Diglett]] |
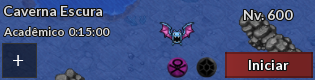
| | [[Arquivo:Caverna_escura_card.png|link=Cavern Escura]]<br> |
| | <br> |
| | </center> |
| | |
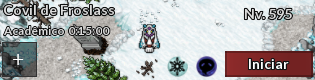
| | =Informações básicas= |
| | [[Arquivo:Templo_de_bronzong_card.png|link=]] |
| | |
| | '''Tempo de conclusão:''' 15 minutos <br> |
| | '''Experiência obtida pelo aluno:''' 300 <br> |
| | '''Experiência obtida pelo jogador:''' 100.000 <br> |
| | '''Derrotar Pokémon:''' [[Arquivo:comvip.png|link=Quests]] <br> |
| | '''Capturar Pokémon:''' [[Arquivo:comvip.png|link=Quests]] <br> |
|
| |
|
| <table class="seeMore">
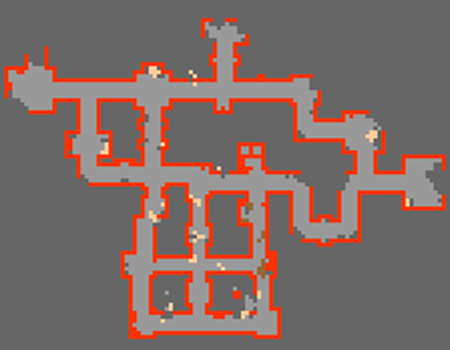
| | ==Mapa== |
| <tr>
| |
| <td class="seeMore__image">[[Arquivo:Telekinetic-compass.gif|link=]]</td>
| |
| <td> '''Veja mais: [[Cosmic Quest]] e [[Desert Quest]]'''</td>
| |
| </tr>
| |
| </table>
| |
|
| |
|
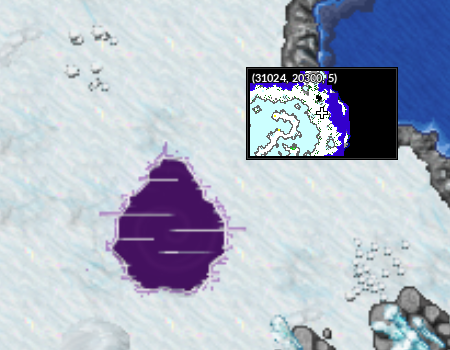
| === T1H Cosmic Quest === | | <center>[[Arquivo:Templo_de_bronzong_mapa.png|link=]]</center> |
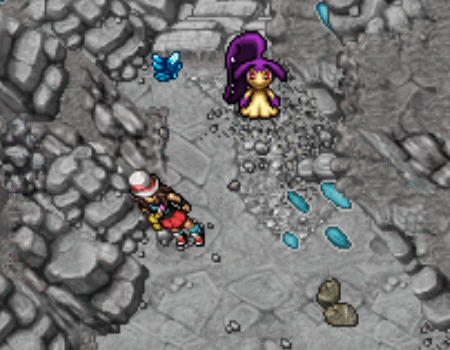
| Alguns dos T1H podem ser capturados após a conclusão da Cosmic Quest. São Pokémon essenciais para jogadores em locais de caça fortes, bem como podem facilitar diversos conteúdos dentro do jogo. Abaixo é possível visualizar a lista dos T1H Pokémon disponíveis para obtenção após a Cosmic Quest. <br>
| |
|
| |
|
| <center>
| | ==Tipo de Missão== |
| {| class="wikitable" width="30%"
| | |
| ! width="1%" style="background-color: #4682B4" | Elemento
| | ===Captura=== |
| ! width="1%" style="background-color: #4682B4" | Ícone
| | O jogador deverá usar uma quantidade específica de Friend Balls para tentar capturar Bronzong e Bronzor. |
| ! width="10%" style="background-color: #4682B4" | Pokémon
| | |
| | ===Caça=== |
| | |
| | O jogador deverá matar uma quantidade específica de Pokémon de Bronzong e Bronzor |
| | |
| | ==Pokémon== |
| | |
| | {| class="wikitable" style="text-align:center;" width="20%" |
| |- | | |- |
| | align="center" | [[Arquivo:Grass.png|link=]]
| | ! colspan="3" | Pokémon disponíveis |
| | align="center" | [[Arquivo:254-Shiny_Sceptile.png|link=Shiny Sceptile]]
| |
| | align="center" | '''[[Shiny Sceptile]]'''
| |
| |- | | |- |
| | align="center" | [[Arquivo:Steel.png|link=]]
| | | [[Arquivo:436-Bronzor.png|link=]] || '''Bronzong''' || [[Arquivo:Pokeball.png|15px|link=]] |
| | align="center" | [[Arquivo:Shiny_Mawlie.png|link=Shiny Mawile]] | |
| | align="center" | '''[[Shiny Mawile]]'''
| |
| |- | | |- |
| | align="center" | [[arquivo:Fighting.png|link=]]
| | | [[Arquivo:437-Bronzong.png|link=]] || '''Bronzor''' || [[Arquivo:Pokeball.png|15px|link=]] |
| | align="center" | [[Arquivo:297-Shiny_Hariyama.png|link=Shiny Hariyama]] | |
| | align="center" | '''[[Shiny Hariyama]]'''
| |
| |- | | |- |
| | align="center" | [[arquivo:Fairy.png|link=]]
| | | [[Arquivo:437-Sh_Bronzong.png|link=]] || '''Shiny Bronzong''' || [[Arquivo:Pokeball.png|15px|link=]] |
| | align="center" | [[Arquivo:282-Shiny_Gardevoir.png|link=Shiny Gardevoir]]
| | |} |
| | align="center" | '''[[Shiny Gardevoir]]''' | | |
| |- | | [[Arquivo:Pokeball.png|15px|link=]] '''= Pokémon capturáveis''' |
| | align="center" | [[arquivo:Rock.png|link=]]
| | |
| | align="center" | [[Arquivo:409-Shiny_rampardos.png|link=Shiny Rampardos]] | | ==Recompensas:== |
| | align="center" | '''[[Shiny Rampardos]]''' | | |
| | {| class ="wikitable" style="text-align:center" width="35%" |
| | ! colspan="2" | Item |
| | ! Quantidade |
| | ! Raridade |
| |- | | |- |
| | align="center" | [[arquivo:Fire.png|link=]]
| | | [[file:Study Notes.png|link=]] || Study Notes || 20 || Comum |
| | align="center" | [[Arquivo:631-Shiny_Heatmor.png|link=Shiny Heatmor]] | |
| | align="center" | '''[[Shiny Heatmor]]''' | |
| |- | | |- |
| | align="center" | [[arquivo:Electric.png|link=]]
| | | [[Arquivo:Bag_of_Nightmare_Experience_Candy.png|link=]] || Bag Of Nightmare Experience Candy || 1 || Comum |
| | align="center" | [[Arquivo:417-Shiny_Pachirisu.png|link=Shiny Pachirisu]] | |
| | align="center" | '''[[Shiny Pachirisu]]''' | |
| |- | | |- |
| | align="center" | [[arquivo:Dark1.png|link=]]
| | ! colspan="4" | [[Arquivo:Exp_icon.png|30px|link=]] 100.000 de experiência para o jogador |
| | align="center" | [[Arquivo:571-Zoroark%281%29.png|link=Zoroark]]
| |
| | align="center" | '''[[Zoroark]]'''
| |
| |- | | |- |
| | align="center" | [[arquivo:Flying.png|link=]]
| | ! colspan="4" | [[Arquivo:Exp_icon.png|30px|link=]] 300 de experiência para o aluno |
| | align="center" | [[Arquivo:018M.png|link=Mega Pidgeot]]
| |
| | align="center" | '''[[Mega Pidgeot]]'''
| |
| |- | | |- |
| | align="center" | [[arquivo:Ice.png|link=]]
| |
| | align="center" | [[Arquivo:Megaglalie.png|link=Mega Glalie]]
| |
| | align="center" | '''[[Mega Glalie]]'''
| |
| |} | | |} |
| </center>
| |
|
| |
|
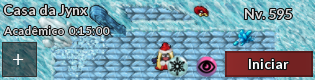
| === T1H Desert Quest === | | =Informações básicas= |
| | [[Arquivo:Caverna_shoal_card.png|link=]] |
| | |
| | '''Tempo de conclusão:''' 15 minutos <br> |
| | '''Experiência obtida pelo aluno:''' 300 <br> |
| | '''Experiência obtida pelo jogador:''' 100.000 <br> |
| | '''Derrotar Pokémon:''' [[Arquivo:comvip.png|link=Quests]] <br> |
| | '''Capturar Pokémon:''' [[Arquivo:semvip.png|link=Quests]] <br> |
| | |
| | ==Mapa== |
| | |
| | <center>[[Arquivo:Caverna shoal_mapa 1.png|link=]] [[Arquivo:Caverna shoal_mapa 2.png|link=]]</center> <br> |
| | <center>[[Arquivo:Caverna shoal_mapa 3.png|link=]]</center> |
|
| |
|
| Por outro lado, com a chegada da Nightmare Desert Quest novos T1H Pokémon foram disponibilizados para que os jogadores possam tentar capturar. Assim como os outros, são essenciais para os jogadores nos locais de caça fortes, facilitando diversos conteúdos. Além disso, alguns possuem elementos diferentes dos obtidos pela Cosmic Quest, o que traz uma versatilidade interessante para os jogadores.
| | ==Pokémon== |
|
| |
|
| <center>
| | {| class="wikitable" style="float:left" style="text-align:center;" width="20%" |
| {| class="wikitable" width="30%" | | |- |
| ! width="1%" style="background-color: #4682B4" | Elemento
| | ! colspan="3" | Pokémon disponíveis |
| ! width="1%" style="background-color: #4682B4" | Ícone
| | |- |
| ! width="10%" style="background-color: #4682B4" | Pokémon | | | [[Arquivo:131-Lapras.png|link=]] || '''Lapras''' || [[Arquivo:Pokeball.png|15px|link=]] |
| |- | | |- |
| | align="center" | [[arquivo:Bug.png|link=]]
| | | [[Arquivo:073-Tentacruel.png|link=]] || '''Tentacruel''' || [[Arquivo:Pokeball.png|15px|link=]] |
| | align="center" | [[Arquivo:469-Shiny_Yanmega.png|link=Shiny Yanmega]] | |
| | align="center" | '''[[Shiny Yanmega]]'''
| |
| |- | | |- |
| | align="center" | [[arquivo:Steel.png|link=]]
| | | [[Arquivo:362-Glalie.png|link=]] || '''Glalie''' || [[Arquivo:Pokeball.png|15px|link=]] |
| | align="center" | [[Arquivo:681-Shiny_Aegislash.png|link=Shiny Aegislash]] | |
| | align="center" | '''[[Shiny Aegislash]]'''
| |
| |- | | |- |
| | align="center" | [[arquivo:Fighting.png|link=]]
| | | [[Arquivo:364-Sealeo.png|link=]] || '''Sealeo''' || [[Arquivo:Pokeball.png|15px|link=]] |
| | align="center" | [[Arquivo:620-Shiny_Mienshao.png|link=Shiny Mienshao]] | |
| | align="center" | '''[[Shiny Mienshao]]'''
| |
| |- | | |- |
| | align="center" | [[arquivo:Psychic.png|link=]]
| | | [[Arquivo:225-Delibird.png|link=]] || '''Delibird''' || |
| | align="center" | [[Arquivo:575-Shiny_Gothitelle.png|link=Shiny Gothitelle]]
| |
| | align="center" | '''[[Shiny Gothitelle]]''' | |
| |- | | |- |
| | align="center" | [[arquivo:Ground.png|link=]]
| | | [[Arquivo:361-Snorut.png|link=]] || '''Snorunt''' || |
| | align="center" | [[Arquivo:553-Shiny_Krookodile.png|link=Shiny Krookodile]]
| |
| | align="center" | '''[[Shiny Krookodile]]''' | |
| |- | | |- |
| | align="center" | [[arquivo:Fire.png|link=]]
| | | [[Arquivo:072-Tentacool.png|link=]] || '''Tentacool''' || |
| | align="center" | [[Arquivo:609-Shiny_Chandelure.png|link=Shiny Chandelure]]
| |
| | align="center" | '''[[Shiny Chandelure]]''' | |
| |- | | |- |
| | align="center" | [[arquivo:Electric.png|link=]]
| | | [[Arquivo:075-Graveler.png|link=]] || '''Graveler''' || |
| | align="center" | [[Arquivo:849-Shiny_Toxtricity.png|link=Shiny Toxtricity]]
| |
| | align="center" | '''[[Shiny Toxtricity]]''' | |
| |- | | |- |
| | align="center" | [[arquivo:Poison1.png|link=]]
| | | [[Arquivo:074-Geodude.png|link=]] || '''Geodude''' || |
| | align="center" | [[Arquivo:569-Shiny_Garbodor.png|link=Shiny Garbodor]]
| |
| | align="center" | '''[[Shiny Garbodor]]''' | |
| |- | | |- |
| | align="center" | [[arquivo:Dragon.png|link=]]
| | | [[Arquivo:042-Golbat.png|link=]] || '''Golbat''' || |
| | align="center" | [[Arquivo:635-Shiny_Hydreigon.png|link=Shiny Hydreigon]]
| |
| | align="center" | '''[[Shiny Hydreigon]]''' | |
| |- | | |- |
| | align="center" | [[arquivo:Water.png|link=]]
| | | [[Arquivo:041-Zubat.png|link=]] || '''Zubat''' || |
| | align="center" | [[Arquivo:419-Shiny_Floatzel.png|link=Shiny Floatzel]]
| |
| | align="center" | '''[[Shiny Floatzel]]''' | |
| |} | | |} |
| </center>
| |
|
| |
|
| | {| class="wikitable" style="float:right" style="text-align:center;" width="20%" |
| | |- |
| | ! colspan="3" | Shiny |
| | |- |
| | | [[Arquivo:073-Sh_Tentacruel.png|link=]] || '''Shiny Tentacruel''' || [[Arquivo:Pokeball.png|15px|link=]] |
| | |- |
| | | [[Arquivo:072-Sh_Tentacool.png|link=]] || '''Shiny Tentacool''' || [[Arquivo:Pokeball.png|15px|link=]] |
| | |- |
| | | [[Arquivo:042-Sh_Golbat.png|link=]] || '''Shiny Golbat''' || [[Arquivo:Pokeball.png|15px|link=]] |
| | |- |
| | | [[Arquivo:041-Sh_Zubat.png|link=]] || '''Shiny Zubat''' || [[Arquivo:Pokeball.png|15px|link=]] |
| | |} |
|
| |
|
| '''Observação:''' O Pokémon [[Arquivo:201-UnownLegion.png|link=]] '''Unown Legion''' também é um T1H, entretanto, ele possui a função de [[Arquivo:Interface_SupportOT_PVE.png|20px|link=]] Suporte Contínuo. Ele é extremamente importante em diversos conteúdos como Boss Fight e algumas missões em geral. Além disso, o método de obtenção dele é totalmente diferente dos outros T1H considerados [[Arquivo:Interface_BDD_PVE.png|20px|link=]] Causadores de Dano Explosivo. <br>
| | [[Arquivo:Pokeball.png|15px|link=]] '''= Pokémon capturáveis''' |
|
| |
|
| <table class="seeMore">
| | ==Recompensas:== |
| <tr>
| |
| <td class="seeMore__image">[[Arquivo:Telekinetic-compass.gif|link=]]</td>
| |
| <td> '''Veja mais: [[Pokémon_Obtidos_via_NPC#Unown_Legion|Unown Legion]]'''</td>
| |
| </tr>
| |
| </table>
| |
|
| |
|
| | {| class ="wikitable" style="text-align:center" width="35%" |
| | ! colspan="2" | Item |
| | ! Quantidade |
| | ! Raridade |
| | |- |
| | | [[file:Study Notes.png|link=]] || Study Notes || 20 || Comum |
| | |- |
| | | [[Arquivo:Bag_of_Nightmare_Experience_Candy.png|link=]] || Bag Of Nightmare Experience Candy || 1 || Comum |
| | |- |
| | ! colspan="4" | [[Arquivo:Exp_icon.png|30px|link=]] 100.000 de experiência para o jogador |
| | |- |
| | ! colspan="4" | [[Arquivo:Exp_icon.png|30px|link=]] 300 de experiência para o aluno |
| | |- |
| | |} |
|
| |
|
| =Sistema De Mérito= | | =Informações básicas= |
| | [[Arquivo:Covil_de_froslass_card.png|link=]] |
|
| |
|
| Após completar cada quest, o jogador libera a possibilidade de captura dos T1H.
| | '''Tempo de conclusão:''' 15 minutos <br> |
| | '''Experiência obtida pelo aluno:''' 300 <br> |
| | '''Experiência obtida pelo jogador:''' 100.000 <br> |
| | '''Derrotar Pokémon:''' [[Arquivo:comvip.png|link=Quests]] <br> |
| | '''Capturar Pokémon:''' [[Arquivo:semvip.png|link=Quests]] <br> |
|
| |
|
| Nestas locais de caça, em específico, há um '''sistema de méritos:'''
| | ==Mapa== |
| * A cada 10 balls jogadas em '''T1H''', o jogador recebe uma mensagem informando que suas chances de capturar o Pokémon aumentaram.
| |
| * No caso de Pokémon Mega, a cada 10 coletas de loot, as chances de obter a '''Mega Stone''' do Pokémon desejado aumentam.
| |
| * No caso do Pokémon [[Arquivo:745-Lycanroc_Dusk_Form.png|link=Lycanroc_Dusk_Form]] '''Lycanroc Dusk Form''', a cada 10 coletas de seu loot, as chances de obter a '''Moon Stone''' aumentam.
| |
|
| |
|
| <span style="color:#FF0000">'''Atenção:'''</span> As desvantagens de baixa '''Stamina''' não afetam a captura nem o drop dos T1H | | <center>[[Arquivo:Covil_de_froslass_mapa.png|link=]]</center> |
|
| |
|
| <center>[[Arquivo:Banner_Pokémon-T1H.png|link=]]</center>
| | ==Pokémon== |
|
| |
|
| =Cosmic Island=
| | {| class="wikitable" style="float:left" style="text-align:center;" width="20%" |
| | | ! colspan="3" | Pokémon disponíveis |
| Na Cosmic Island o jogador pode projetar seu próprio T1H.
| |
| | |
| Ao concluir a '''[[Cosmic Quest]]''', o jogador poderá escolher qual respawn deseja caçar e fazer a Task. Falar com o '''NPC Resistance Member''' levará o jogador até a área de respawn de T1H.
| |
| <center>[[Arquivo:Entrada_Cosmic.png|link=]]</center> <br />
| |
| | |
| Após escolher seu respawn o jogador deverá ir à área de entrada desejada, falar com o '''Líder''' para iniciar a Task e com o '''Resistance Member''' para entrar na Hunt. <br />
| |
| <center>
| |
| [[Arquivo:Respawn_T1H_Cosmic.png|link=]]
| |
| </center>
| |
| É possível trocar de Task '''apenas uma vez''' no Merchant que se localiza no Subterrâneo da Cosmic Island. Caso troque, o jogador terá que '''recomeçar''' a Task no novo respawn escolhido.
| |
| <center>[[Arquivo:Merchant_Cosmic_Island.png|link=]]</center><br />
| |
| | |
| Ao concluir a task, receberá como recompensa:
| |
| | |
| <center>
| |
| {| class="wikitable" width="35%" | |
| |- align="center"
| |
| !align="center" width="1%" colspan="4" style="background-color: #660099" | '''Recompensas'''
| |
| |-
| |
| !width="5% | Nightmare Box | |
| !width="30% | 500 na contagem para o mérito
| |
| |- align="center"
| |
| | [[Arquivo:Nightmare_box.png|link=]]
| |
| | Ganhará 500 pontos acumulativos na contagem para a captura/drop do T1H.
| |
| |}
| |
| </center>
| |
| | |
| | |
| Ao abrir a[[Arquivo:Nightmare_box.png|link=]]'''Nightmare box''', receberá em sua mochila os seguintes itens:
| |
| | |
| <center>
| |
| {| class="wikitable" style="color:white" width="35%"
| |
| |- | | |- |
| ! scope="col" style="background-color: #660099" | 2x Big Fortune Totem
| | | [[Arquivo:478-Froslass.png|link=]] || '''Froslass''' || |
| ! scope="col" style="background-color: #660099" | Empty Premier Balls
| |
| ! scope="col" style="background-color: #660099" | Empty Beast Balls
| |
| ! scope="col" style="background-color: #660099" | Empty Nightmare Balls
| |
| |- style="width:50px; text-align:center;"
| |
| | [[Arquivo:Big-fortune-totem4.png|link=Sistema de Pokémon T1H]] | |
| | [[Arquivo:Stack-premier-balls.png|link=Sistema de Pokémon T1H]] | |
| | [[Arquivo:Stack-beast-balls.png|link=Sistema de Pokémon T1H]]
| |
| | [[Arquivo:Stack-nightmare-balls.png|link=Sistema de Pokémon T1H]] | |
| |} | | |} |
| </center>
| |
| ==Task== <!--T:4-->
| |
|
| |
|
| <tabber>
| | {| class="wikitable" style="float:right" style="text-align:center;" width="20%" |
| |-|Zoroark=
| | ! colspan="3" | Shiny |
| <center>
| |
| [[Arquivo:Morty7.png|link=]] <br> [[Arquivo:Malefi1c.png|link=]] '''Morty''' <br>
| |
| {| class="wikitable" style="color:white" | |
| |- | | |- |
| ! scope="col" style="background-color: #660099" | 1º Task
| | | [[Arquivo:478-ShinyFroslass.png|link=]] || '''Shiny Froslass''' || |
| ! scope="col" style="background-color: #660099" | 2º Task
| |
| ! scope="col" style="background-color: #660099" | 3º Task
| |
| |- style="width:70px; text-align:center; color:black"
| |
| | [[Arquivo:570-Zorua.png|link=]]<br> 1000 T1H Zorua | |
| | [[Arquivo:Shadow_Fox_Tail.png|link=Drop de Itens]]<br> 50 Shadow Fox Tail | |
| | [[Arquivo:571-Zoroark%281%29.png|link=]]<br> 500 Zoroark | |
| |} | | |} |
| </center>
| |
| |-|Shiny Mawile=
| |
| <center>
| |
| [[Arquivo:Jasmine7.png|link=]] <BR> [[Arquivo:Ironhard1.png|link=Clã]] '''Jasmine''' <br>
| |
| <center>
| |
| {| class="wikitable" style="color:white"
| |
| |-
| |
| ! scope="col" style="background-color: #660099" | 1º Task
| |
| ! scope="col" style="background-color: #660099" | 2º Task
| |
| ! scope="col" style="background-color: #660099" | 3º Task
| |
| |- style="width:70px; text-align:center; color:black"
| |
| | [[Arquivo:303-Mawile.png|link=]]<br> 1000 T1H Mawile
| |
| | [[Arquivo:Metal_Pink_Jaw.png|link=Drop de Itens]]<br> 50 Metal Pink Jaw
| |
| | [[Arquivo:Shiny_Mawlie.png|link=]]<br> 500 Shiny Mawile
| |
| |}
| |
| </center>
| |
| |-|Shiny Pachirisu=
| |
| <center>
| |
|
| |
|
| [[Arquivo:L%C3%ADder_Wattson.png|link=]] <br> [[Arquivo:Raibol1t.png|link=]] '''Wattson''' <br> | | [[Arquivo:Pokeball.png|15px|link=]] '''= Pokémon capturáveis''' |
| | |
| | ==Recompensas:== |
|
| |
|
| {| class="wikitable" style="color:white" | | {| class ="wikitable" style="text-align:center" width="35%" |
| | ! colspan="2" | Item |
| | ! Quantidade |
| | ! Raridade |
| |- | | |- |
| ! scope="col" style="background-color: #660099" | 1º Task
| | | [[file:Study Notes.png|link=]] || Study Notes || 20 || Comum |
| ! scope="col" style="background-color: #660099" | 2º Task
| | |- |
| ! scope="col" style="background-color: #660099" | 3º Task
| | | [[Arquivo:Bag_of_Nightmare_Experience_Candy.png|link=]] || Bag Of Nightmare Experience Candy || 1 || Comum |
| |- style="width:70px; text-align:center; color:black"
| |
| | [[Arquivo:417-Pachirisu.png|link=]]<br> 1000 T1H Pachirisu | |
| | [[Arquivo:Electric_Pink_Box.png|link=Drop de Itens]]<br> 50 Electric Pink Box | |
| | [[Arquivo:417-Shiny_Pachirisu.png|link=]]<br> 500 Shiny Pachirisu | |
| |} | |
| </center>
| |
| |-|Shiny Heatmor= | |
| <center>
| |
| [[Arquivo:Flannery7.png|link=]] <br> [[Arquivo:Volcanic1.png|link=Clã]] '''Flannery''' <br> | |
| | |
| {| class="wikitable" style="color:white"
| |
| |- | | |- |
| ! scope="col" style="background-color: #660099" | 1º Task
| | | [[Arquivo:Ice_Blocks.png|link=]] || Ice Blocks || 20 || Raro |
| ! scope="col" style="background-color: #660099" | 2º Task
| |
| ! scope="col" style="background-color: #660099" | 3º Task
| |
| |- style="width:70px; text-align:center; color:black"
| |
| | [[Arquivo:631-Heatmor.png|link=]]<br> 1000 T1H Heatmor | |
| | [[Arquivo:Pot_Of_Dark_Lava.png|link=Drop de Itens]]<br> 50 Pot of Dark Lava | |
| | [[Arquivo:631-Shiny_Heatmor.png|link=]]<br> 500 Shiny Heatmor | |
| |}
| |
| </center>
| |
| |-|Shiny Hariyama=
| |
| <center>
| |
| [[Arquivo:Npc-chuck.png|link=]] <br> [[Arquivo:Gardestrike1.png|link=]] '''Chuck'''<br>
| |
| {| class="wikitable" style="color:white"
| |
| |- | | |- |
| ! scope="col" style="background-color: #660099" | 1º Task
| | | [[Arquivo:SolidIce.png|link=]] || Solid Ice Cubes || 100 || Raro |
| ! scope="col" style="background-color: #660099" | 2º Task
| |
| ! scope="col" style="background-color: #660099" | 3º Task
| |
| |- style="width:70px; text-align:center; color:black"
| |
| | [[Arquivo:296-Makuhita.png|link=]] [[Arquivo:297-Hariyama.png|link=]]<br>1000 T1H Makuhita ou T1H Hariyama
| |
| | [[Arquivo:Big_Red_Hand.png|link=Drop de Itens]]<br> 50 Big Red Hand | |
| | [[Arquivo:297-Shiny_Hariyama.png|link=]]<br> 500 Shiny Hariyama | |
| |} | |
| </center>
| |
| |-|Mega Glalie=
| |
| <center>
| |
| [[Arquivo:L%C3%ADder_Pryce.png|link=]] <br> [[Arquivo:Seave1ll.png|link=]] '''Price''' <br>
| |
| | |
| {| class="wikitable" style="color:white"
| |
| |- | | |- |
| ! scope="col" style="background-color: #660099" | 1º Task
| | | [[Arquivo:IceOrb.png|link=]] || Ice Orbs || 50 || Raro |
| ! scope="col" style="background-color: #660099" | 2º Task
| |
| ! scope="col" style="background-color: #660099" | 3º Task
| |
| |- style="width:70px; text-align:center; color:black"
| |
| | [[Arquivo:361-Snorut.png|link=]] [[Arquivo:362-Glalie.png|link=]]<br>1000 T1H Snorunt ou T1H Glalie | |
| | [[Arquivo:Snow_Blocks.png|link=Drop de Itens]]<br> 50 Snow Blocks | |
| | [[Arquivo:Megaglalie.png|link=]]<br> 500 Mega Glalie
| |
| |} | |
| </center>
| |
| |-|Shiny Rampardos=
| |
| <center>
| |
| [[Arquivo:Roxanne.png|link=]] <br> [[Arquivo:Orebound1.png|link=]] '''Roxanne'''<br>
| |
| | |
| {| class="wikitable" style="color:white"
| |
| |- | | |- |
| ! scope="col" style="background-color: #660099" | 1º Task
| | | [[Arquivo:Dawn1.png|link=]] || Dawn Stone || 1 || Épico |
| ! scope="col" style="background-color: #660099" | 2º Task
| |
| ! scope="col" style="background-color: #660099" | 3º Task
| |
| |- style="width:70px; text-align:center; color:black"
| |
| | [[Arquivo:408-Cranidos.png|link=]] [[Arquivo:409-Rampardos%281%29.png|link=]]<br>1000 T1H Cranidos ou T1H Rampardos
| |
| | [[Arquivo:Solid_Red_Head.png|link=Drop de Itens]]<br> 50 Solid Red Head | |
| | [[Arquivo:409-Shiny_rampardos.png|link=]]<br> 500 Shiny Rampardos | |
| |} | |
| </center>
| |
| |-|Shiny Sceptile=
| |
| <center>
| |
| [[Arquivo:Erika7.png|link=]] <br> [[Arquivo:Naturia1.png|link=Clã]] '''Erika''' <br>
| |
| | |
| {| class="wikitable" style="color:white"
| |
| |- | | |- |
| ! scope="col" style="background-color: #660099" | 1º Task | | ! colspan="4" | [[Arquivo:Exp_icon.png|30px|link=]] 100.000 de experiência para o jogador |
| ! scope="col" style="background-color: #660099" | 2º Task
| |
| ! scope="col" style="background-color: #660099" | 3º Task
| |
| |- style="width:70px; text-align:center; color:black"
| |
| | [[Arquivo:252-Treecko.png|link=]] [[Arquivo:253-Grovyle.png|link=]] [[Arquivo:254-Sceptile.png|link=]]<br>1000 T1H Treecko, T1H Grovyle ou T1H Sceptile | |
| | [[Arquivo:Blue_Greens.png|link=Drop de Itens]]<br> 50 Blue Greens
| |
| | [[Arquivo:254-Shiny_Sceptile.png|link=]] <br>500 Shiny Sceptile
| |
| |}
| |
| </center>
| |
| |-|Mega Pidgeot=
| |
| <center>
| |
| | |
| [[Arquivo:L%C3%ADder_Falkner.png|link=]] <br> [[Arquivo:Wingeon1.png|link=Clã]] '''Falkner''' <br>
| |
| | |
| {| class="wikitable" style="color:white"
| |
| |- | | |- |
| ! scope="col" style="background-color: #660099" | 1º Task | | ! colspan="4" | [[Arquivo:Exp_icon.png|30px|link=]] 300 de experiência para o aluno |
| ! scope="col" style="background-color: #660099" | 2º Task
| |
| ! scope="col" style="background-color: #660099" | 3º Task
| |
| |- style="width:70px; text-align:center; color:black"
| |
| | [[Arquivo:016-Pidgey.png|link=]] [[Arquivo:017-Pidgeotto.png|link=]] [[Arquivo:018-Pidgeot.png|link=]]<br>1000 T1H Pidgey, T1H Pidgeotto ou T1H Pidgeot | |
| | [[Arquivo:Shiny_Feather.png|link=Drop de Itens]]<br> 50 Shiny Feather
| |
| | [[Arquivo:018M.png|link=]]<br> 500 Mega Pidgeot
| |
| |}
| |
| </center>
| |
| |-|Shiny Gardevoir=
| |
| <center>
| |
| | |
| [[Arquivo:Sabruna7.png|link=]] <br> [[Arquivo:Psycraft1.png|link=]] '''Sabrina''' <br>
| |
| | |
| {| class="wikitable" style="color:white"
| |
| |- | | |- |
| ! scope="col" style="background-color: #660099" | 1º Task
| |
| ! scope="col" style="background-color: #660099" | 2º Task
| |
| ! scope="col" style="background-color: #660099" | 3º Task
| |
| |- style="width:70px; text-align:center; color:black"
| |
| | [[Arquivo:280-Ralts.png|link=]] [[Arquivo:281-Kirlia.png|link=]] [[Arquivo:282-Gardevoir.png|link=]]<br>1000 T1H Ralts, T1H Kirlia ou T1H Gardevoir
| |
| | [[Arquivo:Fairy_Flower.png|link=Drop de Itens]]<br> 50 Fairy Flower
| |
| | [[Arquivo:282-Shiny_Gardevoir.png|link=]]<br> 500 Shiny Gardevoir
| |
| |} | | |} |
| </center>
| |
| </tabber>
| |
|
| |
|
| ==Troca T1H ==
| |
|
| |
|
| * Após finalizar a Task T1H o jogador poderá trocar, apenas uma vez, qualquer (inclusive o mesmo) T1H por outro na [[Arquivo:Premier-ball%281%29.png|link=]] '''Premier Ball'''. <br>
| | = Frozen Tunnels = |
|
| |
|
| '''Observação:''' Caso o jogador queira trocar o T1H pelo mesmo na [[Arquivo:Premier-ball%281%29.png|link=]] '''Premier Ball''', não perderá held nem boost. Entretanto, caso tente trocar um T1H com helds e boost por outro na premier ball, '''perderá todos os atributos''' deste Pokémon.
| | <center> [[Arquivo:Frozen_Tunnels_Crystals.png|link=]] </center> <br> |
|
| |
|
| * Primeiro o treinador deverá ter finalizado a Task e possuir um T1H na Bag, depois ir ao NPC representante do Clã do T1H com o mesmo na Bag e falar com o NPC para escolher qual T1H deseja receber.
| | '''Nível mínimo:''' 400. <br> |
| | '''Custo de Entrada:''' Frozen Tunnels Rift Crystal. <br> |
| | '''Quantidade de jogadores:''' 2. <br> |
| | '''Boss:''' Abomasnow. <br> |
|
| |
|
| <span style="color:#FF0000">'''Atenção:'''</span> Caso pegue uma das Megas stones o jogador poderá ir na entrada do respawn e conversar com o Resistance Member para trocá-la pelo mesmo Pokémon na Premier Ball, sem gastar a troca única.
| | == Localização da Rift == |
|
| |
|
| == NPCs Cosmic Island == <!--T:7-->
| | A entrada da Frozen Tunnels Rift está localizada no local de caça de Snorunt, ao norte de Lavender. <br> |
|
| |
|
| Na Cosmic Island, o jogador poderá encontrar diversos '''NPCs''' que o auxiliarão com tasks, trocas, etc.
| |
|
| |
|
| {{#widget:container|class=npcCard__list justify-center}}
| | <center> [[Arquivo:Localização_Frozen_Tunnels.png|link=]] </center> <br> |
| {{#widget:npccard|url={{filepath:Carmilla.png|60px}}|name=NPC Carmilla|link={{fullurl:NPC_Carmilla}} }}
| |
| {{#widget:npccard|url={{filepath:Npc-shea.png|60px}}|name=NPC Shea|link={{fullurl:NPC_Shea}} }}
| |
| {{#widget:npccard|url={{filepath:Raven.png|60px}}|name=NPC Raven|link={{fullurl:NPC_Raven}} }}
| |
| {{#widget:npccard|url={{filepath:NPC_Yuki.png|50px}}|name=NPC Yuki|link={{fullurl:NPC_Yuki}} }}
| |
| {{#widget:closecontainer}}
| |
|
| |
|
| | == Minimapa da Rift == |
| | <br> |
|
| |
|
| <center>[[Arquivo:Banner_Pokémon-T1H.png|link=]]</center> | | <center> [[Arquivo:Frozen_Tunnels_Minimap_1.png|link=]] [[Arquivo:Frozen_Tunnels_Minimap_2.png|link=]] </center> <br> |
|
| |
|
| =Desert Island= | | == Informações importantes == |
|
| |
|
| * Na Desert Island o jogador pode projetar seu próprio T1H.
| | Os jogadores deverão derrotar '''48 Pokémon''' para que seja possível concluir a Rift. Abaixo a lista de possíveis Pokémon do local: <br> |
|
| |
|
| * Ao concluir a '''Desert Quest''', o jogador poderá caçar qualquer T1H dos disponíveis na Desert Island. Para ir até este local, o jogador deverá falar com '''Renata''', em cima do centro Pokémon de '''Lavender'''.
| |
|
| |
|
| <center>[[Arquivo:NPC_Renata.png|link=]]</center> | | <center> |
| | {| class="wikitable" width="25%" |
| | |- |
| | | align="center" width="20%" | [[Arquivo:199-Slowking.png|link=Slowking]] |
| | | align="center" width="80%" | '''[[Slowking]]''' |
| | |- |
| | | align="center" width="20%" | [[Arquivo:202-Wobbuffet.png|link=Wobbuffet]] |
| | | align="center" width="80%" | '''[[Wobbuffet]]''' |
| | |- |
| | | align="center" width="20%" | [[Arquivo:065-Alakazam.png|link=Alakazam]] |
| | | align="center" width="80%" | '''[[Alakazam]]''' |
| | |- |
| | | align="center" width="20%" | [[Arquivo:097-Hypno.png|link=Hypno]] |
| | | align="center" width="80%" | '''[[Hypno]]''' |
| | |- |
| | | align="center" width="20%" | [[Arquivo:178-Xatu.png|link=Xatu]] |
| | | align="center" width="80%" | '''[[Xatu]]''' |
| | |- |
| | | align="center" width="20%" | [[Arquivo:121-Starmie.png|link=Starmie]] |
| | | align="center" width="80%" | '''[[Starmie]]''' |
| | |- |
| | | align="center" width="20%" | [[Arquivo:Shiny starmie.png|link=Shiny Starmie]] |
| | | align="center" width="80%" | '''[[Shiny Starmie]]''' |
| | |- |
| | |} |
| | </center> |
|
| |
|
| * Ao chegar na '''Desert Island''', o jogador poderá escolher o local onde quer caçar.
| | == Armadilhas == |
|
| |
|
| <center>[[Arquivo:Localização_Respawn_Desert_Island.png|link=]]</center>
| | Durante o caminho haverá algumas armadilhas. Existem duas armadilhas de [[Arquivo:703-Carbink.png|link=Carbink]] Carbink correndo de um lado para o outro, bem como na diagonal. <br> |
|
| |
|
| '''Observação:''' Ao falar com o NPC '''Nyx Trainee''' as localizações dos portais serão marcadas no mapa do jogador.
| |
|
| |
|
| <center>[[Arquivo:Nyx_Trainee.png|link=]]</center> | | <center> [[Arquivo:Deep_Crystals_Trap_3.gif|link=]] [[Arquivo:Deep_Crystals_Trap_4.gif|link=]] </center> <br> |
|
| |
|
| ==Lycanroc*==
| |
|
| |
|
| * A hunt de [[Arquivo:745-Lycanroc.png|link=Lycanroc]] '''Lycanroc''' tem um sistema parecido com os T1H de Mega Stone da Cosmic Island.
| | Outra armadilha é uma estátua de Carbink que fica localizada em determinados locais. Caso o jogador aplique dano, a estátuas invocará alguns [[Arquivo:703-Carbink.png|link=Carbink]] Carbink. <br> |
|
| |
|
| *Ao matar o [[Arquivo:745-Lycanroc_Dusk_Form.png|link=Lycanroc_Dusk_Form]] '''Lycanroc Dusk Form''', o jogador deve coletar o loot para que o '''sistema de mérito''' funcione. Cada coleta equivale a uma tentativa de captura nos T1H tradicionais da Desert Island.
| |
|
| |
|
| *Ao dropar a [[Arquivo:Moon_stone.png|25px|link=]] '''Moon Stone''', o jogador pode trocá-la por um dos T1H no '''NPC Sebastian'''. Este NPC só pode realizar a troca de um T1H (ou '''Moon Stone''') uma vez. Caso o jogador já tenha realizado a troca, poderá vendê-la pra outro jogador.
| | <center> [[Arquivo:Deep_Crystals_Trap_1.gif|link=]] </center> <br> |
|
| |
|
| ==Fogueiras==
| |
|
| |
|
| * '''Fogueiras''' localizadas nas entradas dos Respawn de cada portal '''curam''' e '''restauram''' o cooldown das skills dos Pokémon.
| | Por fim, existem algumas pedras que caem em locais específicos do local. Se o jogador for atingido, perderá vida. <br> |
|
| |
|
| * O jogador precisará esperar '''30 minutos''' para utilizar a fogueira novamente.
| |
|
| |
|
| <center>[[Arquivo:Fogueira_Desert_Island.png|link=]]</center> | | <center> [[Arquivo:Deep_Crystals_Trap_2.gif|link=]] </center> <br> |
|
| |
|
| ==Rifts== | | == Boss == |
|
| |
|
| * As '''Rifts''' são um tipo de dungeon nas quais o jogador encontrará 43 Pokémon da hunt que escolher, dentre eles '''17''' serão o T1H escolhido. Neste local o jogador poderá tentar capturá-los.
| | O Boss da Deep Crystals Rift é o [[Arquivo:703-Shiny_Carbink.png|link=Shiny Carbink]] Shiny Carbink. Em alguns momentos ele invocará alguns [[Arquivo:703-Carbink.png|link=Carbink]] Carbink, mas trata-se de uma batalha simples. Além disso, haverão algumas pedras caindo do céu. Depois de derrotar o Boss, basta ir para o portal de saída da Rift. <br> |
|
| |
|
| * Para entrar, o jogador precisa juntar 7 [[Arquivo:Rift_Fragment.png|10px|link=]] '''Fragmentos de rift.'''
| |
|
| |
|
| <center>[[Arquivo:Desert_Island_Rifts.png|link=]]</center> | | <center> [[Arquivo:Saída_Deep_Crystals.png|link=]] </center> <br> |
|
| |
|
| <center>
| | == Recompensas == |
| {| class="wikitable bg-none border-0" width="25%" style="text-align:center;"
| |
| ! width="50%" colspan="1"| Recompensas !! Raridade
| |
| |-
| |
| |[[Arquivo:Desert_Addon_Recipe.png|link=]] '''Desert Addon Recipe''' || '''Lendário'''
| |
| |-
| |
| ! colspan="3" | [[Arquivo:Exp_icon.png|30px|link=]] Experiência: 50.000
| |
| |-
| |
| ! colspan="3" | [[Arquivo:Exp_icon_nw.png|30px|link=]] NW Experiência: 1.020
| |
| |}
| |
| </center>
| |
| | |
| ==NPCs Desert Island==
| |
| | |
| Na '''Desert Island''', o jogador poderá encontrar diversos NPCs que o auxiliarão com tasks, trocas, etc.
| |
| | |
| {{#widget:container|class=npcCard__list justify-center}}
| |
| {{#widget:npccard|url={{filepath:NPC_Nyx_Trainee.png|60px}}|name=NPC Nyx Trainee|link={{fullurl:NPC_Nyx_Trainee}} }}
| |
| {{#widget:npccard|url={{filepath:NPC_Joel.png|60px}}|name=NPC Joel|link={{fullurl:NPC_Joel}} }}
| |
| {{#widget:npccard|url={{filepath:NPC_Sebastian.png|60px}}|name=NPC Sebastian|link={{fullurl:NPC_Sebastian}} }}
| |
| {{#widget:npccard|url={{filepath:NPC_Mike.png|50px}}|name=NPC Mike|link={{fullurl:NPC_Mike}} }}
| |
| {{#widget:npccard|url={{filepath:NPC_Blanca.png|50px}}|name=NPC Blanca|link={{fullurl:NPC_Blanca}} }}
| |
| {{#widget:npccard|url={{filepath:NPC_Renata_Desert.png|50px}}|name=NPC Renata|link={{fullurl:NPC_Renata}} }}
| |
| {{#widget:closecontainer}}
| |
| | |
| =NPC Shea=
| |
| | |
| <center>[[Arquivo:Npc-shea.png|60px|link=]]</center>
| |
| <center>'''NPC Shea'''</center>
| |
| | |
| <center>
| |
| {| class="wikitable bg-none border-0" width="50%" style="text-align:center;"
| |
| ! width="3%" colspan="1"| Função:
| |
| |-
| |
| | '''Responsável pela informação precisa de quantos Mega Pidgeot e Mega Glalie o jogador já derrotou'''
| |
| |}
| |
| </center>
| |
| | |
| ==Localização:==
| |
| ===Nightmare World:===
| |
| | |
| [[Arquivo:Localização_Shea.png|link=]]
| |
| | |
| =NPC Raven=
| |
| | |
| <center>[[Arquivo:Raven.png|link=]]</center>
| |
| <center>'''NPC Raven'''</center>
| |
| | |
| <center>
| |
| {| class="wikitable bg-none border-0" width="50%" style="text-align:center;"
| |
| ! width="3%" colspan="2"| Responsável pela missão diária de derrotar T1H Pokémon
| |
| |-
| |
| |Recompensa ao terminar a missão:
| |
| EXP Variável.
| |
| <br>
| |
| 1.020 Nightmare Experiência.
| |
| <br>
| |
| 2 Nightmare Tokens.
| |
| <br>
| |
| 1 Cosmic Token.
| |
| <br>
| |
| 1 Incense de acordo com a diária escolhida.
| |
| <br>
| |
| |-
| |
| | '''OBS.: Lista de Elemento/Pokémon/Quantidade abaixo.'''
| |
| |}
| |
| </center>
| |
|
| |
|
| <center> | | <center> |
| {| class="wikitable bg-none border-0" width="50%" style="text-align:center;" | | {| class="wikitable" width="25%" |
| ! Elemento
| |
| ! Pokémon
| |
| ! Quantidade
| |
| |- | | |- |
| | [[Arquivo:Dark1.png|Dark|link=]]
| | ! colspan="2" | Item |
| | [[Arquivo:570-Zorua.png|T1H Zorua|link=]]
| | ! Raridade |
| | '''100'''
| |
| |- | | |- |
| |[[Arquivo:Electric.png|Electric|link=]] | | | align="center" | [[Arquivo:Random_Ancient_Relics.png|link=]] |
| |[[Arquivo:417-Pachirisu.png|T1H Pachirisu|link=]] | | |align="left" style="border-left-style: hidden; | Random Ancient Relics |
| | '''100''' | | | align="center" |Comum |
| |- | | |- |
| |[[Arquivo:Fairy.png|Fairy|link=]] | | | align="center" | [[Arquivo:Random_Bones.png|link=]] |
| |[[Arquivo:280-Ralts.png|T1H Ralts|link=]] [[Arquivo:281-Kirlia.png|T1H Kirlia|link=]] [[Arquivo:282-Gardevoir.png|T1H Gardevoir|link=]] | | |align="left" style="border-left-style: hidden; | Random Bones |
| | '''100''' | | |align="center" | Comum |
| |- | | |- |
| |[[Arquivo:Fighting.png|Fighting|link=]] | | | align="center" | [[Arquivo:Water-stone.gif|link=]] |
| |[[Arquivo:296-Makuhita.png|T1H Makuhita|link=]] [[Arquivo:297-Hariyama.png|T1H Hariyama|link=]] | | |align="left" style="border-left-style: hidden; | Water Stone |
| |'''100''' | | | align="center" |Comum |
| |- | | |- |
| |[[Arquivo:Fire.png|Fire|link=]] | | | align="center" | [[Arquivo:Ice-stone.gif|link=]] |
| |[[Arquivo:631-Heatmor.png|T1H Heatmor|link=]] | | |align="left" style="border-left-style: hidden; | Ice Stone |
| | '''100''' | | | align="center" |Comum |
| |- | | |- |
| |[[Arquivo:Flying.png|Flying|link=]] | | | align="center" | [[Arquivo:Frosty_Tail.png|link=]] |
| |[[Arquivo:016-Pidgey.png|T1H Pidgey|link=]] [[Arquivo:017-Pidgeotto.png|T1H Pidgeotto|link=]] [[Arquivo:018-Pidgeot.png|T1H Pidgeot|link=]] | | |align="left" style="border-left-style: hidden; | Frosty Tail |
| | '''100''' | | | align="center" |Comum |
| |- | | |- |
| |[[Arquivo:Grass.png|Grass|link=]] | | | align="center" | [[Arquivo:Frosty_Hand.png|link=]] |
| |[[Arquivo:252-Treecko.png|T1H Treecko|link=]] [[Arquivo:253-Grovyle.png|T1H Grovyle|link=]] [[Arquivo:254-Sceptile.png|T1H Sceptile|link=]] | | |align="left" style="border-left-style: hidden; | Frosty Hand |
| | '''100''' | | | align="center" |Comum |
| | |- |
| | | align="center" | [[Arquivo:Random_Skulls.png|link=]] |
| | |align="left" style="border-left-style: hidden; | Random Skull |
| | | align="center" |Raro |
| |- | | |- |
| |[[Arquivo:ice.png|Ice|link=]] | | | align="center" | [[Arquivo:Rift Mitica.png|link=]] |
| |[[Arquivo:361-Snorut.png|T1H Snorunt|link=]] [[Arquivo:362-Glalie.png|T1H Glalie|link=]] | | |align="left" style="border-left-style: hidden; | Rift Crystal (Mítico) |
| | '''100''' | | | align="center" |Raro |
| |- | | |- |
| |[[Arquivo:Rock.png|Rock|link=]] | | | align="center" | [[Arquivo:Book_Dungeons_-_Frozen Tunnels.png|link=]] |
| |[[Arquivo:408-Cranidos.png|T1H Cranidos|link=]] [[Arquivo:409-Rampardos(1).png|T1H Rampardos|link=]] | | |align="left" style="border-left-style: hidden; | Book: Rifts - Frozen Tunnels |
| | '''100''' | | | align="center" |Épico |
| |- | | |- |
| |[[Arquivo:Steel.png|Steel|link=]] | | | align="center" | [[Arquivo:Recipe.png|link=]] |
| |[[Arquivo:303-Mawile.png|T1H Mawile|link=]]
| | |align="left" style="border-left-style: hidden; | MECHA: FROST TREE Addon (Recipe) |
| | '''100'''
| | | align="center" |Épico |
| |}
| |
| </center>
| |
| | |
| ==Localização:==
| |
| ===Nightmare World:===
| |
| | |
| [[Arquivo:Localização_Raven.png|link=]]
| |
| | |
| =NPC Yuki=
| |
| | |
| <center>[[Arquivo:NPC_Yuki.png|60px|link=]]</center>
| |
| <center>'''NPC Yuki'''</center>
| |
| | |
| <center>
| |
| {| class="wikitable bg-none border-0" width="50%" style="text-align:center;"
| |
| ! width="3%" colspan="1"| Função:
| |
| |- | | |- |
| | '''Este NPC mantém o held, boost e addon do Pokémon ao transformar a Poké Ball em Premier Ball.''' | | ! colspan="3" | [[Arquivo:Exp_icon.png|30px|link=]] Experiência: 300.000 <br> [[Arquivo:Exp_icon_nw.png|30px|link=]] Experiência: 1.000 |
| |} | | |} |
| </center> | | </center> |
|
| |
| ==Localização:==
| |
| ===Nightmare World:===
| |
|
| |
| [[Arquivo:Localização_Yuki.png|link=]]
| |


