A Dorabelle cria girassóis que causam dano frontal.
| (17 revisões intermediárias por 4 usuários não estão sendo mostradas) | |||
| Linha 1: | Linha 1: | ||
<center> [[Arquivo:Banner_Dorabelle.webp|link=]] </center> | <center> [[Arquivo:Banner_Dorabelle.webp|link=]] </center> | ||
=Introdução= | |||
Durante | Durante a infância, Mr. Kennedy relata ter se deparado com uma Sunflora gigante, tomada pelo medo, na floresta que hoje abriga o National Park, em Johto. Com o passar do tempo, ele passou a visitá-la com frequência, até conquistar sua confiança e dar-lhe o nome de Dorabelle. Apesar de seu porte impressionante, Dorabelle não acreditava na própria força e temia deixar a floresta. Anos depois, motivado pelo desejo de protegê-la e ajudá-la a superar esse receio, Mr. Kennedy fundou o National Park, onde também a treinou para batalhas. Atualmente, Dorabelle permanece no centro do parque ao lado de Mr. Kennedy, pronta para enfrentar os treinadores que se dispuserem a desafiá-la. | ||
==Desbloqueando o acesso== | ==Desbloqueando o acesso== | ||
Dorabelle's Wrath é uma Mystery Dungeon em formato de Boss Battle solo, | Dorabelle's Wrath é uma Mystery Dungeon em formato de Boss Battle solo, na qual o jogador deve enfrentar e derrotar a Sunflora Gigante. Essa Mystery Dungeon é desbloqueada após a derrota de Dorabelle no modo Guardião Global. | ||
'''Observação''': | '''Observação''': o acesso à Mystery Dungeon será concedido apenas aos jogadores que atingirem a quantidade mínima de dano elegível para o recebimento de recompensas. | ||
==Localização== | ==Localização== | ||
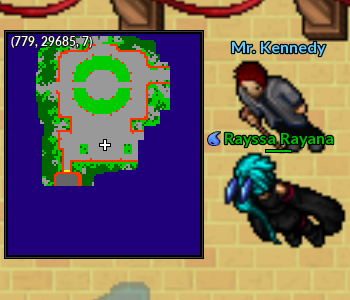
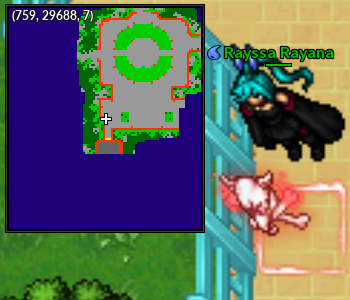
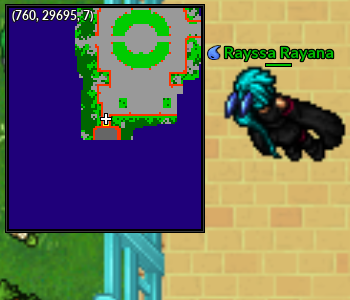
O acesso | O acesso à Mystery Dungeon Dorabelle's Wrath pode ser realizado por meio do NPC Mr. Kennedy, localizado na região central do National Park de Johto. Após interagir com o NPC, o jogador deve seguir para a esquerda até encontrar a interface de entrada da Mystery Dungeon, ou utilizar diretamente a opção de teleporte disponível na própria interface para jogadores de nível 120 ou superior que ja tenham liberado o acesso à mesma. | ||
<center> | <center> | ||
[[Arquivo:MrKennedyDorabelle.png|link=]] | |||
[[Arquivo:EntradaDorabelle.png|link=]] | |||
[[Arquivo:TeleportDorabelle.png|link=]] | |||
</center> | |||
== Efetividade == | |||
A Dorabelle é um boss do tipo [[Arquivo:Grass.png|link=]] Grass. O ideal é utilizar um '''Causador de Dano Contínuo''' [[Arquivo:Interface_OTDD_PVE.png|20px|link=]] dos elementos [[Arquivo:Fire.png|link=]] Fire, [[Arquivo:Flying.png|link=]] Flying, [[Arquivo:Poison1.png|link=]] Poison, [[Arquivo:Bug.png|link=]] Bug ou [[Arquivo:Ice.png|link=]] Ice. | |||
* O elemento [[Arquivo:Ice.png|link=]] Ice recebe dano normal dos ataques do tipo [[Arquivo:Grass.png|link=]] Grass | |||
==Informações importantes== | ==Informações importantes== | ||
* A batalha contra a Dorabelle é feita de forma '''solo'''. | * A batalha contra a Dorabelle é feita de forma '''solo'''. | ||
* Não há bônus de clã | * As seguintes Berries são recomendadas para esta batalha: [[Arquivo:Berrie_23.png|link=]] Lum berry, [[Arquivo:Berrie_6.png|link=]] Rindo berry, [[Arquivo:Salacberry.png|link=]] Salac berry e [[Arquivo:Ganlon_berry.png|link=]] Ganlon berry | ||
* Não há bônus de clã durante o duelo. | |||
* O combate acontece no formato '''PokéView'''. | * O combate acontece no formato '''PokéView'''. | ||
* O jogador poderá utilizar apenas um Pokémon. O Pokémon escolhido deverá estar para fora da Poké Bola antes de iniciar a batalha. Caso o Pokémon seja derrotado, o jogador será removido da luta, não podendo mais retornar. | * O jogador poderá utilizar apenas um Pokémon. O Pokémon escolhido deverá estar para fora da Poké Bola antes de iniciar a batalha. Caso o Pokémon seja derrotado, o jogador será removido da luta, não podendo mais retornar. | ||
* Durante a batalha, ''' | * Durante a batalha, somente o '''Moomoo Milk''' poderá ser utilizado para curar. | ||
* Não há penalização de Experiência ou Bless ao ser derrotado por Dorabelle. | * Não há penalização de Experiência ou Bless ao ser derrotado por Dorabelle. | ||
* É possível utilizar o Attachment Device. | * É possível utilizar o Attachment Device. | ||
| Linha 26: | Linha 37: | ||
* As foods de Cozinheiro tem o efeito dobrado nesta batalha. <br> | * As foods de Cozinheiro tem o efeito dobrado nesta batalha. <br> | ||
== | == Dificuldades == | ||
Os jogadores podem realizar a Mystery Dungeon nas seguintes dificuldades:<br> | |||
<center> | |||
{| class="wikitable" style="text-align:center" | |||
! Dificuldade | |||
! Level Mínimo | |||
! Level Cap | |||
|- | |||
''' | | '''Platinum''' | ||
| 120 | |||
| 135 | |||
|- | |- | ||
| '''Ultra''' | |||
| | | 300 | ||
| 325 | |||
|- | |- | ||
| '''Hyper''' | |||
| | | 400 | ||
| 425 | |||
|-|Grand Master | |- | ||
| '''Master''' | |||
</ | | 500 | ||
| 525 | |||
|- | |||
| '''Grand Master''' | |||
| 600 | |||
| [[File:Semvip.png|link=]] | |||
|}<br> | |||
</center> | |||
'''Observação:''' As dificuldades Hyper, Master e Grand Master possuem o sistema de '''Held Enhancement''', que será explicado e definido abaixo. | |||
== Held Enhancement == | == Held Enhancement == | ||
| Linha 72: | Linha 91: | ||
|-|Bullet Seed= | |-|Bullet Seed= | ||
A Dorabelle cria girassóis que causam dano frontal. | A Dorabelle cria girassóis que causam dano frontal. | ||
{{#widget:Video|url={{filepath:BulletSeedDorabelle.mp4}}|}} | |||
{{#widget:Video|url={{filepath:BulletSeedDorabelle.mp4}}|}}<br> | |||
|-|Giga Drain= | |-|Giga Drain= | ||
A Dorabelle causa dano ao adversário e se cura. | |||
{{#widget:Video|url={{filepath:DorabelleGigaDrain.mp4}}|}} | A Dorabelle causa dano ao adversário e se cura com base no dano causado. | ||
{{#widget:Video|url={{filepath:DorabelleGigaDrain.mp4}}|}} <br> | |||
|-|Grass Knot= | |-|Grass Knot= | ||
{{#widget:Video|url={{filepath:DorabelleGrassKnot.mp4}}|}} | |||
A Dorabelle causa dano Target ao adversário. | |||
{{#widget:Video|url={{filepath:DorabelleGrassKnot.mp4}}|}}<br> | |||
|-|Leaf Blade= | |-|Leaf Blade= | ||
{{#widget:Video|url={{filepath:Leaf_Blade_(2).mp4}}|}} | |||
Dorabelle carrega o ataque e o dispara para frente. O tempo de carregamento é reduzido, dependendo da dificuldade. | |||
{{#widget:Video|url={{filepath:Leaf_Blade_(2).mp4}}|}}<br> | |||
|-|Leafage= | |-|Leafage= | ||
{{#widget:Video|url={{filepath:Leafage_(2).mp4}}|}} | |||
A Dorabelle lança uma planta que causa dano em área durante certo tempo. | |||
{{#widget:Video|url={{filepath:Leafage_(2).mp4}}|}}<br> | |||
|-|Leech Seed= | |-|Leech Seed= | ||
{{#widget:Video|url={{filepath:DorabelleLeechSeed.mp4}}|}} | |||
A Dorabelle causa dano ao adversário e se cura com base no dano causado. | |||
{{#widget:Video|url={{filepath:DorabelleLeechSeed.mp4}}|}}<br> | |||
|-|Magical Leaf= | |-|Magical Leaf= | ||
{{#widget:Video|url={{filepath:Magical_Leaf_(2).mp4}}|}} | |||
A Dorabelle lança ataques progressivos em direção ao SQM atual do adversário. | |||
{{#widget:Video|url={{filepath:Magical_Leaf_(2).mp4}}|}}<br> | |||
|-|Petal Dance= | |-|Petal Dance= | ||
{{#widget:Video|url={{filepath:DorabellePetalDance.mp4}}|}} | |||
A Dorabelle lança um ataque frontal, sendo possível acertar o mesmo usuário mais de uma vez. | |||
{{#widget:Video|url={{filepath:DorabellePetalDance.mp4}}|}}<br> | |||
|-|Razor Leaf= | |-|Razor Leaf= | ||
{{#widget:Video|url={{filepath:DorabelleRazor_Leaf_.mp4}}|}} | |||
A Dorabelle causa dano Target ao adversário. | |||
{{#widget:Video|url={{filepath:DorabelleRazor_Leaf_.mp4}}|}}<br> | |||
|-|Seed Bomb= | |-|Seed Bomb= | ||
{{#widget:Video|url={{filepath:DorabelleSeed_Bomb_.mp4}}|}} | |||
A Dorabelle lança ataques progressivos ao adversário. A área atingida causa dano ao adversário por alguns segundos. | |||
{{#widget:Video|url={{filepath:DorabelleSeed_Bomb_.mp4}}|}}<br> | |||
|-|Solar Beam= | |-|Solar Beam= | ||
{{#widget:Video|url={{filepath:DorabelleDefinitivoSolar_Beam_.mp4}}|}} | |||
A Dorabelle carrega um solar beam que gira ao redor dela algumas vezes. | |||
{{#widget:Video|url={{filepath:DorabelleDefinitivoSolar_Beam_.mp4}}|}}<br> | |||
|-|Vine Whip= | |-|Vine Whip= | ||
{{#widget:Video|url={{filepath:DorabelleVine_Whip_.mp4}}|}} | |||
A Dorabelle lança algumas sementes. Caso as sementes não sejam derrotadas a tempo, elas se tornarão Sunfloras e começarão a atacar o adversário. | |||
{{#widget:Video|url={{filepath:DorabelleVine_Whip_.mp4}}|}}<br> | |||
</center> | </center> | ||
</tabber> | </tabber> | ||
| Linha 111: | Linha 174: | ||
! Raridade | ! Raridade | ||
|- | |- | ||
| align="center" | [[Arquivo:Soul shard fragment.png]] | | align="center" | [[Arquivo:Soul shard fragment.png|link=]] | ||
|align="left" style="border-left-style: hidden; | Soul Shard Fragment | |align="left" style="border-left-style: hidden; | Soul Shard Fragment | ||
|align="center" | Comum | |align="center" | Comum | ||
| Linha 119: | Linha 182: | ||
|align="center" | Comum | |align="center" | Comum | ||
|- | |- | ||
| align="center" | [[Arquivo:Leaf-stone.gif]] | | align="center" | [[Arquivo:Leaf-stone.gif|link=]] | ||
|align="left" style="border-left-style: hidden; | Leaf Stone | |align="left" style="border-left-style: hidden; | Leaf Stone | ||
| align="center" | Comum | | align="center" | Comum | ||
|- | |- | ||
| align="center" | [[Arquivo:Jungle box.png]] | | align="center" | [[Arquivo:Jungle box.png|link=]] | ||
|align="left" style="border-left-style: hidden; | Jungle Box | |align="left" style="border-left-style: hidden; | Jungle Box | ||
| align="center" | Comum | | align="center" | Comum | ||
|- | |- | ||
| align="center" | [[Arquivo:Giant sunflower petal.png]] | | align="center" | [[Arquivo:Giant sunflower petal.png|link=]] | ||
|align="left" style="border-left-style: hidden; | Giant Sunflower Petal | |align="left" style="border-left-style: hidden; | Giant Sunflower Petal | ||
| align="center" | Raro | | align="center" | Raro | ||
|- | |- | ||
| align="center" | [[Arquivo:Radio_Tape.png]] | | align="center" | [[Arquivo:Radio_Tape.png|link=]] | ||
|align="left" style="border-left-style: hidden; | Radio Tape Number 013 | |align="left" style="border-left-style: hidden; | Radio Tape Number 013 | ||
| align="center" | Raro | | align="center" | Raro | ||
| Linha 144: | Linha 207: | ||
! Raridade | ! Raridade | ||
|- | |- | ||
| align="center" | [[Arquivo:Soul shard fragment.png]] | | align="center" | [[Arquivo:Soul shard fragment.png|link=]] | ||
|align="left" style="border-left-style: hidden; | Soul Shard Fragment | |align="left" style="border-left-style: hidden; | Soul Shard Fragment | ||
|align="center" | Comum | |align="center" | Comum | ||
| Linha 156: | Linha 219: | ||
|align="center" | Comum | |align="center" | Comum | ||
|- | |- | ||
| align="center" | [[Arquivo:Helicopter_Leave.png]] | | align="center" | [[Arquivo:Helicopter_Leave.png|link=]] | ||
|align="left" style="border-left-style: hidden; | Helicopter Leaves | |align="left" style="border-left-style: hidden; | Helicopter Leaves | ||
| align="center" | Comum | | align="center" | Comum | ||
|- | |- | ||
| align="center" | [[Arquivo:Leaf-stone.gif]] | | align="center" | [[Arquivo:Leaf-stone.gif|link=]] | ||
|align="left" style="border-left-style: hidden; | Leaf Stone | |align="left" style="border-left-style: hidden; | Leaf Stone | ||
| align="center" | Comum | | align="center" | Comum | ||
|- | |- | ||
| align="center" | [[Arquivo:Jungle box.png]] | | align="center" | [[Arquivo:Jungle box.png|link=]] | ||
|align="left" style="border-left-style: hidden; | Jungle Box | |align="left" style="border-left-style: hidden; | Jungle Box | ||
| align="center" | Comum | | align="center" | Comum | ||
|- | |- | ||
| align="center" | [[Arquivo:Giant sunflower petal.png]] | | align="center" | [[Arquivo:Giant sunflower petal.png|link=]] | ||
|align="left" style="border-left-style: hidden; | Giant Sunflower Petal | |align="left" style="border-left-style: hidden; | Giant Sunflower Petal | ||
| align="center" | Comum | | align="center" | Comum | ||
|- | |- | ||
| align="center" | [[Arquivo:Radio_Tape.png]] | | align="center" | [[Arquivo:Radio_Tape.png|link=]] | ||
|align="left" style="border-left-style: hidden; | Radio Tape Number 013 | |align="left" style="border-left-style: hidden; | Radio Tape Number 013 | ||
| align="center" | Raro | | align="center" | Raro | ||
| Linha 185: | Linha 248: | ||
! Raridade | ! Raridade | ||
|- | |- | ||
| align="center" | [[Arquivo:Soul shard fragment.png]] | | align="center" | [[Arquivo:Soul shard fragment.png|link=]] | ||
|align="left" style="border-left-style: hidden; | Soul Shard Fragment | |align="left" style="border-left-style: hidden; | Soul Shard Fragment | ||
|align="center" | Comum | |align="center" | Comum | ||
| Linha 201: | Linha 264: | ||
| align="center" | Comum | | align="center" | Comum | ||
|- | |- | ||
| align="center" | [[Arquivo:Leaf-stone.gif]] | | align="center" | [[Arquivo:Leaf-stone.gif|link=]] | ||
|align="left" style="border-left-style: hidden; | Leaf Stone | |align="left" style="border-left-style: hidden; | Leaf Stone | ||
| align="center" | Comum | | align="center" | Comum | ||
|- | |- | ||
| align="center" | [[Arquivo:Jungle box.png]] | | align="center" | [[Arquivo:Jungle box.png|link=]] | ||
|align="left" style="border-left-style: hidden; | Jungle Box | |align="left" style="border-left-style: hidden; | Jungle Box | ||
| align="center" | Comum | | align="center" | Comum | ||
|- | |- | ||
| align="center" | [[Arquivo:Giant sunflower petal.png]] | | align="center" | [[Arquivo:Giant sunflower petal.png|link=]] | ||
|align="left" style="border-left-style: hidden; | Giant Sunflower Petal | |align="left" style="border-left-style: hidden; | Giant Sunflower Petal | ||
| align="center" | Comum | | align="center" | Comum | ||
|- | |- | ||
| align="center" | [[Arquivo:Radio_Tape.png]] | | align="center" | [[Arquivo:Radio_Tape.png|link=]] | ||
|align="left" style="border-left-style: hidden; | Radio Tape Number 013 | |align="left" style="border-left-style: hidden; | Radio Tape Number 013 | ||
| align="center" | Raro | | align="center" | Raro | ||
|- | |- | ||
| align="center" | [[Arquivo:Tm_off_tanker_disk.png]] | | align="center" | [[Arquivo:Tm_off_tanker_disk.png|link=]] | ||
|align="left" style="border-left-style: hidden; | TM aleatório ou fragmento de Mega Stone de OFF-Tanker | |align="left" style="border-left-style: hidden; | TM aleatório ou fragmento de Mega Stone de OFF-Tanker | ||
| align="center" | Lendário | | align="center" | Lendário | ||
| Linha 230: | Linha 293: | ||
! Raridade | ! Raridade | ||
|- | |- | ||
| align="center" | [[Arquivo:Soul shard fragment.png]] | | align="center" | [[Arquivo:Soul shard fragment.png|link=]] | ||
|align="left" style="border-left-style: hidden; | Soul Shard Fragment | |align="left" style="border-left-style: hidden; | Soul Shard Fragment | ||
|align="center" | Comum | |align="center" | Comum | ||
| Linha 242: | Linha 305: | ||
|align="center" | Comum | |align="center" | Comum | ||
|- | |- | ||
| align="center" | [[Arquivo:Helicopter_Leave.png]] | | align="center" | [[Arquivo:Helicopter_Leave.png|link=]] | ||
|align="left" style="border-left-style: hidden; | Helicopter Leaves | |align="left" style="border-left-style: hidden; | Helicopter Leaves | ||
| align="center" | Comum | | align="center" | Comum | ||
|- | |- | ||
| align="center" | [[Arquivo:Leaf-stone.gif]] | | align="center" | [[Arquivo:Leaf-stone.gif|link=]] | ||
|align="left" style="border-left-style: hidden; | Leaf Stone | |align="left" style="border-left-style: hidden; | Leaf Stone | ||
| align="center" | Comum | | align="center" | Comum | ||
|- | |- | ||
| align="center" | [[Arquivo:Jungle box.png]] | | align="center" | [[Arquivo:Jungle box.png|link=]] | ||
|align="left" style="border-left-style: hidden; | Jungle Box | |align="left" style="border-left-style: hidden; | Jungle Box | ||
| align="center" | Comum | | align="center" | Comum | ||
|- | |- | ||
| align="center" | [[Arquivo:Giant sunflower petal.png]] | | align="center" | [[Arquivo:Giant sunflower petal.png|link=]] | ||
|align="left" style="border-left-style: hidden; | Giant Sunflower Petal | |align="left" style="border-left-style: hidden; | Giant Sunflower Petal | ||
| align="center" | Comum | | align="center" | Comum | ||
|- | |- | ||
| align="center" | [[Arquivo:Radio_Tape.png]] | | align="center" | [[Arquivo:Radio_Tape.png|link=]] | ||
|align="left" style="border-left-style: hidden; | Radio Tape Number 013 | |align="left" style="border-left-style: hidden; | Radio Tape Number 013 | ||
| align="center" | Raro | | align="center" | Raro | ||
|- | |- | ||
| align="center" | [[Arquivo:Tm_off_tanker_disk.png]] | | align="center" | [[Arquivo:Tm_off_tanker_disk.png|link=]] | ||
|align="left" style="border-left-style: hidden; | TM aleatório ou fragmento de Mega Stone de OFF-Tanker | |align="left" style="border-left-style: hidden; | TM aleatório ou fragmento de Mega Stone de OFF-Tanker | ||
| align="center" | Lendário | | align="center" | Lendário | ||
| Linha 272: | Linha 335: | ||
! colspan="3" | [[Arquivo:Exp_icon.png|30px|link=]] Experiência: 1.560.000 | ! colspan="3" | [[Arquivo:Exp_icon.png|30px|link=]] Experiência: 1.560.000 | ||
|- | |- | ||
! colspan="3" | [[Arquivo: | ! colspan="3" | [[Arquivo:Improved_XP2.png|30px|link=]] Improved XP: 68.250 | ||
|} | |} | ||
|-|Grand Master= | |-|Grand Master= | ||
| Linha 281: | Linha 344: | ||
! Raridade | ! Raridade | ||
|- | |- | ||
| align="center" | [[Arquivo:Soul shard fragment.png]] | | align="center" | [[Arquivo:Soul shard fragment.png|link=]] | ||
|align="left" style="border-left-style: hidden; | Soul Shard Fragment | |align="left" style="border-left-style: hidden; | Soul Shard Fragment | ||
|align="center" | Comum | |align="center" | Comum | ||
| Linha 293: | Linha 356: | ||
|align="center" | Comum | |align="center" | Comum | ||
|- | |- | ||
| align="center" | [[Arquivo:Helicopter_Leave.png]] | | align="center" | [[Arquivo:Helicopter_Leave.png|link=]] | ||
|align="left" style="border-left-style: hidden; | Helicopter Leaves | |align="left" style="border-left-style: hidden; | Helicopter Leaves | ||
| align="center" | Comum | | align="center" | Comum | ||
|- | |- | ||
| align="center" | [[Arquivo:Leaf-stone.gif]] | | align="center" | [[Arquivo:Leaf-stone.gif|link=]] | ||
|align="left" style="border-left-style: hidden; | Leaf Stone | |align="left" style="border-left-style: hidden; | Leaf Stone | ||
| align="center" | Comum | | align="center" | Comum | ||
|- | |- | ||
| align="center" | [[Arquivo:Ancient-stone.gif]] | | align="center" | [[Arquivo:Ancient-stone.gif|link=]] | ||
|align="left" style="border-left-style: hidden; | Ancient Stone | |align="left" style="border-left-style: hidden; | Ancient Stone | ||
| align="center" | Comum | | align="center" | Comum | ||
|- | |- | ||
| align="center" | [[Arquivo:Jungle box.png]] | | align="center" | [[Arquivo:Jungle box.png|link=]] | ||
|align="left" style="border-left-style: hidden; | Jungle Box | |align="left" style="border-left-style: hidden; | Jungle Box | ||
| align="center" | Comum | | align="center" | Comum | ||
|- | |- | ||
| align="center" | [[Arquivo:Giant sunflower petal.png]] | | align="center" | [[Arquivo:Giant sunflower petal.png|link=]] | ||
|align="left" style="border-left-style: hidden; | Giant Sunflower Petal | |align="left" style="border-left-style: hidden; | Giant Sunflower Petal | ||
| align="center" | Comum | | align="center" | Comum | ||
|- | |- | ||
| align="center" | [[Arquivo:Radio_Tape.png]] | | align="center" | [[Arquivo:Radio_Tape.png|link=]] | ||
|align="left" style="border-left-style: hidden; | Radio Tape Number 013 | |align="left" style="border-left-style: hidden; | Radio Tape Number 013 | ||
| align="center" | Raro | | align="center" | Raro | ||
|- | |- | ||
| align="center" | [[Arquivo:Tm_off_tanker_disk.png]] | | align="center" | [[Arquivo:Tm_off_tanker_disk.png|link=]] | ||
|align="left" style="border-left-style: hidden; | TM aleatório ou fragmento de Mega Stone de OFF-Tanker | |align="left" style="border-left-style: hidden; | TM aleatório ou fragmento de Mega Stone de OFF-Tanker | ||
| align="center" | Épico | | align="center" | Épico | ||
| Linha 325: | Linha 388: | ||
| align="center" | Lendário | | align="center" | Lendário | ||
|- | |- | ||
! colspan="3" | [[Arquivo: | ! colspan="3" | [[Arquivo:Improved_XP2.png|30px|link=]] Improved XP: 105.000 | ||
|} | |} | ||
</tabber> | |||
<center> | |||
{| class="wikitable" width="25%" | |||
|- | |||
! colspan="3" | [[Arquivo:Jungle box.png|link=]] Jungle Box | |||
|- | |||
! colspan="2" | Item | |||
! Raridade | |||
|- | |||
| align="center" | [[Arquivo:PileOfSeeds.png|link=]] | |||
| align="left" style="border-left-style: hidden; | Pile of Seeds | |||
|align="center" | Comum | |||
|- | |||
| align="center" | [[Arquivo:Leaves.png|link=]] | |||
| align="left" style="border-left-style: hidden; | Leaves | |||
|align="center" | Comum | |||
|- | |||
| align="center" | [[Arquivo:Leaf-stone.gif|link=]] | |||
| align="left" style="border-left-style: hidden; | Leaf Stone | |||
|align="center" | Raro | |||
|- | |||
| align="center" | [[Arquivo:Dorabelle_Backpack.png|link=]] | |||
| align="left" style="border-left-style: hidden; | Dorabelle Backpack | |||
|align="center" | Lendário | |||
|- | |||
| align="center" | [[Arquivo:Avatar_Card_-_Silver.gif|link=]] | |||
| align="left" style="border-left-style: hidden; | Avatar Card - Shiny Dorabelle | |||
|align="center" | Lendário | |||
|- | |||
| align="center" | [[Arquivo:Shiny Dorabelle Guardian Costume.png|link=]] | |||
| align="left" style="border-left-style: hidden; | Shiny Dorabelle Guardian (Female) | |||
|align="center" | Lendário | |||
|- | |||
| align="center" | [[Arquivo:Soul_Core.png|link=]] | |||
| align="left" style="border-left-style: hidden; | Soul Core | |||
|align="center" | Lendário | |||
|- | |||
|} | |||
</ | </center> | ||

Durante a infância, Mr. Kennedy relata ter se deparado com uma Sunflora gigante, tomada pelo medo, na floresta que hoje abriga o National Park, em Johto. Com o passar do tempo, ele passou a visitá-la com frequência, até conquistar sua confiança e dar-lhe o nome de Dorabelle. Apesar de seu porte impressionante, Dorabelle não acreditava na própria força e temia deixar a floresta. Anos depois, motivado pelo desejo de protegê-la e ajudá-la a superar esse receio, Mr. Kennedy fundou o National Park, onde também a treinou para batalhas. Atualmente, Dorabelle permanece no centro do parque ao lado de Mr. Kennedy, pronta para enfrentar os treinadores que se dispuserem a desafiá-la.
Dorabelle's Wrath é uma Mystery Dungeon em formato de Boss Battle solo, na qual o jogador deve enfrentar e derrotar a Sunflora Gigante. Essa Mystery Dungeon é desbloqueada após a derrota de Dorabelle no modo Guardião Global.
Observação: o acesso à Mystery Dungeon será concedido apenas aos jogadores que atingirem a quantidade mínima de dano elegível para o recebimento de recompensas.
O acesso à Mystery Dungeon Dorabelle's Wrath pode ser realizado por meio do NPC Mr. Kennedy, localizado na região central do National Park de Johto. Após interagir com o NPC, o jogador deve seguir para a esquerda até encontrar a interface de entrada da Mystery Dungeon, ou utilizar diretamente a opção de teleporte disponível na própria interface para jogadores de nível 120 ou superior que ja tenham liberado o acesso à mesma.
A Dorabelle é um boss do tipo ![]() Grass. O ideal é utilizar um Causador de Dano Contínuo
Grass. O ideal é utilizar um Causador de Dano Contínuo ![]() dos elementos
dos elementos ![]() Fire,
Fire, ![]() Flying,
Flying, ![]() Poison,
Poison, ![]() Bug ou
Bug ou ![]() Ice.
Ice.
Os jogadores podem realizar a Mystery Dungeon nas seguintes dificuldades:
| Dificuldade | Level Mínimo | Level Cap |
|---|---|---|
| Platinum | 120 | 135 |
| Ultra | 300 | 325 |
| Hyper | 400 | 425 |
| Master | 500 | 525 |
| Grand Master | 600 |
Observação: As dificuldades Hyper, Master e Grand Master possuem o sistema de Held Enhancement, que será explicado e definido abaixo.
Esse sistema concede bônus importantes para jogadores que estiverem utilizando determinadas categorias de Held. O sistema é baseado no Held Item X equipado no Pokémon que o jogador estiver utilizando. Se o jogador estiver utilizando um Pokémon com o Held Item X determinado pela dificuldade, receberá os bônus equivalentes.
![]() Hyper: caso o jogador esteja utilizando Held de Tier 6 ou maior, causará 35% mais dano e receberá 35% menos dano dos inimigos.
Hyper: caso o jogador esteja utilizando Held de Tier 6 ou maior, causará 35% mais dano e receberá 35% menos dano dos inimigos.
![]() Master: caso o jogador esteja utilizando Held de Tier 7 ou maior, causará 35% mais dano e receberá 35% menos dano dos inimigos.
Master: caso o jogador esteja utilizando Held de Tier 7 ou maior, causará 35% mais dano e receberá 35% menos dano dos inimigos.
![]() Grand Master: caso o jogador esteja utilizando Held de Tier 8, causará 35% mais dano e receberá 35% menos dano dos inimigos.
Grand Master: caso o jogador esteja utilizando Held de Tier 8, causará 35% mais dano e receberá 35% menos dano dos inimigos.
Observações:
A Dorabelle cria girassóis que causam dano frontal.
A Dorabelle causa dano ao adversário e se cura com base no dano causado.
A Dorabelle causa dano Target ao adversário.
Dorabelle carrega o ataque e o dispara para frente. O tempo de carregamento é reduzido, dependendo da dificuldade.
A Dorabelle lança uma planta que causa dano em área durante certo tempo.
A Dorabelle causa dano ao adversário e se cura com base no dano causado.
A Dorabelle lança ataques progressivos em direção ao SQM atual do adversário.
A Dorabelle lança um ataque frontal, sendo possível acertar o mesmo usuário mais de uma vez.
A Dorabelle causa dano Target ao adversário.
A Dorabelle lança ataques progressivos ao adversário. A área atingida causa dano ao adversário por alguns segundos.
A Dorabelle carrega um solar beam que gira ao redor dela algumas vezes.
A Dorabelle lança algumas sementes. Caso as sementes não sejam derrotadas a tempo, elas se tornarão Sunfloras e começarão a atacar o adversário.
| Item | Raridade | |
|---|---|---|
| Soul Shard Fragment | Comum | |
| Pile of Seeds | Comum | |
| Leaf Stone | Comum | |
| Jungle Box | Comum | |
| Giant Sunflower Petal | Raro | |
| Radio Tape Number 013 | Raro | |
| Item | Raridade | |
|---|---|---|
| Soul Shard Fragment | Comum | |
| Leaves | Comum | |
| Pile of Seeds | Comum | |
| Helicopter Leaves | Comum | |
| Leaf Stone | Comum | |
| Jungle Box | Comum | |
| Giant Sunflower Petal | Comum | |
| Radio Tape Number 013 | Raro | |
| Item | Raridade | |
|---|---|---|
| Soul Shard Fragment | Comum | |
| Leaves | Comum | |
| Pile of Seeds | Comum | |
| Helicopter Leaves | Comum | |
| Leaf Stone | Comum | |
| Jungle Box | Comum | |
| Giant Sunflower Petal | Comum | |
| Radio Tape Number 013 | Raro | |
| TM aleatório ou fragmento de Mega Stone de OFF-Tanker | Lendário | |
| TM OTDD aleatório | Lendário | |
| Item | Raridade | |
|---|---|---|
| Soul Shard Fragment | Comum | |
| Leaves | Comum | |
| Pile of Seeds | Comum | |
| Helicopter Leaves | Comum | |
| Leaf Stone | Comum | |
| Ancient Stone | Comum | |
| Jungle Box | Comum | |
| Giant Sunflower Petal | Comum | |
| Radio Tape Number 013 | Raro | |
| TM aleatório ou fragmento de Mega Stone de OFF-Tanker | Épico | |
| TM OTDD aleatório | Lendário | |
| Item | Raridade | |
|---|---|---|
| Pile of Seeds | Comum | |
| Leaves | Comum | |
| Leaf Stone | Raro | |
| Dorabelle Backpack | Lendário | |
| Avatar Card - Shiny Dorabelle | Lendário | |
| Shiny Dorabelle Guardian (Female) | Lendário | |
| Soul Core | Lendário | |