|
|
(102 revisões intermediárias por 2 usuários não estão sendo mostradas) |
Linha 1: |
Linha 1: |
| =Crafts= | | ===== WIP ===== |
| Nesse local está localizada a máquina para craft de Helds com os Fragmentos de cada Tier obtidos durante a Quest. Também é possível craftar ou utilizar a Workshop de essences elementares. Para ter acesso a essa sala, você deve entrar no Lab através do NPC Aiden pelo menos uma vez.
| |
|
| |
|
| <center> [[Arquivo:Sala_dos_work.png|500px|link=]] </center> | | <center>[[Arquivo:EstilistaG.gif|link=Profissões]]</center> |
|
| |
|
| <tabber> | | <!--T:71--> |
| |-|Held Itens=
| | O decorador é alguém que possui habilidades e conhecimentos especializados em design de interiores ou exteriores, com o objetivo de criar espaços esteticamente agradáveis. Além disso, também é capaz de criar Toys, Upgrades para Premier Ball e Camas que concedem bônus de captura, sorte e experiência. |
|
| |
|
| <center>
| | ===Tornando-se um Decorador=== <!--T:72--> |
| {| class="wikitable" width="100%" align="center"
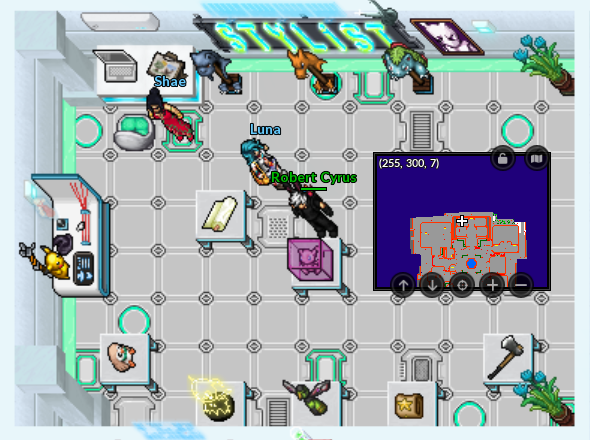
| | Para entrar nesta profissão, você deverá falar com a '''NPC NAME'''. Ela pode ser encontrada na area das especializações no subterrâneo de Cerulean da Nightmare World, junto com os mentores das outras especializações. |
| ! colspan="6" width="1%" | Craft dos Helds
| |
| |-
| |
| ! align="center" width="1%" | Imagem
| |
| ! align="center" width="1%" | Nome
| |
| ! align="center" colspan="4" | Requisitos | |
| |-
| |
| | align="center" width="1%"| [[Arquivo:Junto.png|link=Held Itens]]
| |
| | align="center" | '''Tier: 8'''
| |
| | align="center" width="12%" | 100 [[Arquivo:Sarkies_Advanced_Stone.png|link=Secret Lab]] <br/> Sarkies Advanced Stones
| |
| | align="center" width="10%" colspan="2" |30 [[Arquivo:NW_unusual_ore.png|Nightmare unusual ore|link=Secret Lab]] <br/> Nightmare Unusual Ore
| |
| | align="center" width="10%"|250 [[Arquivo:NW_ore.png|Nightmare Ore|link=Secret Lab]] <br/> Nightmare Ore
| |
| |-
| |
| | align="center" width="1%"| [[Arquivo:X-Upgrade-Tier-8.gif|link=Secret Lab]]
| |
| | align="center" | '''X-Upgrade (Tier: 8)'''
| |
| | align="center" width="12%"|100 [[Arquivo:Frag_tier8.png|Technological Crystal (Tier: 8)|link=Secret Lab]] <br/> Technological Crystal (Tier: 8)
| |
| | align="center" width="10%" |20 [[Arquivo:NW_unusual_ore.png|Nightmare unusual ore|link=Secret Lab]] <br/> Nightmare Unusual Ore
| |
| | align="center" width="10%"|48 [[Arquivo:NW_ore.png|Nightmare Ore|link=Secret Lab]] <br/> Nightmare Ore
| |
| | align="center" width="10%"|400 [[Arquivo:Compressed_Nightmare_Gems.png|Compressed Nightmare Gems|link=Secret Lab]] <br/> Compressed Nightmare Gem
| |
| |-
| |
| | align="center" width="1%"| [[Arquivo:X-upgrade-tier-7.gif|link=Secret Lab]]
| |
| | align="center" | '''X-Upgrade (Tier: 7)'''
| |
| | align="center" width="12%"|100 [[Arquivo:Frag_tier_7.png|Technological Crystal (Tier: 7)|link=Secret Lab]] <br/> Technological Crystal (Tier: 7)
| |
| | align="center" width="10%" |20 [[Arquivo:NW_unusual_ore.png|Nightmare unusual ore|link=Secret Lab]] <br/> Nightmare Unusual Ore
| |
| | align="center" width="10%"|48 [[Arquivo:NW_ore.png|Nightmare Ore|link=Secret Lab]] <br/> Nightmare Ore
| |
| | align="center" width="10%"|200 [[Arquivo:Compressed_Nightmare_Gems.png|Compressed Nightmare Gems|link=Secret Lab]] <br/> Compressed Nightmare Gem
| |
| |-
| |
| | align="center" width="1%"| [[Arquivo:X-upgrade-tier-6.gif|link=Secret Lab]]
| |
| | align="center" | '''X-Upgrade (Tier: 6)'''
| |
| | align="center" width="12%"|100 [[Arquivo:Frag_tier_6.png|Technological Crystal (Tier: 6)|link=Secret Lab]] <br/> Technological Crystal (Tier: 6)
| |
| | align="center" width="10%" |5 [[Arquivo:NW_unusual_ore.png|Nightmare unusual ore|link=Secret Lab]] <br/> Nightmare Unusual Ore
| |
| | align="center" width="10%"|12 [[Arquivo:NW_ore.png|Nightmare Ore|link=Secret Lab]] <br/> Nightmare Ore
| |
| | align="center" width="10%"|100 [[Arquivo:Compressed_Nightmare_Gems.png|Compressed Nightmare Gems|link=Secret Lab]] <br/> Compressed Nightmare Gem
| |
| |-
| |
| | align="center" width="1%"| [[Arquivo:Held5_3.png|link=Held Itens]]<br/>[[Arquivo:Held5_lista.png|link=Held Itens]]<br/>[[Arquivo:Lista_held5.png|link=Held Itens]]<br/>[[Arquivo:Ultima_t5.png|link=Held Itens]]
| |
| | align="center" | '''Tier: 5'''
| |
| | align="center" width="12%"|100 [[Arquivo:Frag_tier_5.png|Technological Crystal (Tier: 5)|link=Secret Lab]] <br/> Technological Crystal (Tier: 5)
| |
| | align="center" width="10%" |3 [[Arquivo:NW_unusual_ore.png|Nightmare unusual ore|link=Secret Lab]] <br/> Nightmare Unusual Ore
| |
| | align="center" width="10%"|8 [[Arquivo:NW_ore.png|Nightmare Ore|link=Secret Lab]] <br/> Nightmare Ore
| |
| | align="center" width="10%"|50 [[Arquivo:Compressed_Nightmare_Gems.png|Compressed Nightmare Gems|link=Secret Lab]] <br/> Compressed Nightmare Gem
| |
| |-
| |
| | align="center" width="1%"| [[Arquivo:Held4_lista.png|link=Held Itens]]<br/>[[Arquivo:Held4..png|link=Held Itens]]<br/>[[Arquivo:Lista4_3.png|link=Held Itens]]
| |
| | align="center" | '''Tier: 4'''
| |
| | align="center" width="10%" colspan="2" |100 [[Arquivo:Frag_tier_4.png|Technological Crystal (Tier:4)|link=Secret Lab]] <br/> Technological Crystal (Tier: 4)
| |
| | align="center" width="12%" colspan="2"|20 [[Arquivo:Compressed_Nightmare_Gems.png|Compressed Nightmare Gems|link=Secret Lab]] <br/> Compressed Nightmare Gem
| |
| |-
| |
| | align="center" width="1%"| [[Arquivo:Ghost.png|link=Secret Lab]]
| |
| | align="center" | '''Y-Ghost (Tier: 3)'''
| |
| | align="center" width="12%" colspan="2"|100 [[Arquivo:Frag_tier_3.png|Technological Crystal (Tier:3)|link=Secret Lab]] <br/> Technological Crystal (Tier: 3)
| |
| | align="center" width="10%" colspan="2"|10 [[Arquivo:Compressed_Nightmare_Gems.png|Compressed Nightmare Gems|link=Secret Lab]] <br/> Compressed Nightmare Gem
| |
| |-
| |
| |}
| |
| </center>
| |
| * Embora não ganhe Fragmentos Tier: 8 durante o Secret Lab, os helds podem ser craftados no mesmo Workshop.
| |
| |-|Costumes=
| |
| {| class="wikitable" width="100%" style="text-align: center;"
| |
| ! colspan="14" width="1%" | Craft dos Costumes
| |
| |-
| |
| ! width="1%" | Imagem
| |
| ! width="10%"| Nome
| |
| ! width="50%" colspan="12"| Requisitos
| |
| |-
| |
| |[[file:Mecha_bighorn.png|link=]]
| |
| |'''Mecha: BIG HORN'''
| |
| | [[Arquivo:Recipe.png|link=]] Mecha Costume (Recipe) <br>
| |
| [[Arquivo:Cyborg_Cell_(Normal).png|Cyborg Cell (Normal)|link=Secret Lab]] 5 Cyborg Cell (Normal) <br>
| |
| [[Arquivo:NW_ore.png|link=]] 5 Nightmare Ores <br>
| |
| [[Arquivo:Compressed_Nightmare_Gem.png|link=]] 5 Compressed Nightmare Gems<br>
| |
| [[Arquivo:Metal_Scraps.png|link=]] 5 Metal Scraps
| |
| |-
| |
| |[[file:Mecha_crystalsnake.png|link=]]
| |
| |'''Mecha: CRYSTAL SNAKE'''
| |
| | [[Arquivo:Recipe.png|link=]] Mecha Costume (Recipe) <br>
| |
| [[Arquivo:Cyborg_Cell_(Crystal)..png|Cyborg Cell (Crystal)|link=Secret Lab]] 5 Cyborg Cell (Crystal) <br>
| |
| [[Arquivo:NW_ore.png|link=]] 5 Nightmare Ores <br>
| |
| [[Arquivo:Compressed_Nightmare_Gem.png|link=]] 5 Compressed Nightmare Gems<br>
| |
| [[Arquivo:Metal_Scraps.png|link=]] 5 Metal Scraps
| |
| |-
| |
| |[[file:Mecha_drill.png|link=]]
| |
| |'''Mecha: DRILL'''
| |
| | [[Arquivo:Recipe.png|link=]] Mecha Costume (Recipe) <br>
| |
| [[Arquivo:Cyborg_Cell_(Earth).png|Cyborg Cell (Earth)|link=Secret Lab]] 5 Cyborg Cell (Earth) <br>
| |
| [[Arquivo:NW_ore.png|link=]] 5 Nightmare Ores <br>
| |
| [[Arquivo:Compressed_Nightmare_Gem.png|link=]] 5 Compressed Nightmare Gems<br>
| |
| [[Arquivo:Metal_Scraps.png|link=]] 5 Metal Scraps
| |
| |-
| |
| |[[file:Mecha_fossil.png|link=]]
| |
| |'''Mecha: FOSSIL'''
| |
| | [[Arquivo:Recipe.png|link=]] Mecha Costume (Recipe) <br>
| |
| [[Arquivo:Cell_rock.png|Cyborg Cell (Rock)|link=Secret Lab]] 5 Cyborg Cell (Rock) <br>
| |
| [[Arquivo:NW_ore.png|link=]] 5 Nightmare Ores <br>
| |
| [[Arquivo:Compressed_Nightmare_Gem.png|link=]] 5 Compressed Nightmare Gems<br>
| |
| [[Arquivo:Metal_Scraps.png|link=]] 5 Metal Scraps
| |
| |-
| |
| |[[file:Mecha_fox.png|link=]]
| |
| |'''Mecha: FOX'''
| |
| | [[Arquivo:Recipe.png|link=]] Mecha Costume (Recipe) <br>
| |
| [[Arquivo:Cyborg_Cell_(Fire)..png|Cyborg Cell (Fire)|link=Secret Lab]] 5 Cyborg Cell (Fire) <br>
| |
| [[Arquivo:NW_ore.png|link=]] 5 Nightmare Ores <br>
| |
| [[Arquivo:Compressed_Nightmare_Gem.png|link=]] 5 Compressed Nightmare Gems<br>
| |
| [[Arquivo:Metal_Scraps.png|link=]] 5 Metal Scraps
| |
| |-
| |
| |[[file:Mecha_frog.png|link=]]
| |
| |'''Mecha: FROG'''
| |
| | [[Arquivo:Recipe.png|link=]] Mecha Costume (Recipe) <br>
| |
| [[Arquivo:Cyborg_Cell_(Water)..png|Cyborg Cell (Water)|link=Secret Lab]] 5 Cyborg Cell (Water) <br>
| |
| [[Arquivo:NW_ore.png|link=]] 5 Nightmare Ores <br>
| |
| [[Arquivo:Compressed_Nightmare_Gem.png|link=]] 5 Compressed Nightmare Gems<br>
| |
| [[Arquivo:Metal_Scraps.png|link=]] 5 Metal Scraps
| |
| |-
| |
| |[[file:Mecha_longleg.png|link=]]
| |
| |'''Mecha: LONG LEG'''
| |
| | [[Arquivo:Recipe.png|link=]] Mecha Costume (Recipe) <br>
| |
| [[Arquivo:Cyborg_Cell_(Bug)..png|Cyborg Cell (Bug)|link=Secret Lab]] 5 Cyborg Cell (Bug) <br>
| |
| [[Arquivo:NW_ore.png|link=]] 5 Nightmare Ores <br>
| |
| [[Arquivo:Compressed_Nightmare_Gem.png|link=]] 5 Compressed Nightmare Gems<br>
| |
| [[Arquivo:Metal_Scraps.png|link=]] 5 Metal Scraps
| |
| |-
| |
| |[[file:Mecha_magnet.png|link=]]
| |
| |'''Mecha: MAGNET'''
| |
| | [[Arquivo:Recipe.png|link=]] Mecha Costume (Recipe) <br>
| |
| [[Arquivo:Cyborg_Cell_(Electric)..png|Cyborg Cell (Electric)|link=Secret Lab]] 5 Cyborg Cell (Electric) <br>
| |
| [[Arquivo:NW_ore.png|link=]] 5 Nightmare Ores <br>
| |
| [[Arquivo:Compressed_Nightmare_Gem.png|link=]] 5 Compressed Nightmare Gems<br>
| |
| [[Arquivo:Metal_Scraps.png|link=]] 5 Metal Scraps
| |
| |-
| |
| |[[file:Mecha_moon.png|link=]]
| |
| |'''Mecha: MOON'''
| |
| | [[Arquivo:Recipe.png|link=]] Mecha Costume (Recipe) <br>
| |
| [[Arquivo:Cyborg_Cell_(Dark).png|Cyborg Cell (Dark)|link=Secret Lab]] 5 Cyborg Cell (Dark) <br>
| |
| [[Arquivo:NW_ore.png|link=]] 5 Nightmare Ores <br>
| |
| [[Arquivo:Compressed_Nightmare_Gem.png|link=]] 5 Compressed Nightmare Gems<br>
| |
| [[Arquivo:Metal_Scraps.png|link=]] 5 Metal Scraps
| |
| |-
| |
| |[[file:Mecha_sun.png|link=]]
| |
| |'''Mecha: SUN'''
| |
| | [[Arquivo:Recipe.png|link=]] Mecha Costume (Recipe) <br>
| |
| [[Arquivo:Cyborg_Cell_(Psychic).png|Cyborg Cell (Psychic)|link=Secret Lab]] 5 Cyborg Cell (Psychic) <br>
| |
| [[Arquivo:NW_ore.png|link=]] 5 Nightmare Ores <br>
| |
| [[Arquivo:Compressed_Nightmare_Gem.png|link=]] 5 Compressed Nightmare Gems<br>
| |
| [[Arquivo:Metal_Scraps.png|link=]] 5 Metal Scraps
| |
| |-
| |
| |[[file:Mecha_triplebird.png|link=]]
| |
| |'''Mecha: TRIPLE BIRD'''
| |
| | [[Arquivo:Recipe.png|link=]] Mecha Costume (Recipe) <br>
| |
| [[Arquivo:Cyborg_Cell_(Flying)..png|Cyborg Cell (Flying)|link=Secret Lab]] 5 Cyborg Cell (Flying) <br>
| |
| [[Arquivo:NW_ore.png|link=]] 5 Nightmare Ores <br>
| |
| [[Arquivo:Compressed_Nightmare_Gem.png|link=]] 5 Compressed Nightmare Gems<br>
| |
| [[Arquivo:Metal_Scraps.png|link=]] 5 Metal Scraps
| |
| |-
| |
| |}
| |
| |-|Elemental Workshop=
| |
| <center>
| |
| {| class="wikitable" width="100%" style="text-align: center;"
| |
| ! colspan="14" width="1%" | Craft do Elemental Workshop
| |
| |-
| |
| ! width="1%" | Imagem
| |
| ! width="10%"| Nome
| |
| ! width="50%" colspan="12"| Requisitos
| |
| |-
| |
| | width="1%"| [[Arquivo:Workshop.png|100px|link=Secret Lab]]
| |
| | '''Elemental Workshop'''
| |
| | colspan="12"|20 [[Arquivo:Diamond.png|link=]] Diamond
| |
| |-
| |
| | width="1%"| [[Arquivo:Neutral dvc.png|link=Secret Lab]]|| align="center" | '''Neutralizer Device*'''
| |
| | width="5%"|2 [[Arquivo:Azure_Shard.png|link=Drop de Itens]] <br/> Azure Shard
| |
| | width="5%"|2 [[Arquivo:Cerise_Shard.png|link=Drop de Itens]] <br/> Cerise Shard
| |
| | width="5%"|2 [[Arquivo:Damson_Shard.png|link=Drop de Itens]] <br/> Damson Shard
| |
| | width="5%"|2 [[Arquivo:Harlequin_Shard.png|link=Drop de Itens]] <br/> Harlequin Shard
| |
| | width="5%"|2 [[Arquivo:Indigo_Shard.png|link=Drop de Itens]] <br/> Indigo Shard
| |
| | width="5%"|2 [[Arquivo:Kermes_Shard.png|link=Drop de Itens]] <br/> Kermes Shard
| |
| | width="5%"|2 [[Arquivo:Scarlet_Shard.png|link=Drop de Itens]] <br/> Scarlet Shard
| |
| | width="5%"|2 [[Arquivo:Shell_Shard.png|link=Drop de Itens]] <br/> Shell Shard
| |
| | width="5%"|2 [[Arquivo:Slate_Shard.png|link=Drop de Itens]] <br/> Slate Shard
| |
| | width="5%"|2 [[Arquivo:Sunflower_Shard.png|link=Drop de Itens]] <br/> Sunflower Shard
| |
| | width="5%"|75 [[Arquivo:Ncs-transparent.gif.gif|30px|link=Secret Lab]] <br/> Nightmare Corruption Stone
| |
| | width="5%"|4 [[Arquivo:NW_unusual_ore.png|link=Secret Lab]] <br/> Nightmare Unusual Ores
| |
| |-
| |
| | [[Arquivo:Gardeessence.png|link=Drop de Itens]]
| |
| | '''Gardestrike Essence'''
| |
| | colspan="12"|2 [[Arquivo:Neutral_essence.png|link=Secret Lab]] Neutral Essence
| |
| |-
| |
| | [[Arquivo:Ironessence.png|link=Drop de Itens]]
| |
| | '''Ironhard Essence'''
| |
| | colspan="12"|2 [[Arquivo:Neutral_essence.png|link=Secret Lab]] Neutral Essence
| |
| |-
| |
| | [[Arquivo:Maleficessence.png|link=Drop de Itens]]
| |
| | '''Malefic Essence'''
| |
| | colspan="12"|2 [[Arquivo:Neutral_essence.png|link=Secret Lab]] Neutral Essence
| |
| |-
| |
| | [[Arquivo:Natuessence.png|link=Drop de Itens]]
| |
| | '''Naturia Essence'''
| |
| | colspan="12"|2 [[Arquivo:Neutral_essence.png|link=Secret Lab]] Neutral Essence
| |
| |-
| |
| | [[Arquivo:Oreessence.png|link=Drop de Itens]]
| |
| | '''Orebound Essence'''
| |
| | colspan="12"|2 [[Arquivo:Neutral_essence.png|link=Secret Lab]] Neutral Essence
| |
| |-
| |
| | [[Arquivo:Psyessence.png|link=Drop de Itens]]
| |
| | '''Psycraft Essence'''
| |
| | colspan="12"|2 [[Arquivo:Neutral_essence.png|link=Secret Lab]] Neutral Essence
| |
| |-
| |
| | [[Arquivo:Boltessence.png|link=Drop de Itens]]
| |
| | '''Raibolt Essence'''
| |
| | colspan="12"|2 [[Arquivo:Neutral_essence.png|link=Secret Lab]] Neutral Essence
| |
| |-
| |
| | [[Arquivo:Seaessence.png|link=Drop de Itens]]
| |
| | '''Seavell Essence'''
| |
| | colspan="12"|2 [[Arquivo:Neutral_essence.png|link=Secret Lab]] Neutral Essence
| |
| |-
| |
| | [[Arquivo:Volcanicessence.png|link=Drop de Itens]]
| |
| | '''Volcanic Essence'''
| |
| | colspan="12"|2 [[Arquivo:Neutral_essence.png|link=Secret Lab]] Neutral Essence
| |
| |-
| |
| | [[Arquivo:Wingeon_essence.png|link=Drop de Itens]]
| |
| | '''Wingeon Essence'''
| |
| | colspan="12"|2 [[Arquivo:Neutral_essence.png|link=Secret Lab]] Neutral Essence
| |
| |-
| |
| |}
| |
| </center>
| |
| <br>
| |
| *'''Neutralizer Device''': Este dispositivo pode ser utilizado para neutralizar essences elementares em pequena escala.
| |
| </tabber>
| |
|
| |
|
| naluuu
| | <!--T:73--> |
| | <center>[[Arquivo:Estilista (TC).png|link=]]</center> |
|
| |
|
| | ===Primeiros passos=== <!--T:74--> |
|
| |
|
| <center>[[Arquivo:Banner_Cosmic_Quest.png|link=]]</center><br> | | <!--T:75--> |
| | O primeiro passo, assim como nas outras profissões, é comprar o Item de coleta de recursos, o [[Arquivo:Decoratordrawingbook.png|link=]] '''Decorator Drawing Book''' logo após se tornar um Decorador na '''NPC NAME'''. |
|
| |
|
| <p><font color="red">'''Nível Necessário:</font> 450+''' </p> | | <center>[[Arquivo:Rank_E_(Estilista).png|link=]]</center> |
|
| |
|
| <p><font color="red">'''Nível NW Necessário:</font> 45+''' </p>
| |
|
| |
|
| <p><font color="red">'''Recompensas:</font> 20KK EXP, 300K NW EXP, 100 Technological Crystal (Tier: 7), 30 Empty Premier Ball e Acesso aos novos T1H.<br> | | <table class="seeMore"> |
| | <tr> |
| | <td class="seeMore__image">[[Arquivo:Telekinetic-compass.gif|link=]]</td> |
| | <td> '''Veja mais: [[Introdução_às_Especializações|Introdução às Especializações]]'''</td> |
| | </tr> |
| | </table> |
| | <!--T:76--> |
|
| |
|
| <br>'''Caso encontre algum erro ou queira acrescentar alguma informação, entre em contato com [[Nossa Equipe|um dos membros da wiki.]]''' | | ===Coleta de recursos=== <!--T:77--> |
| <br />
| |
|
| |
|
| == Iniciando == | | <!--T:78--> |
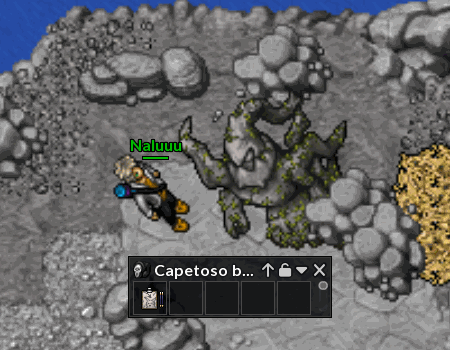
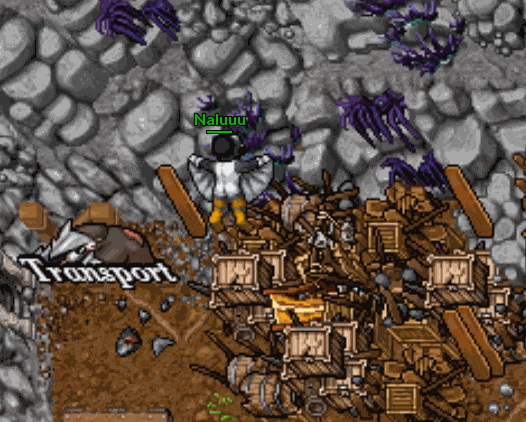
| | Diferentemente de Estilista e Designer, o decorador coleta recurso dos monumentos espalhados pelo mapa utilizando o [[Arquivo:Decoratordrawingbook.png|link=]] '''Decorator Drawing Book'''. Devido ao alto tempo de recarga para coletar recurso do mesmo monumento, o decorador aventura-se em diversas rotas para obter os seus recursos. |
| | *Decorator Drawing Book: Item utilizado para desenhar monumentos a fim de obter o recurso [[Arquivo:Drawing_Clipboard.png|link=]] '''Drawing Clipboard''', material utilizado na fabricação geral da Especialização. |
| | *Woodcutter's Axe: É um machado utilizado para cortar árvores e obter [[Arquivo:Purpleheart_Log.png|link=]] '''Purpleheart Logs''' (madeiras), que é utilizada na produção de itens como capsulas e câmeras. |
| | *High-Tech Device: É um dispositivo utilizado para converter [[Arquivo:Drawing_Clipboard.png|link=]] '''Drawing Clipboards''' no recurso padrão do Rank S utilizado pelas duas especializações, o [[Arquivo:Purpleheart_Log.png|link=]] '''Purpleheart Log'''. |
| | '''Dicas:''' |
| | *O jogador não precisa estar perto, nem no mesmo andar para poder coletar o recurso com o decorator drawing book.<br> |
|
| |
|
| Para iniciar a Nightmare Desert Quest, o jogador deverá ir até o '''NPC Tate''' em '''Lavender'''.
| | <!--T:79--> |
| | <center> |
| | [[Arquivo:Decoratordrawingbook use.gif|link=]] [[Arquivo:Woodcutteraxenw use.gif|link=]]</center><br> |
|
| |
|
| [[Arquivo:Banner_Cosmic_Quest.png|link=]]
| | ===Recurso exclusivo=== |
|
| |
|
| Ao conversar com o Tate ele pedirá os seguintes itens:
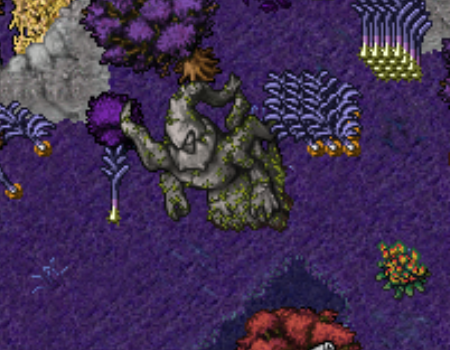
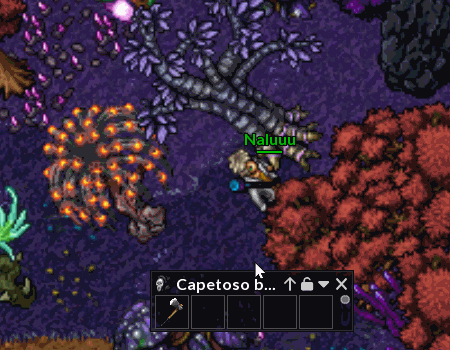
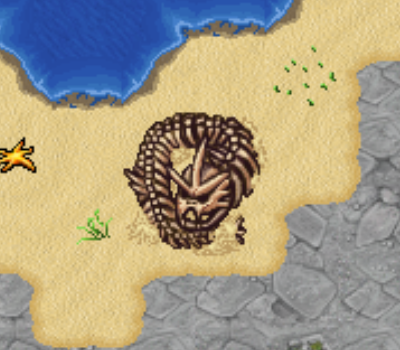
| | Os recursos exclusivos de decoradores são obtidos através de '''monumentos''' espalhados pelo mapa. Eles tem o tempo de recarga interno de 1 hora, esses que podem ser vistos na página abaixo: |
|
| |
|
| {| class="wikitable" style="text-align:center"
| | <center>'''Monumentos de decorador'''</center> |
| !colspan="2" |Item
| | <center>[[Arquivo:Monumento darkrai.png|link=]]</center><br> |
| !Quantidade
| |
| |-
| |
| |[[Arquivo:Big_Screw.png|link=]]
| |
| |Big Screw
| |
| |1.000
| |
| |-
| |
| |[[Arquivo:Compressed_Steel.png|link=]]
| |
| |Compressed Steel
| |
| |1.000
| |
| |-
| |
| |[[Arquivo:SolidWaterGem.png|link=]]
| |
| |Solid Water Gem
| |
| |1.000
| |
| |-
| |
| |[[Arquivo:PileOfSeeds.png|link=]]
| |
| |Pile of Seed
| |
| |1.000
| |
| |-
| |
| |[[Arquivo:CompressedStraw.png|link=]]
| |
| |Compressed Straw
| |
| |1.000
| |
| |-
| |
| |[[Arquivo:SolidIce.png|link=]]
| |
| |Solid Ice Cube
| |
| |1.000
| |
| |-
| |
| |[[Arquivo:Injection.png|link=]]
| |
| |Injection
| |
| |1.000
| |
| |-
| |
| |[[Arquivo:CompressedFire.gif|link=]]
| |
| |Compressed Fire
| |
| |1.000
| |
| |-
| |
| |} <br>
| |
|
| |
|
| == Encontrando a Liza == | | Monumentos |
| | <center><tabber> |
| | |-| Darkrai= |
| | [[Arquivo:Monumento darkrai.png|link=]] |
| | |-| Fossil= |
| | [[Arquivo:Monumento osso1.png|link=]] |
| | |-| Coffins= |
| | x |
| | x |
| | x |
| | |-| Earth= |
| | x |
| | x |
| | x |
| | |-| Ice= |
| | x |
| | x |
| | x |
| | |-| Totems= |
| | x |
| | x |
| | x |
| | |-| Gears= |
| | x |
| | x |
| | x |
| | |-| Hypno= |
| | x |
| | x |
| | x |
| | |-| Charizard= |
| | x |
| | x |
| | x |
| | |-| Gong= |
| | x |
| | x |
| | x |
| | |-| Fountain= |
| | x |
| | x |
| | x |
| | |-| Sphinx= |
| | x |
| | x |
| | x |
| | |-| Machoke= |
| | x |
| | x |
| | x |
| | |-| Elekid= |
| | x |
| | x |
| | x |
| | |-| Pinsir= |
| | x |
| | x |
| | x |
| | |-| Glalie= |
| | x |
| | x |
| | x |
| | |-| Strange eyes= |
| | x |
| | x |
| | x |
| | </tabber></center> |
|
| |
|
| Tate pedirá para o jogador ir até a '''NPC Liza''', em '''Viridian'''.
| | === Recurso base === |
| | Com as [[Arquivo:Purpleheart_Log.png|link=]], os Decoradores poderão fazer os [[Arquivo:Nightmare_XP_Totem.png|50px|link=]] '''Nightmare XP Totem''' que aumentam a experiência recebida ao derrotar Pokémon, com uma grande área de efeito. Essa totem concederá um bônus de 30% de experiência. |
|
| |
|
| [[Arquivo:Banner_Cosmic_Quest.png|link=]] | | '''Dicas:''' |
| | *Os Banners possuem um grande alcance, mas eles devem ser posicionados com inteligência, de preferência em algum lugar que abranja a maior parte da rota que o jogador pretenda fazer;<br> |
| | *Os Banners podem se acumular com os bônus de EXP da [[Arquivo:Simple_Bed.png|link=]] '''simple bed''' equipada com o [[Arquivo:Charmander_Toolkit.png|link=]] '''Charmander Toolkit''' e também com o bônus do calendário, possibilitando ao jogador fazer uma grande quantidade de experiência em pouco tempo. |
|
| |
|
| Liza irá pedir ajuda para que encontre o [[Arquivo:Old diary desert nightmare quest.png|link=]] '''Old Diary''', ele poderá ser encontrado no bau da imagem abaixo:
| | <center class="center-tab"><tabber> |
| | |-|Nightmare XP Totem= |
| | Com as [[Arquivo:Purpleheart_Log.png|link=]], os Decoradores poderão fazer os [[Arquivo:Nightmare_XP_Totem.png|50px|link=]] '''Nightmare XP Totem''', totens que aumentam a experiência recebida ao derrotar Pokémon, com uma grande área de efeito. Essa totem concederá um bônus de 30% de experiência. |
| | <center>[[Arquivo:Snow.png|400px|link=]]<center><br> |
| | |-|Pokéball Capsule= |
| | Os decoradores, assim como os designers, também podem utilizar do [[File:Purpleheart_Log.png|link=]] '''Purpleheart Log''' para criar capsulas para as pokébolas. |
| | <center>[[Arquivo:Sand.png|400px|link=]]</center> |
|
| |
|
| [[Arquivo:Baudesertquestliza.png|link=]]]
| | <table class="seeMore"> |
| | | <tr> |
| == O Laboratório == | | <td class="seeMore__image">[[Arquivo:Telekinetic-compass.gif|link=]]</td> |
| | | <td> '''Veja mais: [[Ball_Capsule|Capsulas de Pokébola]]'''</td> |
| A sua próxima tarefa da Liza será encontrar o '''NPC Ferb''' que fica na resistência de '''Cinnabar'''.
| | </tr> |
| | | </table> |
| [[Arquivo:Npcferb_nightmaredesertquest.png|link=]] | | |-|Ball Camera= |
| | | Os decoradores, assim como os designers, também podem utilizar do Purpleheart Log.png Purpleheart Log para criar cameras. |
| Ferb pedirá ajuda para que você localize o antigo laboratório. A entrada do laboratório fica escondida atrás de uma arvore, como na imagem.<br><br>
| | <center>[[Arquivo:Sand.png|400px|link=]]</center> |
| Clique no sqm da frente do personagem para entrar<br>
| | <table class="seeMore"> |
| [[arquivo:entrada_laboratorio_nightmaredesertquest.gif|link=]]
| | <tr> |
| | | <td class="seeMore__image">[[Arquivo:Telekinetic-compass.gif|link=]]</td> |
| Ao descer no laboratório o jogador ganhará uma '''Old Lab Key''' que deverá ser usado na porta como na imagem:
| | <td> '''Veja mais: [[C%C3%A2meras#TV_C%C3%A2meras_de_Profiss%C3%B5es|Cameras de Profissões]]'''</td> |
| | | </tr> |
| [[Arquivo:Entrada oldlabkey nightmaredesertquest.gif|link=]] | | </table> |
| | | </tabber></center> |
| Siga ao norte e derrote os [[Arquivo:063-DarkAbra.png|link=]] '''Dark Abra''' e clique no portal no fundo da sala.
| |
| | |
| [[Arquivo:Portal laboratorio nightmaredesertquest.gif|link=]]
| |
| | |
| O portal irá desaparecer e irá aparecer a mensagem: '''O portal sumiu de repente, antes mesmo de você conseguir atravessá-lo'''
| |
| | |
| Volte até a sala anterior e clique no [[Arquivo:Ectoplasmcontainer.png|link=]] '''Ectoplasm Container''' que fica em cima da mesa.
| |
| | |
| [[Arquivo:Ectoplasm container nightmaredesertquest.png|link=]] | |
| | |
| Entregue o [[Arquivo:338-Solrock.png|link=]] Old Lab Key e o [[Arquivo:Ectoplasmcontainer.png|link=]] Ectoplasm Container à '''NPC Liza''' que agora está no segundo andar do Centro Pokémon da Resistência de Pewter.
| |
| | |
| [[Arquivo:Lizapewter nightmaredesertquest.png|link=]] | |
| | |
| ==Nightmare Desert==
| |
| | |
| Liza pedirá para que o jogador vá até '''Lavender''' e fale com o '''NPC Tate''', ao chegar, Tate dirá que você está atrasado e todos os outros pesquisadores já foram pra Darklight Island, mas a '''NPC Renata''' poderá te levar até lá, encontre-se com ela acima do Centro Pokémon de '''Lavender'''.
| |
| | |
| Ao falar com a Renata, ela irá oferecer um teleporte pra '''Darklight Island'''.
| |
| | |
| [[Arquivo:Npcrenata nightmaredesertquest.png|link=]]
| |
| | |
| Siga até o norte da sala e fale com a '''NPC Liza''', ela irá explicar que o portal logo a frente é mais estável que o de Viridian mas não é o ideal pra atravessar, que eles não sabem onde ele leva, mas que parece ser a pirâmide antiga dos Dark Abra.
| |
|
| |
|
| [[Arquivo:tateandliza_nightmaredesertquest.png|link=]]
| | ===Exclusividade=== <!--T:85--> |
|
| |
|
| Agora fale com o '''NPC Sebastian'''.
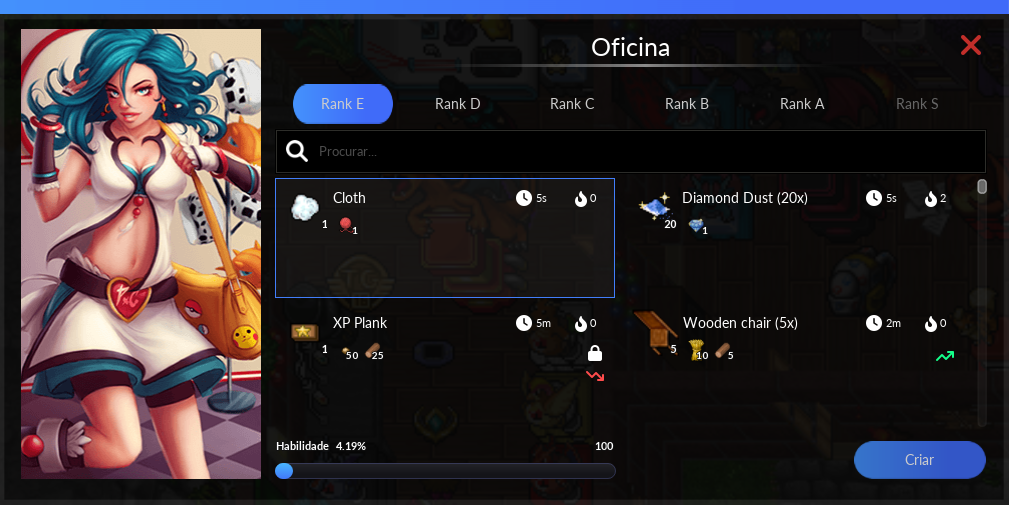
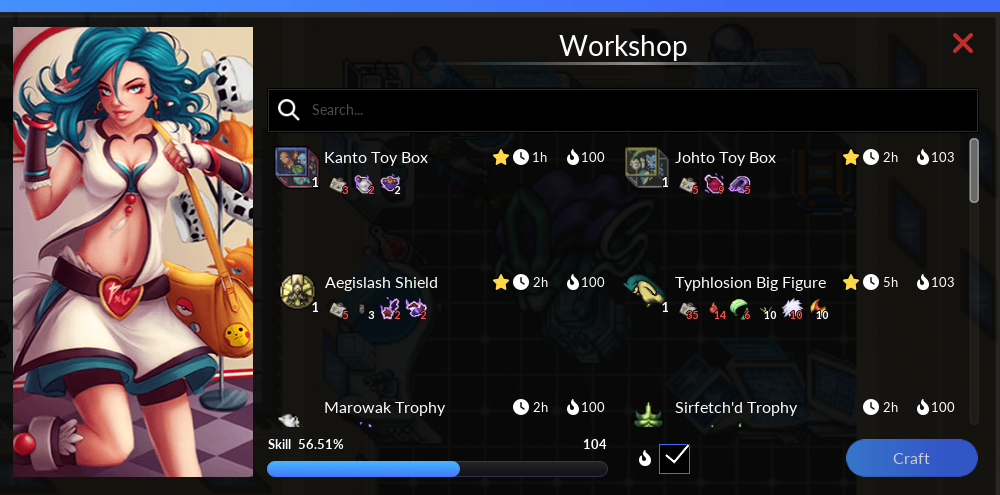
| | Os Decoradores são capazes de utilizar o '''Decorator Workshop''' [[Arquivo:Decorator_Workshop.png|25px|link=]], uma máquina exclusiva onde apenas os decoradores podem criar figures, toy box de Kanto e Johto e outras decorações. |
|
| |
|
| [[Arquivo:Sebastian nightmaredesertquest.png|link=]]
| |
|
| |
|
| Ele irá pedir os seguintes itens
| | <center>[[Arquivo:Decorator workshop aberto.png|link=]]</center><br> |
|
| |
|
| {| class="wikitable" style="text-align:center"
| | Apesar de não poder criar, o Decorador também pode utilizar o [[Arquivo:Wingsuit.png|25px|link=]] '''Wingsuit'''. Uma roupa incrivelmente dificil de confeccionar que permite que o jogador use as estações de voo para qualquer cidade da Nightmare World. |
| !colspan="2" |Item
| |
| !Quantidade
| |
| |-
| |
| |[[Arquivo:BigEnchantedGem.gif|link=]]
| |
| | Big Enchanted Gem
| |
| |1.000
| |
| |- | |
| |[[Arquivo:Solid Dark Gem.gif|link=]]
| |
| |Solid Dark Gem
| |
| |1.000
| |
| |-
| |
| |[[Arquivo:CompressedGhostEssence.gif|link=]]
| |
| |Compressed Ghost Essence
| |
| |1.000
| |
| |-
| |
| |} <br>
| |
|
| |
|
| Ao entregar, o jogador receberá um [[Arquivo:338-Solrock.png|link=]] '''Ectoplasm'''.
| | <center>[[Arquivo:Wingsuit flying.gif|link=]]</center><br> |
| | |
| Observação: caso o jogador morra, perca no tempo ou o seu NPC escolhido seja derrotado precisará entregar esses itens novamente para conseguir mais um [[Arquivo:338-Solrock.png|link=]] '''Ectoplasm''' com o '''Sebastian'''.
| |
| | |
| Fale com o '''NPC Tate''', ele irá pedir para que você escolha um dos seus ajudantes para começar a parte final da Quest.
| |
| | |
| <tabber>
| |
| |-| Blanca=
| |
| [[Arquivo:Blanca nightmaredesertquest.png|link=]]
| |
| | |
| *'''Blanca''' utilizará um [[Arquivo:S.klinklang.png|link=]] '''Shiny Klinklang'''.
| |
| | |
| |-| Joel=
| |
| [[Arquivo:Joel nightmaredesertquest.png|link=]]
| |
| | |
| *'''Joel''' utilizará um [[Arquivo:594-Alomomola.png|link=]] '''Alomomola'''.
| |
| </tabber>
| |
| '''Observação: Caso o Pokémon do ajudante escolhido seja derrotado, o jogador perderá a Quest.'''
| |
| | |
| Ao escolher o ajudante, '''clique no portal''' e comece a parte final da quest.
| |
| | |
| === Quebrando a barreira ===
| |
| | |
| O jogador deve derrotar '''20''' '''Dark Abra''', '''Kadabra''' e '''Alakazam''' em seguida utilizar o item [[Arquivo:Ectoplasmcontainer.png|link=]] '''Ectoplasm Container''' neles.
| |
| | |
| [[Arquivo:Coletandoectoplasma nightmaredesertquest.gif|link=]]
| |
| | |
| Ao juntar [[Arquivo:594-Alomomola.png|link=]] '''20 Dark Essence''', deve-se clicar na [[Arquivo:Turret nightmaredesertquest.png|link=]] '''turret''' no fim do percurso.
| |
| | |
| [[arquivo:usandoturret_nightmaredesertquest.gif|link=]]
| |
| | |
| Após quebrar a barreira, o jogador deve derrotar '''todos''' os Pokémon e depois clicar na corda para prosseguir para a próxima parte.
| |
| | |
| [[Arquivo:Corda nightmaredesertquest.png|link=]]
| |
| | |
| === Parte final ===
| |
| | |
| Ao subir, o jogador deve seguir com seu Pokémon até uma das extremidades do mapa. Existem quatro [[Arquivo:nightmare crystal desert quest.gif|45px|link=]] Nightmare Crystals em cada canto e um [[Arquivo:Black nightmare crystal desert quest.gif|45px|link=]] Black Nightmare Crystal no centro.
| |
| | |
| *'''É necessário destruir todos os cristais das extremidades para que seja possível destruir o central.'''
| |
| | |
| O '''Nightmare Crystal''' irá invocar [[Arquivo:491-Darkrai.png|link=]] '''Darkrai Minion''', alguns dos '''novos [[arquivo:Allt1hdq.gif|link=]] T1H''' e '''Dark Abra''', '''Kadabra''' e '''Alakazam'''.
| |
| <center> | |
| {| class="wikitable bg-none border-0" style="text-align:center"
| |
| |-
| |
| ! <b>1/5</b> !! <b>2/5</b>
| |
| |-
| |
| | [[Arquivo:Northwestcrystal desertnightmarequest.png|link=]] || [[Arquivo:Northeastcrystal nightmaredesertquest.png|link=]]
| |
| |-
| |
| ! <b>3/5</b> !! <b>4/5</b>
| |
| |-
| |
| | [[Arquivo:Southwestcrystal nightmaredesertquest.png|link=]] || [[arquivo:southeastcrystal_nightmaredesertquest.png|link=]]
| |
| |-
| |
| ! colspan="2" | 5/5
| |
| |-
| |
| | colspan="2" | [[Arquivo:Centercrystal nightmaredesertquest.png|link=]]
| |
| |}
| |
| </center>
| |
| | |
| '''Observações:'''<br>
| |
| *É importante derrotar todos os Pokémon T1H que aparecem no cristal. Caso o jogador apenas dê lost nos T1H, ao chegar na metade da vida do Cristal no meio da sala, os T1H serão invocados.
| |
| *Não é necessario derrotar os '''Dark Abra''', '''Kadabra''' e '''Alakazam''' que spawnam do Nightmare Crystal. O jogador pode dar lost e prosseguir a matar o Cristal sem risco.
| |
| | |
| === Desert Island ===
| |
| | |
| Ao terminar de destruir o cristal negro, o jogador será teleportado para o centro da Desert Island onde terá acesso aos novos T1H.
| |
| | |
| [[Arquivo:Tatenightmaredesert.png|link=]]
| |
| | |
| Fale com o '''NPC Tate''' para receber sua recompensa.
| |
| | |
| <center>
| |
| {| class="wikitable" width="65%"
| |
| |- align="center"
| |
| !align="center" width="1%" style="background-color: #4682B4" |20KK EXP
| |
| !align="center" width="1%" style="background-color: #4682B4" |300K NW EXP
| |
| !align="center" width="1%" style="background-color: #4682B4" |100 Technological Crystal (Tier: 7)
| |
| !align="center" width="1%" style="background-color: #4682B4" |30 Empty Premier Balls
| |
| !align="center" width="1%" style="background-color: #4682B4" |Acesso aos novos T1H
| |
| |- align="center"
| |
| | [[Arquivo:Exp_icon.png|30px|link=]]
| |
| | [[Arquivo:Exp_icon_nw.png|30px|link=]]
| |
| | [[Arquivo:Frag_tier_7.png|link=]]
| |
| | [[Arquivo:Premier-ball%281%29.png|link=]]
| |
| | [[Arquivo:Allt1hdq.gif|link=]]
| |
| |}
| |
| </center> | |
| | |
| Fale com o '''NPC Nyx Trainee''' para que ele marque a localização da entrada do respawn de cada T1H no seu mapa.<br>
| |
| | |
| [[Arquivo:Nyxtraineemap.png|link=]]
| |
| | |
| <br> | |
| Para saber mais sobre a '''Daily''', '''NPCs''' e '''Tasks''' visite a pagina abaixo:
| |
| | |
| <table class="seeMore">
| |
| <tr>
| |
| <td class="seeMore__image">[[Arquivo:Telekinetic-compass.gif|link=]]</td>
| |
| <td> '''Veja Também: [[Sistema de Pokémon T1H]]'''. </td>
| |
| </tr>
| |
| </table>
| |