Predefinição:Teste20: mudanças entre as edições
Ir para navegação
Ir para pesquisar
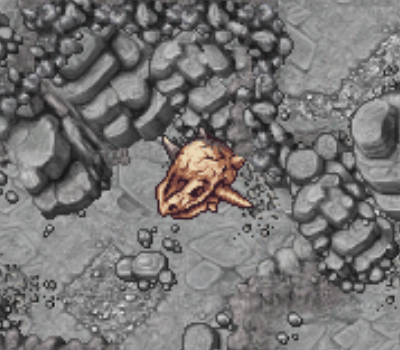
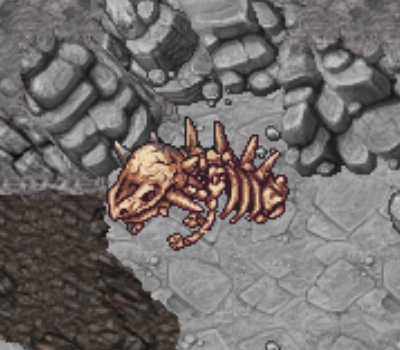
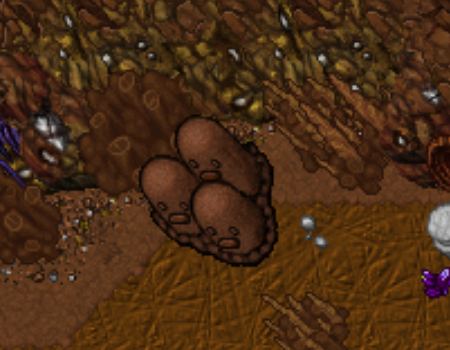
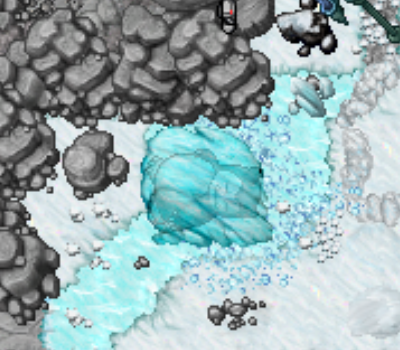
Monumentos de decorador
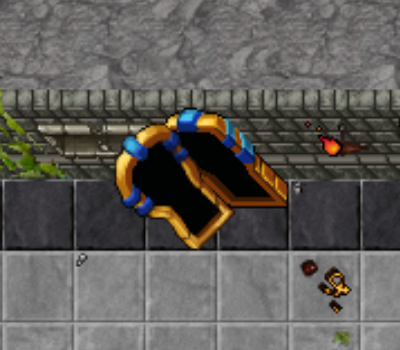
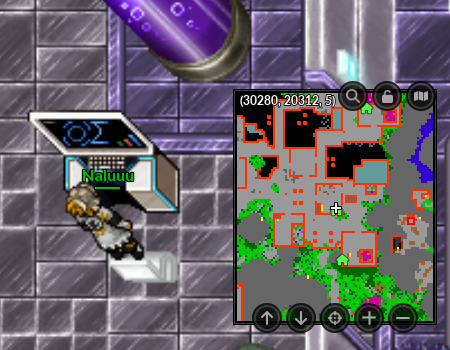
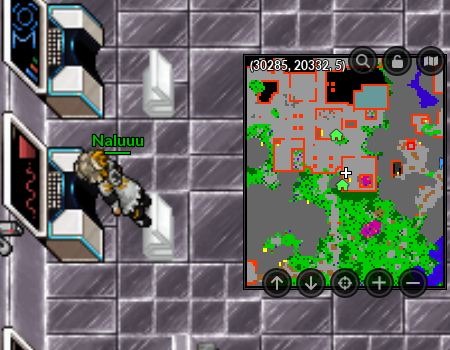
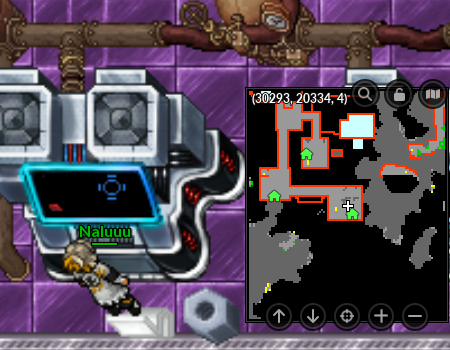
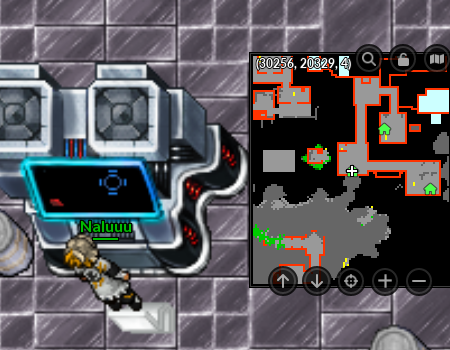
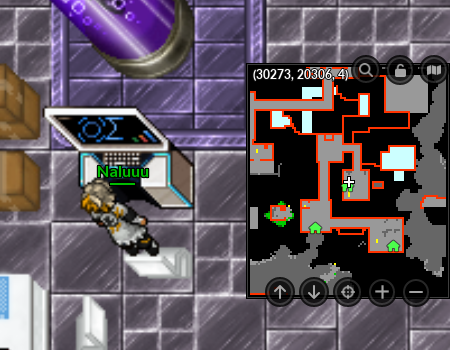
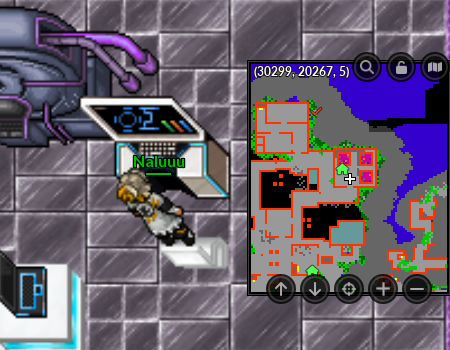
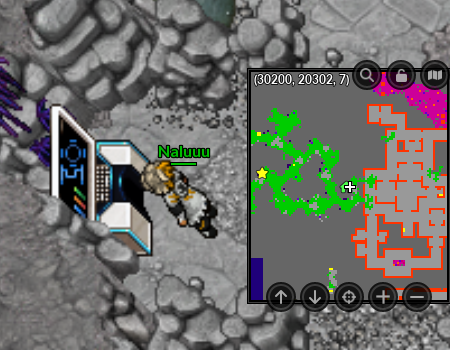
Para acessar o Ultra Lab, deve-se desativar a barreira da entrada. Para isso, o jogador deve desativar os 7 computadores de segurança na Fortaleza do Sarkies.
Ao desativar todos os computadores acima, a barreira irá ser desativada e concederá aos jogadores acesso ao Ultra Lab.
*A barreira ficará desativada até o Shutdown.


| (438 revisões intermediárias por 4 usuários não estão sendo mostradas) | |||
| Linha 1: | Linha 1: | ||
===== WIP ===== | |||
{| class="wikitable" style="text-align:center;" width ="50%" | |||
|- | |||
! colspan="3" | Recurso de Especialização | |||
! colspan ="3" | Recurso Base | |||
|- | |||
! colspan = "2" | Item | |||
! Quantidade | |||
! colspan = "2" | Item | |||
! Quantidade | |||
|- | |||
| png item especialização || nome do item || quantidade | |||
| png item especialização || nome do item || quantidade | |||
|- | |||
| png item especialização ||nome do item || quantidade | |||
| png item especialização || nome do item || quantidade | |||
|- | |||
|} | |||
===== PAGINA DE MONUMENTOS ===== | |||
Os tipos de monumentos podem ser encontrados na página abaixo: | |||
< | <center>'''Monumentos de decorador'''</center> | ||
{|class="wikitable" style= "text-align:center" width= "71%" | |||
!colspan="2"| Nome | |||
|- | |||
| '''Darkrai''' <br> <tabber> | |||
|-|Tipo 1= [[file:Monumento_darkrai1.png|link=]] | |||
</tabber> | |||
| '''Fossil''' <br> <tabber> | |||
|-|Tipo 1= [[file:Monumento_osso1.png|link=]] | |||
|-|Tipo 2= [[file:Monumento_fossil2.png|link=]] | |||
|-|Tipo 3= [[file:Monumento_fossil3.png|link=]] | |||
</tabber> | |||
|- | |||
| '''Coffin''' <br> <tabber> | |||
|-|Tipo 1= [[file:Monumento_coffin1.png|link=]] | |||
|-|Tipo 2= [[file:Monumento_coffin2.png|link=]] | |||
</tabber> | |||
| '''Earth''' <br> <tabber> | |||
|-|Tipo 1= [[file:Monumento_earth1.png|link=]] | |||
|-|Tipo 2= [[file:Monumento_earth2.png|link=]] | |||
</tabber> | |||
|- | |||
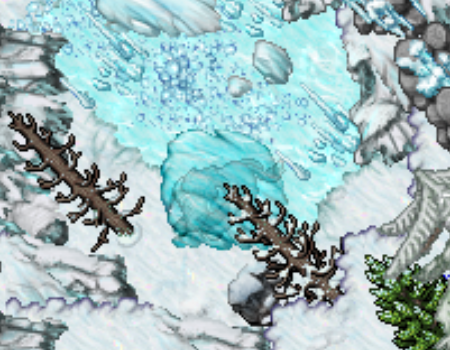
| '''Ice''' <br> <tabber> | |||
|-|Tipo 1= [[file:Monumento_iceblock1.png|link=]] | |||
|-|Tipo 2= [[file:Monumento_iceblock2.png|link=]] | |||
|-|Tipo 3= [[file:Monumento_iceblock3.png|link=]] | |||
</tabber> | |||
| '''Totem''' <br> <tabber> | |||
|-|Tipo 1= [[file:Monumento_totem1.png|link=]] | |||
</tabber> | |||
|- | |||
| '''Gear''' <br> <tabber> | |||
|-|Tipo 1= [[file:Monumento_gear1.png|link=]] | |||
</tabber> | |||
| '''Hypno''' <br> <tabber> | |||
|-|Tipo 1= [[file:Monumento_hypno1.png|link=]] | |||
</tabber> | |||
|- | |||
| '''Charizard''' <br> <tabber> | |||
|-|Tipo 1= [[file:Monumento_charizard1.png|link=]] | |||
</tabber> | |||
| '''Gong''' <br> <tabber> | |||
|-|Tipo 1= [[file:Monumento_gong1.png|link=]] | |||
</tabber> | |||
|- | |||
| '''Fountain''' <br> <tabber> | |||
|-|Tipo 1= [[file:Monumento_fountain1.png|link=]] | |||
|-|Tipo 2= [[file:Monumento_fountain2.png|link=]] | |||
|-|Tipo 3= [[file:Monumento_fountain3.png|link=]] | |||
</tabber> | |||
| '''Sphinx''' <br> <tabber> | |||
|-|Tipo 1= [[file:Monumento_sphinx1.png|link=]] | |||
</tabber> | |||
|- | |||
| '''Machoke''' <br> <tabber> | |||
|-|Tipo 1= [[file:Monumento_machoke1.png|link=]] | |||
</tabber> | |||
| '''Elekid''' <br> <tabber> | |||
|-|Tipo 1= [[file:Monumento_elekid1.png|link=]] | |||
</tabber> | |||
|- | |||
| '''Pinsir''' <br> <tabber> | |||
|-|Tipo 1= [[file:Monumento_pinsir1.png|link=]] | |||
</tabber> | |||
| '''Glalie''' <br> <tabber> | |||
|-|Tipo 1= [[file:Monumento_glalie1.png|link=]] | |||
</tabber> | |||
|- | |||
| '''Strange Eyes''' <br> <tabber> | |||
|-|Tipo 1= [[file:Monumento_strangeeyes2.png|link=]] | |||
</tabber> | |||
|- | |||
|} | |||
= | == PAGINA DO ULTRA LAB == | ||
Ultra Laboratory | |||
Level 550, Ter concluido a Sarkies Quest. | |||
<center>[[ | === Acessando o Ultra Lab === | ||
<center><span class="mw-customtoggle-UltraLab"> | |||
{| style="text-align:center" width="20%" | |||
|+ '''Como acessar o Ultra Lab''' | |||
! [[file:pc0.png|link=]] | |||
|- | |||
|align="center"| '''(Clique na Imagem)''' | |||
|- | |||
|} | |||
</span><br></center> | |||
<div class="mw-collapsible mw-collapsed" id="mw-customcollapsible-UltraLab"> | |||
<br> | |||
Para | <center>Para acessar o Ultra Lab, deve-se desativar a barreira da entrada. Para isso, o jogador deve desativar os '''7''' computadores de segurança na Fortaleza do Sarkies.</center> | ||
<center> | |||
{| class="wikitable bg-none border-0" style="text-align:center" | |||
|- | |||
! <b>1/7</b> !! <b>2/7</b> | |||
|- | |||
| [[Arquivo:pc1.png|link=]] || [[Arquivo:pc2.png|link=]] | |||
|- | |||
! <b>3/7</b> !! <b>4/7</b> | |||
|- | |||
| [[Arquivo:pc3.png|link=]] || [[arquivo:pc4.png|link=]] | |||
|- | |||
! <b>5/7</b> !! <b>6/7</b> | |||
|- | |||
| [[Arquivo:pc5.png|link=]] || [[arquivo:pc6.png|link=]] | |||
|- | |||
{| class="wikitable bg-none border-0" style="text-align:center" | |||
! colspan="2" | 7/7 | |||
|- | |||
| colspan="2" | [[Arquivo:pc7.png|link=]] | |||
|} | |||
</center> | |||
<center>Ao desativar todos os computadores acima, a barreira irá ser desativada e concederá aos jogadores acesso ao Ultra Lab.</center> | |||
<center>[[Arquivo: | <center>[[Arquivo:Barreiralab.gif|link=]]</center> | ||
<center>*A barreira ficará desativada até o Shutdown.</center> | |||
<center> | |||
|- | |||
|} | |||
</center> | |||
</div> | |||
Apenas os jogadores que derrotaram o Sarkies e falaram com o '''NPC Bill''' em Cerulean da Nightmare World conseguirão acessar as áreas de caça do Ultra Lab.<br> | |||
<center>[[arquivo:ultralab_billgate.png|link=]]</center> | |||
Apenas os jogadores que derrotaram o Sarkies e falaram com o '''NPC Bill''' em Cerulean da Nightmare World conseguirão acessar as áreas de caça do Ultra Lab.<br> | |||
<center>[[arquivo:southeastcrystal_nightmaredesertquest.png|link=]]</center><br> | |||
< | <table class="seeMore"> | ||
<tr> | |||
<td class="seeMore__image">[[Arquivo:Telekinetic-compass.gif|link=]]</td> | |||
<td> '''Veja mais: [[Sarkies_Quest|Sarkies Quest]]'''</td> | |||
</tr> | |||
</table> | |||
= | |||
< | |||
== Held Enhancement == | |||
Esse sistema concede bônus importantes para jogadores que estiverem utilizando determinadas categorias de Held. O sistema é baseado no Held Item X equipado no Pokémon que o jogador estiver utilizando. <br> | |||
[[Arquivo:Pokeball.png|15px|link=]] Caso o jogador esteja utilizando Held de Tier 8, causará 40% mais dano e receberá 40% menos dano dos inimigos. | |||
<br><br> | |||
'''Observações:''' | |||
* Esse sistema somente é válido para o Held equipado diretamente no slot X do Pokémon escolhido para o combate, ou seja, não é aplicado para o Held equipado no slot Y ou no Device. | |||
* O bônus do sistema de Held Enhancement é cumulativo, ou seja, se um jogador estiver usando o held X-Attack ou X-Defense, terá bônus tanto do sistema quanto o do held somados. | |||
==== NPCS ==== | |||
<center>[[arquivo:Sidis s3 nw.png|link=]]</center> | |||
<center> | <center> | ||
{| class="wikitable" width="70%" style="text-align:center;" | |||
|- | ! width="12%" |Nº e NPC | ||
! width="32%" |Objetivo | |||
| | ! width="20%" |Recompensa | ||
|- | |||
|- | | '''1.''' NPC Sidis S-3 | ||
| | |<!-- Objetivo --> | ||
|- | '''Derrotar:''' 15 Subjects Alpha <br> | ||
[[Arquivo:mecha_shiny_mrmime.png|link=]] '''Subject Alpha #1''' <br> [[Arquivo:mecha_elite_farfetchd.png|link=]]''' Subject Alpha #2''' <br> [[Arquivo:mecha_shiny_raichu.png|link=]] '''Subject Alpha #3''' <br> [[Arquivo:mecha_shiny_marowak.png|link=]] '''Subject Alpha #4''' | |||
|<!-- Recompensas --> | |||
< | [[Arquivo:Exp icon.png|30px|link=]] 715.000 <br> | ||
[[Arquivo:Exp icon nw.png|30px|link=]] 11.000 <br> | |||
[[Arquivo:Nightmare_Token.png|link=]] 12 Nightmare Token <br> | |||
|- | |||
|} | |||
< | |||
[[Arquivo: | |||
[[Arquivo: | |||
<br> | |||
[[Arquivo: | |||
</center> | </center> | ||
= | Caso encontre algum erro ou queira acrescentar alguma informação, <span style="color:red">'''entre em contato com um dos membros da [[Nossa Equipe|Wiki]].</span> <br> <br> | ||
'''Nível Mínimo:''' 550 <br> | |||
'''Nível Nightmare Mínimo:''' 60 <br> | |||
'''Recompensa:''' [[Arquivo:Exp_icon.png|30px|link=]] 2.000.000 Experiência, [[Arquivo:Exp_icon_nw.png|30px|link=]] 35.000 Experiência Nightmare, [[Arquivo:Nightmare_Token.png|link=]] 15 Nightmare Tokens e [[Arquivo:Access_Card.png|link=]] Access Card <br>. <br> | |||
'''Requisitos:''' Ter falado com o '''NPC Bill''' após finalizar a Sarkies Quest.<br> | |||
<table class="seeMore"> | <table class="seeMore"> | ||
<tr> | <tr> | ||
<td class="seeMore__image" | <td class="seeMore__image">[[Arquivo:Telekinetic-compass.gif|link=]]</td> | ||
<td> '''Veja Também:''' [[ | <td> '''Veja Também:''' [[Sarkies Quest]] </td> | ||
</tr> | </tr> | ||
</table> | </table> | ||
<br> | |||
<center>[[arquivo:Sidis nw.gif|link=]]</center> | |||
<center> | |||
Para começar, vá até o computador NPC Sidis localizada na direita do Ultra Lab receber sua tarefa. | |||
Sidis irá pedir para fazer uma análise do perfil do jogador, após isso dirá que ele enviou uma sentinela capaz de coletar dados mas ele precisa que você a encontre e fisicamente colete os dados. O seu sistema tem uma tecnologia para se auto-reiniciar assim que os dados forem removidos, porém ele precisa de um pendrive compatível e que por sorte, Sidis fez uma outra sentinela capaz de fabricar dispositivos portateis. Sidis dirá para procurá-lo e conseguir um flash drive. | |||
<center>[[arquivo:Sidislocation1.png|link=]]</center> | |||
Fale com Sidis S-1 e compre um flash drive por $100.000 | |||
<center> | <center>[[arquivo:Sidis01pendrive.png|link=]]</center> | ||
Procure o Sidis S-2 e utilize o pen drive para coletar os dados. | |||
<center>[[arquivo:Sidis02pendrive.png|link=]]</center> | |||
Volte ao Sidis e obtenha a tarefa semanal. | |||
*Essa missão reseta toda Segunda-feira no shutdown diário (07h40 BRT). | |||
<center> | <center> | ||
{| class="wikitable" width="70%" style="text-align:center;" | |||
! width="12%" |Nº e NPC | |||
''' | ! width="32%" |Objetivo | ||
! width="20%" |Recompensa | |||
[[Arquivo: | |- | ||
| '''1.''' NPC Sidis S-1 | |||
|<!-- Objetivo --> | |||
'''Derrotar:''' 600 Sentinelas ou Troopers<br> | |||
[[Arquivo:Advanced_Sentinel.png|link=Advanced Sentinel]] Advanced Sentinel <br> [[Arquivo:mecha trooper.png|link=Advanced Sentinel]] Mecha Trooper | |||
|<!-- Recompensas --> | |||
[[Arquivo:Exp icon.png|30px|link=]] 2.000.000 <br> | |||
[[Arquivo:Exp icon nw.png|30px|link=]] 35.000 <br> | |||
[[Arquivo:Nightmare_Token.png|link=]] 15 Nightmare Token <br> | |||
[[Arquivo:Access_Card.png|link=]] Access Card <br> | |||
|- | |||
|} | |||
</center> | </center> | ||
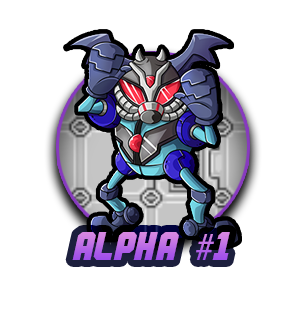
==== Subject Alpha ==== | |||
Os Subject Alpha recebem apenas 10% do dano causado até que os seus 4 mecanismos de defesa sejam completamente destruidos. | |||
=== | <center>[[Arquivo:Banner Bolinha Alpha -1.png|link=]]</center> | ||
<center class="center-tab"><tabber> | |||
|-|Play Rough= | |||
{{#widget:Video|url={{filepath:Alpha Shiny MrMime Play Rough.mp4}}|}} | |||
|-|Psyusion= | |||
{{#widget:Video|url={{filepath:Alpha Shiny MrMime Psyusion.mp4}}|}} | |||
|- | |||
| | |||
|} | |||
|-|Dazzling Gleam= | |||
| | {{#widget:Video|url={{filepath:Alpha Shiny MrMime Dazzling Gleam.mp4}}|}} | ||
| | |||
== | |-|Synchronoise= | ||
{{#widget:Video|url={{filepath:Alpha Shiny MrMime Synchronoise.mp4}}|}} | |||
|-|Psychic= | |||
{{#widget:Video|url={{filepath:Alpha Shiny MrMime Psychic.mp4}}|}} | |||
|-|Psyshock= | |||
{{#widget:Video|url={{filepath:Alpha Shiny MrMime Psyshock.mp4}}|}} | |||
|-|Metronome= | |||
{{#widget:Video|url={{filepath:Alpha Shiny MrMime Metronome.mp4}}|}} | |||
|-|Mimic Wall= | |||
{{#widget:Video|url={{filepath:Alpha Shiny MrMime Mimic Wall.mp4}}|}} | |||
|-|Selfdestruction= | |||
{{#widget:Video|url={{filepath:Alpha Shiny MrMime Selfdestruction.mp4}}|}} | |||
</tabber> | |||
{| class="wikitable" width="32%" style="text-align:center" | |||
< | |- | ||
! colspan="4" | Subject Alpha #1 [[Arquivo:mecha_shiny_mrmime.png|link=]] | |||
|- | |||
! colspan="2" | Item | |||
= | ! Quantidade | ||
! Chance de Drop | |||
|- | |||
| align="center" |[[Arquivo:Inhibitor_Chip.png|link=]] | |||
| style="border-left-style: hidden; | Inhibitor Chip | |||
|align="center" |1-46 | |||
|align="center" | 69% | |||
|- | |||
| align="center" |[[Arquivo:Metal_Scraps_(Duke).png|link=]] | |||
| style="border-left-style: hidden; | Metal Scraps | |||
|align="center" |1-46 | |||
|align="center" | 69% | |||
|- | |||
| align="center" | [[Arquivo:Electronic_Components.png|link=]] | |||
| style="border-left-style: hidden; | Electronic Components | |||
|align="center" |1-46 | |||
|align="center" | 69% | |||
|- | |||
| align="center" | [[Arquivo:Motherboard.png|link=]] | |||
| style="border-left-style: hidden; | Motherboard | |||
=== | |align="center" |1-46 | ||
|align="center" | 69% | |||
|- | |||
| align="center" | [[Arquivo:NW_ore.png|link=]] | |||
| style="border-left-style: hidden; | Nightmare Ore | |||
|align="center" |1-3 | |||
|align="center" | 60% | |||
|- | |||
| align="center" | [[Arquivo:Sentry_Remains.png|link=]] | |||
| style="border-left-style: hidden; | Sentry Remains | |||
| | |align="center" | 1 | ||
|align="center" | 33.7% | |||
|- | |||
| align="center" | [[Arquivo:Neutral_essence.png|link=]] | |||
| style="border-left-style: hidden; | Neutral Essence | |||
|align="center" | 1-2 | |||
|align="center" | 29% | |||
|- | |||
| align="center" | [[Arquivo:Metal_Scraps.png|link=]] | |||
| style="border-left-style: hidden; | Metal Scraps | |||
|align="center" | 1-10 | |||
|align="center" | 5% | |||
|- | |||
| align="center" | [[Arquivo:Star_Dust.png|link=]] | |||
| style="border-left-style: hidden; | Star Dust | |||
|align="center" | 1 | |||
|align="center" | 4% | |||
|- | |- | ||
| | | align="center" | [[Arquivo:Access_Card.png|link=]] | ||
| style="border-left-style: hidden; | Access Card | |||
|align="center" | 1 | |||
|align="center" | 1.5% | |||
|[[Arquivo: | |||
| | |||
| align=" | |||
| | |||
|- | |- | ||
| | | align="center" | [[Arquivo:Technological_Crystal_(Tier_8).png|link=]] | ||
| style="border-left-style: hidden; | Technological Crystal (Tier: 8) | |||
|align="center" | 1 | |||
|align="center" | 1.3% | |||
|[[Arquivo: | |||
| | |||
| align=" | |||
| | |||
|- | |- | ||
| | | align="center" | [[Arquivo:Mecha_Reactor.png|link=]] | ||
| style="border-left-style: hidden; | Mecha Reactor | |||
|align="center" | 1 | |||
|align="center" | Raro (Menor que 1%) | |||
|[[Arquivo: | |||
| | |||
| align=" | |||
| | |||
|- | |- | ||
| | | align="center" | [[Arquivo:Black Nightmare Gem.png|link=]] | ||
| style="border-left-style: hidden; | Black Nightmare Gem | |||
|align="center" | 1 | |||
|align="center" | Raro (Menor que 1%) | |||
| | |||
| align=" | |||
| | |||
|- | |- | ||
| | | align="center" | [[Arquivo:Mecha Costume (MrMime).png|link=]] | ||
| style="border-left-style: hidden; | Mecha Costume | |||
|align="center" | 1 | |||
|align="center" | Raro (Menor que 1%) | |||
| | |||
| align=" | |||
| | |||
|- | |- | ||
|- | |} | ||
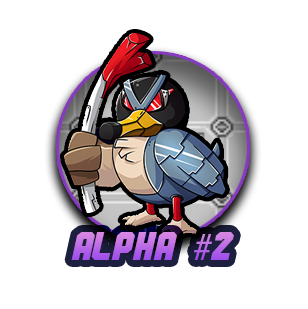
<center>[[Arquivo:Banner Bolinha Alpha -2.png|link=]]</center> | |||
| | <tabber> | ||
# | |-|Drill Peck= | ||
# | {{#widget:Video|url={{filepath:Alpha Elite Farfetchd Drill Peck.mp4}}|}} | ||
# | |-|Slash= | ||
| | {{#widget:Video|url={{filepath:Alpha Elite Farfetchd Slash.mp4}}|}} | ||
|-|Feather Dance= | |||
{{#widget:Video|url={{filepath:Alpha Elite Farfetchd Feather Dance.mp4}}|}} | |||
|-|Stick Throw= | |||
{{#widget:Video|url={{filepath:Alpha Elite Farfetchd Stick Throw.mp4}}|}} | |||
|-|Air Slash= | |||
{{#widget:Video|url={{filepath:Alpha Elite Farfetchd Air Slash.mp4}}|}} | |||
|-|Stickmerang= | |||
{{#widget:Video|url={{filepath:Alpha Elite Farfetchd Stickmerang.mp4}}|}} | |||
|-|Sky Attack= | |||
{{#widget:Video|url={{filepath:Alpha Elite Farfetchd Sky Attack.mp4}}|}} | |||
|-|Sand Attack= | |||
{{#widget:Video|url={{filepath:Alpha Elite Farfetchd Sand Attack.mp4}}|}} | |||
|-|Selfdestruction= | |||
{{#widget:Video|url={{filepath:Alpha Elite Farfetchd Selfdestruction.mp4}}|}} | |||
</tabber> | |||
| | {| class="wikitable" width="32%" style="text-align:center" | ||
|- | |- | ||
! colspan="4" | Subject Alpha #2 [[Arquivo:mecha_elite_farfetchd.png|link=]] | |||
! | |||
| | |||
# | |||
|- | |- | ||
! colspan="2" | Item | |||
! | ! Quantidade | ||
! Chance de Drop | |||
! | |||
! | |||
|- | |- | ||
| | | align="center" |[[Arquivo:Inhibitor_Chip.png|link=]] | ||
| style="border-left-style: hidden; | Inhibitor Chip | |||
|align="center" |1-46 | |||
|align="center" | 69% | |||
|[[Arquivo: | |||
| | |||
| align=" | |||
| | |||
|- | |- | ||
| | | align="center" |[[Arquivo:Metal_Scraps_(Duke).png|link=]] | ||
| style="border-left-style: hidden; | Metal Scraps | |||
|align="center" |1-46 | |||
|align="center" | 69% | |||
|[[Arquivo: | |||
| | |||
| align=" | |||
| | |||
|- | |- | ||
| | | align="center" | [[Arquivo:Electronic_Components.png|link=]] | ||
| style="border-left-style: hidden; | Electronic Components | |||
|align="center" |1-46 | |||
|align="center" | 69% | |||
|[[Arquivo: | |||
| | |||
| align=" | |||
| | |||
|- | |- | ||
| | | align="center" | [[Arquivo:Motherboard.png|link=]] | ||
| style="border-left-style: hidden; | Motherboard | |||
|align="center" |1-46 | |||
|align="center" | 69% | |||
|[[Arquivo: | |||
| | |||
| align=" | |||
| | |||
|- | |- | ||
| | | align="center" | [[Arquivo:NW_ore.png|link=]] | ||
| style="border-left-style: hidden; | Nightmare Ore | |||
|align="center" |1-3 | |||
|align="center" | 60% | |||
|[[Arquivo: | |||
| | |||
| align=" | |||
| | |||
|- | |- | ||
| | | align="center" | [[Arquivo:Sentry_Remains.png|link=]] | ||
| style="border-left-style: hidden; | Sentry Remains | |||
|align="center" | 1 | |||
|align="center" | 33.7% | |||
|[[Arquivo: | |||
| | |||
| align=" | |||
| | |||
|- | |- | ||
| | | align="center" | [[Arquivo:Neutral_essence.png|link=]] | ||
| style="border-left-style: hidden; | Neutral Essence | |||
|align="center" | 1-2 | |||
|align="center" | 29% | |||
|[[Arquivo: | |||
| | |||
| align=" | |||
| | |||
|- | |- | ||
| | | align="center" | [[Arquivo:Metal_Scraps.png|link=]] | ||
| style="border-left-style: hidden; | Metal Scraps | |||
|align="center" | 1-10 | |||
|align="center" | 5% | |||
|[[Arquivo: | |||
| | |||
| align=" | |||
| | |||
|- | |- | ||
| | | align="center" | [[Arquivo:Star_Dust.png|link=]] | ||
| style="border-left-style: hidden; | Star Dust | |||
|align="center" | 1 | |||
|align="center" | 4% | |||
| | |||
| align=" | |||
| | |||
|- | |- | ||
| | | align="center" | [[Arquivo:Access_Card.png|link=]] | ||
| style="border-left-style: hidden; | Access Card | |||
|align="center" | 1 | |||
|align="center" | 1.5% | |||
| | |||
| align=" | |||
| | |||
|- | |- | ||
| | | align="center" | [[Arquivo:Technological_Crystal_(Tier_8).png|link=]] | ||
| style="border-left-style: hidden; | Technological Crystal (Tier: 8) | |||
|align="center" | 1 | |||
|align="center" | 1.3% | |||
|[[Arquivo: | |||
| | |||
| align=" | |||
| | |||
|- | |- | ||
| | | align="center" | [[Arquivo:Mecha_Reactor.png|link=]] | ||
| style="border-left-style: hidden; | Mecha Reactor | |||
|align="center" | 1 | |||
|align="center" | Raro (Menor que 1%) | |||
| | |||
| align=" | |||
| | |||
|- | |- | ||
| | | align="center" | [[Arquivo:Black Nightmare Gem.png|link=]] | ||
| style="border-left-style: hidden; | Black Nightmare Gem | |||
|align="center" | 1 | |||
|align="center" | Raro (Menor que 1%) | |||
|[[Arquivo: | |||
| | |||
| align=" | |||
| | |||
|- | |- | ||
| | | align="center" | [[Arquivo:Mecha Costume (Elite Farfetchd).png|link=]] | ||
| style="border-left-style: hidden; | Mecha Costume | |||
|align="center" | 1 | |||
|align="center" | Raro (Menor que 1%) | |||
|[[Arquivo: | |||
| | |||
| align=" | |||
| | |||
|- | |- | ||
| | |} | ||
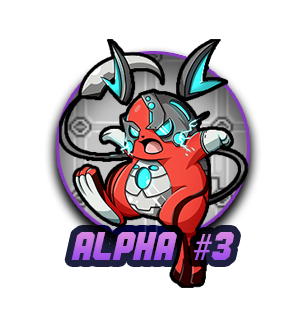
| | <center>[[Arquivo:Banner Bolinha Alpha -3.png|link=]]</center> | ||
<tabber> | |||
| | |-|Mega Kick= | ||
# | {{#widget:Video|url={{filepath:Alpha Shiny Raichu Mega Kick.mp4}}|}} | ||
|-|Thunder Punch= | |||
# | {{#widget:Video|url={{filepath:Alpha Shiny Raichu Thunder Punch.mp4}}|}} | ||
| | |-|Thunder Shock= | ||
{{#widget:Video|url={{filepath:Alpha Shiny Raichu Thunder Shock.mp4}}|}} | |||
|- | |-|Thunderbolt= | ||
{{#widget:Video|url={{filepath:Alpha Shiny Raichu Thunderbolt.mp4}}|}} | |||
|- | |-|Volt Tackle= | ||
| | {{#widget:Video|url={{filepath:Alpha Shiny Raichu Volt Tackle.mp4}}|}} | ||
|-|Electrify= | |||
| | {{#widget:Video|url={{filepath:Alpha Shiny Raichu Electrify.mp4}}|}} | ||
# | |-|Discharge= | ||
# | {{#widget:Video|url={{filepath:Alpha Shiny Raichu Discharge.mp4}}|}} | ||
|-|Selfdestruction= | |||
| | {{#widget:Video|url={{filepath:Alpha Shiny Raichu Selfdestruction.mp4}}|}} | ||
</tabber> | |||
| | {| class="wikitable" width="32%" style="text-align:center" | ||
|- | |- | ||
! colspan="4" | Subject Alpha #3 [[Arquivo:mecha_shiny_raichu.png|link=]] | |||
! | |||
# | |||
|- | |- | ||
! colspan="2" | Item | |||
! | ! Quantidade | ||
! Chance de Drop | |||
! | |||
! | |||
|- | |- | ||
| | | align="center" |[[Arquivo:Inhibitor_Chip.png|link=]] | ||
| style="border-left-style: hidden; | Inhibitor Chip | |||
|align="center" |1-46 | |||
|align="center" | 69% | |||
|[[Arquivo: | |||
| | |||
| align=" | |||
| | |||
|- | |- | ||
| | | align="center" |[[Arquivo:Metal_Scraps_(Duke).png|link=]] | ||
| style="border-left-style: hidden; | Metal Scraps | |||
|align="center" |1-46 | |||
|align="center" | 69% | |||
|[[Arquivo: | |||
| | |||
| align=" | |||
| | |||
|- | |- | ||
| | | align="center" | [[Arquivo:Electronic_Components.png|link=]] | ||
| style="border-left-style: hidden; | Electronic Components | |||
|align="center" |1-46 | |||
|align="center" | 69% | |||
|[[Arquivo: | |||
| | |||
| align=" | |||
| | |||
|- | |- | ||
| | | align="center" | [[Arquivo:Motherboard.png|link=]] | ||
| style="border-left-style: hidden; | Motherboard | |||
|align="center" |1-46 | |||
|align="center" | 69% | |||
|[[Arquivo: | |||
| | |||
| align=" | |||
| | |||
|- | |- | ||
| | | align="center" | [[Arquivo:NW_ore.png|link=]] | ||
| style="border-left-style: hidden; | Nightmare Ore | |||
|align="center" |1-3 | |||
|align="center" | 60% | |||
|[[Arquivo: | |||
| | |||
| align=" | |||
| | |||
|- | |- | ||
| | | align="center" | [[Arquivo:Sentry_Remains.png|link=]] | ||
| style="border-left-style: hidden; | Sentry Remains | |||
|align="center" | 1 | |||
|align="center" | 33.7% | |||
|[[Arquivo: | |||
| | |||
| align=" | |||
| | |||
|- | |- | ||
| | | align="center" | [[Arquivo:Neutral_essence.png|link=]] | ||
| style="border-left-style: hidden; | Neutral Essence | |||
|align="center" | 1-2 | |||
|align="center" | 29% | |||
|[[Arquivo: | |||
| | |||
| align=" | |||
| | |||
|- | |- | ||
| | | align="center" | [[Arquivo:Metal_Scraps.png|link=]] | ||
| style="border-left-style: hidden; | Metal Scraps | |||
|align="center" | 1-10 | |||
|align="center" | 5% | |||
|[[Arquivo: | |||
| | |||
| align=" | |||
| | |||
|- | |- | ||
| | | align="center" | [[Arquivo:Star_Dust.png|link=]] | ||
| style="border-left-style: hidden; | Star Dust | |||
|align="center" | 1 | |||
|align="center" | 4% | |||
|[[Arquivo: | |||
| | |||
| align=" | |||
| | |||
|- | |- | ||
| | | align="center" | [[Arquivo:Access_Card.png|link=]] | ||
| style="border-left-style: hidden; | Access Card | |||
|align="center" | 1 | |||
|align="center" | 1.5% | |||
| | |||
| align=" | |||
| | |||
|- | |- | ||
| | | align="center" | [[Arquivo:Technological_Crystal_(Tier_8).png|link=]] | ||
| style="border-left-style: hidden; | Technological Crystal (Tier: 8) | |||
|align="center" | 1 | |||
|align="center" | 1.3% | |||
|[[Arquivo: | |||
| | |||
| align=" | |||
| | |||
|- | |- | ||
| | | align="center" | [[Arquivo:Mecha_Reactor.png|link=]] | ||
| style="border-left-style: hidden; | Mecha Reactor | |||
|align="center" | 1 | |||
|align="center" | Raro (Menor que 1%) | |||
|[[Arquivo: | |||
| | |||
| | |||
| | |||
| | |||
|- | |- | ||
| | | align="center" | [[Arquivo:Black Nightmare Gem.png|link=]] | ||
| style="border-left-style: hidden; | Black Nightmare Gem | |||
|align="center" | 1 | |||
|align="center" | Raro (Menor que 1%) | |||
|[[Arquivo: | |||
| | |||
|- | |- | ||
| | | align="center" | [[Arquivo:Mecha Costume (Shiny Raichu).png|link=]] | ||
| style="border-left-style: hidden; | Mecha Costume | |||
= | |align="center" | 1 | ||
|align="center" | Raro (Menor que 1%) | |||
|- | |- | ||
|} | |} | ||
<center>[[Arquivo:Banner Bolinha Alpha -4.png|link=]]</center> | |||
<tabber> | |||
|-|Headbutt= | |||
{{#widget:Video|url={{filepath:Alpha Shiny Marowak Headbutt.mp4}}|}} | |||
|-|Bone Club= | |||
{{#widget:Video|url={{filepath:Alpha Shiny Marowak Bone Club.mp4}}|}} | |||
|-|Mud Sport= | |||
{{#widget:Video|url={{filepath:Alpha Shiny Marowak Mud Sport.mp4}}|}} | |||
|-|Bone Rush= | |||
{{#widget:Video|url={{filepath:Alpha Shiny Marowak Bone Rush.mp4}}|}} | |||
|-|Earth Power= | |||
{{#widget:Video|url={{filepath:Alpha Shiny Marowak Earth Power.mp4}}|}} | |||
|-|Bulldoze= | |||
{{#widget:Video|url={{filepath:Alpha Shiny Marowak Bulldoze.mp4}}|}} | |||
|-|Sand Eruption= | |||
{{#widget:Video|url={{filepath:Alpha Shiny Marowak Sand Eruption.mp4}}|}} | |||
|-|Selfdestruction= | |||
{{#widget:Video|url={{filepath:Alpha Shiny Marowak Selfdestruction.mp4}}|}} | |||
|-|Bone Spin= | |||
{{#widget:Video|url={{filepath:Alpha Shiny Marowak Bone Spin.mp4}}|}} | |||
</tabber> | |||
{| class="wikitable" width="32%" style="text-align:center" | |||
|- | |||
! colspan="4" | Subject Alpha #4 [[Arquivo:mecha_shiny_marowak.png|link=]] | |||
|- | |||
! colspan="2" | Item | |||
! Quantidade | |||
! Chance de Drop | |||
{| | |- | ||
| align="center" |[[Arquivo:Inhibitor_Chip.png|link=]] | |||
| style="border-left-style: hidden; | Inhibitor Chip | |||
|align="center" |1-46 | |||
|align="center" | 69% | |||
|- | |||
| align="center" |[[Arquivo:Metal_Scraps_(Duke).png|link=]] | |||
| style="border-left-style: hidden; | Metal Scraps | |||
|align="center" |1-46 | |||
|align="center" | 69% | |||
|- | |||
| align="center" | [[Arquivo:Electronic_Components.png|link=]] | |||
|- | | style="border-left-style: hidden; | Electronic Components | ||
! | |align="center" |1-46 | ||
|align="center" | 69% | |||
|- | |||
| align="center" | [[Arquivo:Motherboard.png|link=]] | |||
| style="border-left-style: hidden; | Motherboard | |||
|align="center" |1-46 | |||
|- | |align="center" | 69% | ||
|- | |||
| align="center" | [[Arquivo:NW_ore.png|link=]] | |||
| style="border-left-style: hidden; | Nightmare Ore | |||
|align="center" |1-3 | |||
! | |align="center" | 60% | ||
|- | |||
| | |||
| | |||
| align=" | |||
| | |||
|- | |||
| | |||
| | |||
| | |||
|- | |||
| | |||
|- | |||
| | |||
| | |||
| | |||
|- | |||
| | |||
|- | |||
| | |||
| | |||
| | |||
| | |||
|- | |||
| | |||
| | |||
| | |||
| | |||
|- | |||
| | |||
|- | |- | ||
| align="center" | [[Arquivo:Sentry_Remains.png|link=]] | |||
| style="border-left-style: hidden; | Sentry Remains | |||
|align="center" | 1 | |||
|align="center" | 33.7% | |||
|- | |- | ||
| | | align="center" | [[Arquivo:Neutral_essence.png|link=]] | ||
| | | style="border-left-style: hidden; | Neutral Essence | ||
|align="center" | 1-2 | |||
|align="center" | 29% | |||
|- | |- | ||
| | | align="center" | [[Arquivo:Metal_Scraps.png|link=]] | ||
| | | style="border-left-style: hidden; | Metal Scraps | ||
|align="center" | 1-10 | |||
|align="center" | 5% | |||
|- | |- | ||
| | | align="center" | [[Arquivo:Star_Dust.png|link=]] | ||
| style="border-left-style: hidden; | Star Dust | |||
|align="center" | 1 | |||
|align="center" | 4% | |||
|- | |- | ||
| align="center" | [[Arquivo:Access_Card.png|link=]] | |||
| style="border-left-style: hidden; | Access Card | |||
|align="center" | 1 | |||
|align="center" | 1.5% | |||
|- | |- | ||
| | | align="center" | [[Arquivo:Technological_Crystal_(Tier_8).png|link=]] | ||
| | | style="border-left-style: hidden; | Technological Crystal (Tier: 8) | ||
|align="center" | 1 | |||
|align="center" | 1.3% | |||
|- | |- | ||
| | | align="center" | [[Arquivo:Mecha_Reactor.png|link=]] | ||
| | | style="border-left-style: hidden; | Mecha Reactor | ||
|align="center" | 1 | |||
|align="center" | Raro (Menor que 1%) | |||
|- | |- | ||
| | | align="center" | [[Arquivo:Black Nightmare Gem.png|link=]] | ||
| | | style="border-left-style: hidden; | Black Nightmare Gem | ||
|align="center" | 1 | |||
|align="center" | Raro (Menor que 1%) | |||
|- | |- | ||
| | | align="center" | [[Arquivo:Mecha Costume (Marowak).png|link=]] | ||
| | | style="border-left-style: hidden; | Mecha Costume | ||
|align="center" | 1 | |||
|align="center" | Raro (Menor que 1%) | |||
|- | |- | ||
|} | |} | ||
==== access card ==== | |||
Ao derrotar o Alpha Subject, o tubo de experimento no centro da sala estará desprotegido e poderá ser quebrado, revelando dois Pokémon Mega ou Shiny do respectivo clã que poderão ser capturados ou "dropados". É importante destacar que, caso o jogador seja derrotado pelo protetor do local, não sofrerá penalidade de experiência e Bless; apenas seu Access Card será consumido. | |||
É possível encontrar todos os T1B e os principais T1C (não estão presentes os Pokémon T1 da Cyber, Embedded Tower, Shiny Mr. Mime e os Megas das DZs). | |||
Há dez laboratórios ocultos pela Nightmare World, cada um deles referente a um determinado clã e com um experimento imperfeito de Sarkies defendendo o local. | |||
Apenas os pokémon do tubo são elementais. | |||
Levar cura | |||
mecanicas talvez | |||
Edição atual tal como às 23h14min de 9 de junho de 2024
WIP
| Recurso de Especialização | Recurso Base | ||||
|---|---|---|---|---|---|
| Item | Quantidade | Item | Quantidade | ||
| png item especialização | nome do item | quantidade | png item especialização | nome do item | quantidade |
| png item especialização | nome do item | quantidade | png item especialização | nome do item | quantidade |
PAGINA DE MONUMENTOS
Os tipos de monumentos podem ser encontrados na página abaixo:
| Nome | |
|---|---|
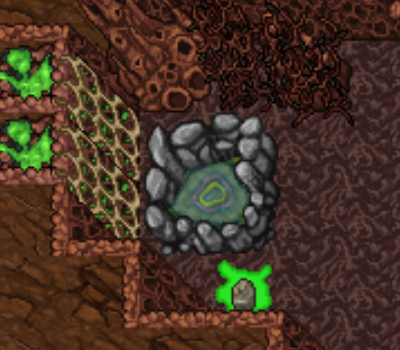
| Darkrai
|
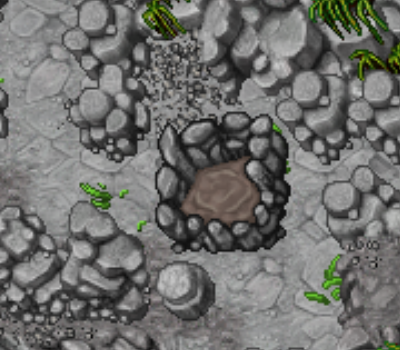
Fossil 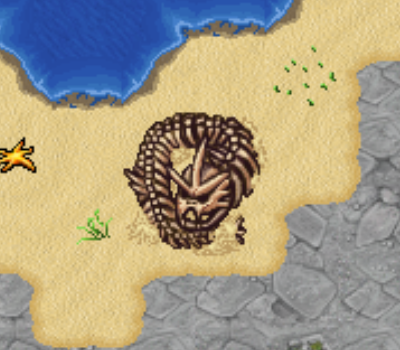
|
Coffin 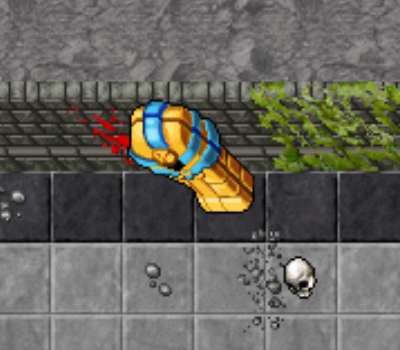
|
Earth 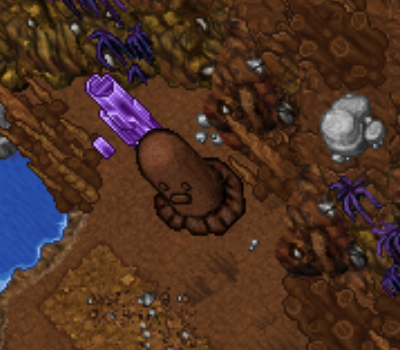
|
Ice 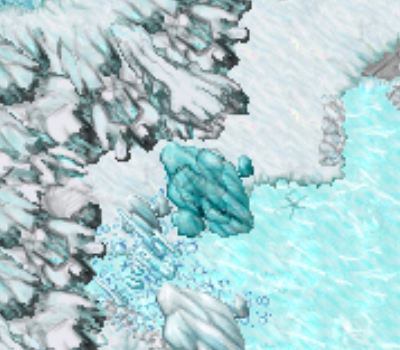
|
Totem 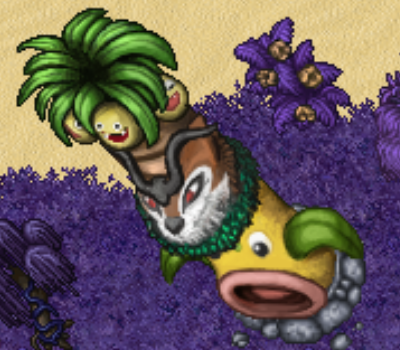
|
Gear 
|
Hypno 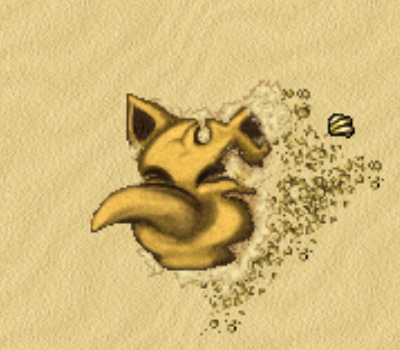
|
Charizard 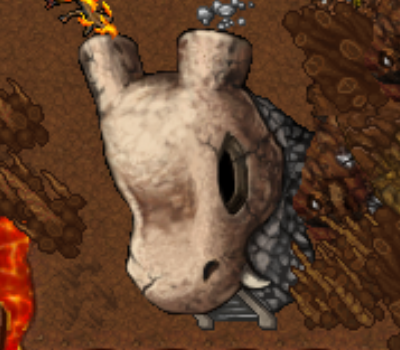
|
Gong 
|
Fountain 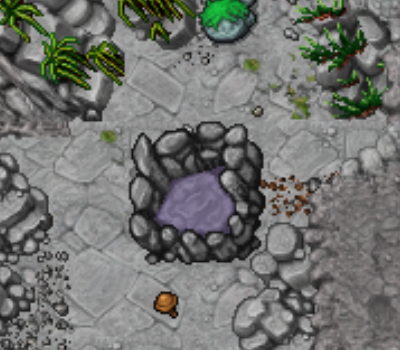
|
Sphinx 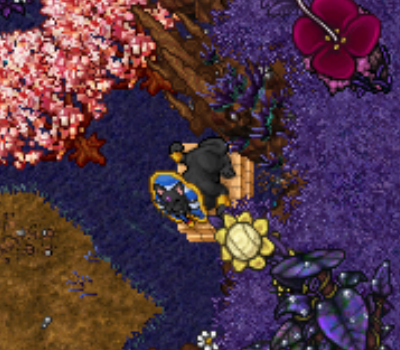
|
Machoke 
|
Elekid 
|
Pinsir 
|
Glalie 
|
Strange Eyes 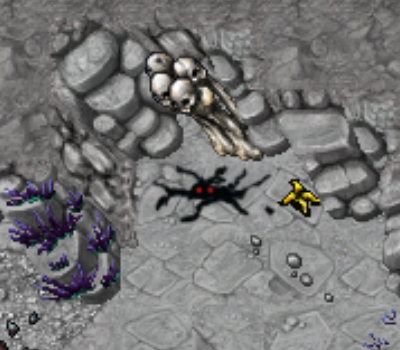
| |
PAGINA DO ULTRA LAB
Ultra Laboratory
Level 550, Ter concluido a Sarkies Quest.
Acessando o Ultra Lab
|
|---|
| (Clique na Imagem) |
| 1/7 | 2/7 |
|---|---|
 |
|
| 3/7 | 4/7 |
 |
|
| 5/7 | 6/7 |
 |
|
| 7/7 | |
|---|---|
|
Apenas os jogadores que derrotaram o Sarkies e falaram com o NPC Bill em Cerulean da Nightmare World conseguirão acessar as áreas de caça do Ultra Lab.
Apenas os jogadores que derrotaram o Sarkies e falaram com o NPC Bill em Cerulean da Nightmare World conseguirão acessar as áreas de caça do Ultra Lab.
| Veja mais: Sarkies Quest |
Held Enhancement
Esse sistema concede bônus importantes para jogadores que estiverem utilizando determinadas categorias de Held. O sistema é baseado no Held Item X equipado no Pokémon que o jogador estiver utilizando.
![]() Caso o jogador esteja utilizando Held de Tier 8, causará 40% mais dano e receberá 40% menos dano dos inimigos.
Caso o jogador esteja utilizando Held de Tier 8, causará 40% mais dano e receberá 40% menos dano dos inimigos.
Observações:
- Esse sistema somente é válido para o Held equipado diretamente no slot X do Pokémon escolhido para o combate, ou seja, não é aplicado para o Held equipado no slot Y ou no Device.
- O bônus do sistema de Held Enhancement é cumulativo, ou seja, se um jogador estiver usando o held X-Attack ou X-Defense, terá bônus tanto do sistema quanto o do held somados.
NPCS
| Nº e NPC | Objetivo | Recompensa |
|---|---|---|
| 1. NPC Sidis S-3 |
Derrotar: 15 Subjects Alpha |
|
Caso encontre algum erro ou queira acrescentar alguma informação, entre em contato com um dos membros da Wiki.
Nível Mínimo: 550
Nível Nightmare Mínimo: 60
Recompensa: ![]() 2.000.000 Experiência,
2.000.000 Experiência, ![]() 35.000 Experiência Nightmare,
35.000 Experiência Nightmare, ![]() 15 Nightmare Tokens e
15 Nightmare Tokens e ![]() Access Card
Access Card
.
Requisitos: Ter falado com o NPC Bill após finalizar a Sarkies Quest.
| Veja Também: Sarkies Quest |
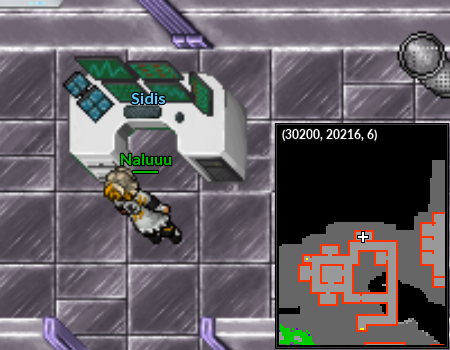
Para começar, vá até o computador NPC Sidis localizada na direita do Ultra Lab receber sua tarefa.
Sidis irá pedir para fazer uma análise do perfil do jogador, após isso dirá que ele enviou uma sentinela capaz de coletar dados mas ele precisa que você a encontre e fisicamente colete os dados. O seu sistema tem uma tecnologia para se auto-reiniciar assim que os dados forem removidos, porém ele precisa de um pendrive compatível e que por sorte, Sidis fez uma outra sentinela capaz de fabricar dispositivos portateis. Sidis dirá para procurá-lo e conseguir um flash drive.
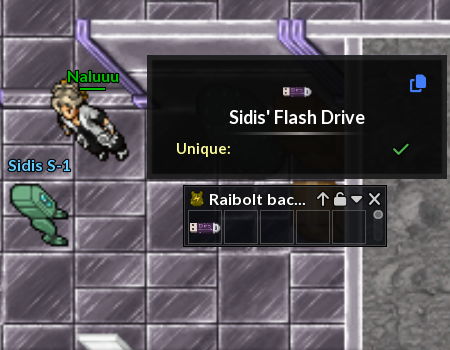
Fale com Sidis S-1 e compre um flash drive por $100.000
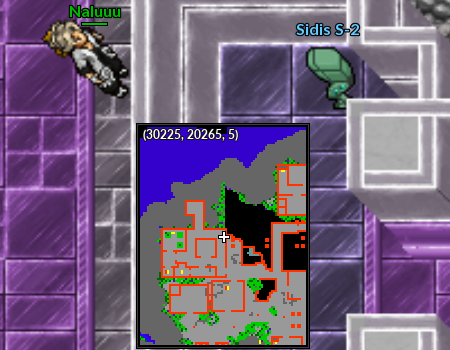
Procure o Sidis S-2 e utilize o pen drive para coletar os dados.
Volte ao Sidis e obtenha a tarefa semanal.
- Essa missão reseta toda Segunda-feira no shutdown diário (07h40 BRT).
| Nº e NPC | Objetivo | Recompensa |
|---|---|---|
| 1. NPC Sidis S-1 |
Derrotar: 600 Sentinelas ou Troopers |
|


Subject Alpha
Os Subject Alpha recebem apenas 10% do dano causado até que os seus 4 mecanismos de defesa sejam completamente destruidos.
| Subject Alpha #1 | |||
|---|---|---|---|
| Item | Quantidade | Chance de Drop | |
| 1-46 | 69% | ||
| 1-46 | 69% | ||
| 1-46 | 69% | ||
| 1-46 | 69% | ||
| 1-3 | 60% | ||
| 1 | 33.7% | ||
| 1-2 | 29% | ||
| 1-10 | 5% | ||
| 1 | 4% | ||
| 1 | 1.5% | ||
| 1 | 1.3% | ||
| 1 | Raro (Menor que 1%) | ||
| 1 | Raro (Menor que 1%) | ||
| 1 | Raro (Menor que 1%) | ||
| Subject Alpha #2 | |||
|---|---|---|---|
| Item | Quantidade | Chance de Drop | |
| 1-46 | 69% | ||
| 1-46 | 69% | ||
| 1-46 | 69% | ||
| 1-46 | 69% | ||
| 1-3 | 60% | ||
| 1 | 33.7% | ||
| 1-2 | 29% | ||
| 1-10 | 5% | ||
| 1 | 4% | ||
| 1 | 1.5% | ||
| 1 | 1.3% | ||
| 1 | Raro (Menor que 1%) | ||
| 1 | Raro (Menor que 1%) | ||
| 1 | Raro (Menor que 1%) | ||
| Subject Alpha #3 | |||
|---|---|---|---|
| Item | Quantidade | Chance de Drop | |
| 1-46 | 69% | ||
| 1-46 | 69% | ||
| 1-46 | 69% | ||
| 1-46 | 69% | ||
| 1-3 | 60% | ||
| 1 | 33.7% | ||
| 1-2 | 29% | ||
| 1-10 | 5% | ||
| 1 | 4% | ||
| 1 | 1.5% | ||
| 1 | 1.3% | ||
| 1 | Raro (Menor que 1%) | ||
| 1 | Raro (Menor que 1%) | ||
| 1 | Raro (Menor que 1%) | ||
| Subject Alpha #4 | |||
|---|---|---|---|
| Item | Quantidade | Chance de Drop | |
| 1-46 | 69% | ||
| 1-46 | 69% | ||
| 1-46 | 69% | ||
| 1-46 | 69% | ||
| 1-3 | 60% | ||
| 1 | 33.7% | ||
| 1-2 | 29% | ||
| 1-10 | 5% | ||
| 1 | 4% | ||
| 1 | 1.5% | ||
| 1 | 1.3% | ||
| 1 | Raro (Menor que 1%) | ||
| 1 | Raro (Menor que 1%) | ||
| 1 | Raro (Menor que 1%) | ||
access card
Ao derrotar o Alpha Subject, o tubo de experimento no centro da sala estará desprotegido e poderá ser quebrado, revelando dois Pokémon Mega ou Shiny do respectivo clã que poderão ser capturados ou "dropados". É importante destacar que, caso o jogador seja derrotado pelo protetor do local, não sofrerá penalidade de experiência e Bless; apenas seu Access Card será consumido. É possível encontrar todos os T1B e os principais T1C (não estão presentes os Pokémon T1 da Cyber, Embedded Tower, Shiny Mr. Mime e os Megas das DZs). Há dez laboratórios ocultos pela Nightmare World, cada um deles referente a um determinado clã e com um experimento imperfeito de Sarkies defendendo o local. Apenas os pokémon do tubo são elementais. Levar cura
mecanicas talvez