Wingeon: mudanças entre as edições
(→Tier 2) |
|||
| (11 revisões intermediárias por 2 usuários não estão sendo mostradas) | |||
| Linha 68: | Linha 68: | ||
</center> | </center> | ||
Abaixo estão listados todos os Pokémon do clã '''Wingeon''' e suas respectivas funções, separados por Tier. <br> | Abaixo estão listados todos os Pokémon do clã '''Wingeon''' e suas respectivas funções, separados por Tier e com algumas recomendações de Held Itens. <br> | ||
<b>Observação:</b> A nossa lista de Helds Recomendados foi composta por colaboradores experientes da Wiki da PokeXGames e serve como sugestões de Held Itens para os Pokémon no âmbito do PvP e PvE, respectivamente. | |||
O jogador ainda tem toda a liberdade de testar e utilizar outros Helds que não esses, podendo personalizar seu Pokémon de um jeito diferente. Ressaltamos que em caso de alterações nos Pokémon, essa lista pode ser alterada e não será garantido que o Pokémon seja adicionado como opção no NPC Jorge.</br> | |||
<b>Observação:</b> Na listagem, o Held PvP sugerido é o primeiro, seguido pelo Held PvE. Caso o Pokémon utilize o mesmo Held Item nos 2 âmbitos, aparecerá listado somente 1 Held Item.</br> | |||
==Tier 1S== | ==Tier 1S== | ||
<center> | <center> | ||
| Linha 97: | Linha 100: | ||
<center> | <center> | ||
{| class="wikitable | {| class="wikitable" style="text-align:center" width="65%;" | ||
|- | |- | ||
! scope="col" width="10%" style="background-color: #F1C232"| <span style="color:black">Nº Dex</span> | ! scope="col" width="10%" style="background-color: #F1C232"| <span style="color:black">Nº Dex</span> | ||
| Linha 120: | Linha 123: | ||
<center> | <center> | ||
{| class="wikitable" style="text-align:center" width=" | {| class="wikitable" style="text-align:center" width="65%;" | ||
|- | |- | ||
! scope="col" width=" | ! scope="col" width="10%" style="background-color: #F1C232"| <span style="color:black">Nº Dex</span> | ||
! scope="col" style="background-color: # | ! scope="col" style="background-color: #F1C232"| <span style="color:black">Ícone</span> | ||
! scope="col" width=" | ! scope="col" width="15%;" style="background-color: #F1C232"| <span style="color:black">Nome</span> | ||
! scope="col" style="background-color: # | ! scope="col" style="background-color: #F1C232"| <span style="color:black">Elementos</span> | ||
! scope="col" width=" | ! scope="col" width="15%;" style="background-color: #F1C232"| <span style="color:black">Função PvE</span> | ||
! scope="col" width=" | ! scope="col" width="15%;" style="background-color: #F1C232"| <span style="color:black">Função PvP</span> | ||
! scope="col" width="20%;" style="background-color: #F1C232"| <span style="color:black">Held Recomendado (PvP/PvE)</span> | |||
|- | |- | ||
| text-align:center;" | #148 | | text-align:center;" | #148 | ||
| Linha 135: | Linha 139: | ||
| width="10%" | [[Arquivo:Interface_BDD_PVE.png|24px|link=]] [[Arquivo:Interface_OTDD_PVE.png|24px|link=]] | | width="10%" | [[Arquivo:Interface_BDD_PVE.png|24px|link=]] [[Arquivo:Interface_OTDD_PVE.png|24px|link=]] | ||
| width="10%" | [[Arquivo:Interface_Tanker_PVP.png|24px|link=]] | | width="10%" | [[Arquivo:Interface_Tanker_PVP.png|24px|link=]] | ||
| text-align:"center;" | [[file:Def7.png|Defense T7|link=]] [[file:Atk7.png|Attack T7|link=]] | |||
|} | |} | ||
</center> | </center> | ||
| Linha 141: | Linha 146: | ||
<center> | <center> | ||
{| class="wikitable sortable" style="text-align:center" width=" | {| class="wikitable sortable" style="text-align:center" width="65%;" | ||
|- | |- | ||
! scope="col" width=" | ! scope="col" width="10%" style="background-color: #F1C232"| <span style="color:black">Nº Dex</span> | ||
! scope="col" style="background-color: # | ! scope="col" style="background-color: #F1C232"| <span style="color:black">Ícone</span> | ||
! scope="col" width=" | ! scope="col" width="15%;" style="background-color: #F1C232"| <span style="color:black">Nome</span> | ||
! scope="col" style="background-color: # | ! scope="col" style="background-color: #F1C232"| <span style="color:black">Elementos</span> | ||
! scope="col" width=" | ! scope="col" width="15%;" style="background-color: #F1C232"| <span style="color:black">Função PvE</span> | ||
! scope="col" width=" | ! scope="col" width="15%;" style="background-color: #F1C232"| <span style="color:black">Função PvP</span> | ||
! scope="col" width="20%;" style="background-color: #F1C232"| <span style="color:black">Held Recomendado (PvP/PvE)</span> | |||
|- | |- | ||
| text-align:"center;" | #006 | | text-align:"center;" | #006 | ||
| Linha 156: | Linha 162: | ||
| text-align:"center;" | [[Arquivo:Interface_OTDD_PVE.png|24px|link=]] | | text-align:"center;" | [[Arquivo:Interface_OTDD_PVE.png|24px|link=]] | ||
| text-align:"center;" | [[Arquivo:Interface_Tanker_PVP.png|24px|link=]] | | text-align:"center;" | [[Arquivo:Interface_Tanker_PVP.png|24px|link=]] | ||
| text-align:"center;" | [[file:Def7.png|Defense T7|link=]] [[file:Atk7.png|Attack T7|link=]] | |||
|- | |- | ||
| text-align:"center;" | #006 | | text-align:"center;" | #006 | ||
| Linha 162: | Linha 169: | ||
| text-align:"center;" | [[Arquivo:Fire.png|link=]] [[Arquivo:Flying.png|link=]] | | text-align:"center;" | [[Arquivo:Fire.png|link=]] [[Arquivo:Flying.png|link=]] | ||
| text-align:"center;" | [[Arquivo:Interface_BDD_PVE.png|24px|link=]] | | text-align:"center;" | [[Arquivo:Interface_BDD_PVE.png|24px|link=]] | ||
| text-align:"center;" | [[Arquivo:Interface_OffTank_PVP.png|24px|link=]] | | text-align:"center;" | [[Arquivo:Interface_OffTank_PVP.png|24px|link=]] | ||
| text-align:"center;" | [[file:Def7.png|Defense T7|link=]] [[file:Atk7.png|Attack T7|link=]] | |||
|- | |- | ||
| text-align:"center;" | #006 | | text-align:"center;" | #006 | ||
| Linha 170: | Linha 178: | ||
| text-align:"center;" | [[Arquivo:Interface_BDD_PVE.png|24px|link=]] | | text-align:"center;" | [[Arquivo:Interface_BDD_PVE.png|24px|link=]] | ||
| text-align:"center;" | [[Arquivo:Interface_Tanker_PVP.png|24px|link=]] | | text-align:"center;" | [[Arquivo:Interface_Tanker_PVP.png|24px|link=]] | ||
| text-align:"center;" | [[file:Def7.png|Defense T7|link=]] [[file:Atk7.png|Attack T7|link=]] | |||
|- | |- | ||
| text-align:"center;" | #018 | | text-align:"center;" | #018 | ||
| Linha 177: | Linha 186: | ||
| text-align:"center;" | [[Arquivo:Interface_BDD_PVE.png|24px|link=]] | | text-align:"center;" | [[Arquivo:Interface_BDD_PVE.png|24px|link=]] | ||
| text-align:"center;" | [[Arquivo:Interface_OffTank_PVP.png|24px|link=]] | | text-align:"center;" | [[Arquivo:Interface_OffTank_PVP.png|24px|link=]] | ||
| text-align:"center;" | [[file:Def7.png|Defense T7|link=]] [[file:Atk7.png|Attack T7|link=]] | |||
|- | |- | ||
| text-align:"center;" | #083 | | text-align:"center;" | #083 | ||
| Linha 184: | Linha 194: | ||
| text-align:"center;" | [[Arquivo:Interface_OTDD_PVE.png|24px|link=]] | | text-align:"center;" | [[Arquivo:Interface_OTDD_PVE.png|24px|link=]] | ||
| text-align:"center;" | [[Arquivo:Interface_OTDD_PVP.png|24px|link=]] | | text-align:"center;" | [[Arquivo:Interface_OTDD_PVP.png|24px|link=]] | ||
| text-align:"center;" | [[file:Def7.png|Defense T7|link=]] [[file:Atk7.png|Attack T7|link=]] | |||
|- | |- | ||
| text-align:"center;" | #085 | | text-align:"center;" | #085 | ||
| Linha 191: | Linha 202: | ||
| text-align:"center;" | [[Arquivo:Not.png|link=]] | | text-align:"center;" | [[Arquivo:Not.png|link=]] | ||
| text-align:"center;" | [[Arquivo:Interface_BDD_PVP.png|24px|link=]] | | text-align:"center;" | [[Arquivo:Interface_BDD_PVP.png|24px|link=]] | ||
| text-align:"center;" | [[file:Atk7.png|Attack T7|link=]] | |||
|- | |- | ||
| text-align:"center;" | #103 | | text-align:"center;" | #103 | ||
| Linha 198: | Linha 210: | ||
| text-align:"center;" | [[Arquivo:Interface_OTDD_PVE.png|24px|link=]] | | text-align:"center;" | [[Arquivo:Interface_OTDD_PVE.png|24px|link=]] | ||
| text-align:"center;" | [[Arquivo:Interface_Disrupter_PVP.png|24px|link=]] | | text-align:"center;" | [[Arquivo:Interface_Disrupter_PVP.png|24px|link=]] | ||
| text-align:"center;" | [[file:Acc7.png|Accuracy T7|link=]] [[file:Atk7.png|Attack T7|link=]] | |||
|- | |- | ||
| text-align:"center;" | #127 | | text-align:"center;" | #127 | ||
| Linha 205: | Linha 218: | ||
| text-align:"center;" | [[Arquivo:Interface_BDD_PVE.png|24px|link=]] | | text-align:"center;" | [[Arquivo:Interface_BDD_PVE.png|24px|link=]] | ||
| text-align:"center;" | [[Arquivo:Interface_BDD_PVP.png|24px|link=]] | | text-align:"center;" | [[Arquivo:Interface_BDD_PVP.png|24px|link=]] | ||
| text-align:"center;" | [[file:Atk7.png|Attack T7|link=]] | |||
|- | |- | ||
| text-align:"center;" | #142 | | text-align:"center;" | #142 | ||
| Linha 212: | Linha 226: | ||
| text-align:"center;" | [[Arquivo:Interface_OTDD_PVE.png|24px|link=]] | | text-align:"center;" | [[Arquivo:Interface_OTDD_PVE.png|24px|link=]] | ||
| text-align:"center;" | [[Arquivo:Interface_Tanker_PVP.png|24px|link=]] | | text-align:"center;" | [[Arquivo:Interface_Tanker_PVP.png|24px|link=]] | ||
| text-align:"center;" | [[file:Def7.png|Defense T7|link=]] [[file:Atk7.png|Attack T7|link=]] | |||
|- | |- | ||
| text-align:"center;" | #181 | | text-align:"center;" | #181 | ||
| Linha 219: | Linha 234: | ||
| text-align:"center;" | [[Arquivo:Interface_BDD_PVE.png|24px|link=]] | | text-align:"center;" | [[Arquivo:Interface_BDD_PVE.png|24px|link=]] | ||
| text-align:"center;" | [[Arquivo:Interface_BDD_PVP.png|24px|link=]] | | text-align:"center;" | [[Arquivo:Interface_BDD_PVP.png|24px|link=]] | ||
| text-align:"center;" | [[file:Atk7.png|Attack T7|link=]] | |||
|- | |- | ||
| text-align:"center;" | #254 | | text-align:"center;" | #254 | ||
| Linha 226: | Linha 242: | ||
| text-align:"center;" | [[Arquivo:Interface_BDD_PVE.png|24px|link=]] | | text-align:"center;" | [[Arquivo:Interface_BDD_PVE.png|24px|link=]] | ||
| text-align:"center;" | [[Arquivo:Interface_OffTank_PVP.png|24px|link=]] | | text-align:"center;" | [[Arquivo:Interface_OffTank_PVP.png|24px|link=]] | ||
| text-align:"center;" | [[file:Def7.png|Defense T7|link=]] [[file:Atk7.png|Attack T7|link=]] | |||
|- | |- | ||
| text-align:"center;" | #334 | | text-align:"center;" | #334 | ||
| Linha 233: | Linha 250: | ||
| text-align:"center;" | [[Arquivo:Not.png|link=]] | | text-align:"center;" | [[Arquivo:Not.png|link=]] | ||
| text-align:"center;" | [[Arquivo:Interface_Disrupter_PVP.png|24px|link=]] | | text-align:"center;" | [[Arquivo:Interface_Disrupter_PVP.png|24px|link=]] | ||
| text-align:"center;" | [[file:Acc7.png|Accuracy T7|link=]] [[file:Atk7.png|Attack T7|link=]] | |||
|- | |- | ||
| text-align:"center;" | #373 | | text-align:"center;" | #373 | ||
| Linha 240: | Linha 258: | ||
| text-align:"center;" | [[Arquivo:Interface_BDD_PVE.png|24px|link=]] | | text-align:"center;" | [[Arquivo:Interface_BDD_PVE.png|24px|link=]] | ||
| text-align:"center;" | [[Arquivo:Interface_BDD_PVP.png|24px|link=]] | | text-align:"center;" | [[Arquivo:Interface_BDD_PVP.png|24px|link=]] | ||
| text-align:"center;" | [[file:Atk7.png|Attack T7|link=]] | |||
|- | |- | ||
| text-align:"center;" | #430 | | text-align:"center;" | #430 | ||
| Linha 247: | Linha 266: | ||
| text-align:"center;" | [[Arquivo:Interface_OTDD_PVE.png|24px|link=]] | | text-align:"center;" | [[Arquivo:Interface_OTDD_PVE.png|24px|link=]] | ||
| text-align:"center;" | [[Arquivo:Interface_OffTank_PVP.png|24px|link=]] | | text-align:"center;" | [[Arquivo:Interface_OffTank_PVP.png|24px|link=]] | ||
| text-align:"center;" | [[file:Atk7.png|Attack T7|link=]] | |||
|- | |- | ||
| text-align:"center;" | #445 | | text-align:"center;" | #445 | ||
| Linha 254: | Linha 274: | ||
| text-align:"center;" | [[Arquivo:Interface_BDD_PVE.png|24px|link=]] | | text-align:"center;" | [[Arquivo:Interface_BDD_PVE.png|24px|link=]] | ||
| text-align:"center;" | [[Arquivo:Interface_Tanker_PVP.png|24px|link=]] | | text-align:"center;" | [[Arquivo:Interface_Tanker_PVP.png|24px|link=]] | ||
| text-align:"center;" | [[file:Def7.png|Defense T7|link=]] [[file:Atk7.png|Attack T7|link=]] | |||
|} | |} | ||
</center> | </center> | ||
| Linha 262: | Linha 283: | ||
<center> | <center> | ||
{| class="wikitable" style="text-align:center" width=" | {| class="wikitable" style="text-align:center" width="65%;" | ||
|- | |- | ||
! scope="col" width=" | ! scope="col" width="10%" style="background-color: #F1C232"| <span style="color:black">Nº Dex</span> | ||
! scope="col" style="background-color: # | ! scope="col" style="background-color: #F1C232"| <span style="color:black">Ícone</span> | ||
! scope="col" width=" | ! scope="col" width="15%;" style="background-color: #F1C232"| <span style="color:black">Nome</span> | ||
! scope="col" style="background-color: # | ! scope="col" style="background-color: #F1C232"| <span style="color:black">Elementos</span> | ||
! scope="col" width=" | ! scope="col" width="15%;" style="background-color: #F1C232"| <span style="color:black">Função PvE</span> | ||
! scope="col" width=" | ! scope="col" width="15%;" style="background-color: #F1C232"| <span style="color:black">Função PvP</span> | ||
! scope="col" width="20%;" style="background-color: #F1C232"| <span style="color:black">Held Recomendado (PvE)</span> | |||
|- | |- | ||
| text-align:center;" | #048 | | text-align:center;" | #048 | ||
| Linha 277: | Linha 299: | ||
| width="10%" | [[Arquivo:Interface_BDD_PVE.png|24px|link=]] | | width="10%" | [[Arquivo:Interface_BDD_PVE.png|24px|link=]] | ||
| width="10%" | [[Arquivo:Not.png|link=]] | | width="10%" | [[Arquivo:Not.png|link=]] | ||
| text-align:"center;" | [[file:Atk7.png|Attack T7|link=]] | |||
|- | |- | ||
| text-align:center;" | #635 | | text-align:center;" | #635 | ||
| Linha 284: | Linha 307: | ||
| width="10%" | [[Arquivo:Interface_BDD_PVE.png|24px|link=]] | | width="10%" | [[Arquivo:Interface_BDD_PVE.png|24px|link=]] | ||
| width="10%" | [[Arquivo:Not.png|link=]] | | width="10%" | [[Arquivo:Not.png|link=]] | ||
| text-align:"center;" | [[file:Atk7.png|Attack T7|link=]] | |||
|} | |} | ||
</center> | </center> | ||
| Linha 293: | Linha 317: | ||
<center> | <center> | ||
{| class="wikitable sortable" style="text-align:center" width=" | {| class="wikitable sortable" style="text-align:center" width="65%;" | ||
|- | |- | ||
! scope="col" width=" | ! scope="col" width="10%" style="background-color: #F1C232"| <span style="color:black">Nº Dex</span> | ||
! scope="col" style="background-color: # | ! scope="col" style="background-color: #F1C232"| <span style="color:black">Ícone</span> | ||
! scope="col" width=" | ! scope="col" width="15%;" style="background-color: #F1C232"| <span style="color:black">Nome</span> | ||
! scope="col" style="background-color: # | ! scope="col" style="background-color: #F1C232"| <span style="color:black">Elementos</span> | ||
! scope="col" width=" | ! scope="col" width="15%;" style="background-color: #F1C232"| <span style="color:black">Função PvE</span> | ||
! scope="col" width=" | ! scope="col" width="15%;" style="background-color: #F1C232"| <span style="color:black">Função PvP</span> | ||
! scope="col" width="20%;" style="background-color: #F1C232"| <span style="color:black">Held Recomendado (PvP/PvE)</span> | |||
|- | |- | ||
| text-align:center;" | #022 | | text-align:center;" | #022 | ||
| Linha 308: | Linha 333: | ||
| width="10%" | [[Arquivo:Interface_OffensiveTanker_pve.png|24px|link=]] | | width="10%" | [[Arquivo:Interface_OffensiveTanker_pve.png|24px|link=]] | ||
| width="10%" | [[Arquivo:Not.png|link=]] | | width="10%" | [[Arquivo:Not.png|link=]] | ||
| text-align:"center;" | [[file:Atk7.png|Attack T7|link=]] [[file:Def7.png|Defense T7|link=]] | |||
|- | |- | ||
| text-align:center;" | #123 | | text-align:center;" | #123 | ||
| Linha 314: | Linha 340: | ||
| text-align:center;" | [[Arquivo:Bug.png|link=Naturia]] [[Arquivo:Flying.png|link=Wingeon]] | | text-align:center;" | [[Arquivo:Bug.png|link=Naturia]] [[Arquivo:Flying.png|link=Wingeon]] | ||
| width="10%" | [[Arquivo:Not.png|link=]] | | width="10%" | [[Arquivo:Not.png|link=]] | ||
| width="10%" | [[Arquivo:Interface_OTDD_PVP.png|24px|link=]] | | width="10%" | [[Arquivo:Interface_OTDD_PVP.png|24px|link=]] | ||
| text-align:"center;" | [[file:Def7.png|Defense T7|link=]] | |||
|- | |- | ||
| text-align:center;" | #130 | | text-align:center;" | #130 | ||
| Linha 322: | Linha 349: | ||
| width="10%" | [[Arquivo:Interface_BDD_PVE.png|24px|link=]] | | width="10%" | [[Arquivo:Interface_BDD_PVE.png|24px|link=]] | ||
| width="10%" | [[Arquivo:Not.png|link=]] | | width="10%" | [[Arquivo:Not.png|link=]] | ||
| text-align:"center;" | [[file:Atk7.png|Attack T7|link=]] | |||
|- | |- | ||
| text-align:center;" | #149 | | text-align:center;" | #149 | ||
| Linha 329: | Linha 357: | ||
| width="10%" | [[Arquivo:Interface_OffensiveTanker_pve.png|24px|link=]] | | width="10%" | [[Arquivo:Interface_OffensiveTanker_pve.png|24px|link=]] | ||
| width="10%" | [[Arquivo:Interface_OffTank_PVP.png|24px|link=]] | | width="10%" | [[Arquivo:Interface_OffTank_PVP.png|24px|link=]] | ||
| text-align:"center;" | [[file:Atk7.png|Attack T7|link=]] [[file:Def7.png|Defense T7|link=]] | |||
|- | |- | ||
| text-align:center;" | #164 | | text-align:center;" | #164 | ||
| Linha 336: | Linha 365: | ||
| width="10%" | [[Arquivo:Interface_Tank_PVE.png|24px|link=]] | | width="10%" | [[Arquivo:Interface_Tank_PVE.png|24px|link=]] | ||
| width="10%" | [[Arquivo:Not.png|link=]] | | width="10%" | [[Arquivo:Not.png|link=]] | ||
| text-align:"center;" | [[file:Def7.png|Defense T7|link=]] | |||
|- | |- | ||
| text-align:center;" | #169 | | text-align:center;" | #169 | ||
| Linha 343: | Linha 373: | ||
| width="10%" | [[Arquivo:Not.png|link=]] | | width="10%" | [[Arquivo:Not.png|link=]] | ||
| width="10%" | [[Arquivo:Interface_OTDD_PVP.png|24px|link=]] | | width="10%" | [[Arquivo:Interface_OTDD_PVP.png|24px|link=]] | ||
| text-align:"center;" | [[file:Def7.png|Defense T7|link=]] | |||
|- | |- | ||
| text-align:center;" | #176 | | text-align:center;" | #176 | ||
| Linha 350: | Linha 381: | ||
| width="10%" | [[Arquivo:Not.png|link=]] | | width="10%" | [[Arquivo:Not.png|link=]] | ||
| width="10%" | [[Arquivo:Interface_Disrupter_PVP.png|24px|link=]] [[Arquivo:Interface_Support_PVP.png|24px|link=]] | | width="10%" | [[Arquivo:Interface_Disrupter_PVP.png|24px|link=]] [[Arquivo:Interface_Support_PVP.png|24px|link=]] | ||
| text-align:"center;" | [[file:Acc7.png|Accuracy T7|link=]] | |||
|- | |- | ||
| text-align:center;" | #226 | | text-align:center;" | #226 | ||
| Linha 357: | Linha 389: | ||
| width="10%" | [[Arquivo:Not.png|link=]] | | width="10%" | [[Arquivo:Not.png|link=]] | ||
| width="10%" | [[Arquivo:Interface_OffTank_PVP.png|24px|link=]] | | width="10%" | [[Arquivo:Interface_OffTank_PVP.png|24px|link=]] | ||
| text-align:"center;" | [[file:Atk7.png|Attack T7|link=]] | |||
|- | |- | ||
| text-align:center;" | #227 | | text-align:center;" | #227 | ||
| Linha 364: | Linha 397: | ||
| width="10%" | [[Arquivo:Not.png|link=]] | | width="10%" | [[Arquivo:Not.png|link=]] | ||
| width="10%" | [[Arquivo:Interface_OffTank_PVP.png|24px|link=]] | | width="10%" | [[Arquivo:Interface_OffTank_PVP.png|24px|link=]] | ||
| text-align:"center;" | [[file:Def7.png|Defense T7|link=]] | |||
|- | |- | ||
| text-align:center;" | #230 | | text-align:center;" | #230 | ||
| Linha 371: | Linha 405: | ||
| width="10%" | [[Arquivo:Interface_OTDD_PVE.png|24px|link=]] | | width="10%" | [[Arquivo:Interface_OTDD_PVE.png|24px|link=]] | ||
| width="10%" | [[Arquivo:Interface_OffTank_PVP.png|24px|link=]] | | width="10%" | [[Arquivo:Interface_OffTank_PVP.png|24px|link=]] | ||
| text-align:"center;" | [[file:Def7.png|Defense T7|link=]] [[file:Atk7.png|Attack T7|link=]] | |||
|- | |- | ||
| text-align:center;" | #330 | | text-align:center;" | #330 | ||
| Linha 378: | Linha 413: | ||
| width="10%" | [[Arquivo:Not.png|link=]] | | width="10%" | [[Arquivo:Not.png|link=]] | ||
| width="10%" | [[Arquivo:Interface_Disrupter_PVP.png|24px|link=]] | | width="10%" | [[Arquivo:Interface_Disrupter_PVP.png|24px|link=]] | ||
| text-align:"center;" | [[file:Acc7.png|Accuracy T7|link=]] | |||
|- | |- | ||
| text-align:center;" | #357 | | text-align:center;" | #357 | ||
| Linha 385: | Linha 421: | ||
| width="10%" | [[Arquivo:Interface_BDD_PVE.png|24px|link=]] | | width="10%" | [[Arquivo:Interface_BDD_PVE.png|24px|link=]] | ||
| width="10%" | [[Arquivo:Not.png|link=]] | | width="10%" | [[Arquivo:Not.png|link=]] | ||
| text-align:"center;" | [[file:Atk7.png|Attack T7|link=]] | |||
|- | |- | ||
| text-align:center;" | #398 | | text-align:center;" | #398 | ||
| Linha 392: | Linha 429: | ||
| width="10%" | [[Arquivo:Interface_BDD_PVE.png|24px|link=]] | | width="10%" | [[Arquivo:Interface_BDD_PVE.png|24px|link=]] | ||
| width="10%" | [[Arquivo:Not.png|link=]] | | width="10%" | [[Arquivo:Not.png|link=]] | ||
| text-align:"center;" | [[file:Atk7.png|Attack T7|link=]] | |||
|- | |- | ||
| text-align:center;" | #416 | | text-align:center;" | #416 | ||
| Linha 399: | Linha 437: | ||
| width="10%" | [[Arquivo:Interface_OffensiveTanker_pve.png|24px|link=]] | | width="10%" | [[Arquivo:Interface_OffensiveTanker_pve.png|24px|link=]] | ||
| width="10%" | [[Arquivo:Not.png|link=]] | | width="10%" | [[Arquivo:Not.png|link=]] | ||
| text-align:"center;" | [[file:Atk7.png|Attack T7|link=]] | |||
|- | |- | ||
| text-align:center;" | #430 | | text-align:center;" | #430 | ||
| Linha 406: | Linha 445: | ||
| width="10%" | [[Arquivo:Not.png|link=]] | | width="10%" | [[Arquivo:Not.png|link=]] | ||
| width="10%" | [[Arquivo:Interface_Disrupter_PVP.png|24px|link=]] | | width="10%" | [[Arquivo:Interface_Disrupter_PVP.png|24px|link=]] | ||
| text-align:"center;" | [[file:Acc7.png|Accuracy T7|link=]] | |||
|- | |- | ||
| text-align:center;" | #445 | | text-align:center;" | #445 | ||
| Linha 412: | Linha 452: | ||
| text-align:center;" | [[Arquivo:Dragon.png|link=Wingeon]] [[Arquivo:Ground.png|link=Orebound]] | | text-align:center;" | [[Arquivo:Dragon.png|link=Wingeon]] [[Arquivo:Ground.png|link=Orebound]] | ||
| width="10%" | [[Arquivo:Interface_BDD_PVE.png|24px|link=]] | | width="10%" | [[Arquivo:Interface_BDD_PVE.png|24px|link=]] | ||
| width="10%" | [[Arquivo: | | width="10%" | [[Arquivo:Interface_BDD_PVP.png|24px|link=]] | ||
| text-align:"center;" | [[file:Atk7.png|Attack T7|link=]] | |||
|- | |- | ||
| text-align:center;" | #468 | | text-align:center;" | #468 | ||
| Linha 420: | Linha 461: | ||
| width="10%" | [[Arquivo:Interface_OTDD_PVE.png|24px|link=]] | | width="10%" | [[Arquivo:Interface_OTDD_PVE.png|24px|link=]] | ||
| width="10%" | [[Arquivo:Interface_BDD_PVP.png|24px|link=]] | | width="10%" | [[Arquivo:Interface_BDD_PVP.png|24px|link=]] | ||
| text-align:"center;" | [[file:Atk7.png|Attack T7|link=]] | |||
|- | |- | ||
| text-align:"center;" | #469 | | text-align:"center;" | #469 | ||
| Linha 427: | Linha 469: | ||
| text-align:"center;" | [[Arquivo:Interface_OTDD_PVE.png|24px|link=]] | | text-align:"center;" | [[Arquivo:Interface_OTDD_PVE.png|24px|link=]] | ||
| text-align:"center;" | [[Arquivo:Interface_BDD_PVP.png|24px|link=]] | | text-align:"center;" | [[Arquivo:Interface_BDD_PVP.png|24px|link=]] | ||
| text-align:"center;" | [[file:Atk7.png|Attack T7|link=]] | |||
|- | |- | ||
| text-align:"center;" | #472 | | text-align:"center;" | #472 | ||
| Linha 434: | Linha 477: | ||
| text-align:"center;" | [[Arquivo:Not.png|link=]] | | text-align:"center;" | [[Arquivo:Not.png|link=]] | ||
| text-align:"center;" | [[Arquivo:Interface_BDD_PVP.png|24px|link=]] | | text-align:"center;" | [[Arquivo:Interface_BDD_PVP.png|24px|link=]] | ||
| text-align:"center;" | [[file:Atk7.png|Attack T7|link=]] | |||
|- | |- | ||
| text-align:center;" | #567 | | text-align:center;" | #567 | ||
| Linha 441: | Linha 485: | ||
| width="10%" | [[Arquivo:Not.png|link=]] | | width="10%" | [[Arquivo:Not.png|link=]] | ||
| width="10%" | [[Arquivo:Interface_BDD_PVP.png|24px|link=]] | | width="10%" | [[Arquivo:Interface_BDD_PVP.png|24px|link=]] | ||
| text-align:"center;" | [[file:Atk7.png|Attack T7|link=]] | |||
|- | |- | ||
| text-align:center;" | #612 | | text-align:center;" | #612 | ||
| Linha 448: | Linha 493: | ||
| width="10%" | [[Arquivo:Interface_OffensiveTanker_pve.png|24px|link=]] | | width="10%" | [[Arquivo:Interface_OffensiveTanker_pve.png|24px|link=]] | ||
| width="10%" | [[Arquivo:Not.png|link=]] | | width="10%" | [[Arquivo:Not.png|link=]] | ||
| text-align:"center;" | [[file:Atk7.png|Attack T7|link=]] [[file:Def7.png|Defense T7|link=]] | |||
|- | |- | ||
| text-align:center;" | #621 | | text-align:center;" | #621 | ||
| Linha 455: | Linha 501: | ||
| width="10%" | [[Arquivo:Interface_BDD_PVE.png|24px|link=]] | | width="10%" | [[Arquivo:Interface_BDD_PVE.png|24px|link=]] | ||
| width="10%" | [[Arquivo:Not.png|link=]] | | width="10%" | [[Arquivo:Not.png|link=]] | ||
| text-align:"center;" | [[file:Atk7.png|Attack T7|link=]] | |||
|- | |- | ||
| text-align:center;" | #628 | | text-align:center;" | #628 | ||
| Linha 462: | Linha 509: | ||
| width="10%" | [[Arquivo:Interface_BDD_PVE.png|24px|link=]] | | width="10%" | [[Arquivo:Interface_BDD_PVE.png|24px|link=]] | ||
| width="10%" | [[Arquivo:Not.png|link=]] | | width="10%" | [[Arquivo:Not.png|link=]] | ||
| text-align:"center;" | [[file:Atk7.png|Attack T7|link=]] | |||
|- | |- | ||
| text-align:center;" | #635 | | text-align:center;" | #635 | ||
| Linha 469: | Linha 517: | ||
| width="10%" | [[Arquivo:Interface_OTDD_PVE.png|24px|link=]] | | width="10%" | [[Arquivo:Interface_OTDD_PVE.png|24px|link=]] | ||
| width="10%" | [[Arquivo:Interface_OTDD_PVP.png|24px|link=]] | | width="10%" | [[Arquivo:Interface_OTDD_PVP.png|24px|link=]] | ||
| text-align:"center;" | [[file:Def7.png|Defense T7|link=]] [[file:Atk7.png|Attack T7|link=]] | |||
|- | |- | ||
| text-align:center;" | #663 | | text-align:center;" | #663 | ||
| Linha 476: | Linha 525: | ||
| width="10%" | [[Arquivo:Interface_OTDD_PVE.png|24px|link=]] | | width="10%" | [[Arquivo:Interface_OTDD_PVE.png|24px|link=]] | ||
| width="10%" | [[Arquivo:Interface_BDD_PVP.png|24px|link=]] | | width="10%" | [[Arquivo:Interface_BDD_PVP.png|24px|link=]] | ||
| text-align:"center;" | [[file:Atk7.png|Attack T7|link=]] | |||
|- | |- | ||
| text-align:center;" | #691 | | text-align:center;" | #691 | ||
| Linha 483: | Linha 533: | ||
| width="10%" | [[Arquivo:Interface_OTDD_PVE.png|24px|link=]] | | width="10%" | [[Arquivo:Interface_OTDD_PVE.png|24px|link=]] | ||
| width="10%" | [[Arquivo:Interface_Tanker_PVP.png|24px|link=]] | | width="10%" | [[Arquivo:Interface_Tanker_PVP.png|24px|link=]] | ||
| text-align:"center;" | [[file:Def7.png|Defense T7|link=]] [[file:Atk7.png|Attack T7|link=]] | |||
|- | |- | ||
| text-align:center;" | #706 | | text-align:center;" | #706 | ||
| Linha 490: | Linha 541: | ||
| width="10%" | [[Arquivo:Interface_Tank_PVE.png|24px|link=]] | | width="10%" | [[Arquivo:Interface_Tank_PVE.png|24px|link=]] | ||
| width="10%" | [[Arquivo:Interface_Tanker_PVP.png|24px|link=]] | | width="10%" | [[Arquivo:Interface_Tanker_PVP.png|24px|link=]] | ||
| text-align:"center;" | [[file:Def7.png|Defense T7|link=]] | |||
|} | |} | ||
</center> | </center> | ||
| Linha 498: | Linha 550: | ||
<center> | <center> | ||
{| class="wikitable sortable" style="text-align:center" width=" | {| class="wikitable sortable" style="text-align:center" width="65%;" | ||
|- | |- | ||
! scope="col" width=" | ! scope="col" width="10%" style="background-color: #F1C232"| <span style="color:black">Nº Dex</span> | ||
! scope="col" style="background-color: # | ! scope="col" style="background-color: #F1C232"| <span style="color:black">Ícone</span> | ||
! scope="col" width=" | ! scope="col" width="15%;" style="background-color: #F1C232"| <span style="color:black">Nome</span> | ||
! scope="col" style="background-color: # | ! scope="col" style="background-color: #F1C232"| <span style="color:black">Elementos</span> | ||
! scope="col" width=" | ! scope="col" width="15%;" style="background-color: #F1C232"| <span style="color:black">Função PvE</span> | ||
! scope="col" width=" | ! scope="col" width="15%;" style="background-color: #F1C232"| <span style="color:black">Função PvP</span> | ||
! scope="col" width="20%;" style="background-color: #F1C232"| <span style="color:black">Held Recomendado (PvP/PvE)</span> | |||
|- | |- | ||
| text-align:center;" | #006 | | text-align:center;" | #006 | ||
| Linha 513: | Linha 566: | ||
| width="10%" | [[Arquivo:Not.png|link=]] | | width="10%" | [[Arquivo:Not.png|link=]] | ||
| width="10%" | [[Arquivo:Interface_OffTank_PVP.png|24px|link=]] | | width="10%" | [[Arquivo:Interface_OffTank_PVP.png|24px|link=]] | ||
| text-align:"center;" | [[file:Def7.png|Defense T7|link=]] | |||
|- | |- | ||
| text-align:center;" | #018 | | text-align:center;" | #018 | ||
| Linha 520: | Linha 574: | ||
| width="10%" | [[Arquivo:Interface_BDD_PVE.png|24px|link=]] | | width="10%" | [[Arquivo:Interface_BDD_PVE.png|24px|link=]] | ||
| width="10%" | [[Arquivo:Not.png|link=]] | | width="10%" | [[Arquivo:Not.png|link=]] | ||
| text-align:"center;" | [[file:Atk7.png|Attack T7|link=]] | |||
|- | |- | ||
| text-align:center;" | #169 | | text-align:center;" | #169 | ||
| Linha 527: | Linha 582: | ||
| width="10%" | [[Arquivo:Interface_BDD_PVE.png|24px|link=]] | | width="10%" | [[Arquivo:Interface_BDD_PVE.png|24px|link=]] | ||
| width="10%" | [[Arquivo:Not.png|link=]] | | width="10%" | [[Arquivo:Not.png|link=]] | ||
| text-align:"center;" | [[file:Atk7.png|Attack T7|link=]] | |||
|- | |- | ||
| text-align:center;" | #176 | | text-align:center;" | #176 | ||
| Linha 534: | Linha 590: | ||
| width="10%" | [[Arquivo:Interface_BDD_PVE.png|24px|link=]] | | width="10%" | [[Arquivo:Interface_BDD_PVE.png|24px|link=]] | ||
| width="10%" | [[Arquivo:Not.png|link=]] | | width="10%" | [[Arquivo:Not.png|link=]] | ||
| text-align:"center;" | [[file:Atk7.png|Attack T7|link=]] | |||
|- | |- | ||
| text-align:center;" | #178 | | text-align:center;" | #178 | ||
| Linha 541: | Linha 598: | ||
| width="10%" | [[Arquivo:Interface_BDD_PVE.png|24px|link=]] | | width="10%" | [[Arquivo:Interface_BDD_PVE.png|24px|link=]] | ||
| width="10%" | [[Arquivo:Not.png|link=]] | | width="10%" | [[Arquivo:Not.png|link=]] | ||
| text-align:"center;" | [[file:Atk7.png|Attack T7|link=]] | |||
|- | |- | ||
| text-align:center;" | #225 | | text-align:center;" | #225 | ||
| Linha 548: | Linha 606: | ||
| width="10%" | [[Arquivo:Interface_BDD_PVE.png|24px|link=]] | | width="10%" | [[Arquivo:Interface_BDD_PVE.png|24px|link=]] | ||
| width="10%" | [[Arquivo:Not.png|link=]] | | width="10%" | [[Arquivo:Not.png|link=]] | ||
| text-align:"center;" | [[file:Atk7.png|Attack T7|link=]] | |||
|- | |- | ||
| text-align:center;" | #267 | | text-align:center;" | #267 | ||
| Linha 555: | Linha 614: | ||
| width="10%" | [[Arquivo:Interface OffensiveTanker pve.png|24px|link=]] | | width="10%" | [[Arquivo:Interface OffensiveTanker pve.png|24px|link=]] | ||
| width="10%" | [[Arquivo:Not.png|link=]] | | width="10%" | [[Arquivo:Not.png|link=]] | ||
| text-align:"center;" | [[file:Atk7.png|Attack T7|link=]] | |||
|- | |- | ||
| text-align:center;" | #277 | | text-align:center;" | #277 | ||
| Linha 562: | Linha 622: | ||
| width="10%" | [[Arquivo:Not.png|link=]] | | width="10%" | [[Arquivo:Not.png|link=]] | ||
| width="10%" | [[Arquivo:Interface_BDD_PVP.png|24px|link=]] | | width="10%" | [[Arquivo:Interface_BDD_PVP.png|24px|link=]] | ||
| text-align:"center;" | [[file:Atk7.png|Attack T7|link=]] | |||
|- | |- | ||
| text-align:center;" | #279 | | text-align:center;" | #279 | ||
| Linha 569: | Linha 630: | ||
| width="10%" | [[Arquivo:Not.png|link=]] | | width="10%" | [[Arquivo:Not.png|link=]] | ||
| width="10%" | [[Arquivo:Interface_Disrupter_PVP.png|24px|link=]] [[Arquivo:Interface_Support_PVP.png|24px|link=]] | | width="10%" | [[Arquivo:Interface_Disrupter_PVP.png|24px|link=]] [[Arquivo:Interface_Support_PVP.png|24px|link=]] | ||
| text-align:"center;" | [[file:Acc7.png|Accuracy T7|link=]] | |||
|- | |- | ||
| text-align:center;" | #291 | | text-align:center;" | #291 | ||
| Linha 576: | Linha 638: | ||
| width="10%" | [[Arquivo:Not.png|link=]] | | width="10%" | [[Arquivo:Not.png|link=]] | ||
| width="10%" | [[Arquivo:Interface_OTDD_PVP.png|24px|link=]] | | width="10%" | [[Arquivo:Interface_OTDD_PVP.png|24px|link=]] | ||
| text-align:"center;" | [[file:Def7.png|Defense T7|link=]] | |||
|- | |- | ||
| text-align:center;" | #334 | | text-align:center;" | #334 | ||
| Linha 583: | Linha 646: | ||
| width="10%" | [[Arquivo:Not.png|link=]] | | width="10%" | [[Arquivo:Not.png|link=]] | ||
| width="10%" | [[Arquivo:Interface_Disrupter_PVP.png|24px|link=]] | | width="10%" | [[Arquivo:Interface_Disrupter_PVP.png|24px|link=]] | ||
| text-align:"center;" | [[file:Acc7.png|Accuracy T7|link=]] | |||
|- | |- | ||
| text-align:center;" | #587 | | text-align:center;" | #587 | ||
| Linha 590: | Linha 654: | ||
| width="10%" | [[Arquivo:Not.png|link=]] | | width="10%" | [[Arquivo:Not.png|link=]] | ||
| width="10%" | [[Arquivo:Interface_BDD_PVP.png|24px|link=]] | | width="10%" | [[Arquivo:Interface_BDD_PVP.png|24px|link=]] | ||
| text-align:"center;" | [[file:Atk7.png|Attack T7|link=]] | |||
|- | |- | ||
| text-align:center;" | #621 | | text-align:center;" | #621 | ||
| Linha 597: | Linha 662: | ||
| width="10%" | [[Arquivo:Interface_BDD_PVE.png|24px|link=]] | | width="10%" | [[Arquivo:Interface_BDD_PVE.png|24px|link=]] | ||
| width="10%" | [[Arquivo:Not.png|link=]] | | width="10%" | [[Arquivo:Not.png|link=]] | ||
| text-align:"center;" | [[file:Atk7.png|Attack T7|link=]] | |||
|- | |- | ||
| text-align:center;" | #841 | | text-align:center;" | #841 | ||
| Linha 604: | Linha 670: | ||
| width="10%" | [[Arquivo:Interface_BDD_PVE.png|24px|link=]] | | width="10%" | [[Arquivo:Interface_BDD_PVE.png|24px|link=]] | ||
| width="10%" | [[Arquivo:Not.png|link=]] | | width="10%" | [[Arquivo:Not.png|link=]] | ||
| text-align:"center;" | [[file:Atk7.png|Attack T7|link=]] | |||
|- | |- | ||
| text-align:center;" | #842 | | text-align:center;" | #842 | ||
| Linha 611: | Linha 678: | ||
| width="10%" | [[Arquivo:Not.png|link=]] | | width="10%" | [[Arquivo:Not.png|link=]] | ||
| width="10%" | [[Arquivo:Interface_Tanker_PVP.png|24px|link=]] | | width="10%" | [[Arquivo:Interface_Tanker_PVP.png|24px|link=]] | ||
| text-align:"center;" | [[file:Def7.png|Defense T7|link=]] | |||
|} | |} | ||
</center> | </center> | ||
Edição atual tal como às 16h09min de 16 de maio de 2024
Introdução
Os membros do clã Wingeon são muito isolados das cidades. Eles preferem viver entre os Pokémon do tipo ![]() Flying e
Flying e ![]() Dragon nas montanhas mais altas.
Dragon nas montanhas mais altas.
Ranking
- Rank 1: Wingeon Cloud.
- Rank 2: Wingeon Wind.
- Rank 3: Wingeon Sky.
- Rank 4: Wingeon Falcon.
- Rank 5: Wingeon Dragon.
Acesse a página de Tasks do clã Wingeon para conferir os requisitos necessários em cada um dos Rankings.
Bônus de Clã
O bônus máximo do clã é aplicado ao completar as tarefas do Rank 5. Abaixo estão as porcentagens de bônus adquiridas:
![]() Flying: Atk 28%, Def 28%
Flying: Atk 28%, Def 28%
![]() Dragon: Atk 28%, Def 28%
Dragon: Atk 28%, Def 28%
Tiers
Tier é uma classificação comum entre os Pokémon, indicando não apenas a raridade deste dentro do jogo, mas também qual executará melhor uma função, contanto que a comparação seja realizada entre dois Pokémon de mesma função. O Tier e a Função de um Pokémon pode ser conferido na ![]() Pokédex (Atalho Shift + D). Caso deseje ler mais sobre, acesse a página Tier e Funções ou Tiers (listagem) para conferir a listagem de Tier de todos os Pokémon.
Pokédex (Atalho Shift + D). Caso deseje ler mais sobre, acesse a página Tier e Funções ou Tiers (listagem) para conferir a listagem de Tier de todos os Pokémon.
Para facilitar a leitura desta página, a tabela a seguir contém a legenda de todas as Funções, PvP e PvE disponíveis no jogo.
| Função PvE | Função PvP | ||
|---|---|---|---|
| Ícone | Função | Ícone | Função |
| Tank | Tank | ||
| Offensive Tank | Offensive Tank | ||
| Burst Damage Dealer | Burst Damage Dealer | ||
| Over Time Damage Dealer | Over Time Damage Dealer | ||
| Support Overtime | Support | ||
| - | Disrupter | ||
Abaixo estão listados todos os Pokémon do clã Wingeon e suas respectivas funções, separados por Tier e com algumas recomendações de Held Itens.
Observação: A nossa lista de Helds Recomendados foi composta por colaboradores experientes da Wiki da PokeXGames e serve como sugestões de Held Itens para os Pokémon no âmbito do PvP e PvE, respectivamente.
O jogador ainda tem toda a liberdade de testar e utilizar outros Helds que não esses, podendo personalizar seu Pokémon de um jeito diferente. Ressaltamos que em caso de alterações nos Pokémon, essa lista pode ser alterada e não será garantido que o Pokémon seja adicionado como opção no NPC Jorge.
Observação: Na listagem, o Held PvP sugerido é o primeiro, seguido pelo Held PvE. Caso o Pokémon utilize o mesmo Held Item nos 2 âmbitos, aparecerá listado somente 1 Held Item.
Tier 1S
| Nº Dex | Ícone | Nome | Elementos | Função PvE | Função PvP | Held Recomendado (PvP/PvE) |
|---|---|---|---|---|---|---|
| #123 | Shiny Scyther |
Tier 1A
| Nº Dex | Ícone | Nome | Elementos | Função PvE | Função PvP | Held Recomendado (PvP/PvE) |
|---|---|---|---|---|---|---|
| #130 | Shiny Gyarados |
Tier 1B
| Nº Dex | Ícone | Nome | Elementos | Função PvE | Função PvP | Held Recomendado (PvP/PvE) |
|---|---|---|---|---|---|---|
| #148 | Shiny Dragonair |
Tier 1C
| Nº Dex | Ícone | Nome | Elementos | Função PvE | Função PvP | Held Recomendado (PvP/PvE) |
|---|---|---|---|---|---|---|
| #006 | Shiny Charizard | |||||
| #006 | Mega Charizard Y | |||||
| #006 | Mega Charizard X* | |||||
| #018 | Shiny Pidgeot | |||||
| #083 | Elite Farfetch'D | |||||
| #085 | Shiny Dodrio | |||||
| #103 | Alolan Exeggutor | |||||
| #127 | Mega Pinsir | |||||
| #142 | Aerodactyl | |||||
| #181 | Mega Ampharos* | |||||
| #254 | Mega Sceptile | |||||
| #334 | Mega Altaria | |||||
| #373 | Salamence | |||||
| #430 | Shiny Honchkrow | |||||
| #445 | Mega Garchomp |
*Observação: Os Pokémon Mega Charizard X e Mega Ampharos são exclusivos de outros clãs no PvP.
Tier 1H
| Nº Dex | Ícone | Nome | Elementos | Função PvE | Função PvP | Held Recomendado (PvE) |
|---|---|---|---|---|---|---|
| #048 | Mega Pidgeot | |||||
| #635 | Shiny Hydreigon |
Observação: Os Pokémon T1H tem força de T1C fora da Nightmare World e são acima dos T1C dentro dela ou pelo menos tem um diferencial perante os demais Pokémon. São balanceados exclusivamente para conteúdos PvE e não podem ser utilizados em duelos PvP.
Tier 2
| Nº Dex | Ícone | Nome | Elementos | Função PvE | Função PvP | Held Recomendado (PvP/PvE) |
|---|---|---|---|---|---|---|
| #022 | Shiny Fearow | |||||
| #123 | Scyther | |||||
| #130 | Gyarados | |||||
| #149 | Dragonite | |||||
| #164 | Shiny Noctowl | |||||
| #169 | Shiny Crobat | |||||
| #176 | Shiny Togetic | |||||
| #226 | Mantine | |||||
| #227 | Skarmory | |||||
| #230 | Kingdra | |||||
| #330 | Flygon | |||||
| #357 | Tropius | |||||
| #398 | Staraptor | |||||
| #416 | Vespiquen | |||||
| #430 | Honchkrow | |||||
| #445 | Garchomp | |||||
| #468 | Togekiss | |||||
| #469 | Yanmega | |||||
| #472 | Gliscor | |||||
| #567 | Archeops* | |||||
| #612 | Haxorus | |||||
| #621 | Shiny Druddigon | |||||
| #628 | Braviary | |||||
| #635 | Hydreigon | |||||
| #663 | Talonflame | |||||
| #691 | Dragalge | |||||
| #706 | Goodra |
*Observação: O Pokémon Archeops é exclusivo de outro clã no PvP.
Tier 3
| Nº Dex | Ícone | Nome | Elementos | Função PvE | Função PvP | Held Recomendado (PvP/PvE) |
|---|---|---|---|---|---|---|
| #006 | Charizard | |||||
| #018 | Pidgeot | |||||
| #169 | Crobat | |||||
| #176 | Togetic | |||||
| #178 | Xatu | |||||
| #225 | Shiny Delibird | |||||
| #267 | Shiny Beautifly | |||||
| #277 | Swellow | |||||
| #279 | Pelipper | |||||
| #291 | Ninjask | |||||
| #334 | Altaria | |||||
| #587 | Emolga | |||||
| #621 | Druddigon | |||||
| #841 | Flapple | |||||
| #842 | Appletun |
Rotação Mid-Late Game
| Pokémon | Nome | Função | Tier |
|---|---|---|---|
| Shiny Noctowl | 2 | ||
| Shiny Fearow | 2 | ||
| Shiny Beautifly | 3 | ||
| Mega Pidgeot | 1H | ||
| Braviary | 2 | ||
| Staraptor | 2 | ||
| Pidgeot | 3 | ||
| Crobat | 3 | ||
| Pokémon | Nome | Função | Tier |
|---|---|---|---|
| Goodra | 2 | ||
| Dragonite | 2 | ||
| Haxorus | 2 | ||
| Shiny Hydreigon | 1H | ||
| Garchomp | 2 | ||
| Shiny Druddigon | 2 | ||
| Flapple | 3 | ||
| Druddigon | 3 | ||
Exclusividade do Clã no PvP
| Pokémon | Nome | Requer Rank 5 |
|---|---|---|
| Mega Charizard Y | ||
| Shiny Fearow | ||
| Alolan Exeggutor | ||
| Shiny Togetic | ||
| Honchkrow | ||
| Mega Garchomp | ||
| Dragalge | ||
| Shiny Honchkrow |
Observação: A exclusividade é aplicada apenas em conteúdos PvP. No PvE, o uso é liberado para todos os clãs.
Pokémon obtido via NPC de Clã
- Shiny de Clã
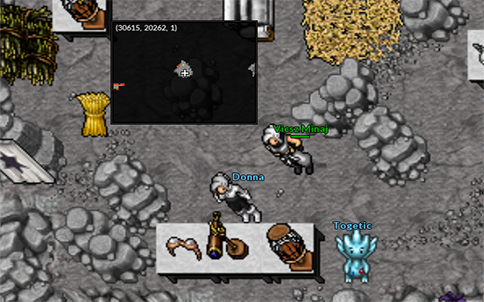
Para obter um ![]() Shiny Fearow, fale com a NPC Donna, localizada na área do Clã Wingeon, no Trade Center.
Shiny Fearow, fale com a NPC Donna, localizada na área do Clã Wingeon, no Trade Center.
- Shiny de Clã da Nightmare World
Para obter um ![]() Shiny Togetic, fale com a NPC Donna, na área Wingeon, na resistência de Cerulean.
Shiny Togetic, fale com a NPC Donna, na área Wingeon, na resistência de Cerulean.
Efetividades
Abaixo são apresentadas as efetividades dos Pokémon deste clã, considerando apenas aqueles que possuem um elemento. A efetividade pode mudar caso o Pokémon possua dois elementos ou possua alguma resistência à algum elemento, como é o caso do Mega Pinsir que possui a passiva Bug Armor, permitindo que ganhe resistência contra ataques do tipo Ice (1x).
A efetividade de um Pokémon pode ser conferida na ![]() Pokédex ou realizando uma busca na página Pokémon (uso do Ctrl+F recomendado). Clique no ícone do elemento desejado para conferir a tabela de efetividade deste clã.
Pokédex ou realizando uma busca na página Pokémon (uso do Ctrl+F recomendado). Clique no ícone do elemento desejado para conferir a tabela de efetividade deste clã.
![]() Flying
Flying
| Dano | Elemento | |
|---|---|---|
| 0x | - | |
| Dano | Elemento | |
|---|---|---|
| 0x | ||
![]() Dragon
Dragon
| Dano | Elemento | |
|---|---|---|
| 0x | ||
| Dano | Elemento | |
|---|---|---|
| Water | ||
| 0x | ||
Mais informações poderão ser adquiridas acessando a página Efetividades.
Outfits Exclusivas
| Rank 1 | Rank 5 | ||
|---|---|---|---|

|

|

|

|
| Master | |
|---|---|
|
|