|
|
| (605 revisões intermediárias por 3 usuários não estão sendo mostradas) |
| Linha 1: |
Linha 1: |
| Página do Bulba
| | <center>[[Arquivo:Banner_Especialização_Alquimista.png]]</center> |
|
| |
|
| <center>[[Arquivo:Banner_Outland-Main.png|link=]]<br></center>
| | =Introdução= |
|
| |
|
| | Os '''alquimistas''' são responsáveis pela criação de itens muito importantes para jogadores de alto nível, como[[Arquivo:Pink-Star-Piece.gif|link=]] '''Pink Star Piece''' (Boost +80), [[Arquivo:Philosopher%27s_Stone.png|link=]] '''Philosopher's Stone''', [[Arquivo:Ganlon_berry.png|link=]] '''Ganlon Berry''', '''Elixires''' exclusivos, entre outros. |
|
| |
|
| <span style="color:red">'''Nível necessário:'''</span> '''150'''
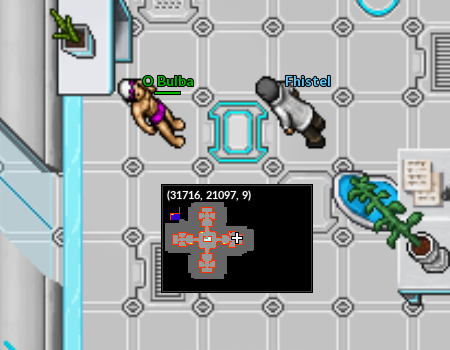
| | Para escolher esta especialização, o jogador deverá ir até '''Cerulean''' na '''Nightmare World''', descer as escadas do CP e procurar o '''NPC Fhistel.''' |
|
| |
|
| <span style="color:red">'''Recompensa:'''</span> '''22KK de experiência, Outland outfit e itens a seguir'''
| | <center>[[Arquivo:Localização_NPC_Fhistel.png|link=]]</center> |
| | |
| <span style="color:red">'''Habilidades necessárias:'''</span> '''Fly, Surf e Rock Smash.'''
| |
| | |
| '''Caso encontre algum erro ou queira acrescentar alguma informação,''' <span style="color:red">'''entre em contato com um dos membros da wiki.'''</span>
| |
| | |
| ==Introdução==
| |
| | |
| | |
| Para iniciar essa quest, você deverá se encontrar com o mentor do seu clã, na área dos clãs ao norte do Trade Center.
| |
| | |
| <center>[[Arquivo:entrada dos clans.png|1050px|link=]]</center>
| |
| | |
| <center><span style="color:#FF0000">'''Observação'''</span>: Ao entrar no portal dedicado ao seu clã, suba a primeira escada ao norte, se dirija à escada da direita e siga reto para o norte.</center>
| |
| | |
| <center>[[Arquivo:Introdução_outland.png|link=]]</center> | |
| | |
| <center><span style="color:#FF0000">'''Observação'''</span>: A coordenada de localização indicada na imagem acima representa o mentor do clã Naturia. Para chegar ao mentor do seu clã, siga as instruções acima</center>
| |
|
| |
| Ele irá dizer que um grave problema está colocando em risco a sobrevivência da raça humana, pois portais que ligam nossa dimensão a outra foram abertos e diversos pokémon extremamente fortes estão tentando passar para a nossa dimensão.
| |
| | |
| Felizmente, as forças da resistência foram vitoriosas em um primeiro momento e conseguiram montar bases protegendo os três portais. Os treinadores mais fortes do mundo foram convocados para proteger nosso mundo, sobre a liderança do lendário treinador, '''Ash Ketchum'''.
| |
| | |
| Os líderes dos clãs estão procurando jovens e fortes treinadores para ajudarem a salvar o mundo. Seu mentor irá pedir para que você entre nesse universo paralelo chamado Outland e fale com Ash Ketchum, na base sul.
| |
| | |
| <span style="color:#FF0000">'''Importante'''</span>: Caso não saiba onde fica a entrada da outland sul, você pode encontrar essa e muito mais informações sobre este local na página '''Outland'''
| |
|
| |
|
| <table class="seeMore"> | | <table class="seeMore"> |
| <tr> | | <tr> |
| <td class="seeMore__image">[[Arquivo:Telekinetic-compass.gif|link=]]</td> | | <td class="seeMore__image">[[Arquivo:Telekinetic-compass.gif|link=]]</td> |
| <td> '''Veja mais: [[Outland]]'''</td> | | <td> '''Veja mais: [[Introdução às Especializações]]'''</td> |
| </tr> | | </tr> |
| </table> | | </table> |
|
| |
|
| ==Encontro com o treinador lendário, Ash Ketchum== <!--T:26--> | | =Outfits= |
|
| |
|
| Como dito anteriormente, Ash estará na base sul da Outland. Ao falar com ele, você será informado de que os maiores treinadores do mundo estão protegendo as passagens. Ash pedirá para que você os ajude.
| | Ao se tornar '''Alquimista''', o jogador recebe a '''outfit''' referente à sua especialização. |
|
| |
|
| <center>[[arquivo:Ash_Ketchum_outland.png|link=]]</center> | | <Center>[[Arquivo:Outfit_Especializacao_Alchemist_Male.png|link=]] [[Arquivo:Outfit_Especializacao_Alchemist_Female.png|link=]] </center> |
|
| |
| No total, são 15 NPCs. Cada um deles pedirá para que você contenha a invasão dos pokémon selvagens enquanto eles procuram por um artefato especial, capaz de fechar para sempre o portal que liga os dois mundos.
| |
|
| |
|
| ==Tasks da Outland Main Quest:== | | =Recursos= |
|
| |
|
| {|class="wikitable" width="100%"
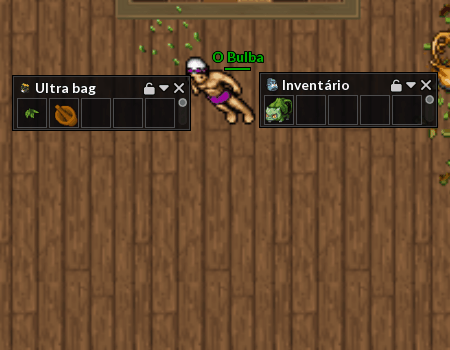
| | '''Alquimistas''' podem realizar suas coletas utilizando o [[Arquivo:Tablet.png|link=]] '''Tablet''' e o [[Arquivo:Alchemist_Empty_Becker.png|link=]] '''Alchemist Empty Becker'''. |
| ! align="center" width="20%" colspan="2" | NPC
| |
| ! align="center" width="30%" | Local
| |
| ! align="center" width="50%" | Tasks
| |
| |-
| |
| | align="center" width="10%" |[[Arquivo:League_Misty.png|link=Outland_Main]]
| |
| | align="center" width="10%" |Misty
| |
| | align="center" | Outland North - Water Area
| |
| | align="center" |100 Brave Blastoise e 100 Tribal Feraligatr
| |
| |-
| |
| | align="center" | [[Arquivo:League_Erika.png|link=Outland_Main]]
| |
| | align="center" | Erika
| |
| | align="center" | Outland North - Grass Area
| |
| | align="center" | 100 Ancient Meganium e 100 Brave Venusaur
| |
| |-
| |
| | align="center" | [[Arquivo:League_Bugsy.png|link=Outland_Main]]
| |
| | align="center" | Bugsy
| |
| | align="center" | Outland North - Bug Area
| |
| | align="center" | 100 War Heracross e 100 Furious Scyther
| |
| |-
| |
| | align="center" | [[Arquivo:League_Sabrina.png|link=Outland_Main]]
| |
| | align="center" | Sabrina
| |
| | align="center" | Outland North - Psychic Area
| |
| | align="center" | 100 Enigmatic Girafarig e 100 Tribal Xatu
| |
| |-
| |
| | align="center" | [[Arquivo:League_LtSurge.png|link=Outland_Main]]
| |
| | align="center" | Surge
| |
| | align="center" | Outland South - Electric Area
| |
| | align="center" | 65 Charged Raichu, 65 Furious Ampharos e 65 Magnetic Electabuzz
| |
| |-
| |
| | align="center" | [[Arquivo:League_Lance.png|link=Outland_Main]]
| |
| | align="center" | Lance
| |
| | align="center" | Outland South - Dragon Area
| |
| | align="center" | 200 Ancient Dragonair
| |
| |-
| |
| | align="center" | [[Arquivo:League Lorelei.png|link=Outland_Main]]
| |
| | align="center" | Lorelei
| |
| | align="center" | Outland South - Ice Area
| |
| | align="center" | 50 Evil Cloyster, 50 Freezing Dewgong, 50 Psy Jynx e 50 Heavy Piloswine
| |
| |-
| |
| | align="center" | [[Arquivo:League_Kyra.png|link=Outland_Main]]
| |
| | align="center" | Kyra
| |
| | align="center" | Outland South - Normal Area
| |
| | align="center" | 200 Milch-Miltank
| |
| |-
| |
| | align="center" | [[Arquivo:League_Falkner.png|link=Outland_Main]]
| |
| | align="center" | Falkner
| |
| | align="center" | Outland South - Flying Area
| |
| | align="center" | 100 Aviator Pidgeot e 100 Brave Noctowl
| |
| |-
| |
| | align="center" | [[Arquivo:League_Brock.png|link=Outland_Main]]
| |
| | align="center" | Brock
| |
| | align="center" | Outland South - Ground Area
| |
| | align="center" | 100 Roll Donphan e 100 Furious Sandslash
| |
| |-
| |
| | align="center" | [[Arquivo:League_Bruno.png|link=Outland_Main]]
| |
| | align="center" | Bruno
| |
| | align="center" | Outland East - Rock Area
| |
| | align="center" | 100 Hard Golem e 100 Brute Rhydon
| |
| |-
| |
| | align="center" | [[Arquivo:League_Blaine.png|link=Outland_Main]]
| |
| | align="center" | Blaine
| |
| | align="center" | Outland East - Fire Area
| |
| | align="center" | 100 Brave Charizard e 100 Enraged Typhlosion
| |
| |-
| |
| | align="center" | [[Arquivo:League_Chuck.png|link=Outland_Main]]
| |
| | align="center" | Chuck
| |
| | align="center" | Outland East - Fighting Area
| |
| | align="center" | 65 Boxer Hitmonchan, 65 Capoeira Hitmontop e 65 Taekwondo Hitmonlee
| |
| |-
| |
| | align="center" | [[Arquivo:League_Koga.png|link=Outland_Main]]
| |
| | align="center" | Koga
| |
| | align="center" | Outland East - Poison Area
| |
| | align="center" | 50 Brave Nidoking, 50 Brave Nidoqueen e 100 Dark Crobat
| |
| |-
| |
| | align="center" | [[Arquivo:League_Agatha.png|link=Outland_Main]]
| |
| | align="center" | Agatha
| |
| | align="center" | Outland East - Ghost Area
| |
| | align="center" | 120 Trickmaster Gengar, 80 Banshee Misdreavus
| |
| |}
| |
|
| |
|
| Após Completar cada task, o NPC correspondente te dirá que o artefato está muito bem protegido por fortes pokémon. Então, ele pede para que você monte uma equipe capaz de enfrentar tais pokémon para que possam conseguir alcançar o artefato. Sendo assim, forme um grupo de jogadores e vá até as partes mais profundas de cada área, até encontrar o artefato solicitado pelo NPC.
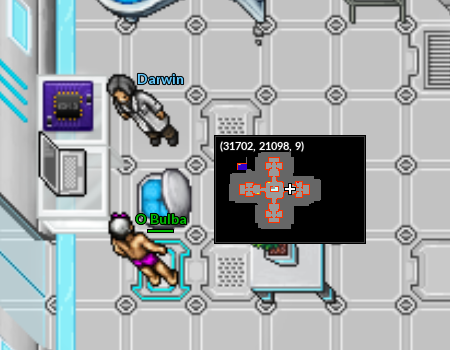
| | Para comprar suas '''ferramentas de trabalho''', o jogador deverá ir até o '''NPC Darwin''', que estará localizado próximo ao NPC Fhistel. |
|
| |
|
| == <center>Outland North</center> ==
| | <center>[[Arquivo:Localização_NPC_Darwin.png|link=]]</center> |
|
| |
|
| <center class="center-tab"><tabber>
| | Além disso, este NPC permitirá que o jogador compre '''Medicinal Leaves''', [[Arquivo:Gardening_bag.png|15px|link=]] '''Gardening Bag''', [[Arquivo:Alchemist_Empty_Becker.png|link=]] '''Alchemist Empty Becker''', [[Arquivo:Mortar.png|link=]] '''Mortar''' e [[Arquivo:Tablet.png|link=]] '''Tablet'''. |
| |-|Artefato Água= | |
| <center>
| |
|
| |
|
| <big>'''Artefato:'''</big>
| | Estes itens serão extremamente importantes para o '''Alquimista'''. |
|
| |
|
| [[Arquivo:Artefato_água.png|link=]]
| | ==Recurso Base == |
|
| |
|
| <big>'''Caminho:'''</big>
| | Ao utilizar o [[Arquivo:Tablet.png|link=]] '''Tablet''', o jogador pode coletar a alma dos [[Arquivo:491-Darkrai.png|25px|link=]] '''Darkrai Minion''' e dos [[Arquivo:Nightmare_Crystal.png|25px|link=]] '''Nightmare Crystal'''. |
|
| |
|
| [[Arquivo:Caminho_1_artefato_water.png|link=]] [[Arquivo:Caminho_2_artefato_water.png|link=]]
| | Este tipo de coleta é comum entre as duas especializações de Professor ('''alquimista''' e '''acadêmico'''). |
| |-|Saída Leste=
| |
| <center>
| |
| [[Arquivo:Outland North - Meganium.png|link=]] [[Arquivo:Outland North - Venusaur.png|link=]]
| |
| |-|Saída Oeste=
| |
| <center>
| |
| [[Arquivo:Outland North - Girafarig e Xatu.png|link=]] [[Arquivo:Outland North - Alakazam.png|link=]]
| |
| <center>
| |
| [[Arquivo:Outland North - Hypno.png|link=]]
| |
| |-|Saída Sul=
| |
| <center>
| |
| [[Arquivo:Outland North - Pinsir e Scyther.png|link=]] [[Arquivo:Outland North - Heracross.png|link=]]
| |
| <center>
| |
|
| |
|
| [[Arquivo:Outland North - Parasect.png|link=]]
| | <tabber> |
| </tabber></center> | |
|
| |
|
| == <center>Outland South</center> ==
| | |-|Darkrai Essence= |
|
| |
|
| <center class="center-tab"><tabber>
| | Ao matar [[Arquivo:491-Darkrai.png|25px|link=]] '''Darkrai Minions''', o jogador pode '''"estudar"''' os corpos das criaturas para adquirir [[Arquivo:Darkrai-Essence.gif|link=]] '''Darkrai Essences'''. |
| |-|Saída Leste=
| |
| <center>
| |
| [[Arquivo:Outland South - Miltank e Wigglytuff.png|link=]] [[Arquivo:Outland South - Granbull.png|link=]] | |
|
| |
|
| [[Arquivo:Outland South - Skarmory Noctowl e Pidgeot.png|link=]] [[Arquivo:Outland South - Crobat.png|link=]]
| | <center>[[Arquivo:Recurso_Darkrai_Minion.gif|link=]]</center> |
| |-|Saída Oeste=
| |
| <center>
| |
| [[Arquivo:Outland South - Donphan Sandslash e Marowak.png|link=]] [[Arquivo:Outland South - Electabuzz Raichu e Ampharos.png|link=]]
| |
| |-|Saída Norte=
| |
| <center> | |
| [[Arquivo:Outland South - Typhlosion.png|link=]] [[Arquivo:Outland South - Charizard.png|link=]] | |
| |-|Saída Sul=
| |
| <center> | |
| [[Arquivo:Outland South - Dewgong e Cloyster.png|link=]] [[Arquivo:Outland South - Piloswine.png|link=]]
| |
|
| |
|
| [[Arquivo:Outland South - Dragonair.png|link=]] [[Arquivo:Outland South - Jynx.png|link=]]
| | |-|Black Darkrai Essence= |
| </tabber></center>
| |
|
| |
|
| == <center>Outland East</center> == | | Ao derrotar '''Nightmare Crystals''', o jogador pode utilizar o '''tablet''' no '''Crystal''' destruído para receber '''1 [[Arquivo:Black-Darkrai-Essence.gif|link=]] Black Darkrai Essence'''. |
|
| |
|
| <center class="center-tab"><tabber>
| | '''Observação:''' O jogador pode estudar essas criaturas e entidades sem tê-las derrotado. Para isso, deve estar no mesmo '''grupo''' da pessoa que os derrotou. |
| |-|Saída Leste=
| |
| <center>
| |
| [[Arquivo:Outland East - Hitmonchan e Hitmonlee.png|link=]] [[Arquivo:Outland East - Hitmontop.png|link=]]
| |
| |-|Saída Oeste=
| |
| <center>
| |
| [[Arquivo:Outland East - Arcanine.png|link=]] [[Arquivo:Outland East - Charizard.png|link=]]
| |
|
| |
|
| [[Arquivo:Outland East - Magmar.png|link=]] | | <center>[[Arquivo:Recurso_Nightmare_Crystal.gif|link=]]</center> |
| |-|Saída Norte=
| |
| <center> | |
| [[Arquivo:Outland East - Nidoking e Nidoqueen.png|link=]] [[Arquivo:Outland East - Gengar.png|link=]]
| |
|
| |
|
| [[Arquivo:Outland East - Misdreavus.png|link=]] [[Arquivo:Outland East - Murkrow.png|link=]]
| | </tabber> |
| |-|Saída Sul=
| |
| <center> | |
| [[Arquivo:Outland East - Golem Rhydon e Pupitar.png|link=]] [[Arquivo:Outland East - Steelix.png|link=]]
| |
|
| |
|
| [[Arquivo:Outland East - Wigglytuff.png|link=]]
| | ==Mortar== |
| </tabber></center>
| |
|
| |
|
| '''OBSERVAÇÃO''': Você poderá ir até os artefatos e coletá-los mesmo antes de fazer as primeiras missões, mas não poderá entregá-los ao NPC. | | O [[Arquivo:Mortar.png|link=]] '''Mortar''' é um item usado para transformar '''Medicinal Leaves''' em '''Crushed Leaves'''. |
|
| |
|
| | '''Observação:''' Este item pode ser utilizado por qualquer profissão. |
|
| |
|
| | <center>[[Arquivo:Mortar_Uso.gif|link=]]</center> |
|
| |
|
| A localização de cada artefato estará ao final nesta página.
| | Para isso, será necessário encontrar a erva em seu estado natural: |
|
| |
|
| | O jogador pode encontrar '''3 tipos''' de '''Medicinal Herbs'''. |
| | <center> |
| | {| class="wikitable" width = "28%" |
| | |+ |
| | |- |
| | ! Green Medicinal Herb!! Yellow Medicinal Herb !! Red Medicinal Herb |
| | |- |
| | | align="center" | [[Arquivo:Green_Medicinal_Herb.gif|25px|link=]] |
| | | align="center" | [[Arquivo:Yellow_Medicinal_Herb.gif|25px|link=]] |
| | | align="center" | [[Arquivo:Red_Medicinal_Herb.gif|28px|link=]] |
| | |} |
| | </center> |
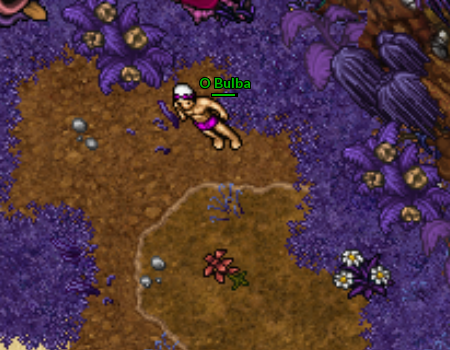
| | Este recurso é coletável por '''qualquer jogador''', porém os itens que os utilizam são craftáveis apenas por '''alquimistas''' e '''acadêmicos'''. |
|
| |
|
| | <center>[[Arquivo:Medicinal_Herb.png|link=]]</center> |
|
| |
|
| <span style="color:red">'''Atenção:'''</span>: Os NPCs coletam '''qualquer artefato''', por exemplo, a NPC Misty da Water Area pode pegar o artefato Fire. Tome muito cuidado para não esquecer quais artefatos você já pegou, pois é impossível verificar isso no futuro e você terá que ir até os locais novamente para confirmar.
| | Ao coletar as '''Medicinal Herbs''', o jogador receberá em seu inventário '''Medicinal Leaves''', que por fim, ao utilizar o [[Arquivo:Mortar.png|link=]] '''Mortar''', se tornarão '''Crushed Leaves'''. |
|
| |
|
| | ==Recurso exclusivo== |
|
| |
|
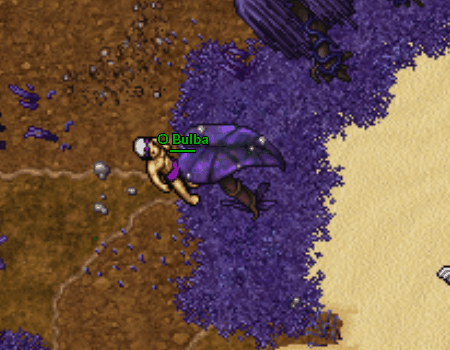
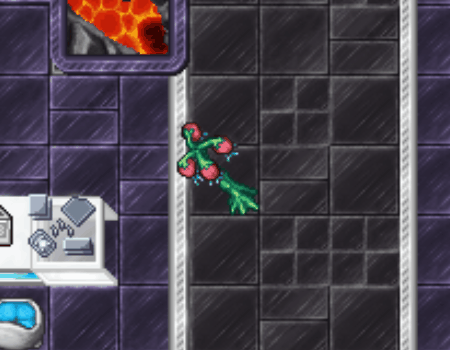
| | Ao utilizar o [[Arquivo:Alchemist_Empty_Becker.png|link=]] '''Alchemist Empty Becker''' em uma '''Wet Strange Plant''', o jogador consegue coletar [[Arquivo:Dew_Becker.png|link=]] '''Dew Beckers''', que servirão como recurso para diversos itens de confecção '''exclusiva''' da especialização de Alquimista. |
|
| |
|
| '''Dica''': Guarde os artefatos no centro pokémon e só entregue eles para o seu NPC correspondente, sendo assim você saberá quais já entregou.
| | <center>[[Arquivo:Recurso_Dew_Becker.gif|link=]]</center> |
|
| |
|
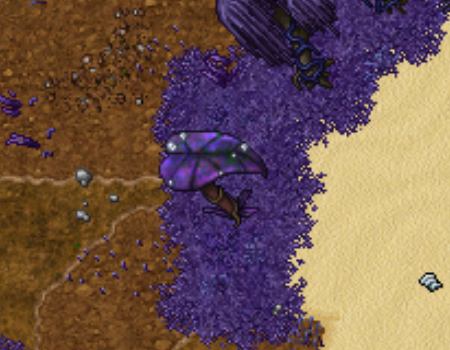
| | Ao coletar o recurso, o jogador retirará o '''orvalho''' da planta, fazendo com que esta fique seca, e se torne uma '''Strange Plant'''. |
|
| |
|
| | | <center> |
| Após completar todas as tasks e entregar todos os 15 artefatos, você deverá conversar com Ash Ketchum, na base sul. Ele dirá que todas as peças do artefato foram entregues e que conseguiram uní-las em um poderoso objeto, que tem o poder de fechar o portal para sempre.
| | {| class="wikitable" |
| | | |+ |
| '''Você reberá 8KK de experiência após concluir essa parte da quest.'''
| |
| | |
| =='''A batalha final'''== <!--T:39-->
| |
| | |
| Ash dirá que serão necessários diferentes tipos de poderes para conseguir invadir a fortaleza da Outland, sendo assim, você terá que reunir uma equipe '''de 6 até 9 jogadores''' de clãs diferentes, sendo eles:
| |
| | |
| | |
| | |
| Naturia, Volcanic, Seavell, Orebound, Malefic, Psycraft, Gardestrike, Raibolt, Wingeon e Ironhard.
| |
| | |
| | |
| <span style="color:red">Observação:</span> Após a atualização do dia 15/12/2021, '''o clã Ironhard não é mais um coringa''', só podendo ter 1 no time e não substitui mais qualquer clã. Agora também não é mais necessário ter 9 jogadores na equipe, com 6 jogadores a quest pode ser iniciada.
| |
| | |
| | |
| O portal para a fortaleza da Outland se encontra no final do caminho da Ghost Area. Veja na imagem a seguir:
| |
|
| |
| | |
| <center>[[Arquivo:Caminho_Outland_Main1.jpg|link=]] [[Arquivo:Caminho_Outland_Main2.jpg.jpg|link=]]</center>
| |
| | |
| | |
| | |
| '''Cada jogador deverá se posicionar em algum dos sqms marcados no chão, quando todos estiverem posicionados, a caixa verde no centro deve ser ativada para que a missão final se inicie:'''
| |
| | |
| | |
| <center>[[Arquivo:Hall_Outland_Main.jpg|link=Outland_Main]]</center>
| |
| | |
| Na primeira parte da quest, cada jogador deverá seguir sozinho um percurso com vários inimigos. Não é necessário derrotar nenhum pokémon, apenas derrotar o NPC no final do percurso. Neste local, os pokémon dão Respawn normalmente.
| |
| | |
| <center>[[Arquivo:Outland10.png|link=Outland_Main]]</center>
| |
| | |
| ==='''Primeira parte'''=== <!--T:48-->
| |
| Você enfrentará, na ordem:
| |
| | |
| {| class="wikitable" width="100%" | |
| |- | | |- |
| | width="20%" align="center" | Rock
| | ! Wet Strange Plant !! Strange Plant |
| | width="80%" align="center" | 3 Hard Golem e 3 Brute Rhydon
| |
| |- | | |- |
| | width="20%" align="center" | Ground | | | [[Arquivo:Wet_Strange_Plant.png|link=]] || [[Arquivo:Strange_Plant.png|link=]] |
| | width="80%" align="center" | 3 Furious Sandslash, 3 Roll Donphan e 1 Bone Marowak | |
| |- | | |- |
| | width="20%" align="center" | Ghost
| |
| | width="80%" align="center" | 3 Trickmaster Gengar e 3 Banshee Misdreavus
| |
| |-
| |
| | width="20%" align="center" | Fire
| |
| | width="80%" align="center" | 2 Lava Magmar, 2 Enraged Typhlosion, 1 Brave Charizard e 1 Wardog Arcanne
| |
| |-
| |
| | width="20%" align="center" | Psychic
| |
| | width="80%" align="center" | 2 Enigmatic Girafarig, 2 Tribal Xatu e 2 Ancient Alakazam
| |
| |-
| |
| | width="20%" align="center" | Water
| |
| | width="80%" align="center" | 1 Octopus Octillery, 2 Brave Blstoise, 2 Triba Feraigatr e 1 War Gyaradosl
| |
| |-
| |
| | width="20%" align="center" | Grass
| |
| | width="80%" align="center" | 3 Ancient Meganium e 3 Brave Venusaur
| |
| |-
| |
| | width="20%" align="center" | Poison
| |
| | width="80%" align="center" | 2 Dark Crobat, 2 Brave Nidoking e 2 Brave Nidoqueen
| |
| |-
| |
| | width="20%" align="center" | Bug
| |
| | width="80%" align="center" | 3 Furious Scyther e 3 War Heracross
| |
| |-
| |
| | width="20%" align="center" | Flying
| |
| | width="80%" align="center" | 4 Aviator Pidgeot, 1 Brave Noctowl e 1 Metal Skarmory
| |
| |-
| |
| | width="20%" align="center" | Normal
| |
| | width="80%" align="center" | 2 Milch-Miltank, 2 Monn Clafable, 1 Granbull e 1 Singer Wigglytuff
| |
| |-
| |
| | width="20%" align="center" | Ice
| |
| | width="80%" align="center" | 2 Freezing Dewgong, 2 Evil Cloyster, 1 Psy Jynx e 1 Heavy Piloswine
| |
| |-
| |
| | width="20%" align="center" | Dragon
| |
| | width="80%" align="center" | 2 Ancient Kingdra e 3 Ancient Dragonite
| |
| |-
| |
| | width="20%" align="center" | Fighting
| |
| | width="80%" align="center" | 1 Capoeira Hitmontop 1Taekwondo Hitmonlee, 1 Boxer Hitmonchan e 3 Undfeated Machamp
| |
| |-
| |
| | width="20%" align="center" | Electric
| |
| | width="80%" align="center" | 2 Furious Ampharos, 2 Charged Raichu e 2 Magnetic Elctabuzz
| |
| |-
| |
| | width="20%" align="center" | Final
| |
| | width="80%" align="center" | Um clone de um dos integrantes de sua equipe, com os 6 pokémon que ele estava usando quando entrou na quest.
| |
| |} | | |} |
| | </center> |
|
| |
|
| ==='''Segunda parte'''=== <!--T:50--> | | =Árvore de Berry= |
| Quando um jogador derrota o NPC Clone no final do percurso, ele é teleportado para um dos 9 pontos a seguir. Tome muito cuidado, pois o local estará repleto de '''Outland Spectre''', NPCs que usam diversos pokémon.
| |
|
| |
|
| <center>[[Arquivo:Outland11.png|link=Outland_Main]]</center>
| | '''Alquimistas''' podem coletar recursos da '''Árvore de Berry''', obtendo '''Berries''' e '''Medicinal Leaves'''. |
|
| |
|
| O objetivo é reunir todos os jogadores na fortaleza ao norte do mapa, como informado na imagem acima. No local existirá outra plataforma, onde cada jogador deverá se posicionar nos espaços marcados no chão, como antes.
| | <span style="color:red">'''Atenção:'''</span> Apenas as '''2 coletas''' da Árvore de Berry concederão '''Berries'''. Após isso, o jogador receberá apenas '''Medicinal Leaves.''' |
|
| |
|
| <center>[[Arquivo:Outland12.png|link=Outland_Main]]</center> | | <center>[[Arquivo:Árvore_de_Berries.gif|link=]]</center> |
|
| |
|
| ==='''Terceira parte'''=== <!--T:54--> | | =Crafts Exclusivos= |
| <span style="color:red">'''ATENÇÃO''':</span> Ao acionar o botão, a equipe será teleportada para a arena com muitos NPC Outland Spectre.
| |
|
| |
|
| Serão '''4 rodadas de luta contra os NPC'''. No final de cada rodada os jogadores devem voltar a suas posições e acionarem o botão verde, para que a próxima rodada se inicie. Cuidado, pois a cada luta eles usam pokémon mais fortes do que na rodada anterior.
| | <tabber> |
| | |-|Craft Philosopher's Stone= |
|
| |
|
| <center>[[Arquivo:Outland13.png|link=Outland_Main]]</center> | | <center> |
| | {| class="wikitable" width="70%" |
| | ! width="2%" style="background-color: #9d1a64" | Item |
| | ! width="1%" style="background-color: #9d1a64" | Habilidade |
| | ! width="1%" style="background-color: #9d1a64" | Tempo de espera |
| | ! width="5%" style="background-color: #9d1a64" | Materiais |
| | |- |
| | | align="center" | [[Arquivo:Philosopher's_Stone.png|link=]]<br>Philosopher's Stone |
| | | align="center" | Skill 120 |
| | | align="center" | 10 Dias |
| | | align="center" | [[Arquivo:Dew_Becker.png|link=]] 36000 Dew Beckers <br> [[Arquivo:Diamond.png|link=]] 20 Diamonds <br> [[Arquivo:Black-Darkrai-Essence.gif|link=]] 10 Black Darkrai Essences <br> [[Arquivo:Fire_Monkey_Hair.png|link=]] 60 Fire Monkey Hairs <br> [[Arquivo:Corrupted-Feather.gif|link=]] 60 Corrupted Feathers <br> [[Arquivo:Petite_Leaves.png|link=]] 60 Petite Leaves <br> [[Arquivo:Corrupted-Pot-of-Lava.gif|link=]] 60 Corrupted Pots Of Lava <br> [[Arquivo:Red_Spike.png|link=]] 60 Red Spikes <br> [[Arquivo:Pig_Ear.png|link=]] 60 Pig Ears <br> [[Arquivo:Big Eagle Feather.png|link=]] 60 Big Eagle Feather <br> [[Arquivo:Solid_Head.png|link=]] 10 Solid Heads <br> [[Arquivo:Compressed_Nightmare_Gems.png|link=]] 10 Compressed Nightmare Gems <br> [[Arquivo:Royal_Mane.png|link=]] 5 Royal Manes <br> [[Arquivo:Flame_Tail.png|link=]] 1 Flame Tails <br> [[Arquivo:Turtle_Shell.png|link=]] 3 Turtle Shells <br> [[Arquivo:Sentry_Remains.png|link=]] 40 Sentry Remains <br> [[Arquivo:Red-Star-Piece.gif|link=]] 2 Red Star Piece |
| | |- |
| | |} |
| | </center> |
|
| |
|
| No final da última rodada, você será teleportado para a sala que selará o portal da Outland.
| | <table class="seeMore"> |
| | <tr> |
| | <td class="seeMore__image">[[Arquivo:Telekinetic-compass.gif|link=]]</td> |
| | <td> '''Veja mais:[[Philosopher's_Stone|Philosopher's Stone]], [[Elixir#Elixir_de_Alquimista|Elixires]], [[Craft_Profissões_-_Professor#Rank_S|Crafts Professor Rank S]]'''</td> |
| | </tr> |
| | </table> |
|
| |
|
| | |-|Crafts Workshop= |
|
| |
|
| '''Cada jogador deverá colocar seu artefato em uma das pilastras.'''
| | <center> |
| | | {| class="wikitable sortable" width="70%" |
| | | ! width="2%" class="unsortable" | Item |
| Quando todos tiverem terminado, cada um ganhará '''14KK''' de experiência.
| | ! width="1%" | Habilidade |
| | | ! width="1%" class="unsortable" | Tempo de espera |
| <center>[[Arquivo:Outland14.png|link=Outland_Main]]</center>
| | ! width="5%" class="unsortable" | Materiais |
| | |
| Após isso, os jogadores devem falar com o '''NPC Ash Ketchum'''.
| |
| | |
| | |
| Ele ficará agradecido e te dirá para recolher sua recompensa '''com o mentor de seu clã''' (O mesmo que inicia a quest).
| |
| | |
| =='''Artefatos'''==
| |
|
| |
| Nesta parte listaremos o caminho para os artefatos da Outland Main Quest.
| |
| | |
| {|class="wikitable" width="100%" | |
| ! align="center" width="20%" colspan="2" | NPC | |
| ! align="center" width="20%" | Artefato | |
| ! align="center" width="60%" | Você enfrentará | |
| |-
| |
| | align="center" width="10%" |[[Arquivo:League_Misty.png|link=Outland_Main]]
| |
| | align="center" width="10%" |Misty
| |
| | align="center" | Artefato Water
| |
| | align="center" | Brave Blastoise, Tribal Feraligatr, Octopus Octillery, War Gyarados, Elder Blastoise e Elder Tentacruel
| |
| |-
| |
| | align="center" | [[Arquivo:League_Erika.png|link=Outland_Main]]
| |
| | align="center" | Erika
| |
| | align="center" | Artefato Grass
| |
| | align="center" | Ancient Meganium, Brave Venusaur, Elder Tangela e Elder Venusaur
| |
| |- | | |- |
| | align="center" | [[Arquivo:League_Bugsy.png|link=Outland_Main]] | | | align="center" | [[Arquivo:Ganlon_Seed.png|link=]]<br>Ganlon Seed |
| | align="center" | Bugsy | | | align="center" | Skill 103 |
| | align="center" | Artefato Bug | | | align="center" | 1 Hora |
| | align="center" | War Heracross, Furious Scizor, Elder Pinsir e Tribal Scyther | | | align="center" | [[Arquivo:Dew_Becker.png|link=]] 225 Dew Beckers <br> [[Arquivo:Nightmare-Seed-Bag.gif|link=]] 5 Nightmare Seed Bags <br> [[Arquivo:Corrupted-Streak-Tail.gif|link=]] 2 Corrupted Streak Tails <br> [[Arquivo:Corrupted-Ice-Piece.gif|link=]] 2 Corrupted Ice Pieces <br> [[Arquivo:Fire_Monkey_Hair.png|link=]] 1 Fire Monkey Hairs |
| |- | | |- |
| | align="center" | [[Arquivo:League_Sabrina.png|link=Outland_Main]] | | | align="center" | [[Arquivo:Kamikaze_Elixir.png|link=]]<br>Kamikaze Elixir (10x) |
| | align="center" | Sabrina | | | align="center" | Skill 103 |
| | align="center" | Artefato Psychic | | | align="center" | 20 Segundos |
| | align="center" | Enigmatic Girafarig, Tribal Xatu, Ancient Alakazam e Master Alakazam | | | align="center" | [[Arquivo:Dew_Becker.png|link=]] 240 Dew Beckers <br> [[Arquivo:Red_Crushed_Leaf.png|link=]] 750 Red Crushed Leaves <br> [[Arquivo:Green_Crushed_Leaf.png|link=]] 750 Green Crushed Leaves <br> [[Arquivo:Yellow_Crushed_Leaf.png|link=]] 750 Yellow Crushed Leaves |
| |- | | |- |
| | align="center" | [[Arquivo:League_LtSurge.png|link=Outland_Main]] | | | align="center" | [[Arquivo:Iron_Wall_Elixir.png|link=]]<br>Iron Wall Elixir (10x) |
| | align="center" | Lt.Surge | | | align="center" | Skill 105 |
| | align="center" | Artefato Electric | | | align="center" | 20 Segundos |
| | align="center" | Charged Raichu, Furious Ampharos, Magnetic Electabuzz, Elder Electabuzz e Elder Raichu | | | align="center" | [[Arquivo:Dew_Becker.png|link=]] 240 Dew Beckers <br> [[Arquivo:Red_Crushed_Leaf.png|link=]] 750 Red Crushed Leaves <br> [[Arquivo:Green_Crushed_Leaf.png|link=]] 750 Green Crushed Leaves <br> [[Arquivo:Yellow_Crushed_Leaf.png|link=]] 750 Yellow Crushed Leaves |
| |- | | |- |
| | align="center" | [[Arquivo:League_Lance.png|link=Outland_Main]] | | | align="center" | [[Arquivo:Salvation_Elixir.png|link=]]<br>Salvation Elixir |
| | align="center" | Lance | | | align="center" | Skill 107 |
| | align="center" | Artefato Dragon | | | align="center" | 20 Segundos |
| | align="center" | Ancient Dragonair, Ancient Dragonite e Elder Dragonite | | | align="center" | [[Arquivo:Dew_Becker.png|link=]] 135 Dew Beckers <br> [[Arquivo:Red_Crushed_Leaf.png|link=]] 420 Red Crushed Leaves <br> [[Arquivo:Yellow_Crushed_Leaf.png|link=]] 420 Yellow Crushed Leaves <br> [[Arquivo:Green_Crushed_Leaf.png|link=]] 420 Green Crushed Leaves <br> |
| |- | | |- |
| | align="center" | [[Arquivo:League Lorelei.png|link=Outland_Main]] | | | align="center" | [[Arquivo:Hot_Nightmare_Potion.png|link=]]<br>Hot Nightmare Potion (100x) |
| | align="center" | Lorelei | | | align="center" | Skill 102 |
| | align="center" | Artefato Ice | | | align="center" | 1 Hora |
| | align="center" | Evil Cloyster, Freezing Dewgong e Elder Jynx | | | align="center" | [[Arquivo:Red_Crushed_Leaf.png|link=]] 353 Red Crushed Leaves <br> [[Arquivo:Yellow_Crushed_Leaf.png|link=]] 353 Yellow Crushed Leaves <br> [[Arquivo:Green_Crushed_Leaf.png|link=]] 353 Green Crushed Leaves <br> [[Arquivo:Dew_Becker.png|link=]] 113 Dew Beckers |
| |- | | |- |
| | align="center" | [[Arquivo:League_Kyra.png|link=Outland_Main]] | | | align="center" | [[Arquivo:Black_Nightmare_Potion.png|link=]]<br>Black Nightmare Potion (100x) |
| | align="center" | Kyra | | | align="center" | Skill 101 |
| | align="center" | Artefato Normal | | | align="center" | 1 Hora |
| | align="center" | Milch-Miltank, Brute Ursaring e Brute Snorlax | | | align="center" | [[Arquivo:Red_Crushed_Leaf.png|link=]] 333 Red Crushed Leaves <br> [[Arquivo:Yellow_Crushed_Leaf.png|link=]] 333 Yellow Crushed Leaves <br> [[Arquivo:Green_Crushed_Leaf.png|link=]] 333 Green Crushed Leaves <br> [[Arquivo:Dew_Becker.png|link=]] 105 Dew Beckers |
| |- | | |- |
| | align="center" | [[Arquivo:League_Falkner.png|link=Outland_Main]] | | | align="center" | [[Arquivo:Superior_Nightmare_Revive.png|link=]]<br>Superior Nightmare Revive |
| | align="center" | Falkner | | | align="center" | Skill 110 |
| | align="center" | Artefato Flying | | | align="center" | 30 Minutos |
| | align="center" | Aviator Pidgeot, Brave Noctowl, Metal Skarmory e Elder Pidgeot | | | align="center" | [[Arquivo:Dew_Becker.png|link=]] 24 Dew Beckers <br> [[Arquivo:Red_Crushed_Leaf.png|link=]] 75 Red Crushed Leaves <br> [[Arquivo:Yellow_Crushed_Leaf.png|link=]] 75 Yellow Crushed Leaves <br> [[Arquivo:Green_Crushed_Leaf.png|link=]] 75 Green Crushed Leaves |
| |- | | |- |
| | align="center" | [[Arquivo:League_Brock.png|link=Outland_Main]] | | | align="center" | [[Arquivo:Fertilizer.png|link=]]<br>Fertilizer |
| | align="center" | Brock | | | align="center" | Skill 100 |
| | align="center" | Artefato Ground | | | align="center" | 30 Minutos |
| | align="center" | Roll Donphan, Furious Sandslash, Bone Marowak e Elder Marowak | | | align="center" | [[Arquivo:Green_Crushed_Leaf.png|link=]] 140 Green Crushed Leaves <br> [[Arquivo:Dew_Becker.png|link=]] 15 Dew Beckers |
| |- | | |- |
| | align="center" | [[Arquivo:League_Bruno.png|link=Outland_Main]] | | | align="center" | [[Arquivo:Cell_Culture_Tubes.png|link=]]<br>Cell Culture Tubes |
| | align="center" | Bruno | | | align="center" | Skill 100 |
| | align="center" | Artefato Rock | | | align="center" | 2 Horas |
| | align="center" | Hard Golem, Brute Rhydon, Brute Tyranitar e Iron Steelix | | | align="center" | [[Arquivo:Dew_Becker.png|link=]] 600 Dew Beckers <br> [[Arquivo:Corrupted-Streak-Tail.gif|link=]] 10 Corrupted Streak Tails <br> [[Arquivo:Red_Spike.png|link=]] 10 Red Spikes <br> [[Arquivo:Toxic_Gosme.png|link=]] 5 Toxic Gosmes |
| |- | | |- |
| | align="center" | [[Arquivo:League_Blaine.png|link=Outland_Main]] | | | align="center" | [[Arquivo:Pink-Star-Piece.gif|link=]]<br>Pink Star Piece |
| | align="center" | Blaine | | | align="center" | Skill 120 |
| | align="center" | Artefato Fire | | | align="center" | 5 Horas |
| | align="center" | Brave Charizard, Enraged Typhlosion, Lava Magmar, Wardog Arcanine, Elder Charizard e Elder Arcanine | | | align="center" | [[Arquivo:Dew_Becker.png|link=]] 6000 Dew Beckers <br> [[Arquivo:Star_Dust.png|link=]] 150 Star Dusts <br> [[Arquivo:Boost1.png|link=]] 5 Boost Stones |
| |- | | |- |
| | align="center" | [[Arquivo:League_Chuck.png|link=Outland_Main]]
| |
| | align="center" | Chuck
| |
| | align="center" | Artefato Fighting
| |
| | align="center" | Boxer Hitmonchan, Capoeira Hitmontop, Taekwondo Hitmonlee e Undefeated Machamp
| |
| |-
| |
| | align="center" | [[Arquivo:League_Koga.png|link=Outland_Main]]
| |
| | align="center" | Koga
| |
| | align="center" | Artefato Poison
| |
| | align="center" | Brave Nidoking, Brave Nidoqeen e Elder Muk
| |
| |-
| |
| | align="center" | [[Arquivo:League_Agatha.png|link=Outland_Main]]
| |
| | align="center" | Agatha
| |
| | align="center" | Artefato Ghost
| |
| | align="center" | Trickmaster Gengar, Banshee Misdreavus, Dark Abra e Dark Gengar
| |
| |}
| |
|
| |
| ===<span style="color:red">'''Outland North'''</span>=== <!--T:61-->
| |
|
| |
| ===='''Artefato Water'''==== <!--T:62-->
| |
| ----
| |
| <center>[[Arquivo:water_1_artefato.jpg|link=]] [[Arquivo:water_2_artefato.jpg|link=]]</center>
| |
|
| |
| ===='''Artefato Grass'''==== <!--T:63-->
| |
| ----
| |
| <center>[[Arquivo:grass_1_artefato.jpg|link=]] [[Arquivo:grass_2_artefato.jpg|link=]]</center>
| |
|
| |
| ===='''Artefato Bug'''==== <!--T:64-->
| |
| ----
| |
| <center>[[Arquivo:bug_artefato.jpg|link=]]</center>
| |
|
| |
| ===='''Artefato Psychic'''==== <!--T:65-->
| |
| ----
| |
| <center>[[Arquivo:psychic_1_artefato.jpg|link=]] [[Arquivo:psychic_2_artefato.jpg|link=]] [[Arquivo:psychic_3_artefato.jpg|link=]]</center>
| |
|
| |
| ===<span style="color:red">'''Outland South'''</span>=== <!--T:67-->
| |
|
| |
| ===='''Artefato Electric'''==== <!--T:66-->
| |
| ----
| |
| <center>[[Arquivo:electric_1_artefato.jpg|link=]] [[Arquivo:electric_2_artefato.jpg|link=]]</center>
| |
|
| |
| ===='''Artefato Normal'''==== <!--T:68-->
| |
| ----
| |
| <center>[[Arquivo:normal_artefato.jpg|link=]]</center>
| |
|
| |
| ===='''Artefato Flying'''==== <!--T:69-->
| |
| ----
| |
| <center>[[Arquivo:fly_1_artefato.jpg|link=]] [[Arquivo:fly_2_artefato.jpg|link=]]</center>
| |
|
| |
| ===='''Artefato Ice'''==== <!--T:70-->
| |
| ----
| |
| <center>[[Arquivo:ice_artefato.jpg|link=]] [[Arquivo:ice_2_artefato.jpg|link=]] [[Arquivo:ice_3_artefato.jpg|link=]]</center>
| |
|
| |
| ===='''Artefato Dragon'''==== <!--T:71-->
| |
| ----
| |
| <center>[[Arquivo:dragon_1_artefato.jpg|link=]] [[Arquivo:dragon_2_artefato.jpg|link=]] [[Arquivo:dragon_3_artefato.jpg|link=]]</center>
| |
|
| |
| ===='''Artefato Ground'''==== <!--T:72-->
| |
| ----
| |
| <center>[[Arquivo:ground_artefato.jpg|link=]]</center>
| |
|
| |
| ===<span style="color:red">'''Outland East'''</span>=== <!--T:73-->
| |
|
| |
| ===='''Artefato Poison'''==== <!--T:74-->
| |
| ----
| |
| <center>[[Arquivo:poison_artefato.jpg|link=]]</center>
| |
|
| |
| ===='''Artefato Ghost'''==== <!--T:75-->
| |
| ----
| |
| <center>[[Arquivo:ghost_1_artefato.jpg|link=]] [[Arquivo:ghost_2_artefato.jpg|link=]]</center>
| |
|
| |
| ===='''Artefato Fighting'''==== <!--T:76-->
| |
| ----
| |
| <center>[[Arquivo:fight_artefato.jpg|link=]]</center>
| |
|
| |
| ===='''Artefato Rock'''==== <!--T:77-->
| |
| ----
| |
| <center>[[Arquivo:rock_1_artefato.jpg|link=]] [[Arquivo:rock_2_artefato.jpg|link=]]</center>
| |
|
| |
| ===='''Artefato Fire'''==== <!--T:78-->
| |
| ----
| |
| <center>[[Arquivo:fire_1_artefato.jpg|link=]] [[Arquivo:fire_2_artefato.jpg|link=]]</center>
| |
|
| |
| '''Antigo''' <br>
| |
| =='''Itens da recompensa:'''== <!--T:5-->
| |
|
| |
| <center>
| |
| {| class="wikitable" width="100%"
| |
| |- align="center"
| |
| !align="center" width="1%" colspan="10" style="background-color: #4682B4" |'''Recompensas'''
| |
| |-
| |
| !width="10% | 22.000.000 de Experiência
| |
| ! width="10% |32 Feather Stone
| |
| ! width="10% |32 Earth Stone
| |
| ! width="10% |32 Fire Stone
| |
| ! width="10% |32 Water Stone
| |
| ! width="10% |32 Leaf Stone
| |
| ! width="10% |32 Heart Stone
| |
| ! width="10% |32 Enigma Stone
| |
| ! width="10% |32 Rock Stone
| |
| ! width="10% |32 Venom Stone
| |
| |- align="center"
| |
| | [[Arquivo:Exp_icon.png|30px|link=]]
| |
| | [[Arquivo:Feather1.png|link=]]
| |
| | [[Arquivo:Earth-stone.gif|link=]]
| |
| | [[Arquivo:Fire-stone.gif|link=]]
| |
| | [[Arquivo:Water-stone.gif|link=]]
| |
| | [[Arquivo:Leaf-stone.gif|link=]]
| |
| | [[Arquivo:Heart-stone.gif|link=]]
| |
| | [[Arquivo:Enigma-stone.gif|link=]]
| |
| | [[Arquivo:Rock-stone.gif|link=]]
| |
| | [[Arquivo:Venom-stone.gif|link=]]
| |
| |-
| |
| ! width="10% |32 Punch Stone
| |
| ! width="10% |32 Darkness Stone
| |
| ! width="10% |32 Cocoon Stone
| |
| ! width="10% |32 Thunder Stone
| |
| ! width="10% |32 Ice Stone
| |
| ! width="10% |4 Metal Stone
| |
| ! width="10% |4 Crystal Stone
| |
| ! width="10% |4 Ancient Stone
| |
| ! width="10% |2 Cartoon Box
| |
| ! width="10% |2 Halloween Box
| |
| |- align="center"
| |
| | [[Arquivo:HrnVNwK.png|link=]]
| |
| | [[Arquivo:Cocoon_stone.gif|link=]]
| |
| | [[Arquivo:Thunder-stone.gif|link=]]
| |
| | [[Arquivo:Ice-stone.gif|link=]]
| |
| | [[Arquivo:MetalStone.png|link=]]
| |
| | [[Arquivo:Crystal-stone.gif|link=]]
| |
| | [[Arquivo:Ancient-stone.gif|link=]]
| |
| | [[Arquivo:Cartoon_Box.png|link=]]
| |
| | [[Arquivo:Halloween_Box.png|link=]]
| |
| | [[Arquivo:3mDejdt.png|link=]]
| |
| |-
| |
| ! width="10% |Clã Doll
| |
| ! width="10% |900.000 Cash
| |
| |- align="center"
| |
| | [[Arquivo:Toy_cla.png|link=]]
| |
| | [[Arquivo:900k.png|30px|link=]]
| |
| |} | | |} |
| </center> | | </center> |
|
| |
|
| '''Toy personalizado de acordo com o clã do jogador'''
| | <table class="seeMore"> |
| | | <tr> |
| | | <td class="seeMore__image">[[Arquivo:Telekinetic-compass.gif|link=]]</td> |
| ----
| | <td> '''Veja mais: [[Craft_Profissões_-_Professor#Rank_S|Crafts Professor Rank S]], [[Tabela_de_Boost#Boost_+80|Pink Star Piece]]'''</td> |
| '''Atual''' <br>
| | </tr> |
| =='''Itens da recompensa:'''== <!--T:5-->
| | </table> |
| <center> | |
| {| class="wikitable" width="100%"
| |
| |- align="center"
| |
| !align="center" width="1%" colspan="11" style="background-color: #4682B4" |'''Recompensas'''
| |
| |-
| |
| !width="8% | 2.000.000 de Experiência
| |
| ! width="8% |900.000 Cash
| |
| ! width="8% |32 Feather Stone
| |
| ! width="8% |32 Earth Stone
| |
| ! width="8% |32 Fire Stone
| |
| ! width="9% |32 Water Stone
| |
| ! width="8% |32 Leaf Stone
| |
| ! width="8% |32 Heart Stone
| |
| ! width="8% |32 Enigma Stone
| |
| ! width="8% |32 Rock Stone
| |
| ! width="8% |32 Venom Stone
| |
| |- align="center"
| |
| | [[Arquivo:Exp_icon.png|30px|link=]]
| |
| | [[Arquivo:900k.png|30px|link=]]
| |
| | [[Arquivo:Feather1.png|link=]]
| |
| | [[Arquivo:Earth-stone.gif|link=]]
| |
| | [[Arquivo:Fire-stone.gif|link=]]
| |
| | [[Arquivo:Water-stone.gif|link=]]
| |
| | [[Arquivo:Leaf-stone.gif|link=]]
| |
| | [[Arquivo:Heart-stone.gif|link=]]
| |
| | [[Arquivo:Enigma-stone.gif|link=]]
| |
| | [[Arquivo:Rock-stone.gif|link=]]
| |
| | [[Arquivo:Venom-stone.gif|link=]]
| |
| |-
| |
| ! width="10% |32 Punch Stone
| |
| ! width="9% |32 Darkness Stone
| |
| ! width="9% |32 Cocoon Stone
| |
| ! width="9% |32 Thunder Stone
| |
| ! width="9% |32 Ice Stone
| |
| ! width="9% |4 Metal Stone
| |
| ! width="9% |4 Crystal Stone
| |
| ! width="9% |4 Ancient Stone
| |
| ! width="9% |2 Cartoon Box
| |
| ! width="9% |2 Halloween Box
| |
| ! width="9% |Clã Doll
| |
| |- align="center"
| |
| | [[Arquivo:3mDejdt.png|link=]]
| |
| | [[Arquivo:HrnVNwK.png|link=]]
| |
| | [[Arquivo:Cocoon_stone.gif|link=]]
| |
| | [[Arquivo:Thunder-stone.gif|link=]]
| |
| | [[Arquivo:Ice-stone.gif|link=]]
| |
| | [[Arquivo:MetalStone.png|link=]]
| |
| | [[Arquivo:Crystal-stone.gif|link=]]
| |
| | [[Arquivo:Ancient-stone.gif|link=]]
| |
| | [[Arquivo:Cartoon_Box.png|link=]]
| |
| | [[Arquivo:Halloween_Box.png|link=]]
| |
| | [[Arquivo:Toy_cla.png|link=]]
| |
| |-
| |
| |}
| |
| </center> | |
|
| |
|
| * '''Observação''': O [[Arquivo:Toy_cla.png|link=]] Clã doll é personalizado à partir do clã do jogador
| | </tabber> |
| [[Arquivo:Outland-master-gif.gif|link=]]
| |