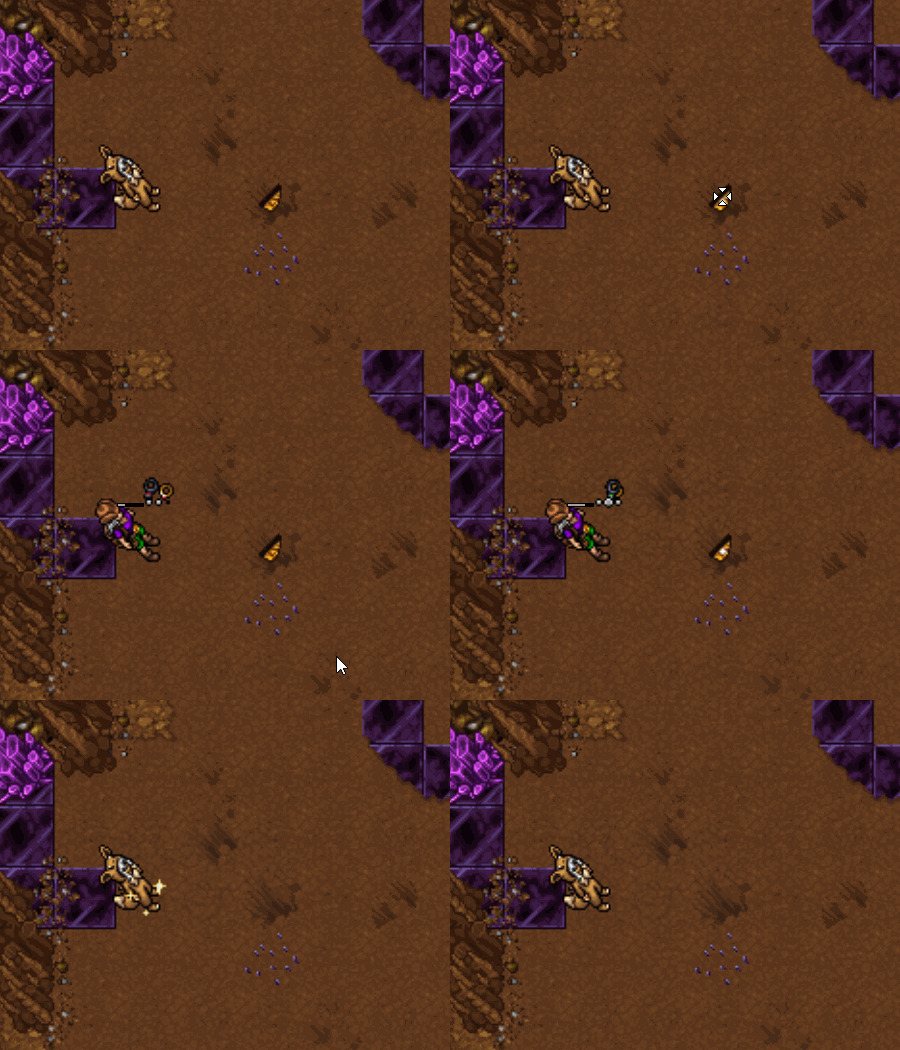
Adventurers can collect buried  Hidden Relics scattered across the map.
Sem resumo de edição |
Sem resumo de edição |
||
| Linha 2: | Linha 2: | ||
[[Arquivo:ES.png|link=Aventurero]] | [[Arquivo:ES.png|link=Aventurero]] | ||
<center>[[Arquivo:Banner_Profissoes_Aventureiro.webp|link=]]</center | <center>[[Arquivo:Banner_Profissoes_Aventureiro.webp|link=]]</center> | ||
The Adventurer profession involves exploring the map in search of mysteries, hidden tombs, and treasure chests. The main resource used by this profession is the Lockpick, an indispensable tool for opening chests found during exploration. | |||
===Becoming an Adventurer=== | |||
To learn more about the Adventurer profession, the player can talk to NPC Todd Snap, located north of the Trade Center. After viewing the profession guide, simply talk to Todd Snap again to receive a portable Workshop E. This item is unique and can be sold back to the NPC. | |||
< | <center>[[Arquivo:Aventureiro (TC).png|link=]]</center> | ||
<!-- | == Profession Ranks == | ||
As the player's profession skill increases, they will be able to upgrade their Workshops, unlocking new ranks. Each rank has a skill range and requires a minimum character level. | |||
<center> | |||
{| class="wikitable" width="60%" style="text-align:center;" | |||
! Rank | |||
! Skill | |||
! Required Level | |||
|- | |||
| '''E''' | |||
| 0 to 20 | |||
| 10 | |||
|- | |||
| '''D''' | |||
| 20 to 40 | |||
| 35 | |||
|- | |||
| '''C''' | |||
| 40 to 60 | |||
| 70 | |||
|- | |||
| '''B''' | |||
| 60 to 80 | |||
| 140 | |||
|- | |||
| '''A''' | |||
| 80 to 100 | |||
| 250 | |||
|- | |||
| '''S''' | |||
| 100 to 120 | |||
| 300 | |||
|} | |||
</center> | |||
== Resource Gathering == | |||
Adventurers use two resources to craft their items: Gold Coin and Cooking Token. | |||
Gold Coins are obtained by opening wooden chests scattered across the map or found in Adventurer Dungeons. To open chests found around the map, the player must use a Lockpick, an item crafted at Rank E of the profession. | |||
<center> [[Arquivo:Bau de Madeira-ADV.png|link=]] [[Arquivo:Bau Mapa-ADV.png|link=]]</center> | |||
Cooking Tokens are obtained by serving customers at restaurants or food stalls. Customers who want to place an order will have their hands raised, indicating that they are waiting to be served. | |||
< | <center> [[Arquivo:Clientes-ADV.png|link=]] </center> | ||
===Lockpick=== | |||
The Adventurer must always keep an eye on the surroundings in search of treasures, as the chests scattered across the map do not require any payment to open and can offer great rewards. To open them, the player must use a Lockpick, so it is recommended to carry several in their backpack. | |||
The | |||
When using a Lockpick on a chest, a window will open, showing the tool stuck in the lock. To open it, the player must position the Lockpick according to their intuition and hold down the spacebar on the keyboard. If it is in the wrong position, it will turn red and gradually begin to break. When noticing this change, release the spacebar, adjust its position, and try again. Repeat this process until the lock turns completely and the chest opens. | |||
The difficulty of opening chests varies according to the player's skill level in the profession. | |||
< | <center>[[Arquivo:Abrir baú (Aventureiro).png|link=]]</center> | ||
===Item Finder=== | |||
The Item Finder is used to locate hidden treasure chests and Dungeons. To use it, simply use it on the ground, and it will indicate the direction of the nearest chest or Dungeon. | |||
The | The Finder's color indicates the distance to the target: green means it is nearby, yellow indicates a moderate distance, and red means it is far away. The device can also indicate whether the target is on another floor, either above or below the player's current position. | ||
After identifying the approximate direction, the player must dig in the places where they believe the chest or Dungeon might be. Depending on what is hidden there, they may find a buried chest or a Dungeon. | |||
====How to use the Item Finder==== | |||
The Item Finder works in a very basic way: the player simply uses it on the ground, and it will point in the direction of the nearest chest or cave. | |||
<center>[[Arquivo:usandofinder.gif|link=]]</center> | |||
It is possible to reset the Item Finder by pressing '''CTRL + Right mouse button''' on it and clicking '''Reset''', or by using the !resetfinder command. | |||
''' | |||
If the Finder is green, it means the location is nearby; if it is yellow, the location is at a moderate distance; if it is red, the Finder is a long way from the chest or Dungeon. | |||
<center> | <center> | ||
[[Arquivo:FinderVerde.png|link=]] Short distance<br> | [[Arquivo:FinderVerde.png|link=]] Short distance<br> | ||
[[Arquivo:FinderAmarelo.png|link=]] Medium distance<br> | [[Arquivo:FinderAmarelo.png|link=]] Medium distance<br> | ||
[[Arquivo:FinderVermelho.png|link=]] Long distance | [[Arquivo:FinderVermelho.png|link=]] Long distance | ||
</center><br> | </center> | ||
The Finder can also indicate when the target object is on a different floor with a blue arrow, pointing either upward or downward. | |||
<center> | |||
[[Arquivo:FinderUp.png|link=]] Upper floor<br> | |||
[[Arquivo:FinderDown.png|link=]] Lower floor<br> | |||
</center> | |||
== Rank S == | |||
Upon reaching Skill 100 in the profession and Level 300, the player will be able to access Rank S content. | |||
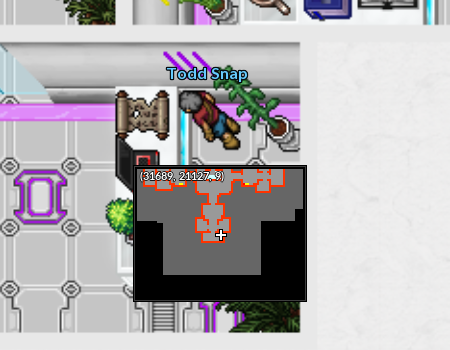
To access the area located in the basement of the Cerulean Resistance Pokémon Center in the Nightmare World, the player must first complete the Introduction Quest. In this location, NPC Todd Snap explains how Rank S works for Adventurers. | |||
<center>[[Arquivo:Todd Snap-Rank S Aventureiro.png|link=]]</center> | |||
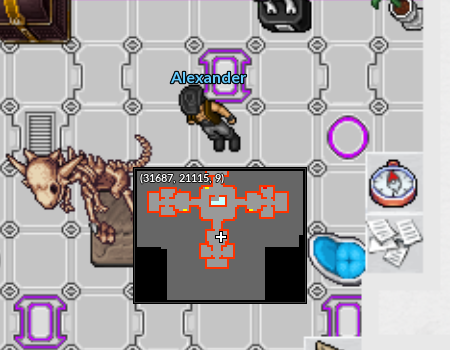
NPC Alexander will also be present in this location. He is responsible for buying profession items crafted at Rank S. | |||
<center>[[Arquivo:NPC Alexander-Aventureiro Rank S.png|link=]]</center> | |||
<table class="seeMore"> | |||
<tr> | |||
<td class="seeMore__image">[[Arquivo:Telekinetic-compass.gif|link=]]</td> | |||
<td>'''See more: [[Introdução_às_Especializações|Introduction to Specializations]]'''</td> | |||
</tr> | |||
</table> | |||
Once the necessary requirements are met, the outfits will be unlocked automatically. | |||
<center> | |||
{| class="wikitable" style="text-align:center;" width="60%" | |||
! colspan="2" | Cook Outfit | |||
! colspan="2" | Archeologist Outfit | |||
|- | |||
| [[Arquivo:Outfit Especializacao Cook Male.png|link=]] | |||
| [[Arquivo:Outfit Especializacao Cook Female.png|link=]] | |||
| [[Arquivo:Outfit Especializacao Arqueólogo Male.png|link=]] | |||
| [[Arquivo:Outfit Especializacao Arqueólogo Female.png|link=]] | |||
|} | |||
</center> | |||
=== Rank S Resources === | |||
The resources used to craft Rank S items for the Adventurer profession can be obtained in the Nightmare World. To collect them, the player must use the [[Arquivo:Toolbag.png|link=]] Toolbag, available in the game's Action Bar, except for chests, which require a Lockpick. | |||
<tabber> | |||
|-| Hidden Relic= | |||
Adventurers can collect buried [[file:Hidden Relic.png|link=]] Hidden Relics scattered across the map. | |||
<center>[[file:Coletando Hidden Relic2.gif|link=]]</center> | |||
|-| Nightmare Chest= | |||
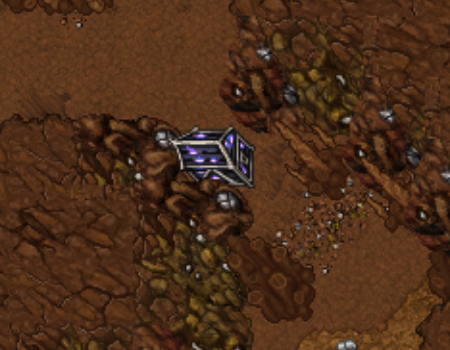
When opening a Nightmare Chest, the player can obtain [[Arquivo:Corrupted Gold Bar.png|link=]] '''Corrupted Gold Bars''', [[Arquivo:Strange Gold Bar.png|link=]] '''Strange Gold Bars''', and [[Arquivo:Nightmare Treasure Map.png|link=]] '''Nightmare Treasure Maps'''. | |||
<center> [[Arquivo:Nightmare Chest1.png|link=]] </center> | |||
|-|Food Bag= | |||
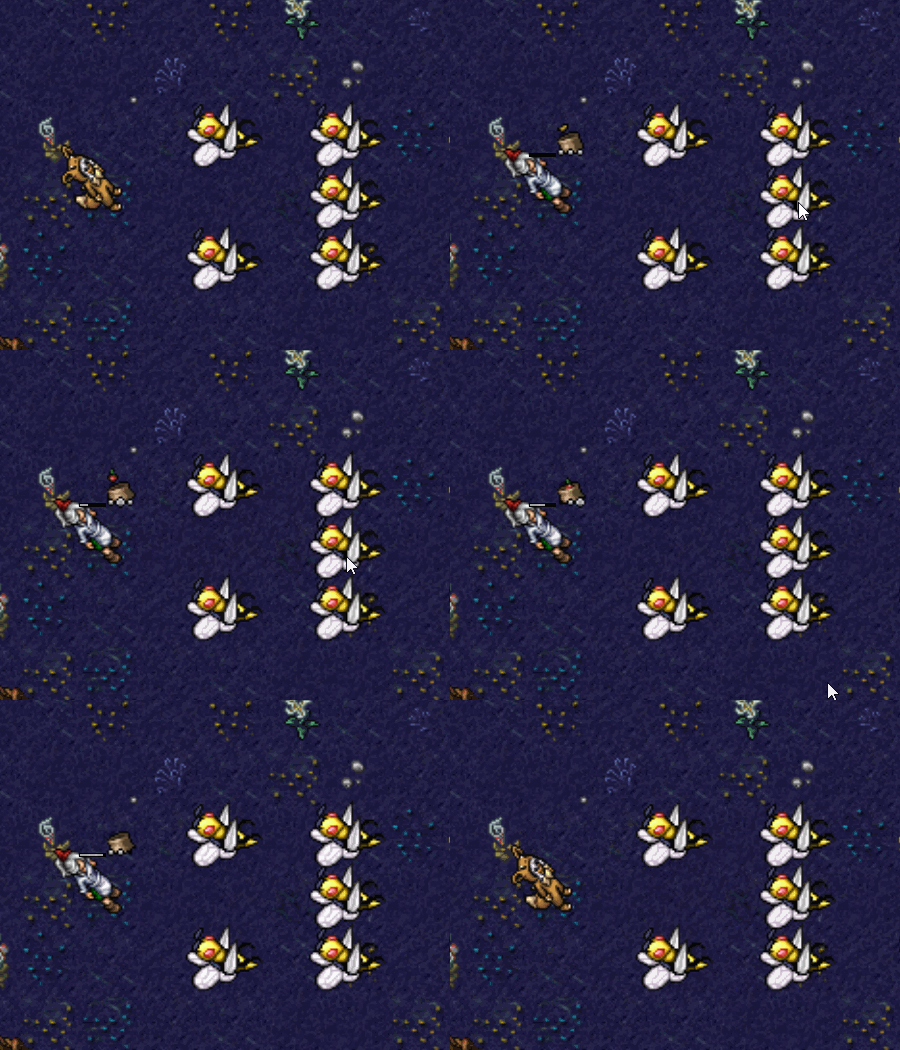
[[Arquivo:Food Bag.png|link=]] '''Food Bags''' are the resource used in most food-related crafts. They are obtained by collecting loot from defeated Pokémon. The amount obtained may vary depending on the strength of the Pokémon defeated. | |||
<center>[[Arquivo:ColetandoFood2.gif|link=]]</center> | |||
</tabber> | |||
'''Tip:''' The [[Arquivo:High-Tech_Chip.gif|link=]] '''High Tech Device''' can be used to convert [[file:Hidden Relic.png|link=]] '''Hidden Relics''' and [[Arquivo:Food Bag.png|link=]] '''Food Bags''' into [[Arquivo:Corrupted Gold Bar.png|link=]] '''Corrupted Gold Bars'''. | |||
==Food Daily== | |||
The daily mission consists of delivering food to certain NPCs at the '''Nightmare World''' Resistances. | |||
<center> | |||
{| class="wikitable" width="25%" | |||
! style="background-color: #9d1a64" | Individual Reward | |||
|- | |||
| align="center" | [[Arquivo:Hundred Dollars.png|link=]] 50 Hundred Dollars (5K) <br> [[Arquivo:Nightmare cooking token.png|link=]] 2 Nightmare Cooking Tokens <br> [[Arquivo:Exp icon nw.png|30px|link=]] 250 Nightmare Experience points | |||
|} | |||
</center> | |||
'''Note:''' | |||
* Each NPC can only receive one food item per day. The daily reset takes place during Server Save at 7:40 (BRT). | |||
* The food requested by NPCs is random, but it will always be Tier 1 food (1% Foods). | |||
* Each Resistance has 2 NPCs who request food, for a total of 12 NPCs. | |||
===NPC Locations=== | |||
<tabber> | |||
|-| Cerulean = | |||
<center> | |||
{| class="wikitable" width="70%" | |||
! colspan="2" width="2%" style="background-color: #9d1a64" | Cerulean | |||
|- | |||
| align="center" | <strong>Camilo</strong> <br> [[Arquivo:Local Npc Camilo.png|link=]] | |||
| align="center" | <strong>Catrina</strong> <br> [[Arquivo:Local Npc Catrina.png|link=]] | |||
|} | |||
</center> | |||
|-| Lavender = | |||
<center> | |||
{| class="wikitable" width="70%" | |||
! colspan="2" width="2%" style="background-color: #9d1a64" | Lavender | |||
|- | |||
| align="center" | <strong>Cristine</strong> <br> [[Arquivo:Local Npc Cristine.png|link=]] | |||
| align="center" | <strong>Mary</strong> <br> [[Arquivo:Local Npc Mary.png|link=]] | |||
|} | |||
</center> | |||
|-| Fuchsia = | |||
<center> | |||
{| class="wikitable" width="70%" | |||
! colspan="2" width="2%" style="background-color: #9d1a64" | Fuchsia | |||
|- | |||
| align="center" | <strong>Teodor</strong> <br> [[Arquivo:Local Npc Teodor.png|link=]] | |||
| align="center" | <strong>Yasmin</strong> <br> [[Arquivo:Local Npc Yasmin.png|link=]] | |||
|} | |||
</center> | |||
|-| Cinnabar = | |||
<center> | |||
{| class="wikitable" width="70%" | |||
! colspan="2" width="2%" style="background-color: #9d1a64" | Cinnabar | |||
|- | |||
| align="center" | <strong>Ashton</strong> <br> [[Arquivo:Local Npc Ashton.png|link=]] | |||
| align="center" | <strong>Cleo</strong> <br> [[Arquivo:Local Npc Cleo.png|link=]] | |||
|} | |||
</center> | |||
|-| Pallet = | |||
<center> | |||
{| class="wikitable" width="70%" | |||
! colspan="2" width="2%" style="background-color: #9d1a64" | Pallet | |||
|- | |||
| align="center" | <strong>Alvaro</strong> <br> [[Arquivo:Local Npc Alvaro.png|link=]] | |||
| align="center" | <strong>Ryann</strong> <br> [[Arquivo:Local Npc Ryann.png|link=]] | |||
|} | |||
</center> | |||
|-| Pewter = | |||
<center> | |||
{| class="wikitable" width="70%" | |||
! colspan="2" width="2%" style="background-color: #9d1a64" | Pewter | |||
|- | |||
| align="center" | <strong>Nilton</strong> <br> [[Arquivo:Local Npc Nilton.png|link=]] | |||
| align="center" | <strong>Georgia</strong> <br> [[Arquivo:Local Npc Georgia.png|link=]] | |||
|} | |||
</center> | |||
</tabber> | |||
===Nightmare Cooking Tokens=== | |||
Nightmare Cooking Tokens are obtained by completing the daily food delivery missions and are used to increase '''productivity''' when preparing food. By enabling the option to use a [[Arquivo:Nightmare cooking token.png|link=]] Nightmare Cooking Token when preparing food and completing the minigame, the player will have a chance to obtain additional '''extra''' food when collecting the results. Each food item produced consumes [[Arquivo:Nightmare cooking token.png|link=]] '''1 Nightmare Cooking Token''' from the player's backpack. | |||
==Travel Exclusivity== | |||
Upon reaching Rank S, Adventurers gain an exclusive benefit that '''makes''' traveling between Resistances easier. This reduces travel expenses between Resistances and increases travel speed, allowing them to travel more frequently to fulfill various requests. | |||
This benefit applies to '''Excadrill Transportation''', allowing Adventurers to travel without a boost. Additionally, when using the boosted version, the travel cost is reduced from 30k to 25k, and its '''speed''' is increased. | |||
<center>[[Arquivo:Travel Cozinheiro.gif|link=]]</center> | |||
==Excavation Center== | |||
The Excavation Center is where Adventurers gather to go on expeditions and search for rare artifacts. To access it, the player must talk to NPC Hoang, located in Fuchsia. | |||
'''Note:''' Nightmare Level 20 is required to start the mission. | |||
<center>[[Arquivo:Local NPC Hoang.png|link=]]</center> | |||
After being teleported to the island, if the player wishes to return to Fuchsia, they simply need to talk to NPC Ploy, who is located right at the entrance. | |||
<center>[[Arquivo:Local NPC Ploy.png|link=]]</center> | |||
===Digger Hiram=== | |||
When talking to Hiram, he will explain that he would like to go out with his friends, but will need to stay late at work. | |||
<center>[[Arquivo:Local Digger Hiram.png|link=]]</center> | |||
He will ask the player to inform his friends '''Moe''', located at the Cerulean Resistance, '''Larry''', located at the Lavender Resistance, and '''Shemp''', located at the Cinnabar Resistance, that he will not be able to see them this week. | |||
<tabber> | |||
|-| Cerulean = | |||
<center> | |||
{| class="wikitable" width="40%" | |||
! colspan="2" width="2%" style="background-color: #9d1a64" | Cerulean | |||
|- | |||
| align="center" | <strong>Moe</strong> <br> [[Arquivo:Local Npc Moe.png|link=]] | |||
|} | |||
</center> | |||
|-| Lavender = | |||
<center> | |||
{| class="wikitable" width="40%" | |||
! colspan="2" width="2%" style="background-color: #9d1a64" | Lavender | |||
|- | |||
| align="center" | <strong>Larry</strong> <br> [[Arquivo:Local Npc Larry.png|link=]] | |||
|} | |||
</center> | |||
|-| Cinnabar = | |||
<center> | <center> | ||
{| class="wikitable" width="40%" | |||
[[Arquivo: | ! colspan="2" width="2%" style="background-color: #9d1a64" | Cinnabar | ||
|- | |||
| align="center" | <strong>Shemp</strong> <br> [[Arquivo:Local Npc Shemp.png|link=]] | |||
|} | |||
</center> | </center> | ||
</tabber> | |||
After talking to all of Hiram's friends, the player must talk to him again to receive the reward: '''[[Arquivo:exp icon.png|link=]] 800,000 Experience (800K)''', [[Arquivo:exp icon nw.png|30px|link=]] '''4,500 Nightmare Experience (4.5K)''', and '''5 [[Arquivo:Strange Gold Bar.png|link=]] Strange Gold Bars'''. | |||
===Digger Frank=== | |||
Digger Frank is an expert excavator who uses special tools in his work. He will give the player a mission to defeat '''300''' [[Arquivo:491-Darkrai.png|25px|link=]] '''Darkrai'''. As a reward, the player will receive the [[Arquivo:Golden Shovel.png|link=]]'''Golden Shovel''', which is used to access the '''Weekly Dungeons'''. | |||
<center>[[Arquivo:Local NPC Digger Frank.png||link=]]</center> | |||
===Digger Anette=== | |||
During her work, Anette discovered that there are many lost chests scattered all over the place. As a good Archaeologist, the player should have no trouble finding them. | |||
= | <center>[[Arquivo:Local Digger Anette.png|link=]]</center> | ||
She will give the player permission to open the chests located in the Nightmare World. | |||
< | <tabber> | ||
|-| Fire Island = | |||
<center>[[Arquivo:Fire Island Chest Anette.png]] | |||
{| class="wikitable" style="text-align:center" width="27.5%" | |||
! colspan="2" | Reward | |||
|- | |||
| [[Arquivo:Book-_Dungeons_-_Fire_Mountain_Temple.png|link=]] || '''Book: Dungeons - Fire Mountain Temple.''' | |||
|- | |||
|[[Arquivo:Book_-_Dungeons_-_The_Frozen_Temple.png|link=]] || '''Book: Dungeons - The Frozen Temple.''' | |||
|- | |||
|} | |||
</center> | |||
|-| Seafoam Island = | |||
<center class="center- | <center>[[Arquivo:Seafom Island Chest Anette.png]] | ||
|-| | {| class="wikitable" style="text-align:center" width="27.5%" | ||
! colspan="2" | Reward | |||
|- | |||
| [[Arquivo:Book-_Dungeons_-_Zeraora%27s_Lair.png|link=]] || '''Book: Dungeons - Zeraora Lair's.''' | |||
|- | |||
|[[Arquivo:Book-_Dungeons_-_Unown%27s_Secret_Place.png|link=]] || '''Book: Dungeons - Unown's Secret Place.''' | |||
|- | |||
|} | |} | ||
|-| | </center> | ||
{| class="wikitable" | |||
|-| Pewter Resistence = | |||
<center>[[Arquivo:Pewter Resistance Chest Anette.png]] | |||
{| class="wikitable" style="text-align:center" width="27.5%" | |||
! colspan="2" | Reward | |||
|- | |||
| [[Arquivo:Book-_Dungeons_-_Golden_Steelix%27s_Lair.png|link=]] || '''Book: Dungeons - Golden Steelix's Lair.''' | |||
|- | |||
|[[Arquivo:Book-_Dungeons_-_Magearna%27s_Temple.png|link=]] || '''Book: Dungeons - Magearna's Temple.''' | |||
|- | |||
|} | |} | ||
|-| | </center> | ||
{| class="wikitable" | |||
|-| Power Plant = | |||
<center>[[Arquivo:Power Plant Chest Anette.png]] | |||
{| class="wikitable" style="text-align:center" width="27.5%" | |||
! colspan="2" | Reward | |||
|- | |||
| [[Arquivo:Book-_Dungeons_-_Birth_Island.png|link=]] || '''Book: Dungeons - Birth Island.''' | |||
|- | |||
|[[Arquivo:Book-_Dungeons_-_Mythical_Dungeon.png|link=]] || '''Book: Dungeons - Mythical Garden.''' | |||
|- | |||
|} | |} | ||
</tabber></center> | </center> | ||
|-| Dragon Tunnel = | |||
<center>[[Arquivo:Dragon Tunnel Chest Anette.png]] | |||
{| class="wikitable" style="text-align:center" width="27.5%" | |||
! colspan="2" | Reward | |||
|- | |||
| [[Arquivo:Book-_Dungeons_-_Darkrai_Cultist_Temple%27s.png|link=]] || '''Book: Dungeons - Darkrai's Cultists Temple.''' | |||
|- | |||
|[[Arquivo:Book-_Dungeons_-_Sea_Guardians_Temple.png|link=]] || '''Book: Dungeons - Sea Guardians Temple.''' | |||
|- | |||
|} | |||
</center> | |||
</tabber> | |||
'''Note:''' These books serve as small hints about the locations of the Weekly Dungeons. | |||
===Professor Sycamore=== | |||
'''Professor Sycamore''' is a renowned Pokémon researcher and is responsible for a weekly mission. To complete it, the player must deliver 5 Professor Oak's Research Journals, which are obtained as rewards from Weekly Dungeons. | |||
<center>[[Arquivo:Local NPC Sycamore.png|link=]]</center> | |||
After delivering the 5 [[Arquivo:Professor Oak's research journal.png|link=]] '''Professor Oak's Research Journals''', the player will receive: [[file:Nightmare Rift.png|link=]] 1x Random Epic Rift, [[file:Hidden Relic.png|link=]] 200 Hidden Relics, [[Arquivo:exp icon.png|30px|link=]] 1,000,000 Experience (1KK), and [[Arquivo:exp icon nw.png|30px|link=]] 3,000 Nightmare World Experience (3K). | |||
== Weekly Dungeon == | |||
To access a Dungeon, the player must use the [[Arquivo:Golden Shovel.png|link=]]'''Golden Shovel''' obtained from NPC Digger Frank at the exact location where the Dungeon is found. | |||
The entrance fee for each Dungeon is 1 [[Arquivo:Treasure Map.png|link=]] '''Treasure Map''', which can be crafted at the Adventurer Workshop S.<br> | |||
For each successful mission, the player will receive some [[file:Hidden Relic.png|link=]] '''Hidden Relics''', one [[Arquivo:Professor Oak's research journal.png|link=]] '''Professor Oak's Research Journal''', and may also obtain rare drops.<br> | |||
'''Note: '''Bless is not lost when dying in a Dungeon. | |||
===Dungeons=== | |||
<center class="hover-minimize"> | |||
[[Arquivo:Banner Bolinha - Unown's Secret Place.png|250px|link=Unown's Secret Place]] | |||
[[Arquivo:Banner Bolinha - The Frozen Temple.png|250px|link=The Frozen Temple]] | |||
[[Arquivo:Banner Bolinha - Birth Island.png|250px|link=Birth Island]] | |||
[[Arquivo:Banner Bolinha - Golden Steelix's Lair.png|250px|link=Golden Steelix's Lair]] | |||
[[Arquivo:Banner Bolinha - Mythical Garden.png|250px|link=Mythical Garden]]<br> | |||
[[Arquivo:Banner Bolinha - Zeraora Lair.png|250px|link=Zeraora's Lair]] | |||
[[Arquivo:Banner Bolinha - Magearna Temple.png|250px|link=Magearna's Temple]] | |||
[[Arquivo:Banner Bolinha - Darkrai Cultists Temple.png|250px|link=Darkrai Cultists Temple]] | |||
[[Arquivo:Banner Bolinha - Fire Mountain.png|250px|link=Fire Mountain]] | |||
[[Arquivo:Banner Bolinha - Sea Guardians Temple.png|250px|link=Sea Guardians Temple]] | |||
</center> | |||
{{#widget:container|class=flex-center break-row}} | {{#widget:container|class=flex-center break-row}} | ||
<table class="seeMore"> | <table class="seeMore"> | ||
<tr> | |||
<td class="seeMore__image">[[Arquivo:Telekinetic-compass.gif|link=]]</td> | |||
<td>'''See also:''' [[Introdução_às_Especializações|Introduction to Specializations]] - [[Mapas de Aventureiro|Adventurer Maps]] - [[Minigame de profissão|Profession Minigame]] - [[High-Tech_Device|High Tech Device]] - [[Craft de Profissões|Profession Craft]] - [[Super Recursos|Super Resources]] - [[Itens Especiais|Special Items]]</td> | |||
</tr> | |||
</table> | </table> | ||
{{#widget:closecontainer}} | {{#widget:closecontainer}} | ||


The Adventurer profession involves exploring the map in search of mysteries, hidden tombs, and treasure chests. The main resource used by this profession is the Lockpick, an indispensable tool for opening chests found during exploration.
To learn more about the Adventurer profession, the player can talk to NPC Todd Snap, located north of the Trade Center. After viewing the profession guide, simply talk to Todd Snap again to receive a portable Workshop E. This item is unique and can be sold back to the NPC.

As the player's profession skill increases, they will be able to upgrade their Workshops, unlocking new ranks. Each rank has a skill range and requires a minimum character level.
| Rank | Skill | Required Level |
|---|---|---|
| E | 0 to 20 | 10 |
| D | 20 to 40 | 35 |
| C | 40 to 60 | 70 |
| B | 60 to 80 | 140 |
| A | 80 to 100 | 250 |
| S | 100 to 120 | 300 |
Adventurers use two resources to craft their items: Gold Coin and Cooking Token.
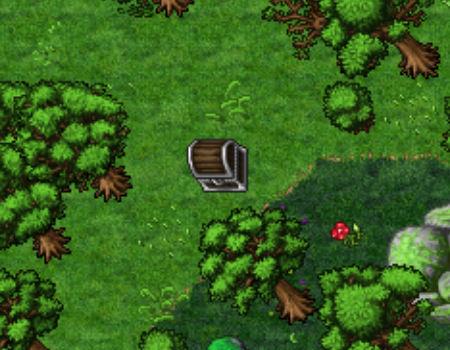
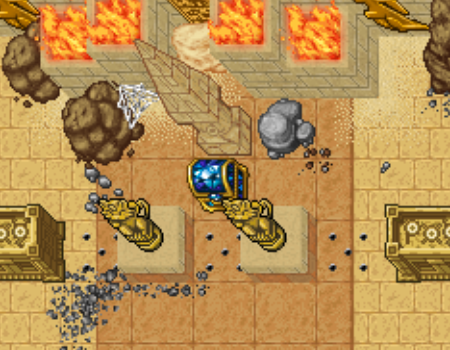
Gold Coins are obtained by opening wooden chests scattered across the map or found in Adventurer Dungeons. To open chests found around the map, the player must use a Lockpick, an item crafted at Rank E of the profession.
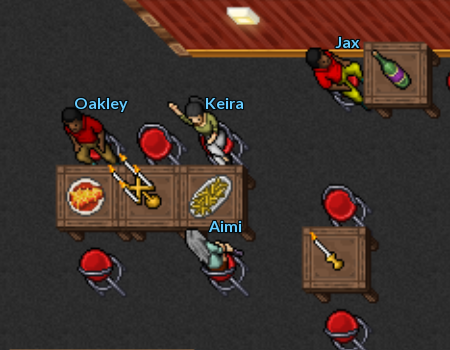
Cooking Tokens are obtained by serving customers at restaurants or food stalls. Customers who want to place an order will have their hands raised, indicating that they are waiting to be served.
The Adventurer must always keep an eye on the surroundings in search of treasures, as the chests scattered across the map do not require any payment to open and can offer great rewards. To open them, the player must use a Lockpick, so it is recommended to carry several in their backpack.
When using a Lockpick on a chest, a window will open, showing the tool stuck in the lock. To open it, the player must position the Lockpick according to their intuition and hold down the spacebar on the keyboard. If it is in the wrong position, it will turn red and gradually begin to break. When noticing this change, release the spacebar, adjust its position, and try again. Repeat this process until the lock turns completely and the chest opens.
The difficulty of opening chests varies according to the player's skill level in the profession.

The Item Finder is used to locate hidden treasure chests and Dungeons. To use it, simply use it on the ground, and it will indicate the direction of the nearest chest or Dungeon.
The Finder's color indicates the distance to the target: green means it is nearby, yellow indicates a moderate distance, and red means it is far away. The device can also indicate whether the target is on another floor, either above or below the player's current position.
After identifying the approximate direction, the player must dig in the places where they believe the chest or Dungeon might be. Depending on what is hidden there, they may find a buried chest or a Dungeon.
The Item Finder works in a very basic way: the player simply uses it on the ground, and it will point in the direction of the nearest chest or cave.

It is possible to reset the Item Finder by pressing CTRL + Right mouse button on it and clicking Reset, or by using the !resetfinder command.
If the Finder is green, it means the location is nearby; if it is yellow, the location is at a moderate distance; if it is red, the Finder is a long way from the chest or Dungeon.
 Short distance
 Medium distance
 Long distance
The Finder can also indicate when the target object is on a different floor with a blue arrow, pointing either upward or downward.
 Upper floor
 Lower floor
Upon reaching Skill 100 in the profession and Level 300, the player will be able to access Rank S content.
To access the area located in the basement of the Cerulean Resistance Pokémon Center in the Nightmare World, the player must first complete the Introduction Quest. In this location, NPC Todd Snap explains how Rank S works for Adventurers.
NPC Alexander will also be present in this location. He is responsible for buying profession items crafted at Rank S.
 |
See more: Introduction to Specializations |
Once the necessary requirements are met, the outfits will be unlocked automatically.
| Cook Outfit | Archeologist Outfit | ||
|---|---|---|---|

|

|

|

|
The resources used to craft Rank S items for the Adventurer profession can be obtained in the Nightmare World. To collect them, the player must use the  Toolbag, available in the game's Action Bar, except for chests, which require a Lockpick.
Adventurers can collect buried Hidden Relics scattered across the map.
When opening a Nightmare Chest, the player can obtain  Corrupted Gold Bars,
 Strange Gold Bars, and
 Nightmare Treasure Maps.
 Food Bags are the resource used in most food-related crafts. They are obtained by collecting loot from defeated Pokémon. The amount obtained may vary depending on the strength of the Pokémon defeated.
Tip: The  High Tech Device can be used to convert Hidden Relics and Food Bags into Corrupted Gold Bars.
The daily mission consists of delivering food to certain NPCs at the Nightmare World Resistances.
| Individual Reward |
|---|
 50 Hundred Dollars (5K)  2 Nightmare Cooking Tokens  250 Nightmare Experience points |
Note:
| Cerulean | |
|---|---|
Camilo 
|
Catrina 
|
| Lavender | |
|---|---|
Cristine 
|
Mary 
|
| Fuchsia | |
|---|---|
Teodor 
|
Yasmin 
|
| Cinnabar | |
|---|---|
Ashton 
|
Cleo 
|
| Pallet | |
|---|---|
Alvaro 
|
Ryann 
|
| Pewter | |
|---|---|
Nilton 
|
Georgia 
|
Nightmare Cooking Tokens are obtained by completing the daily food delivery missions and are used to increase productivity when preparing food. By enabling the option to use a Nightmare Cooking Token when preparing food and completing the minigame, the player will have a chance to obtain additional extra food when collecting the results. Each food item produced consumes 1 Nightmare Cooking Token from the player's backpack.
Upon reaching Rank S, Adventurers gain an exclusive benefit that makes traveling between Resistances easier. This reduces travel expenses between Resistances and increases travel speed, allowing them to travel more frequently to fulfill various requests.
This benefit applies to Excadrill Transportation, allowing Adventurers to travel without a boost. Additionally, when using the boosted version, the travel cost is reduced from 30k to 25k, and its speed is increased.

The Excavation Center is where Adventurers gather to go on expeditions and search for rare artifacts. To access it, the player must talk to NPC Hoang, located in Fuchsia.
Note: Nightmare Level 20 is required to start the mission.

After being teleported to the island, if the player wishes to return to Fuchsia, they simply need to talk to NPC Ploy, who is located right at the entrance.

When talking to Hiram, he will explain that he would like to go out with his friends, but will need to stay late at work.

He will ask the player to inform his friends Moe, located at the Cerulean Resistance, Larry, located at the Lavender Resistance, and Shemp, located at the Cinnabar Resistance, that he will not be able to see them this week.
| Cerulean | |
|---|---|
Moe 
| |
| Lavender | |
|---|---|
Larry 
| |
| Cinnabar | |
|---|---|
Shemp 
| |
After talking to all of Hiram's friends, the player must talk to him again to receive the reward:  800,000 Experience (800K), 4,500 Nightmare Experience (4.5K), and 5 Strange Gold Bars.
Digger Frank is an expert excavator who uses special tools in his work. He will give the player a mission to defeat 300  Darkrai. As a reward, the player will receive the
 Golden Shovel, which is used to access the Weekly Dungeons.

During her work, Anette discovered that there are many lost chests scattered all over the place. As a good Archaeologist, the player should have no trouble finding them.

She will give the player permission to open the chests located in the Nightmare World.

| Reward | |
|---|---|
 |
Book: Dungeons - Fire Mountain Temple. |
 |
Book: Dungeons - The Frozen Temple. |

| Reward | |
|---|---|
 |
Book: Dungeons - Zeraora Lair's. |
 |
Book: Dungeons - Unown's Secret Place. |

| Reward | |
|---|---|
 |
Book: Dungeons - Golden Steelix's Lair. |
 |
Book: Dungeons - Magearna's Temple. |

| Reward | |
|---|---|
 |
Book: Dungeons - Birth Island. |
 |
Book: Dungeons - Mythical Garden. |

| Reward | |
|---|---|
 |
Book: Dungeons - Darkrai's Cultists Temple. |
 |
Book: Dungeons - Sea Guardians Temple. |
Note: These books serve as small hints about the locations of the Weekly Dungeons.
Professor Sycamore is a renowned Pokémon researcher and is responsible for a weekly mission. To complete it, the player must deliver 5 Professor Oak's Research Journals, which are obtained as rewards from Weekly Dungeons.

After delivering the 5  Professor Oak's Research Journals, the player will receive:
 1x Random Epic Rift, 200 Hidden Relics, 1,000,000 Experience (1KK), and 3,000 Nightmare World Experience (3K).
To access a Dungeon, the player must use the Golden Shovel obtained from NPC Digger Frank at the exact location where the Dungeon is found.
The entrance fee for each Dungeon is 1  Treasure Map, which can be crafted at the Adventurer Workshop S.
For each successful mission, the player will receive some Hidden Relics, one Professor Oak's Research Journal, and may also obtain rare drops.
Note: Bless is not lost when dying in a Dungeon.


