Wes Quest - Boss e Mega Dungeons: mudanças entre as edições
Ir para navegação
Ir para pesquisar


Sem resumo de edição |
|||
| Linha 3: | Linha 3: | ||
<center>[[Arquivo:Banner_Wes-Dungeons.png|link=]]</center> | <center>[[Arquivo:Banner_Wes-Dungeons.png|link=]]</center> | ||
'''Requisitos para o acesso:''' Conclusão da [[Wes Quest]]. | |||
==Introdução== | ==Introdução== | ||
Após o jogador finalizar a Wes Quest, ficará disponível o craft de dois novos itens no painel da Embedded Tower, o [[Arquivo:Alpha_Antidote.png|link=]] Alpha Antidote, que são para '''Dungeons de Boss''', e o [[Arquivo:Omega_Antidote.png|link=]] Omega Antidote, que são para '''Dungeons de Mega'''. | |||
Após o jogador finalizar a Wes Quest, ficará disponível o craft de dois novos itens no painel da Embedded Tower, o [[Arquivo:Alpha_Antidote.png|link=]] Alpha Antidote, que são para '''Dungeons de | |||
É possível comprar um item de cada por semana, ao comprar eles são utilizados automaticamente e resetam toda segunda-feira, não sendo possível acumular para gastar depois. | É possível comprar um item de cada por semana, ao comprar eles são utilizados automaticamente e resetam toda segunda-feira, não sendo possível acumular para gastar depois. | ||
A recompensa de todas as dungeons são [[Arquivo:Exp icon.png | A recompensa de todas as dungeons são de [[Arquivo:Exp icon.png|link=]] 2.000.000 de Experiência. | ||
===Alpha Dungeons=== | ===Alpha Dungeons=== | ||
| Linha 19: | Linha 17: | ||
'''Observações:''' | '''Observações:''' | ||
* Cada dungeon tem 20 inimigos. | * Cada dungeon tem 20 inimigos. | ||
* Não é possível dropar itens dos bosses nas dungeons, apenas capturar o boss com a [[Arquivo:Timer_Ball.png|link= | * Não é possível dropar itens dos bosses nas dungeons, apenas capturar o boss com a [[Arquivo:Timer_Ball.png|link=]] Timer Ball. | ||
<center> | <center> | ||
{| class="wikitable" width="45%" style="float:left" | |||
{| class="wikitable" width=" | |||
|- | |- | ||
! width="24%" align="center" style="background-color: #4682B4" | Rhyperior - Respawn de Claydol | ! width="24%" align="center" style="background-color: #4682B4" | Rhyperior - Respawn de Claydol | ||
|- | |- | ||
| width="24%" align="center" | [[Arquivo: | | width="24%" align="center" | [[Arquivo:Dungeon_Rhyperior1.png|link=]] <br> '''Coordenadas:''' {{Copiar|5669, 5682, 5}} | ||
|- | |- | ||
| width="24%" align="center" | '''Inimigos'''<br>[[Arquivo:111-Rhyhorn.png|link=Rhyhorn]] Rhyhorn<br>[[Arquivo:112-Rhydon.png|link=Rhydon]] Rhydon<br>[[Arquivo:464-Rhyperior.png|link=Rhyperior]] Rhyperior | | width="24%" align="center" | '''Inimigos'''<br>[[Arquivo:111-Rhyhorn.png|link=Rhyhorn]] Rhyhorn<br>[[Arquivo:112-Rhydon.png|link=Rhydon]] Rhydon<br>[[Arquivo:464-Rhyperior.png|link=Rhyperior]] Rhyperior | ||
|} | |} | ||
{| class="wikitable" width=" | {| class="wikitable" width="45%" style="float:right" | ||
|- | |- | ||
! width="24%" align="center" style="background-color: #4682B4" | Slaking - Respawn de Zangoose | ! width="24%" align="center" style="background-color: #4682B4" | Slaking - Respawn de Zangoose | ||
|- | |- | ||
| width="24%" align="center" | [[Arquivo: | | width="24%" align="center" | [[Arquivo:Dungeon_Slaking1.png|link=]] <br> '''Coordenadas:''' {{Copiar|5408, 5759, 7}} | ||
|- | |- | ||
| width="24%" align="center" | '''Inimigos'''<br>[[Arquivo:287-Slakoth.png|link=Slakoth]] Slakoth<br>[[Arquivo:288-Vigoroth.png|link=Vigoroth]] Vigoroth<br>[[Arquivo:289-Slaking.png|link=Slaking]] Slaking | | width="24%" align="center" | '''Inimigos'''<br>[[Arquivo:287-Slakoth.png|link=Slakoth]] Slakoth<br>[[Arquivo:288-Vigoroth.png|link=Vigoroth]] Vigoroth<br>[[Arquivo:289-Slaking.png|link=Slaking]] Slaking | ||
| Linha 47: | Linha 44: | ||
|} | |} | ||
{| class="wikitable" width=" | {| class="wikitable" width="45%" style="float:left" | ||
|- | |- | ||
! width="24%" align="center" style="background-color: #4682B4" | Electivire - Respawn de Hariyama | ! width="24%" align="center" style="background-color: #4682B4" | Electivire - Respawn de Hariyama | ||
|- | |- | ||
| width="24%" align="center" | [[Arquivo: | | width="24%" align="center" | [[Arquivo:Dungeon_Electivire1.png|link=]] <br> '''Coordenadas:''' {{Copiar|5366, 5780, 5}} | ||
|- | |- | ||
| width="24%" align="center" | '''Inimigos'''<br>[[Arquivo:239-Elekid.png|link=Elekid]] Elekid<br>[[Arquivo:125-Electabuzz.png|link=Electabuzz]] Electabuzz<br>[[Arquivo:466-Electivire.png|link=Electivire]] Electivire | | width="24%" align="center" | '''Inimigos'''<br>[[Arquivo:239-Elekid.png|link=Elekid]] Elekid<br>[[Arquivo:125-Electabuzz.png|link=Electabuzz]] Electabuzz<br>[[Arquivo:466-Electivire.png|link=Electivire]] Electivire | ||
|} | |} | ||
{| class="wikitable" width=" | {| class="wikitable" width="45%" style="float:right" | ||
|- | |- | ||
! width="24%" align="center" style="background-color: #4682B4" | Metagross - Respawn de Metang | ! width="24%" align="center" style="background-color: #4682B4" | Metagross - Respawn de Metang | ||
|- | |- | ||
| width="24%" align="center" | [[Arquivo: | | width="24%" align="center" | [[Arquivo:Dungeon_Metagross1.png|link=]] <br> '''Coordenadas:''' {{Copiar|5451, 5549, 6}} | ||
|- | |- | ||
| width="24%" align="center" | '''Inimigos'''<br>[[Arquivo:374-Beldum.png|link=Beldum]] Beldum<br>[[Arquivo:375-Metang.png|link=Metang]] Metang<br>[[Arquivo:376-Metagross.png|link=Metagross]] Metagross | | width="24%" align="center" | '''Inimigos'''<br>[[Arquivo:374-Beldum.png|link=Beldum]] Beldum<br>[[Arquivo:375-Metang.png|link=Metang]] Metang<br>[[Arquivo:376-Metagross.png|link=Metagross]] Metagross | ||
| Linha 69: | Linha 66: | ||
|} | |} | ||
{| class="wikitable" width=" | {| class="wikitable" width="45%" style="float:left" | ||
|- | |- | ||
! width="24%" align="center" style="background-color: #4682B4" | Salamence - Respawn de Swellow | ! width="24%" align="center" style="background-color: #4682B4" | Salamence - Respawn de Swellow | ||
|- | |- | ||
| width="24%" align="center" | [[Arquivo: | | width="24%" align="center" | [[Arquivo:Dungeon_Salamence1.png|link=]] <br> '''Coordenadas:''' {{Copiar|4978, 5789, 5}} | ||
|- | |- | ||
| width="24%" align="center" | '''Inimigos'''<br>[[Arquivo:371-Bagon.png|link=Bagon]] Bagon<br>[[Arquivo:372-Shelgon.png|link=Shelgon]] Shelgon<br>[[Arquivo:373-Salamence.png|link=Salamence]] Salamence | | width="24%" align="center" | '''Inimigos'''<br>[[Arquivo:371-Bagon.png|link=Bagon]] Bagon<br>[[Arquivo:372-Shelgon.png|link=Shelgon]] Shelgon<br>[[Arquivo:373-Salamence.png|link=Salamence]] Salamence | ||
|} | |} | ||
{| class="wikitable" width=" | {| class="wikitable" width="45%" style="float:right" | ||
|- | |- | ||
! width="24%" align="center" style="background-color: #4682B4" | Dusknoir - Respawn de Banette | ! width="24%" align="center" style="background-color: #4682B4" | Dusknoir - Respawn de Banette | ||
|- | |- | ||
| width="24%" align="center" | [[Arquivo: | | width="24%" align="center" | [[Arquivo:Dungeon_Dusknoir1.png|link=]] <br> '''Coordenadas:''' {{Copiar|5523, 5594, 8}} | ||
|- | |- | ||
| width="24%" align="center" | '''Inimigos'''<br>[[Arquivo:355-Duskull.png|link=Duskull]] Duskull<br>[[Arquivo:356-Dusclops.png|link=Dusclops]] Dusclops<br>[[Arquivo:477-Dusknoir.png|link=Dusknoir]] Dusknoir | | width="24%" align="center" | '''Inimigos'''<br>[[Arquivo:355-Duskull.png|link=Duskull]] Duskull<br>[[Arquivo:356-Dusclops.png|link=Dusclops]] Dusclops<br>[[Arquivo:477-Dusknoir.png|link=Dusknoir]] Dusknoir | ||
| Linha 91: | Linha 88: | ||
|} | |} | ||
{| class="wikitable" width=" | {| class="wikitable" width="45%" style="float:left" | ||
|- | |- | ||
! width="24%" align="center" style="background-color: #4682B4" | Tangrowth - Respawn de Shiftry | ! width="24%" align="center" style="background-color: #4682B4" | Tangrowth - Respawn de Shiftry | ||
|- | |- | ||
| width="24%" align="center" | [[Arquivo: | | width="24%" align="center" | [[Arquivo:Dungeon_Tangrowth1.png|link=]] <br> '''Coordenadas:''' {{Copiar|5428, 6006, 6}} | ||
|- | |- | ||
| width="24%" align="center" | '''Inimigos'''<br>[[Arquivo:114-Tangela.png|link=Tangela]] Tangela<br>[[Arquivo:465-Tangrowth.png|link=Tangrowth]] Tangrowth<br> | | width="24%" align="center" | '''Inimigos'''<br>[[Arquivo:114-Tangela.png|link=Tangela]] Tangela<br>[[Arquivo:465-Tangrowth.png|link=Tangrowth]] Tangrowth<br> | ||
|} | |} | ||
{| class="wikitable" width=" | {| class="wikitable" width="45%" style="float:right" | ||
|- | |- | ||
! width="24%" align="center" style="background-color: #4682B4" | | ! width="24%" align="center" style="background-color: #4682B4" | Milotic - Respawn de Pelipper | ||
|- | |- | ||
| width="24%" align="center" | [[Arquivo: | | width="24%" align="center" | [[Arquivo:Dungeon_Milotic1.png|link=]] <br> '''Coordenadas:''' {{Copiar|5806, 6058, 7}} | ||
|- | |- | ||
| width="24%" align="center" | '''Inimigos'''<br>[[Arquivo: | | width="24%" align="center" | '''Inimigos'''<br>[[Arquivo:349-Feebas.png|link=Feebas]] Feebas<br>[[Arquivo:350-Milotic.png|link=Milotic]] Milotic<br> | ||
|} | |} | ||
| Linha 114: | Linha 111: | ||
|} | |} | ||
{| class="wikitable" width=" | {| class="wikitable" width="45%" style="float:center" | ||
|- | |- | ||
! width="24%" align="center" style="background-color: #4682B4" | | ! width="24%" align="center" style="background-color: #4682B4" | Magmortar - Respawn de Camerupt | ||
|- | |- | ||
| width="24%" align="center" | [[Arquivo: | | width="24%" align="center" | [[Arquivo:Dungeon_Magmortar1.png|link=]] <br> '''Coordenadas:''' {{Copiar|5655, 5932, 5}} | ||
|- | |- | ||
| width="24%" align="center" | '''Inimigos'''<br>[[Arquivo: | | width="24%" align="center" | '''Inimigos'''<br>[[Arquivo:240-Magby.png|link=Magby]] Magby<br>[[Arquivo:126-Magmar.png|link=Magmar]] Magmar<br>[[Arquivo:467-Magmortar.png|link=Magmortar]] Magmortar | ||
|} | |} | ||
| Linha 138: | Linha 135: | ||
<center> | <center> | ||
{| class="wikitable" width=" | {| class="wikitable" width="45%" style="float:left" | ||
|- | |- | ||
! width="24%" align="center" style="background-color: #ff2c2c" | Mega Sceptile - Respawn de Sceptile | ! width="24%" align="center" style="background-color: #ff2c2c" | Mega Sceptile - Respawn de Sceptile | ||
|- | |- | ||
| width="24%" align="center" | [[Arquivo: | | width="24%" align="center" | [[Arquivo:Dungeon_Sceptile1.png|link=]] <br> '''Coordenadas:''' {{Copiar|5338, 5871, 7}} | ||
|- | |- | ||
| width="24%" align="center" | '''Inimigos'''<br>[[Arquivo:252-Treecko.png|link=Treecko]] Treecko<br>[[Arquivo:253-Grovyle.png|link=Grovyle]] Grovyle<br>[[Arquivo:254-Sceptile.png|link=Sceptile]] Sceptile<br>[[Arquivo:254-MegaSceptile.png|link=Mega Sceptile]] Mega Sceptile | | width="24%" align="center" | '''Inimigos'''<br>[[Arquivo:252-Treecko.png|link=Treecko]] Treecko<br>[[Arquivo:253-Grovyle.png|link=Grovyle]] Grovyle<br>[[Arquivo:254-Sceptile.png|link=Sceptile]] Sceptile<br>[[Arquivo:254-MegaSceptile.png|link=Mega Sceptile]] Mega Sceptile | ||
|} | |} | ||
{| class="wikitable" width=" | {| class="wikitable" width="45%" style="float:right" | ||
|- | |- | ||
! width="24%" align="center" style="background-color: #ff2c2c" | Mega Blaziken - Respawn de Blaziken | ! width="24%" align="center" style="background-color: #ff2c2c" | Mega Blaziken - Respawn de Blaziken | ||
|- | |- | ||
| width="24%" align="center" | [[Arquivo: | | width="24%" align="center" | [[Arquivo:Dungeon_Blaziken1.png|link=]] <br> '''Coordenadas:''' {{Copiar|5601, 5922, 4}} | ||
|- | |- | ||
| width="24%" align="center" | '''Inimigos'''<br>[[Arquivo:255-Torchic.png|link=Torchic]] Torchic<br>[[Arquivo:256-Combusken.png|link=Combusken]] Combusken<br>[[Arquivo:257-Blaziken.png|link=Blaziken]] Blaziken<br>[[Arquivo:257-MegaBlaziken.png|link=Mega Blaziken]] Mega Blaziken | | width="24%" align="center" | '''Inimigos'''<br>[[Arquivo:255-Torchic.png|link=Torchic]] Torchic<br>[[Arquivo:256-Combusken.png|link=Combusken]] Combusken<br>[[Arquivo:257-Blaziken.png|link=Blaziken]] Blaziken<br>[[Arquivo:257-MegaBlaziken.png|link=Mega Blaziken]] Mega Blaziken | ||
| Linha 161: | Linha 158: | ||
|} | |} | ||
{| class="wikitable" width=" | {| class="wikitable" width="45%" style="float:left" | ||
|- | |- | ||
! width="24%" align="center" style="background-color: #ff2c2c" | Mega Swampert - Respawn de Swampert | ! width="24%" align="center" style="background-color: #ff2c2c" | Mega Swampert - Respawn de Swampert | ||
|- | |- | ||
| width="24%" align="center" | [[Arquivo: | | width="24%" align="center" | [[Arquivo:Dungeon_Swampert1.png|link=]] <br> '''Coordenadas:''' {{Copiar|5714, 5869, 7}} | ||
|- | |- | ||
| width="24%" align="center" | '''Inimigos'''<br>[[Arquivo:258-Mudkip.png|link=Mudkip]] Mudkip<br>[[Arquivo:259-Marshtomp.png|link=Marshtomp]] Marshtomp<br>[[Arquivo:260-Swampert.png|link=Swampert]] Swampert<br>[[Arquivo:260-shMegaSwampert.png|link=Mega Swampert]] Mega Swampert | | width="24%" align="center" | '''Inimigos'''<br>[[Arquivo:258-Mudkip.png|link=Mudkip]] Mudkip<br>[[Arquivo:259-Marshtomp.png|link=Marshtomp]] Marshtomp<br>[[Arquivo:260-Swampert.png|link=Swampert]] Swampert<br>[[Arquivo:260-shMegaSwampert.png|link=Mega Swampert]] Mega Swampert | ||
|} | |} | ||
{| class="wikitable" width=" | {| class="wikitable" width="45%" style="float:right" | ||
|- | |- | ||
! width="24%" align="center" style="background-color: #ff2c2c" | Mega Gardevoir - Respawn de Gardevoir | ! width="24%" align="center" style="background-color: #ff2c2c" | Mega Gardevoir - Respawn de Gardevoir | ||
|- | |- | ||
| width="24%" align="center" | [[Arquivo: | | width="24%" align="center" | [[Arquivo:Dungeon_Gardevoir1.png|link=]] <br> '''Coordenadas:''' {{Copiar|5624, 5704, 7}} | ||
|- | |- | ||
| width="24%" align="center" | '''Inimigos'''<br>[[Arquivo:280-Ralts.png|link=Ralts]] Ralts<br>[[Arquivo:281-Kirlia.png|link=Kirlia]] Kirlia<br>[[Arquivo:282-Gardevoir.png|link=Gardevoir]] Gardevoir<br>[[Arquivo:282-MegaGardevoir.png|link=Mega Gardevoir]] Mega Gardevoir | | width="24%" align="center" | '''Inimigos'''<br>[[Arquivo:280-Ralts.png|link=Ralts]] Ralts<br>[[Arquivo:281-Kirlia.png|link=Kirlia]] Kirlia<br>[[Arquivo:282-Gardevoir.png|link=Gardevoir]] Gardevoir<br>[[Arquivo:282-MegaGardevoir.png|link=Mega Gardevoir]] Mega Gardevoir | ||
| Linha 183: | Linha 180: | ||
|} | |} | ||
{| class="wikitable" width=" | {| class="wikitable" width="45%" style="float:left" | ||
|- | |- | ||
! width="24%" align="center" style="background-color: #ff2c2c" | Mega Sableye - Respawn de Sableye | ! width="24%" align="center" style="background-color: #ff2c2c" | Mega Sableye - Respawn de Sableye | ||
|- | |- | ||
| width="24%" align="center" | [[Arquivo: | | width="24%" align="center" | [[Arquivo:Dungeon_Sableye1.png|link=]] <br> '''Coordenadas:''' {{Copiar|5448, 5583, 7}} | ||
|- | |- | ||
| width="24%" align="center" | '''Inimigos'''<br>[[Arquivo:302-Sableye.png|link=Sableye]] Sableye<br>[[Arquivo:302-MegaSableye.png|link=Mega Sableye]] Mega Sableye | | width="24%" align="center" | '''Inimigos'''<br>[[Arquivo:302-Sableye.png|link=Sableye]] Sableye<br>[[Arquivo:302-MegaSableye.png|link=Mega Sableye]] Mega Sableye | ||
|} | |} | ||
{| class="wikitable" width=" | {| class="wikitable" width="45%" style="float:right" | ||
|- | |- | ||
! width="24%" align="center" style="background-color: #ff2c2c" | Mega Manectric - Respawn de Manectric | ! width="24%" align="center" style="background-color: #ff2c2c" | Mega Manectric - Respawn de Manectric | ||
|- | |- | ||
| width="24%" align="center" | [[Arquivo: | | width="24%" align="center" | [[Arquivo:Dungeon_Manectric1.png|link=]] <br> '''Coordenadas:''' {{Copiar|5547, 6024, 6}} | ||
|- | |- | ||
| width="24%" align="center" | '''Inimigos'''<br>[[Arquivo:309-Electrike.png|link=Electrike]] Electrike<br>[[Arquivo:310-Manectric.png|link=Manectric]] Manectric<br>[[Arquivo:310-MegaManectric.png|link=Mega Manectric]] Mega Manectric | | width="24%" align="center" | '''Inimigos'''<br>[[Arquivo:309-Electrike.png|link=Electrike]] Electrike<br>[[Arquivo:310-Manectric.png|link=Manectric]] Manectric<br>[[Arquivo:310-MegaManectric.png|link=Mega Manectric]] Mega Manectric | ||
| Linha 205: | Linha 202: | ||
|} | |} | ||
{| class="wikitable" width=" | {| class="wikitable" width="45%" style="float:center" | ||
|- | |- | ||
! width="24%" align="center" style="background-color: #ff2c2c" | Mega Lucario - Respawn de Lucario | ! width="24%" align="center" style="background-color: #ff2c2c" | Mega Lucario - Respawn de Lucario | ||
|- | |- | ||
| width="24%" align="center" | [[Arquivo: | | width="24%" align="center" | [[Arquivo:MegaDungeonLucario1.png|link=]] <br> '''Coordenadas:''' {{Copiar|5330, 5754, 4}} | ||
|- | |- | ||
| width="24%" align="center" | '''Inimigos'''<br>[[Arquivo:447-Riolu.png|link=Riolu]] Riolu<br>[[Arquivo:448-Lucario.png|link=Lucario]] Lucario<br>[[Arquivo:448-MegaLucario.png|link=Mega Lucario]] Mega Lucario | | width="24%" align="center" | '''Inimigos'''<br>[[Arquivo:447-Riolu.png|link=Riolu]] Riolu<br>[[Arquivo:448-Lucario.png|link=Lucario]] Lucario<br>[[Arquivo:448-MegaLucario.png|link=Mega Lucario]] Mega Lucario | ||
Edição atual tal como às 18h47min de 1 de outubro de 2026

Requisitos para o acesso: Conclusão da Wes Quest.
Introdução
Após o jogador finalizar a Wes Quest, ficará disponível o craft de dois novos itens no painel da Embedded Tower, o  Alpha Antidote, que são para Dungeons de Boss, e o
  Omega Antidote, que são para Dungeons de Mega.
É possível comprar um item de cada por semana, ao comprar eles são utilizados automaticamente e resetam toda segunda-feira, não sendo possível acumular para gastar depois.
A recompensa de todas as dungeons são de  2.000.000 de Experiência.
Alpha Dungeons
Observações:
- Cada dungeon tem 20 inimigos.
- Não é possível dropar itens dos bosses nas dungeons, apenas capturar o boss com a
 Timer Ball.
| Rhyperior - Respawn de Claydol |
|---|
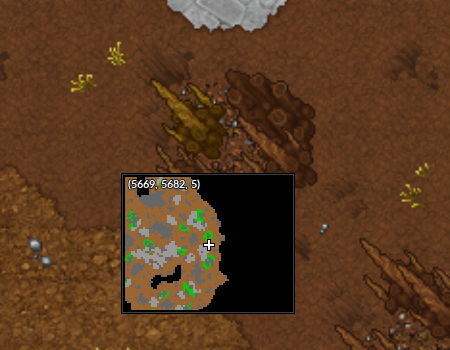 Coordenadas: |
Inimigos Rhyhorn Rhyhorn Rhydon Rhydon Rhyperior Rhyperior
|
| Slaking - Respawn de Zangoose |
|---|
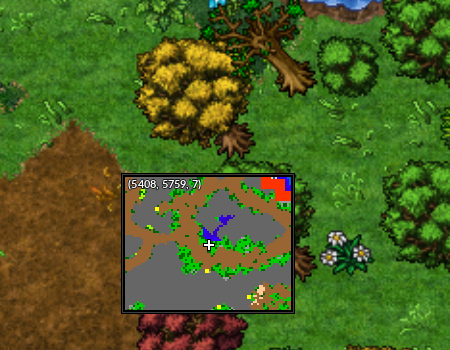 Coordenadas: |
Inimigos Slakoth Slakoth Vigoroth Vigoroth Slaking Slaking
|
| Electivire - Respawn de Hariyama |
|---|
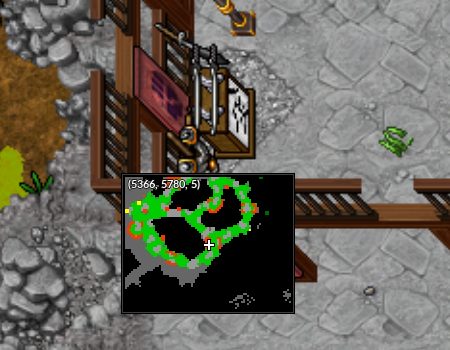 Coordenadas: |
Inimigos Elekid Elekid Electabuzz Electabuzz Electivire Electivire
|
| Metagross - Respawn de Metang |
|---|
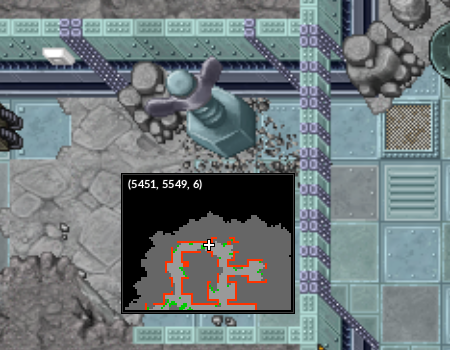 Coordenadas: |
Inimigos Beldum Beldum Metang Metang Metagross Metagross
|
| Salamence - Respawn de Swellow |
|---|
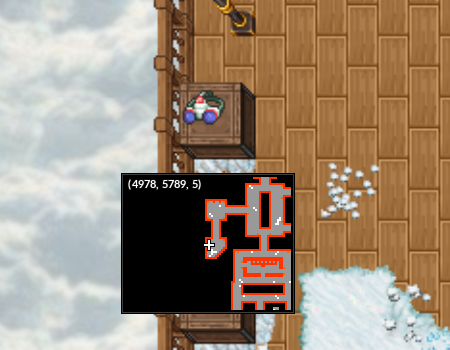 Coordenadas: |
Inimigos Bagon Bagon Shelgon Shelgon Salamence Salamence
|
| Dusknoir - Respawn de Banette |
|---|
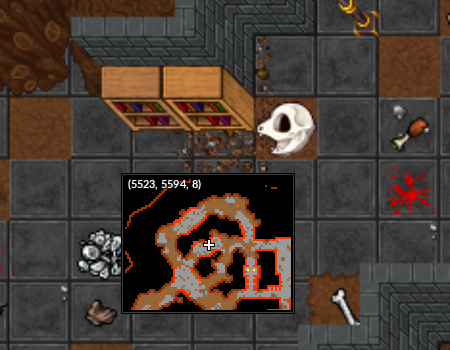 Coordenadas: |
Inimigos Duskull Duskull Dusclops Dusclops Dusknoir Dusknoir
|
| Tangrowth - Respawn de Shiftry |
|---|
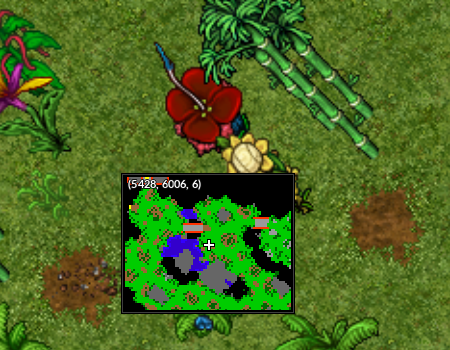 Coordenadas: |
Inimigos Tangela Tangela Tangrowth Tangrowth |
| Milotic - Respawn de Pelipper |
|---|
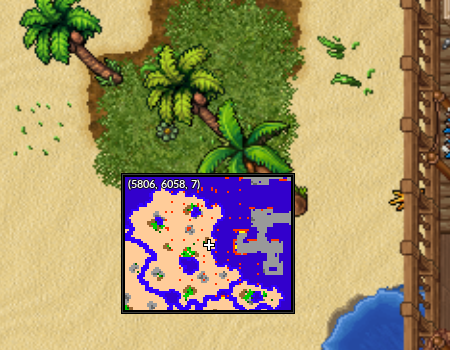 Coordenadas: |
Inimigos Feebas Feebas Milotic Milotic |
| Magmortar - Respawn de Camerupt |
|---|
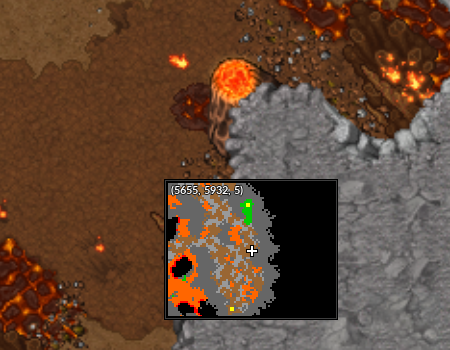 Coordenadas: |
Inimigos Magby Magby Magmar Magmar Magmortar Magmortar
|
Omega Dungeons
Observações:
- Cada dungeon tem 21 inimigos.
- É possível dropar a Mega Stone dos Mega Pokémon.
| Mega Sceptile - Respawn de Sceptile |
|---|
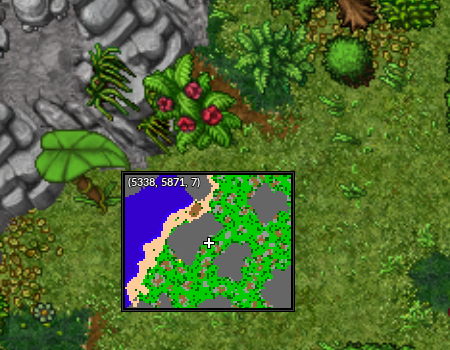 Coordenadas: |
Inimigos Treecko Treecko Grovyle Grovyle Sceptile Sceptile Mega Sceptile Mega Sceptile
|
| Mega Blaziken - Respawn de Blaziken |
|---|
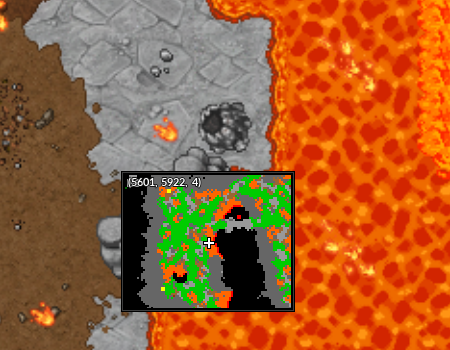 Coordenadas: |
Inimigos Torchic Torchic Combusken Combusken Blaziken Blaziken Mega Blaziken Mega Blaziken
|
| Mega Swampert - Respawn de Swampert |
|---|
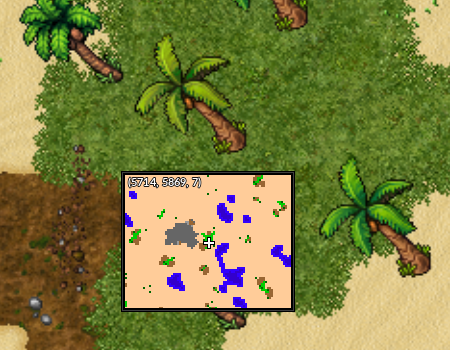 Coordenadas: |
Inimigos Mudkip Mudkip Marshtomp Marshtomp Swampert Swampert Mega Swampert Mega Swampert
|
| Mega Gardevoir - Respawn de Gardevoir |
|---|
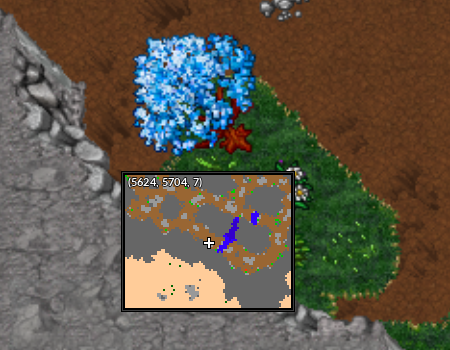 Coordenadas: |
Inimigos Ralts Ralts Kirlia Kirlia Gardevoir Gardevoir Mega Gardevoir Mega Gardevoir
|
| Mega Sableye - Respawn de Sableye |
|---|
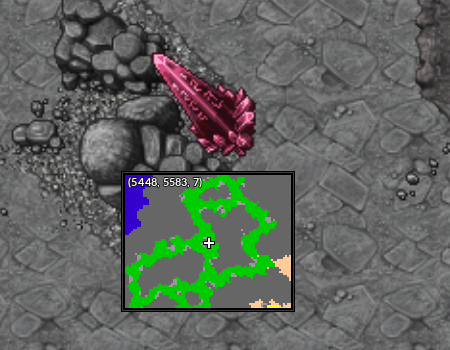 Coordenadas: |
Inimigos Sableye Sableye Mega Sableye Mega Sableye
|
| Mega Manectric - Respawn de Manectric |
|---|
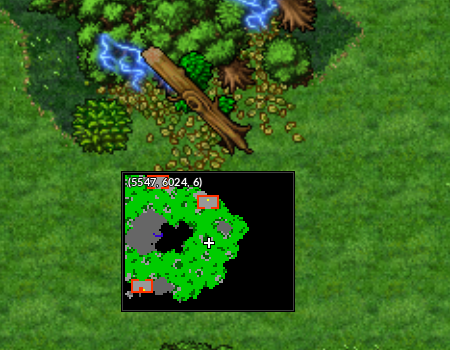 Coordenadas: |
Inimigos Electrike Electrike Manectric Manectric Mega Manectric Mega Manectric
|
| Mega Lucario - Respawn de Lucario |
|---|
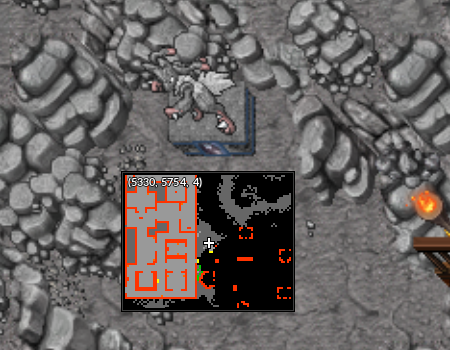 Coordenadas: |
Inimigos Riolu Riolu Lucario Lucario Mega Lucario Mega Lucario
|