Shiny Infernape: mudanças entre as edições
Ir para navegação
Ir para pesquisar
| Linha 154: | Linha 154: | ||
! rowspan="2" | M2 | ! rowspan="2" | M2 | ||
| width="10px" | | | width="10px" | | ||
| align="left" | '''Mega Kick ( | | align="left" | '''Mega Kick (10s)''' | ||
| width="50px" rowspan="2" | | | width="50px" rowspan="2" | | ||
| rowspan="2" align="right" | [[Arquivo:Target.png|Target]][[Arquivo:Damage.png|Damage]] | | rowspan="2" align="right" | [[Arquivo:Target.png|Target]][[Arquivo:Damage.png|Damage]] | ||
| Linha 167: | Linha 167: | ||
| align="left" | '''Double Kick (12s)''' | | align="left" | '''Double Kick (12s)''' | ||
| width="50px" rowspan="2" | | | width="50px" rowspan="2" | | ||
| rowspan="2" align="right" | [[Arquivo:Target.png|Target]] [[Arquivo:Focus Blocked.png|Focus Blocked]][[Arquivo:Damage.png|Damage]][[Arquivo:Stun.png|Stun]] | | rowspan="2" align="right" | [[Arquivo:Target.png|Target]] [[Arquivo:Focus Blocked.png|Focus Blocked]][[Arquivo:Damage.png|Damage]][[Arquivo:Stun.png|Stun]][[Arquivo:NeverBoost.png|Neverboost]] | ||
| rowspan="2" | [[Arquivo:fighting.png|Fighting|link=Gardestrike]] | | rowspan="2" | [[Arquivo:fighting.png|Fighting|link=Gardestrike]] | ||
|- align="center" | |- align="center" | ||
| Linha 176: | Linha 176: | ||
! rowspan="2" | M4 | ! rowspan="2" | M4 | ||
| width="10px" | | | width="10px" | | ||
| align="left" | Close Combat ( | | align="left" | '''Close Combat (40s)''' | ||
| width="50px" rowspan="2" | | | width="50px" rowspan="2" | | ||
| rowspan="2" align="right" | [[Arquivo:Target.png|Target | | rowspan="2" align="right" | [[Arquivo:Target.png|Target]] [[Arquivo:Damage.png|Damage]][[Arquivo:Buff.png|Buff]] | ||
| rowspan="2" | [[Arquivo:fighting.png|Fighting|link=Gardestrike]] | | rowspan="2" | [[Arquivo:fighting.png|Fighting|link=Gardestrike]] | ||
|- align="center" style="background-color:#E6E6FA; | |- align="center" style="background-color:#E6E6FA; | ||
| Linha 198: | Linha 198: | ||
! rowspan="2" | M6 | ! rowspan="2" | M6 | ||
| width="10px" | | | width="10px" | | ||
| align="left" | Mach Punch ( | | align="left" | '''Mach Punch (50s)''' | ||
| width="50px" rowspan="2" | | | width="50px" rowspan="2" | | ||
| rowspan="2" align="right" | [[Arquivo:AOE.png|AOE]][[Arquivo:Damage.png|Damage]][[Arquivo:Buff.png|Buff]][[Arquivo:Debuff.png|Debuff]] | | rowspan="2" align="right" | [[Arquivo:AOE.png|AOE]][[Arquivo:Damage.png|Damage]][[Arquivo:Buff.png|Buff]][[Arquivo:Debuff.png|Debuff]] | ||
| Linha 211: | Linha 211: | ||
| align="left" | '''Focus Blast (40s)''' | | align="left" | '''Focus Blast (40s)''' | ||
| width="50px" rowspan="2" | | | width="50px" rowspan="2" | | ||
| rowspan="2" align="right" | [[Arquivo:AOE.png|AOE | | rowspan="2" align="right" | [[Arquivo:AOE.png|AOE]] [[Arquivo:Damage.png|Damage]] | ||
| rowspan="2" | [[Arquivo:fighting.png|Fighting|link=Gardestrike]] | | rowspan="2" | [[Arquivo:fighting.png|Fighting|link=Gardestrike]] | ||
|- align="center" | |- align="center" | ||
| Linha 220: | Linha 220: | ||
! rowspan="2" | M8 | ! rowspan="2" | M8 | ||
| width="10px" | | | width="10px" | | ||
| align="left" | '''Vacuum Wave ( | | align="left" | '''Vacuum Wave (25s)''' | ||
| width="50px" rowspan="2" | | | width="50px" rowspan="2" | | ||
| rowspan="2" align="right" | [[Arquivo:AOE.png|AOE]][[Arquivo:Damage.png|Damage]] | | rowspan="2" align="right" | [[Arquivo:AOE.png|AOE]][[Arquivo:Damage.png|Damage]] | ||
| Linha 249: | Linha 249: | ||
| width="10px" | | | width="10px" | | ||
| align="left" | | | align="left" | | ||
|} | |} | ||
Edição das 14h20min de 7 de julho de 2026
Informações Gerais
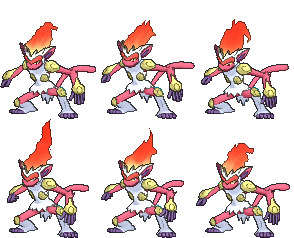
Nome: Shiny Infernape
Level: 100
Elemento: Fire/Fighting
Habilidades: Dig, rock smash, cut and headbutt
Boost: Fire stone (2)
Materia: Volcanic Mastered ou Gardestrike Mastered.
Este Pokémon é EXCLUSIVO dos clãs Volcanic e Gardestrike em batalhas PvP.
Evoluções
Infernape precisa de Level 100.
Descrição:
Ele lança seus inimigos com agilidade. Ele usa todos os seus membros para lutar em seu próprio estilo único.
Movimentos
Movimentos PvP
| M1 | Low Kick (8s) |  
|

| ||
|---|---|---|---|---|---|
| Level 100 | |||||
| M2 | Mega Kick (22s) |
|
| ||
| Level 100 | |||||
| M3 | Double Kick (20s) |  
|
| ||
| Level 100 | |||||
| M4 | Close Combat (20s) | 
|
| ||
| Level 100 | |||||
| M5 | Backflip (25s) |  
|

| ||
| Level 100 | |||||
| M6 | Mach Punch (28s) |  
|
| ||
| Level 100 | |||||
| M7 | Focus Blast (35s) |
|
| ||
| Level 100 | |||||
| M8 | Vacuum Wave (50s) |
|
| ||
| Level 100 | |||||
| M9 | Bulk Up (50s) |
|
| ||
| Level 100 | |||||
| P | Jungle Fury | 
|

| ||
Movimentos PvE
| M1 | Low Kick (12s) |
|
| ||
|---|---|---|---|---|---|
| Level 100 | |||||
| M2 | Mega Kick (10s) |
|
| ||
| Level 100 | |||||
| M3 | Double Kick (12s) | 
|
| ||
| Level 100 | |||||
| M4 | Close Combat (40s) |
|
| ||
| Level 100 | |||||
| M5 | Backflip (50s) |
|
| ||
| Level 100 | |||||
| M6 | Mach Punch (50s) |
|
| ||
| Level 100 | |||||
| M7 | Focus Blast (40s) |
|
| ||
| Level 100 | |||||
| M8 | Vacuum Wave (25s) |
|
| ||
| Level 100 | |||||
| M9 | Bulk Up (40s) |
|
| ||
| Level 100 | |||||
| P | Jungle Fury |
|
| ||
Efetividades
Efetivo: Water, ground, flying and psychic.
Normal: Normal, electric, fighting, poison, rock, ghost, dragon, crystal and fairy.
Inefetivo: Fire, grass, ice, steel and dark.
Muito Inefetivo: Bug.
Outras Versões

|
Infernape |

|
Shiny Infernape (TM) |