Hariyama: mudanças entre as edições
Ir para navegação
Ir para pesquisar
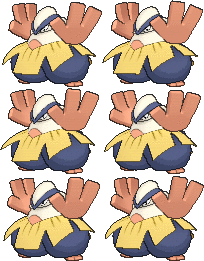
(Adicionado ícone Focus Blocked ao movimento Detect (via bot)) |
|||
| Linha 39: | Linha 39: | ||
| align="left" | Smelling Salts (20s) | | align="left" | Smelling Salts (20s) | ||
| width="50px" rowspan="2" | | | width="50px" rowspan="2" | | ||
| rowspan="2" align="right" | [[Arquivo:Target.png|Target]] [[Arquivo:Damage.png|Damage]] [[Arquivo: | | rowspan="2" align="right" | [[Arquivo:Target.png|Target]] [[Arquivo:Damage.png|Damage]] [[Arquivo:Debuff.png|Debuff]] | ||
| rowspan="2" | [[Arquivo:Normal1.png|Normal|link=Gardestrike]] | | rowspan="2" | [[Arquivo:Normal1.png|Normal|link=Gardestrike]] | ||
|- align="center" | |- align="center" | ||
| Linha 116: | Linha 116: | ||
| align="left" | Detect (60s) | | align="left" | Detect (60s) | ||
| width="50px" rowspan="2" | | | width="50px" rowspan="2" | | ||
| rowspan="2" align="right" | [[Arquivo:Self.png|Self|link=]] [[Arquivo:Focus Blocked.png|Focus Blocked]] [[Arquivo:Focus Blocked.png|Focus Blocked|link=]] [[Arquivo:Buff.png|Buff]] | | rowspan="2" align="right" | [[Arquivo:Self.png|Self|link=]] [[Arquivo:Focus Blocked.png|Focus Blocked|link=]] [[Arquivo:Buff.png|Buff]] | ||
| rowspan="2" | [[Arquivo:Fighting.png|Fighting|link=Gardestrike]] | |||
|- align="center" style="background-color:#E6E6FA;" | |||
| width="10px" | | |||
| align="left" | Level 100 | |||
|- align="center" | |||
! rowspan="2" | P | |||
| width="10px" | | |||
| rowspan="2" align="left" | Foresight | |||
| width="50px" rowspan="2" | | |||
| rowspan="2" align="right" | [[Arquivo:Passive.png|Passive]] [[Arquivo:Buff.png|Buff]] | |||
| rowspan="2" | [[Arquivo:Fighting.png|Fighting|link=Gardestrike]] | |||
|- align="center" | |||
| width="10px" | | |||
| align="left" | | |||
|- align="center" style="background-color:#E6E6FA;" | |||
! rowspan="2" | P | |||
| width="10px" | | |||
| rowspan="2" align="left" | Thick Fat | |||
| width="50px" rowspan="2" | | |||
| rowspan="2" align="right" | [[Arquivo:Passive.png|Passive]] [[Arquivo:Buff.png|Buff]] | |||
| rowspan="2" | [[Arquivo:Rock.png|Rock|link=Orebound]] | |||
|- align="center" style="background-color:#E6E6FA;" | |||
| width="10px" | | |||
| align="left" | | |||
|- align="center" | |||
|} | |||
=== '''Movimentos PVE''' === | |||
{| border="0" style="border-collapse:collapse" | |||
|- align="center" style="background-color:#E6E6FA;" | |||
! rowspan="2" | M1 | |||
| width="10px" | | |||
| align="left" | Low Kick (10s) | |||
| width="50px" rowspan="2" | | |||
| rowspan="2" align="right" | [[Arquivo:Target.png|Target]] [[Arquivo:Damage.png|Damage]] | |||
| rowspan="2" | [[Arquivo:Fighting.png|Fighting|link=Gardestrike]] | |||
|- align="center" style="background-color:#E6E6FA;" | |||
| width="10px" | | |||
| align="left" | Level 100 | |||
|- align="center" | |||
! rowspan="2" | M2 | |||
| width="10px" | | |||
| align="left" | Smelling Salts (20s) | |||
| width="50px" rowspan="2" | | |||
| rowspan="2" align="right" | [[Arquivo:Target.png|Target]] [[Arquivo:Damage.png|Damage]] [[Arquivo:Debuff.png|Debuff]] | |||
| rowspan="2" | [[Arquivo:Normal1.png|Normal|link=Gardestrike]] | |||
|- align="center" | |||
| width="10px" | | |||
| align="left" | Level 100 | |||
|- align="center" style="background-color:#E6E6FA;" | |||
! rowspan="2" | M3 | |||
| width="10px" | | |||
| align="left" | Leap Strike (15s) | |||
| width="50px" rowspan="2" | | |||
| rowspan="2" align="right" | [[Arquivo:Target.png|Target]] [[Arquivo:Damage.png|Damage]] [[Arquivo:Buff.png|Buff]] [[Arquivo:Nevermiss.png|Nevermiss]] | |||
| rowspan="2" | [[Arquivo:Fighting.png|Fighting|link=Gardestrike]] | |||
|- align="center" style="background-color:#E6E6FA;" | |||
| width="10px" | | |||
| align="left" | Level 100 | |||
|- align="center" | |||
! rowspan="2" | M4 | |||
| width="10px" | | |||
| align="left" | Knock Off (22s) | |||
| width="50px" rowspan="2" | | |||
| rowspan="2" align="right" | [[Arquivo:Target.png|Target]] [[Arquivo:Damage.png|Damage]] [[Arquivo:Nevermiss.png|Nevermiss]] | |||
| rowspan="2" | [[Arquivo:Dark1.png|Dark|link=Malefic]] | |||
|- align="center" | |||
| width="10px" | | |||
| align="left" | Level 100 | |||
|- align="center" style="background-color:#E6E6FA;" | |||
! rowspan="2" | M5 | |||
| width="10px" | | |||
| align="left" | '''Arm Thrust (40s)''' | |||
| width="50px" rowspan="2" | | |||
| rowspan="2" align="right" | [[Arquivo:AOE.png|AOE]] [[Arquivo:Damage.png|Damage]] | |||
| rowspan="2" | [[Arquivo:Fighting.png|Fighting|link=Gardestrike]] | |||
|- align="center" style="background-color:#E6E6FA;" | |||
| width="10px" | | |||
| align="left" | Level 100 | |||
|- align="center" | |||
! rowspan="2" | M6 | |||
| width="10px" | | |||
| align="left" | '''Vital Throw (30s)''' | |||
| width="50px" rowspan="2" | | |||
| rowspan="2" align="right" | [[Arquivo:AOE.png|AOE]] [[Arquivo:Damage.png|Damage]] | |||
| rowspan="2" | [[Arquivo:Fighting.png|Fighting|link=Gardestrike]] | |||
|- align="center" | |||
| width="10px" | | |||
| align="left" | Level 100 | |||
|- align="center" style="background-color:#E6E6FA;" | |||
! rowspan="2" | M7 | |||
| width="10px" | | |||
| align="left" | '''Force Palm (50s)''' | |||
| width="50px" rowspan="2" | | |||
| rowspan="2" align="right" | [[Arquivo:AOE.png|AOE]] [[Arquivo:Damage.png|Damage]] [[Arquivo:Debuff.png|Debuff]] [[Arquivo:Paralyze.png|Paralyze]][[Arquivo:NeverBoost.png|Neverboost|link=]] | |||
| rowspan="2" | [[Arquivo:Fighting.png|Fighting|link=Gardestrike]] | |||
|- align="center" style="background-color:#E6E6FA;" | |||
| width="10px" | | |||
| align="left" | Level 100 | |||
|- align="center" | |||
! rowspan="2" | M8 | |||
| width="10px" | | |||
| align="left" | Reversal (50s) | |||
| width="50px" rowspan="2" | | |||
| rowspan="2" align="right" | [[Arquivo:AOE.png|AOE]] [[Arquivo:Damage.png|Damage]] | |||
| rowspan="2" | [[Arquivo:Fighting.png|Fighting|link=Gardestrike]] | |||
|- align="center" | |||
| width="10px" | | |||
| align="left" | Level 100 | |||
|- align="center" style="background-color:#E6E6FA;" | |||
! rowspan="2" | M9 | |||
| width="10px" | | |||
| align="left" | '''Detect (50s)''' | |||
| width="50px" rowspan="2" | | |||
| rowspan="2" align="right" | [[Arquivo:Self.png|Self|link=]] [[Arquivo:Focus Blocked.png|Focus Blocked|link=]] [[Arquivo:Buff.png|Buff]] | |||
| rowspan="2" | [[Arquivo:Fighting.png|Fighting|link=Gardestrike]] | | rowspan="2" | [[Arquivo:Fighting.png|Fighting|link=Gardestrike]] | ||
|- align="center" style="background-color:#E6E6FA;" | |- align="center" style="background-color:#E6E6FA;" | ||

Edição atual tal como às 13h48min de 3 de julho de 2026
Informações Gerais
Nome: Hariyama
Level: 100
Elemento: Fighting
Habilidades: Rock Smash, Dig and Headbutt.
Boost: Ancient Stone (30)
Materia: Gardestrike Superior
Evoluções
Makuhita precisa de Level 40.
Hariyama precisa de Level 100.
Descrição:
Adora desafiar outras pessoas a testes de força. Ele tem o poder de parar um trem com um tapa.
Movimentos
Movimentos PVP
| M1 | Low Kick (10s) |  
|

| ||
|---|---|---|---|---|---|
| Level 100 | |||||
| M2 | Smelling Salts (20s) | 
|

| ||
| Level 100 | |||||
| M3 | Leap Strike (15s) |  
|
| ||
| Level 100 | |||||
| M4 | Knock Off (22s) |
|

| ||
| Level 100 | |||||
| M5 | Arm Thrust (30s) | 
|
| ||
| Level 100 | |||||
| M6 | Vital Throw (20s) |
|
| ||
| Level 100 | |||||
| M7 | Force Palm (40s) |  
|
| ||
| Level 100 | |||||
| M8 | Reversal (50s) |
|
| ||
| Level 100 | |||||
| M9 | Detect (60s) |  
|
| ||
| Level 100 | |||||
| P | Foresight | 
|
| ||
| P | Thick Fat |
|

| ||
Movimentos PVE
| M1 | Low Kick (10s) |
|
| ||
|---|---|---|---|---|---|
| Level 100 | |||||
| M2 | Smelling Salts (20s) |
|
| ||
| Level 100 | |||||
| M3 | Leap Strike (15s) |
|
| ||
| Level 100 | |||||
| M4 | Knock Off (22s) |
|
| ||
| Level 100 | |||||
| M5 | Arm Thrust (40s) |
|
| ||
| Level 100 | |||||
| M6 | Vital Throw (30s) |
|
| ||
| Level 100 | |||||
| M7 | Force Palm (50s) |
|
| ||
| Level 100 | |||||
| M8 | Reversal (50s) |
|
| ||
| Level 100 | |||||
| M9 | Detect (50s) |
|
| ||
| Level 100 | |||||
| P | Foresight |
|
| ||
| P | Thick Fat |
|
| ||
Efetividades
Muito Efetivo: Flying, Psychic and Fairy.
Normal: Normal, Fire, Water, Grass, Electric, Ice, Fighting, Poison, Ground, Ghost, Dragon, Steel and Crystal.
Muito Inefetivo: Bug, Rock and Dark.
Outras Versões

|
Shiny Hariyama |