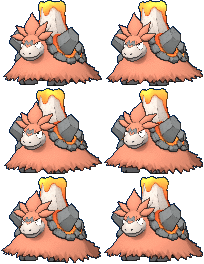
Mega Camerupt: mudanças entre as edições
Ir para navegação
Ir para pesquisar
(Atualiza Tier e Função a partir do JSON revisado) |
|||
| (17 revisões intermediárias por 3 usuários não estão sendo mostradas) | |||
| Linha 5: | Linha 5: | ||
'''Nome:''' Mega Camerupt<br /> | '''Nome:''' Mega Camerupt<br /> | ||
'''Level:''' 100<br /> | '''Level:''' 100<br /> | ||
'''Tier: ''' T2 <br /> | |||
'''Função: ''' Burst Damage Dealer PvP <br /> | |||
'''Elemento:''' Fire / Ground<br /> | '''Elemento:''' Fire / Ground<br /> | ||
'''Habilidades:''' Dig, Rock Smash, Ride and Headbutt.<br /> | '''Habilidades:''' Dig, Rock Smash, Ride and Headbutt.<br /> | ||
| Linha 17: | Linha 19: | ||
Tem vulcões nas costas. Se o magma se acumula em seu corpo, ele estremece e, então, entra em erupção violentamente. | Tem vulcões nas costas. Se o magma se acumula em seu corpo, ele estremece e, então, entra em erupção violentamente. | ||
== '''Movimentos''' == | == '''Movimentos PVP''' == | ||
{| border="0" style="border-collapse:collapse" | {| border="0" style="border-collapse:collapse" | ||
| Linha 23: | Linha 25: | ||
! rowspan="2" | M1 | ! rowspan="2" | M1 | ||
| width="10px" | | | width="10px" | | ||
| align="left" | Mud Sport ( | | align="left" | Mud Sport (32s) | ||
| width="50px" rowspan="2" | | | width="50px" rowspan="2" | | ||
| rowspan="2" align="right" | [[Arquivo:Target.png|Target]] [[Arquivo:Damage.png|Damage]] [[Arquivo:Blind.png|Blind]] [[Arquivo:NeverBoost.png|Neverboost]] | | rowspan="2" align="right" | [[Arquivo:Target.png|Target]] [[Arquivo:Focus Blocked.png|Focus Blocked]] [[Arquivo:Damage.png|Damage]] [[Arquivo:Blind.png|Blind]] [[Arquivo:NeverBoost.png|Neverboost]] | ||
| rowspan="2" | [[Arquivo:Ground.png|Ground|link=Orebound]] | | rowspan="2" | [[Arquivo:Ground.png|Ground|link=Orebound]] | ||
|- align="center" style="background-color: #E6E6FA;" | |- align="center" style="background-color: #E6E6FA;" | ||
| Linha 56: | Linha 58: | ||
! rowspan="2" | M4 | ! rowspan="2" | M4 | ||
| width="10px" | | | width="10px" | | ||
| align="left" | Bulldoze (30s) | | align="left" | '''Bulldoze (30s)''' | ||
| width="50px" rowspan="2" | | |||
| rowspan="2" align="right" | [[Arquivo:AOE.png|AOE]] [[Arquivo:Damage.png|Damage]] [[Arquivo:Slow.png|Slow]] | |||
| rowspan="2" | [[Arquivo:Ground.png|Ground|link=Orebound]] | |||
|- align="center" | |||
| width="10px" | | |||
| align="left" | Level 100 | |||
|- align="center" style="background-color: #E6E6FA;" | |||
! rowspan="2" | M5 | |||
| width="10px" | | |||
| align="left" | '''Earth Power (40s)''' | |||
| width="50px" rowspan="2" | | |||
| rowspan="2" align="right" | [[Arquivo:AOE.png|AOE]] [[Arquivo:Damage.png|Damage]] | |||
| rowspan="2" | [[Arquivo:Ground.png|Ground|link=Orebound]] | |||
|- align="center" style="background-color: #E6E6FA;" | |||
| width="10px" | | |||
| align="left" | Level 100 | |||
|- align="center" | |||
! rowspan="2" | M6 | |||
| width="10px" | | |||
| align="left" | '''Earthquake (35s)''' | |||
| width="50px" rowspan="2" | | | width="50px" rowspan="2" | | ||
| rowspan="2" align="right" | [[Arquivo:AOE.png|AOE]] [[Arquivo:Damage.png|Damage]] | | rowspan="2" align="right" | [[Arquivo:AOE.png|AOE]] [[Arquivo:Damage.png|Damage]] | ||
| rowspan="2" | [[Arquivo:Ground.png|Ground|link=Orebound]] | |||
|- align="center" | |||
| width="10px" | | |||
| align="left" | Level 100 | |||
|- align="center" style="background-color: #E6E6FA;" | |||
! rowspan="2" | M7 | |||
| width="10px" | | |||
| align="left" | '''Fissure (60s)''' | |||
| width="50px" rowspan="2" | | |||
| rowspan="2" align="right" | [[Arquivo:AOE.png|AOE]] [[Arquivo:Damage.png|Damage]] | |||
| rowspan="2" | [[Arquivo:Ground.png|Ground|link=Orebound]] | |||
|- align="center" style="background-color: #E6E6FA;" | |||
| width="10px" | | |||
| align="left" | Level 100 | |||
|- align="center" | |||
! rowspan="2" | M8 | |||
| width="10px" | | |||
| align="left" | '''Sand Eruption (50s)''' | |||
| width="50px" rowspan="2" | | |||
| rowspan="2" align="right" | [[Arquivo:AOE.png|AOE]] [[Arquivo:Damage.png|Damage]] | |||
| rowspan="2" | [[Arquivo:Ground.png|Ground|link=Orebound]] | |||
|- align="center" | |||
| width="10px" | | |||
| align="left" | Level 100 | |||
|- align="center" style="background-color: #E6E6FA;" | |||
! rowspan="2" | M9 | |||
| width="10px" | | |||
| align="left" | '''Sandstorm (45s)''' | |||
| width="50px" rowspan="2" | | |||
| rowspan="2" align="right" | [[Arquivo:AOE.png|AOE]] [[Arquivo:Focus Blocked.png|Focus Blocked]] [[Arquivo:Buff.png|Buff]] [[Arquivo:Blind.png|Blind]] [[Arquivo:Slow.png|Slow]] | |||
| rowspan="2" | [[Arquivo:Rock.png|Rock|link=Orebound]] | |||
|- align="center" style="background-color: #E6E6FA;" | |||
| width="10px" | | |||
| align="left" | Level 100 | |||
|- align="center" | |||
! rowspan="2" | M10 | |||
| width="10px" | | |||
| align="left" | '''Focus Energy (60s)''' | |||
| width="50px" rowspan="2" | | |||
| rowspan="2" align="right" | [[Arquivo:Self.png|Self]] [[Arquivo:Focus Blocked.png|Focus Blocked]] [[Arquivo:Buff.png|Buff]] | |||
| rowspan="2" | [[Arquivo:Normal1.png|Normal|link=Gardestrike]] | |||
|- align="center" | |||
| width="10px" | | |||
| align="left" | Level 100 | |||
|- align="center" style="background-color: #E6E6FA;" | |||
! rowspan="2" | P | |||
| width="10px" | | |||
| align="left" | Solid Rock | |||
| width="50px" rowspan="2" | | |||
| rowspan="2" align="right" | [[Arquivo:Buff.png|Buff]] [[Arquivo:Passive.png|Passive]] | |||
| rowspan="2" | [[Arquivo:Rock.png|Rock|link=Orebound]] | |||
|- align="center" style="background-color: #E6E6FA;" | |||
| width="10px" | | |||
| align="left" | | |||
|- align="center" | |||
! rowspan="2" | P | |||
| width="10px" | | |||
| align="left" | Magma Armor | |||
| width="50px" rowspan="2" | | |||
| rowspan="2" align="right" | [[Arquivo:Buff.png|Buff]] [[Arquivo:Passive.png|Passive]] | |||
| rowspan="2" | [[Arquivo:Fire.png|Fire|link=Volcanic]] | |||
|- align="center" | |||
| width="10px" | | |||
| align="left" | | |||
|- align="center" style="background-color: #E6E6FA;" | |||
! rowspan="2" | P | |||
| width="10px" | | |||
| align="left" | Molten Coat | |||
| width="50px" rowspan="2" | | |||
| rowspan="2" align="right" | [[Arquivo:Buff.png|Buff]] [[Arquivo:Passive.png|Passive]] | |||
| rowspan="2" | [[Arquivo:Fire.png|Fire|link=Volcanic]] | |||
|- align="center" style="background-color: #E6E6FA;" | |||
| width="10px" | | |||
| align="left" | | |||
|} | |||
== '''Movimentos PVE''' == | |||
{| border="0" style="border-collapse:collapse" | |||
|- align="center" style="background-color: #E6E6FA;" | |||
! rowspan="2" | M1 | |||
| width="10px" | | |||
| align="left" | Mud Sport (32s) | |||
| width="50px" rowspan="2" | | |||
| rowspan="2" align="right" | [[Arquivo:Target.png|Target]] [[Arquivo:Focus Blocked.png|Focus Blocked]] [[Arquivo:Damage.png|Damage]] [[Arquivo:Blind.png|Blind]] [[Arquivo:NeverBoost.png|Neverboost]] | |||
| rowspan="2" | [[Arquivo:Ground.png|Ground|link=Orebound]] | |||
|- align="center" style="background-color: #E6E6FA;" | |||
| width="10px" | | |||
| align="left" | Level 100 | |||
|- align="center" | |||
! rowspan="2" | M2 | |||
| width="10px" | | |||
| align="left" | Mud Sludge (10s) | |||
| width="50px" rowspan="2" | | |||
| rowspan="2" align="right" | [[Arquivo:Target.png|Target]] [[Arquivo:Damage.png|Damage]] | |||
| rowspan="2" | [[Arquivo:Ground.png|Ground|link=Orebound]] | |||
|- align="center" | |||
| width="10px" | | |||
| align="left" | Level 100 | |||
|- align="center" style="background-color: #E6E6FA;" | |||
! rowspan="2" | M3 | |||
| width="10px" | | |||
| align="left" | Ember (15s) | |||
| width="50px" rowspan="2" | | |||
| rowspan="2" align="right" | [[Arquivo:Target.png|Target]] [[Arquivo:Damage.png|Damage]] | |||
| rowspan="2" | [[Arquivo:Fire.png|Fire|link=Volcanic]] | |||
|- align="center" style="background-color: #E6E6FA;" | |||
| width="10px" | | |||
| align="left" | Level 100 | |||
|- align="center" | |||
! rowspan="2" | M4 | |||
| width="10px" | | |||
| align="left" | Bulldoze (35s) | |||
| width="50px" rowspan="2" | | |||
| rowspan="2" align="right" | [[Arquivo:AOE.png|AOE]] [[Arquivo:Damage.png|Damage]] [[Arquivo:Slow.png|Slow]] | |||
| rowspan="2" | [[Arquivo:Ground.png|Ground|link=Orebound]] | | rowspan="2" | [[Arquivo:Ground.png|Ground|link=Orebound]] | ||
|- align="center" | |- align="center" | ||
| Linha 67: | Linha 217: | ||
! rowspan="2" | M5 | ! rowspan="2" | M5 | ||
| width="10px" | | | width="10px" | | ||
| align="left" | Earth Power ( | | align="left" | Earth Power (35s) | ||
| width="50px" rowspan="2" | | | width="50px" rowspan="2" | | ||
| rowspan="2" align="right" | [[Arquivo:AOE.png|AOE]] [[Arquivo:Damage.png|Damage]] | | rowspan="2" align="right" | [[Arquivo:AOE.png|AOE]] [[Arquivo:Damage.png|Damage]] | ||
| Linha 78: | Linha 228: | ||
! rowspan="2" | M6 | ! rowspan="2" | M6 | ||
| width="10px" | | | width="10px" | | ||
| align="left" | Earthquake ( | | align="left" | Earthquake (40s) | ||
| width="50px" rowspan="2" | | | width="50px" rowspan="2" | | ||
| rowspan="2" align="right" | [[Arquivo:AOE.png|AOE]] [[Arquivo:Damage.png|Damage]] | | rowspan="2" align="right" | [[Arquivo:AOE.png|AOE]] [[Arquivo:Damage.png|Damage]] | ||
| Linha 84: | Linha 234: | ||
|- align="center" | |- align="center" | ||
| width="10px" | | | width="10px" | | ||
| align="left" | Level | | align="left" | Level 100 | ||
|- align="center" style="background-color: #E6E6FA;" | |- align="center" style="background-color: #E6E6FA;" | ||
! rowspan="2" | M7 | ! rowspan="2" | M7 | ||
| width="10px" | | | width="10px" | | ||
| align="left" | Fissure ( | | align="left" | Fissure (50s) | ||
| width="50px" rowspan="2" | | | width="50px" rowspan="2" | | ||
| rowspan="2" align="right" | [[Arquivo:AOE.png|AOE]] [[Arquivo:Damage.png|Damage]] | | rowspan="2" align="right" | [[Arquivo:AOE.png|AOE]] [[Arquivo:Damage.png|Damage]] | ||
| Linha 95: | Linha 245: | ||
|- align="center" style="background-color: #E6E6FA;" | |- align="center" style="background-color: #E6E6FA;" | ||
| width="10px" | | | width="10px" | | ||
| align="left" | Level | | align="left" | Level 100 | ||
|- align="center" | |- align="center" | ||
| Linha 106: | Linha 256: | ||
|- align="center" | |- align="center" | ||
| width="10px" | | | width="10px" | | ||
| align="left" | Level | | align="left" | Level 100 | ||
|- align="center" style="background-color: #E6E6FA;" | |- align="center" style="background-color: #E6E6FA;" | ||
! rowspan="2" | M9 | ! rowspan="2" | M9 | ||
| width="10px" | | | width="10px" | | ||
| align="left" | Sandstorm ( | | align="left" | Sandstorm (40s) | ||
| width="50px" rowspan="2" | | | width="50px" rowspan="2" | | ||
| rowspan="2" align="right" | [[Arquivo:AOE.png|AOE]] [[Arquivo:Buff.png|Buff]] [[Arquivo:Blind.png|Blind]] [[Arquivo:Slow.png|Slow]] | | rowspan="2" align="right" | [[Arquivo:AOE.png|AOE]] [[Arquivo:Focus Blocked.png|Focus Blocked]] [[Arquivo:Buff.png|Buff]] [[Arquivo:Blind.png|Blind]] [[Arquivo:Slow.png|Slow]] | ||
| rowspan="2" | [[Arquivo:Rock.png|Rock|link=Orebound]] | | rowspan="2" | [[Arquivo:Rock.png|Rock|link=Orebound]] | ||
|- align="center" style="background-color: #E6E6FA;" | |- align="center" style="background-color: #E6E6FA;" | ||
| Linha 122: | Linha 272: | ||
! rowspan="2" | M10 | ! rowspan="2" | M10 | ||
| width="10px" | | | width="10px" | | ||
| align="left" | Focus Energy ( | | align="left" | Focus Energy (40s) | ||
| width="50px" rowspan="2" | | | width="50px" rowspan="2" | | ||
| rowspan="2" align="right" | [[Arquivo:Self.png|Self]] [[Arquivo:Buff.png|Buff]] | | rowspan="2" align="right" | [[Arquivo:Self.png|Self]] [[Arquivo:Focus Blocked.png|Focus Blocked]] [[Arquivo:Buff.png|Buff]] | ||
| rowspan="2" | [[Arquivo:Normal1.png|Normal|link=Gardestrike]] | | rowspan="2" | [[Arquivo:Normal1.png|Normal|link=Gardestrike]] | ||
|- align="center" | |- align="center" | ||
| width="10px" | | | width="10px" | | ||
| align="left" | Level | | align="left" | Level 100 | ||
|- align="center" style="background-color: #E6E6FA;" | |- align="center" style="background-color: #E6E6FA;" | ||
| Linha 146: | Linha 296: | ||
| align="left" | Magma Armor | | align="left" | Magma Armor | ||
| width="50px" rowspan="2" | | | width="50px" rowspan="2" | | ||
| rowspan="2" align="right" | [[Arquivo: | | rowspan="2" align="right" | [[Arquivo:Buff.png|Buff]] [[Arquivo:Passive.png|Passive]] | ||
| rowspan="2" | [[Arquivo:Fire.png|Fire|link=Volcanic]] | | rowspan="2" | [[Arquivo:Fire.png|Fire|link=Volcanic]] | ||
|- align="center" | |- align="center" | ||
| width="10px" | | |||
| align="left" | | |||
|- align="center" style="background-color: #E6E6FA;" | |||
! rowspan="2" | P | |||
| width="10px" | | |||
| align="left" | Molten Coat | |||
| width="50px" rowspan="2" | | |||
| rowspan="2" align="right" | [[Arquivo:Buff.png|Buff]] [[Arquivo:Passive.png|Passive]] | |||
| rowspan="2" | [[Arquivo:Fire.png|Fire|link=Volcanic]] | |||
|- align="center" style="background-color: #E6E6FA;" | |||
| width="10px" | | | width="10px" | | ||
| align="left" | | | align="left" | | ||
| Linha 168: | Linha 329: | ||
| style="width:50px; text-align:center;" | <b>[[Arquivo:323-Camerupt.png|link=Camerupt]]</b> | | style="width:50px; text-align:center;" | <b>[[Arquivo:323-Camerupt.png|link=Camerupt]]</b> | ||
| style="width:150px; text-align:center;" | <b>'''[[Camerupt]]'''</b> | | style="width:150px; text-align:center;" | <b>'''[[Camerupt]]'''</b> | ||
|- style="vertical-align:top; text-align=center;" | |||
| style="width:50px; text-align:center;" | <b>[[Arquivo:Shiny_Mega_Camerupt.png|link=]]</b> | |||
| style="width:150px; text-align:center;" | <b>'''[[Shiny Mega Camerupt]]'''</b> | |||
|} | |} | ||
Edição atual tal como às 23h51min de 3 de outubro de 2026
Informações Gerais
Nome: Mega Camerupt
Level: 100
Tier: T2
Função: Burst Damage Dealer PvP
Elemento: Fire / Ground
Habilidades: Dig, Rock Smash, Ride and Headbutt.
Mega Stone: Cameruptite
Evoluções
Camerupt precisa de Level 80.
Mega Camerupt precisa de Level 100.
Descrição:
Tem vulcões nas costas. Se o magma se acumula em seu corpo, ele estremece e, então, entra em erupção violentamente.
Movimentos PVP
| M1 | Mud Sport (32s) |     
|

| ||
|---|---|---|---|---|---|
| Level 100 | |||||
| M2 | Mud Sludge (10s) |
|
| ||
| Level 100 | |||||
| M3 | Ember (15s) |
|

| ||
| Level 100 | |||||
| M4 | Bulldoze (30s) |  
|
| ||
| Level 100 | |||||
| M5 | Earth Power (40s) |
|
| ||
| Level 100 | |||||
| M6 | Earthquake (35s) |
|
| ||
| Level 100 | |||||
| M7 | Fissure (60s) |
|
| ||
| Level 100 | |||||
| M8 | Sand Eruption (50s) |
|
| ||
| Level 100 | |||||
| M9 | Sandstorm (45s) | 
|

| ||
| Level 100 | |||||
| M10 | Focus Energy (60s) | 
|

| ||
| Level 100 | |||||
| P | Solid Rock | 
|
| ||
| P | Magma Armor |
|
| ||
| P | Molten Coat |
|
| ||
Movimentos PVE
| M1 | Mud Sport (32s) |
|
| ||
|---|---|---|---|---|---|
| Level 100 | |||||
| M2 | Mud Sludge (10s) |
|
| ||
| Level 100 | |||||
| M3 | Ember (15s) |
|
| ||
| Level 100 | |||||
| M4 | Bulldoze (35s) |
|
| ||
| Level 100 | |||||
| M5 | Earth Power (35s) |
|
| ||
| Level 100 | |||||
| M6 | Earthquake (40s) |
|
| ||
| Level 100 | |||||
| M7 | Fissure (50s) |
|
| ||
| Level 100 | |||||
| M8 | Sand Eruption (60s) |
|
| ||
| Level 100 | |||||
| M9 | Sandstorm (40s) |
|
| ||
| Level 100 | |||||
| M10 | Focus Energy (40s) |
|
| ||
| Level 100 | |||||
| P | Solid Rock |
|
| ||
| P | Magma Armor |
|
| ||
| P | Molten Coat |
|
| ||
Efetividades
Muito Efetivo: Water.
Efetivo: Ground.
Normal: Normal, Grass, Ice, Fighting, Flying, Psychic, Rock, Ghost, Dragon, Dark and Crystal.
Inefetivo: Fire, Poison, Bug, Steel and Fairy.
Nulo: Electric.
Outras Versões

|
Camerupt |

|
Shiny Mega Camerupt |