Mega Houndoom: mudanças entre as edições
| (17 revisões intermediárias por 7 usuários não estão sendo mostradas) | |||
| Linha 6: | Linha 6: | ||
'''Level:''' 100<br /> | '''Level:''' 100<br /> | ||
'''Elemento:''' Dark / Fire<br /> | '''Elemento:''' Dark / Fire<br /> | ||
'''Habilidades:''' Dig, | '''Habilidades:''' Dig, Rock Smash, Headbutt and Ride.<br /> | ||
== '''Evoluções''' == | == '''Evoluções''' == | ||
| Linha 17: | Linha 17: | ||
== '''Movimentos''' == | == '''Movimentos''' == | ||
=== | ==='''Movimentos PvP'''=== | ||
{| border="0" style="border-collapse:collapse" | {| border="0" style="border-collapse:collapse" | ||
|- align="center" style="background-color:#E6E6FA;" | |- align="center" style="background-color: #E6E6FA;" | ||
! rowspan="2" | M1 | ! rowspan="2" | M1 | ||
| width="10px" | | | width="10px" | | ||
| align="left" | Roar (35s) | | align="left" | Roar (35s) | ||
| width="50px" rowspan="2" | | | width="50px" rowspan="2" | | ||
| rowspan="2" align="right" | [[Arquivo:AOE.png|AOE]] [[Arquivo: | | rowspan="2" align="right" | [[Arquivo:AOE.png|AOE]] [[Arquivo:Focus Blocked.png|Focus Blocked]] [[Arquivo:Silence.png|Silence]] [[Arquivo:Debuff.png|Debuff]] [[Arquivo:NeverBoost.png|Neverboost]] | ||
| rowspan="2" | [[Arquivo:Normal1.png|Normal|link=Gardestrike]] | | rowspan="2" | [[Arquivo:Normal1.png|Normal|link=Gardestrike]] | ||
|- align="center" style="background-color:#E6E6FA;" | |- align="center" style="background-color: #E6E6FA;" | ||
| width="10px" | | | width="10px" | | ||
| align="left" | Level | | align="left" | Level 100 | ||
|- align="center" | |||
|- align="center" | |||
! rowspan="2" | M2 | ! rowspan="2" | M2 | ||
| width="10px" | | | width="10px" | | ||
| align="left" | Bite ( | | align="left" | Bite (10s) | ||
| width="50px" rowspan="2" | | | width="50px" rowspan="2" | | ||
| rowspan="2" align="right" | [[Arquivo:Target.png|Target]] [[Arquivo:Damage.png|Damage]] | | rowspan="2" align="right" | [[Arquivo:Target.png|Target]] [[Arquivo:Damage.png|Damage]] | ||
| rowspan="2" | [[Arquivo:Dark1.png|Dark|link=Malefic]] | | rowspan="2" | [[Arquivo:Dark1.png|Dark|link=Malefic]] | ||
|- align="center" | |- align="center" | ||
| width="10px" | | | width="10px" | | ||
| align="left" | Level 100 | | align="left" | Level 100 | ||
|- align="center" style="background-color:#E6E6FA;" | |||
|- align="center" style="background-color: #E6E6FA;" | |||
! rowspan="2" | M3 | ! rowspan="2" | M3 | ||
| width="10px" | | | width="10px" | | ||
| align="left" | Crunch ( | | align="left" | Crunch (12s) | ||
| width="50px" rowspan="2" | | | width="50px" rowspan="2" | | ||
| rowspan="2" align="right" | [[Arquivo:Target.png|Target]] [[Arquivo:Damage.png|Damage]] | | rowspan="2" align="right" | [[Arquivo:Target.png|Target]] [[Arquivo:Damage.png|Damage]] | ||
| rowspan="2" | [[Arquivo:Dark1.png|Dark|link=Malefic]] | | rowspan="2" | [[Arquivo:Dark1.png|Dark|link=Malefic]] | ||
|- align="center" style="background-color:#E6E6FA;" | |- align="center" style="background-color: #E6E6FA;" | ||
| width="10px" | | | width="10px" | | ||
| align="left" | Level 100 | | align="left" | Level 100 | ||
|- align="center" | |||
|- align="center" | |||
! rowspan="2" | M4 | ! rowspan="2" | M4 | ||
| width="10px" | | | width="10px" | | ||
| align="left" | | | align="left" | Ember (10s) | ||
| width="50px" rowspan="2" | | | width="50px" rowspan="2" | | ||
| rowspan="2" align="right" | [[Arquivo:Target.png|Target | | rowspan="2" align="right" | [[Arquivo:Target.png|Target]] [[Arquivo:Damage.png|Damage]] | ||
| rowspan="2" | [[Arquivo:Fire.png|Fire|link=Volcanic]] | | rowspan="2" | [[Arquivo:Fire.png|Fire|link=Volcanic]] | ||
|- align="center" | |- align="center" | ||
| width="10px" | | | width="10px" | | ||
| align="left" | Level 100 | | align="left" | Level 100 | ||
|- align="center" style="background-color:#E6E6FA;" | |||
|- align="center" style="background-color: #E6E6FA;" | |||
! rowspan="2" | M5 | ! rowspan="2" | M5 | ||
| width="10px" | | | width="10px" | | ||
| align="left" | | | align="left" | Punishment (30s) | ||
| width="50px" rowspan="2" | | | width="50px" rowspan="2" | | ||
| rowspan="2" align="right" | [[Arquivo: | | rowspan="2" align="right" | [[Arquivo:Target.png|Target]] [[Arquivo:Damage.png|Damage]] | ||
| rowspan="2" | [[Arquivo:Dark1.png|Dark|link=Malefic]] | | rowspan="2" | [[Arquivo:Dark1.png|Dark|link=Malefic]] | ||
|- align="center" style="background-color:#E6E6FA;" | |- align="center" style="background-color: #E6E6FA;" | ||
| width="10px" | | | width="10px" | | ||
| align="left" | Level 100 | | align="left" | Level 100 | ||
|- align="center" | |||
|- align="center" | |||
! rowspan="2" | M6 | ! rowspan="2" | M6 | ||
| width="10px" | | | width="10px" | | ||
| align="left" | | | align="left" | Dark Pulse (30s) | ||
| width="50px" rowspan="2" | | | width="50px" rowspan="2" | | ||
| rowspan="2" align="right" | [[Arquivo: | | rowspan="2" align="right" | [[Arquivo:AOE.png|AOE]] [[Arquivo:Damage.png|Damage]] | ||
| rowspan="2" | [[Arquivo:Dark1.png|Dark|link=Malefic]] | | rowspan="2" | [[Arquivo:Dark1.png|Dark|link=Malefic]] | ||
|- align="center" | |- align="center" | ||
| width="10px" | | | width="10px" | | ||
| align="left" | Level | | align="left" | Level 100 | ||
|- align="center" style="background-color:#E6E6FA;" | |||
|- align="center" style="background-color: #E6E6FA;" | |||
! rowspan="2" | M7 | ! rowspan="2" | M7 | ||
| width="10px" | | | width="10px" | | ||
| align="left" | Flamethrower (20s) | | align="left" | Flamethrower (20s) | ||
| width="50px" rowspan="2" | | | width="50px" rowspan="2" | | ||
| rowspan="2" align="right" | [[Arquivo:AOE.png|AOE]] [[Arquivo:Damage.png|Damage]] [[Arquivo:Burn.png|Burn]] | | rowspan="2" align="right" | [[Arquivo:AOE.png|AOE]] [[Arquivo:Damage.png|Damage]] [[Arquivo:Burn.png|Burn]] | ||
| rowspan="2" | [[Arquivo:Fire.png|Fire|link=Volcanic]] | | rowspan="2" | [[Arquivo:Fire.png|Fire|link=Volcanic]] | ||
|- align="center" style="background-color:#E6E6FA;" | |- align="center" style="background-color: #E6E6FA;" | ||
| width="10px" | | | width="10px" | | ||
| align="left" | Level 100 | | align="left" | Level 100 | ||
|- align="center" | |||
|- align="center" | |||
! rowspan="2" | M8 | ! rowspan="2" | M8 | ||
| width="10px" | | | width="10px" | | ||
| align="left" | Incinerate (20s) | | align="left" | Incinerate (20s) | ||
| width="50px" rowspan="2" | | | width="50px" rowspan="2" | | ||
| rowspan="2" align="right" | [[Arquivo:Target.png|Target]] [[Arquivo:Damage.png|Damage]] [[Arquivo:Burn.png|Burn]] | | rowspan="2" align="right" | [[Arquivo:Target.png|Target]] [[Arquivo:Damage.png|Damage]] [[Arquivo:Burn.png|Burn]] | ||
| rowspan="2" | [[Arquivo:Fire.png|Fire|link=Volcanic]] | | rowspan="2" | [[Arquivo:Fire.png|Fire|link=Volcanic]] | ||
|- align="center" | |- align="center" | ||
| width="10px" | | | width="10px" | | ||
| align="left" | Level 100 | | align="left" | Level 100 | ||
|- align="center" style="background-color:#E6E6FA;" | |||
|- align="center" style="background-color: #E6E6FA;" | |||
! rowspan="2" | M9 | ! rowspan="2" | M9 | ||
| width="10px" | | | width="10px" | | ||
| align="left" | Fire Blast (50s) | | align="left" | Fire Blast (50s) | ||
| width="50px" rowspan="2" | | | width="50px" rowspan="2" | | ||
| rowspan="2" align="right" | [[Arquivo:AOE.png|AOE]] [[Arquivo:Damage.png|Damage]] [[Arquivo:Burn.png|Burn]] | | rowspan="2" align="right" | [[Arquivo:AOE.png|AOE]] [[Arquivo:Damage.png|Damage]] [[Arquivo:Burn.png|Burn]] | ||
| rowspan="2" | [[Arquivo:Fire.png|Fire|link=Volcanic]] | | rowspan="2" | [[Arquivo:Fire.png|Fire|link=Volcanic]] | ||
|- align="center" style="background-color:#E6E6FA;" | |- align="center" style="background-color: #E6E6FA;" | ||
| width="10px" | | | width="10px" | | ||
| align="left" | Level | | align="left" | Level 100 | ||
|- align="center" | |||
|- align="center" | |||
! rowspan="2" | M10 | ! rowspan="2" | M10 | ||
| width="10px" | | | width="10px" | | ||
| align="left" | Inferno (70s) | | align="left" | Inferno (70s) | ||
| width="50px" rowspan="2" | | | width="50px" rowspan="2" | | ||
| rowspan="2" align="right" | [[Arquivo:AOE.png|AOE]] [[Arquivo:Damage.png|Damage]] [[Arquivo:Burn.png|Burn]] | | rowspan="2" align="right" | [[Arquivo:AOE.png|AOE]] [[Arquivo:Damage.png|Damage]] [[Arquivo:Burn.png|Burn]] | ||
| rowspan="2" | [[Arquivo:Fire.png|Fire|link=Volcanic]] | | rowspan="2" | [[Arquivo:Fire.png|Fire|link=Volcanic]] | ||
|- align="center" | |- align="center" | ||
| width="10px" | | | width="10px" | | ||
| align="left" | Level | | align="left" | Level 100 | ||
|} | |} | ||
=== | ==='''Movimentos PvE'''=== | ||
{| border="0" style="border-collapse:collapse" | {| border="0" style="border-collapse:collapse" | ||
|- align="center" style="background-color: #E6E6FA;" | |- align="center" style="background-color: #E6E6FA;" | ||
| Linha 129: | Linha 138: | ||
| align="left" | Roar (35s) | | align="left" | Roar (35s) | ||
| width="50px" rowspan="2" | | | width="50px" rowspan="2" | | ||
| rowspan="2" align="right" | [[Arquivo:AOE.png|AOE]] [[Arquivo: | | rowspan="2" align="right" | [[Arquivo:AOE.png|AOE]] [[Arquivo:Focus Blocked.png|Focus Blocked]] [[Arquivo:Stun.png|Stun]] [[Arquivo:Debuff.png|Debuff]] [[Arquivo:NeverBoost.png|Neverboost]] | ||
| rowspan="2" | [[Arquivo:Normal1.png|Normal|link=Gardestrike]] | | rowspan="2" | [[Arquivo:Normal1.png|Normal|link=Gardestrike]] | ||
|- align="center" style="background-color: #E6E6FA;" | |- align="center" style="background-color: #E6E6FA;" | ||
| Linha 138: | Linha 147: | ||
! rowspan="2" | M2 | ! rowspan="2" | M2 | ||
| width="10px" | | | width="10px" | | ||
| align="left" | Bite ( | | align="left" | '''Bite (20s)''' | ||
| width="50px" rowspan="2" | | | width="50px" rowspan="2" | | ||
| rowspan="2" align="right" | [[Arquivo:Target.png|Target]] [[Arquivo:Damage.png|Damage]] | | rowspan="2" align="right" | [[Arquivo:Target.png|Target]] [[Arquivo:Damage.png|Damage]] | ||
| Linha 149: | Linha 158: | ||
! rowspan="2" | M3 | ! rowspan="2" | M3 | ||
| width="10px" | | | width="10px" | | ||
| align="left" | Crunch ( | | align="left" | '''Crunch (20s)''' | ||
| width="50px" rowspan="2" | | | width="50px" rowspan="2" | | ||
| rowspan="2" align="right" | [[Arquivo:Target.png|Target]] [[Arquivo:Damage.png|Damage]] | | rowspan="2" align="right" | [[Arquivo:Target.png|Target]] [[Arquivo:Damage.png|Damage]] | ||
| Linha 160: | Linha 169: | ||
! rowspan="2" | M4 | ! rowspan="2" | M4 | ||
| width="10px" | | | width="10px" | | ||
| align="left" | Ember ( | | align="left" | '''Ember (8s)''' | ||
| width="50px" rowspan="2" | | | width="50px" rowspan="2" | | ||
| rowspan="2" align="right" | [[Arquivo:Target.png|Target]] [[Arquivo:Damage.png|Damage]] | | rowspan="2" align="right" | [[Arquivo:Target.png|Target]] [[Arquivo:Damage.png|Damage]] | ||
| Linha 177: | Linha 186: | ||
|- align="center" style="background-color: #E6E6FA;" | |- align="center" style="background-color: #E6E6FA;" | ||
| width="10px" | | | width="10px" | | ||
| align="left" | Level | | align="left" | Level 100 | ||
|- align="center" | |- align="center" | ||
! rowspan="2" | M6 | ! rowspan="2" | M6 | ||
| width="10px" | | | width="10px" | | ||
| align="left" | | | align="left" | '''Dark Pulse (25s)''' | ||
| width="50px" rowspan="2" | | | width="50px" rowspan="2" | | ||
| rowspan="2" align="right" | [[Arquivo:AOE.png|AOE]] [[Arquivo:Damage.png|Damage]] | | rowspan="2" align="right" | [[Arquivo:AOE.png|AOE]] [[Arquivo:Damage.png|Damage]] | ||
| Linha 215: | Linha 224: | ||
! rowspan="2" | M9 | ! rowspan="2" | M9 | ||
| width="10px" | | | width="10px" | | ||
| align="left" | Fire Blast (40s) | | align="left" | '''Fire Blast (40s)''' | ||
| width="50px" rowspan="2" | | | width="50px" rowspan="2" | | ||
| rowspan="2" align="right" | [[Arquivo:AOE.png|AOE]] [[Arquivo:Damage.png|Damage]] [[Arquivo:Burn.png|Burn]] | | rowspan="2" align="right" | [[Arquivo:AOE.png|AOE]] [[Arquivo:Damage.png|Damage]] [[Arquivo:Burn.png|Burn]] | ||
| Linha 221: | Linha 230: | ||
|- align="center" style="background-color: #E6E6FA;" | |- align="center" style="background-color: #E6E6FA;" | ||
| width="10px" | | | width="10px" | | ||
| align="left" | Level | | align="left" | Level 100 | ||
|- align="center" | |- align="center" | ||
! rowspan="2" | M10 | ! rowspan="2" | M10 | ||
| width="10px" | | | width="10px" | | ||
| align="left" | Inferno (50s) | | align="left" | '''Inferno (50s)''' | ||
| width="50px" rowspan="2" | | | width="50px" rowspan="2" | | ||
| rowspan="2" align="right" | [[Arquivo:AOE.png|AOE]] [[Arquivo:Damage.png|Damage]] [[Arquivo:Burn.png|Burn]] | | rowspan="2" align="right" | [[Arquivo:AOE.png|AOE]] [[Arquivo:Damage.png|Damage]] [[Arquivo:Burn.png|Burn]] | ||
| Linha 232: | Linha 241: | ||
|- align="center" | |- align="center" | ||
| width="10px" | | | width="10px" | | ||
| align="left" | Level | | align="left" | Level 100 | ||
|} | |} | ||
| Linha 249: | Linha 258: | ||
| style="width:50px; text-align:center;" | <b>[[Arquivo:229-Houndoom.png|link=Houndoom]]</b> | | style="width:50px; text-align:center;" | <b>[[Arquivo:229-Houndoom.png|link=Houndoom]]</b> | ||
| style="width:150px; text-align:center;" | <b>'''[[Houndoom]]'''</b> | | style="width:150px; text-align:center;" | <b>'''[[Houndoom]]'''</b> | ||
|- | |||
|- style="vertical-align:top; text-align=center;" | |||
| style="width:50px; text-align:center;" | <b>[[Arquivo:229 - Shiny Houndoom.png|link=Shiny Houndoom]]</b> | |||
| style="width:150px; text-align:center;" | <b>'''[[Shiny Houndoom]]'''</b> | |||
|- style="vertical-align:top; text-align=center;" | |||
| style="width:50px; text-align:center;" | <b>[[Arquivo:Megahoundoom.png|link=Mega Houndoom (TM)]]</b> | |||
| style="width:150px; text-align:center;" | <b>'''[[Mega Houndoom (TM)]]'''</b> | |||
|} | |} | ||
Edição atual tal como às 15h21min de 6 de abril de 2026
Informações Gerais
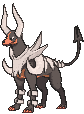
Nome: Mega Houndoom
Level: 100
Elemento: Dark / Fire
Habilidades: Dig, Rock Smash, Headbutt and Ride.
Evoluções
Houndoom precisa de Level 100.
Descrição:
As chamas que respira quando irritado contêm toxinas. Se elas causarem uma queimadura, doerá para sempre.
Movimentos
Movimentos PvP
| M1 | Roar (35s) | ||||
|---|---|---|---|---|---|
| Level 100 | |||||
| M2 | Bite (10s) | ||||
| Level 100 | |||||
| M3 | Crunch (12s) | ||||
| Level 100 | |||||
| M4 | Ember (10s) | ||||
| Level 100 | |||||
| M5 | Punishment (30s) | ||||
| Level 100 | |||||
| M6 | Dark Pulse (30s) | ||||
| Level 100 | |||||
| M7 | Flamethrower (20s) | ||||
| Level 100 | |||||
| M8 | Incinerate (20s) | ||||
| Level 100 | |||||
| M9 | Fire Blast (50s) | ||||
| Level 100 | |||||
| M10 | Inferno (70s) | ||||
| Level 100 |
Movimentos PvE
| M1 | Roar (35s) | ||||
|---|---|---|---|---|---|
| Level 100 | |||||
| M2 | Bite (20s) | ||||
| Level 100 | |||||
| M3 | Crunch (20s) | ||||
| Level 100 | |||||
| M4 | Ember (8s) | ||||
| Level 100 | |||||
| M5 | Punishment (30s) | ||||
| Level 100 | |||||
| M6 | Dark Pulse (25s) | ||||
| Level 100 | |||||
| M7 | Flamethrower (20s) | ||||
| Level 100 | |||||
| M8 | Incinerate (20s) | ||||
| Level 100 | |||||
| M9 | Fire Blast (40s) | ||||
| Level 100 | |||||
| M10 | Inferno (50s) | ||||
| Level 100 |
Efetividades
Efetivo: Water, fighting, ground and rock.
Normal: Normal, electric, poison, flying, bug, dragon, crystal and fairy.
Inefetivo: Fire, grass, ice, ghost, steel and dark.
Nulo: Psychic.
Outras Versões
| Houndoom | |
| Shiny Houndoom | |
| Mega Houndoom (TM) |