Mega Manectric: mudanças entre as edições
Ir para navegação
Ir para pesquisar
Sem resumo de edição |
|||
| (23 revisões intermediárias por 12 usuários não estão sendo mostradas) | |||
| Linha 4: | Linha 4: | ||
'''Nome:''' Mega Manectric<br /> | '''Nome:''' Mega Manectric<br /> | ||
'''Level:''' | '''Level:''' 100<br /> | ||
'''Elemento:''' Electric<br /> | '''Elemento:''' Electric<br /> | ||
'''Habilidades:''' Light and | '''Habilidades:''' Dig, Cut, Light, Ride, Headbutt and Strength.<br /> | ||
'''Mega Stone:''' Manectite | '''Mega Stone:''' Manectite | ||
== '''Evoluções''' == | == '''Evoluções''' == | ||
'''Manectric''' precisa de Level | '''Mega Manectric''' precisa de Level 100. | ||
''' | |||
== '''Descrição''' == | |||
Ele libera eletricidade pela juba. Forma uma nuvem de tempestade sobre sua cabeça para lançar raios. | |||
== '''Movimentos''' == | == '''Movimentos''' == | ||
M1 - | ==='''Movimentos PvP'''=== | ||
{| border="0" style="border-collapse:collapse" | |||
|- align="center" style="background-color: #E6E6FA;" | |||
! rowspan="2" | M1 | |||
| width="10px" | | |||
| align="left" | Ice Fang (25s) | |||
| width="50px" rowspan="2" | | |||
M9 | | rowspan="2" align="right" | [[Arquivo:Target.png|Target]] [[Arquivo:Damage.png|Damage]] [[Arquivo:Slow.png|Slow]] | ||
| rowspan="2" | [[Arquivo:Ice.png|Ice|link=Seavell]] | |||
|- align="center" style="background-color: #E6E6FA;" | |||
| width="10px" | | |||
| align="left" | Level 100 | |||
|- align="center" | |||
! rowspan="2" | M2 | |||
| width="10px" | | |||
| align="left" | Swift (15s) | |||
| width="50px" rowspan="2" | | |||
| rowspan="2" align="right" | [[Arquivo:Target.png|Target]] [[Arquivo:Damage.png|Damage]] | |||
| rowspan="2" | [[Arquivo:Normal1.png|Normal|link=Gardestrike]] | |||
|- align="center" | |||
| width="10px" | | |||
| align="left" | Level 100 | |||
|- align="center" style="background-color: #E6E6FA;" | |||
! rowspan="2" | M3 | |||
| width="10px" | | |||
| align="left" | Electro Ball (25s) | |||
| width="50px" rowspan="2" | | |||
| rowspan="2" align="right" | [[Arquivo:Target.png|Target]] [[Arquivo:Damage.png|Damage]] | |||
| rowspan="2" | [[Arquivo:Electric.png|Electric|link=Raibolt]] | |||
|- align="center" style="background-color: #E6E6FA;" | |||
| width="10px" | | |||
| align="left" | Level 100 | |||
|- align="center" | |||
! rowspan="2" | M4 | |||
| width="10px" | | |||
| align="left" | Spark (12s) | |||
| width="50px" rowspan="2" | | |||
| rowspan="2" align="right" | [[Arquivo:Target.png|Target]] [[Arquivo:Damage.png|Damage]] | |||
| rowspan="2" | [[Arquivo:Electric.png|Electric|link=Raibolt]] | |||
|- align="center" | |||
| width="10px" | | |||
| align="left" | Level 100 | |||
|- align="center" style="background-color: #E6E6FA;" | |||
! rowspan="2" | M5 | |||
| width="10px" | | |||
| align="left" | Flamethrower (25s) | |||
| width="50px" rowspan="2" | | |||
| rowspan="2" align="right" | [[Arquivo:AOE.png|AOE]] [[Arquivo:Damage.png|Damage]] [[Arquivo:Burn.png|Burn]] | |||
| rowspan="2" | [[Arquivo:Fire.png|Fire|link=Volcanic]] | |||
|- align="center" style="background-color: #E6E6FA;" | |||
| width="10px" | | |||
| align="left" | Level 100 | |||
|- align="center" | |||
! rowspan="2" | M6 | |||
| width="10px" | | |||
| align="left" | Shock Wave (40s) | |||
| width="50px" rowspan="2" | | |||
| rowspan="2" align="right" | [[Arquivo:AOE.png|AOE]] [[Arquivo:Damage.png|Damage]] [[Arquivo:Stun.png|Stun]] [[Arquivo:NeverBoost.png|Neverboost]] | |||
| rowspan="2" | [[Arquivo:Electric.png|Electric|link=Raibolt]] | |||
|- align="center" | |||
| width="10px" | | |||
| align="left" | Level 100 | |||
|- align="center" style="background-color: #E6E6FA;" | |||
! rowspan="2" | M7 | |||
| width="10px" | | |||
| align="left" | Rising Voltage (35s) | |||
| width="50px" rowspan="2" | | |||
| rowspan="2" align="right" | [[Arquivo:AOE.png|AOE]] [[Arquivo:Damage.png|Damage]] | |||
| rowspan="2" | [[Arquivo:Electric.png|Electric|link=Raibolt]] | |||
|- align="center" style="background-color: #E6E6FA;" | |||
| width="10px" | | |||
| align="left" | Level 100 | |||
|- align="center" | |||
! rowspan="2" | M8 | |||
| width="10px" | | |||
| align="left" | Discharge (60s) | |||
| width="50px" rowspan="2" | | |||
| rowspan="2" align="right" | [[Arquivo:AOE.png|AOE]] [[Arquivo:Damage.png|Damage]] | |||
| rowspan="2" | [[Arquivo:Electric.png|Electric|link=Raibolt]] | |||
|- align="center" | |||
| width="10px" | | |||
| align="left" | Level 100 | |||
|- align="center" style="background-color: #E6E6FA;" | |||
! rowspan="2" | M9 | |||
| width="10px" | | |||
| align="left" | Electric Terrain (60s) | |||
| width="50px" rowspan="2" | | |||
| rowspan="2" align="right" | [[Arquivo:AOE.png|AOE]] [[Arquivo:Self.png|Self]] [[Arquivo:Focus_Blocked.png|Focus Blocked]] [[Arquivo:Buff.png|Buff]] [[Arquivo:Locked.png|Locked]] [[Arquivo:NeverBoost.png|Neverboost]] [[Arquivo:Nevermiss.png|Nevermiss]] | |||
| rowspan="2" | [[Arquivo:Electric.png|Electric|link=Raibolt]] | |||
|- align="center" style="background-color: #E6E6FA;" | |||
| width="10px" | | |||
| align="left" | Level 100 | |||
|- align="center" | |||
! rowspan="2" | M10 | |||
| width="10px" | | |||
| align="left" | Intimidate (60s) | |||
| width="50px" rowspan="2" | | |||
| rowspan="2" align="right" | [[Arquivo:Self.png|Self]] [[Arquivo:Focus_Blocked.png|Focus Blocked]] [[Arquivo:Buff.png|Buff]] [[Arquivo:Nevermiss.png|Nevermiss]] | |||
| rowspan="2" | [[Arquivo:NeutralICON.png|Neutral|link=]] | |||
|- align="center" | |||
| width="10px" | | |||
| align="left" | Level 100 | |||
|} | |||
==='''Movimentos PvE'''=== | |||
{| border="0" style="border-collapse:collapse" | |||
|- align="center" style="background-color: #E6E6FA;" | |||
! rowspan="2" | M1 | |||
| width="10px" | | |||
| align="left" | Ice Fang (25s) | |||
| width="50px" rowspan="2" | | |||
| rowspan="2" align="right" | [[Arquivo:Target.png|Target]] [[Arquivo:Damage.png|Damage]] [[Arquivo:Slow.png|Slow]] | |||
| rowspan="2" | [[Arquivo:Ice.png|Ice|link=Seavell]] | |||
|- align="center" style="background-color: #E6E6FA;" | |||
| width="10px" | | |||
| align="left" | Level 100 | |||
|- align="center" | |||
! rowspan="2" | M2 | |||
| width="10px" | | |||
| align="left" | Swift (15s) | |||
| width="50px" rowspan="2" | | |||
| rowspan="2" align="right" | [[Arquivo:Target.png|Target]] [[Arquivo:Damage.png|Damage]] | |||
| rowspan="2" | [[Arquivo:Normal1.png|Normal|link=Gardestrike]] | |||
|- align="center" | |||
| width="10px" | | |||
| align="left" | Level 100 | |||
|- align="center" style="background-color: #E6E6FA;" | |||
! rowspan="2" | M3 | |||
| width="10px" | | |||
| align="left" | Electro Ball (25s) | |||
| width="50px" rowspan="2" | | |||
| rowspan="2" align="right" | [[Arquivo:Target.png|Target]] [[Arquivo:Damage.png|Damage]] | |||
| rowspan="2" | [[Arquivo:Electric.png|Electric|link=Raibolt]] | |||
|- align="center" style="background-color: #E6E6FA;" | |||
| width="10px" | | |||
| align="left" | Level 100 | |||
|- align="center" | |||
! rowspan="2" | M4 | |||
| width="10px" | | |||
| align="left" | '''Spark (12s)''' | |||
| width="50px" rowspan="2" | | |||
| rowspan="2" align="right" | [[Arquivo:Target.png|Target]] [[Arquivo:Damage.png|Damage]] | |||
| rowspan="2" | [[Arquivo:Electric.png|Electric|link=Raibolt]] | |||
|- align="center" | |||
| width="10px" | | |||
| align="left" | Level 100 | |||
|- align="center" style="background-color: #E6E6FA;" | |||
! rowspan="2" | M5 | |||
| width="10px" | | |||
| align="left" | '''Flamethrower (30s)''' | |||
| width="50px" rowspan="2" | | |||
| rowspan="2" align="right" | [[Arquivo:AOE.png|AOE]] [[Arquivo:Damage.png|Damage]] [[Arquivo:Burn.png|Burn]] | |||
| rowspan="2" | [[Arquivo:Fire.png|Fire|link=Volcanic]] | |||
|- align="center" style="background-color: #E6E6FA;" | |||
| width="10px" | | |||
| align="left" | Level 100 | |||
|- align="center" | |||
! rowspan="2" | M6 | |||
| width="10px" | | |||
| align="left" | Shock Wave (40s) | |||
| width="50px" rowspan="2" | | |||
| rowspan="2" align="right" | [[Arquivo:AOE.png|AOE]] [[Arquivo:Damage.png|Damage]] [[Arquivo:Stun.png|Stun]] [[Arquivo:NeverBoost.png|Neverboost]] | |||
| rowspan="2" | [[Arquivo:Electric.png|Electric|link=Raibolt]] | |||
|- align="center" | |||
| width="10px" | | |||
| align="left" | Level 100 | |||
|- align="center" style="background-color: #E6E6FA;" | |||
! rowspan="2" | M7 | |||
| width="10px" | | |||
| align="left" | '''Rising Voltage (40s)''' | |||
| width="50px" rowspan="2" | | |||
| rowspan="2" align="right" | [[Arquivo:AOE.png|AOE]] [[Arquivo:Damage.png|Damage]] | |||
| rowspan="2" | [[Arquivo:Electric.png|Electric|link=Raibolt]] | |||
|- align="center" style="background-color: #E6E6FA;" | |||
| width="10px" | | |||
| align="left" | Level 100 | |||
|- align="center" | |||
! rowspan="2" | M8 | |||
| width="10px" | | |||
| align="left" | '''Discharge (50s)''' | |||
| width="50px" rowspan="2" | | |||
| rowspan="2" align="right" | [[Arquivo:AOE.png|AOE]] [[Arquivo:Damage.png|Damage]] | |||
| rowspan="2" | [[Arquivo:Electric.png|Electric|link=Raibolt]] | |||
|- align="center" | |||
| width="10px" | | |||
| align="left" | Level 100 | |||
|- align="center" style="background-color: #E6E6FA;" | |||
! rowspan="2" | M9 | |||
| width="10px" | | |||
| align="left" | '''Electric Terrain (40s)''' | |||
| width="50px" rowspan="2" | | |||
| rowspan="2" align="right" | [[Arquivo:AOE.png|AOE]] [[Arquivo:Self.png|Self]] [[Arquivo:Focus_Blocked.png|Focus Blocked]] [[Arquivo:Buff.png|Buff]] [[Arquivo:Locked.png|Locked]] [[Arquivo:NeverBoost.png|Neverboost]] [[Arquivo:Nevermiss.png|Nevermiss]] | |||
| rowspan="2" | [[Arquivo:Electric.png|Electric|link=Raibolt]] | |||
|- align="center" style="background-color: #E6E6FA;" | |||
| width="10px" | | |||
| align="left" | Level 100 | |||
|- align="center" | |||
! rowspan="2" | M10 | |||
| width="10px" | | |||
| align="left" | '''Intimidate (80s)''' | |||
| width="50px" rowspan="2" | | |||
| rowspan="2" align="right" | [[Arquivo:Self.png|Self]] [[Arquivo:Focus_Blocked.png|Focus Blocked]] [[Arquivo:Buff.png|Buff]] [[Arquivo:Nevermiss.png|Nevermiss]] | |||
| rowspan="2" | [[Arquivo:NeutralICON.png|Neutral|link=]] | |||
|- align="center" | |||
| width="10px" | | |||
| align="left" | Level 100 | |||
|} | |||
== '''Efetividades''' == | == '''Efetividades''' == | ||
''' | '''Super Efetivo:''' Ground.<br /> | ||
'''Normal:''' Normal, Fire, Water, Grass, Ice, Fighting, Poison, Psychic, Bug, Rock, Ghost, Dragon, Dark, Crystal and Fairy.<br /> | '''Normal:''' Normal, Fire, Water, Grass, Ice, Fighting, Poison, Psychic, Bug, Rock, Ghost, Dragon, Dark, Crystal and Fairy.<br /> | ||
''' | '''Super Inefetivo:''' Electric, Flying and Steel.<br /> | ||
== '''Outras Versões''' == | == '''Outras Versões''' == | ||
| Linha 38: | Linha 241: | ||
| style="width:50px; text-align:center;" | <b>[[Arquivo:310-Manectric.png|link=Manectric]]</b> | | style="width:50px; text-align:center;" | <b>[[Arquivo:310-Manectric.png|link=Manectric]]</b> | ||
| style="width:150px; text-align:center;" | <b>'''[[Manectric]]'''</b> | | style="width:150px; text-align:center;" | <b>'''[[Manectric]]'''</b> | ||
|- style="vertical-align:top; text-align=center;" | |||
| style="width:50px; text-align:center;" | <b>[[Arquivo:310-Sh Manectric.png|link=Shiny Manectric]]</b> | |||
| style="width:150px; text-align:center;" | <b>'''[[Shiny Manectric]]'''</b> | |||
|} | |} | ||
Edição atual tal como às 18h38min de 22 de setembro de 2026
Informações Gerais
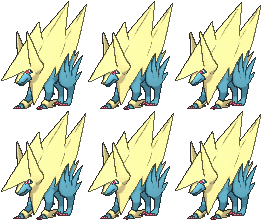
Nome: Mega Manectric
Level: 100
Elemento: Electric
Habilidades: Dig, Cut, Light, Ride, Headbutt and Strength.
Mega Stone: Manectite
Evoluções
Mega Manectric precisa de Level 100.
Descrição
Ele libera eletricidade pela juba. Forma uma nuvem de tempestade sobre sua cabeça para lançar raios.
Movimentos
Movimentos PvP
| M1 | Ice Fang (25s) |   
|

| ||
|---|---|---|---|---|---|
| Level 100 | |||||
| M2 | Swift (15s) |
|

| ||
| Level 100 | |||||
| M3 | Electro Ball (25s) |
|

| ||
| Level 100 | |||||
| M4 | Spark (12s) |
|
| ||
| Level 100 | |||||
| M5 | Flamethrower (25s) |  
|

| ||
| Level 100 | |||||
| M6 | Shock Wave (40s) |  
|
| ||
| Level 100 | |||||
| M7 | Rising Voltage (35s) |
|
| ||
| Level 100 | |||||
| M8 | Discharge (60s) |
|
| ||
| Level 100 | |||||
| M9 | Electric Terrain (60s) |     
|
| ||
| Level 100 | |||||
| M10 | Intimidate (60s) |
|

| ||
| Level 100 |
Movimentos PvE
| M1 | Ice Fang (25s) |
|
| ||
|---|---|---|---|---|---|
| Level 100 | |||||
| M2 | Swift (15s) |
|
| ||
| Level 100 | |||||
| M3 | Electro Ball (25s) |
|
| ||
| Level 100 | |||||
| M4 | Spark (12s) |
|
| ||
| Level 100 | |||||
| M5 | Flamethrower (30s) |
|
| ||
| Level 100 | |||||
| M6 | Shock Wave (40s) |
|
| ||
| Level 100 | |||||
| M7 | Rising Voltage (40s) |
|
| ||
| Level 100 | |||||
| M8 | Discharge (50s) |
|
| ||
| Level 100 | |||||
| M9 | Electric Terrain (40s) |
|
| ||
| Level 100 | |||||
| M10 | Intimidate (80s) |
|
| ||
| Level 100 |
Efetividades
Super Efetivo: Ground.
Normal: Normal, Fire, Water, Grass, Ice, Fighting, Poison, Psychic, Bug, Rock, Ghost, Dragon, Dark, Crystal and Fairy.
Super Inefetivo: Electric, Flying and Steel.
Outras Versões

|
Manectric |

|
Shiny Manectric |