|
|
| (71 revisões intermediárias pelo mesmo usuário não estão sendo mostradas) |
| Linha 1: |
Linha 1: |
| ===== WIP ===== | | ===== WIP ===== |
|
| |
|
| ==== page ==== | | |
| Confira a seguir uma lista do que poderá ser obtido em cada Box.
| | ===== Mecha Device ===== |
|
| | |
| <tabber> | | <center>[[file:Mecha_Device.png|link=]]</center> |
| |-|Eletrician Egg=
| | |
| | O Mecha Device é um item criado pela profissão '''Mecânico''' que oferece uma vantagem significativa aos jogadores que o equipam. Com ele, os jogadores conseguem infligir 10% a mais de dano em todos os inimigos neutros. |
| | |
| | ===== Enhancement Kit ===== |
| | |
| | <center>[[file:Enhancement_Kit.png|link=]]</center> |
| | |
| | O Enhancement Kit é um item especial que aumenta a chance de coleta critica durante a coleta de recursos das diversas profissões disponíveis. Esse item possui uma mecânica interessante: a cada vez que o jogador realiza um crítico ao coletar um recurso, uma certa porcentagem da bateria do item é consumida. A quantidade de bateria gasta por crítico varia conforme a profissão do personagem. Por exemplo, mecânicos podem gastar 2% de bateria por crítico, enquanto Alquimistas gastam apenas 1%. Quando a bateria se esgota, o item precisa ser substituído. |
| | |
| <center> | | <center> |
| {|class="wikitable" style="text-align:center;" | | {| class="wikitable" width=30%;" |
| |-
| |
| ! colspan="2" |Pokémon
| |
| ! Boost
| |
| |- | | |- |
| |[[Arquivo:181-Ampharos.png|link=Ampharos]] || Ampharos || 10
| | ! colspan="2" scope="col" style="text-align:center" | Recurso Primário |
| |- | | |- |
| |[[Arquivo:082-Magneton.png|link=Magneton]] || Magneton || 10 | | | style="text-align:center" width=10% | '''9%''' |
| | | width=70% | Decorador |
| |- | | |- |
| |[[Arquivo:026-Raichu.png|link=Raichu]] || Raichu || 5 | | | style="text-align:center" width=10% | '''?%''' |
| |- | | | width=70% | Designer |
| |[[Arquivo:310-Manectric.png|link=Manectric]] || Manectric || 5 | |
| |- | | |- |
| |[[Arquivo:171-Lanturn.png|link=Lanturn]] || Lanturn || 5 | | | style="text-align:center" width=10% | '''?%''' |
| | | width=70% | Hacker |
| |- | | |- |
| |[[Arquivo:417-Pachirisu.png|link=Pachirisu]] || Pachirisu || 5 | | | style="text-align:center" width=10% | '''?%''' |
| | | width=70% | Mecânico |
| |- | | |- |
| |[[Arquivo:101-Sh Electrode.png|link=Shiny Electrode]] || Shiny Electrode || 0 | | | style="text-align:center" width=10% | '''?%''' |
| |- | | | width=70% | Arqueólogo |
| |[[Arquivo:479-Rotom.png|link=Rotom]] || Rotom || 0 | |
| |- | | |- |
| |[[Arquivo:311-MinunEPlusle.png|link=Minun and Plusle]] || Minun and Plusle || 0 | | | style="text-align:center" width=10% | '''?%''' |
| | | width=70% | Cozinheiro |
| |- | | |- |
| |[[Arquivo:462-Magnezone.png|link=Magnezone]] || Magnezone || 0 | | | style="text-align:center" width=10% | '''?%''' |
| | | width=70% | Alquimista |
| |- | | |- |
| |[[Arquivo:125-Electabuzz.png|link=Electabuzz]] || Electabuzz || 0 | | | style="text-align:center" width=10% | '''35%''' |
| | | width=70% | Acadêmico |
| |- | | |- |
| |[[Arquivo:777-Togedemaru.png|link=Togedemaru]] || Togedemaru || 0
| |
| |-
| |
| |[[Arquivo:604-Eelektross.png|link=Eelektross]] || Eelektross || 0
| |
| |-
| |
| |[[Arquivo:849-Toxtricity.png|link=Toxtricity]] || Toxtricity || 0
| |
| |-
| |
| |[[Arquivo:738-Vikavolt.png|link=Vikavolt]] || Vikavolt || 0
| |
| |-
| |
| |[[Arquivo:075-Alolan_Graveler.png|link=Alolan Graveler]] || Alolan Graveler || 0
| |
| |-
| |
| |[[Arquivo:026-AlolanRaichu.png|link=Alolan Raichu]] || Alolan Raichu|| 0
| |
| |} | | |} |
| </center> | | </center> |
| |-|Flame Egg=
| | |
| <center> | | <center> |
| {|class="wikitable" style="text-align:center;" | | {| class="wikitable" width=30%;" |
| |- | | |- |
| ! colspan="2" |Pokémon | | ! colspan="2" scope="col" style="text-align:center" | Recurso Secundário |
| ! Boost
| |
| |- | | |- |
| |[[Arquivo:038-Ninetales.png|link=Ninetales]] || Ninetales || 10 | | | style="text-align:center" width=10% | '''9%''' |
| |- | | | width=70% | Madeira |
| |[[Arquivo:219-Magcargo.png|link=Magcargo]] || Magcargo || 10 | |
| |- | | |- |
| |[[Arquivo:257-Blaziken.png|link=Blaziken]] ||Blaziken || 5 | | | style="text-align:center" width=10% | '''?%''' |
| | | width=70% | Minerio |
| |- | | |- |
| |[[Arquivo:323-Camerupt.png|link=Camerupt]] ||Camerupt || 5 | | | style="text-align:center" width=10% | '''?%''' |
| | | width=70% | Bau |
| |- | | |- |
| |[[Arquivo:006-Charizard.png|link=Charizard]] ||Charizard|| 5 | | | style="text-align:center" width=10% | '''35%''' |
| |-
| | | width=70% | Essencia de Darkrai |
| |[[Arquivo:157-Typhlosion.png|link=Typhlosion]] || Typhlosion || 5
| |
| |-
| |
| |[[Arquivo:078-Rapidash.png|link=Rapidash]] || Rapidash || 5
| |
| |-
| |
| |[[Arquivo:229-Houndoom.png|link=Houndoom]] || Houndoom || 5
| |
| |-
| |
| |[[Arquivo:126-Magmar.png|link=Magmar]] || Magmar || 0
| |
| |-
| |
| |[[Arquivo:059-Arcanine.png|link=Arcanine]] || Arcanine || 0
| |
| |-
| |
| |[[Arquivo:324-Torkoal.png|link=Torkoal]] || Torkoal || 0
| |
| |-
| |
| |[[Arquivo:351-Castform.png|link=Castform]] || Castform || 0
| |
| |-
| |
| |[[Arquivo:514-Simisear%281%29.png|link=Simisear]] || Simisear || 0
| |
| |- | |
| |[[Arquivo:663-Talonflame.png|link=Talonflame]] || Talonflame || 0
| |
| |-
| |
| |[[Arquivo:668-PyroarMale.png|link=Pyroar]] || Pyroar || 0
| |
| |-
| |
| |[[Arquivo:668-Pyroar_Female.png|link=Pyroar Female]] || Pyroar Female || 0
| |
| |-
| |
| |[[Arquivo:555-Galarian_Darmanitan.png|link=Galarian Darmanitan]] || Galarian Darmanitan || 0
| |
| |- | | |- |
| |} | | |} |
| </center> | | </center> |
| |-|Waterfall Egg= | | |
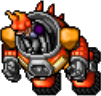
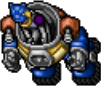
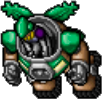
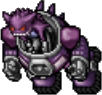
| | ===== Mecha ===== |
| | |
| | [[file:Mecha.png|link=]] |
| | [[file:FlameMecha.png|link=]] |
| | [[file:CannonMecha.png|link=]] |
| | [[file:ForestMecha.png|link=]] |
| | [[file:NightmareMecha.png|link=]] |
| | |
| | == Introdução == |
| | |
| | Criado por Engenheiros '''Rank A''', o Mecha é uma Outfit que permite os jogadores que completaram a '''[[Mecha Fly Quest]]''' voarem '''dentro da Nightmare World'''. |
| | |
| | == Comandos de Voo == |
| | |
| <center> | | <center> |
| {|class="wikitable" style="text-align:center;" | | {| class="wikitable" width=30%;" |
| |-
| |
| ! colspan="2" |Pokémon
| |
| ! Boost
| |
| |-
| |
| |[[Arquivo:073-Tentacruel.png|link=Tentacruel]] || Tentacruel || 10
| |
| |-
| |
| |[[Arquivo:221-Piloswine.png|link=Piloswine]] || Piloswine || 10
| |
| |-
| |
| |[[Arquivo:0009-Blastoise.png|link=Blastoise]] || Blastoise || 5
| |
| |-
| |
| |[[Arquivo:160-Feraligatr.png|link=Feraligatr]] || Feraligatr || 5
| |
| |-
| |
| |[[Arquivo:260-Swampert.png|link=Swampert]] || Swampert || 5
| |
| |-
| |
| |[[Arquivo:362-Glalie.png|link=Glalie]] || Glalie || 5
| |
| |-
| |
| |[[Arquivo:171-Lanturn.png|link=Lanturn]] || Lanturn || 5
| |
| |-
| |
| |[[Arquivo:342-Crawdaunt.png|link=Crawdaunt]] || Crawdaunt || 5
| |
| |-
| |
| |[[Arquivo:272-Ludicolo.png|link-Ludicolo]] || Ludicolo || 5
| |
| |-
| |
| |[[Arquivo:062-Poliwrath.png|link=Poliwrath]] || Poliwrath || 5
| |
| |-
| |
| |[[Arquivo:184-Azumarill.png|link=Azumarill]] || Azumarill || 5
| |
| |-
| |
| |[[Arquivo:121-Starmie.png|link=Starmie]] || Starmie || 5
| |
| |-
| |
| |[[Arquivo:124-Jynx.png|link=Jynx]] || Jynx || 0
| |
| |-
| |
| |[[Arquivo:478-Froslass.png|link=Froslass]] || Froslass || 0
| |
| |-
| |
| |[[Arquivo:139-Omastar.png|link=Omastar]] || Omastar || 0
| |
| |- | | |- |
| |[[Arquivo:141-Kabutops.png|link=Kabutops]] || Kabutops || 0
| | ! colspan="2" scope="col" style="text-align:center" | Comandos |
| |- | | |- |
| |[[Arquivo:460-Abomasnow.png|link=Abomasnow]] || Abomasnow || 0 | | | style="text-align:center" width=10% | '''!mecha''' |
| | | width=70% | para começar/parar. |
| |- | | |- |
| |[[Arquivo:131-Lapras.png|link=Lapras]] || Lapras || 0 | | | style="text-align:center" width=10% | '''PageUp''' |
| | | width=70% | Sobe um andar enquanto o Mecha flying está ativo. |
| |- | | |- |
| |[[Arquivo:365-Walrein.png|link=Walrein]] || Walrein || 0 | | | style="text-align:center" width=10% | '''PageDown''' |
| | | width=70% | Desce um andar enquanto o Mecha flying está ativo. |
| |- | | |- |
| |[[Arquivo:130-Gyarados.png|link=Gyarados]] || Gyarados || 0
| |
| |-
| |
| |[[Arquivo:230-Kingdra.png|link=Kingdra]] || Kingdra || 0
| |
| |-
| |
| |[[Arquivo:199-Slowking.png|link=Slowking]] || Slowking || 0
| |
| |-
| |
| |[[Arquivo:226-Mantine.png|link=Mantine]] || Mantine || 0
| |
| |-
| |
| |[[Arquivo:129-GiantMagikarp.png|link=Shiny Giant Magikarp]] || Shiny Giant Magikarp || 0
| |
| |-
| |
| |[[Arquivo:584-Vanilluxe.png|link=Vanilluxe]] || Vanilluxe || 0
| |
| |-
| |
| |[[Arquivo:340-Whiscash.png|link=Whiscash]] || Whiscash || 0
| |
| |-
| |
| |[[Arquivo:319-Sharpedo.png|link=Sharpedo]] || Sharpedo || 0
| |
| |-
| |
| |[[Arquivo:713-Avalugg.png|link=Avalugg]] || Avalugg || 0
| |
| |-
| |
| |[[Arquivo:594-Alomomola.png|link=Alomomola]] || Alomomola || 0
| |
| |-
| |
| |[[Arquivo:461-Weavile.png|link=Weavile]] || Weavile || 0
| |
| |-
| |
| |[[Arquivo:419-Floatzel.png|link=Floatzel]] || Floatzel || 0
| |
| |-
| |
| |[[Arquivo:555-Galarian_Darmanitan.png|link=Galarian Darmanitan]] || Galarian Darmanitan || 0
| |
| |} | | |} |
| </center> | | </center> |
| |-|Sprout Egg= | | |
| | == Combustível == |
| | |
| | O Mecha utiliza combustivel para voar, o mesmo é criado pela profissão '''Mecânico''' mas também pode ser craftado através de uma '''Workshop''' que fica próxima ao '''NPC Flint''' em '''Cinnabar do Nightmare World'''.<br> |
| | É utilizado o [[file:Full_Fuel_Tank.png|link=]] '''Fuel Tank''' para abastecer o Mecha, cada unidade enche '''10 litros'''. O limite do tanque é de '''100 litros'''. |
| | |
| | *O jogador pode aumentar a capacidade do tanque utilizando o [[file:Fuel_Tank_Upgrade_I.png|link=]] '''Fuel Tank Upgrade''', também criado pela profissão '''Mecânico'''.<br> |
| | *O '''Fuel Tank Upgrade I''' aumenta a capacidade máxima para '''200''' e o '''Fuel Tank Upgrade II''' para '''400'''. |
| | |
| | '''Observação''': É necessário fazer o Upgrade '''1''' antes do '''2'''. |
| | |
| | |
| | <tabber> |
| | |-|Fuel Tank Upgrade= |
| | |
| <center> | | <center> |
| {|class="wikitable" style="text-align:center;" | | {| class="wikitable" width="70%" style="text-align:center" |
| | ! width="2%" style="background-color: #9d1a64" | Item |
| | ! width="1%" style="background-color: #9d1a64" | Habilidade |
| | ! width="1%" style="background-color: #9d1a64" | Tempo de espera |
| | ! width="5%" style="background-color: #9d1a64" | Materiais |
| |- | | |- |
| ! colspan="2" |Pokémon
| | | [[Arquivo:Full_Fuel_Tank.png|link=]] <br> Full Fuel Tank |
| ! Boost
| | | 100 |
| | | 1 minuto |
| | | [[Arquivo:Tech_Data.png|link=]] 140 Tech Data<br> |
| | [[Arquivo:EmptyFuelTank.png|link=]] 1 Empty Fuel Tank<br> |
| | [[Arquivo:Metal_Scraps.png|link=]] 2 Metal Scraps<br> |
| | [[Arquivo:Nightmare_Gem.png|link=]] 5 Nightmare Gems |
| |- | | |- |
| |[[Arquivo:003-Venusaur.png|link=Venusaur]] || Venusaur || 5 | | |
| |- | | == Aprimoramentos == |
| |[[Arquivo:154-Meganium.png|link=Meganium]] || Meganium || 5 | | |
| | <tabber> |
| | |-|Fuel Tank Upgrade= |
| | |
| | <center> |
| | {| class="wikitable" width="70%" style="text-align:center" |
| | ! width="2%" style="background-color: #9d1a64" | Item |
| | ! width="1%" style="background-color: #9d1a64" | Habilidade |
| | ! width="1%" style="background-color: #9d1a64" | Tempo de espera |
| | ! width="5%" style="background-color: #9d1a64" | Materiais |
| |- | | |- |
| |[[Arquivo:254-Sceptile.png|link=Sceptile]] || Sceptile || 5 | | | align="center" | [[Arquivo:Fuel_Tank_Upgrade_I.png|link=]]<br>Fuel Tank Upgrade I |
| | | align="center" | Skill 103 |
| | | align="center" | 5 Dias |
| | | align="center" | [[Arquivo:Tech_Data.png|link=]] 3000 Tech Data <br> [[Arquivo:Petite_Leaves.png|link=]] 18 Petite Leaves <br> [[Arquivo:NW_ore.png|link=]] 10 Nightmare Ores <br> [[Arquivo:NW_unusual_ore.png|link=]] 3 Nightmare Unusual Ores <br> [[Arquivo:Metal_Scraps.png|link=]] 3 Metal Scraps <br> [[Arquivo:Razor_Claw.png|link=]] 1 Razor Claw <br> [[Arquivo:Gear_Nose.png|link=]] 1 Gear Nose<br> [[Arquivo:Blueprint.png|link=]] 1 Blueprint |
| |- | | |- |
| |[[Arquivo:205-Forretress.png|link=Forretress]] || Forretress || 5 | | | [[Arquivo:Fuel_Tank_Upgrade_I.png|link=]] <br> Fuel Tank Upgrade II |
| | | 107 |
| | | 7 dias |
| | | [[Arquivo:Tech_Data.png|link=]] 7500 Tech Data<br> |
| | [[Arquivo:Mole_Hair.png|link=]] 75 Mole Hairs<br> |
| | [[Arquivo:Metal_Scraps.png|link=]] 100 Metal Scraps<br> |
| | [[Arquivo:NW_ore.png|link=]] 15 Nightmare Ores<br> |
| | [[Arquivo:NW_unusual_ore.png|link=]] 5 Nightmare Unusual Ores<br> |
| | [[Arquivo:Gear_Nose.png|link=]] 5 Gear Noses<br> |
| | [[Arquivo:Alolan_Electric_Rat_Tail.png|link=]] 2 Alolan Electric Rat Tails<br> |
| | [[Arquivo:Razor_Claw.png|link=]] 2 Razor Claws<br> |
| | [[Arquivo:Emperor_Trident.png|link=]] 1 Emperor Tridents<br> |
| | [[Arquivo:Blueprint.png|link=]] 1 Blueprint |
| |- | | |- |
| |[[Arquivo:272-Ludicolo.png|link=Ludicolo]] || Ludicolo || 5
| |
| |-
| |
| |[[Arquivo:275-Shiftry.png|link=Shiftry]] || Shiftry || 5
| |
| |-
| |
| |[[Arquivo:402.Kricketune.png|link=Kricketune]] || Kricketune || 5
| |
| |-
| |
| |[[Arquivo:103-Exeggutor.png|link=Exeggutor]] || Exeggutor || 5
| |
| |-
| |
| |[[Arquivo:291-Ninjask.png|link=Ninjask]] || Ninjask || 0
| |
| |-
| |
| |[[Arquivo:460-Abomasnow.png|link=Abomasnow]] || Abomasnow || 0
| |
| |-
| |
| |[[Arquivo:348-Armaldo.png|link=Armaldo]] || Armaldo || 0
| |
| |-
| |
| |[[Arquivo:214-Heracross.png|link=Heracross]] || Heracross || 0
| |
| |-
| |
| |[[Arquivo:Scizor.png|link=Scizor]] || Scizor || 0
| |
| |-
| |
| |[[Arquivo:357-Tropius.png|link=Tropius]] || Tropius || 0
| |
| |-
| |
| |[[Arquivo:127-Pinsir.png|link=Pinsir]] || Pinsir || 0
| |
| |-
| |
| |[[Arquivo:123-Scyther.png|link=Scyther]] || Scyther || 0
| |
| |-
| |
| |[[Arquivo:842_-_Appletun.png|link=Appletun]] || Appletun || 0
| |
| |-
| |
| |[[Arquivo:841_-_Flapple.png|link=Flapple]] || Flapple || 0
| |
| |-
| |
| |[[Arquivo:549-Lilligant.png|link=Lilligant]] || Lilligant || 0
| |
| |-
| |
| |[[Arquivo:413-WormadamPlantCloak.png|link=Wormadam]] || Wormadam || 0
| |
| |-
| |
| |[[Arquivo:738-Vikavolt.png|link=Vikavolt]] || Vikavolt || 0
| |
| |-
| |
| |[[Arquivo:469-Yanmega.png|link=Yanmega]] || Yanmega || 0
| |
| |-
| |
| |[[Arquivo:416-Vespiquen.png|link=Vespiquen]] || Vespiquen || 0
| |
| |-
| |
| |[[Arquivo:332.Cacturne.png|link=Cacturne]] || Cacturne || 0
| |
| |-
| |
| |[[Arquivo:673-Gogoat.png|link=Gogoat]] || Gogoat || 0
| |
| |} | | |} |
| </center> | | </center> |
| |-|Smither Egg= | | |
| | <table class="seeMore"> |
| | <tr> |
| | <td class="seeMore__image">[[Arquivo:Telekinetic-compass.gif|link=]]</td> |
| | <td> '''Veja mais:[[Mec%C3%A2nico#Crafts_Exclusivos|Mecânico]]'''</td> |
| | </tr> |
| | </table> |
| | |
| | |-|Fuel Consumption Upgrade= |
| | |
| <center> | | <center> |
| {|class="wikitable" style="text-align:center;" | | {| class="wikitable sortable" width="70%" style="text-align:center" |
| | ! width="2%" class="unsortable" | Item |
| | ! width="1%" | Habilidade |
| | ! width="1%" class="unsortable" | Tempo de espera |
| | ! width="5%" class="unsortable" | Materiais |
| |- | | |- |
| ! colspan="2" |Pokémon
| |
| ! Boost
| |
| |- | | |- |
| |[[Arquivo:082-Magneton.png|link=Magneton]] || Magneton || 10 | | | [[Arquivo:Fuel_Consumption_Upgrade_I.png|link=]] <br> Fuel Consumption Upgrade I |
| |- | | | 110 |
| |[[Arquivo:205-Forretress.png|link=Forretress]] || Forretress || 5 | | | 5 dias |
| | | [[Arquivo:Tech_Data.png|link=]] 24k Tech Data<br> |
| | [[Arquivo:Corrupted-Pot-of-Lava.gif|link=]] 100 Corrupted Pots Of Lava<br> |
| | [[Arquivo:Corrupted-Doll-Star.gif|link=]] 165 Corrupted Doll Stars<br> |
| | [[Arquivo:Black_Lucky_Charm.png|link=]] 150 Black Lucky Charms<br> |
| | [[Arquivo:Corrupted-Lizard-Tail.gif|link=]] 85 Corrupted Lizard Tails<br> |
| | [[Arquivo:Metal_Scraps.png|link=]] 90 Metal Scraps<br> |
| | [[Arquivo:Mole_Big_Hair.png|link=]] 10 Mole Big Hairs<br> |
| | [[Arquivo:Gleam_Tail.png|link=]] 5 Gleam Tails<br> |
| | [[Arquivo:Blade_Horn.png|link=]] 2 Blade Horns<br> |
| | [[Arquivo:NW_ore.png|link=]] 20 Nightmare Ores<br> |
| | [[Arquivo:NW_unusual_ore.png|link=]] 10 Nightmare Unusual Ores<br> |
| | [[Arquivo:Emperor_Trident.png|link=]] 2 Emperor Tridents<br> |
| | [[Arquivo:Blueprint.png|link=]] 1 Blueprint |
| |- | | |- |
| |[[Arquivo:448-Lucario.png|link=Lucario]] || Lucario || 0 | | | [[Arquivo:Fuel_Consumption_Upgrade_I.png|link=]] <br> Fuel Consumption Upgrade II |
| |- | | | 113 |
| |[[Arquivo:375-Metang.png|link=Metang]] || Metang || 0 | | | 7 dias |
| |-
| | | [[Arquivo:Tech_Data.png|link=]] 30k Tech Data<br> |
| |[[Arquivo:303-Mawile.png|link=Mawile]] || Mawile || 0
| | [[Arquivo:Metal_Scraps.png|link=]] 300 Metal Scraps<br> |
| |-
| | [[Arquivo:Corrupted-Gem-Star.gif|link=]] 130 Corrupted Gem Stars<br> |
| |[[Arquivo:437-Bronzong.png|link=Bronzong]] || Bronzong || 0
| | [[Arquivo:Corrupted-Cow-Tail.gif|link=]] 90 Corrupted Cow Tails<br> |
| |-
| | [[Arquivo:Corrupted-Black-Hull.gif|link=]] 90 Corrupted Black Hulls<br> |
| |[[Arquivo:411-Bastiodon.png|link=Bastiodon]] || Bastiodon || 0
| | [[Arquivo:Sand Pouch.png|link=]] 90 Sand Pouch<br> |
| |-
| | [[Arquivo:Lovely_Topknot.png|link=]] 50 Lovely Topknots<br> |
| |[[Arquivo:306-Aggron.png|link=Aggron]] || Aggron || 0
| | [[Arquivo:Razor_Claw.png|link=]] 20 Razor Claws<br> |
| |-
| | [[Arquivo:NW_ore.png|link=]] 25 Nightmare Ores<br> |
| |[[Arquivo:462-Magnezone.png|link=Magnezone]] || Magnezone || 0
| | [[Arquivo:NW_unusual_ore.png|link=]] 10 Nightmare Unusual Ores<br> |
| |-
| | [[Arquivo:Catfish_Whiskers.png|link=]] 10 Catfish Whiskers<br> |
| |[[Arquivo:Scizor.png|link=Scizor]] || Scizor || 0
| | [[Arquivo:Mach_Nail.png|link=]] 5 Mach Nails<br> |
| |-
| | [[Arquivo:Blade_Horn.png|link=]] 5 Blade Horns<br> |
| |[[Arquivo:227-Skarmory.png|link=Skarmory]] || Skarmory || 0
| | [[Arquivo:Blueprint.png|link=]] 1 Blueprint |
| |-
| |
| |[[Arquivo:208-Steelix.png|link=Steelix]] || Steelix || 0
| |
| |-
| |
| |[[Arquivo:777-Togedemaru.png|link=Togedemaru]] || Togedemaru || 0
| |
| |-
| |
| |[[Arquivo:601-Klinklang.png|link=Klinklang]] || Klinklang || 0
| |
| |-
| |
| |[[Arquivo:051-AlolanDugtrio.png|link=Alolan Dugtrio]] || Alolan Dugtrio || 0
| |
| |-
| |
| |[[Arquivo:879-Copperajah.png|link=Copperajah]] || Copperajah || 0
| |
| |-
| |
| |[[Arquivo:863-Perrserker.png|link=Perrserker]] || Perrserker || 0
| |
| |-
| |
| |[[Arquivo:707-Klefki.png|link=Klefki]] || Klefki || 0
| |
| |- | | |- |
| |} | | |} |
| </center> | | </center> |
| |-|Spectre Egg= | | |
| | |-|Speed Boost Upgrade= |
| | |
| <center> | | <center> |
| {|class="wikitable" style="text-align:center;" | | {| class="wikitable" width="70%" style="text-align:center" |
| |-
| | ! width="2%" style="background-color: #9d1a64" | Item |
| ! colspan="2" |Pokémon | | ! width="1%" style="background-color: #9d1a64" | Habilidade |
| ! Boost
| | ! width="1%" style="background-color: #9d1a64" | Tempo de espera |
| |-
| | ! width="5%" style="background-color: #9d1a64" | Materiais |
| |[[Arquivo:073-Tentacruel.png|link=Tentacruel]] ||Tentacruel || 10
| |
| |-
| |
| |[[Arquivo:094-Gengar.png|link=Gengar]] || Gengar || 5
| |
| |-
| |
| |[[Arquivo:354-Banette.png|link=Banette]] || Banette || 5
| |
| |-
| |
| |[[Arquivo:089-Muk.png|link=Muk]] || Muk || 5
| |
| |-
| |
| |[[Arquivo:229-Houndoom.png|link=Houndoom]] || Houndoom || 5
| |
| |-
| |
| |[[Arquivo:356-Dusclops.png|link=Dusclops]] || Dusclops || 5
| |
| |-
| |
| |[[Arquivo:034-Nidoking.png|link=Nidoking]] || Nidoking || 5
| |
| |-
| |
| |[[Arquivo:003-Venusaur.png|link=Venusaur]] || Venusaur || 5
| |
| |-
| |
| |[[Arquivo:342-Crawdaunt.png|link=Crawdaunt]] || Crawdaunt || 5
| |
| |-
| |
| |[[Arquivo:275-Shiftry.png|link=Shiftry]] || Shiftry || 5
| |
| |-
| |
| |[[Arquivo:169-Crobat.png|link=Crobat]] || Crobat || 0
| |
| |-
| |
| |[[Arquivo:336-Seviper.png|link=Seviper]] || Seviper || 0
| |
| |-
| |
| |[[Arquivo:478-Froslass.png|link=Froslass]] || Froslass || 0
| |
| |-
| |
| |[[Arquivo:169-Sh Crobat.png|link=Shiny Crobat]] || Shiny Crobat || 0
| |
| |-
| |
| |[[Arquivo:063-DarkAbra.png|link=Dark Abra]] || Dark Abra || 0
| |
| |-
| |
| |[[Arquivo:248-Tyranitar.png|link=Tyranitar]] || Tyranitar || 0
| |
| |-
| |
| |[[Arquivo:359-Absol.png|link=Absol]] || Absol || 0
| |
| |-
| |
| |[[Arquivo:454-Toxicroak.png|link=Toxicroak]] || Toxicroak || 0
| |
| |-
| |
| |[[Arquivo:200-Misdreavus.png|link=Misdreavus]] || Misdreavus || 0
| |
| |-
| |
| |[[Arquivo:317-Swalot.png|link=Swalot]] || Swalot || 0
| |
| |-
| |
| |[[Arquivo:053-AlolanPersian.png|link=Alolan Persian]] || Alolan Persian || 0
| |
| |-
| |
| |[[Arquivo:778-Mimikyu.png|link=Mimikyu]] || Mimikyu || 0
| |
| |-
| |
| |[[Arquivo:770-Palossand.png|link=Palossand]] || Palossand || 0
| |
| |-
| |
| |[[Arquivo:623-Golurk.png|link=Golurk]] || Golurk || 0
| |
| |-
| |
| |[[Arquivo:635-Hydreigon.png|link=Hydreigon]] || Hydreigon || 0
| |
| |-
| |
| |[[Arquivo:569-Garbodor.png|link=Garbodor]] || Garbodor || 0
| |
| |-
| |
| |[[Arquivo:563-Cofagrigus.png|link=Cofagrigus]] || Cofagrigus || 0
| |
| |- | | |- |
| |[[Arquivo:461-Weavile.png|link=Weavile]] || Weavile || 0 | | | [[Arquivo:Speed_Boost_Upgrade.png|link=]] <br> Speed Boost Upgrade |
| | | 116 |
| | | 5 dias |
| | | [[Arquivo:Tech_Data.png|link=]] 24k Tech Data<br> |
| | [[Arquivo:Metal_Scraps.png|link=]] 150 Metal Scraps<br> |
| | [[Arquivo:Small_Bird_Beak.png|link=]] 100 Small Bird Beaks<br> |
| | [[Arquivo:Pig_Ear.png|link=]] 100 Pig Ears<br> |
| | [[Arquivo:Corrupted-Feather.gif|link=]] 70 Corrupted Feathers<br> |
| | [[Arquivo:Solid_Head.png|link=]] 30 Solid Heads<br> |
| | [[Arquivo:Compressed_Nightmare_Gem.png|link=]] 20 Compressed Nightmare Gems<br> |
| | [[Arquivo:NW_ore.png|link=]] 20 Nightmare Ores<br> |
| | [[Arquivo:NW_unusual_ore.png|link=]] 10 Nightmare Unusual Ores<br> |
| | [[Arquivo:Mole_Big_Hair.png|link=]] 5 Mole Big Hairs<br> |
| | [[Arquivo:Alolan_Electric_Rat_Tail.png|link=]] 10 Alolan Electric Rat Tails<br> |
| | [[Arquivo:Emperor_Trident.png|link=]] 3 Emperor Tridents<br> |
| | [[Arquivo:Gleam_Tail.png|link=]] 3 Gleam Tails<br> |
| | [[Arquivo:Blueprint.png|link=]] 1 Blueprint |
| |- | | |- |
| |[[Arquivo:442-spiritomb.png|link=Spiritomb]] || Spiritomb || 0
| |
| |-
| |
| |[[Arquivo:429-Mismagius.png|link=Mismagius]] || Mismagius || 0
| |
| |-
| |
| |[[Arquivo:089-AlolanMuk.png|link=Alolan Muk]] || Alolan Muk || 0
| |
| |-
| |
| |[[Arquivo:319-Sharpedo.png|link=Sharpedo]] || Sharpedo || 0
| |
| |-
| |
| |[[Arquivo:332.Cacturne.png|link=Cacturne]] || Cacturne || 0
| |
| |-
| |
| |[[Arquivo:849-Toxtricity_Low_Key_Form.png|link=Toxtricity Low Key Form]] || Toxtricity Low Key Form || 0
| |
| |} | | |} |
| </center> | | </center> |
| |-|Sand Egg=
| | |
| <center> | | </tabber> |
| {|class="wikitable" style="text-align:center;"
| | |
| |-
| | ===== Nightmare Pokégear ===== |
| ! colspan="2" |Pokémon
| | |
| ! Boost
| | <center>[[file:Nightmare_Pokegear.png|link=]]</center> |
| |-
| | |
| | [[Arquivo:112-Rhydon.png|link=Rhydon]] || Rhydon || 10
| | == Introdução == |
| |-
| | |
| | [[Arquivo:219-Magcargo.png|link=Magcargo]] || Magcargo || 10
| | O [[file:Nightmare_Pokegear.png|link=]] '''Nightmare Pokégear''' é um item criado pela profissão '''Hacker'''. Esse item oferece aos jogadores a capacidade de se comunicar com NPCs específicos, como o '''Hugh''' e outros NPCs que fornecem tarefas '''diárias''' e '''semanais'''. |
| |-
| | |
| | [[Arquivo:221-Piloswine.png|link=Piloswine]] || Piloswine || 10
| | Através do Nightmare Pokégear, os jogadores podem facilmente aceitar e entregar missões sem a necessidade de encontrar fisicamente esses NPCs. |
| |-
| | <br> |
| | [[Arquivo:076-Golem.png|link=Golem]] || Golem || 10
| | '''Observação''': Esse item apenas pode ser utilizado nas '''zonas de proteção''' do '''Nightmare World'''. |
| |-
| | |
| | [[Arquivo:232-Donphan.png|link=Donphan]] || Donphan || 5
| |
| |-
| |
| | [[Arquivo:344-Claydol.png|link=Claydol]] || Claydol || 5
| |
| |-
| |
| | [[Arquivo:260-Swampert.png|link=Swampert]] || Swampert || 5
| |
| |-
| |
| | [[Arquivo:472-Gliscor.png|link=Gliscor]] || Gliscor || 5
| |
| |-
| |
| | [[Arquivo:323-Camerupt.png|link=Camerupt]] || Camerupt || 5
| |
| |-
| |
| | [[Arquivo:031-Nidoqueen.png|link=Nidoqueen]] || Nidoqueen || 5
| |
| |-
| |
| | [[Arquivo:141-Kabutops.png|link=Kabutops]] || Kabutops || 0
| |
| |-
| |
| | [[Arquivo:139-Omastar.png|link=Omastar]] || Omastar || 0
| |
| |-
| |
| | [[Arquivo:330-Flygon.png|link=Flygon]] || Flygon || 0
| |
| |-
| |
| | [[Arquivo:185-Sudowoodo.png|link=Sudowoodo]] || Sudowoodo || 0
| |
| |-
| |
| | [[Arquivo:248-Tyranitar.png|link=Tyranitar]] || Tyranitar || 0
| |
| |-
| |
| | [[Arquivo:208-Steelix.png|link=Steelix]] || Steelix || 0
| |
| |-
| |
| | [[Arquivo:348-Armaldo.png|link=Armaldo]] || Armaldo || 0
| |
| |-
| |
| | [[Arquivo:306-Aggron.png|link=Aggron]] || Aggron || 0
| |
| |-
| |
| | [[Arquivo:660-Diggersby.png|link=Diggersby]] || Diggersby || 0
| |
| |-
| |
| | [[Arquivo:553-Krookodile.png|link=Krookodile]] || Krookodile || 0
| |
| |-
| |
| | [[Arquivo:411-Bastiodon.png|link=Bastiodon]] || Bastiodon || 0
| |
| |-
| |
| | [[Arquivo:340-Whiscash.png|link=Whiscash]] || Whiscash || 0
| |
| |-
| |
| | [[Arquivo:338-Solrock.png|link=Solrock]] || Solrock || 0
| |
| |-
| |
| | [[Arquivo:337-Lunatone.png|link=Lunatone]] || Lunatone || 0
| |
| |-
| |
| | [[Arquivo:051-AlolanDugtrio.png|link=Alolan Dugtrio]] || Alolan Dugtrio || 0
| |
| |-
| |
| | [[Arquivo:770-Palossand.png|link=Palossand]] || Palossand || 0
| |
| |-
| |
| | [[Arquivo:750-Mudsdale.png|link=Mudsdale]] || Mudsdale || 0
| |
| |-
| |
| | [[Arquivo:623-Golurk.png|link=Golurk]] || Golurk || 0
| |
| |-
| |
| | [[Arquivo:553-Krookodile.png|link=Krookodile]] || Krookodile || 0
| |
| |-
| |
| | [[Arquivo:445-Garchomp.png|link=Garchomp]] || Garchomp || 0
| |
| |-
| |
| | [[Arquivo:409-Rampardos.png|link=Rampardos]] || Rampardos || 0
| |
| |-
| |
| | [[Arquivo:745-Lycanroc.png|link=Lycanroc]] || Lycanroc || 0
| |
| |-
| |
| | [[Arquivo:745-Lycanroc_Midnight_Form.png|link=Lycanroc Midnight Form]] || Lycanroc Midnight Form || 0
| |
| |-
| |
| | [[Arquivo:745-Lycanroc_Dusk_Form.png|link=Lycanroc Dusk Form]] || Lycanroc Dusk Form || 0
| |
| </center> | | </center> |
| |-|Brain Egg=
| | <table class="seeMore"> |
| <center> | | <tr> |
| {| class="wikitable" style="text-align:center;"
| | <td class="seeMore__image">[[Arquivo:Telekinetic-compass.gif|link=]]</td> |
| |-
| | <td> '''Veja mais:''' [[Nightmare Missões Diárias]]. </td> |
| ! colspan="2" | Pokémon
| | </tr> |
| ! Boost
| | </table> |
| |-
| | |
| | [[Arquivo:065-Alakazam.png|link=Alakazam]] || Alakazam || 5
| | == Recarga == |
| |-
| | |
| | [[Arquivo:344-Claydol.png|link=Claydol]] || Claydol || 5
| | Para recarregar, os jogadores devem utilizar a [[file:Pokegear_Battery.png|link=]] '''Pokegear Battery''' no [[file:Nightmare_Pokegear.png|link=]] '''Nightmare Pokégear'''. |
| |-
| | |
| | [[Arquivo:121-Starmie.png|link=Starmie]] || Starmie || 5
| | *A bateria recarrega '''30''' usos do Pokégear. |
| |-
| | *Quando comprado, Pokégear vem com '''30 cargas'''. |
| | [[Arquivo:326-Grumpig.png|link=Grumpig]] || Grumpig || 5
| | *É possivel carregar mais de uma bateria ao mesmo tempo, atingindo o limite de '''300''' usos. |
| |-
| | |
| | [[Arquivo:308-Medicham.png|link=Medicham]] || Medicham || 5
| | == NPCS disponiveis == |
| |-
| | |
| | [[Arquivo:176-Togetic.png|link=Togetic]] || Togetic || 5
| | <center class="center-tab"><tabber> |
| |-
| | |-|Diárias= |
| | [[Arquivo:210-Granbull.png|link=Granbull]] || Granbull || 5
| | {|class="wikitable" style="text-align:center" width="27%" |
| |-
| |
| | [[Arquivo:178-Xatu.png|link=Xatu]] || Xatu || 5 | |
| |- | |
| | [[Arquivo:103-Exeggutor.png|link=Exeggutor]] || Exeggutor || 5
| |
| |- | | |- |
| | [[Arquivo:036-Clefable.png|link=Clefable]] || Clefable || 5 | | ! colspan="3"| [[file:Nightmare_Pokegear.png|link=]] Nightmare Pokégear |
| |- | | |- |
| | [[Arquivo:040-Wigglytuff.png|link=Wigglytuff]] || Wigglytuff || 5
| | ! N |
| | ! colspan="2"| NPC |
| |- | | |- |
| | [[Arquivo:184-Azumarill.png|link=Azumarill]] || Azumarill || 5 | | | 1 || [[file:Falkner.png|link=Nightmare Falkner]] || Falkner |
| |- | | |- |
| | [[Arquivo:303-Mawile.png|link=Mawile]] || Mawile || 0 | | | 2 || [[file:NWBruno.png|link=Nightmare Bruno]] || Bruno |
| |- | | |- |
| | [[Arquivo:375-Metang.png|link=Metang]] || Metang || 0 | | | 3 || [[file:NWMite.png|link=Nightmare Mite]] || Mite |
| |- | | |- |
| | [[Arquivo:203-Girafarig.png|link=Girafarig]] || Girafarig || 0 | | | 4 || [[file:Yellow_Parachute.png|link=Nightmare Yellow Parachute]] || Yellow Parachute |
| |- | | |- |
| | [[Arquivo:124-Jynx.png|link=Jynx]] || Jynx || 0 | | | 5 || [[file:Lance.png|link=Nightmare Lance]] || Lance |
| |- | | |- |
| | [[Arquivo:437-Bronzong.png|link=Bronzong]] || Bronzong || 0 | | | 6 || [[file:NW_Jenny.png|link=Nightmare Officer Jenny]] || Officer Jenny |
| |- | | |- |
| | [[Arquivo:063-DarkAbra.png|link=Dark Abra]] || Dark Abra || 0 | | | 7 || [[file:Sidis_s3_nw.png|link=NPC Sidis S-3]] || Sidis S-3 |
| |- | | |- |
| | [[Arquivo:282-Gardevoir.png|link=Gardevoir]] || Gardevoir || 0 | | | 8 || [[file:Raven.png|link=NPC Raven]] || Raven |
| |- | | |- |
| | [[Arquivo:468-Togekiss.png|link=Togekiss]] || Togekiss || 0 | | | 9 || [[file:NPC_Blanca.png|link=NPC Blanca]] || Blanca |
| |- | | |- |
| | [[Arquivo:199-Slowking.png|link=Slowking]] || Slowking || 0 | | |-|Semanais= |
| | {|class="wikitable" style="text-align:center" width="27%" |
| |- | | |- |
| | [[Arquivo:202-Wobbuffet.png|link=Wobbuffet]] || Wobbuffet || 0 | | ! colspan="3"| [[file:Nightmare_Pokegear.png|link=]] Nightmare Pokégear |
| |- | | |- |
| | [[Arquivo:338-Solrock.png|link=Solrock]] || Solrock || 0
| | ! N |
| | ! colspan="2"| NPC |
| |- | | |- |
| | [[Arquivo:122-Mr.Mime.png|link=Mr.Mime]] || Mr.Mime || 0 | | | 1 || [[file:NWLorelei.png|link=Nightmare Lorelei]] || Lorelei |
| |- | | |- |
| | [[Arquivo:869-Alcremie.png|link=Alcremie]] || Alcremie || 0 | | | 2 || [[file:NWMisty.png|link=Nightmare Misty]] || Misty |
| |- | | |- |
| | [[Arquivo:858-Hatterene.png|link=Hatterene]] || Hatterene || 0 | | | 3 || [[file:NWBarry.png|link=Nightmare Barry]] || Barry |
| |- | | |- |
| | [[Arquivo:778-Mimikyu.png|link=Mimikyu]] || Mimikyu || 0 | | | 4 || [[file:NWZedd.png|link=Missão Semanal NPC Zedd]] || Zedd |
| |- | | |- |
| | [[Arquivo:683-Aromatisse.png|link=Aromatisse]] || Aromatisse || 0 | | | 5 || [[file:SidisNW.png|link=NPC Sidis]] || Sidis |
| |- | | |- |
| | [[Arquivo:678-Meowstic.png|link=Meowstic]] || Meowstic || 0
| |
| |-
| |
| | [[Arquivo:671.Florges.png|link=Florges]] || Florges || 0
| |
| |-
| |
| | [[Arquivo:576-Gothitelle.png|link=Gothitelle]] || Gothitelle || 0
| |
| |-
| |
| | [[Arquivo:078-Galarian_Rapidash.png|link=Galarian Rapidash]] || Galarian Rapidash || 0
| |
| |-
| |
| | [[Arquivo:026-AlolanRaichu.png|link=Alolan Raichu]] || Alolan Raichu || 0
| |
| |} | | |} |
| </center>
| | |-|Outros= |
| |-|Champion Egg= | | {|class="wikitable" style="text-align:center" width="27%" |
| <center>
| |
| {|class="wikitable" style="text-align:center;" | |
| |-
| |
| ! colspan="2" |Pokémon
| |
| ! Boost
| |
| |- | | |- |
| |[[Arquivo:277-Swellow.png|link=Swellow]] || Swellow || 10 | | ! colspan="3"| [[file:Nightmare_Pokegear.png|link=]] Nightmare Pokégear |
| |- | | |- |
| |[[Arquivo:335-Zangoose.png|link=Zangoose]] || Zangoose || 5
| | ! N |
| | ! colspan="2"| NPC |
| |- | | |- |
| |[[Arquivo:295-Exploud.png|link=Exploud]] || Exploud || 5 | | | 1 || [[file:Hugh_-_Quest_transporte_e_boost_do_travel.png|link=Nightmare Transportes]] || Hugh |
| |- | | |- |
| |[[Arquivo:257-Blaziken.png|link=Blaziken]] || Blaziken || 5
| |
| |-
| |
| |[[Arquivo:018-Pidgeot.png|link=Pidgeot]] || Pidgeot || 5
| |
| |-
| |
| |[[Arquivo:068-Machamp.png|link=Machamp]] || Machamp || 5
| |
| |-
| |
| |[[Arquivo:062-Poliwrath.png|link=Poliwrath]] || Poliwrath || 5
| |
| |-
| |
| |[[Arquivo:428-Lopunny.png|link=Lopunny]] || Lopunny || 5
| |
| |-
| |
| |[[Arquivo:040-Wigglytuff.png|link=Wigglytuff]] || Wigglytuff || 5
| |
| |-
| |
| |[[Arquivo:308-Medicham.png|link=Medicham]] || Medicham || 5
| |
| |-
| |
| | [[Arquivo:660-Diggersby.png|link=Diggersby]] || Diggersby || 0
| |
| |-
| |
| |[[Arquivo:241-Miltank.png|link=Miltank]] || Miltank || 0
| |
| |-
| |
| |[[Arquivo:115-Kangaskhan.png|link=Kangaskhan]] || Kangaskhan || 0
| |
| |-
| |
| |[[Arquivo:233-Porygon2.png|link=Porygon2]] || Porygon2 || 0
| |
| |-
| |
| |[[Arquivo:352-Kecleon.png|link=Kecleon]] || Kecleon || 0
| |
| |-
| |
| |[[Arquivo:203-Girafarig.png|link=Girafarig]] || Girafarig || 0
| |
| |-
| |
| |[[Arquivo:448-Lucario.png|link=Lucario]] || Lucario || 0
| |
| |-
| |
| |[[Arquivo:Elite_Hitmonlee.png|link=Elite Hitmonlee]] || Elite Hitmonlee || 0
| |
| |-
| |
| |[[Arquivo:107-Hitmonchan.png|link=Elite Hitmonchan]] || Elite Hitmonchan || 0
| |
| |-
| |
| |[[Arquivo:143-Snorlax.png|link=Snorlax]] || Snorlax || 0
| |
| |-
| |
| |[[Arquivo:217-Ursaring.png|link=Ursaring]] || Ursaring || 0
| |
| |-
| |
| |[[Arquivo:297-Hariyama.png|link=Hariyama]] || Hariyama || 0
| |
| |-
| |
| |[[Arquivo:214-Heracross.png|link=Heracross]] || Heracross || 0
| |
| |-
| |
| |[[Arquivo:454-Toxicroak.png|link=Toxicroak]] || Toxicroak || 0
| |
| |-
| |
| |[[Arquivo:242-Blissey.png|link=Blissey]] || Blissey || 0
| |
| |-
| |
| |[[Arquivo:865-Sirfetch%27d.png|link=Sirfetch'd]] || Sirfetch'd || 0
| |
| |-
| |
| |[[Arquivo:668-Pyroar_Female.png|link=Pyroar Female]] || Pyroar Female || 0
| |
| |-
| |
| |[[Arquivo:668-PyroarMale.png|link=Pyroar]] || Pyroar || 0
| |
| |-
| |
| |[[Arquivo:628-Braviary.png|link=Braviary]] || Braviary || 0
| |
| |-
| |
| |[[Arquivo:620-Mienshao.png|link=Mienshao]] || Mienshao || 0
| |
| |} | | |} |
| </center> | | </center></tabber> |
| |-|Falcon Egg=
| | '''Observação:''' é utilizada uma carga para ao pegar uma task e outra ao entrega-lá |
| <center> | | |
| {|class="wikitable" style="text-align:center;"
| |
| |-
| |
| ! colspan="2" |Pokémon
| |
| ! Boost
| |
| |-
| |
| |[[Arquivo:277-Swellow.png|link=Swellow]] || Swellow || 10
| |
| |-
| |
| |[[Arquivo:006-Charizard.png|link=Charizard]] || Charizard || 5
| |
| |-
| |
| |[[Arquivo:018-Pidgeot.png|link=Pidgeot]] || Pidgeot || 5
| |
| |-
| |
| |[[Arquivo:472-Gliscor.png|link=Gliscor]] || Gliscor || 5
| |
| |-
| |
| |[[Arquivo:178-Xatu.png|link=Xatu]] || Xatu || 5
| |
| |-
| |
| |[[Arquivo:176-Togetic.png|link=Togetic]] || Togetic || 5
| |
| |-
| |
| |[[Arquivo:330-Flygon.png|link=Flygon]] || Flygon || 0
| |
| |-
| |
| |[[Arquivo:291-Ninjask.png|link=Ninjask]] || Ninjask || 0
| |
| |-
| |
| |[[Arquivo:169-Crobat.png|link=Crobat]] || Crobat || 0
| |
| |-
| |
| |[[Arquivo:334-Altaria.png|link=Altaria]] || Altaria || 0
| |
| |-
| |
| |[[Arquivo:169-Sh Crobat.png|link=Shiny Crobat]] || Shiny Crobat || 0
| |
| |-
| |
| |[[Arquivo:149-Dragonite.png|link=Dragonite]] || Dragonite || 0
| |
| |-
| |
| |[[Arquivo:130-Gyarados.png|link=Gyarados]] || Gyarados || 0
| |
| |-
| |
| |[[Arquivo:230-Kingdra.png|link=Kingdra]] || Kingdra || 0
| |
| |-
| |
| |[[Arquivo:357-Tropius.png|link=Tropius]] || Tropius || 0
| |
| |-
| |
| |[[Arquivo:123-Scyther.png|link=Scyther]] || Scyther || 0
| |
| |-
| |
| |[[Arquivo:227-Skarmory.png|link=Skarmory]] || Skarmory || 0
| |
| |-
| |
| |[[Arquivo:468-Togekiss.png|link=Togekiss]] || Togekiss || 0
| |
| |-
| |
| |[[Arquivo:226-Mantine.png|link=Mantine]] || Mantine || 0
| |
| |-
| |
| |[[Arquivo:842_-_Appletun.png|link=Appletun]] || Appletun || 0
| |
| |-
| |
| |[[Arquivo:841_-_Flapple.png|link=Flapple]] || Flapple|| 0
| |
| |-
| |
| |[[Arquivo:621-Druddigon.png|link=Druddigon]] || Druddigon || 0
| |
| |-
| |
| |[[Arquivo:706-Goodra.png|link=Goodra]] || Goodra || 0
| |
| |-
| |
| |[[Arquivo:663-Talonflame.png|link=Talonflame]] || Talonflame || 0
| |
| |-
| |
| |[[Arquivo:635-Hydreigon.png|link=Hydreigon]] || Hydreigon || 0
| |
| |-
| |
| |[[Arquivo:628-Braviary.png|link=Braviary]] || Braviary || 0
| |
| |-
| |
| |[[Arquivo:469-Yanmega.png|link=Yanmega]] || Yanmega || 0
| |
| |-
| |
| |[[Arquivo:445-Garchomp%281%29.png|link=Garchomp]] || Garchomp || 0
| |
| |-
| |
| |[[Arquivo:416-Vespiquen.png|link=Vespiquen]] || Vespiquen || 0
| |
| |-
| |
| |[[Arquivo:398-Staraptor.png|link=Staraptor]] || Staraptor || 0
| |
| |}
| |
| </center>
| |
| </tabber>
| |
|
| |
|
| ==== PAGINA DE MONUMENTOS ==== | | ==== PAGINA DE MONUMENTOS ==== |
| Linha 1 002: |
Linha 713: |
| |- | | |- |
| | 8 ||30790,20591,3 | | | 8 ||30790,20591,3 |
| |-
| |
| |}
| |
| </center>
| |
|
| |
| ==== ultra lab ====
| |
|
| |
| <center> [[Arquivo:Banner_Ultra_Lab.png|link=]] </center>
| |
| <br>
| |
| <font color="red">''' Nível necessário:</font> 550+ '''<br>
| |
| <font color="red>''' Requisito:</font> Ter completado a [[Sarkies Quest]]. '''<br>
| |
| <b>Caso encontre algum erro ou queira acrescentar alguma informação, entre em contato com [[Nossa Equipe|um dos membros da wiki.]]</b> <br>
| |
|
| |
| <br>
| |
| == Introdução ==
| |
|
| |
| O Ultra Lab é um ambiente para jogadores de alto nível em busca de novos desafios.<br>
| |
|
| |
| Dr. Sarkies, em parceria com Darkrai, aprisionou Cresselia e espalhou medo pela região. Ele iniciou a Era das Máquinas com experimentos genéticos e desenvolvimento de robôs, ciborgues e armas. Sarkies usava manipulação para avançar suas pesquisas.<br>
| |
|
| |
| Mesmo derrotado, o Ultra Lab, construído por Sarkies, continua operando com seus sistemas de máquinas e segurança.<br>
| |
|
| |
| === Acessando o Ultra Laboratory ===
| |
| <center><span class="mw-customtoggle-UltraLab">
| |
| {| style="text-align:center" width="20%"
| |
| |+ '''Como acessar o Ultra Lab'''
| |
| ! [[file:pc0.png|link=]]
| |
| |-
| |
| |align="center"| '''(Clique na Imagem)'''
| |
| |-
| |
| |}
| |
| </span><br></center>
| |
| <div class="mw-collapsible mw-collapsed" id="mw-customcollapsible-UltraLab">
| |
| <br>
| |
|
| |
| <center>Para acessar o Ultra Lab, deve-se desativar a barreira da entrada. Para isso, o jogador deve desativar os '''7''' computadores de segurança na Fortaleza do Sarkies.</center>
| |
| <center>
| |
| {| class="wikitable bg-none border-0" style="text-align:center"
| |
| |-
| |
| ! <b>1/7</b> !! <b>2/7</b>
| |
| |-
| |
| | [[Arquivo:pc1.png|link=]] || [[Arquivo:pc2.png|link=]]
| |
| |-
| |
| ! <b>3/7</b> !! <b>4/7</b>
| |
| |-
| |
| | [[Arquivo:pc3.png|link=]] || [[arquivo:pc4.png|link=]]
| |
| |-
| |
| ! <b>5/7</b> !! <b>6/7</b>
| |
| |-
| |
| | [[Arquivo:pc5.png|link=]] || [[arquivo:pc6.png|link=]]
| |
| |-
| |
| {| class="wikitable bg-none border-0" style="text-align:center"
| |
| ! colspan="2" | 7/7
| |
| |-
| |
| | colspan="2" | [[Arquivo:pc7.png|link=]]
| |
| |}
| |
| </center>
| |
| <center>Ao desativar todos os computadores acima, a barreira irá ser desativada e concederá aos jogadores acesso ao Ultra Lab.</center>
| |
|
| |
| <center>[[Arquivo:Barreiralab.gif|link=]]</center>
| |
| <center>*A barreira ficará desativada até o shutdown diário (07h40 BRT).</center>
| |
| <center>
| |
| <br>
| |
| --------------
| |
| |-
| |
| |}
| |
|
| |
| </center>
| |
| </div>
| |
| Apenas os jogadores que derrotaram o Sarkies e falaram com o '''NPC Bill''' em Cerulean da Nightmare World conseguirão acessar as áreas de caça do Ultra Lab.<br>
| |
| <center>[[arquivo:ultralab_billgate.png|link=]]</center>
| |
|
| |
| <table class="seeMore">
| |
| <tr>
| |
| <td class="seeMore__image">[[Arquivo:Telekinetic-compass.gif|link=]]</td>
| |
| <td> '''Veja mais: [[Sarkies_Quest|Sarkies Quest]]'''</td>
| |
| </tr>
| |
| </table>
| |
|
| |
| == Berries ==
| |
|
| |
| No Ultra Laboratory, todo o dano causado pelos Advanced Sentinels, Mecha Trooper e Alpha Subject é neutro. Logo, os jogadores devem utilizar [[file:Kee_berry.png|link=]] Kee Berry. [[file:Berrie_23.png|link=]] Lum Berries, e [[file:Red_Sitrus_berry.png|link=]] Red Sitrus Berry são indispensáveis.
| |
|
| |
| Os jogadores também podem utilizar [[file:Ganlon_berry.png|link=]] Ganlon Berry para maior sobrevivência nos momentos de risco.
| |
|
| |
|
| |
| [[file:Kee_berry.png|link=]]
| |
| [[file:Red_Sitrus_berry.png|link=]]
| |
| [[file:Ganlon_berry.png|link=]]
| |
| [[file:Berrie_24.png|link=]]
| |
| [[file:Berrie_23.png|link=]]
| |
| [[file:Salacberry.png|link=]]
| |
|
| |
| == Shadow Move ==
| |
|
| |
| Sarkies usou sua tecnologia avançada para neutralizar a corrupção de Darkrai e criou um mecanismo de defesa em seu laboratório. Como resultado, Pokémon corrompidos por Darkrai '''não''' podem usar seus poderes, incluindo o '''Shadow Move''', dentro do Ultra Lab.
| |
|
| |
| == Held Enhancement ==
| |
|
| |
| Esse sistema concede bônus importantes para jogadores que estiverem utilizando determinadas categorias de Held. O sistema é baseado no '''Held Item X''' equipado no Pokémon que o jogador estiver utilizando. <br>
| |
|
| |
| [[Arquivo:Pokeball.png|15px|link=]] Caso o jogador esteja utilizando Held de Tier 8, causará '''40%''' mais dano e receberá '''40%''' menos dano dos inimigos.
| |
| <br><br>
| |
| '''Observações:'''
| |
| * Esse sistema somente é válido para o Held equipado diretamente no slot X do Pokémon escolhido para o combate, ou seja, '''não''' é aplicado para o Held equipado no '''slot Y''' ou no '''Device'''.
| |
| * O bônus do sistema de Held Enhancement é '''cumulativo''', ou seja, se um jogador estiver usando o held '''X-Attack''' ou '''X-Defense''', terá bônus tanto do sistema quanto o do held somados.
| |
|
| |
| ==== Alpha Subject ====
| |
| = Alpha#1 =
| |
| <center>[[Arquivo:Banner Subject Alpha 1.png|link=]]</center>
| |
|
| |
| == Introdução ==
| |
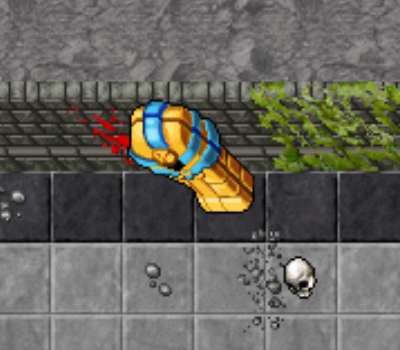
| Esses experimentos de Sarkies serão os principais inimigos a serem derrotados nesse laboratório. <br> Apesar de imperfeitos, eles carregam valiosos espólios que podem ser saqueados, como o seu respectivo Addon, [[Arquivo:Access_Card.png|link=]] '''Access Cards''', [[Arquivo:Mecha_Reactor.png|link=]] '''Mecha Reactors''', [[Arquivo:Technological_Crystal_%28Tier_8%29.png|link=]] '''fragmentos de Held Item (Tier: 8)''', [[Arquivo:Star_Dust.png|link=]] '''Stardust''' e [[Arquivo:Sentry_Remains.png|link=]] '''Sentry Remains'''.
| |
|
| |
| == Mecanismo de Defesa ==
| |
|
| |
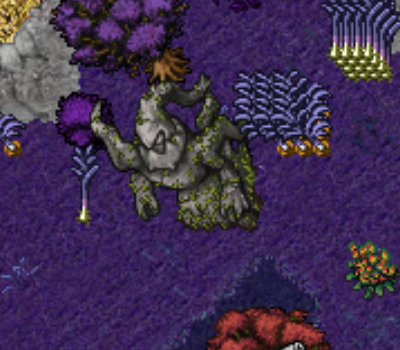
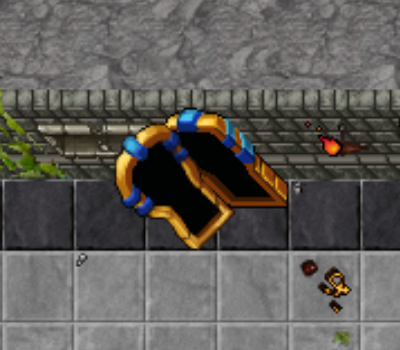
| Os mecanismos de defesa são quatro maquinas que nascem junto com os Alpha Subject que enquanto ativos, reduzem o dano recebido dos Alpha Subject em '''90%'''. Os jogadores devem destruir '''todas''' as máquinas antes de atacar o Alpha Subject. <br>
| |
| Os quatro mecanismos de defesa '''sempre''' nascem em volta do '''Alpha Subject'''. <br><br>
| |
|
| |
| <center>
| |
| [[file:Alpha-1 Defense Mechanism.png|link=]]
| |
| </center>
| |
|
| |
| == Habilidades ==
| |
|
| |
| <center class="center-tab"><tabber>
| |
| |-|Play Rough=
| |
|
| |
| Causa dano ao oponente, essa habilidade só pode ser usada à curta distância.
| |
|
| |
| {{#widget:Video|url={{filepath:Alpha Shiny MrMime Play Rough.mp4}}|}}
| |
|
| |
| |-|Psyusion=
| |
|
| |
| Causa dano progressivo em uma grande area ao redor do Alpha Subject #1.
| |
|
| |
| ▶ O dano pode ser evitado ao subir no mesmo SQM do Alpha Subject #1.
| |
|
| |
| {{#widget:Video|url={{filepath:Alpha Shiny MrMime Psyusion.mp4}}|}}
| |
|
| |
| |-|Dazzling Gleam=
| |
|
| |
| Causa dano ao oponente, essa habilidade pode ser usada a distância.
| |
|
| |
| {{#widget:Video|url={{filepath:Alpha Shiny MrMime Dazzling Gleam.mp4}}|}}
| |
|
| |
| |-|Synchronoise=
| |
|
| |
| Causa dano ao oponente, essa habilidade pode ser usada a distância.
| |
|
| |
| {{#widget:Video|url={{filepath:Alpha Shiny MrMime Synchronoise.mp4}}|}}
| |
|
| |
| |-|Psychic=
| |
|
| |
| Causa dano numa grande area ao redor do Alpha Subject #1
| |
|
| |
| {{#widget:Video|url={{filepath:Alpha Shiny MrMime Psychic.mp4}}|}}
| |
|
| |
| |-|Psyshock=
| |
|
| |
| Causa dano progressivo em uma area frontal, sendo possivel acertar mais de uma vez.
| |
|
| |
| {{#widget:Video|url={{filepath:Alpha Shiny MrMime Psyshock.mp4}}|}}
| |
|
| |
| |-|Metronome=
| |
|
| |
| O Alpha Subject #1 utiliza uma habilidade aleatória em uma grande area ao seu redor.
| |
|
| |
| {{#widget:Video|url={{filepath:Alpha Shiny MrMime Metronome.mp4}}|}}
| |
|
| |
| |-|Mimic Wall=
| |
|
| |
| Após um curto periodo o Alpha Subject #1 lança uma parede de vidro que causa dano e empurra os inimigos, o maior dano sendo causado ao inimigo mais próximo.
| |
|
| |
| {{#widget:Video|url={{filepath:Alpha Shiny MrMime Mimic Wall.mp4}}|}}
| |
|
| |
| |-|Selfdestruction=
| |
|
| |
| Ao chegar em 9% de HP, o sistema dos Alpha Subject entra em curto. Após um tempo, ele utilizará o ataque Selfdestruction.
| |
|
| |
| {{#widget:Video|url={{filepath:Alpha Shiny MrMime Selfdestruction.mp4}}|}}
| |
|
| |
| </center></tabber>
| |
|
| |
| == Loots ==
| |
| <center>
| |
| {| class="wikitable" width="40%" style="text-align:center"
| |
| |-
| |
| ! colspan="4" | [[Arquivo:mecha_shiny_mrmime.png|link=]] Alpha Subject #1
| |
| |-
| |
| ! colspan="2" | Item
| |
| ! Quantidade
| |
| ! Chance de Drop
| |
| |-
| |
| | align="center" |[[Arquivo:Inhibitor_Chip.png|link=]]
| |
| | style="border-left-style: hidden; | Inhibitor Chip
| |
| |align="center" |1-46
| |
| |align="center" | 69%
| |
| |-
| |
| | align="center" |[[Arquivo:Metal_Scraps_(Duke).png|link=]]
| |
| | style="border-left-style: hidden; | Metal Scraps
| |
| |align="center" |1-46
| |
| |align="center" | 69%
| |
| |-
| |
| | align="center" | [[Arquivo:Electronic_Components.png|link=]]
| |
| | style="border-left-style: hidden; | Electronic Components
| |
| |align="center" |1-46
| |
| |align="center" | 69%
| |
| |-
| |
| | align="center" | [[Arquivo:Motherboard.png|link=]]
| |
| | style="border-left-style: hidden; | Motherboard
| |
| |align="center" |1-46
| |
| |align="center" | 69%
| |
| |-
| |
| | align="center" | [[Arquivo:NW_ore.png|link=]]
| |
| | style="border-left-style: hidden; | Nightmare Ore
| |
| |align="center" |1-3
| |
| |align="center" | 60%
| |
| |-
| |
| | align="center" | [[Arquivo:Sentry_Remains.png|link=]]
| |
| | style="border-left-style: hidden; | Sentry Remains
| |
| |align="center" | 1
| |
| |align="center" | 33.7%
| |
| |-
| |
| | align="center" | [[Arquivo:Neutral_essence.png|link=]]
| |
| | style="border-left-style: hidden; | Neutral Essence
| |
| |align="center" | 1-2
| |
| |align="center" | 29%
| |
| |-
| |
| | align="center" | [[Arquivo:Metal_Scraps.png|link=]]
| |
| | style="border-left-style: hidden; | Metal Scraps
| |
| |align="center" | 1-10
| |
| |align="center" | 5%
| |
| |-
| |
| | align="center" | [[Arquivo:Star_Dust.png|link=]]
| |
| | style="border-left-style: hidden; | Star Dust
| |
| |align="center" | 1
| |
| |align="center" | 4%
| |
| |-
| |
| | align="center" | [[Arquivo:Access_Card.png|link=]]
| |
| | style="border-left-style: hidden; | Access Card
| |
| |align="center" | 1
| |
| |align="center" | 1.5%
| |
| |-
| |
| | align="center" | [[Arquivo:Technological_Crystal_(Tier_8).png|link=]]
| |
| | style="border-left-style: hidden; | Technological Crystal (Tier: 8)
| |
| |align="center" | 1
| |
| |align="center" | 1.3%
| |
| |-
| |
| | align="center" | [[Arquivo:Mecha_Reactor.png|link=]]
| |
| | style="border-left-style: hidden; | Mecha Reactor
| |
| |align="center" | 1
| |
| |align="center" | Raro (Menor que 1%)
| |
| |-
| |
| | align="center" | [[Arquivo:Black Nightmare Gem.png|link=]]
| |
| | style="border-left-style: hidden; | Black Nightmare Gem
| |
| |align="center" | 1
| |
| |align="center" | Raro (Menor que 1%)
| |
| |-
| |
| | align="center" | [[Arquivo:Mecha Costume (MrMime).png|link=]]
| |
| | style="border-left-style: hidden; | Mecha Costume
| |
| |align="center" | 1
| |
| |align="center" | Raro (Menor que 1%)
| |
| |-
| |
| |}
| |
| </center>
| |
|
| |
| = Alpha#2 =
| |
|
| |
| <center>[[Arquivo:Subject Alpha 2.png|link=]]</center>
| |
|
| |
| == Introdução ==
| |
|
| |
| Esses experimentos de Sarkies serão os principais inimigos a serem derrotados nesse laboratório. <br> Apesar de imperfeitos, eles carregam valiosos espólios que podem ser saqueados, como o seu respectivo Addon, [[Arquivo:Access_Card.png|link=]] '''Access Cards''', [[Arquivo:Mecha_Reactor.png|link=]] '''Mecha Reactors''', [[Arquivo:Technological_Crystal_%28Tier_8%29.png|link=]] '''fragmentos de Held Item (Tier: 8)''', [[Arquivo:Star_Dust.png|link=]] '''Stardust''' e [[Arquivo:Sentry_Remains.png|link=]] '''Sentry Remains'''.
| |
|
| |
| == Mecanismo de Defesa ==
| |
| Os mecanismos de defesa são quatro maquinas que nascem junto com os Alpha Subject que enquanto ativos, reduzem o dano recebido dos Alpha Subject em '''90%'''. Os jogadores devem destruir '''todas''' as máquinas antes de atacar o Alpha Subject. <br>
| |
| Os quatro mecanismos de defesa '''sempre''' nascem em volta do '''Alpha Subject'''. <br><br>
| |
|
| |
| <center>
| |
| [[file:Alpha-2 Defense Mechanism.png|link=]]
| |
| </center>
| |
|
| |
| == Habilidades ==
| |
|
| |
| <center class="center-tab"><tabber>
| |
| |-|Drill Peck=
| |
|
| |
| Causa dano ao oponente, essa habilidade só pode ser usada à curta distância.
| |
|
| |
| {{#widget:Video|url={{filepath:Alpha Elite Farfetchd Drill Peck.mp4}}|}}
| |
| |-|Slash=
| |
|
| |
| Causa dano ao oponente, essa habilidade só pode ser usada à curta distância.
| |
|
| |
| {{#widget:Video|url={{filepath:Alpha Elite Farfetchd Slash.mp4}}|}}
| |
| |-|Feather Dance=
| |
|
| |
| Causa dano ao oponente, essa habilidade pode ser usada a distância.
| |
|
| |
| {{#widget:Video|url={{filepath:Alpha Elite Farfetchd Feather Dance.mp4}}|}}
| |
| |-|Stick Throw=
| |
|
| |
| Causa dano ao oponente, essa habilidade pode ser usada a distância.
| |
|
| |
| {{#widget:Video|url={{filepath:Alpha Elite Farfetchd Stick Throw.mp4}}|}}
| |
| |-|Air Slash=
| |
|
| |
| Causa dano ao oponente numa area mediana ao redor do Alpha Subject #2
| |
|
| |
| {{#widget:Video|url={{filepath:Alpha Elite Farfetchd Air Slash.mp4}}|}}
| |
| |-|Stickmerang=
| |
|
| |
| Causa dano em uma área frontal progressiva que empurra os oponentes, pode causar dano mais de uma vez aos inimigos que foram acertados. Adicionalmente, os inimigos que foram marcados são alvos da Habilidade '''Brave Bird'''.
| |
|
| |
| '''Brave Bird''': O Alpha Subject #2 se teleporta em todos os Pokémon marcados pelo stickmerang dando dano e ganhando um bônus de velocidade de ataque e de movimento.
| |
|
| |
| ▶ Inimigos marcados com o stickmerang podem evitar o ataque Brave Bird ao puxar o Pokémon para a Pokébola antes do fim da canalização do Stickmerang.
| |
|
| |
| {{#widget:Video|url={{filepath:Alpha Elite Farfetchd Stickmerang.mp4}}|}}
| |
| |-|Sky Attack=
| |
|
| |
| Causa dano em uma grande area ao redor
| |
|
| |
| {{#widget:Video|url={{filepath:Alpha Elite Farfetchd Sky Attack.mp4}}|}}
| |
| |-|Sand Attack=
| |
|
| |
| Causa o efeito BLIND em uma linha reta.
| |
|
| |
| {{#widget:Video|url={{filepath:Alpha Elite Farfetchd Sand Attack.mp4}}|}}
| |
| |-|Selfdestruction=
| |
|
| |
| Ao chegar em 9% de HP, o sistema dos Alpha Subject entra em curto. Após um tempo, ele utilizará o ataque Selfdestruction.
| |
|
| |
| {{#widget:Video|url={{filepath:Alpha Elite Farfetchd Selfdestruction.mp4}}|}}
| |
| </center></tabber>
| |
|
| |
| == Loots ==
| |
| <center>
| |
| {| class="wikitable" width="40%" style="text-align:center"
| |
| |-
| |
| ! colspan="4" | [[Arquivo:mecha_elite_farfetchd.png|link=]] Alpha Subject #2
| |
| |-
| |
| ! colspan="2" | Item
| |
| ! Quantidade
| |
| ! Chance de Drop
| |
| |-
| |
| | align="center" |[[Arquivo:Inhibitor_Chip.png|link=]]
| |
| | style="border-left-style: hidden; | Inhibitor Chip
| |
| |align="center" |1-46
| |
| |align="center" | 69%
| |
| |-
| |
| | align="center" |[[Arquivo:Metal_Scraps_(Duke).png|link=]]
| |
| | style="border-left-style: hidden; | Metal Scraps
| |
| |align="center" |1-46
| |
| |align="center" | 69%
| |
| |-
| |
| | align="center" | [[Arquivo:Electronic_Components.png|link=]]
| |
| | style="border-left-style: hidden; | Electronic Components
| |
| |align="center" |1-46
| |
| |align="center" | 69%
| |
| |-
| |
| | align="center" | [[Arquivo:Motherboard.png|link=]]
| |
| | style="border-left-style: hidden; | Motherboard
| |
| |align="center" |1-46
| |
| |align="center" | 69%
| |
| |-
| |
| | align="center" | [[Arquivo:NW_ore.png|link=]]
| |
| | style="border-left-style: hidden; | Nightmare Ore
| |
| |align="center" |1-3
| |
| |align="center" | 60%
| |
| |-
| |
| | align="center" | [[Arquivo:Sentry_Remains.png|link=]]
| |
| | style="border-left-style: hidden; | Sentry Remains
| |
| |align="center" | 1
| |
| |align="center" | 33.7%
| |
| |-
| |
| | align="center" | [[Arquivo:Neutral_essence.png|link=]]
| |
| | style="border-left-style: hidden; | Neutral Essence
| |
| |align="center" | 1-2
| |
| |align="center" | 29%
| |
| |-
| |
| | align="center" | [[Arquivo:Metal_Scraps.png|link=]]
| |
| | style="border-left-style: hidden; | Metal Scraps
| |
| |align="center" | 1-10
| |
| |align="center" | 5%
| |
| |-
| |
| | align="center" | [[Arquivo:Star_Dust.png|link=]]
| |
| | style="border-left-style: hidden; | Star Dust
| |
| |align="center" | 1
| |
| |align="center" | 4%
| |
| |-
| |
| | align="center" | [[Arquivo:Access_Card.png|link=]]
| |
| | style="border-left-style: hidden; | Access Card
| |
| |align="center" | 1
| |
| |align="center" | 1.5%
| |
| |-
| |
| | align="center" | [[Arquivo:Technological_Crystal_(Tier_8).png|link=]]
| |
| | style="border-left-style: hidden; | Technological Crystal (Tier: 8)
| |
| |align="center" | 1
| |
| |align="center" | 1.3%
| |
| |-
| |
| | align="center" | [[Arquivo:Mecha_Reactor.png|link=]]
| |
| | style="border-left-style: hidden; | Mecha Reactor
| |
| |align="center" | 1
| |
| |align="center" | Raro (Menor que 1%)
| |
| |-
| |
| | align="center" | [[Arquivo:Black Nightmare Gem.png|link=]]
| |
| | style="border-left-style: hidden; | Black Nightmare Gem
| |
| |align="center" | 1
| |
| |align="center" | Raro (Menor que 1%)
| |
| |-
| |
| | align="center" | [[Arquivo:Mecha Costume (Elite Farfetchd).png|link=]]
| |
| | style="border-left-style: hidden; | Mecha Costume
| |
| |align="center" | 1
| |
| |align="center" | Raro (Menor que 1%)
| |
| |-
| |
| |}
| |
| </center>
| |
|
| |
|
| |
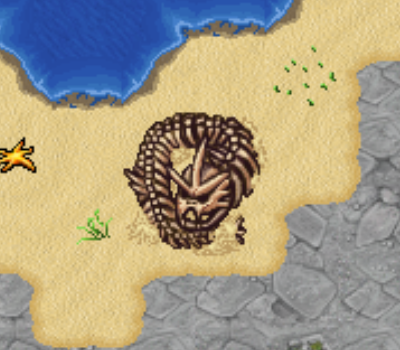
| = Alpha#3 =
| |
| <center>[[Arquivo:Subject Alpha 3.png|link=]]</center>
| |
|
| |
| == Introdução ==
| |
|
| |
| Esses experimentos de Sarkies serão os principais inimigos a serem derrotados nesse laboratório. <br> Apesar de imperfeitos, eles carregam valiosos espólios que podem ser saqueados, como o seu respectivo Addon, [[Arquivo:Access_Card.png|link=]] '''Access Cards''', [[Arquivo:Mecha_Reactor.png|link=]] '''Mecha Reactors''', [[Arquivo:Technological_Crystal_%28Tier_8%29.png|link=]] '''fragmentos de Held Item (Tier: 8)''', [[Arquivo:Star_Dust.png|link=]] '''Stardust''' e [[Arquivo:Sentry_Remains.png|link=]] '''Sentry Remains'''.
| |
| == Mecanismo de Defesa ==
| |
| Os mecanismos de defesa são quatro maquinas que nascem junto com os Alpha Subject que enquanto ativos, reduzem o dano recebido dos Alpha Subject em '''90%'''. Os jogadores devem destruir '''todas''' as máquinas antes de atacar o Alpha Subject. <br>
| |
| Os quatro mecanismos de defesa '''sempre''' nascem em volta do '''Alpha Subject'''. <br><br>
| |
|
| |
| <center>
| |
| [[file:Alpha-3 Defense Mechanism.png|link=]]
| |
| </center>
| |
|
| |
| == Habilidades ==
| |
|
| |
| <center class="center-tab"><tabber>
| |
| |-|Mega Kick=
| |
|
| |
| Causa dano ao oponente, essa habilidade só pode ser usada à curta distância.
| |
|
| |
| {{#widget:Video|url={{filepath:Alpha Shiny Raichu Mega Kick.mp4}}|}}
| |
| |-|Thunder Punch=
| |
|
| |
| Causa dano ao oponente, essa habilidade só pode ser usada à curta distância.
| |
|
| |
| {{#widget:Video|url={{filepath:Alpha Shiny Raichu Thunder Punch.mp4}}|}}
| |
| |-|Thunder Shock=
| |
|
| |
| Causa dano ao oponente, essa habilidade pode ser usada a distância.
| |
|
| |
| {{#widget:Video|url={{filepath:Alpha Shiny Raichu Thunder Shock.mp4}}|}}
| |
| |-|Thunderbolt=
| |
|
| |
| Causa muitos danos consecutivos ao oponente.
| |
|
| |
| {{#widget:Video|url={{filepath:Alpha Shiny Raichu Thunderbolt.mp4}}|}}
| |
| |-|Volt Tackle=
| |
|
| |
| Após periodo de canalização, o Alpha Subject #3 dá uma grande quantidade de dano ao redor e aplica o efeito STUN aos oponentes, após o uso dessa habilidade, ele usa o ataque '''Wild Charge'''.
| |
|
| |
| '''Wild Charge''': Essa habilidade faz com o que o Alpha Subject #3 tome uma distância do jogador e tente acertar multiplas vezes a habilidade.
| |
|
| |
| ▶ O jogador pode tentar ficar na frente do Alpha Subject #3 no momento em que ele vai andar em direção ao seu Pokémon para impedir que tome varios hits.
| |
|
| |
| {{#widget:Video|url={{filepath:Alpha Shiny Raichu Volt Tackle.mp4}}|}}
| |
| |-|Electrify=
| |
|
| |
| Causa dano a todos os oponentes em uma area ao redor do usuário e aplicando o efeito STUN.
| |
|
| |
| {{#widget:Video|url={{filepath:Alpha Shiny Raichu Electrify.mp4}}|}}
| |
| |-|Discharge=
| |
|
| |
| Causa dano em uma grande area ao redor do Alpha Subject #3.
| |
|
| |
| {{#widget:Video|url={{filepath:Alpha Shiny Raichu Discharge.mp4}}|}}
| |
| |-|Selfdestruction=
| |
|
| |
| Ao chegar em 9% de HP, o sistema dos Alpha Subject entra em curto. Após um tempo, ele utilizará o ataque Selfdestruction.
| |
|
| |
| {{#widget:Video|url={{filepath:Alpha Shiny Raichu Selfdestruction.mp4}}|}}
| |
| </center></tabber>
| |
|
| |
| == Loots ==
| |
| <center>
| |
| {| class="wikitable" width="40%" style="text-align:center"
| |
| |-
| |
| ! colspan="4" | [[Arquivo:mecha_shiny_raichu.png|link=]] Alpha Subject #3
| |
| |-
| |
| ! colspan="2" | Item
| |
| ! Quantidade
| |
| ! Chance de Drop
| |
| |-
| |
| | align="center" |[[Arquivo:Inhibitor_Chip.png|link=]]
| |
| | style="border-left-style: hidden; | Inhibitor Chip
| |
| |align="center" |1-46
| |
| |align="center" | 69%
| |
| |-
| |
| | align="center" |[[Arquivo:Metal_Scraps_(Duke).png|link=]]
| |
| | style="border-left-style: hidden; | Metal Scraps
| |
| |align="center" |1-46
| |
| |align="center" | 69%
| |
| |-
| |
| | align="center" | [[Arquivo:Electronic_Components.png|link=]]
| |
| | style="border-left-style: hidden; | Electronic Components
| |
| |align="center" |1-46
| |
| |align="center" | 69%
| |
| |-
| |
| | align="center" | [[Arquivo:Motherboard.png|link=]]
| |
| | style="border-left-style: hidden; | Motherboard
| |
| |align="center" |1-46
| |
| |align="center" | 69%
| |
| |-
| |
| | align="center" | [[Arquivo:NW_ore.png|link=]]
| |
| | style="border-left-style: hidden; | Nightmare Ore
| |
| |align="center" |1-3
| |
| |align="center" | 60%
| |
| |-
| |
| | align="center" | [[Arquivo:Sentry_Remains.png|link=]]
| |
| | style="border-left-style: hidden; | Sentry Remains
| |
| |align="center" | 1
| |
| |align="center" | 33.7%
| |
| |-
| |
| | align="center" | [[Arquivo:Neutral_essence.png|link=]]
| |
| | style="border-left-style: hidden; | Neutral Essence
| |
| |align="center" | 1-2
| |
| |align="center" | 29%
| |
| |-
| |
| | align="center" | [[Arquivo:Metal_Scraps.png|link=]]
| |
| | style="border-left-style: hidden; | Metal Scraps
| |
| |align="center" | 1-10
| |
| |align="center" | 5%
| |
| |-
| |
| | align="center" | [[Arquivo:Star_Dust.png|link=]]
| |
| | style="border-left-style: hidden; | Star Dust
| |
| |align="center" | 1
| |
| |align="center" | 4%
| |
| |-
| |
| | align="center" | [[Arquivo:Access_Card.png|link=]]
| |
| | style="border-left-style: hidden; | Access Card
| |
| |align="center" | 1
| |
| |align="center" | 1.5%
| |
| |-
| |
| | align="center" | [[Arquivo:Technological_Crystal_(Tier_8).png|link=]]
| |
| | style="border-left-style: hidden; | Technological Crystal (Tier: 8)
| |
| |align="center" | 1
| |
| |align="center" | 1.3%
| |
| |-
| |
| | align="center" | [[Arquivo:Mecha_Reactor.png|link=]]
| |
| | style="border-left-style: hidden; | Mecha Reactor
| |
| |align="center" | 1
| |
| |align="center" | Raro (Menor que 1%)
| |
| |-
| |
| | align="center" | [[Arquivo:Black Nightmare Gem.png|link=]]
| |
| | style="border-left-style: hidden; | Black Nightmare Gem
| |
| |align="center" | 1
| |
| |align="center" | Raro (Menor que 1%)
| |
| |-
| |
| | align="center" | [[Arquivo:Mecha Costume (Shiny Raichu).png|link=]]
| |
| | style="border-left-style: hidden; | Mecha Costume
| |
| |align="center" | 1
| |
| |align="center" | Raro (Menor que 1%)
| |
| |-
| |
| |}
| |
| </center>
| |
|
| |
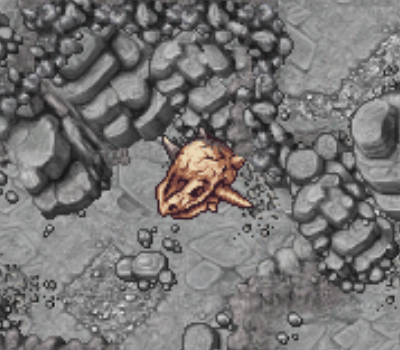
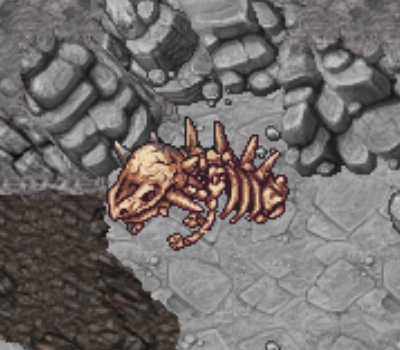
| = Alpha#4 =
| |
| <center>[[Arquivo:Subject Alpha 4.png|link=]]</center>
| |
|
| |
| == Introdução ==
| |
|
| |
| Esses experimentos de Sarkies serão os principais inimigos a serem derrotados nesse laboratório. <br> Apesar de imperfeitos, eles carregam valiosos espólios que podem ser saqueados, como o seu respectivo Addon, [[Arquivo:Access_Card.png|link=]] '''Access Cards''', [[Arquivo:Mecha_Reactor.png|link=]] '''Mecha Reactors''', [[Arquivo:Technological_Crystal_%28Tier_8%29.png|link=]] '''fragmentos de Held Item (Tier: 8)''', [[Arquivo:Star_Dust.png|link=]] '''Stardust''' e [[Arquivo:Sentry_Remains.png|link=]] '''Sentry Remains'''.
| |
|
| |
| == Mecanismo de Defesa ==
| |
| Os mecanismos de defesa são quatro maquinas que nascem junto com os Alpha Subject que enquanto ativos, reduzem o dano recebido dos Alpha Subject em '''90%'''. Os jogadores devem destruir '''todas''' as máquinas antes de atacar o Alpha Subject. <br>
| |
| Os quatro mecanismos de defesa '''sempre''' nascem em volta do '''Alpha Subject'''. <br><br>
| |
|
| |
| <center>
| |
| [[file:Alpha-4 Defense Mechanism.png|link=]]
| |
| </center>
| |
|
| |
| == Habilidades ==
| |
|
| |
| <center class="center-tab"><tabber>
| |
| |-|Headbutt=
| |
|
| |
| Causa dano ao oponente, essa habilidade só pode ser usada à curta distância.
| |
|
| |
| {{#widget:Video|url={{filepath:Alpha Shiny Marowak Headbutt.mp4}}|}}
| |
| |-|Bone Club=
| |
|
| |
| Causa dano ao oponente, essa habilidade só pode ser usada à curta distância.
| |
|
| |
| {{#widget:Video|url={{filepath:Alpha Shiny Marowak Bone Club.mp4}}|}}
| |
| |-|Mud Sport=
| |
|
| |
| Causa muitos danos consecutivos ao oponente e aplica o efeito BLIND, essa habilidade pode ser usada a distância.
| |
|
| |
| {{#widget:Video|url={{filepath:Alpha Shiny Marowak Mud Sport.mp4}}|}}
| |
| |-|Bone Rush=
| |
|
| |
| Após um breve periodo de canalização, o Alpha Subject #4 anda para trás enquanto ativa o ataque Bone Rush fazendo com que o oponente receba varios danos consecutivos.
| |
|
| |
| ▶ O jogador pode impedir o Alpha Subject #4 de andar para trás ao ficar atrás dele, diminuindo bastante o dano recebido.
| |
|
| |
| {{#widget:Video|url={{filepath:Alpha Shiny Marowak Bone Rush.mp4}}|}}
| |
| |-|Earth Power=
| |
|
| |
| Causa uma grande quantidade de dano em area ao redor do Alpha Subject #4 aplicando o efeito BLIND.
| |
|
| |
| {{#widget:Video|url={{filepath:Alpha Shiny Marowak Earth Power.mp4}}|}}
| |
| |-|Bulldoze=
| |
|
| |
| Causa dano progressivo em uma area frontal, sendo possivel acertar mais de uma vez.
| |
|
| |
| {{#widget:Video|url={{filepath:Alpha Shiny Marowak Bulldoze.mp4}}|}}
| |
| |-|Sand Eruption=
| |
|
| |
| O Alpha Subject #4 usa toda sua força para provocar um terremoto e cria uma tempestade de areia causando dano a todos os inimigos em uma grande area.
| |
|
| |
| {{#widget:Video|url={{filepath:Alpha Shiny Marowak Sand Eruption.mp4}}|}}
| |
| |-|Selfdestruction=
| |
|
| |
| Ao chegar em 9% de HP, o sistema dos Alpha Subject entra em curto. Após um tempo, ele utilizará o ataque Selfdestruction.
| |
|
| |
| {{#widget:Video|url={{filepath:Alpha Shiny Marowak Selfdestruction.mp4}}|}}
| |
| |-|Bone Spin=
| |
|
| |
| Essa habilidade passiva é ativada ao ser atacado fisicamente, causando dano em uma area circular ao redor do Alpha Subject #4, sendo possivel acertar mais de uma vez o mesmo oponente.
| |
|
| |
| {{#widget:Video|url={{filepath:Alpha Shiny Marowak Bone Spin.mp4}}|}}
| |
| </center></tabber>
| |
|
| |
| == Loots ==
| |
| <center>
| |
| {| class="wikitable" width="40%" style="text-align:center"
| |
| |-
| |
| ! colspan="4" | [[Arquivo:mecha_shiny_marowak.png|link=]] Alpha Subject #4
| |
| |-
| |
| ! colspan="2" | Item
| |
| ! Quantidade
| |
| ! Chance de Drop
| |
| |-
| |
| | align="center" |[[Arquivo:Inhibitor_Chip.png|link=]]
| |
| | style="border-left-style: hidden; | Inhibitor Chip
| |
| |align="center" |1-46
| |
| |align="center" | 69%
| |
| |-
| |
| | align="center" |[[Arquivo:Metal_Scraps_(Duke).png|link=]]
| |
| | style="border-left-style: hidden; | Metal Scraps
| |
| |align="center" |1-46
| |
| |align="center" | 69%
| |
| |-
| |
| | align="center" | [[Arquivo:Electronic_Components.png|link=]]
| |
| | style="border-left-style: hidden; | Electronic Components
| |
| |align="center" |1-46
| |
| |align="center" | 69%
| |
| |-
| |
| | align="center" | [[Arquivo:Motherboard.png|link=]]
| |
| | style="border-left-style: hidden; | Motherboard
| |
| |align="center" |1-46
| |
| |align="center" | 69%
| |
| |-
| |
| | align="center" | [[Arquivo:NW_ore.png|link=]]
| |
| | style="border-left-style: hidden; | Nightmare Ore
| |
| |align="center" |1-3
| |
| |align="center" | 60%
| |
| |-
| |
| | align="center" | [[Arquivo:Sentry_Remains.png|link=]]
| |
| | style="border-left-style: hidden; | Sentry Remains
| |
| |align="center" | 1
| |
| |align="center" | 33.7%
| |
| |-
| |
| | align="center" | [[Arquivo:Neutral_essence.png|link=]]
| |
| | style="border-left-style: hidden; | Neutral Essence
| |
| |align="center" | 1-2
| |
| |align="center" | 29%
| |
| |-
| |
| | align="center" | [[Arquivo:Metal_Scraps.png|link=]]
| |
| | style="border-left-style: hidden; | Metal Scraps
| |
| |align="center" | 1-10
| |
| |align="center" | 5%
| |
| |-
| |
| | align="center" | [[Arquivo:Star_Dust.png|link=]]
| |
| | style="border-left-style: hidden; | Star Dust
| |
| |align="center" | 1
| |
| |align="center" | 4%
| |
| |-
| |
| | align="center" | [[Arquivo:Access_Card.png|link=]]
| |
| | style="border-left-style: hidden; | Access Card
| |
| |align="center" | 1
| |
| |align="center" | 1.5%
| |
| |-
| |
| | align="center" | [[Arquivo:Technological_Crystal_(Tier_8).png|link=]]
| |
| | style="border-left-style: hidden; | Technological Crystal (Tier: 8)
| |
| |align="center" | 1
| |
| |align="center" | 1.3%
| |
| |-
| |
| | align="center" | [[Arquivo:Mecha_Reactor.png|link=]]
| |
| | style="border-left-style: hidden; | Mecha Reactor
| |
| |align="center" | 1
| |
| |align="center" | Raro (Menor que 1%)
| |
| |-
| |
| | align="center" | [[Arquivo:Black Nightmare Gem.png|link=]]
| |
| | style="border-left-style: hidden; | Black Nightmare Gem
| |
| |align="center" | 1
| |
| |align="center" | Raro (Menor que 1%)
| |
| |-
| |
| | align="center" | [[Arquivo:Mecha Costume (Marowak).png|link=]]
| |
| | style="border-left-style: hidden; | Mecha Costume
| |
| |align="center" | 1
| |
| |align="center" | Raro (Menor que 1%)
| |
| |- | | |- |
| |} | | |} |
| </center> | | </center> |