| Kairiki |
|---|
|
| Recebe | Entrega |
|---|---|
Giant Belt |
Black Star Piece |
| (28 revisões intermediárias por 2 usuários não estão sendo mostradas) | |||
| Linha 1: | Linha 1: | ||
<center>[[ | <center>[[file:The_Duke.png|link=]]</center> | ||
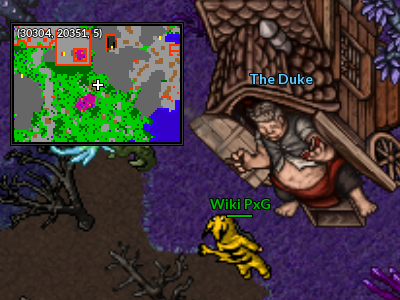
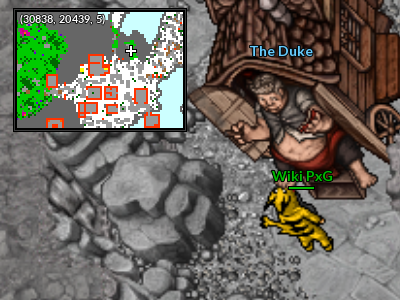
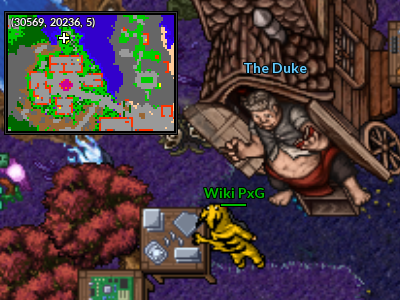
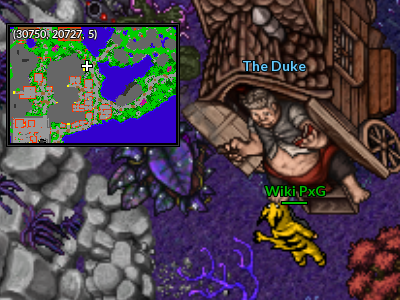
Este Mercador é responsável por trocar itens especiais dropáveis dos Nightmare Terrors por '''Black Star Pieces'''. | |||
'''Observação:''' Black Star Pieces são itens necessários para criar o '''Voidmania Rift Crystal'''. | |||
= | =Localização= | ||
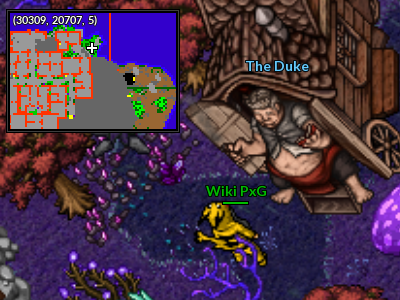
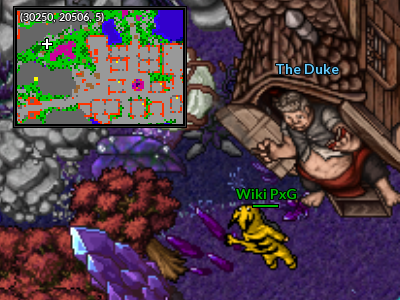
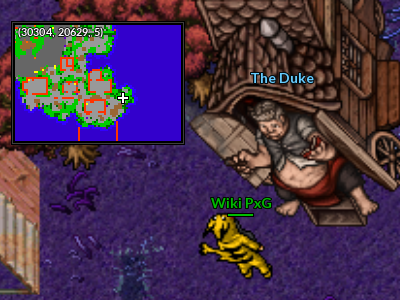
O Duke aparecerá aleatoriamente próximo a entrada dos Nightmare Terrors. | |||
Este mercador só poderá trocar o item referente ao Nightmare Terror ao qual ele estiver próximo. | |||
<tabber> | <tabber> | ||
|-|Kairiki= | |||
<center> | |||
{| class="wikitable bg-none border-0" width="26%" style="text-align:center;" | |||
! Kairiki | |||
|- | |||
| [[Arquivo:The_Duke_Pewter.png|link=]] | |||
|} | |||
|-| | <center> | ||
{| class="wikitable" width="26%" | |||
! colspan="1" width="2%" | Recebe | |||
! colspan="1" width="2%" | Entrega | |||
|- | |||
| align="center" width="15% | [[Arquivo:Giant_Belt.png|link=]] <br> '''Giant Belt''' | |||
| align="center" width="15% | [[Arquivo:036-Clefable.png|link=Clefable]] <br> '''Black Star Piece''' | |||
|} | |||
</center> | |||
</center> | |||
|-|Kame= | |||
<center> | |||
{| class="wikitable bg-none border-0" width="20%" style="text-align:center;" | |||
! Kame | |||
|- | |||
| [[Arquivo:The_Duke_Lavender.png|link=]] | |||
|} | |||
</center> | |||
<center>[[Arquivo: | <center> | ||
{| class="wikitable" width="26%" | |||
! colspan="1" width="2%" | Recebe | |||
! colspan="1" width="2%" | Entrega | |||
|- | |||
| align="center" width="15% | [[Arquivo:Giant_Shell.png|link=]] <br> '''Giant Shell''' | |||
| align="center" width="15% | [[Arquivo:036-Clefable.png|link=Clefable]] <br> '''Black Star Piece''' | |||
|} | |||
</center> | |||
|-| | |-|Ptera= | ||
<center> | |||
{| class="wikitable bg-none border-0" width="20%" style="text-align:center;" | |||
! Ptera | |||
|- | |||
| [[Arquivo:The_Duke_Cerulean.png|link=]] | |||
|} | |||
</center> | |||
<center> | |||
{| class="wikitable" width="26%" | |||
! colspan="1" width="2%" | Recebe | |||
! colspan="1" width="2%" | Entrega | |||
|- | |||
| align="center" width="15% | [[Arquivo:Pteras_Head.png|link=]] <br> '''Ptera's Head''' | |||
| align="center" width="15% | [[Arquivo:036-Clefable.png|link=Clefable]] <br> '''Black Star Piece''' | |||
|} | |||
</center> | |||
|-|Riza= | |||
<center> | |||
{| class="wikitable bg-none border-0" width="20%" style="text-align:center;" | |||
! Riza | |||
|- | |||
| [[Arquivo:The_Duke_Fuchsia.png|link=]] | |||
|} | |||
</center> | |||
<center>[[Arquivo: | <center> | ||
{| class="wikitable" width="26%" | |||
! colspan="1" width="2%" | Recebe | |||
! colspan="1" width="2%" | Entrega | |||
|- | |||
| align="center" width="15% | [[Arquivo:Giant_Fire_Tail.png|link=]] <br> '''Giant Fire Tail''' | |||
| align="center" width="15% | [[Arquivo:036-Clefable.png|link=Clefable]] <br> '''Black Star Piece''' | |||
|} | |||
</center> | |||
</ | |-|Raito= | ||
<center> | |||
{| class="wikitable bg-none border-0" width="20%" style="text-align:center;" | |||
! Raito | |||
|- | |||
| [[Arquivo:The_Duke_Cinnabar.png|link=]] | |||
|} | |||
</center> | |||
== | <center> | ||
{| class="wikitable" width="26%" | |||
! colspan="1" width="2%" | Recebe | |||
! colspan="1" width="2%" | Entrega | |||
|- | |||
| align="center" width="15% | [[Arquivo:Giant_Electric_Remains.png|link=]] <br> '''Giant Electric Remains''' | |||
| align="center" width="15% | [[Arquivo:036-Clefable.png|link=Clefable]] <br> '''Black Star Piece''' | |||
|} | |||
</center> | |||
|-|Gyakko= | |||
<center> | |||
{| class="wikitable bg-none border-0" width="20%" style="text-align:center;" | |||
! Gyakko | |||
|- | |||
| [[Arquivo:The_Duke_Viridian.png|link=]] | |||
|} | |||
</center> | |||
''' | <center> | ||
{| class="wikitable" width="26%" | |||
! colspan="1" width="2%" | Recebe | |||
! colspan="1" width="2%" | Entrega | |||
|- | |||
| align="center" width="15% | [[Arquivo:Giant_Red_Gyarados_Tail.png|link=]] <br> '''Giant Red Gyarados Tail''' | |||
| align="center" width="15% | [[Arquivo:036-Clefable.png|link=Clefable]] <br> '''Black Star Piece''' | |||
|} | |||
</center> | |||
<center>[[Arquivo: | |-|Gama= | ||
<center> | |||
{| class="wikitable bg-none border-0" width="20%" style="text-align:center;" | |||
! Gama | |||
|- | |||
| [[Arquivo:The_Duke_Pallet.png|link=]] | |||
|} | |||
<center> | |||
{| class="wikitable" width="26%" | |||
! colspan="1" width="2%" | Recebe | |||
! colspan="1" width="2%" | Entrega | |||
|- | |||
| align="center" width="15% | [[Arquivo:Giant Bulb.png|link=]] <br> '''Giant Bulb''' | |||
| align="center" width="15% | [[Arquivo:036-Clefable.png|link=Clefable]] <br> '''Black Star Piece''' | |||
|} | |||
</center> | |||
|-|Seishin & Yurei= | |||
<center> | <center> | ||
{| class="wikitable" width = " | {| class="wikitable bg-none border-0" width="20%" style="text-align:center;" | ||
! Seishin & Yurei | |||
|- | |- | ||
! | | [[Arquivo:The_Duke_Pallet.png|link=]] | ||
|} | |||
<center> | |||
{| class="wikitable" width="26%" | |||
! colspan="1" width="2%" | Recebe | |||
! colspan="1" width="2%" | Entrega | |||
|- | |- | ||
| align="center" | [[Arquivo: | | align="center" width="15% | [[Arquivo:Giant_Creepy_Remains.png|link=]] <br> '''Giant Creepy Remains''' | ||
| align="center" | | align="center" width="15% | [[Arquivo:036-Clefable.png|link=Clefable]] <br> '''Black Star Piece''' | ||
|} | |} | ||
</center> | </center> | ||
|-|Kitsune= | |||
<center> | |||
{| class="wikitable bg-none border-0" width="20%" style="text-align:center;" | |||
! Kitsune | |||
|- | |||
| [[Arquivo:The_Duke_Pallet.png|link=]] | |||
|} | |||
</center> | |||
== | <center> | ||
{| class="wikitable" width="26%" | |||
! colspan="1" width="2%" | Recebe | |||
! colspan="1" width="2%" | Entrega | |||
|- | |||
| align="center" width="15% | [[Arquivo:Giant_Belt.png|link=]] <br> '''Giant Corrupted Hair''' | |||
| align="center" width="15% | [[Arquivo:036-Clefable.png|link=Clefable]] <br> '''Black Star Piece''' | |||
|} | |||
</center> | |||
</tabber> | |||
=Informações básicas= | |||
[[Arquivo:Templo_de_bronzong_card.png|link=]] | |||
Tempo de conclusão: '''15 minutos''' <br> | |||
Experiência obtida pelo aluno: '''300''' <br> | |||
Experiência obtida pelo jogador: '''100.000''' <br> | |||
Recompensas garantidas: <br> | |||
'''20 [[Arquivo:Study_Notes.png|25px|link=]] Study Notes''' <br> | |||
'''1 [[Arquivo:Bag_of_Nightmare_Experience_Candy.png|link=]] Bag of Nightmare Experience Candy''' <br> | |||
==Mapa== | |||
<center>[[Arquivo:Templo_de_bronzong_mapa.png|link=]]</center> | |||
==Tipo de Missão== | |||
===Captura=== | |||
O jogador deverá usar uma quantidade específica de Friend Balls para tentar capturar Bronzong e Bronzor. | |||
===Caça=== | |||
O jogador deverá matar uma quantidade específica de Pokémon de Bronzong e Bronzor | |||
==Pokémon== | |||
{| class="wikitable" style="text-align:center;" width="20%" | |||
|- | |||
! colspan="3" | Pokémon disponíveis | |||
|- | |||
| [[Arquivo:436-Bronzor.png|link=]] || '''Bronzong''' || [[Arquivo:Pokeball.png|15px|link=]] | |||
|- | |||
| [[Arquivo:437-Bronzong.png|link=]] || '''Bronzor''' || [[Arquivo:Pokeball.png|15px|link=]] | |||
|- | |||
| [[Arquivo:437-Sh_Bronzong.png|link=]] || '''Shiny Bronzong''' || [[Arquivo:Pokeball.png|15px|link=]] | |||
|} | |||
[[Arquivo:Pokeball.png|15px|link=]] = Pokémon capturáveis | |||
=Informações básicas= | |||
[[Arquivo:Caverna_shoal_card.png|link=]] | |||
Tempo de conclusão: '''15 minutos''' <br> | |||
Experiência obtida pelo aluno: '''300''' <br> | |||
Experiência obtida pelo jogador: '''100.000''' <br> | |||
Derrotar Pokémon: [[Arquivo:comvip.png|link=Quests]] <br> | |||
Capturar Pokémon: [[Arquivo:semvip.png|link=Quests]] <br> | |||
== | ==Mapa== | ||
<center>[[Arquivo:Caverna shoal_mapa 1.png|link=]] [[Arquivo:Caverna shoal_mapa 2.png|link=]]</center> <br> | |||
<center>[[Arquivo:Caverna shoal_mapa 3.png|link=]]</center> | |||
== | ==Pokémon== | ||
{| class="wikitable" style="float:left" style="text-align:center;" width="20%" | |||
|- | |||
! colspan="3" | Pokémon disponíveis | |||
|- | |||
| [[Arquivo:131-Lapras.png|link=]] || '''Lapras''' || [[Arquivo:Pokeball.png|15px|link=]] | |||
|- | |||
| [[Arquivo:073-Tentacruel.png|link=]] || '''Tentacruel''' || [[Arquivo:Pokeball.png|15px|link=]] | |||
|- | |||
| [[Arquivo:362-Glalie.png|link=]] || '''Glalie''' || [[Arquivo:Pokeball.png|15px|link=]] | |||
|- | |||
| [[Arquivo:364-Sealeo.png|link=]] || '''Sealeo''' || [[Arquivo:Pokeball.png|15px|link=]] | |||
|- | |||
| [[Arquivo:225-Delibird.png|link=]] || '''Delibird''' || | |||
|- | |||
| [[Arquivo:361-Snorut.png|link=]] || '''Snorunt''' || | |||
|- | |||
| [[Arquivo:072-Tentacool.png|link=]] || '''Tentacool''' || | |||
|- | |||
| [[Arquivo:075-Graveler.png|link=]] || '''Graveler''' || | |||
|- | |||
| [[Arquivo:074-Geodude.png|link=]] || '''Geodude''' || | |||
|- | |||
| [[Arquivo:042-Golbat.png|link=]] || '''Golbat''' || | |||
|- | |||
| [[Arquivo:041-Zubat.png|link=]] || '''Zubat''' || | |||
|} | |||
{| class="wikitable" style="float:right" style="text-align:center;" width="20%" | |||
|- | |||
! colspan="3" | Shiny | |||
|- | |||
| [[Arquivo:073-Sh_Tentacruel.png|link=]] || '''Shiny Tentacruel''' || [[Arquivo:Pokeball.png|15px|link=]] | |||
|- | |||
| [[Arquivo:072-Sh_Tentacool.png|link=]] || '''Shiny Tentacool''' || [[Arquivo:Pokeball.png|15px|link=]] | |||
|- | |||
| [[Arquivo:042-Sh_Golbat.png|link=]] || '''Shiny Golbat''' || [[Arquivo:Pokeball.png|15px|link=]] | |||
|- | |||
| [[Arquivo:041-Sh_Zubat.png|link=]] || '''Shiny Zubat''' || [[Arquivo:Pokeball.png|15px|link=]] | |||
|} | |||
== | [[Arquivo:Pokeball.png|15px|link=]] '''= Pokémon capturáveis''' | ||
==Recompensas:== | |||
{| class ="wikitable" style="text-align:center" width="35%" | |||
! colspan="2" | Item | |||
! Quantidade | |||
! Raridade | |||
|- | |||
| [[file:Study Notes.png|link=]] || Study Notes || 20 || Comum | |||
{| class="wikitable | |||
! | |||
! | |||
! | |||
|- | |- | ||
| | | [[Arquivo:Bag_of_Nightmare_Experience_Candy.png|link=]] || Bag Of Nightmare Experience Candy || 1 || Comum | ||
|- | |- | ||
! colspan="4" | [[Arquivo:Exp_icon.png|30px|link=]] 100.000 de experiência para o jogador | |||
|- | |- | ||
! colspan="4" | [[Arquivo:Exp_icon.png|30px|link=]] 300 de experiência para o aluno | |||
|- | |- | ||
|} | |} | ||

Este Mercador é responsável por trocar itens especiais dropáveis dos Nightmare Terrors por Black Star Pieces.
Observação: Black Star Pieces são itens necessários para criar o Voidmania Rift Crystal.
O Duke aparecerá aleatoriamente próximo a entrada dos Nightmare Terrors.
Este mercador só poderá trocar o item referente ao Nightmare Terror ao qual ele estiver próximo.
| Kairiki |
|---|
|
|
| Recebe | Entrega |
|---|---|
Giant Belt |
Black Star Piece |
| Kame |
|---|
|
| Recebe | Entrega |
|---|---|
Giant Shell |
Black Star Piece |
| Ptera |
|---|
|
| Recebe | Entrega |
|---|---|
Ptera's Head |
Black Star Piece |
| Riza |
|---|
|
| Recebe | Entrega |
|---|---|
Giant Fire Tail |
Black Star Piece |
| Raito |
|---|
|
| Recebe | Entrega |
|---|---|
Giant Electric Remains |
Black Star Piece |
| Gyakko |
|---|
|
| Recebe | Entrega |
|---|---|
Giant Red Gyarados Tail |
Black Star Piece |
| Gama |
|---|
|
| Recebe | Entrega |
|---|---|
Giant Bulb |
Black Star Piece |
| Seishin & Yurei |
|---|
|
|
| Recebe | Entrega |
|---|---|
Giant Creepy Remains |
Black Star Piece |
| Kitsune |
|---|
|
|
| Recebe | Entrega |
|---|---|
Giant Corrupted Hair |
Black Star Piece |

Tempo de conclusão: 15 minutos
Experiência obtida pelo aluno: 300
Experiência obtida pelo jogador: 100.000
Recompensas garantidas:
20 ![]() Study Notes
Study Notes
1 ![]() Bag of Nightmare Experience Candy
Bag of Nightmare Experience Candy
O jogador deverá usar uma quantidade específica de Friend Balls para tentar capturar Bronzong e Bronzor.
O jogador deverá matar uma quantidade específica de Pokémon de Bronzong e Bronzor
| Pokémon disponíveis | ||
|---|---|---|
| Bronzong | ||
| Bronzor | ||
| Shiny Bronzong | ||
![]() = Pokémon capturáveis
= Pokémon capturáveis

Tempo de conclusão: 15 minutos
Experiência obtida pelo aluno: 300
Experiência obtida pelo jogador: 100.000
Derrotar Pokémon: ![]()
Capturar Pokémon: ![]()


| Pokémon disponíveis | ||
|---|---|---|
| Lapras | ||
| Tentacruel | ||
| Glalie | ||
| Sealeo | ||
| Delibird | ||
| Snorunt | ||
| Tentacool | ||
| Graveler | ||
| Geodude | ||
| Golbat | ||
| Zubat | ||
| Shiny | ||
|---|---|---|
| Shiny Tentacruel | ||
| Shiny Tentacool | ||
| Shiny Golbat | ||
| Shiny Zubat | ||
![]() = Pokémon capturáveis
= Pokémon capturáveis
| Item | Quantidade | Raridade | |
|---|---|---|---|
| Study Notes | 20 | Comum | |
| Bag Of Nightmare Experience Candy | 1 | Comum | |