|
|
| Linha 1: |
Linha 1: |
| Renee | | Renee |
| <center>[[Arquivo:Banner tower.jpg|link=Embedded Tower]]<br></center>
| |
|
| |
|
| | == '''PokéPark Temático''' == |
|
| |
|
|
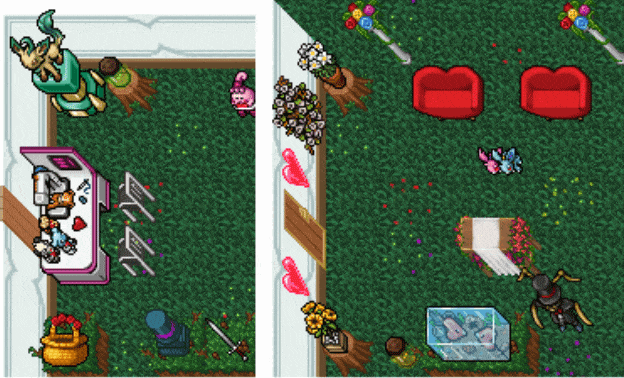
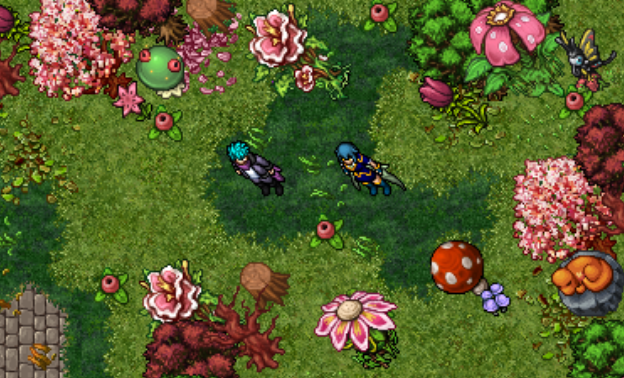
| | Participe do evento do PokéPark e encontre Pokémon que só podem ser vistos por lá durante esta época:<BR> |
| <span style="color:red">'''Nível Necessário:</span> - <br>
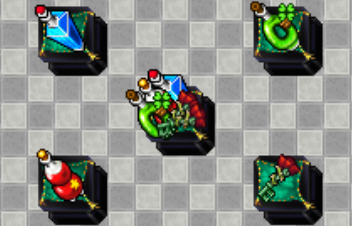
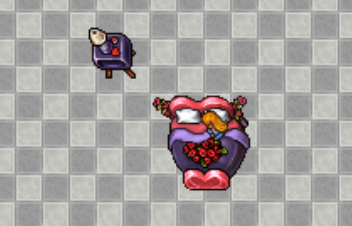
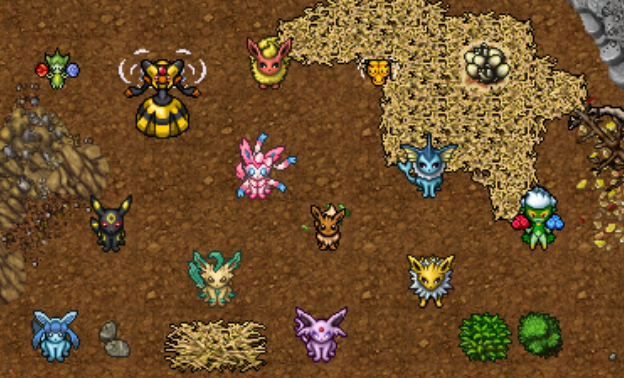
| | Encontre [[Arquivo:416-Vespiquen.png|link=Vespiquen]] Vespiquen, [[Arquivo:415-Combee.png|link=Combee]] Combee, [[Arquivo:315-Roselia.png|link=Roselia]] Roselia, [[Arquivo:407-Roserade.png|link=Roserade]] Roserade, [[Arquivo:133-Eevee.png|link=Eevee]] Eevee, [[Arquivo:134-Vaporeon.png|link=Vaporeon]] Vaporeon, [[Arquivo:136-Flareon.png|link=Flareon]] Flareon, [[Arquivo:135-Jolteon.png|link=Jolteon]] Jolteon, [[Arquivo:197-Umbreon.png|link=Umbreon]] Umbreon, [[Arquivo:196-Espeon.png|link=Espeon]] Espeon, [[Arquivo:700-Sylveon.png|link=Sylveon]] Sylveon, [[Arquivo:471-Glaceon.png|link=Glaceon]] Glaceon e [[Arquivo:470-Leafeon.png|link=Leafeon]] Leafeon em qualquer área do PokéPark durante o Evento de Dia dos Namorados. <br> |
| <span style="color:red">'''Nível Recomendado:</span> 150+ <br>
| |
| <span style="color:red">'''Recompensa:</span> - (imagem do painel de recompensas da torre)
| |
|
| |
|
| <b>Caso encontre algum erro ou queira acrescentar alguma informação,</b> <span style="color:red">'''entre em contato com um dos membros da wiki.</span>
| |
|
| |
|
| |
|
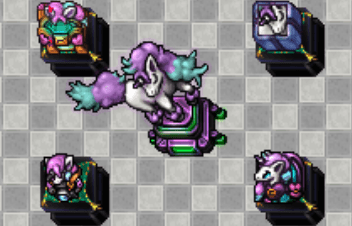
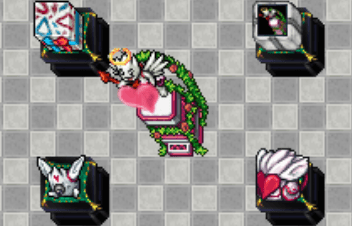
| | <center> [[Arquivo:PokéPark_Dia Dos Namorados_2024.png|link=]] </center> <br> |
|
| |
|
| ==<b>Como conseguir acesso a Embedded Tower?</b>== <!--T:4-->
| |
|
| |
|
| |
|
| Primeiramente você deve ir até Phenac e falar com o Professor Syncamore. Ele dirá que está fazendo uma pesquisa na torre e que não conseguiu avançar por causa da existência de Pokémon com uma força maior que o normal. Em seguida, ele conta que o último pesquisador que entrou na torre se machucou ao sair e que não havia mais ninguém para enviar. Ele irá propor um acordo oferecendo uma premiação caso você consiga ajudá-lo.
| | <table class="seeMore"> |
| | <tr> |
| | <td class="seeMore__image">[[Arquivo:Telekinetic-compass.gif|link=]]</td> |
| | <td> '''Veja mais: [[PokéPark]]'''</td> |
| | </tr> |
| | </table> |
|
| |
|
|
| | == Workshop de Dia dos Namorados == |
| <center>[[Arquivo:Syncamore12.jpg|link=Embedded_Tower]]</center>
| |
|
| |
|
|
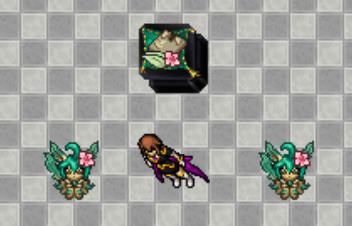
| | Troque Lovely Tokens por Addons, mochilas, Lockers e decorativos no '''Valentine's Workshop'''. |
| *Após isso, o Professor irá pedir para que você fale com um de seus pesquisadores que está no deserto ao leste de Phenac, fazendo pesquisas. O nome dele é Barry e ele irá te ajudar a entrar na torre. | | * '''Observação:''' Os [[Arquivo:Lovely Token.png|link=]] Lovely Tokens que sobrarem se transformarão em itens descartáveis próximo do início do Evento de Dia dos Namorados 2025. <br><br> |
|
| |
|
|
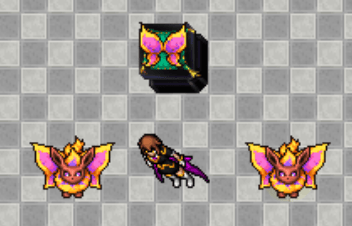
| | <center> [[file:Workshop Dia Dos Namorados_2024.gif|link=]]</center><br><br> |
| <center>[[Arquivo:Barry.png|link=Embedded_Tower]]</center> | |
|
| |
|
| | == '''Novos Addons''' == |
| | Conquiste novos Addons temáticos para Typhlosion, Goodra, Vanilluxe, Perrserker. <br> |
|
| |
|
|
| |
| *Barry pedirá que você encontre a sua mochila que poderá estar em um destes locais:
| |
|
| |
|
|
| |
| {| class="wikitable" width="60%"
| |
| ! width="31%" style="background-color: #483D8B" | <span style="color:white">Possíveis locais onde a bag pode aparecer ou já foi encontrada:</span>
| |
| | width="3%" style="border-top-style: hidden; border-width: 1px; border-bottom-style: hidden; border-width: 1px" |
| |
| ! width="32%" style="background-color: #483D8B" | <span style="color:white">Possíveis locais onde a bag pode aparecer ou já foi encontrada:</span>
| |
| |- align="center"
| |
| | [[Arquivo:Possivel 1.png|link=Embedded Tower]]
| |
| | width="4%" style="border-top-style: hidden; border-width: 1px; border-bottom-style: hidden; border-width: 1px" |
| |
| | [[Arquivo:Possivel 2.png|link=Embedded Tower]]
| |
| |-
| |
| | height="30px" style="border-left-style: hidden; border-width: 1px; border-right-style: hidden; border-width: 1px" |
| |
| |-
| |
| ! style="background-color: #483D8B" | <span style="color:white">Possíveis locais onde a bag pode aparecer ou já foi encontrada:</span>
| |
| | style="border-top-style: hidden; border-width: 1px; border-bottom-style: hidden; border-width: 1px" |
| |
| ! style="background-color: #483D8B" | <span style="color:white">Possíveis locais onde a bag pode aparecer ou já foi encontrada:</span>
| |
| |- align="center"
| |
| | [[Arquivo:Possivel 3.png|link=Embedded Tower]]
| |
| | width="4%" style="border-top-style: hidden; border-width: 1px; border-bottom-style: hidden; border-width: 1px" |
| |
| | [[Arquivo:Possivel 4.png|link=Embedded Tower]]
| |
| |-
| |
| | height="30px" style="border-left-style: hidden; border-width: 1px; border-right-style: hidden; border-width: 1px" |
| |
| |-
| |
| ! style="background-color: #483D8B" | <span style="color:white">Possíveis locais onde a bag pode aparecer ou já foi encontrada:</span>
| |
| | style="border-top-style: hidden; border-width: 1px; border-bottom-style: hidden; border-width: 1px" |
| |
| ! style="background-color: #483D8B" | <span style="color:white">Possíveis locais onde a bag pode aparecer ou já foi encontrada:</span>
| |
| |- align="center"
| |
| | [[Arquivo:Possivel 5.png|link=Embedded Tower]]
| |
| | width="4%" style="border-top-style: hidden; border-width: 1px; border-bottom-style: hidden; border-width: 1px" |
| |
| | [[Arquivo:Possivel 6.png|link=Embedded Tower]]
| |
| |-
| |
| | height="30px" style="border-left-style: hidden; border-width: 1px; border-right-style: hidden; border-width: 1px" |
| |
| |-
| |
| ! style="background-color: #483D8B" | <span style="color:white">Possíveis locais onde a bag pode aparecer ou já foi encontrada:</span>
| |
| | style="border-top-style: hidden; border-width: 1px; border-bottom-style: hidden; border-width: 1px" |
| |
| ! style="background-color: #483D8B" | <span style="color:white">Possíveis locais onde a bag pode aparecer ou já foi encontrada:</span>
| |
| |- align="center"
| |
| | [[Arquivo:Possivel 7.png|link=Embedded Tower]]
| |
| | width="4%" style="border-top-style: hidden; border-width: 1px; border-bottom-style: hidden; border-width: 1px" |
| |
| | [[Arquivo:Possivel 8.png|link=Embedded Tower]]
| |
| |-
| |
| |}
| |
|
| |
|
| |
|
| |
| *Depois disto, retorne ao Berry para entregar a sua mochila e ele lhe entregará o Sky Pillar emblem:
| |
|
| |
|
| |
| <center>[[Arquivo:Sky Pillar emblem1.png|link=Embedded_Tower]]</center>
| |
|
| |
|
| |
| *Conversando com o NPC Professor Sycamore, ele irá continuar a história da Embedded Tower e liberando-a, assim como pedir para que você recupere alguns fragmentos do artefato de cada um dos andares da Tower.
| |
|
| |
| ==<b>Funcionamento Geral da Embbeded Tower</b>== <!--T:26-->
| |
| A Tower é um conteúdo semanal, sendo possível realizar a qualquer momento durante toda semana, resetando sempre toda '''Segunda Feira ás 07:40'''. o sistema possui 15 tentativas semanais, sendo consumidas ao entrar porém o numero de tentativas consumidas pela tower varia de acordo com os andares, em caso de falha na torre o sistema devolve algumas tentativas variando conforme tabela abaixo:
| |
|
| |
| <center> | | <center> |
| {| class="wikitable" width="31%" | | {| style="text-align:center" width="45%" |
| ! width="4%" style="background-color: #9d1a64" | <span style="color:white">Andar</span>
| |
| ! width="7%" style="background-color: #9d1a64" | <span style="color:white">Tentativas Necessárias</span>
| |
| ! width="7%" style="background-color: #9d1a64" | <span style="color:white">Tentativas Devolvidas</span>
| |
| |- | | |- |
| | align="center" | '''1° ao 5º Andar'''
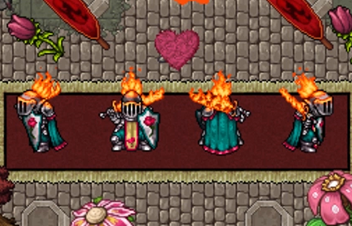
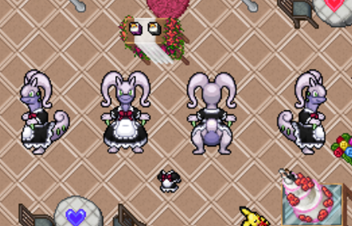
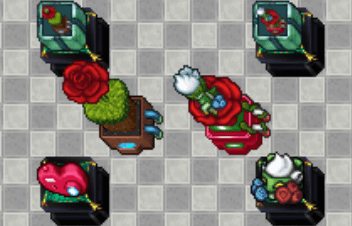
| | |'''Order of The Rose Warrior''' <br> [[file:Order of The Rose Warrior Valentines 2024.png|link=]] || '''Maid Coffee''' <br> [[file:Maid Coffee Valentines 2024.png|link=]] |
| | align="center" | '''2 Tentativas''' | |
| | align="center" | '''1 Tentativa''' | |
| |- | | |- |
| | align="center" | '''6º Andar'''
| | !colspan="2" | |
| | align="center" | '''6 Tentativas'''
| |
| | align="center" | '''4 Tentativas'''
| |
| |- | | |- |
| | align="center" | '''7º Andar'''
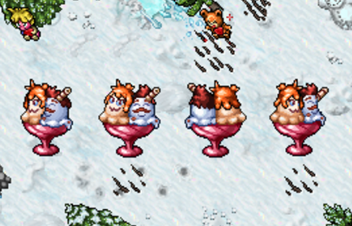
| | |'''Lovely Sundae''' <br> [[file:Lovely Sundae Valentines 2024.png|link=]] || '''Gentleman Suit''' <br> [[file:Gentleman Suit Valentines 2024.png|link=]] |
| | align="center" | '''8 Tentativas''' | | |- |
| | align="center" | '''6 Tentativas''' | | |} |
| |- | |
| |} | |
| </center> | | </center> |
|
| |
|
| Os andares possuem uma experiência variada e uma pontuação fixa sendo os Tower Points ('''[[Arquivo:Tower Points.png|29px|link=]]''') do 1° ao 5º Andar e Wish Points ('''[[Arquivo:Wish_Points.png|22px|link=]]''') no 6º Andar e 7º Andar.
| | == '''Trajes''' == |
|
| |
|
| <center>
| | Complete a tarefa do '''Link''' no saguão do castelo do Rei Charizard e ganhe um traje exclusivo. <br> |
| {| class="wikitable" width="41%"
| |
| ! width="4%" style="background-color: #9d1a64" | <span style="color:white">Andar</span>
| |
| ! width="8%" style="background-color: #9d1a64" | <span style="color:white">Experiência Obtida [[Arquivo:XP Normal.png|26px|link=]]</span>
| |
| ! width="7%" style="background-color: #9d1a64" | <span style="color:white"> Pontos </span>
| |
| |-
| |
| | align="center" | '''1° Andar'''
| |
| | align="center" | ''' Nivel 1 ao 424 150.000 de XP '''<br> '''Nivel 425 ao 449 37.500 de XP '''<br> '''Nivel 450 ao 600 18.750 de XP '''
| |
| | align="center" | '''[[Arquivo:Tower Points.png|29px|link=]]'''<br> '''40 Tower Points '''
| |
| |-
| |
| | align="center" | '''2° Andar'''
| |
| | align="center" | '''Nivel 1 ao 424 200.000 de XP '''<br> '''Nivel 425 ao 449 50.000 de XP '''<br> '''Nivel 450 ao 600 25.000 de XP '''
| |
| | align="center" | '''[[Arquivo:Tower Points.png|29px|link=]]'''<br> '''80 Tower Points '''
| |
| |-
| |
| | align="center" | '''3° Andar'''
| |
| | align="center" | '''Nivel 1 ao 424 250.000 de XP '''<br> '''Nivel 425 ao 449 62.500 de XP '''<br> '''Nivel 450 ao 600 31.250 de XP '''
| |
| | align="center" | '''[[Arquivo:Tower Points.png|29px|link=]]'''<br> '''120 Tower Points '''
| |
| |-
| |
| |-
| |
| | align="center" | '''4° Andar'''
| |
| | align="center" | '''Nivel 1 ao 424 300.000 de XP '''<br> '''Nivel 425 ao 449 75.000 de XP '''<br> '''Nivel 450 ao 600 37.500 de XP '''
| |
| | align="center" | '''[[Arquivo:Tower Points.png|29px|link=]]'''<br> '''160 Tower Points '''
| |
| |-
| |
| |-
| |
| | align="center" | '''5° Andar'''
| |
| | align="center" | '''Nivel 1 ao 424 600.000 de XP '''<br> '''Nivel 425 ao 449 150.000 de XP '''<br> '''Nivel 450 ao 600 75.000 de XP '''
| |
| | align="center" | '''[[Arquivo:Tower Points.png|29px|link=]]'''<br> '''500 Tower Points ''' <br> '''300 Tower Points '''
| |
| |-
| |
| |-
| |
| | align="center" | '''6° Andar'''
| |
| | align="center" | '''Nivel 450 ao 600 1.000.000 de XP '''
| |
| | align="center" | '''[[Arquivo:Wish_Points.png|22px|link=]]''' <br> '''50 Wish Points '''
| |
| |-
| |
| |-
| |
| | align="center" | '''7° Andar'''
| |
| | align="center" | '''Nivel 525 ao 600 6.000.000 de XP '''
| |
| | align="center" | '''[[Arquivo:Wish_Points.png|22px|link=]]''' <br> '''150 Wish Points '''
| |
| |-
| |
| |-
| |
| |}
| |
| </center>
| |
|
| |
|
| == <b>Tower Points e Wish Points</b>==
| |
| Tower Points ('''[[Arquivo:Tower Points.png|29px|link=]]''') são usados para Liberar os Andares e para resgastes através do mural, o desbloqueio dos andares varia de acordo com cada andar.
| |
| <center>
| |
| {| class="wikitable" width="25%"
| |
| ! width="3%" style="background-color: #9d1a64" | <span style="color:white">Item</span>
| |
| ! width="3%" style="background-color: #9d1a64" | <span style="color:white">Pontos Necessários</span>
| |
|
| |
|
| |-
| | <center>[[Arquivo: Trajes Namorados 2024.png|link=]] </center> |
| | align="center" | '''[[Arquivo:Shinysalamence.png|Shiny Salamence|link=]]''' 1º Andar
| |
| | align="center" | '''Liberado'''
| |
| |-
| |
| |-
| |
| | align="center" | '''[[Arquivo:Shinymagmortar.png|Shiny Magmortar|link=]]''' 2º Andar
| |
| | align="center" | '''Liberado'''
| |
| |-
| |
| |-
| |
| | align="center" | '''[[Arquivo:Shinyelectivire.png|Shiny Electivire|link=]]''' 3º Andar
| |
| | align="center" | '''Liberado'''
| |
| |-
| |
| |-
| |
| | align="center" | '''[[Arquivo:Shinyscizor.png|Shiny Scizor|link=]]''' 4º Andar
| |
| | align="center" | '''Liberado'''
| |
| |-
| |
| |-
| |
| | align="center" | '''[[Arquivo:Regis.png|Regigigas, Regirock, Registeel e Regice|link=]]''' 5º Andar
| |
| | align="center" | '''300 Tower Points'''
| |
| |-
| |
| |-
| |
| | align="center" | '''[[Arquivo:Groudon_e_Kyogre.png|Groudon e Kyogre|link=]]''' 6º Andar
| |
| | align="center" | '''600 Tower Points'''
| |
| |-
| |
| |-
| |
| | align="center" | '''[[Arquivo:Rayquaza.png|Rayquaza|link=]]''' 7º Andar
| |
| | align="center" | '''1200 Tower Points'''
| |
| |-
| |
| |}
| |
| </center> | |
|
| |
|
| As recompensas da torre diferente de outros conteúdos, não te limitam a finalizar todos os andares para resgatar sua recompensa, exceto no 6° e 7° andar, no qual é necessário ter finalizado o 7o andar pelo menos uma vez para ter acesso a uma parte das recompensas.
| | == '''Loja de Diamantes''' == |
|
| |
|
| <center><b>Possiveis Resgates com Tower Points</b>
| | Garanta novos itens e pacotes promocionais na [[Arquivo:DD.gif|link=]] Loja de Diamantes. |
| | | <center> |
| {| class="wikitable" width="30%"
| | {|style="text-align: center" width="60%" |
| ! width="3%" style="background-color: #9d1a64" | <span style="color:white">Item</span>
| | |width="20%"|[[file:label new.png|link=]] ''' Valentine's Builder Kit''' <br> [[file:Valentines Builder Kit Namorados 2024.gif|link=]] <br><br> [[Arquivo:DD.gif|link=]] 10 Diamantes <br> <font size="1">Mude o piso da sua casa com 4 novos pisos desta edição temática.<br><br></font> |
| ! width="3%" style="background-color: #9d1a64" | <span style="color:white">Pontos Necessários</span>
| | |width="20%"|[[file:label new.png|link=]] '''Eevee Ticket Pack''' <br>[[file:Eevee Ticket Pack Namorados 2024.png|link=]] <br><br> [[Arquivo:DD.gif|link=]] 25 Diamantes <br> <font size="1">'''Item único:''' 10x Eevee Ticket e 15x Chocolate Star.<br><br></font> |
| ! width="1%" style="background-color: #9d1a64" | <span style="color:white">Possível Vender</span>
| | |width="20%"|[[file:label new.png|link=]] '''Profession Booster Pack''' <br> [[file:Profession Booster Pack Namorados 2024.png|link=]] <br><br> [[Arquivo:DD.gif|link=]] 30 Diamantes <br> <font size="1">'''Item único:''' 5x Profession Booster.<br><br></font> |
| |-
| |
| | align="center" | [[Arquivo:GUc8LUi.png|Mystic Star|link=]] '''Mystic Star'''
| |
| | align="center" | '''300 Pontos'''
| |
| | align="center" | '''[[Arquivo:Comvip.png|link=]]'''
| |
| |-
| |
| |-
| |
| | align="center" |[[Arquivo:Teleport_Tower.png|30px|link=]] ''' Teleport Tower '''
| |
| | align="center" | '''1000 Pontos''' | |
| | align="center" | '''[[Arquivo:Semvip.png|link=]]'''
| |
| |-
| |
| |-
| |
| | align="center" | [[Arquivo:Flying_License.png|Flying License|link=]]'''Flying License'''
| |
| | align="center" | '''1500 Pontos'''
| |
| | align="center" | '''[[Arquivo:Semvip.png|link=]]'''
| |
| |-
| |
| |-
| |
| | align="center" | [[Arquivo:Smeargle_Reset.png|Smeargle Reset|link=]] ''' Smeargle Reset '''
| |
| | align="center" | '''1500 Pontos'''
| |
| | align="center" | '''[[Arquivo:Comvip.png|link=]]'''
| |
| |- | |
| |-
| |
| | align="center" | [[Arquivo:Shiny_ditto_memory.png|Shiny Ditto Memory|link=]] ''' Shiny Ditto Memory '''
| |
| | align="center" | '''3000 Pontos'''
| |
| | align="center" | '''[[Arquivo:Comvip.png|link=]]'''
| |
| |-
| |
| |-
| |
| | align="center" | [[Arquivo:Embedded-Tower2.gif|Embedded Box|link=]] ''' Embedded Box '''
| |
| | align="center" | '''18000 Pontos'''
| |
| | align="center" | '''[[Arquivo:Comvip.png|link=]]'''
| |
| |- | |
| |-
| |
| | align="center" | [[Arquivo:Tyranitarite.png|Tyranitarite|link=]] ''' Tyranitarite '''
| |
| | align="center" | '''18000 Pontos'''
| |
| | align="center" | '''[[Arquivo:Comvip.png|link=]]'''
| |
| |-
| |
| |-
| |
| | align="center" | [[Arquivo:Venusaurite.png|Venusaurite|link=]] ''' Venusaurite '''
| |
| | align="center" | '''18000 Pontos'''
| |
| | align="center" | '''[[Arquivo:Comvip.png|link=]]'''
| |
| |-
| |
| |-
| |
| | align="center" | [[Arquivo:Blastoisinite.png|Blastoisinite|link=]] ''' Blastoisinite '''
| |
| | align="center" | '''18000 Pontos''' | |
| | align="center" | '''[[Arquivo:Comvip.png|link=]]'''
| |
| |-
| |
| |-
| |
| | align="center" | [[Arquivo:Charizardite_Y.png|Charizardite Y|link=]] ''' Charizardite Y '''
| |
| | align="center" | '''18000 Pontos'''
| |
| | align="center" | '''[[Arquivo:Comvip.png|link=]]'''
| |
| |-
| |
| |-
| |
| | align="center" | [[Arquivo:Charizardite_X.png|Charizardite X|link=]] ''' Charizardite X '''
| |
| | align="center" | '''18000 Pontos'''
| |
| | align="center" | '''[[Arquivo:Comvip.png|link=]]'''
| |
| |-
| |
| |-
| |
| | align="center" | [[Arquivo:Alakazite.png|Alakazite|link=]] '''Alakazite'''
| |
| | align="center" | '''18000 Pontos'''
| |
| | align="center" | '''[[Arquivo:Comvip.png|link=]]'''
| |
| |-
| |
| |-
| |
| | align="center" | [[Arquivo:Ampharosite.png|Ampharosite|link=]] '''Ampharosite'''
| |
| | align="center" | '''18000 Pontos'''
| |
| | align="center" | '''[[Arquivo:Comvip.png|link=]]'''
| |
| |-
| |
| |- | | |- |
| | align="center" | [[Arquivo:Gengarite.png|Gengarite|link=]] '''Gengarite'''
| | |[[file:label new.png|link=]] ''' Galarian Ponyta Box'''<br> [[file:Galarian Ponyta Box Namorados 2024.gif|link=]] <br><br>[[Arquivo:DD.gif|link=]] 30 Diamantes <br> <font size="1"> 1x Galarian Ponyta Locker, 1x Galarian Ponyta Backpack,1x Galarian Ponyta TV Camera e 1x Empty Galarian Ponyta Box.<br><br></font> |
| | align="center" | '''18000 Pontos''' | | |[[file:label new.png|link=]] '''Growing Fireflies Ball Capsule '''<br>[[file:Growing Fireflies Ball Capsule Namorados 2024.gif|link=]] <br><br>[[Arquivo:DD.gif|link=]] 7 Diamantes <br> <font size="1">Este efeito é visual e não influencia nas estatísticas do Pokémon.<br><br><br></font> |
| | align="center" | '''[[Arquivo:Comvip.png|link=]]''' | | |[[file:label new.png|link=]] '''Mystic Blossom'''<br>[[file:Mystic Blossom Namorados 2024.gif|link=]] <br><br>[[Arquivo:DD.gif|link=]] 20 Diamantes <br> <font size="1">Esta fantasia não influencia nas estatísticas do Pokémon.<br><br><br></font> |
| |- | | |- |
| | |[[file:label new.png|link=]] ''' Mystic Flamepetal'''<br> [[file:Mystic Flamepetal Namorados 2024.gif|link=]] <br><br>[[Arquivo:DD.gif|link=]] 20 Diamantes <br> <font size="1">Esta fantasia não influencia nas estatísticas do Pokémon.<br><br></font> |
| | |'''Borage Flower Pack'''<br>[[file:Borage Flower Pack Namorados 2024.png|link=]] <br><br>[[Arquivo:DD.gif|link=]] 25 Diamantes <br> <font size="1">'''Item único:''' 15x Borage Flower.<br><br></font> |
| | |'''Valentine's Dimensional Pack'''<br>[[file:Valentines Dimensional Pack Namorados 2024.png|link=]] <br><br>[[Arquivo:DD.gif|link=]] 25 Diamantes <br> <font size="1">'''Itens Únicos:''' 20x Flask of Lucky Elixir, 20x Flask of Catch Elixir, <br>20x Flask of Experience Elixir e 20x Lovely Dimensional Key.<br></font> |
| |- | | |- |
| | align="center" | [[Arquivo:Mawilite.png|Mawilite|link=]] '''Mawilite''' | | | ''' Pink Heart Ball Capsule (2021) '''<br> [[file:Pink Heart Ball Capsule (2021) Namorados 2024.gif|link=]] <br><br>[[Arquivo:DD.gif|link=]] 7 Diamantes <br> <font size="1">Este efeito é visual e não influencia nas estatísticas do Pokémon.<br><br></font> |
| | align="center" | '''18000 Pontos''' | | |'''Lovely Heart Ball Capsule (2022)'''<br>[[file:Lovely Heart Ball Capsule (2022) Namorados 2024.gif|link=]] <br><br>[[Arquivo:DD.gif|link=]] 7 Diamantes <br> <font size="1">Este efeito é visual e não influencia nas estatísticas do Pokémon.<br><br></font> |
| | align="center" | '''[[Arquivo:Comvip.png|link=]]''' | | |'''Blue Roses Ball Capsule (2023)'''<br>[[file:Blue Roses Ball Capsule (2023) Namorados 2024.gif|link=]] <br><br>[[Arquivo:DD.gif|link=]] 7 Diamantes <br> <font size="1">Este efeito é visual e não influencia nas estatísticas do Pokémon.<br><br></font> |
| |- | | |- |
| | | '''Togetic Box'''<br> [[file:Togetic Box Namorados 2024.gif|link=]] <br><br>[[Arquivo:DD.gif|link=]] 30 Diamantes <br> <font size="1">1x Togetic Locker, 1x Togetic Backpack, 1x Togetic TV Camera e 1x Empty Togetic Box.<br><br></font> |
| | |'''Roserade Box'''<br>[[file:Roserade Box Namorados 2024.gif|link=]] <br><br>[[Arquivo:DD.gif|link=]] 30 Diamantes <br> <font size="1">1x Roserade Locker, 1x Budew Locker, 1x Roserade Backpack, 1x Lovely TV Camera e 1x Empty Roserade Box.<br><br></font> |
| | |'''Vespiquen Box'''<br>[[file:Vespiquen Box Namorados 2024.gif|link=]] <br><br>[[Arquivo:DD.gif|link=]] 30 Diamantes <br> <font size="1">1x Vespiquen Locker, 1x Vespiquen Backpack, 1x Vespiquen TV Camera e 1x Empty Vespiquen Box.<br><br></font> |
| |- | | |- |
| | align="center" | [[Arquivo:Kangaskhanite.png|Kangaskhanite|link=]] '''Kangaskhanite''' | | | '''Lovely Workshop'''<br> [[file:Lovely Workshop Namorados 2024.png|link=]] <br><br>[[Arquivo:DD.gif|link=]] 10 Diamantes <br> <font size="1">Crie Addons e decorativos temáticos.<br><br></font> |
| | align="center" | '''18000 Pontos''' | | |'''Valentine's Bed'''<br>[[file:Valentines Bed Namorados 2024.png|link=]] <br><br>[[Arquivo:DD.gif|link=]] 35 Diamantes <br> <font size="1">Fique AFK sem o risco de ser desconectado do jogo por inatividade.<br><br></font> |
| | align="center" | '''[[Arquivo:Comvip.png|link=]]''' | | |'''Valentine's Bathub'''<br>[[file:Valentines Bathub Namorados 2024.png|link=]] <br><br>[[Arquivo:DD.gif|link=]] 35 Diamantes <br> <font size="1">Fique AFK sem o risco de ser desconectado do jogo por inatividade.<br><br></font> |
| |-
| |
| |} | | |} |
| </center> | | </center> |
|
| |
|
| == <b>1° ao 4º Andar</b>== <!--T:17--> | | == '''Trajes''' == |
| | | As fantasias de Páscoa estão de volta por tempo limitado. Corra para adquiri-las por [[file:DD.gif|link=]] 15 Diamantes cada! |
|
| |
| <b>Regras:</b><br>
| |
| | |
|
| |
| <b>1-</b> Seu objetivo é <b>derrotar todos os pokémon do local</b> e, após isso, derrotar o boss (chefe).<br>
| |
| <b>2-</b> Haverá um <b>limite de 80 poções e 12 revives</b> por tentativa.<br>
| |
| <b>3-</b> Sua premiação dependerá do andar concluído, sendo <b>40 pontos para o primeiro andar, 80 para o segundo, 120 para o terceiro e 160 para o quarto</b>.<br>
| |
| <b>4-</b> <b>Caso encontre um fragmento</b> (falaremos sobre eles depois), <b>você deverá obrigatoriamente concluir o andar</b>, ou o perderá.<br>
| |
| <b>5-</b> <b>Não é possível usar poções ou revives durante a batalha contra o boss.</b><br>
| |
| <b>6-</b> As <b>armadilhas da torre</b> (falaremos sobre elas depois) <b>causam dano em porcentagem fixa</b>, ou seja, não importa seu level ou se possui itens que aumentem a vida de seu personagem, pois a armadilha irá tratar todos os jogadores igualmente. <br>
| |
| <b>7-</b> O jogador terá <b>1h </b>para terminar estes andares;<br>
| |
| | |
|
| |
| Os andares 1 a 4 tem o mesmo mapa. A cada andar, o nível dos pokémon aumentará e, a partir do terceiro andar, existirão pokémon diferentes e mais fortes dos dois anteriores. Seu objetivo é derrotar todos os pokémon do local e, após isso, o boss (chefe) do local.
| |
| *'''obs:''' Os bosses são de elemento '''neutro''' nesses andares.<br>
| |
| ==<b>Fragmentos</b>== <!--T:23-->
| |
| Do primeiro ao quarto andar, os fragmentos se encontram escondidos nos cantos do mapa, até você achar as 4 partes de cada andar, sempre faça devagar olhando cada cantinho, alguns ficam bem escondidos, ao encontrar as 4 partes, volte ao NPC Syncamore e junte as 4 partes para formar o Tablet do andar coletado, falando o nome respectivo a cada uma delas e depois YES. Você deve entregar os fragmentos da tower em ordem. Exemplo: Para entregar os fragmentos do nível 3 você deve antes ter entregado os do nível 2.<br>
| |
| <b>1º - Blackwing Fragment - Recompensa: Blackwing Tablet, 1kk EXP, 1.000 Pontos<br>
| |
| 2º - Cyanflame Fragment - Recompensa: Cyanflame Tablet, 2kk EXP, 1.200 Pontos<br>
| |
| 3º - Whitevolt Fragment - Recompensa: Whitevolt Tablet, 3kk EXP, 1.400 Pontos<br>
| |
| 4º - Greenclaw Fragment - Recompensa: Greenclaw Tablet, 4kk EXP, 2.000 Pontos</b><br>
| |
|
| |
| Abaixo o mapa dos 4 primeiros andares, com os possíveis locais que podem aparecer fragmento:
| |
| | |
|
| |
| <center> | | <center> |
| [[Arquivo:Mapa 1a 4.png|link=Embedded_Tower]]
| |
| </center>
| |
|
| |
|
| Abaixo você poderá conferir os bosses dos andares, seus fragmentos e seus drops:<br>
| | {| class="wikitable" style="text-align:center" |
| | | !colspan="2" | Pikachu Pajamas |
|
| | !colspan="2" | Valentines 2021 |
| <center>
| | ! colspan ="2" | Valentines 2023 |
| {| class="wikitable" width="30%" | |
| ! width="3%" style="background-color: #9d1a64" | <span style="color:white">Andar</span>
| |
| ! width="1%" style="background-color: #9d1a64" | <span style="color:white">Boss</span>
| |
| ! width="1%" style="background-color: #9d1a64" | <span style="color:white">Item</span> | |
| ! width="1%" style="background-color: #9d1a64" | <span style="color:white">Fragmento</span> | |
| ! width="1%" style="background-color: #9d1a64" | <span style="color:white">Tablet</span> | |
| |-
| |
| | align="center" | '''1º - Shiny Salamence'''
| |
| | align="center" | '''[[Arquivo:Shinysalamence.png|Shiny Salamence|link=]]'''
| |
| | align="center" | '''[[Arquivo:Blue wings.png|Blue Wings|link=]]'''
| |
| | align="center" | '''[[Arquivo:JJYlsjR.png|link=]]'''
| |
| | align="center" | '''[[Arquivo:IVH6wXz.png|link=]]'''
| |
| |-
| |
| |-
| |
| | align="center" | '''2º - Shiny Magmortar'''
| |
| | align="center" | '''[[Arquivo:Shinymagmortar.png|Shiny Magmortar|link=]]'''
| |
| | align="center" | '''[[Arquivo:Cyan topknot.png|link=]]'''
| |
| | align="center" | '''[[Arquivo:RJNlJDI.png|link=]]'''
| |
| | align="center" | '''[[Arquivo:S67DFYX.png|link=]]'''
| |
| |-
| |
| |-
| |
| | align="center" | '''3º - Shiny Electivire'''
| |
| | align="center" | '''[[Arquivo:Shinyelectivire.png|Shiny Electivire|link=]]'''
| |
| | align="center" | '''[[Arquivo:White volt paw.png|link=]]'''
| |
| | align="center" | '''[[Arquivo:QuhiFgP.png|link=]]'''
| |
| | align="center" | '''[[Arquivo:RcoPfpy.png|link=]]'''
| |
| |-
| |
| |-
| |
| | align="center" | '''4º Shiny Scizor'''
| |
| | align="center" | '''[[Arquivo:Shinyscizor.png|Shiny Scizor|link=]]'''
| |
| | align="center" | '''[[Arquivo:Green scizor claw.png|link=]]'''
| |
| | align="center" | '''[[Arquivo:W05BAp2.png|link=]]'''
| |
| | align="center" | '''[[Arquivo:QEaziaz.png|link=]]'''
| |
| |- | | |- |
| | |style="border-right-style: hidden" |[[Arquivo:Pikachu_male.png|link=]] || [[Arquivo:Pikachu_female.png|link=]] |
| | |style="border-right-style: hidden" |[[Arquivo:Valentines-2021-outfit-male.png|70px|link=]] || [[Arquivo:Valentines-2021-outfit-female.png|70px|link=]] |
| | |style="border-right-style: hidden" |[[Arquivo:Valentines 2023_Male.png|60px|link=]] || [[Arquivo:Valentines 2023_Female.png|60px|link=]] |
| | |- |
| |} | | |} |
| </center> | | </center> |
|
| |
| *Ao entregar todos os fragmentos, o Sycamore pedirá que você fale com o Professor Birch que fica no andar inferior da Tower.
| |
|
| |
| [[Arquivo:Andar 14.png|link=Embedded_Tower]]
| |
|
| |
|
| |
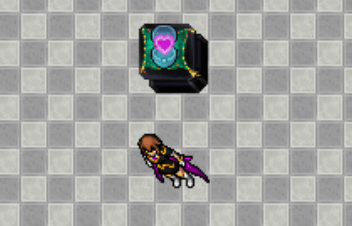
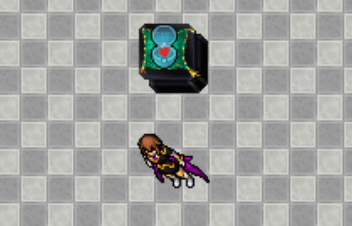
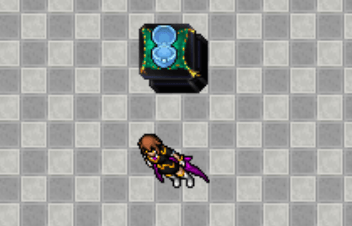
| '''[[Arquivo:Tower Points.png|29px|link=]]'''
| |
| '''[[Arquivo:Wish_Points.png|22px|link=]]'''
| |
|
| |
|
| |
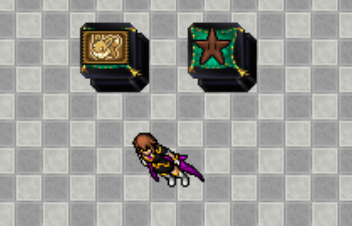
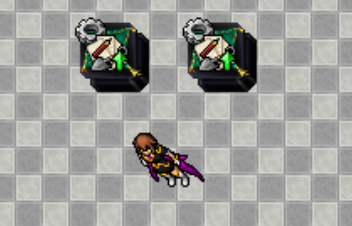
| *Ao conversar com este NPC, ele lhe dará um Ancient Tablet ([[Arquivo:Item4 a 1.png|link=Embedded_Tower]]), e pedirá para conversar com o Professor Sycamore novamente e assim, irá liberar o acesso à Tower 5.
| |
 Lovely Tokens que sobrarem se transformarão em itens descartáveis próximo do início do Evento de Dia dos Namorados 2025.