|
|
| Linha 1: |
Linha 1: |
| Renee | | Renee |
| | ===== PAGINA DE MONUMENTOS ===== |
|
| |
|
| <center>[[Arquivo:Banner tower.jpg|link=Embedded Tower]]<br></center>
| | {|class="wikitable" style= "text-align:center" width= "71%" |
| | | !colspan="2"| Nome |
| | |
| <!--T:1-->
| |
| <span style="color:red">'''Nível Necessário:</span> -
| |
| | |
| <!--T:2-->
| |
| <span style="color:red">'''Nível Recomendado:</span> 150+
| |
| | |
| <!--T:3-->
| |
| <span style="color:red">'''Recompensa:</span> - (imagem do painel de recompensas da torre)
| |
|
| |
| <b>Caso encontre algum erro ou queira acrescentar alguma informação,</b> <span style="color:red">'''entre em contato com um dos membros da wiki.</span>
| |
|
| |
| | |
| | |
| ==<b>Como conseguir acesso a Embbeded Tower?</b>== <!--T:4-->
| |
| | |
| <!--T:5-->
| |
| Primeiramente você deve ir até Phenac e falar com o Professor Syncamore. Ele dirá que está fazendo uma pesquisa na torre e que não conseguiu avançar por causa da existência de Pokémon com uma força maior que o normal. Em seguida, ele conta que o último pesquisador que entrou na torre se machucou ao sair e que não havia mais ninguém para enviar. Ele irá propor um acordo oferecendo uma premiação caso você consiga ajudá-lo.
| |
| | |
| <!--T:6-->
| |
| <center>[[Arquivo:Syncamore12.jpg|link=Embedded_Tower]]</center>
| |
| | |
| <!--T:7-->
| |
| *Após isso, o Professor irá pedir para que você fale com um de seus pesquisadores que está no deserto ao leste de Phenac, fazendo pesquisas. O nome dele é Barry e ele irá te ajudar a entrar na torre.
| |
| | |
| <!--T:8-->
| |
| <center>[[Arquivo:Barry.png|link=Embedded_Tower]]</center>
| |
| | |
| | |
| <!--T:9-->
| |
| *Barry pedirá que você encontre a sua mochila que poderá estar em um destes locais:
| |
| | |
| <!--T:13-->
| |
| {| class="wikitable" width="60%" | |
| ! width="31%" style="background-color: #483D8B" | <span style="color:white">Possíveis locais onde a bag pode aparecer ou já foi encontrada:</span>
| |
| | width="3%" style="border-top-style: hidden; border-width: 1px; border-bottom-style: hidden; border-width: 1px" |
| |
| ! width="32%" style="background-color: #483D8B" | <span style="color:white">Possíveis locais onde a bag pode aparecer ou já foi encontrada:</span> | |
| |- align="center"
| |
| | [[Arquivo:Possivel 1.png|link=Embedded Tower]]
| |
| | width="4%" style="border-top-style: hidden; border-width: 1px; border-bottom-style: hidden; border-width: 1px" |
| |
| | [[Arquivo:Possivel 2.png|link=Embedded Tower]]
| |
| |- | | |- |
| | height="30px" style="border-left-style: hidden; border-width: 1px; border-right-style: hidden; border-width: 1px" | | | | '''Darkrai''' <br> [[file:Monumento_darkrai1.png|link=]] |
| | | '''Fossil''' <br> <tabber> |
| | |-|Tipo 1= [[file:Monumento_osso1.png|link=]] |
| | |-|Tipo 2= [[file:Monumento_fossil2.png|link=]] |
| | |-|Tipo 3= [[file:Monumento_fossil3.png|link=]] |
| | </tabber> |
| |- | | |- |
| ! style="background-color: #483D8B" | <span style="color:white">Possíveis locais onde a bag pode aparecer ou já foi encontrada:</span>
| | | '''Coffin''' <br> <tabber> |
| | style="border-top-style: hidden; border-width: 1px; border-bottom-style: hidden; border-width: 1px" | | | |-|Tipo 1= [[file:Monumento_coffin1.png|link=]] |
| ! style="background-color: #483D8B" | <span style="color:white">Possíveis locais onde a bag pode aparecer ou já foi encontrada:</span>
| | |-|Tipo 2= [[file:Monumento_coffin2.png|link=]] |
| |- align="center" | | </tabber> |
| | [[Arquivo:Possivel 3.png|link=Embedded Tower]]
| | | '''Earth''' <br> <tabber> |
| | width="4%" style="border-top-style: hidden; border-width: 1px; border-bottom-style: hidden; border-width: 1px" | | | |-|Tipo 1= [[file:Monumento_earth1.png|link=]] |
| | [[Arquivo:Possivel 4.png|link=Embedded Tower]] | | |-|Tipo 2= [[file:Monumento_earth2.png|link=]] |
| | </tabber> |
| |- | | |- |
| | height="30px" style="border-left-style: hidden; border-width: 1px; border-right-style: hidden; border-width: 1px" | | | | '''Ice''' <br> <tabber> |
| |-
| | |-|Tipo 1= [[file:Monumento_iceblock1.png|link=]] |
| ! style="background-color: #483D8B" | <span style="color:white">Possíveis locais onde a bag pode aparecer ou já foi encontrada:</span>
| | |-|Tipo 2= [[file:Monumento_iceblock2.png|link=]] |
| | style="border-top-style: hidden; border-width: 1px; border-bottom-style: hidden; border-width: 1px" | | | |-|Tipo 3= [[file:Monumento_iceblock3.png|link=]] |
| ! style="background-color: #483D8B" | <span style="color:white">Possíveis locais onde a bag pode aparecer ou já foi encontrada:</span>
| | </tabber> |
| |- align="center" | | | '''Totem''' <br> |
| | [[Arquivo:Possivel 5.png|link=Embedded Tower]]
| | [[file:Monumento_totem1.png|link=]] |
| | width="4%" style="border-top-style: hidden; border-width: 1px; border-bottom-style: hidden; border-width: 1px" | | | |
| | [[Arquivo:Possivel 6.png|link=Embedded Tower]] | |
| |- | |
| | height="30px" style="border-left-style: hidden; border-width: 1px; border-right-style: hidden; border-width: 1px" | | |
| |- | | |- |
| ! style="background-color: #483D8B" | <span style="color:white">Possíveis locais onde a bag pode aparecer ou já foi encontrada:</span>
| | | '''Gear''' <br> |
| | style="border-top-style: hidden; border-width: 1px; border-bottom-style: hidden; border-width: 1px" |
| | [[file:Monumento_gear1.png|link=]] |
| ! style="background-color: #483D8B" | <span style="color:white">Possíveis locais onde a bag pode aparecer ou já foi encontrada:</span>
| |
| |- align="center"
| |
| | [[Arquivo:Possivel 7.png|link=Embedded Tower]]
| |
| | width="4%" style="border-top-style: hidden; border-width: 1px; border-bottom-style: hidden; border-width: 1px" |
| |
| | [[Arquivo:Possivel 8.png|link=Embedded Tower]]
| |
| |-
| |
| |}
| |
|
| |
|
| | | '''Hypno''' <br> |
| | [[file:Monumento_hypno1.png|link=]] |
|
| |
|
| <!--T:14--> | | |- |
| *Depois disto, retorne ao Berry para entregar a sua mochila e ele lhe entregará o Sky Pillar emblem:
| | | '''Charizard''' <br> |
| | [[file:Monumento_charizard1.png|link=]] |
|
| |
|
| <!--T:15--> | | | '''Gong''' <br> |
| <center>[[Arquivo:Sky Pillar emblem1.png|link=Embedded_Tower]]</center>
| | [[file:Monumento_gong1.png|link=]] |
|
| |
|
| | |- |
| | | '''Fountain''' <br> <tabber> |
| | |-|Tipo 1= [[file:Monumento_fountain1.png|link=]] |
| | |-|Tipo 2= [[file:Monumento_fountain2.png|link=]] |
| | |-|Tipo 3= [[file:Monumento_fountain3.png|link=]] |
| | </tabber> |
| | | '''Sphinx''' <br> |
| | [[file:Monumento_sphinx1.png|link=]] |
|
| |
|
| *Conversando com o NPC Professor Sycamore, ele irá continuar a história da Embedded Tower e liberando-a, assim como pedir para que você recupere alguns fragmentos do artefato de cada um dos andares da Tower.
| | |- |
| | | '''Machoke''' <br> |
| | [[file:Monumento_machoke1.png|link=]] |
|
| |
|
| | | | '''Elekid''' <br> <tabber> |
| ==<b>Funcionamento Geral da Embbeded Tower</b>== <!--T:26-->
| | |-|Tipo 1= [[file:Monumento_elekid1.png|link=]] |
| A Tower eh um conteudo semanal, sendo possível realizar a qualquer momento durante toda semana, resetando sempre toda '''Segunda Feira as 07:40'''. o sistema possui 15 tentativas semanais, sendo consumidos ao entrar porem o numero de tentativas consumidas pela tower varia de acordo com o andar que voce se encontra, em caso de falha na torre o sistema devolve algumas tentativas variando conforme tabela abaixo:
| | </tabber> |
| <!--T:30--> | |
| <center> | |
| {| class="wikitable" width="31%"
| |
| ! width="4%" style="background-color: #9d1a64" | <span style="color:white">Andar</span>
| |
| ! width="7%" style="background-color: #9d1a64" | <span style="color:white">Tentativas Necessarias</span>
| |
| ! width="7%" style="background-color: #9d1a64" | <span style="color:white">Tentativas Devolvidas</span>
| |
| |- | | |- |
| | align="center" | '''1° ao 5º Andar'''
| | | '''Pinsir''' <br> <tabber> |
| | align="center" | '''2 Tentativas''' | | |-|Tipo 1= [[file:Monumento_pinsir1.png|link=]] |
| | align="center" | '''1 Tentativa''' | | </tabber> |
| | | '''Glalie''' <br> <tabber> |
| | |-|Tipo 1= [[file:Monumento_glalie1.png|link=]] |
| | </tabber> |
| |- | | |- |
| | align="center" | '''6º Andar'''
| | | '''Strange Eyes''' <br> |
| | align="center" | '''6 Tentativas'''
| | [[file:Monumento_strangeeyes2.png|link=]] |
| | align="center" | '''4 Tentativas'''
| |
| |-
| |
| | align="center" | '''7º Andar'''
| |
| | align="center" | '''8 Tentativas'''
| |
| | align="center" | '''6 Tentativas'''
| |
| |-
| |
| |}
| |
| </center>
| |
| | |
| Cada Andar possui uma experiencia fixa obtida e recompensa fixa sendo Tower Points ('''[[Arquivo:Tower Points.png|29px|link=]]''') do 1° ao 5º Andar e Wish Points ('''[[Arquivo:Wish_Points.png|22px|link=]]''') no 6º Andar e 7º Andar.
| |
| | |
| | |
| ==- <b>1° ao 4º Andar</b>== <!--T:17-->
| |
| | |
| <!--T:18-->
| |
| <b>Regras:</b><br>
| |
| | |
| <!--T:19-->
| |
| <b>1-</b> Seu objetivo é <b>derrotar todos os pokémon do local</b> e, após isso, derrotar o boss (chefe).<br>
| |
| <b>2-</b> Haverá um <b>limite de 80 poções e 12 revives</b> por tentativa.<br>
| |
| <b>3-</b> Sua premiação dependerá do andar concluído, sendo <b>40 pontos para o primeiro andar, 80 para o segundo, 120 para o terceiro e 160 para o quarto</b>.<br>
| |
| <b>4-</b> <b>Caso encontre um fragmento</b> (falaremos sobre eles depois), <b>você deverá obrigatoriamente concluir o andar</b>, ou o perderá.<br>
| |
| <b>5-</b> <b>Não é possível usar poções ou revives durante a batalha contra o boss.</b><br>
| |
| <b>6-</b> As <b>armadilhas da torre</b> (falaremos sobre elas depois) <b>causam dano em porcentagem fixa</b>, ou seja, não importa seu level ou se possui itens que aumentem a vida de seu personagem, pois a armadilha irá tratar todos os jogadores igualmente. <br>
| |
| <b>7-</b> O jogador terá <b>1h </b>para terminar estes andares;<br>
| |
| | |
| <!--T:20-->
| |
| Os andares 1 a 4 tem o mesmo mapa. A cada andar, o nível dos pokémon aumentará e, a partir do terceiro andar, existirão pokémon diferentes e mais fortes dos dois anteriores. Seu objetivo é derrotar todos os pokémon do local e, após isso, o boss (chefe) do local.
| |
| *'''obs:''' Os bosses são de elemento '''neutro''' nesses andares.<br>
| |
| ==<b>Fragmentos</b>== <!--T:23-->
| |
| Do primeiro ao quarto andar, os fragmentos se encontram escondidos nos cantos do mapa, até você achar as 4 partes de cada andar, sempre faça devagar olhando cada cantinho, alguns ficam bem escondidos, ao encontrar as 4 partes, volte ao NPC Syncamore e junte as 4 partes para formar o Tablet do andar coletado, falando o nome respectivo a cada uma delas e depois YES. Você deve entregar os fragmentos da tower em ordem. Exemplo: Para entregar os fragmentos do nível 3 você deve antes ter entregado os do nível 2.<br>
| |
| <b>1º - Blackwing Fragment - Recompensa: Blackwing Tablet, 1kk EXP, 1.000 Pontos<br>
| |
| 2º - Cyanflame Fragment - Recompensa: Cyanflame Tablet, 2kk EXP, 1.200 Pontos<br>
| |
| 3º - Whitevolt Fragment - Recompensa: Whitevolt Tablet, 3kk EXP, 1.400 Pontos<br>
| |
| 4º - Greenclaw Fragment - Recompensa: Greenclaw Tablet, 4kk EXP, 2.000 Pontos</b><br>
| |
| <!--T:21-->
| |
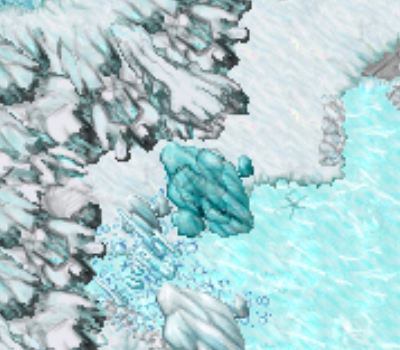
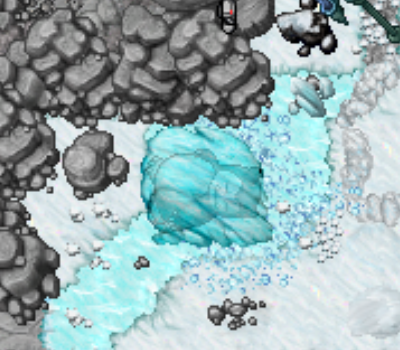
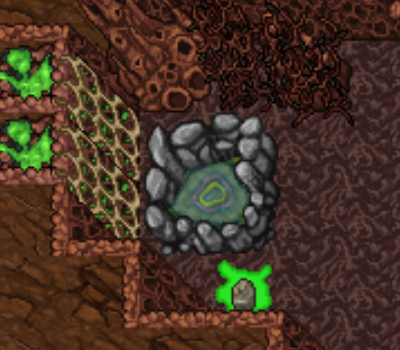
| Abaixo o mapa dos 4 primeiros andares, com os possíveis locais que podem aparecer fragmento:
| |
| | |
| | |
| <!--T:22-->
| |
| <center>
| |
| [[Arquivo:Mapa 1a 4.png|link=Embedded_Tower]] | |
| </center>
| |
| | |
| Abaixo você poderá conferir os bosses dos andares, seus fragmentos e seus drops:<br>
| |
|
| |
|
| <!--T:27-->
| |
| <center>
| |
| {| class="wikitable" width="30%"
| |
| ! width="3%" style="background-color: #9d1a64" | <span style="color:white">Andar</span>
| |
| ! width="1%" style="background-color: #9d1a64" | <span style="color:white">Boss</span>
| |
| ! width="1%" style="background-color: #9d1a64" | <span style="color:white">Item</span>
| |
| ! width="1%" style="background-color: #9d1a64" | <span style="color:white">Fragmento</span>
| |
| ! width="1%" style="background-color: #9d1a64" | <span style="color:white">Tablet</span>
| |
| |-
| |
| | align="center" | '''1º - Shiny Salamence'''
| |
| | align="center" | '''[[Arquivo:Shinysalamence.png|Shiny Salamence|link=]]'''
| |
| | align="center" | '''[[Arquivo:Blue wings.png|Blue Wings|35px|link=]]'''
| |
| | align="center" | '''[[Arquivo:JJYlsjR.png|link=]]'''
| |
| | align="center" | '''[[Arquivo:IVH6wXz.png|link=]]'''
| |
| |-
| |
| |-
| |
| | align="center" | '''2º - Shiny Magmortar'''
| |
| | align="center" | '''[[Arquivo:Shinymagmortar.png|Shiny Magmortar|link=]]'''
| |
| | align="center" | '''[[Arquivo:Cyan topknot.png|25px|link=]]'''
| |
| | align="center" | '''[[Arquivo:RJNlJDI.png|link=]]'''
| |
| | align="center" | '''[[Arquivo:S67DFYX.png|link=]]'''
| |
| |-
| |
| |-
| |
| | align="center" | '''3º - Shiny Electivire'''
| |
| | align="center" | '''[[Arquivo:Shinyelectivire.png|Shiny Electivire|link=]]'''
| |
| | align="center" | '''[[Arquivo:White volt paw.png|25px|link=]]'''
| |
| | align="center" | '''[[Arquivo:QuhiFgP.png|link=]]'''
| |
| | align="center" | '''[[Arquivo:RcoPfpy.png|link=]]'''
| |
| |-
| |
| |-
| |
| | align="center" | '''4º Shiny Scizor'''
| |
| | align="center" | '''[[Arquivo:Shinyscizor.png|Shiny Scizor|link=]]'''
| |
| | align="center" | '''[[Arquivo:Green scizor claw.png|30px|link=]]'''
| |
| | align="center" | '''[[Arquivo:W05BAp2.png|link=]]'''
| |
| | align="center" | '''[[Arquivo:QEaziaz.png|link=]]'''
| |
| |- | | |- |
| |} | | |} |
| </center>
| |
|
| |
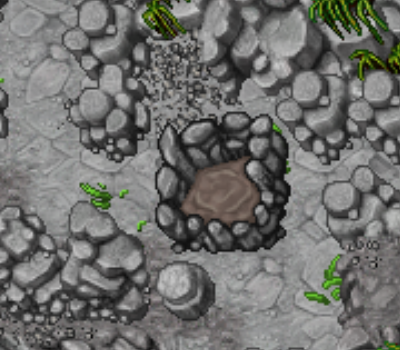
| *Ao entregar todos os fragmentos, o Sycamore pedirá que você fale com o Professor Birch que fica no andar inferior da Tower.
| |
|
| |
| [[Arquivo:Andar 14.png|link=Embedded_Tower]]
| |
|
| |
|
| |
| '''[[Arquivo:Tower Points.png|29px|link=]]'''
| |
| '''[[Arquivo:Wish_Points.png|22px|link=]]'''
| |
|
| |
|
| |
|
| *Ao conversar com este NPC, ele lhe dará um Ancient Tablet ([[Arquivo:Item4 a 1.png|link=Embedded_Tower]]), e pedirá para conversar com o Professor Sycamore novamente e assim, irá liberar o acesso à Tower 5.
| | =testene= |