Shiny Dodrio: mudanças entre as edições
Ir para navegação
Ir para pesquisar
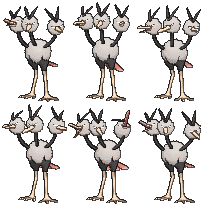
| (5 revisões intermediárias por 3 usuários não estão sendo mostradas) | |||
| Linha 5: | Linha 5: | ||
'''Nome:''' Shiny Dodrio<br /> | '''Nome:''' Shiny Dodrio<br /> | ||
'''Level:''' 100<br /> | '''Level:''' 100<br /> | ||
'''Tier: ''' T1C <br /> | |||
'''Função: ''' Burst Damage Dealer PvP <br /> | |||
'''Elemento:''' Flying<br /> | '''Elemento:''' Flying<br /> | ||
'''Habilidades:''' Ride.<br /> | '''Habilidades:''' Ride and Headbutt.<br /> | ||
'''Boost:''' Feather Stone (2)<br /> | '''Boost:''' Feather Stone (2)<br /> | ||
'''Materia:''' Wingeon Mastered | '''Materia:''' Wingeon Mastered | ||
| Linha 12: | Linha 14: | ||
== '''Evoluções''' == | == '''Evoluções''' == | ||
'''Shiny | '''Shiny Doduo''' precisa de Level 30.<br /> | ||
'''Shiny Dodrio''' precisa de Level 100. | |||
== '''Descrição:''' == | == '''Descrição:''' == | ||
| Linha 24: | Linha 27: | ||
! rowspan="2" | M1 | ! rowspan="2" | M1 | ||
| width="10px" | | | width="10px" | | ||
| align="left" | Uproar ( | | align="left" | Uproar (50s) | ||
| width="50px" rowspan="2" | | | width="50px" rowspan="2" | | ||
| rowspan="2" align="right" | [[Arquivo:AOE.png|AOE]] [[Arquivo:Buff.png|Buff]] [[Arquivo:Slow.png|Slow]] [[Arquivo:NeverBoost.png|Neverboost]] | | rowspan="2" align="right" | [[Arquivo:AOE.png|AOE]] [[Arquivo:Buff.png|Buff]] [[Arquivo:Slow.png|Slow]] [[Arquivo:NeverBoost.png|Neverboost]] | ||
| Linha 35: | Linha 38: | ||
! rowspan="2" | M2 | ! rowspan="2" | M2 | ||
| width="10px" | | | width="10px" | | ||
| align="left" | Peck ( | | align="left" | Peck (10s) | ||
| width="50px" rowspan="2" | | | width="50px" rowspan="2" | | ||
| rowspan="2" align="right" | [[Arquivo:Target.png|Target]] [[Arquivo:Damage.png|Damage]] | | rowspan="2" align="right" | [[Arquivo:Target.png|Target]] [[Arquivo:Damage.png|Damage]] | ||
| Linha 46: | Linha 49: | ||
! rowspan="2" | M3 | ! rowspan="2" | M3 | ||
| width="10px" | | | width="10px" | | ||
| align="left" | | | align="left" | Drill Peck (15s) | ||
| width="50px" rowspan="2" | | | width="50px" rowspan="2" | | ||
| rowspan="2" align="right" | [[Arquivo:Target.png|Target]] [[Arquivo:Damage.png|Damage]] | | rowspan="2" align="right" | [[Arquivo:Target.png|Target]] [[Arquivo:Damage.png|Damage]] | ||
| Linha 52: | Linha 55: | ||
|- align="center" style="background-color: #E6E6FA;" | |- align="center" style="background-color: #E6E6FA;" | ||
| width="10px" | | | width="10px" | | ||
| align="left" | Level | | align="left" | Level 100 | ||
|- align="center" | |- align="center" | ||
! rowspan="2" | M4 | ! rowspan="2" | M4 | ||
| width="10px" | | | width="10px" | | ||
| align="left" | | | align="left" | Knock Off (22s) | ||
| width="50px" rowspan="2" | | | width="50px" rowspan="2" | | ||
| rowspan="2" align="right" | [[Arquivo:Target.png|Target]] [[Arquivo:Damage.png|Damage]] | | rowspan="2" align="right" | [[Arquivo:Target.png|Target]] [[Arquivo:Damage.png|Damage]] [[Arquivo:Nevermiss.png|Nevermiss]] | ||
| rowspan="2" | [[Arquivo: | | rowspan="2" | [[Arquivo:Dark1.png|Dark|link=Gardestrike]] | ||
|- align="center" | |- align="center" | ||
| width="10px" | | | width="10px" | | ||
| Linha 68: | Linha 71: | ||
! rowspan="2" | M5 | ! rowspan="2" | M5 | ||
| width="10px" | | | width="10px" | | ||
| align="left" | | | align="left" | Tri-Attack (30s) | ||
| width="50px" rowspan="2" | | | width="50px" rowspan="2" | | ||
| rowspan="2" align="right" | [[Arquivo:Target.png|Target]] [[Arquivo:Damage.png|Damage]] | | rowspan="2" align="right" | [[Arquivo:Target.png|Target]] [[Arquivo:Damage.png|Damage]] | ||
| rowspan="2" | [[Arquivo: | | rowspan="2" | [[Arquivo:Normal1.png|Normal|link=Gardestrike]] | ||
|- align="center" style="background-color: #E6E6FA;" | |- align="center" style="background-color: #E6E6FA;" | ||
| width="10px" | | | width="10px" | | ||
| Linha 79: | Linha 82: | ||
! rowspan="2" | M6 | ! rowspan="2" | M6 | ||
| width="10px" | | | width="10px" | | ||
| align="left" | | | align="left" | Jump Kick (32s) | ||
| width="50px" rowspan="2" | | | width="50px" rowspan="2" | | ||
| rowspan="2" align="right" | [[Arquivo: | | rowspan="2" align="right" | [[Arquivo:AOE.png|AOE]] [[Arquivo:Damage.png|Damage]] | ||
| rowspan="2" | [[Arquivo: | | rowspan="2" | [[Arquivo:Fighting.png|Fighting|link=Gardestrike]] | ||
|- align="center" | |- align="center" | ||
| width="10px" | | | width="10px" | | ||
| align="left" | Level | | align="left" | Level 100 | ||
|- align="center" style="background-color: #E6E6FA;" | |- align="center" style="background-color: #E6E6FA;" | ||
| Linha 96: | Linha 99: | ||
|- align="center" style="background-color: #E6E6FA;" | |- align="center" style="background-color: #E6E6FA;" | ||
| width="10px" | | | width="10px" | | ||
| align="left" | Level | | align="left" | Level 100 | ||
|- align="center" | |- align="center" | ||
| Linha 107: | Linha 110: | ||
|- align="center" | |- align="center" | ||
| width="10px" | | | width="10px" | | ||
| align="left" | Level | | align="left" | Level 100 | ||
|- align="center" style="background-color: #E6E6FA;" | |- align="center" style="background-color: #E6E6FA;" | ||
! rowspan="2" | M9 | ! rowspan="2" | M9 | ||
| width="10px" | | | width="10px" | | ||
| align="left" | Brave Bird ( | | align="left" | Brave Bird (60s) | ||
| width="50px" rowspan="2" | | | width="50px" rowspan="2" | | ||
| rowspan="2" align="right" | [[Arquivo:Target.png|Target]] [[Arquivo:Damage.png|Damage]] [[Arquivo:Buff.png|Buff]] [[Arquivo:Debuff.png|Debuff]] [[Arquivo:Nevermiss.png|Nevermiss]] | | rowspan="2" align="right" | [[Arquivo:Target.png|Target]] [[Arquivo:Damage.png|Damage]] [[Arquivo:Buff.png|Buff]] [[Arquivo:Debuff.png|Debuff]] [[Arquivo:Nevermiss.png|Nevermiss]] | ||
| Linha 119: | Linha 122: | ||
| width="10px" | | | width="10px" | | ||
| align="left" | Level 100 | | align="left" | Level 100 | ||
|- align="center" | |||
! rowspan="2" | M10 | |||
| width="10px" | | |||
| align="left" | Growl (60s) | |||
| width="50px" rowspan="2" | | |||
| rowspan="2" align="right" | [[Arquivo:AOE.png|AOE]] [[Arquivo:Buff.png|Buff]] [[Arquivo:Nevermiss.png|Nevermiss]] | |||
| rowspan="2" | [[Arquivo:Neutral.png|Neutral|link=]] | |||
|- align="center" | |||
| width="10px" | | |||
| align="left" | Level 100 | |||
|- align="center" style="background-color: #E6E6FA;" | |||
! rowspan="2" | P | |||
| width="10px" | | |||
| align="left" | Early Bird | |||
| width="50px" rowspan="2" | | |||
| rowspan="2" align="right" | [[Arquivo:Buff.png|Buff]] | |||
| rowspan="2" | [[Arquivo:Normal1.png|Normal|link=Gardestrike]] | |||
|- align="center" style="background-color: #E6E6FA;" | |||
| width="10px" | | |||
| align="left" | | |||
|} | |} | ||
| Linha 127: | Linha 152: | ||
! rowspan="2" | M1 | ! rowspan="2" | M1 | ||
| width="10px" | | | width="10px" | | ||
| align="left" | '''Uproar (40s) ''' | | align="left" | ''' Uproar (40s) ''' | ||
| width="50px" rowspan="2" | | | width="50px" rowspan="2" | | ||
| rowspan="2" align="right" | [[Arquivo:AOE.png|AOE]] [[Arquivo:Buff.png|Buff]] [[Arquivo:Slow.png|Slow]] [[Arquivo:NeverBoost.png|Neverboost]] | | rowspan="2" align="right" | [[Arquivo:AOE.png|AOE]] [[Arquivo:Buff.png|Buff]] [[Arquivo:Slow.png|Slow]] [[Arquivo:NeverBoost.png|Neverboost]] | ||
| Linha 138: | Linha 163: | ||
! rowspan="2" | M2 | ! rowspan="2" | M2 | ||
| width="10px" | | | width="10px" | | ||
| align="left" | Peck ( | | align="left" | Peck (10s) | ||
| width="50px" rowspan="2" | | | width="50px" rowspan="2" | | ||
| rowspan="2" align="right" | [[Arquivo:Target.png|Target]] [[Arquivo:Damage.png|Damage]] | | rowspan="2" align="right" | [[Arquivo:Target.png|Target]] [[Arquivo:Damage.png|Damage]] | ||
| Linha 149: | Linha 174: | ||
! rowspan="2" | M3 | ! rowspan="2" | M3 | ||
| width="10px" | | | width="10px" | | ||
| align="left" | | | align="left" | Drill Peck (15s) | ||
| width="50px" rowspan="2" | | | width="50px" rowspan="2" | | ||
| rowspan="2" align="right" | [[Arquivo:Target.png|Target]] [[Arquivo:Damage.png|Damage]] | | rowspan="2" align="right" | [[Arquivo:Target.png|Target]] [[Arquivo:Damage.png|Damage]] | ||
| Linha 155: | Linha 180: | ||
|- align="center" style="background-color: #E6E6FA;" | |- align="center" style="background-color: #E6E6FA;" | ||
| width="10px" | | | width="10px" | | ||
| align="left" | Level | | align="left" | Level 100 | ||
|- align="center" | |- align="center" | ||
! rowspan="2" | M4 | ! rowspan="2" | M4 | ||
| width="10px" | | | width="10px" | | ||
| align="left" | | | align="left" | Knock Off (22s) | ||
| width="50px" rowspan="2" | | | width="50px" rowspan="2" | | ||
| rowspan="2" align="right" | [[Arquivo:Target.png|Target]] [[Arquivo:Damage.png|Damage]] | | rowspan="2" align="right" | [[Arquivo:Target.png|Target]] [[Arquivo:Damage.png|Damage]] [[Arquivo:Nevermiss.png|Nevermiss]] | ||
| rowspan="2" | [[Arquivo: | | rowspan="2" | [[Arquivo:Dark1.png|Dark|link=Gardestrike]] | ||
|- align="center" | |- align="center" | ||
| width="10px" | | | width="10px" | | ||
| Linha 171: | Linha 196: | ||
! rowspan="2" | M5 | ! rowspan="2" | M5 | ||
| width="10px" | | | width="10px" | | ||
| align="left" | | | align="left" | Tri-Attack (30s) | ||
| width="50px" rowspan="2" | | | width="50px" rowspan="2" | | ||
| rowspan="2" align="right" | [[Arquivo:Target.png|Target]] [[Arquivo:Damage.png|Damage]] | | rowspan="2" align="right" | [[Arquivo:Target.png|Target]] [[Arquivo:Damage.png|Damage]] | ||
| rowspan="2" | [[Arquivo: | | rowspan="2" | [[Arquivo:Normal1.png|Normal|link=Gardestrike]] | ||
|- align="center" style="background-color: #E6E6FA;" | |- align="center" style="background-color: #E6E6FA;" | ||
| width="10px" | | | width="10px" | | ||
| Linha 182: | Linha 207: | ||
! rowspan="2" | M6 | ! rowspan="2" | M6 | ||
| width="10px" | | | width="10px" | | ||
| align="left" | | | align="left" | Jump Kick (32s) | ||
| width="50px" rowspan="2" | | | width="50px" rowspan="2" | | ||
| rowspan="2" align="right" | [[Arquivo: | | rowspan="2" align="right" | [[Arquivo:AOE.png|AOE]] [[Arquivo:Damage.png|Damage]] | ||
| rowspan="2" | [[Arquivo: | | rowspan="2" | [[Arquivo:Fighting.png|Fighting|link=Gardestrike]] | ||
|- align="center" | |- align="center" | ||
| width="10px" | | | width="10px" | | ||
| align="left" | Level | | align="left" | Level 100 | ||
|- align="center" style="background-color: #E6E6FA;" | |- align="center" style="background-color: #E6E6FA;" | ||
| Linha 199: | Linha 224: | ||
|- align="center" style="background-color: #E6E6FA;" | |- align="center" style="background-color: #E6E6FA;" | ||
| width="10px" | | | width="10px" | | ||
| align="left" | Level | | align="left" | Level 100 | ||
|- align="center" | |- align="center" | ||
| Linha 210: | Linha 235: | ||
|- align="center" | |- align="center" | ||
| width="10px" | | | width="10px" | | ||
| align="left" | Level | | align="left" | Level 100 | ||
|- align="center" style="background-color: #E6E6FA;" | |- align="center" style="background-color: #E6E6FA;" | ||
! rowspan="2" | M9 | ! rowspan="2" | M9 | ||
| width="10px" | | | width="10px" | | ||
| align="left" | Brave Bird (50s) | | align="left" |''' Brave Bird (50s) ''' | ||
| width="50px" rowspan="2" | | | width="50px" rowspan="2" | | ||
| rowspan="2" align="right" | [[Arquivo:Target.png|Target]] [[Arquivo:Damage.png|Damage]] [[Arquivo:Buff.png|Buff]] [[Arquivo:Debuff.png|Debuff]] [[Arquivo:Nevermiss.png|Nevermiss]] | | rowspan="2" align="right" | [[Arquivo:Target.png|Target]] [[Arquivo:Damage.png|Damage]] [[Arquivo:Buff.png|Buff]] [[Arquivo:Debuff.png|Debuff]] [[Arquivo:Nevermiss.png|Nevermiss]] | ||
| Linha 222: | Linha 247: | ||
| width="10px" | | | width="10px" | | ||
| align="left" | Level 100 | | align="left" | Level 100 | ||
|- align="center" | |||
! rowspan="2" | M10 | |||
| width="10px" | | |||
| align="left" | Growl (60s) | |||
| width="50px" rowspan="2" | | |||
| rowspan="2" align="right" | [[Arquivo:AOE.png|AOE]] [[Arquivo:Buff.png|Buff]] [[Arquivo:Nevermiss.png|Nevermiss]] | |||
| rowspan="2" | [[Arquivo:Neutral.png|Neutral|link=]] | |||
|- align="center" | |||
| width="10px" | | |||
| align="left" | Level 100 | |||
|- align="center" style="background-color: #E6E6FA;" | |||
! rowspan="2" | P | |||
| width="10px" | | |||
| align="left" | Early Bird | |||
| width="50px" rowspan="2" | | |||
| rowspan="2" align="right" | [[Arquivo:Buff.png|Buff]] | |||
| rowspan="2" | [[Arquivo:Normal1.png|Normal|link=Gardestrike]] | |||
|- align="center" style="background-color: #E6E6FA;" | |||
| width="10px" | | |||
| align="left" | | |||
|} | |} | ||
| Linha 238: | Linha 285: | ||
| style="width:50px; text-align:center;" | <b>[[Arquivo:085-Dodrio.png|link=Dodrio]]</b> | | style="width:50px; text-align:center;" | <b>[[Arquivo:085-Dodrio.png|link=Dodrio]]</b> | ||
| style="width:150px; text-align:center;" | <b>'''[[Dodrio]]'''</b> | | style="width:150px; text-align:center;" | <b>'''[[Dodrio]]'''</b> | ||
|- style="vertical-align:top; text-align=center;" | |||
| style="width:50px; text-align:center;" | <b>[[Arquivo:085-shDodrio.png|link=Shiny Dodrio (TM)]]</b> | |||
| style="width:150px; text-align:center;" | <b>'''[[Shiny Dodrio (TM)]]'''</b> | |||
|} | |} | ||
Edição atual tal como às 16h17min de 6 de novembro de 2026
Informações Gerais
Nome: Shiny Dodrio
Level: 100
Tier: T1C
Função: Burst Damage Dealer PvP
Elemento: Flying
Habilidades: Ride and Headbutt.
Boost: Feather Stone (2)
Materia: Wingeon Mastered
Evoluções
Shiny Doduo precisa de Level 30.
Shiny Dodrio precisa de Level 100.
Descrição:
Este Dodrio exclusivo usa seus três cérebros para executar planos complexos. Enquanto duas cabeças dormem, diz-se que uma cabeça permanece acordada.
Movimentos
Moveset PVP
| M1 | Uproar (50s) |    
|

| ||
|---|---|---|---|---|---|
| Level 100 | |||||
| M2 | Peck (10s) |  
|

| ||
| Level 100 | |||||
| M3 | Drill Peck (15s) |
|
| ||
| Level 100 | |||||
| M4 | Knock Off (22s) | 
|

| ||
| Level 100 | |||||
| M5 | Tri-Attack (30s) |
|
| ||
| Level 100 | |||||
| M6 | Jump Kick (32s) |
|

| ||
| Level 100 | |||||
| M7 | Stampede (50s) | 
|
| ||
| Level 100 | |||||
| M8 | Sky Attack (60s) |
|
| ||
| Level 100 | |||||
| M9 | Brave Bird (60s) | 
|
| ||
| Level 100 | |||||
| M10 | Growl (60s) |
|

| ||
| Level 100 | |||||
| P | Early Bird |
|
| ||
Moveset PVE
| M1 | Uproar (40s) |
|
| ||
|---|---|---|---|---|---|
| Level 100 | |||||
| M2 | Peck (10s) |
|
| ||
| Level 100 | |||||
| M3 | Drill Peck (15s) |
|
| ||
| Level 100 | |||||
| M4 | Knock Off (22s) |
|
| ||
| Level 100 | |||||
| M5 | Tri-Attack (30s) |
|
| ||
| Level 100 | |||||
| M6 | Jump Kick (32s) |
|
| ||
| Level 100 | |||||
| M7 | Stampede (50s) |
|
| ||
| Level 100 | |||||
| M8 | Sky Attack (50s) |
|
| ||
| Level 100 | |||||
| M9 | Brave Bird (50s) |
|
| ||
| Level 100 | |||||
| M10 | Growl (60s) |
|
| ||
| Level 100 | |||||
| P | Early Bird |
|
| ||
Efetividades
Muito Efetivo: Electric, Ice and Rock.
Normal: Normal, Fire, Water, Poison, Flying, Psychic, Ghost, Dragon, Steel, Dark, Crystal and Fairy.
Muito Inefetivo: Grass, Fighting and Bug.
Nulo: Ground.
Outras Versões

|
Dodrio |

|
Shiny Dodrio (TM) |