|
|
| (25 revisões intermediárias por 3 usuários não estão sendo mostradas) |
| Linha 1: |
Linha 1: |
| <center>[[Arquivo:Banner_Stacy-Quest.png|link=]]<br></center> | | <center>[[Arquivo:Banner_Stacy-Quest.png|link=]]<br></center> |
|
| |
|
| | '''Nível necessário:''' 80. |
|
| |
|
| | | '''Recompensa:''' 2KK EXP, 1 Mini Wing, 1 Baby Pokémon Egg, 1 Urn Aura Z, 1 Pokémon Clan Egg, 20 Running Elixir, 1 Wiseman Elixir, 5 Fisherman's Elixir, 5 Juggernaut's Elixir, 1 Fortune Elixir, 2 Bounty Elixir, 5 Healing Elixir, 5 Swordsman's Elixir, 5 Attack Elixir, 2 Mogul Kahn's Elixir, 5 Shield Elixir, 2 Shielder's Elixir, 5 Defense Elixir, 2 Speedster's Elixir, libera troca de itens de boss (de valor de venda igual a 100K no NPC). |
| | |
| <span style="color:red">'''Nível necessário:</span> 80
| |
| | |
| | |
| <span style="color:red">'''Recompensa:</span> 2KK EXP, 1 Mini Wing, 1 Baby Pokémon Egg, 1 Urn Aura Z, 1 Pokémon Clan Egg, 20 Running Elixir, 1 Wiseman Elixir, 5 Fisherman's Elixir, 5 Juggernaut's Elixir, 1 Fortune Elixir, 2 Bounty Elixir, 5 Healing Elixir, 5 Swordsman's Elixir, 5 Attack Elixir, 2 Mogul Kahn's Elixir, 5 Shield Elixir, 2 Shielder's Elixir, 5 Defense Elixir, 2 Speedster's Elixir, libera troca de itens de boss (de valor de venda igual a 100K no NPC).
| |
| | |
|
| |
|
| Caso encontre algum erro ou queira acrescentar alguma informação, entre em contato com um dos <b>[[Nossa Equipe#Wiki Team|membros da wiki]]</b>. | | Caso encontre algum erro ou queira acrescentar alguma informação, entre em contato com um dos <b>[[Nossa Equipe#Wiki Team|membros da wiki]]</b>. |
|
| |
|
| |
|
| |
|
| ==Enigma dos obeliscos== | | ==Enigma dos obeliscos== |
|
| |
|
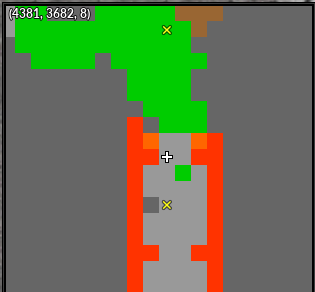
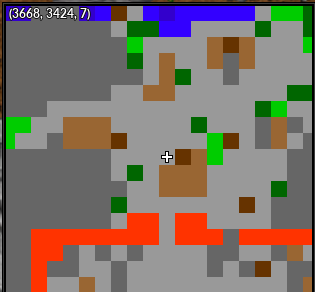
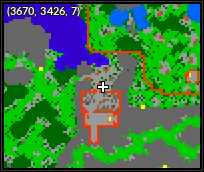
| Para começar a quest é necessário encontrar a NPC Stacy, no cemitério de Lavender, no respawn de Gengar: | | Para começar a quest é necessário encontrar a NPC Stacy, no cemitério de Lavender. |
| | |
| | |
| <center>[[Arquivo:Stacy.jpg|link=]]</center>
| |
|
| |
|
| | <center>[[Arquivo:Stacy.png|link=]]<br> |
| | '''Coordenadas:''' {{Copiar|4303, 3662, 8}}</center> |
|
| |
|
| Primeiro, Stacy pede que o jogador resolva um enigma. Para resolvê-lo, deve-se ir até a <b>Desert Island</b> e usar certos <b>obeliscos</b> espalhados pelas pirâmides. | | Primeiro, Stacy pede que o jogador resolva um enigma. Para resolvê-lo, deve-se ir até a <b>Desert Island</b> e usar certos <b>obeliscos</b> espalhados pelas pirâmides. |
|
| |
|
| <center> | | <center> |
|
| |
| {| class="wikitable" width="30%" | | {| class="wikitable" width="30%" |
|
| |
| |- align="center" | | |- align="center" |
| | | !align="center" width="1%" colspan="9" | Interagir |
| !align="center" width="1%" colspan="9" |'''Interagir''' | |
| | |
| |- | | |- |
| | | !width="10% | Obelisco |
| !width="10% |Obelisco | |
| | |
| |- align="center" | | |- align="center" |
| | | | [[Arquivo:Obelisco Stacy Quest.png|link=]] |
| | [[Arquivo:Obelisk.png|link=]] | |
| | |
| |} | | |} |
|
| |
| </center> | | </center> |
|
| |
|
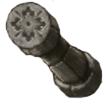
| '''Observação:''' É preciso clicar neles '''na ordem correta''' indicada abaixo, qualquer erro e será preciso recomeçar: | | '''Observação:''' É preciso clicar neles '''na ordem correta''' indicada abaixo, qualquer erro e será preciso recomeçar. |
|
| |
|
| ===Localização dos obeliscos=== | | ===Localização dos obeliscos=== |
| Linha 54: |
Linha 37: |
| ! width="1%" | Terceiro Obelisco | | ! width="1%" | Terceiro Obelisco |
| |- | | |- |
| | align="center" | [[Arquivo:Stacy_um.png|link=]] | | | align="center" | [[Arquivo:Obelisco 1 Stacy Quest.png|link=]] <br> {{Copiar|4585, 3687, 8}} |
| | align="center" | [[Arquivo:Stacy_dois.png|link=]] | | | align="center" | [[Arquivo:Obelisco 2 Stacy Quest.png|link=]] <br> {{Copiar|4596, 3685, 7}} |
| | align="center" | [[Arquivo:Stacy_tres.png|link=]] | | | align="center" | [[Arquivo:Obelisco 3 Stacy Quest.png|link=]] <br> {{Copiar|4644, 3707, 7}} |
| |} | | |} |
| </center> | | </center> |
| Linha 66: |
Linha 49: |
| ! width="1%" | Sexto Obelisco | | ! width="1%" | Sexto Obelisco |
| |- | | |- |
| | align="center" | [[Arquivo:Stacy_quatro.png|link=]] | | | align="center" | [[Arquivo:Obelisco 4 Stacy Quest.png|link=]] <br> {{Copiar|4539, 3628, 8}} |
| | align="center" | [[Arquivo:Stacy_cinco.png|link=]] | | | align="center" | [[Arquivo:Obelisco 5 Stacy Quest.png|link=]] <br> {{Copiar|4556, 3642, 7}} |
| | align="center" | [[Arquivo:Stacy_seis.png|link=]] | | | align="center" | [[Arquivo:Obelisco 6 Stacy Quest.png|link=]] <br> {{Copiar|4592, 3713, 7}} |
| |- | | |- |
| |} | | |} |
| Linha 76: |
Linha 59: |
| {| class="wikitable" width="30%" | | {| class="wikitable" width="30%" |
| ! width="1%" | Sétimo Obelisco | | ! width="1%" | Sétimo Obelisco |
| ! width="1%" | Último Obelisco | | ! width="1%" | Oitavo Obelisco |
| |- | | |- |
| | align="center" | [[Arquivo:Stacy_sete.png|link=]] | | | align="center" | [[Arquivo:Obelisco 7 Stacy Quest.png|link=]] <br> {{Copiar|4640, 3705, 7}} |
| | align="center" | [[Arquivo:Stacy_oito.png|link=]] | | | align="center" | [[Arquivo:Obelisco 8 Stacy Quest.png|link=]] <br> {{Copiar|4589, 3702, 6}} |
| |- | | |- |
| |} | | |} |
| </center> | | </center> |
|
| |
|
| Ao acertar a ordem dos 8 obeliscos, o jogador pode pedir à Stacy uma recompensa. | | Ao acertar a ordem dos obeliscos, retorne até Stacy, o jogador receberá 15 [[Arquivo:Running Elixir.png|link=]] Running Elixir, 1 [[Arquivo:Mini Wings.png|link=]] Mini Wings e 300K [[Arquivo:Exp_icon.png|link=]] de Experiência como recompensa. |
|
| |
|
| ==Capturando um inicial== | | ==Capturando um inicial== |
| Linha 152: |
Linha 135: |
| <ul> | | <ul> |
| <li>Caçar (<span style="color:red">'''Fogo'''</span>)</li> | | <li>Caçar (<span style="color:red">'''Fogo'''</span>)</li> |
| <li>Masmorras (<span style="color:green">'''Planta'''</span>)</li> | | <li>Zonas Dimensionais(<span style="color:green">'''Planta'''</span>)</li> |
| <li>Capturar Pokémon (<span style="color:blue">'''Água'''</span>)</li> | | <li>Capturar Pokémon (<span style="color:blue">'''Água'''</span>)</li> |
| </ul> | | </ul> |
| Linha 167: |
Linha 150: |
| </center> | | </center> |
|
| |
|
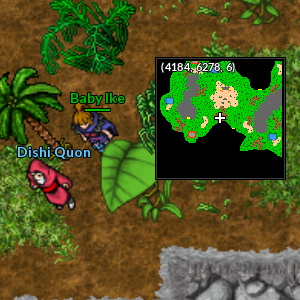
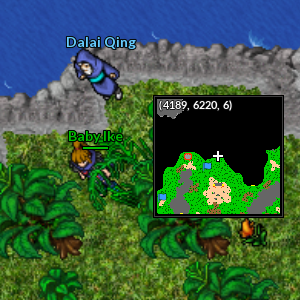
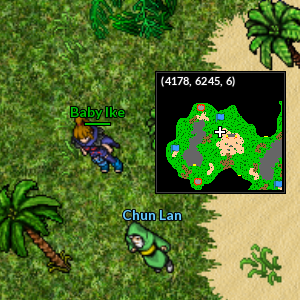
| Após o destino do jogador ser decidido Stacy pedirá para que ele procure um dos NPCs orientadores abaixo, na <b>Golden Island</b>, dependendo de sua afinidade elemental: | | Após o destino do jogador ser decidido Stacy pedirá para que ele procure um dos NPCs orientadores abaixo, na <b>Golden Island</b>, dependendo de sua afinidade elemental. |
|
| |
|
| <center> | | <center> |
| {| class="wikitable" width="56%" | | {| class="wikitable" width="60%" |
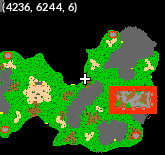
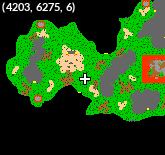
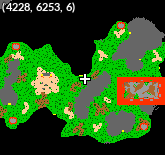
| ! width="1%" | Fogo | | ! width="1%" | Dishi Quon (Fogo) <br> Coordenadas: {{Copiar|4183, 6279, 6}} |
| ! width="1%" | Água | | ! width="1%" | Dalai Qing (Água) <br> Coordenadas: {{Copiar|4189, 6218, 6}} |
| ! width="1%" | Planta | | ! width="1%" | Chun Lan (Planta) <br> Coordenadas: {{Copiar|4179, 6247, 6}} |
| |- | | |- |
| | align="center" | [[Arquivo:NPC Dishi Quon localizacao.png|link=]] | | | align="center" | [[Arquivo:NPC Dishi Quon localizacao.png|link=]] |
| Linha 190: |
Linha 173: |
| ! width="1%" | Planta | | ! width="1%" | Planta |
| |- | | |- |
| | align="center" | [[Arquivo:004-Charmander.png|link=Charmander]] [[Charmander|Charmander]] | | | align="center" | [[Arquivo:004-Charmander.png|link=Charmander]] <br> [[Charmander|Charmander]] |
| | align="center" | [[Arquivo:007-Squirtle.png|link=Squirtle]] [[Squirtle|Squirtle]] | | | align="center" | [[Arquivo:007-Squirtle.png|link=Squirtle]] <br> [[Squirtle|Squirtle]] |
| | align="center" | [[Arquivo:001-Bulbasaur.png|link=Bulbasaur]] [[Bulbasaur|Bulbasaur]] | | | align="center" | [[Arquivo:001-Bulbasaur.png|link=Bulbasaur]] <br> [[Bulbasaur|Bulbasaur]] |
| |- | | |- |
| |} | | |} |
| </center> | | </center> |
|
| |
|
| <span style="color: red"><b>Observação:</b></span><br>
| | '''Observações:''' |
| *O pokémon precisa ser capturado dentro do '''tempo limite de 2 horas'''. Vale também observar que caso o jogador já tenha capturado este pokémon anteriormente, o NPC ignorará este fato, e pedirá uma nova captura de qualquer forma.<br> | | * O pokémon precisa ser capturado dentro do '''tempo limite de 2 horas'''. Vale também observar que caso o jogador já tenha capturado este pokémon anteriormente, o NPC ignorará este fato, e pedirá uma nova captura de qualquer forma. |
| *O jogador terá o tempo de recarga do teletransporte redefinido quando o NPC solicitar a captura de um pokémon. | | * O jogador terá o tempo de recarga do teletransporte redefinido quando o NPC solicitar a captura de um pokémon. |
|
| |
|
| O NPC orientador recompensará o jogador pela captura com um <b>[[Pokémon Egg#Baby Pokémon Egg|Baby Pokémon Egg]]</b>. | | O NPC orientador recompensará o jogador pela captura com um [[Arquivo:Baby_Pok%C3%A9mon_Egg.gif|link=]] [[Pokémon Egg#Baby Pokémon Egg|Baby Pokémon Egg]] e 200K [[Arquivo:Exp_icon.png|link=]] de Experiência. |
|
| |
|
| ==Tirando fotos== | | ==Tirando fotos== |
|
| |
|
| A segunda missão que o NPC orientador demanda é <b>tirar fotos</b> de certos locais e itens com a câmera que ele te entregar. Clique na aba correspondente ao elemento abaixo para visualizar:<br> | | A segunda missão do NPC Orientador é '''tirar fotos''' de determinados locais e itens usando a câmera que ele entrega. Clique na aba correspondente abaixo para conferir o que precisa ser fotografado. |
| | |
| '''Observação:''' Não há uma ordem para ser seguida. | | '''Observação:''' Não há uma ordem para ser seguida. |
|
| |
|
| Linha 213: |
Linha 197: |
| <br> | | <br> |
| <span class="mw-customtoggle-Fire">'''Clique aqui para exibir o spoiler'''</span><div class="mw-collapsible mw-collapsed" id="mw-customcollapsible-Fire"> | | <span class="mw-customtoggle-Fire">'''Clique aqui para exibir o spoiler'''</span><div class="mw-collapsible mw-collapsed" id="mw-customcollapsible-Fire"> |
| {| class="wikitable sortable" width="50%" | | {| class="wikitable sortable" width="70%" |
| ! width="1%" style="background-color: #9d1a64" | Nº | | ! width="1%" style="background-color: #9d1a64" | Nº |
| ! width="10%" style="background-color: #9d1a64" | Imagem | | ! width="10%" style="background-color: #9d1a64" | Imagem |
| ! width="20%" style="background-color: #9d1a64" | Nome | | ! width="20%" style="background-color: #9d1a64" | Nome |
| ! width="30%" style="background-color: #9d1a64" | Localização do mapa | | ! width="40%" style="background-color: #9d1a64" | Localização do mapa |
| ! width="1%" style="background-color: #9d1a64" | Mapa | | ! width="1%" style="background-color: #9d1a64" | Mapa |
| |- | | |- |
| ! align="center" | <font size='5'>'''1'''</font> | | ! align="center" | <font size='5'>'''1'''</font> |
| | align="center" | [[Arquivo:Torch.png|link=]] | | | align="center" | [[Arquivo:Torch_Stacy.png|link=]] |
| | align="center" | '''Torch''' | | | align="center" | '''Torch''' |
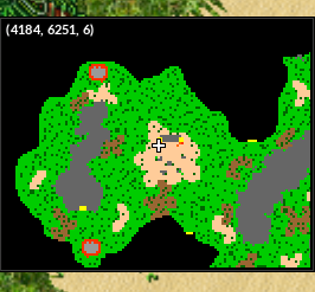
| | align="center" | Golden Island | | | align="center" | Golden Island <br> '''Coordenadas:''' {{Copiar|4186, 6251, 6}} |
| | align="center" | [[Arquivo:Torch_mapa.png|link=]] | | | align="center" | [[Arquivo:Torch_mapa.png|link=]] |
| |- | | |- |
| ! align="center" | <font size='5'>'''2'''</font> | | ! align="center" | <font size='5'>'''2'''</font> |
| | align="center" | [[Arquivo:Lava_Hole.png|link=]] | | | align="center" | [[Arquivo:Lava_Hole_Stacy.png|link=]] |
| | align="center" | '''Lava Hole''' | | | align="center" | '''Lava Hole''' |
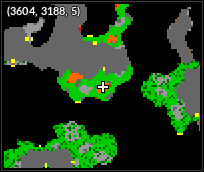
| | align="center" | Magma Island | | | align="center" | Charicific Valley <br> '''Coordenadas:''' {{Copiar|3604, 3188, 5}} |
| | align="center" | [[Arquivo:Lava_hole_mapa.jpg|link=]] | | | align="center" | [[Arquivo:Lava_hole_mapa.png|link=]] |
| |- | | |- |
| ! align="center" | <font size='5'>'''3'''</font> | | ! align="center" | <font size='5'>'''3'''</font> |
| | align="center" | [[Arquivo:Lava_Fountain_2.png|link=]] | | | align="center" | [[Arquivo:Lava_Fountain_2.png|link=]] |
| | align="center" | '''Lava Fountain''' | | | align="center" | '''Giant Rock''' |
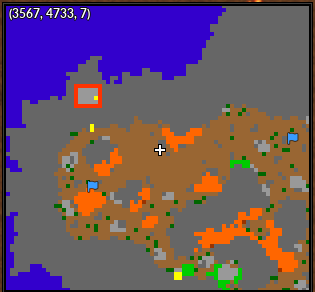
| | align="center" | Magma Island | | | align="center" | Magma Island <br> '''Coordenadas:''' {{Copiar|3567, 4732, 7}} |
| | align="center" | [[Arquivo:Lava_fountain_2_mapa.jpg|link=]] | | | align="center" | [[Arquivo:Lava_fountain_2_mapa.png|link=]] |
| |- | | |- |
| ! align="center" | <font size='5'>'''4'''</font> | | ! align="center" | <font size='5'>'''4'''</font> |
| | align="center" | [[Arquivo:Campfire2.png|link=]] | | | align="center" | [[Arquivo:Campfire_Stacy.png|link=]] |
| | align="center" | '''Campfire''' | | | align="center" | '''Campfire''' |
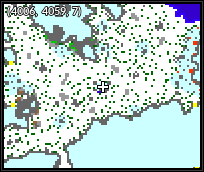
| | align="center" | Seafom Islands | | | align="center" | Seafoam Islands <br> '''Coordenadas:''' {{Copiar|4006, 4059, 7}} |
| | align="center" | [[Arquivo:Campfire2_mapa.jpg|link=]] | | | align="center" | [[Arquivo:Campfire2_mapa.png|link=]] |
| |- | | |- |
| ! align="center" | <font size='5'>'''5'''</font> | | ! align="center" | <font size='5'>'''5'''</font> |
| | align="center" | [[Arquivo:Hot_Cauldron.png|link=]] | | | align="center" | [[Arquivo:Hot_Cauldron.png|link=]] |
| | align="center" | '''Hot Cauldron''' | | | align="center" | '''Hot Cauldron''' |
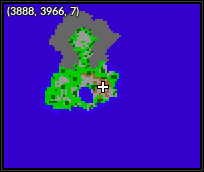
| | align="center" | Ilha pequena entre Cinnabar e Fuchsia | | | align="center" | Ilha pequena entre Cinnabar e Fuchsia <br> '''Coordenadas:''' {{Copiar|3888, 3966, 7}} |
| | align="center" | [[Arquivo:Hot_Cauldron_mapa.jpg|link=]] | | | align="center" | [[Arquivo:Hot_Cauldron_mapa.png|link=]] |
| |- | | |- |
| ! align="center" | <font size='5'>'''6'''</font> | | ! align="center" | <font size='5'>'''6'''</font> |
| | align="center" | [[Arquivo:Candles.png|link=]] | | | align="center" | [[Arquivo:Candles.png|link=]] |
| | align="center" | '''Candles''' | | | align="center" | '''Candles''' |
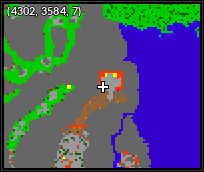
| | align="center" | Cemitério de Lavender | | | align="center" | Cemitério de Lavender <br> '''Coordenadas:''' {{Copiar|4302, 3584, 7}} |
| | align="center" | [[Arquivo:Candles_mapa.jpg|link=]] | | | align="center" | [[Arquivo:Candles_mapa.png|link=]] |
| |- | | |- |
| ! align="center" | <font size='5'>'''7'''</font> | | ! align="center" | <font size='5'>'''7'''</font> |
| | align="center" | [[Arquivo:Coal_Basin.png|link=]] | | | align="center" | [[Arquivo:Coal_Basin.png|link=]] |
| | align="center" | '''Coal Basin''' | | | align="center" | '''Coal Basin''' |
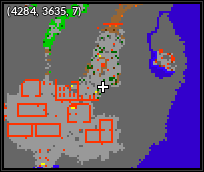
| | align="center" | Cemitério de Lavender | | | align="center" | Cemitério de Lavender <br> '''Coordenadas:''' {{Copiar|4284, 3635, 7}} |
| | align="center" | [[Arquivo:Coal_basin_mapa.jpg|link=]] | | | align="center" | [[Arquivo:Coal_basin_mapa.png|link=]] |
| |- | | |- |
| ! align="center" | <font size='5'>'''8'''</font> | | ! align="center" | <font size='5'>'''8'''</font> |
| | align="center" | [[Arquivo:Candelabrum.png|link=]] | | | align="center" | [[Arquivo:Candelabrum.png|link=]] |
| | align="center" | '''Candelabrum''' | | | align="center" | '''Candelabrum''' |
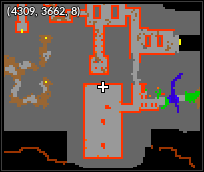
| | align="center" | Cemitério de Lavender | | | align="center" | Cemitério de Lavender <br> '''Coordenadas:''' {{Copiar|4309, 3662, 8}} |
| | align="center" | [[Arquivo:Candle_torch_mapa.jpg|link=]] | | | align="center" | [[Arquivo:Candle_torch_mapa.png|link=]] |
| |- | | |- |
| ! align="center" | <font size='5'>'''9'''</font> | | ! align="center" | <font size='5'>'''9'''</font> |
| | align="center" | [[Arquivo:Skull3.png|link=]] | | | align="center" | [[Arquivo:Skull_Stacy.png|link=]] |
| | align="center" | '''Skull''' | | | align="center" | '''Skull''' |
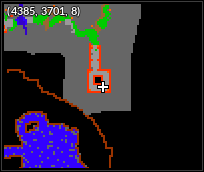
| | align="center" | Cemitério de Lavender | | | align="center" | Cemitério de Lavender <br> '''Coordenadas:''' {{Copiar|4385, 3701, 8}} |
| | align="center" | [[Arquivo:Skull3_mapa.jpg|link=]] | | | align="center" | [[Arquivo:Skull3_mapa.png|link=]] |
| |- | | |- |
| ! align="center" | <font size='5'>'''10'''</font> | | ! align="center" | <font size='5'>'''10'''</font> |
| | align="center" | [[Arquivo:Campfire1.png|link=]] | | | align="center" | [[Arquivo:Campfire1.png|link=]] |
| | align="center" | '''Campfire''' | | | align="center" | '''Campfire''' |
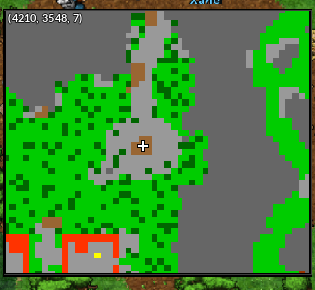
| | align="center" | Em frente do NPC Beleno. <br/> (Cerulean) | | | align="center" | Em frente ao NPC Beleno, em Cerulean <br> '''Coordenadas:''' {{Copiar|4211, 3548, 7}} |
| | align="center" | [[Arquivo:Campfire1_mapa.png|link=]] | | | align="center" | [[Arquivo:Campfire1_mapa.png|link=]] |
| |- | | |- |
| Linha 283: |
Linha 267: |
| | align="center" | [[Arquivo:Skull_Candle.png|link=]] | | | align="center" | [[Arquivo:Skull_Candle.png|link=]] |
| | align="center" | '''Skull Candle''' | | | align="center" | '''Skull Candle''' |
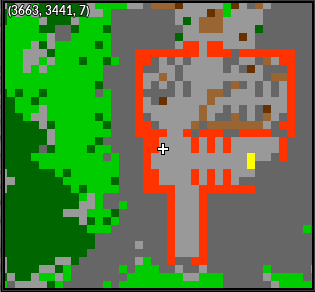
| | align="center" | Cemitério de Pewter | | | align="center" | Cemitério de Pewter <br> '''Coordenadas:''' {{Copiar|3663, 3442, 7}} |
| | align="center" | [[Arquivo:Skull_candle_mapa.png|link=]] | | | align="center" | [[Arquivo:Skull_Candle_Stacy_Map.png|link=]] |
| |- | | |- |
| ! align="center" | <font size='5'>'''12'''</font> | | ! align="center" | <font size='5'>'''12'''</font> |
| | align="center" | [[Arquivo:Mammoth_totem.png|link=]] | | | align="center" | [[Arquivo:Totem.png|link=]] |
| | align="center" | '''Mammoth Totem''' | | | align="center" | '''Totem''' |
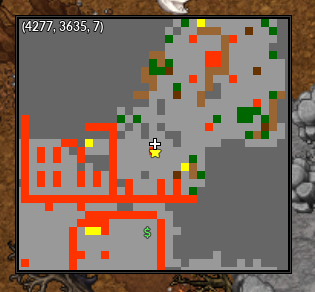
| | align="center" | Cemitério de Pewter | | | align="center" | Cemitério de Lavender <br> '''Coordenadas:''' {{Copiar|4277, 3636, 7}} |
| | align="center" | [[Arquivo:Mammoth_totem_mapa.jpg|link=]] | | | align="center" | [[Arquivo:Totem_Loc.png|link=]] |
| |- | | |- |
| ! align="center" | <font size='5'>'''13'''</font> | | ! align="center" | <font size='5'>'''13'''</font> |
| | align="center" | [[Arquivo:Lava Fountain.png|link=]] | | | align="center" | [[Arquivo:Lava Fountain.png|link=]] |
| | align="center" | '''Lava Fountain''' | | | align="center" | '''Lava Fountain''' |
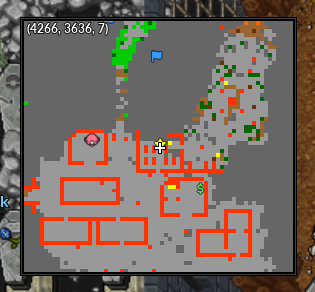
| | align="center" | Cemitério de Pewter | | | align="center" | Cemitério de Lavender <br> '''Coordenadas:''' {{Copiar|4267, 3635, 7}} |
| | align="center" | [[Arquivo:Lava_fountain_mapa.jpg|link=]] | | | align="center" | [[Arquivo:Lava_fountain.png|link=]] |
| |- | | |- |
| ! align="center" | <font size='5'>'''14'''</font> | | ! align="center" | <font size='5'>'''14'''</font> |
| | align="center" | [[Arquivo:Statue.png|link=]] | | | align="center" | [[Arquivo:Statue.png|link=]] |
| | align="center" | '''Statue''' | | | align="center" | '''Statue''' |
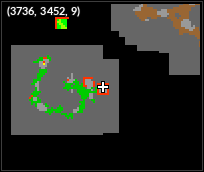
| | align="center" | Cemitério de Pewter | | | align="center" | Cemitério de Pewter <br> '''Coordenadas:''' {{Copiar|3736, 3452, 9}} |
| | align="center" | [[Arquivo:Statue_mapa.jpg|link=]] | | | align="center" | [[Arquivo:Statue_mapa.png|link=]] |
| |- | | |- |
| ! align="center" | <font size='5'>'''15'''</font> | | ! align="center" | <font size='5'>'''15'''</font> |
| | align="center" | [[Arquivo:Stone_Coal_Basin.png|link=]] | | | align="center" | [[Arquivo:Stone_Coal_Basin_Stacy.png|link=]] |
| | align="center" | '''Stone Coal Basin''' | | | align="center" | '''Stone Coal Basin''' |
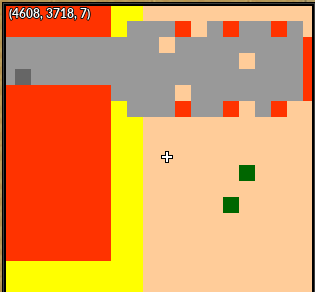
| | align="center" | Área do Clã Psycraft <br/> (Trade Center) | | | align="center" | Desert Island <br> '''Coordenadas:''' {{Copiar|4607, 3718, 7}} |
| | align="center" | [[Arquivo:Stone_coal_basin_mapa.jpg|link=]] | | | align="center" | [[Arquivo:Stone_coal_basin_mapa.png|link=]] |
| |- | | |- |
| ! align="center" | <font size='5'>'''16'''</font> | | ! align="center" | <font size='5'>'''16'''</font> |
| | align="center" | [[Arquivo:Magmar_Statue.png|link=]] | | | align="center" | [[Arquivo:Magmar_Statue.png|link=]] |
| | align="center" | '''Magmar Statue''' | | | align="center" | '''Magmar Statue''' |
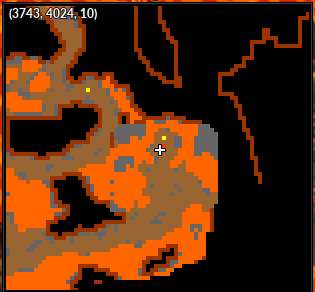
| | align="center" | Área do Clã Volcanic <br/> (Trade Center) | | | align="center" | Subsolo de Cinnabar Island <br> '''Coordenadas:''' {{Copiar|3744, 4023, 10}} |
| | align="center" | [[Arquivo:Magmar_statue_mapa.jpg|link=]] | | | align="center" | [[Arquivo:Magmar_statue_mapa.png|link=]] |
| |- | | |- |
| ! align="center" | <font size='5'>'''17'''</font> | | ! align="center" | <font size='5'>'''17'''</font> |
| | align="center" | [[Arquivo:Volcanic_Carpet.png|link=]] | | | align="center" | [[Arquivo:Volcanic_Carpet.png|link=]] |
| | align="center" | '''Volcanic Carpet''' | | | align="center" | '''Volcanic Carpet''' |
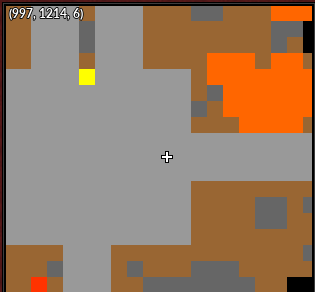
| | align="center" | Área do Clã Volcanic <br/> (Trade Center) | | | align="center" | Área do Clã Volcanic, no Trade Center <br> '''Coordenadas:''' {{Copiar|997, 1210, 6}} |
| | align="center" | [[Arquivo:Volcanic_carpet_mapa.jpg|link=]] | | | align="center" | [[Arquivo:Volcanic_carpet_mapa.png|link=]] |
| |- | | |- |
| ! align="center" | <font size='5'>'''18'''</font> | | ! align="center" | <font size='5'>'''18'''</font> |
| | align="center" | [[Arquivo:Rustic_Column.png|link=]] | | | align="center" | [[Arquivo:Rustic_Column.png|link=]] |
| | align="center" | '''Rustic Column''' | | | align="center" | '''Rustic Column''' |
| | align="center" | Área do Clã Malefic <br/> (Trade Center) | | | align="center" | Cemitério de Lavender <br> '''Coordenadas:''' {{Copiar|4380, 3682, 8}} |
| | align="center" | [[Arquivo:Rustic_column_mapa.jpg|link=]] | | | align="center" | [[Arquivo:Rustic_column_mapa.png|link=]] |
| |- | | |- |
| ! align="center" | <font size='5'>'''19'''</font> | | ! align="center" | <font size='5'>'''19'''</font> |
| | align="center" | [[Arquivo:Skull1.png|link=]] | | | align="center" | [[Arquivo:Skull1.png|link=]] |
| | align="center" | '''Skull''' | | | align="center" | '''Skull''' |
| | align="center" | Área do Clã Malefic <br/> (Trade Center) | | | align="center" | Cemitério de Pewter <br> '''Coordenadas:''' {{Copiar|3667, 3422, 7}} |
| | align="center" | [[Arquivo:Skull1_mapa.jpg|link=]] | | | align="center" | [[Arquivo:Skull1_mapa.png|link=]] |
| |- | | |- |
| ! align="center" | <font size='5'>'''20'''</font> | | ! align="center" | <font size='5'>'''20'''</font> |
| | align="center" | [[Arquivo:Skull2.png|link=]] | | | align="center" | [[Arquivo:Skull2.png|link=]] |
| | align="center" | '''Skull''' | | | align="center" | '''Skull''' |
| | align="center" | Área do Clã Malefic <br/> (Trade Center) | | | align="center" | Cemitério de Pewter <br> '''Coordenadas:''' {{Copiar|3670, 3426, 7}} |
| | align="center" | [[Arquivo:Skull2_mapa.jpg|link=]] | | | align="center" | [[Arquivo:Skull2_mapa.png|link=]] |
| |- | | |- |
| ! align="center" | <font size='5'>'''21'''</font> | | ! align="center" | <font size='5'>'''21'''</font> |
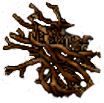
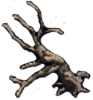
| | align="center" | [[Arquivo:Dead_tree_6.png|link=]] | | | align="center" | [[Arquivo:Dead_tree_6.png|link=]] |
| | align="center" | '''Dead Tree''' | | | align="center" | '''Dead Tree''' |
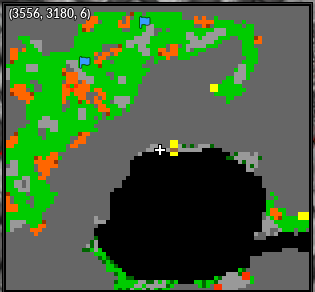
| | align="center" | Área do Clã Malefic <br/> (Trade Center) | | | align="center" | Charicific Valley <br> '''Coordenadas:''' {{Copiar|3555, 3180, 6}} |
| | align="center" | [[Arquivo:Dead_Tree_6_mapa.jpg|link=]] | | | align="center" | [[Arquivo:Dead_Tree_6_mapa.png|link=]] |
| |- | | |- |
| ! align="center" | <font size='5'>'''22'''</font> | | ! align="center" | <font size='5'>'''22'''</font> |
| | align="center" | [[Arquivo:Dragon_Flag.png|link=]] | | | align="center" | [[Arquivo:Dragon_Flag_Stacy.png|link=]] |
| | align="center" | '''Dragon Flag''' | | | align="center" | '''Dragon Flag''' |
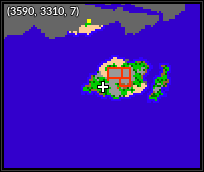
| | align="center" | Ilha do Lance <br/> (Ao sul do Charicific Valley) | | | align="center" | Ilha do Lance, ao sul do Charicific Valley <br> '''Coordenadas:''' {{Copiar|3590, 3310, 7}} |
| | align="center" | [[Arquivo:Dragon_flag_mapa.jpg|link=]] | | | align="center" | [[Arquivo:Dragon_flag_mapa.png|link=]] |
| |- | | |- |
| ! align="center" | <font size='5'>'''23'''</font> | | ! align="center" | <font size='5'>'''23'''</font> |
| | align="center" | [[Arquivo:Dead_tree_1.png|link=]] | | | align="center" | [[Arquivo:Dead_tree_1.png|link=]] |
| | align="center" | '''Dead Tree''' | | | align="center" | '''Dead Tree''' |
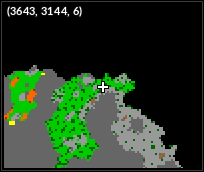
| | align="center" | Charicific Valley | | | align="center" | Charicific Valley <br> '''Coordenadas:''' {{Copiar|3643, 3144, 6}} |
| | align="center" | [[Arquivo:Dead_Tree_1_e_4_mapa.jpg|link=]] | | | align="center" | [[Arquivo:Dead_Tree_1mapa.png|link=]] |
| |- | | |- |
| ! align="center" | <font size='5'>'''24'''</font> | | ! align="center" | <font size='5'>'''24'''</font> |
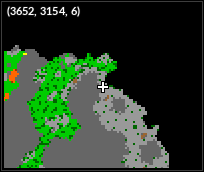
| | align="center" | [[Arquivo:Dead_tree_2.png|link=]] | | | align="center" | [[Arquivo:Dead_tree_2.png|link=]] |
| | align="center" | '''Dead Tree''' | | | align="center" | '''Dead Tree''' |
| | align="center" | Charicific Valley | | | align="center" | Charicific Valley <br> '''Coordenadas:''' {{Copiar|3652, 3154, 6}} |
| | align="center" | [[Arquivo:Dead_Tree_2_mapa.jpg|link=]] | | | align="center" | [[Arquivo:Dead_Tree_2_mapa.png|link=]] |
| |- | | |- |
| ! align="center" | <font size='5'>'''25'''</font> | | ! align="center" | <font size='5'>'''25'''</font> |
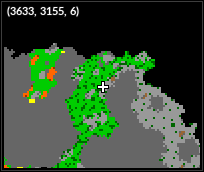
| | align="center" | [[Arquivo:Dead_tree_3.png|link=]] | | | align="center" | [[Arquivo:Dead_tree_3.png|link=]] |
| | align="center" | '''Dead Tree''' | | | align="center" | '''Dead Tree''' |
| | align="center" | Charicific Valley | | | align="center" | Charicific Valley <br> '''Coordenadas:''' {{Copiar|3633, 3155, 6}} |
| | align="center" | [[Arquivo:Dead_Tree_3_mapa.jpg|link=]] | | | align="center" | [[Arquivo:Dead_Tree_3_mapa.png|link=]] |
| |- | | |- |
| ! align="center" | <font size='5'>'''26'''</font> | | ! align="center" | <font size='5'>'''26'''</font> |
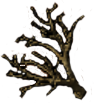
| | align="center" | [[Arquivo:Dead_tree_4.png|link=]] | | | align="center" | [[Arquivo:Dead_tree_4.png|link=]] |
| | align="center" | '''Dead Tree''' | | | align="center" | '''Dead Tree''' |
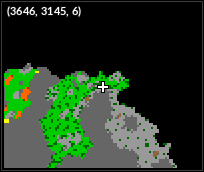
| | align="center" | Charicific Valley | | | align="center" | Charicific Valley <br> '''Coordenadas:''' {{Copiar|3646, 3145, 6}} |
| | align="center" | [[Arquivo:Dead_Tree_1_e_4_mapa.jpg|link=]] | | | align="center" | [[Arquivo:Dead_Tree_1_e_4_mapa.png|link=]] |
| |- | | |- |
| ! align="center" | <font size='5'>'''27'''</font> | | ! align="center" | <font size='5'>'''27'''</font> |
| | align="center" | [[Arquivo:Dead_tree_5.png|link=]] | | | align="center" | [[Arquivo:Dead_tree_5.png|link=]] |
| | align="center" | '''Dead Tree''' | | | align="center" | '''Dead Tree''' |
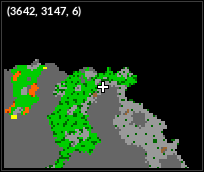
| | align="center" | Charicific Valley | | | align="center" | Charicific Valley <br> '''Coordenadas:''' {{Copiar|3642, 3147, 6}} |
| | align="center" | [[Arquivo:Dead_Tree_5_mapa.jpg|link=]] | | | align="center" | [[Arquivo:Dead_Tree_5_mapa.png|link=]] |
| |- | | |- |
| ! align="center" | <font size='5'>'''28'''</font> | | ! align="center" | <font size='5'>'''28'''</font> |
| | align="center" | [[Arquivo:Charizard_Heart_Statue.png|link=]] | | | align="center" | [[Arquivo:Charizard_Heart_Statue_Stacy.png|link=]] |
| | align="center" | '''Charizard Heart Statue''' | | | align="center" | '''Charizard Heart Statue''' |
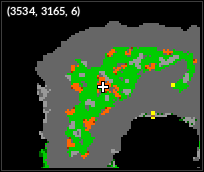
| | align="center" | Charicific Valley <br/> (Precisa ter começado a [[Lance Quest|'''Lance Quest''']]) | | | align="center" | Charicific Valley <br> (Precisa ter começado a [[Mike Quest|'''Mike Quest''']]) <br> '''Coordenadas:''' {{Copiar|3534, 3165, 6}} |
| | align="center" | [[Arquivo:Charizard_heart_statue_mapa.jpg|link=]] | | | align="center" | [[Arquivo:Charizard_heart_statue_mapa.png|link=]] |
| |}</div></center> | | |}</div></center> |
| | |
| |-|Água= | | |-|Água= |
| <center> | | <center> |
| <br> | | <br> |
| <span class="mw-customtoggle-Fire">'''Clique aqui para exibir o spoiler'''</span><div class="mw-collapsible mw-collapsed" id="mw-customcollapsible-Fire"> | | <span class="mw-customtoggle-Fire">'''Clique aqui para exibir o spoiler'''</span><div class="mw-collapsible mw-collapsed" id="mw-customcollapsible-Fire"> |
| {| class="wikitable sortable" width="50%" | | {| class="wikitable sortable" width="70%" |
| ! width="1%" style="background-color: #9d1a64" | Nº | | ! width="1%" style="background-color: #9d1a64" | Nº |
| ! width="10%" style="background-color: #9d1a64" | Imagem | | ! width="10%" style="background-color: #9d1a64" | Imagem |
| ! width="20%" style="background-color: #9d1a64" | Nome | | ! width="20%" style="background-color: #9d1a64" | Nome |
| ! width="30%" style="background-color: #9d1a64" | Localização do mapa | | ! width="40%" style="background-color: #9d1a64" | Localização do mapa |
| ! width="1%" style="background-color: #9d1a64" | Mapa | | ! width="1%" style="background-color: #9d1a64" | Mapa |
| |- | | |- |
| Linha 402: |
Linha 387: |
| | align="center" | [[Arquivo:Coconut_palm.png|link=]] | | | align="center" | [[Arquivo:Coconut_palm.png|link=]] |
| | align="center" | '''Coconut Palm''' | | | align="center" | '''Coconut Palm''' |
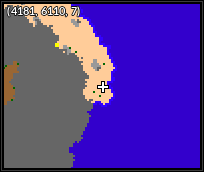
| | align="center" | Leek Island | | | align="center" | Leek Island <br> '''Coordenadas:''' {{Copiar|4181, 6110, 7}} |
| | align="center" | [[Arquivo:Coconut_palm_mapa.jpg|link=]] | | | align="center" | [[Arquivo:Coconut_palm_mapa.png|link=]] |
| |- | | |- |
| ! align="center" | <font size='5'>'''2'''</font> | | ! align="center" | <font size='5'>'''2'''</font> |
| | align="center" | [[Arquivo:Palm_Tree.png|link=]] | | | align="center" | [[Arquivo:Coconut_Palm2.png|link=]] |
| | align="center" | '''Palm Tree''' | | | align="center" | '''Coconut Palm''' |
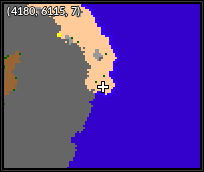
| | align="center" | Leek Island | | | align="center" | Leek Island <br> '''Coordenadas:''' {{Copiar|4180, 6115, 7}} |
| | align="center" | [[Arquivo:Palm_tree_mapa.jpg|link=]] | | | align="center" | [[Arquivo:Coconut_palm_mapa2.png|link=]] |
| |- | | |- |
| ! align="center" | <font size='5'>'''3'''</font> | | ! align="center" | <font size='5'>'''3'''</font> |
| | align="center" | [[Arquivo:Shell_1.png|link=]] | | | align="center" | [[Arquivo:Shell_1.png|link=]] |
| | align="center" | '''Shells''' | | | align="center" | '''Shells''' |
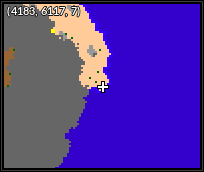
| | align="center" | Leek Island | | | align="center" | Leek Island <br> '''Coordenadas:''' {{Copiar|4183, 6117, 7}} |
| | align="center" | [[Arquivo:Shells_1_mapa.jpg|link=]] | | | align="center" | [[Arquivo:Shells_1_mapa.png|link=]] |
| |- | | |- |
| ! align="center" | <font size='5'>'''4'''</font> | | ! align="center" | <font size='5'>'''4'''</font> |
| | align="center" | [[Arquivo:Shell_2.png|link=]] | | | align="center" | [[Arquivo:Shell_2.png|link=]] |
| | align="center" | '''Shells''' | | | align="center" | '''Shells''' |
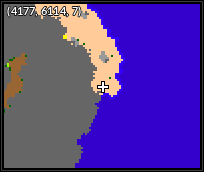
| | align="center" | Leek Island | | | align="center" | Leek Island <br> '''Coordenadas:''' {{Copiar|4177, 6114, 7}} |
| | align="center" | [[Arquivo:Shells_2_mapa.jpg|link=]] | | | align="center" | [[Arquivo:Shells_3_mapa.png|link=]] |
| |- | | |- |
| ! align="center" | <font size='5'>'''5'''</font> | | ! align="center" | <font size='5'>'''5'''</font> |
| | align="center" | [[Arquivo:Shell_3.png|link=]] | | | align="center" | [[Arquivo:Shell_3.png|link=]] |
| | align="center" | '''Shells''' | | | align="center" | '''Shells''' |
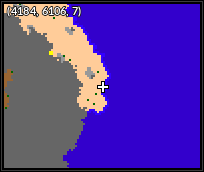
| | align="center" | Leek Island | | | align="center" | Leek Island <br> '''Coordenadas:''' {{Copiar|4184, 6106, 7}} |
| | align="center" | [[Arquivo:Shells_3_mapa.jpg|link=]] | | | align="center" | [[Arquivo:Shells_3.1_mapa.png|link=]] |
| |- | | |- |
| ! align="center" | <font size='5'>'''6'''</font> | | ! align="center" | <font size='5'>'''6'''</font> |
| | align="center" | [[Arquivo:Shell_4.png|link=]] | | | align="center" | [[Arquivo:Shell_4.png|link=]] |
| | align="center" | '''Shells''' | | | align="center" | '''Shells''' |
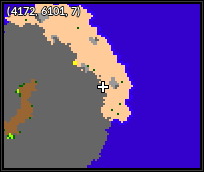
| | align="center" | Leek Island | | | align="center" | Leek Island <br> '''Coordenadas:''' {{Copiar|4172, 6101, 7}} |
| | align="center" | [[Arquivo:Shells_4_mapa.jpg|link=]] | | | align="center" | [[Arquivo:Shells_4_mapa.png|link=]] |
| |- | | |- |
| ! align="center" | <font size='5'>'''7'''</font> | | ! align="center" | <font size='5'>'''7'''</font> |
| | align="center" | [[Arquivo:Starfish.png|link=]] | | | align="center" | [[Arquivo:Starfish.png|link=]] |
| | align="center" | '''Starfish''' | | | align="center" | '''Starfish''' |
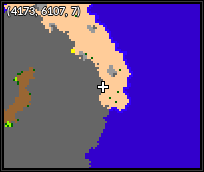
| | align="center" | Leek Island | | | align="center" | Leek Island <br> '''Coordenadas:''' {{Copiar|4173, 6107, 7}} |
| | align="center" | [[Arquivo:Starfish_mapa.jpg|link=]] | | | align="center" | [[Arquivo:Starfish_mapa.png|link=]] |
| |- | | |- |
| ! align="center" | <font size='5'>'''8'''</font> | | ! align="center" | <font size='5'>'''8'''</font> |
| | align="center" | [[Arquivo:Algae.png|link=]] | | | align="center" | [[Arquivo:Algae.png|link=]] |
| | align="center" | '''Algae''' | | | align="center" | '''Algae''' |
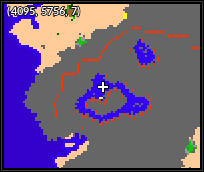
| | align="center" | Kinnow Island | | | align="center" | Kinnow Island <br> '''Coordenadas:''' {{Copiar|4095, 5756, 7}} |
| | align="center" | [[Arquivo:Algae_mapa.jpg|link=]] | | | align="center" | [[Arquivo:Algae_mapa.png|link=]] |
| |- | | |- |
| ! align="center" | <font size='5'>'''9'''</font> | | ! align="center" | <font size='5'>'''9'''</font> |
| | align="center" | [[Arquivo:Coral.png|link=]] | | | align="center" | [[Arquivo:Coral.png|link=]] |
| | align="center" | '''Coral''' | | | align="center" | '''Coral''' |
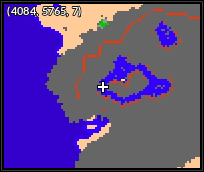
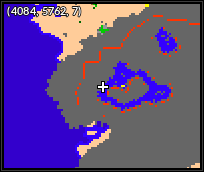
| | align="center" | Kinnow Island | | | align="center" | Kinnow Island <br> '''Coordenadas:''' {{Copiar|4084, 5765, 7}} |
| | align="center" | [[Arquivo:Coral_mapa.jpg|link=]] | | | align="center" | [[Arquivo:Coral_mapa.png|link=]] |
| |- | | |- |
| ! align="center" | <font size='5'>'''10'''</font> | | ! align="center" | <font size='5'>'''10'''</font> |
| | align="center" | [[Arquivo:Coral_reef_1.png|link=]] | | | align="center" | [[Arquivo:Coral_reef_1.png|link=]] |
| | align="center" | '''Coral Reef''' | | | align="center" | '''Coral Reef''' |
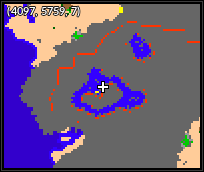
| | align="center" | Kinnow Island | | | align="center" | Kinnow Island <br> '''Coordenadas:''' {{Copiar|4097, 5759, 7}} |
| | align="center" | [[Arquivo:Coral_reef_1_mapa.jpg|link=]] | | | align="center" | [[Arquivo:Coral_reef_1_mapa.png|link=]] |
| |- | | |- |
| ! align="center" | <font size='5'>'''11'''</font> | | ! align="center" | <font size='5'>'''11'''</font> |
| | align="center" | [[Arquivo:Coral_reef_2.png|link=]] | | | align="center" | [[Arquivo:Coral_reef_2.png|link=]] |
| | align="center" | '''Coral Reef''' | | | align="center" | '''Coral Reef''' |
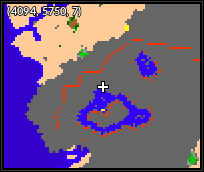
| | align="center" | Kinnow Island | | | align="center" | Kinnow Island <br> '''Coordenadas:''' {{Copiar|4094, 5750, 7}} |
| | align="center" | [[Arquivo:Coral_reef_2_mapa.jpg|link=]] | | | align="center" | [[Arquivo:Coral_reef_2_mapa.png|link=]] |
| |- | | |- |
| ! align="center" | <font size='5'>'''12'''</font> | | ! align="center" | <font size='5'>'''12'''</font> |
| | align="center" | [[Arquivo:Coral_reef_3.png|link=]] | | | align="center" | [[Arquivo:Coral_reef_3.png|link=]] |
| | align="center" | '''Coral Reef''' | | | align="center" | '''Coral Reef''' |
| | align="center" | Kinnow Island | | | align="center" | Kinnow Island <br> '''Coordenadas:''' {{Copiar|4102, 5757, 7}} |
| | align="center" | [[Arquivo:Coral_reef_3_mapa.jpg|link=]] | | | align="center" | [[Arquivo:Coral_reef_3_mapa.png|link=]] |
| |- | | |- |
| ! align="center" | <font size='5'>'''13'''</font> | | ! align="center" | <font size='5'>'''13'''</font> |
| | align="center" | [[Arquivo:Coral_reef_4.png|link=]] | | | align="center" | [[Arquivo:Coral_reef_4.png|link=]] |
| | align="center" | '''Coral Reef''' | | | align="center" | '''Coral Reef''' |
| | align="center" | Kinnow Island | | | align="center" | Kinnow Island <br> '''Coordenadas:''' {{Copiar|4096, 5763, 7}} |
| | align="center" | [[Arquivo:Coral_reef_4_mapa.jpg|link=]] | | | align="center" | [[Arquivo:Coral_reef_4_mapa.png|link=]] |
| |- | | |- |
| ! align="center" | <font size='5'>'''14'''</font> | | ! align="center" | <font size='5'>'''14'''</font> |
| | align="center" | [[Arquivo:Coral_reef_5.png|link=]] | | | align="center" | [[Arquivo:Coral_reef_5.png|link=]] |
| | align="center" | '''Coral Reef''' | | | align="center" | '''Coral Reef''' |
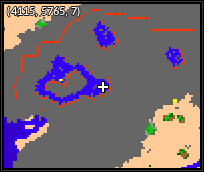
| | align="center" | Kinnow Island | | | align="center" | Kinnow Island <br> '''Coordenadas:''' {{Copiar|4115, 5765, 7}} |
| | align="center" | [[Arquivo:Coral_reef_5_mapa.jpg|link=]] | | | align="center" | [[Arquivo:Coral_reef_5_mapa.png|link=]] |
| |- | | |- |
| ! align="center" | <font size='5'>'''15'''</font> | | ! align="center" | <font size='5'>'''15'''</font> |
| | align="center" | [[Arquivo:Open oyster.png|link=]] | | | align="center" | [[Arquivo:Open oyster.png|link=]] |
| | align="center" | '''Open Oyster''' | | | align="center" | '''Open Oyster''' |
| | align="center" | Kinnow Island | | | align="center" | Kinnow Island <br> '''Coordenadas:''' {{Copiar|4084, 5762, 7}} |
| | align="center" | [[Arquivo:Open oyster mapa.jpg|link=]] | | | align="center" | [[Arquivo:Open oyster mapa.png|link=]] |
| |- | | |- |
| ! align="center" | <font size='5'>'''16'''</font> | | ! align="center" | <font size='5'>'''16'''</font> |
| | align="center" | [[Arquivo:Coral_reef_6.png|link=]] | | | align="center" | [[Arquivo:Coral_reef_6.png|link=]] |
| | align="center" | '''Coral Reef''' | | | align="center" | '''Coral Reef''' |
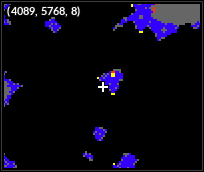
| | align="center" | Kinnow Island | | | align="center" | Kinnow Island <br> '''Coordenadas:''' {{Copiar|4089, 5768, 8}} |
| | align="center" | [[Arquivo:Coral_reef_6_mapa.jpg|link=]] | | | align="center" | [[Arquivo:Coral_reef_6_mapa.png|link=]] |
| |- | | |- |
| ! align="center" | <font size='5'>'''17'''</font> | | ! align="center" | <font size='5'>'''17'''</font> |
| | align="center" | [[Arquivo:Underwater_volcano.png|link=]] | | | align="center" | [[Arquivo:Underwater_volcano.png|link=]] |
| | align="center" | '''Underwater Volcano''' | | | align="center" | '''Underwater Volcano''' |
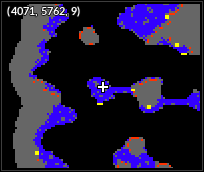
| | align="center" | Kinnow Island | | | align="center" | Kinnow Island <br> '''Coordenadas:''' {{Copiar|4071, 5762, 9}} |
| | align="center" | [[Arquivo:Underwater_volcano_mapa.jpg|link=]] | | | align="center" | [[Arquivo:Underwater_volcano_mapa.png|link=]] |
| |- | | |- |
| ! align="center" | <font size='5'>'''18'''</font> | | ! align="center" | <font size='5'>'''18'''</font> |
| | align="center" | [[Arquivo:Kelp.png|link=]] | | | align="center" | [[Arquivo:Kelp.png|link=]] |
| | align="center" | '''Kelp''' | | | align="center" | '''Kelp''' |
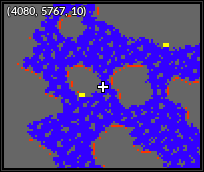
| | align="center" | Kinnow Island | | | align="center" | Kinnow Island <br> '''Coordenadas:''' {{Copiar|4080, 5767, 10}} |
| | align="center" | [[Arquivo:Kelp_mapa.jpg|link=]] | | | align="center" | [[Arquivo:Kelp_mapa.png|link=]] |
| |- | | |- |
| ! align="center" | <font size='5'>'''19'''</font> | | ! align="center" | <font size='5'>'''19'''</font> |
| | align="center" | [[Arquivo:Beach_Umbrella_3.png|link=]] | | | align="center" | [[Arquivo:Beach_Umbrella_3.png|link=]] |
| | align="center" | '''Beach Umbrella''' | | | align="center" | '''Beach Umbrella''' |
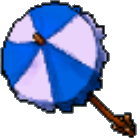
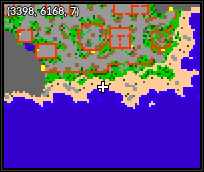
| | align="center" | Valencia | | | align="center" | Valencia <br> '''Coordenadas:''' {{Copiar|3398, 6168, 7}} |
| | align="center" | [[Arquivo:Beach_umbrella_3_mapa.jpg|link=]] | | | align="center" | [[Arquivo:Beach_umbrella_3_mapa.png|link=]] |
| |- | | |- |
| ! align="center" | <font size='5'>'''20'''</font> | | ! align="center" | <font size='5'>'''20'''</font> |
| | align="center" | [[Arquivo:Beach_Umbrella_1.png|link=]] | | | align="center" | [[Arquivo:Beach_Umbrella_1.png|link=]] |
| | align="center" | '''Beach Umbrella''' | | | align="center" | '''Beach Umbrella''' |
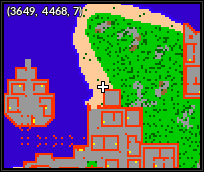
| | align="center" | Hamlin | | | align="center" | Hamlin <br> '''Coordenadas:''' {{Copiar|3649, 4468, 7}} |
| | align="center" | [[Arquivo:Beach_umbrella_1_mapa.jpg|link=]] | | | align="center" | [[Arquivo:Beach_umbrella_1_mapa.png|link=]] |
| |- | | |- |
| ! align="center" | <font size='5'>'''21'''</font> | | ! align="center" | <font size='5'>'''21'''</font> |
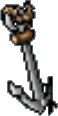
| | align="center" | [[Arquivo:Broken_Anchor.png|link=]] | | | align="center" | [[Arquivo:Broken_Anchor.png|link=]] |
| | align="center" | '''Broken Anchor''' | | | align="center" | '''Broken Anchor''' |
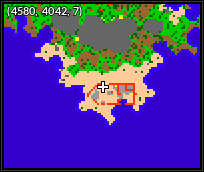
| | align="center" | Lost Island | | | align="center" | Lost Island <br> '''Coordenadas:''' {{Copiar|4580, 4042, 7}} |
| | align="center" | [[Arquivo:Broken_anchor_mapa.jpg|link=]] | | | align="center" | [[Arquivo:Broken_anchor_mapa.png|link=]] |
| |- | | |- |
| ! align="center" | <font size='5'>'''22'''</font> | | ! align="center" | <font size='5'>'''22'''</font> |
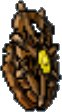
| | align="center" | [[Arquivo:Steering_wheel.png|link=]] | | | align="center" | [[Arquivo:Steering_wheel.png|link=]] |
| | align="center" | '''Steering Wheel''' | | | align="center" | '''Steering Wheel''' |
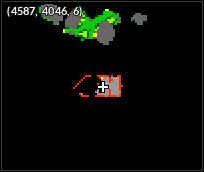
| | align="center" | Lost Island | | | align="center" | Lost Island <br> '''Coordenadas:''' {{Copiar|4587, 4046, 6}} |
| | align="center" | [[Arquivo:Steering_wheel_mapa.jpg|link=]] | | | align="center" | [[Arquivo:Steering_wheel_mapa.png|link=]] |
| |- | | |- |
| ! align="center" | <font size='5'>'''23'''</font> | | ! align="center" | <font size='5'>'''23'''</font> |
| | align="center" | [[Arquivo:Blastoise_Hull.png|link=]] | | | align="center" | [[Arquivo:Blastoise_Hull.png|link=]] |
| | align="center" | '''Blastoise Hull''' | | | align="center" | '''Blastoise Hull''' |
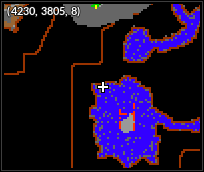
| | align="center" | Diving Spot | | | align="center" | Diving Spot <br> '''Coordenadas:''' {{Copiar|4230, 3805, 8}} |
| | align="center" | [[Arquivo:Blastoise_hull_mapa.jpg|link=]] | | | align="center" | [[Arquivo:Blastoise_hull_mapa.png|link=]] |
| |- | | |- |
| ! align="center" | <font size='5'>'''24'''</font> | | ! align="center" | <font size='5'>'''24'''</font> |
| | align="center" | [[Arquivo:Damaged_Mast_1.png|link=]] | | | align="center" | [[Arquivo:Damaged_Mast_1.png|link=]] |
| | align="center" | '''Damaged Mast''' | | | align="center" | '''Damaged Mast''' |
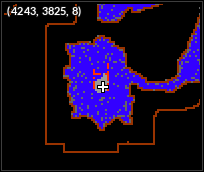
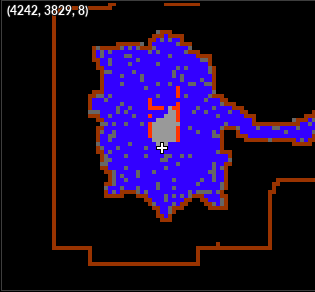
| | align="center" | Diving Spot | | | align="center" | Diving Spot <br> '''Coordenadas:''' {{Copiar|4243, 3825, 8}} |
| | align="center" | [[Arquivo:Damaged_mast_1_mapa.jpg|link=]] | | | align="center" | [[Arquivo:Damaged_mast_1_mapa.png|link=]] |
| |- | | |- |
| ! align="center" | <font size='5'>'''25'''</font> | | ! align="center" | <font size='5'>'''25'''</font> |
| | align="center" | [[Arquivo:Damaged_Mast_2.png|link=]] | | | align="center" | [[Arquivo:Damaged_Mast_2.png|link=]] |
| | align="center" | '''Damaged Mast''' | | | align="center" | '''Damaged Mast''' |
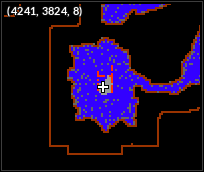
| | align="center" | Diving Spot | | | align="center" | Diving Spot <br> '''Coordenadas:''' {{Copiar|4241, 3824, 8}} |
| | align="center" | [[Arquivo:Damaged_mast_2_mapa.jpg|link=]] | | | align="center" | [[Arquivo:Damaged_mast_2_mapa.png|link=]] |
| |- | | |- |
| ! align="center" | <font size='5'>'''26'''</font> | | ! align="center" | <font size='5'>'''26'''</font> |
| | align="center" | [[Arquivo:Damaged_Mast_3.png|link=]] | | | align="center" | [[Arquivo:Damaged_Mast_3.png|link=]] |
| | align="center" | '''Damaged Mast''' | | | align="center" | '''Damaged Mast''' |
| | align="center" | Diving Spot | | | align="center" | Diving Spot <br> '''Coordenadas:''' {{Copiar|4242, 3829, 8}} |
| | align="center" | [[Arquivo:Damaged_mast_3_mapa.jpg|link=]] | | | align="center" | [[Arquivo:Damaged_mast_3_mapa.png|link=]] |
| |- | | |- |
| ! align="center" | <font size='5'>'''27'''</font> | | ! align="center" | <font size='5'>'''27'''</font> |
| | align="center" | [[Arquivo:Damaged_Mast_4.png|link=]] | | | align="center" | [[Arquivo:Damaged_Mast_4.png|link=]] |
| | align="center" | '''Damaged Mast''' | | | align="center" | '''Damaged Mast''' |
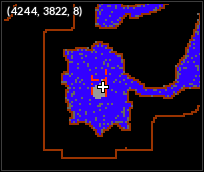
| | align="center" | Diving Spot | | | align="center" | Diving Spot <br> '''Coordenadas:''' {{Copiar|4244, 3822, 8}} |
| | align="center" | [[Arquivo:Damaged_mast_4_mapa.jpg|link=]] | | | align="center" | [[Arquivo:Damaged_mast_4_mapa.png|link=]] |
| |- | | |- |
| ! align="center" | <font size='5'>'''28'''</font> | | ! align="center" | <font size='5'>'''28'''</font> |
| | align="center" | [[Arquivo:Firefly-pronto.gif|link=]] | | | align="center" | [[Arquivo:Firefly-pronto.gif|link=]] |
| | align="center" | '''Firefly''' | | | align="center" | '''Firefly''' |
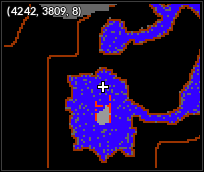
| | align="center" | Diving Spot | | | align="center" | Diving Spot <br> '''Coordenadas:''' {{Copiar|4242, 3809, 8}} |
| | align="center" | [[Arquivo:Firefly_mapa.jpg|link=]] | | | align="center" | [[Arquivo:Firefly_mapa.png|link=]] |
| |- | | |- |
| ! align="center" | <font size='5'>'''29'''</font> | | ! align="center" | <font size='5'>'''29'''</font> |
| | align="center" | [[Arquivo:Beach_Umbrella_2.png|link=]] | | | align="center" | [[Arquivo:Beach_Umbrella_2.png|link=]] |
| | align="center" | '''Beach Umbrella''' | | | align="center" | '''Beach Umbrella''' |
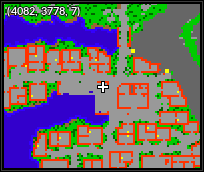
| | align="center" | Vermilion | | | align="center" | Vermilion <br> '''Coordenadas:''' {{Copiar|4082, 3778, 7}} |
| | align="center" | [[Arquivo:Beach_umbrella_2_mapa.jpg|link=]] | | | align="center" | [[Arquivo:Beach_umbrella_2_mapa.png|link=]] |
| |- | | |- |
| ! align="center" | <font size='5'>'''30'''</font> | | ! align="center" | <font size='5'>'''30'''</font> |
| | align="center" | [[Arquivo:Damaged_Mast_5.png|link=]] | | | align="center" | [[Arquivo:Damaged_Mast_5.png|link=]] |
| | align="center" | '''Damaged Mast''' | | | align="center" | '''Damaged Mast''' |
| | align="center" | Respawn Subaquatico <br/> (Entre Viridian e Celadon) | | | align="center" | Respawn Subaquatico, entre Viridian e Celadon <br> '''Coordenadas:''' {{Copiar|3851, 3712, 8}} |
| | align="center" | [[Arquivo:Damaged_mast_5_mapa.jpg|link=]] | | | align="center" | [[Arquivo:Damaged_mast_5_mapa.png|link=]] |
| |- | | |- |
| ! align="center" | <font size='5'>'''31'''</font> | | ! align="center" | <font size='5'>'''31'''</font> |
| | align="center" | [[Arquivo:Damaged_Mast_6.png|link=]] | | | align="center" | [[Arquivo:Damaged_Mast_6.png|link=]] |
| | align="center" | '''Damaged Mast''' | | | align="center" | '''Damaged Mast''' |
| | align="center" | Respawn Subaquatico <br/> (Entre Viridian e Celadon) | | | align="center" | Respawn Subaquatico, entre Viridian e Celadon <br> '''Coordenadas:''' {{Copiar|3855, 3708, 8}} |
| | align="center" | [[Arquivo:Damaged_mast_6_mapa.jpg|link=]] | | | align="center" | [[Arquivo:Damaged_mast_6_mapa.png|link=]] |
| |}</div></center> | | |}</div></center> |
| | |
| |-|Planta= | | |-|Planta= |
| <center> | | <center> |
| <br> | | <br> |
| <span class="mw-customtoggle-Fire">'''Clique aqui para exibir o spoiler'''</span><div class="mw-collapsible mw-collapsed" id="mw-customcollapsible-Fire"> | | <span class="mw-customtoggle-Fire">'''Clique aqui para exibir o spoiler'''</span><div class="mw-collapsible mw-collapsed" id="mw-customcollapsible-Fire"> |
| {| class="wikitable sortable" width="50%" | | {| class="wikitable sortable" width="70%" |
| ! width="1%" style="background-color: #9d1a64" | Nº | | ! width="1%" style="background-color: #9d1a64" | Nº |
| ! width="10%" style="background-color: #9d1a64" | Imagem | | ! width="10%" style="background-color: #9d1a64" | Imagem |
| ! width="20%" style="background-color: #9d1a64" | Nome | | ! width="20%" style="background-color: #9d1a64" | Nome |
| ! width="30%" style="background-color: #9d1a64" | Localização | | ! width="40%" style="background-color: #9d1a64" | Localização do mapa |
| ! width="1%" style="background-color: #9d1a64" | Mapa | | ! width="1%" style="background-color: #9d1a64" | Mapa |
| |- | | |- |
| Linha 599: |
Linha 585: |
| | align="center" | [[Arquivo:Thread_Tree.png|link=]] | | | align="center" | [[Arquivo:Thread_Tree.png|link=]] |
| | align="center" | '''Thread Tree''' | | | align="center" | '''Thread Tree''' |
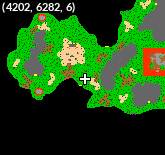
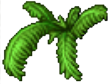
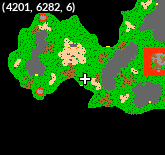
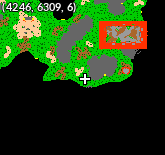
| | align="center" | Golden Island | | | align="center" | Golden Island <br> '''Coordenadas:''' {{Copiar|4202, 6283, 6}} |
| | align="center" | [[Arquivo:Stacy_Quest_-_Thread_Tree.png|link=]] | | | align="center" | [[Arquivo:Stacy_Quest_-_Thread_Tree.png|link=]] |
| |- | | |- |
| Linha 605: |
Linha 591: |
| | align="center" | [[Arquivo:Large_Pearl_Flower.png|link=]] | | | align="center" | [[Arquivo:Large_Pearl_Flower.png|link=]] |
| | align="center" | '''Large Pearl Flower''' | | | align="center" | '''Large Pearl Flower''' |
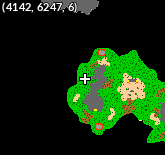
| | align="center" | Golden Island | | | align="center" | Golden Island <br> '''Coordenadas:''' {{Copiar|4141, 6247, 6}} |
| | align="center" | [[Arquivo:Stacy_Quest_-_Large_Pearl_Flower.png|link=]] | | | align="center" | [[Arquivo:Stacy_Quest_-_Large_Pearl_Flower.png|link=]] |
| |- | | |- |
| Linha 611: |
Linha 597: |
| | align="center" | [[Arquivo:Crane_Plant.png|link=]] | | | align="center" | [[Arquivo:Crane_Plant.png|link=]] |
| | align="center" | '''Crane Plant''' | | | align="center" | '''Crane Plant''' |
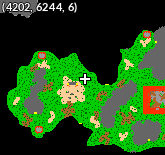
| | align="center" | Golden Island | | | align="center" | Golden Island <br> '''Coordenadas:''' {{Copiar|4202, 6243, 6}} |
| | align="center" | [[Arquivo:Stacy_Quest_-_Crane_Plant.png|link=]] | | | align="center" | [[Arquivo:Stacy_Quest_-_Crane_Plant.png|link=]] |
| |- | | |- |
| Linha 617: |
Linha 603: |
| | align="center" | [[Arquivo:Plant.png|link=]] | | | align="center" | [[Arquivo:Plant.png|link=]] |
| | align="center" | '''Plant''' | | | align="center" | '''Plant''' |
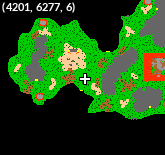
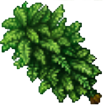
| | align="center" | Golden Island | | | align="center" | Golden Island <br> '''Coordenadas:''' {{Copiar|4200, 6282, 6}} |
| | align="center" | [[Arquivo:Stacy_Quest_-_Plant.png|link=]] | | | align="center" | [[Arquivo:Stacy_Quest_-_Plant.png|link=]] |
| |- | | |- |
| Linha 623: |
Linha 609: |
| | align="center" | [[Arquivo:Giant_Sunflower.png|link=]] | | | align="center" | [[Arquivo:Giant_Sunflower.png|link=]] |
| | align="center" | '''Giant Sunflower''' | | | align="center" | '''Giant Sunflower''' |
| | align="center" | Golden Island | | | align="center" | Golden Island <br> '''Coordenadas:''' {{Copiar|4203, 6278, 6}} |
| | align="center" | [[Arquivo:Stacy_Quest_-_Giant_Sunflower.png|link=]] | | | align="center" | [[Arquivo:Stacy_Quest_-_Giant_Sunflower.png|link=]] |
| |- | | |- |
| Linha 629: |
Linha 615: |
| | align="center" | [[Arquivo:Purple_Kiss_Bush.png|link=]] | | | align="center" | [[Arquivo:Purple_Kiss_Bush.png|link=]] |
| | align="center" | '''Purple Kiss Bush''' | | | align="center" | '''Purple Kiss Bush''' |
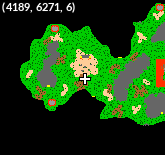
| | align="center" | Golden Island | | | align="center" | Golden Island <br> '''Coordenadas:''' {{Copiar|4188, 6271, 6}} |
| | align="center" | [[Arquivo:Stacy_Quest_-_Purple_Kiss_Bush.png|link=]] | | | align="center" | [[Arquivo:Stacy_Quest_-_Purple_Kiss_Bush.png|link=]] |
| |- | | |- |
| Linha 635: |
Linha 621: |
| | align="center" | [[Arquivo:Jungle_Umbrella.png|link=]] | | | align="center" | [[Arquivo:Jungle_Umbrella.png|link=]] |
| | align="center" | '''Jungle Umbrella''' | | | align="center" | '''Jungle Umbrella''' |
| | align="center" | Golden Island | | | align="center" | Golden Island <br> '''Coordenadas:''' {{Copiar|4215, 6263, 6}} |
| | align="center" | [[Arquivo:Stacy_Quest_-_Jungle_Umbrella1.png|link=]] | | | align="center" | [[Arquivo:Stacy_Quest_-_Jungle_Umbrella1.png|link=]] |
| |- | | |- |
| Linha 641: |
Linha 627: |
| | align="center" | [[Arquivo:Jungle_Umbrella_2.png|link=]] | | | align="center" | [[Arquivo:Jungle_Umbrella_2.png|link=]] |
| | align="center" | '''Jungle Umbrella''' | | | align="center" | '''Jungle Umbrella''' |
| | align="center" | Golden Island | | | align="center" | Golden Island <br> '''Coordenadas:''' {{Copiar|4187, 6275, 6}} |
| | align="center" | [[Arquivo:Stacy_Quest_-_Jungle_Umbrella2.png|link=]] | | | align="center" | [[Arquivo:Stacy_Quest_-_Jungle_Umbrella2.png|link=]] |
| |- | | |- |
| Linha 647: |
Linha 633: |
| | align="center" | [[Arquivo:Strange_Tree.png|link=]] | | | align="center" | [[Arquivo:Strange_Tree.png|link=]] |
| | align="center" | '''Strange Tree''' | | | align="center" | '''Strange Tree''' |
| | align="center" | Golden Island | | | align="center" | Golden Island <br> '''Coordenadas:''' {{Copiar|4235, 6244, 6}} |
| | align="center" | [[Arquivo:Stacy_Quest_-_Strange_Tree.png|link=]] | | | align="center" | [[Arquivo:Stacy_Quest_-_Strange_Tree.png|link=]] |
| |- | | |- |
| Linha 653: |
Linha 639: |
| | align="center" | [[Arquivo:Green_Plant_1.png|link=]] | | | align="center" | [[Arquivo:Green_Plant_1.png|link=]] |
| | align="center" | '''Green Plant''' | | | align="center" | '''Green Plant''' |
| | align="center" | Golden Island | | | align="center" | Golden Island <br> '''Coordenadas:''' {{Copiar|4203, 6274, 6}} |
| | align="center" | [[Arquivo:Stacy_Quest_-_Green_Plant1.png|link=]] | | | align="center" | [[Arquivo:Stacy_Quest_-_Green_Plant1.png|link=]] |
| |- | | |- |
| Linha 659: |
Linha 645: |
| | align="center" | [[Arquivo:Green_Plant_2.png|link=]] | | | align="center" | [[Arquivo:Green_Plant_2.png|link=]] |
| | align="center" | '''Green Plant''' | | | align="center" | '''Green Plant''' |
| | align="center" | Golden Island | | | align="center" | Golden Island <br> '''Coordenadas:''' {{Copiar|4228, 6252, 6}} |
| | align="center" | [[Arquivo:Stacy_Quest_-_Green_Plant2.png|link=]] | | | align="center" | [[Arquivo:Stacy_Quest_-_Green_Plant2.png|link=]] |
| |- | | |- |
| Linha 665: |
Linha 651: |
| | align="center" | [[Arquivo:Jungle_Dweller_Bush.png|link=]] | | | align="center" | [[Arquivo:Jungle_Dweller_Bush.png|link=]] |
| | align="center" | '''Jungle Dweller Bush''' | | | align="center" | '''Jungle Dweller Bush''' |
| | align="center" | Golden Island | | | align="center" | Golden Island <br> '''Coordenadas:''' {{Copiar|4225, 6255, 6}} |
| | align="center" | [[Arquivo:Stacy_Quest_-_Jungle_Dweller_Bush.png|link=]] | | | align="center" | [[Arquivo:Stacy_Quest_-_Jungle_Dweller_Bush.png|link=]] |
| |- | | |- |
| Linha 671: |
Linha 657: |
| | align="center" | [[Arquivo:Jungle_Bells.png|link=]] | | | align="center" | [[Arquivo:Jungle_Bells.png|link=]] |
| | align="center" | '''Jungle Bells''' | | | align="center" | '''Jungle Bells''' |
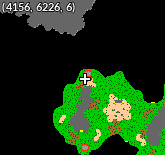
| | align="center" | Golden Island | | | align="center" | Golden Island <br> '''Coordenadas:''' {{Copiar|4156, 6226, 6}} |
| | align="center" | [[Arquivo:Stacy_Quest_-_Jungle_Bells.png|link=]] | | | align="center" | [[Arquivo:Stacy_Quest_-_Jungle_Bells.png|link=]] |
| |- | | |- |
| Linha 677: |
Linha 663: |
| | align="center" | [[Arquivo:Dawn_Singer.png|link=]] | | | align="center" | [[Arquivo:Dawn_Singer.png|link=]] |
| | align="center" | '''Dawn Singer''' | | | align="center" | '''Dawn Singer''' |
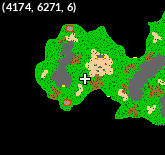
| | align="center" | Golden Island | | | align="center" | Golden Island <br> '''Coordenadas:''' {{Copiar|4174, 6271, 6}} |
| | align="center" | [[Arquivo:Stacy_Quest_-_Dawn_Singer.png|link=]] | | | align="center" | [[Arquivo:Stacy_Quest_-_Dawn_Singer.png|link=]] |
| |- | | |- |
| Linha 683: |
Linha 669: |
| | align="center" | [[Arquivo:Giant_Rose.png|link=]] | | | align="center" | [[Arquivo:Giant_Rose.png|link=]] |
| | align="center" | '''Giant Rose''' | | | align="center" | '''Giant Rose''' |
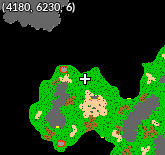
| | align="center" | Golden Island | | | align="center" | Golden Island <br> '''Coordenadas:''' {{Copiar|4179, 6230, 6}} |
| | align="center" | [[Arquivo:Stacy_Quest_-_Giant_Rose.png|link=]] | | | align="center" | [[Arquivo:Stacy_Quest_-_Giant_Rose.png|link=]] |
| |- | | |- |
| Linha 689: |
Linha 675: |
| | align="center" | [[Arquivo:Tulip.png|link=]] | | | align="center" | [[Arquivo:Tulip.png|link=]] |
| | align="center" | '''Tulip''' | | | align="center" | '''Tulip''' |
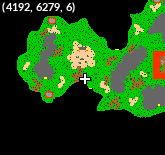
| | align="center" | Golden Island | | | align="center" | Golden Island <br> '''Coordenadas:''' {{Copiar|4192, 6279, 6}} |
| | align="center" | [[Arquivo:Stacy_Quest_-_Tulip.png|link=]] | | | align="center" | [[Arquivo:Stacy_Quest_-_Tulip.png|link=]] |
| |- | | |- |
| Linha 695: |
Linha 681: |
| | align="center" | [[Arquivo:Bush.png|link=]] | | | align="center" | [[Arquivo:Bush.png|link=]] |
| | align="center" | '''Bush''' | | | align="center" | '''Bush''' |
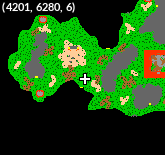
| | align="center" | Golden Island | | | align="center" | Golden Island <br> '''Coordenadas:''' {{Copiar|4200, 6280, 6}} |
| | align="center" | [[Arquivo:Stacy_Quest_-_Bush1.png|link=]] | | | align="center" | [[Arquivo:Stacy_Quest_-_Bush1.png|link=]] |
| |- | | |- |
| Linha 701: |
Linha 687: |
| | align="center" | [[Arquivo:Amazonian_Tree.png|link=]] | | | align="center" | [[Arquivo:Amazonian_Tree.png|link=]] |
| | align="center" | '''Amazonian Tree''' | | | align="center" | '''Amazonian Tree''' |
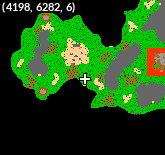
| | align="center" | Golden Island | | | align="center" | Golden Island <br> '''Coordenadas:''' {{Copiar|4198, 6281, 6}} |
| | align="center" | [[Arquivo:Stacy_Quest_-_Amazonian_Tree.png|link=]] | | | align="center" | [[Arquivo:Stacy_Quest_-_Amazonian_Tree.png|link=]] |
| |- | | |- |
| Linha 707: |
Linha 693: |
| | align="center" | [[Arquivo:Flower_Plant.png|link=]] | | | align="center" | [[Arquivo:Flower_Plant.png|link=]] |
| | align="center" | '''Flower Plant''' | | | align="center" | '''Flower Plant''' |
| | align="center" | Golden Island | | | align="center" | Golden Island <br> '''Coordenadas:''' {{Copiar|4245, 6309, 6}} |
| | align="center" | [[Arquivo:Stacy_Quest_-_Flower_Plant.png|link=]] | | | align="center" | [[Arquivo:Stacy_Quest_-_Flower_Plant.png|link=]] |
| |- | | |- |
| Linha 713: |
Linha 699: |
| | align="center" | [[Arquivo:Bulb_Tree.png|link=]] | | | align="center" | [[Arquivo:Bulb_Tree.png|link=]] |
| | align="center" | '''Bulb Tree''' | | | align="center" | '''Bulb Tree''' |
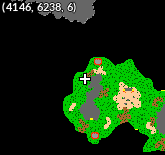
| | align="center" | Golden Island | | | align="center" | Golden Island <br> '''Coordenadas:''' {{Copiar|4145, 6238, 6}} |
| | align="center" | [[Arquivo:Stacy_Quest_-_Bulb_Tree.png|link=]] | | | align="center" | [[Arquivo:Stacy_Quest_-_Bulb_Tree.png|link=]] |
| |- | | |- |
| Linha 719: |
Linha 705: |
| | align="center" | [[Arquivo:Wild Plant.png|link=]] | | | align="center" | [[Arquivo:Wild Plant.png|link=]] |
| | align="center" | '''Wild Plant''' | | | align="center" | '''Wild Plant''' |
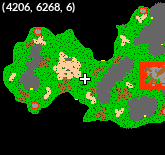
| | align="center" | Golden Island | | | align="center" | Golden Island <br> '''Coordenadas:''' {{Copiar|4205, 6268, 6}} |
| | align="center" | [[Arquivo:Stacy_Quest_-_Wild_Plant.png|link=]] | | | align="center" | [[Arquivo:Stacy_Quest_-_Wild_Plant.png|link=]] |
| |- | | |- |
| Linha 725: |
Linha 711: |
| | align="center" | [[Arquivo:Moonflowers.png|link=]] | | | align="center" | [[Arquivo:Moonflowers.png|link=]] |
| | align="center" | '''Moonflowers''' | | | align="center" | '''Moonflowers''' |
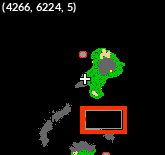
| | align="center" | Golden Island | | | align="center" | Golden Island <br> '''Coordenadas:''' {{Copiar|4266, 6224, 5}} |
| | align="center" | [[Arquivo:Stacy_Quest_-_Moon_Flowers.png|link=]] | | | align="center" | [[Arquivo:Stacy_Quest_-_Moon_Flowers.png|link=]] |
| |- | | |- |
| Linha 731: |
Linha 717: |
| | align="center" | [[Arquivo:Heaven_Blossom.png|link=]] | | | align="center" | [[Arquivo:Heaven_Blossom.png|link=]] |
| | align="center" | '''Heaven Blossom''' | | | align="center" | '''Heaven Blossom''' |
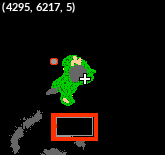
| | align="center" | Golden Island | | | align="center" | Golden Island <br> '''Coordenadas:''' {{Copiar|4295, 6217, 5}} |
| | align="center" | [[Arquivo:Stacy_Quest_-_Heaven_Blossom.png|link=]] | | | align="center" | [[Arquivo:Stacy_Quest_-_Heaven_Blossom.png|link=]] |
| |- | | |- |
| Linha 737: |
Linha 723: |
| | align="center" | [[Arquivo:White_Flowers.png|link=]] | | | align="center" | [[Arquivo:White_Flowers.png|link=]] |
| | align="center" | '''White Flowers''' | | | align="center" | '''White Flowers''' |
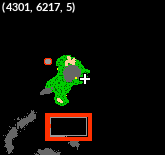
| | align="center" | Golden Island | | | align="center" | Golden Island <br> '''Coordenadas:''' {{Copiar|4301, 6217, 5}} |
| | align="center" | [[Arquivo:Stacy_Quest_-_White_Flowers1.png|link=]] | | | align="center" | [[Arquivo:Stacy_Quest_-_White_Flowers1.png|link=]] |
| |- | | |- |
| Linha 743: |
Linha 729: |
| | align="center" | [[Arquivo:Sunflower.png|link=]] | | | align="center" | [[Arquivo:Sunflower.png|link=]] |
| | align="center" | '''Sunflower''' | | | align="center" | '''Sunflower''' |
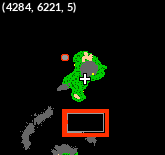
| | align="center" | Golden Island | | | align="center" | Golden Island <br> '''Coordenadas:''' {{Copiar|4284, 6220, 5}} |
| | align="center" | [[Arquivo:Stacy_Quest_-_Sunflower.png|link=]] | | | align="center" | [[Arquivo:Stacy_Quest_-_Sunflower.png|link=]] |
| |- | | |- |
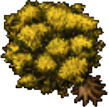
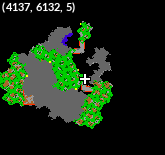
| Linha 749: |
Linha 735: |
| | align="center" | [[Arquivo:Yellow_Maple.png|link=]] | | | align="center" | [[Arquivo:Yellow_Maple.png|link=]] |
| | align="center" | '''Yellow Maple''' | | | align="center" | '''Yellow Maple''' |
| | align="center" | Leek Island | | | align="center" | Leek Island <br> '''Coordenadas:''' {{Copiar|4138, 6132, 5}} |
| | align="center" | [[Arquivo:Stacy_Quest_-_Yellow_Maple.png|link=]] | | | align="center" | [[Arquivo:Stacy_Quest_-_Yellow_Maple.png|link=]] |
| |- | | |- |
| Linha 755: |
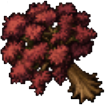
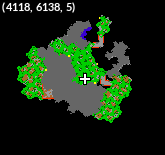
Linha 741: |
| | align="center" | [[Arquivo:Red_Maple.png|link=]] | | | align="center" | [[Arquivo:Red_Maple.png|link=]] |
| | align="center" | '''Red Maple''' | | | align="center" | '''Red Maple''' |
| | align="center" | Leek Island | | | align="center" | Leek Island <br> '''Coordenadas:''' {{Copiar|4117, 6138, 5}} |
| | align="center" | [[Arquivo:Stacy_Quest_-_Red_Maple.png|link=]] | | | align="center" | [[Arquivo:Stacy_Quest_-_Red_Maple.png|link=]] |
| |- | | |- |
| Linha 761: |
Linha 747: |
| | align="center" | [[Arquivo:Indoor_Plant.png|link=]] | | | align="center" | [[Arquivo:Indoor_Plant.png|link=]] |
| | align="center" | '''Indoor Plant''' | | | align="center" | '''Indoor Plant''' |
| | align="center" | Área do Clã Naturia <br/> (Trade Center) | | | align="center" | Entrada do metrô de Phenac <br> '''Coordenadas:''' {{Copiar|5563, 5671, 10}} |
| | align="center" | [[Arquivo:Stacy_Quest_-_Indoor_Plant.png|link=]] | | | align="center" | [[Arquivo:Stacy_Quest_-_Indoor_Plant.png|link=]] |
| |- | | |- |
| Linha 767: |
Linha 753: |
| | align="center" | [[Arquivo:Georgeous_Tree.png|link=]] | | | align="center" | [[Arquivo:Georgeous_Tree.png|link=]] |
| | align="center" | '''Gorgeous Tree''' | | | align="center" | '''Gorgeous Tree''' |
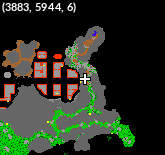
| | align="center" | Mandarin Island | | | align="center" | Mandarin Island <br> '''Coordenadas:''' {{Copiar|3884, 5944, 6}} |
| | align="center" | [[Arquivo:Stacy_Quest_-_Gorgeous_Tree.png|link=]] | | | align="center" | [[Arquivo:Stacy_Quest_-_Gorgeous_Tree.png|link=]] |
| |- | | |- |
| Linha 773: |
Linha 759: |
| | align="center" | [[Arquivo:Pearl_Flower_1.png|link=]] | | | align="center" | [[Arquivo:Pearl_Flower_1.png|link=]] |
| | align="center" | '''Pearl Flower''' | | | align="center" | '''Pearl Flower''' |
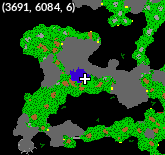
| | align="center" | Mandarin Island | | | align="center" | Mandarin Island <br> '''Coordenadas:''' {{Copiar|3690, 6084, 6}} |
| | align="center" | [[Arquivo:Stacy_Quest_-_Pearl_Flower1.png|link=]] | | | align="center" | [[Arquivo:Stacy_Quest_-_Pearl_Flower1.png|link=]] |
| |- | | |- |
| Linha 779: |
Linha 765: |
| | align="center" | [[Arquivo:Pearl_Flower_2.png|link=]] | | | align="center" | [[Arquivo:Pearl_Flower_2.png|link=]] |
| | align="center" | '''Pearl Flower''' | | | align="center" | '''Pearl Flower''' |
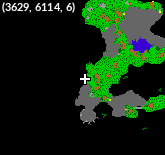
| | align="center" | Mandarin Island | | | align="center" | Mandarin Island <br> '''Coordenadas:''' {{Copiar|3628, 6113, 6}} |
| | align="center" | [[Arquivo:Stacy_Quest_-_Pearl_Flower2.png|link=]] | | | align="center" | [[Arquivo:Stacy_Quest_-_Pearl_Flower2.png|link=]] |
| |- | | |- |
| Linha 785: |
Linha 771: |
| | align="center" | [[Arquivo:White_Flower.png|link=]] | | | align="center" | [[Arquivo:White_Flower.png|link=]] |
| | align="center" | '''White Flower''' | | | align="center" | '''White Flower''' |
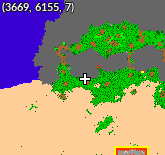
| | align="center" | Mandarin Island | | | align="center" | Mandarin Island <br> '''Coordenadas:''' {{Copiar|3669, 6155, 7}} |
| | align="center" | [[Arquivo:Stacy_Quest_-_White_Flower.png|link=]] | | | align="center" | [[Arquivo:Stacy_Quest_-_White_Flower.png|link=]] |
| |- | | |- |
| Linha 791: |
Linha 777: |
| | align="center" | [[Arquivo:Swamp_Plant.png|link=]] | | | align="center" | [[Arquivo:Swamp_Plant.png|link=]] |
| | align="center" | '''Swamp Plant''' | | | align="center" | '''Swamp Plant''' |
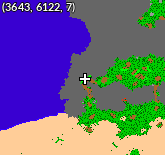
| | align="center" | Mandarin Island | | | align="center" | Mandarin Island <br> '''Coordenadas:''' {{Copiar|3643, 6121, 7}} |
| | align="center" | [[Arquivo:Stacy_Quest_-_Swamp_Plant.png|link=]] | | | align="center" | [[Arquivo:Stacy_Quest_-_Swamp_Plant.png|link=]] |
| |- | | |- |
| Linha 797: |
Linha 783: |
| | align="center" | [[Arquivo:Cactus.png|link=]] | | | align="center" | [[Arquivo:Cactus.png|link=]] |
| | align="center" | '''Cactus''' | | | align="center" | '''Cactus''' |
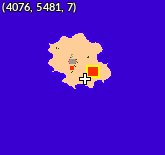
| | align="center" | Sphinx Island | | | align="center" | Sphinx Island <br> '''Coordenadas:''' {{Copiar|4075, 5481, 7}} |
| | align="center" | [[Arquivo:Stacy_Quest_-_Cactus.png|link=]] | | | align="center" | [[Arquivo:Stacy_Quest_-_Cactus.png|link=]] |
| |- | | |- |
| Linha 803: |
Linha 789: |
| | align="center" | [[Arquivo:Pinkan_Tree.png|link=]] | | | align="center" | [[Arquivo:Pinkan_Tree.png|link=]] |
| | align="center" | '''Pinkan Tree''' | | | align="center" | '''Pinkan Tree''' |
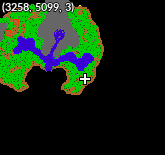
| | align="center" | Pinkan Island | | | align="center" | Pinkan Island <br> '''Coordenadas:''' {{Copiar|3257, 5099, 3}} |
| | align="center" | [[Arquivo:Stacy_Quest_-_Pinkan_Tree.png|link=]] | | | align="center" | [[Arquivo:Stacy_Quest_-_Pinkan_Tree.png|link=]] |
| |- | | |- |
| Linha 809: |
Linha 795: |
| | align="center" | [[Arquivo:Yellow_Royal_Blossom.png|link=]] | | | align="center" | [[Arquivo:Yellow_Royal_Blossom.png|link=]] |
| | align="center" | '''Yellow Royal Blossom''' | | | align="center" | '''Yellow Royal Blossom''' |
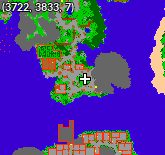
| | align="center" | Pallet | | | align="center" | Pallet <br> '''Coordenadas:''' {{Copiar|3721, 3834, 7}} |
| | align="center" | [[Arquivo:Stacy_Quest_-_Yellow_Royal_Blossom.png|link=]] | | | align="center" | [[Arquivo:Stacy_Quest_-_Yellow_Royal_Blossom.png|link=]] |
| |- | | |- |
| Linha 815: |
Linha 801: |
| | align="center" | [[Arquivo:Red_Royal_Blossom.png|link=]] | | | align="center" | [[Arquivo:Red_Royal_Blossom.png|link=]] |
| | align="center" | '''Red Royal Blossom''' | | | align="center" | '''Red Royal Blossom''' |
| | align="center" | Pallet | | | align="center" | Pallet <br> '''Coordenadas:''' {{Copiar|3723, 3832, 7}} |
| | align="center" | [[Arquivo:Stacy_Quest_-_Red_Royal_Blossom.png|link=]] | | | align="center" | [[Arquivo:Stacy_Quest_-_Red_Royal_Blossom.png|link=]] |
| |- | | |- |
| Linha 821: |
Linha 807: |
| | align="center" | [[Arquivo:Pink_Royal_Blossom.png|link=]] | | | align="center" | [[Arquivo:Pink_Royal_Blossom.png|link=]] |
| | align="center" | '''Pink Royal Blossom''' | | | align="center" | '''Pink Royal Blossom''' |
| | align="center" | Pallet | | | align="center" | Pallet <br> '''Coordenadas:''' {{Copiar|3721, 3833, 7}} |
| | align="center" | [[Arquivo:Stacy_Quest_-_Pink_Royal_Blossom.png|link=]] | | | align="center" | [[Arquivo:Stacy_Quest_-_Pink_Royal_Blossom.png|link=]] |
| |- | | |- |
| Linha 827: |
Linha 813: |
| | align="center" | [[Arquivo:Mushrooms.png|link=]] | | | align="center" | [[Arquivo:Mushrooms.png|link=]] |
| | align="center" | '''Mushrooms''' | | | align="center" | '''Mushrooms''' |
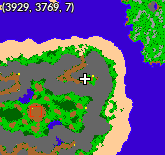
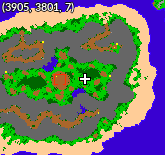
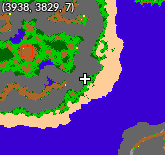
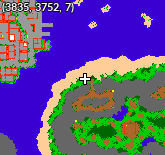
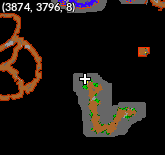
| | align="center" | Jungle Island | | | align="center" | Jungle Island <br> '''Coordenadas:''' {{Copiar|3928, 3769, 7}} |
| | align="center" | [[Arquivo:Stacy_Quest_-_Mushroom.png|link=]] | | | align="center" | [[Arquivo:Stacy_Quest_-_Mushroom.png|link=]] |
| |- | | |- |
| Linha 833: |
Linha 819: |
| | align="center" | [[Arquivo:Jungle_Maw.png|link=]] | | | align="center" | [[Arquivo:Jungle_Maw.png|link=]] |
| | align="center" | '''Jungle Maw''' | | | align="center" | '''Jungle Maw''' |
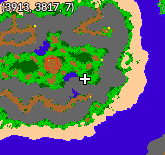
| | align="center" | Jungle Island | | | align="center" | Jungle Island <br> '''Coordenadas:''' {{Copiar|3913, 3817, 7}} |
| | align="center" | [[Arquivo:Stacy_Quest_-_Jungle_Maw.png|link=]] | | | align="center" | [[Arquivo:Stacy_Quest_-_Jungle_Maw.png|link=]] |
| |- | | |- |
| Linha 839: |
Linha 825: |
| | align="center" | [[Arquivo:Small_Fruit.png|link=]] | | | align="center" | [[Arquivo:Small_Fruit.png|link=]] |
| | align="center" | '''Small Fruit''' | | | align="center" | '''Small Fruit''' |
| | align="center" | Jungle Island | | | align="center" | Jungle Island <br> '''Coordenadas:''' {{Copiar|3905, 3801, 7}} |
| | align="center" | [[Arquivo:Stacy_Quest_-_Small_Fruit.png|link=]] | | | align="center" | [[Arquivo:Stacy_Quest_-_Small_Fruit.png|link=]] |
| |- | | |- |
| Linha 845: |
Linha 831: |
| | align="center" | [[Arquivo:Hairy_Plant.png|link=]] | | | align="center" | [[Arquivo:Hairy_Plant.png|link=]] |
| | align="center" | '''Hairy Plant''' | | | align="center" | '''Hairy Plant''' |
| | align="center" | Jungle Island | | | align="center" | Jungle Island <br> '''Coordenadas:''' {{Copiar|3937, 3828, 7}} |
| | align="center" | [[Arquivo:Stacy_Quest_-_Hairy_Plant.png|link=]] | | | align="center" | [[Arquivo:Stacy_Quest_-_Hairy_Plant.png|link=]] |
| |- | | |- |
| Linha 851: |
Linha 837: |
| | align="center" | [[Arquivo:White_Flowers_2.png|link=]] | | | align="center" | [[Arquivo:White_Flowers_2.png|link=]] |
| | align="center" | '''White Flowers''' | | | align="center" | '''White Flowers''' |
| | align="center" | Jungle Island | | | align="center" | Jungle Island <br> '''Coordenadas:''' {{Copiar|3835, 3752, 7}} |
| | align="center" | [[Arquivo:Stacy_Quest_-_White_Flowers2.png|link=]] | | | align="center" | [[Arquivo:Stacy_Quest_-_White_Flowers2.png|link=]] |
| |- | | |- |
| Linha 857: |
Linha 843: |
| | align="center" | [[Arquivo:Moldy_Mushroom.png|link=]] | | | align="center" | [[Arquivo:Moldy_Mushroom.png|link=]] |
| | align="center" | '''Moldy Mushroom''' | | | align="center" | '''Moldy Mushroom''' |
| | align="center" | Jungle Island <br> (Subsolo) | | | align="center" | Subsolo de Jungle Island <br> '''Coordenadas:''' {{Copiar|3873, 3796, 8}} |
| | align="center" | [[Arquivo:Stacy_Quest_-_Moldy_Mushroom.png|link=]] | | | align="center" | [[Arquivo:Stacy_Quest_-_Moldy_Mushroom.png|link=]] |
| |- | | |- |
| Linha 863: |
Linha 849: |
| | align="center" | [[Arquivo:Pack_of_Mushrooms.png|link=]] | | | align="center" | [[Arquivo:Pack_of_Mushrooms.png|link=]] |
| | align="center" | '''Pack of Mushrooms''' | | | align="center" | '''Pack of Mushrooms''' |
| | align="center" | Jungle Island <br> (Subsolo) | | | align="center" | Subsolo de Jungle Island <br> '''Coordenadas:''' {{Copiar|3873, 3798, 8}} |
| | align="center" | [[Arquivo:Stacy_Quest_-_Pack_Of_Mushrooms.png|link=]] | | | align="center" | [[Arquivo:Stacy_Quest_-_Pack_Of_Mushrooms.png|link=]] |
| |- | | |- |
| Linha 870: |
Linha 856: |
| </tabber> | | </tabber> |
|
| |
|
| | | Ao concluir todas as fotos, o jogador recebe como recompensa um [[Arquivo:Volcegg.png|link=]] [[Arquivo:Seaegg.png|link=]] [[Arquivo:Naturiaegg.png|link=]] [[Pokémon_Egg#Stacy_Quest_Eggs|'''Ovo de Pokémon''']] e uma [[Arquivo:Volca Urn2.png|link=]] [[Arquivo:Sea Urn2.png|link=]] [[Arquivo:Natu Urn2.png|link=]] [[Interface_de_Personalização_da_Poké_Bola#Urnas-1|Urn]] especial relacionada ao elemento de afinidade do NPC orientador e 800K [[Arquivo:Exp_icon.png|link=]] de Experiência. |
| | |
| Terminando de tirar todas as fotos, o jogador recebe sua recompensa com um [[Pokémon_Egg#Stacy_Quest_Eggs|'''ovo de pokémon''']] especial relacionado ao elemento da afinidade do NPC orientador.
| |
|
| |
|
| ==Teste de conhecimento== | | ==Teste de conhecimento== |
|
| |
|
| O último teste do NPC orientador é uma série de perguntas sobre o elemento da afinidade do jogador. Clique na aba correspondente ao elemento abaixo para visualizar as perguntas e suas respectivas respostas: | | O último teste do NPC orientador é uma série de perguntas sobre o elemento da afinidade do jogador. Clique na aba correspondente ao elemento abaixo para visualizar as perguntas e suas respectivas respostas. |
|
| |
|
| <tabber> | | <tabber> |
| Linha 972: |
Linha 956: |
| ==Boss final== | | ==Boss final== |
|
| |
|
| Por último, Stacy pedirá para o jogador derrotar um pokémon fantasma poderoso, que só pode ser revelado em sua forma real com um item fornecido por ela: | | Por último, Stacy pedirá para o jogador derrotar um pokémon fantasma poderoso, que só pode ser revelado em sua forma real com um item fornecido por ela. |
|
| |
|
| <center> | | <center> |
| {| class="wikitable" width="30%" | | {| class="wikitable" width="30%" |
|
| |
| |- align="center" | | |- align="center" |
| | | !align="center" width="1%" colspan="9" | Item para usar no fantasma |
| !align="center" width="1%" colspan="9" |'''Item para usar no fantasma''' | |
| | |
| |- | | |- |
|
| |
| !width="10% |Silph Scope | | !width="10% |Silph Scope |
|
| |
| |- align="center" | | |- align="center" |
|
| |
| | [[Arquivo:Silph_scope.png|link=]] | | | [[Arquivo:Silph_scope.png|link=]] |
|
| |
| |} | | |} |
|
| |
| </center> | | </center> |
|
| |
|
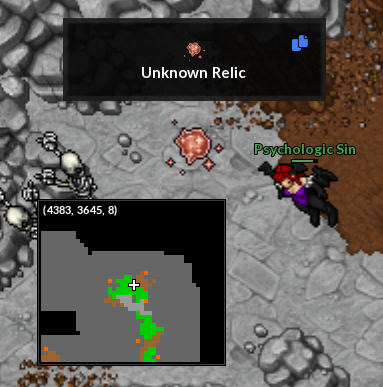
| O fantasma se encontra dentro de uma área que pode ser acessada apenas através de um portal, no fundo da caverna à direita da sala em que Stacy está: | | O fantasma se encontra dentro de uma área que pode ser acessada apenas através de um portal, no fundo da caverna à direita da sala em que Stacy está. |
|
| |
|
| <center>[[Arquivo:Unknown_Relic_mapa.png|link=]]</center> | | <center>[[Arquivo:Unknown_Relic_mapa.png|link=]]<br> |
| | '''Coordenadas:''' {{Copiar|4381, 3644, 8}}</center> |
|
| |
|
| Para atravessar o portal, o jogador deve clicar na "Unknown Relic". Uma vez dentro da área correta, pode-se utilizar o Silph Scope no fantasma que está na parte sudeste da caverna para revelar o Boss final: | | Para atravessar o portal, o jogador deve clicar na "Unknown Relic". Uma vez dentro da área correta, pode-se utilizar o Silph Scope no fantasma que está na parte sudeste da caverna para revelar o Boss final. |
|
| |
|
| <center> | | <center> |
| {| class="wikitable" width="30%" | | {| class="wikitable" width="30%" |
| ! width="1%" | '''Boss''' | | ! width="1%" | Boss |
| | ! width="1%" | Efetividade |
| |- | | |- |
| | align="center" | [[Arquivo:429-Shiny_Mismagius.png|link=Shiny Mismagius]] [[Shiny Mismagius|Shiny Mismagius]] | | | align="center" | [[Arquivo:429-Shiny_Mismagius.png|link=Shiny Mismagius]] <br> [[Shiny Mismagius]] |
| | | align="center" | [[Arquivo:Dark1.png|link=]] [[Arquivo:Ghost1.png|link=]] |
| |- | | |- |
| |} | | |} |
| </center> | | </center> |
|
| |
|
| Há um limite de tempo para derrotar este pokémon. '''Caso morra, perderá exp e bless normalmente'''. Revives podem ser usados de forma normal. | | Há um limite de tempo para derrotar este Pokémon. '''Caso morra, perderá EXP e Bless normalmente.''' Revives podem ser utilizados normalmente. |
|
| |
|
| | | Recomenda-se utilizar Pokémon com efetividade e da categoria [[Arquivo:Interface_Speedster_PVE.png|24px|link=Tier_e_Funções#Speedster]] [[Tier_e_Funções#Speedster|Speedster]] para tornar o duelo mais seguro. |
| ===Método sugerido===
| |
| | |
| Ao contrário de outros chefes de quest, como o [[Dusknoir|'''Cursed Dusknoir''']] da '''[[Emilia Quest]]''' ou o '''[[Giant Porygon]]''' da [[Cyber World|'''Cyber Quest''']], o Shiny Mismagius não tem mecânicas muito complexas e é relativamente fácil de derrotar. Sugere-se que o jogador leve muitos revives, e faça uso da parede que há na área, à esquerda do fantasma (e um pouco acima):
| |
|
| |
|
| <center>[[Arquivo:Pedra_stacy.png|link=]]</center> | | <center>[[Arquivo:Pedra_stacy.png|link=]]</center> |
|
| |
|
| O Shiny Mismagius perseguirá o jogador e seus pokémon como qualquer pokémon selvagem agressivo, criando várias ilusões para confundir e atrapalhar. É sugerido ao jogador posicionar seu pokémon de um lado da parede, ordenar que ele fique parado (com o comando !pokestop - que pode ser colocado em uma hotkey através das configurações de atalhos, para ativação rápida) e posicionar seu treinador do lado oposto, para que a parede o proteja dos ataques do boss. | | O Shiny Mismagius perseguirá o jogador e seus Pokémon, criando ilusões para confundir. Recomenda-se posicionar o Pokémon de um lado da parede, utilizar '''!pokestop''' e manter o treinador do lado oposto, protegido dos ataques. |
| | |
| Uma vez que o Mismagius esteja dentro do alcance dos ataques de área de seu pokémon, o jogador pode ativá-los e usar um revive para recarregar o tempo de espera instantaneamente. Em seguida, basta soltar novamente o pokémon, ordenar que ele fique parado mais uma vez, correr para o outro lado da parede enquanto o Mismagius dá a volta, e repetir o processo até derrotá-lo. Não é necessário utilizar mais de um pokémon, a menos que seus revives acabem.
| |
| | |
| Como o boss só aparece depois que o jogador utiliza o Silph Scope no fantasma, é possível treinar e se familiarizar com a área antes.
| |
|
| |
|
| <center>
| | Quando o Shiny Mismagius entrar no alcance dos ataques de área, ative-os e utilize um Revive para recarregar o tempo de espera. Em seguida, reposicione o Pokémon e repita o processo até derrotá-lo. Não é necessário utilizar mais de um Pokémon, a menos que os Revives acabem. |
| {| class="wikitable" width="30%"
| |
| ! width="1%" | Pokémon sugerido
| |
| ! width="1%" | Recomendado para
| |
| |-
| |
| | align="center" | [[Arquivo:262-Mightyena.png|link=]] [[Mightyena]]
| |
| | align="center" | <span style="color:green">'''Iniciantes'''</span>
| |
| |-
| |
| | align="center" | [[Arquivo:342-Crawdaunt.png|link=]] [[Crawdaunt]]
| |
| | align="center" | <span style="color:green">'''Iniciantes'''</span>
| |
| |-
| |
| | align="center" | [[Arquivo:282-Gardevoir.png|link=]] [[Gardevoir]]
| |
| | align="center" | <span style="color:red">'''Jogadores avançados'''</span>
| |
| |-
| |
| |}
| |
| </center>
| |
|
| |
|
| Após vencer este oponente, o jogador pode retornar à NPC Stacy para receber sua recompensa final com [[Elixir|'''Elixires''']] e experiência.
| | Como o boss só aparece após utilizar o Silph Scope no fantasma, é possível explorar a área previamente para se familiarizar com o local. |
|
| |
|
| <!--Tags: Stacy; Lavender; Fotos; Gengar; Fantasma; Pergunta; Dishi Quon; Dalai Qing; Chun Lan; Steicy; Staci; Steici; Staici; Staycy; Stayci-->
| | Após vencer o Shiny Mismagius, o jogador pode retornar à NPC Stacy para receber sua recompensa final, composta por 5 Fisherman's Elixir, 5 Juggernaut's Elixir, 1 Fortune Elixir, 2 Bounty Elixir, 5 Healing Elixir, 5 Swordsman's Elixir, 5 Attack Elixir, 2 Mogul Kahn's Elixir, 5 Shield Elixir, 2 Shielder's Elixir, 5 Defense Elixir, 2 Speedster's Elixir, 5 Running Elixir e 700K [[Arquivo:Exp_icon.png|link=]] de Experiência. |
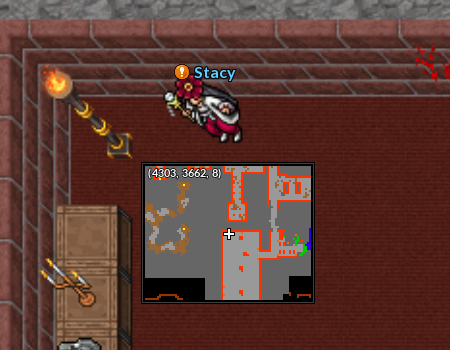
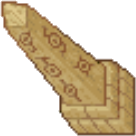
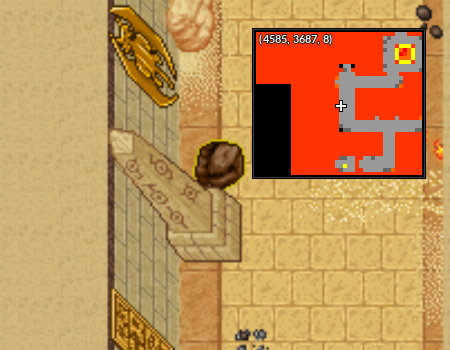
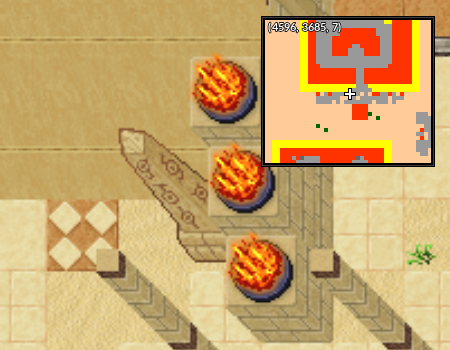
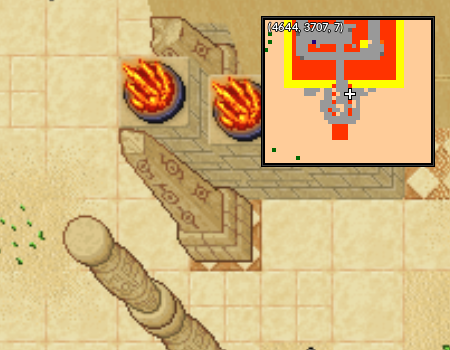
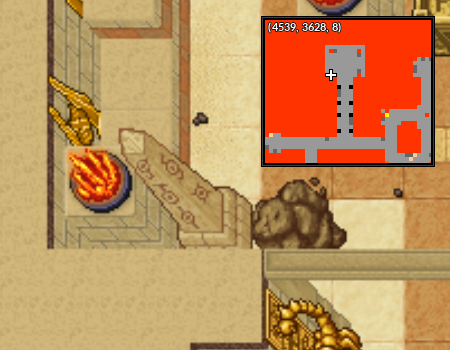
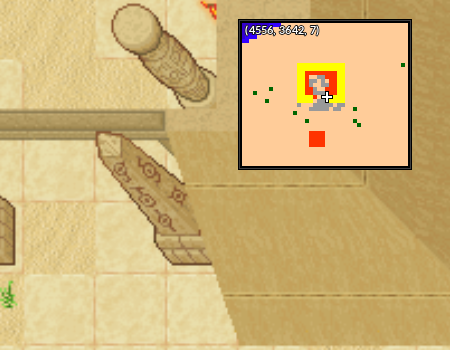
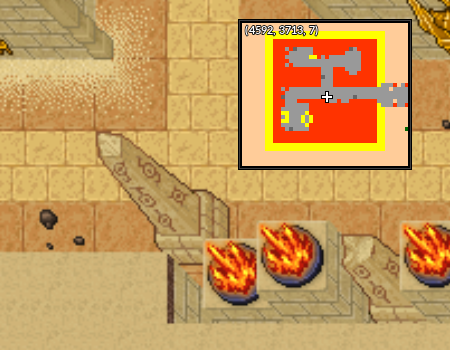

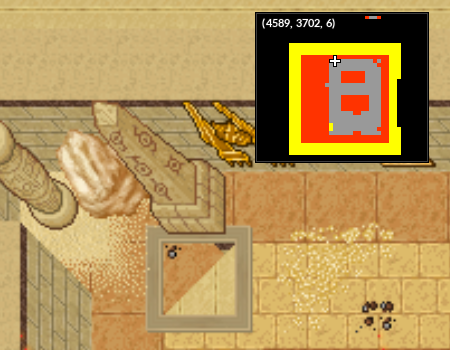
 Running Elixir, 1
  Mini Wings e 300K
  de Experiência como recompensa.