|
|
| (59 revisões intermediárias por 16 usuários não estão sendo mostradas) |
| Linha 1: |
Linha 1: |
| <languages /> | | <center>[[Arquivo:Banner_Stacy-Quest.png|link=]]<br></center> |
| <translate>
| |
| <!--T:1-->
| |
| <span style="color:red">'''Nível necessário:</span> 80 | |
|
| |
|
| <!--T:2-->
| | '''Nível necessário:''' 80. |
| <span style="color:red">'''Recompensa:</span> 2KK EXP, 1 Mini Wing, 1 Baby Pokémon Egg, 1 Urn Aura Z, 1 Pokémon Clan Egg, 20 Running Elixir, 1 Winseman Elixir, 5 Fisherman's Elixir, 5 Juggernaut's Elixir, 1 Fortune Elixir, 2 Bounty Elixir, 5 Healing Elixir, 5 Swordsman's Elixir, 5 Attack Elixir, 2 Mogul Kahn's Elixir, 5 Shield Elixir, 2 Shielder's Elixir, 5 Defense Elixir, 2 Speedster's Elixir, Libera troca de itens boss (100K Npc) no valor de 100K.
| |
|
| |
|
| <!--T:3-->
| | '''Recompensa:''' 2KK EXP, 1 Mini Wing, 1 Baby Pokémon Egg, 1 Urn Aura Z, 1 Pokémon Clan Egg, 20 Running Elixir, 1 Wiseman Elixir, 5 Fisherman's Elixir, 5 Juggernaut's Elixir, 1 Fortune Elixir, 2 Bounty Elixir, 5 Healing Elixir, 5 Swordsman's Elixir, 5 Attack Elixir, 2 Mogul Kahn's Elixir, 5 Shield Elixir, 2 Shielder's Elixir, 5 Defense Elixir, 2 Speedster's Elixir, libera troca de itens de boss (de valor de venda igual a 100K no NPC). |
| <b>Caso encontre algum erro ou queira acrescentar alguma informação,</b> <span style="color:red">'''entre em contato com um dos membros da wiki.</span>
| |
|
| |
|
| ==<b>1ª Parte</b>== <!--T:4-->
| | Caso encontre algum erro ou queira acrescentar alguma informação, entre em contato com um dos <b>[[Nossa Equipe#Wiki Team|membros da wiki]]</b>. |
|
| |
|
| <!--T:5-->
| | ==Enigma dos obeliscos== |
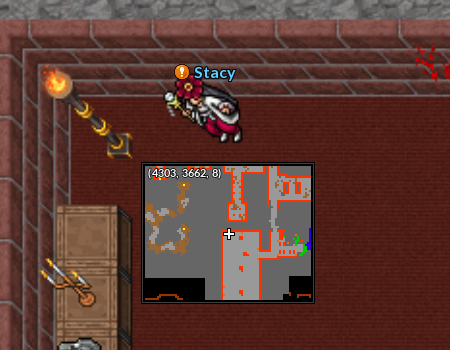
| Para começar a quest, encontre a <b>Npc Stacy, no cemitério de Lavender</b>, no respawn de Gengar:
| |
|
| |
|
| <!--T:6-->
| | Para começar a quest é necessário encontrar a NPC Stacy, no cemitério de Lavender. |
| [[Arquivo:Stacy1.png|link=Stacy_Quest]]
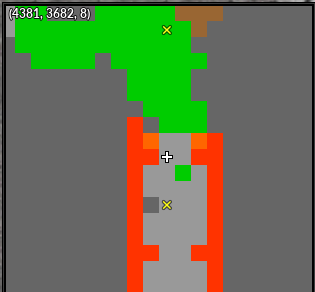
| |
|
| |
|
| <!--T:7--> | | <center>[[Arquivo:Stacy.png|link=]]<br> |
| Stacy irá precisar de sua ajuda com um <b>enigma, na Desert Island</b>, você irá precisar clicar em <b>obeliscos nas pirâmides</b>, na ordem correta, qualquer erro, você terá que começar tudo novamente: | | '''Coordenadas:''' {{Copiar|4303, 3662, 8}}</center> |
|
| |
|
| <!--T:8-->
| | Primeiro, Stacy pede que o jogador resolva um enigma. Para resolvê-lo, deve-se ir até a <b>Desert Island</b> e usar certos <b>obeliscos</b> espalhados pelas pirâmides. |
| <b>1 - Pirâmide dos drowzee, no respawn dos hypno. | |
|
| |
|
| <!--T:9--> | | <center> |
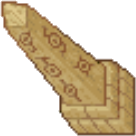
| [[Arquivo:Stacy2.png|link=Stacy_Quest]] | | {| class="wikitable" width="30%" |
| | |- align="center" |
| | !align="center" width="1%" colspan="9" | Interagir |
| | |- |
| | !width="10% | Obelisco |
| | |- align="center" |
| | | [[Arquivo:Obelisco Stacy Quest.png|link=]] |
| | |} |
| | </center> |
|
| |
|
| <!--T:10-->
| | '''Observação:''' É preciso clicar neles '''na ordem correta''' indicada abaixo, qualquer erro e será preciso recomeçar. |
| 2 - Pirâmide dos persians, bem na entrada, o da esquerda.
| |
|
| |
|
| <!--T:11-->
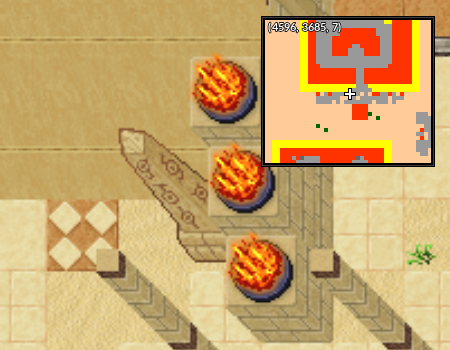
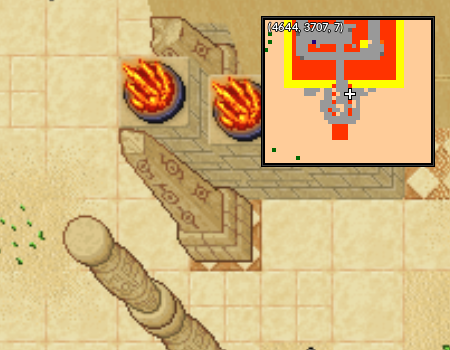
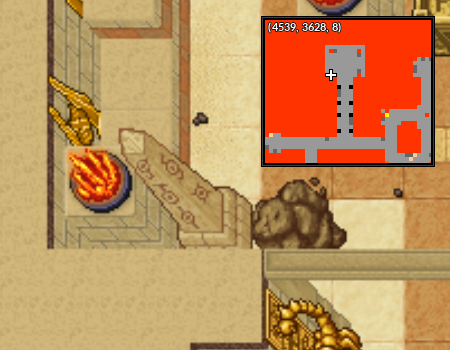
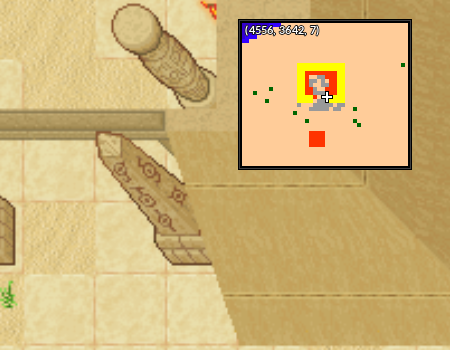
| | ===Localização dos obeliscos=== |
| [[Arquivo:Stacy3.png|link=Stacy_Quest]]
| |
|
| |
|
| <!--T:12--> | | <center> |
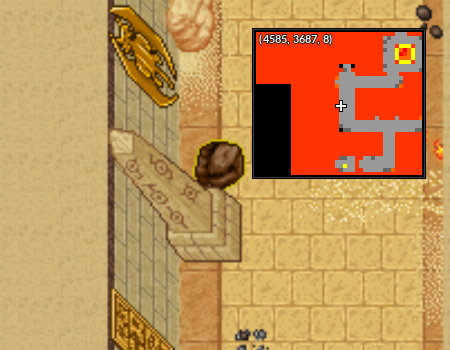
| 3 - Pirâmide da Desert Quest, na entrada, o da direita. | | {| class="wikitable" width="60%" |
| | ! width="1%" | Primeiro Obelisco |
| | ! width="1%" | Segundo Obelisco |
| | ! width="1%" | Terceiro Obelisco |
| | |- |
| | | align="center" | [[Arquivo:Obelisco 1 Stacy Quest.png|link=]] <br> {{Copiar|4585, 3687, 8}} |
| | | align="center" | [[Arquivo:Obelisco 2 Stacy Quest.png|link=]] <br> {{Copiar|4596, 3685, 7}} |
| | | align="center" | [[Arquivo:Obelisco 3 Stacy Quest.png|link=]] <br> {{Copiar|4644, 3707, 7}} |
| | |} |
| | </center> |
|
| |
|
| <!--T:13--> | | <center> |
| [[Arquivo:Stacy4.png|link=Stacy_Quest]] | | {| class="wikitable" width="60%" |
| | ! width="1%" | Quarto Obelisco |
| | ! width="1%" | Quinto Obelisco |
| | ! width="1%" | Sexto Obelisco |
| | |- |
| | | align="center" | [[Arquivo:Obelisco 4 Stacy Quest.png|link=]] <br> {{Copiar|4539, 3628, 8}} |
| | | align="center" | [[Arquivo:Obelisco 5 Stacy Quest.png|link=]] <br> {{Copiar|4556, 3642, 7}} |
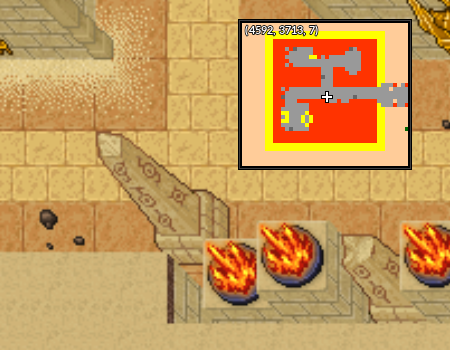
| | | align="center" | [[Arquivo:Obelisco 6 Stacy Quest.png|link=]] <br> {{Copiar|4592, 3713, 7}} |
| | |- |
| | |} |
| | </center> |
|
| |
|
| <!--T:14--> | | <center> |
| 4 - Pirâmide pequena no respawn de alakazam, respawn da esquerda/cima.
| | {| class="wikitable" width="30%" |
| | ! width="1%" | Sétimo Obelisco |
| | ! width="1%" | Oitavo Obelisco |
| | |- |
| | | align="center" | [[Arquivo:Obelisco 7 Stacy Quest.png|link=]] <br> {{Copiar|4640, 3705, 7}} |
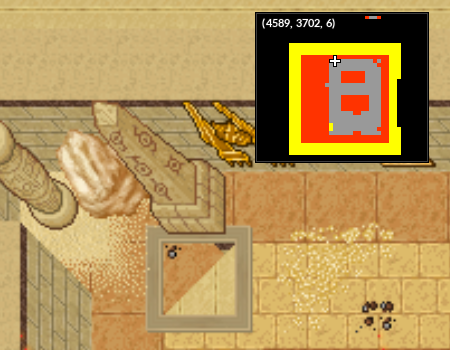
| | | align="center" | [[Arquivo:Obelisco 8 Stacy Quest.png|link=]] <br> {{Copiar|4589, 3702, 6}} |
| | |- |
| | |} |
| | </center> |
|
| |
|
| <!--T:15-->
| | Ao acertar a ordem dos obeliscos, retorne até Stacy, o jogador receberá 15 [[Arquivo:Running Elixir.png|link=]] Running Elixir, 1 [[Arquivo:Mini Wings.png|link=]] Mini Wings e 300K [[Arquivo:Exp_icon.png|link=]] de Experiência como recompensa. |
| [[Arquivo:Stacy5.png|link=Stacy_Quest]] | |
|
| |
|
| <!--T:16-->
| | ==Capturando um inicial== |
| 5 - Pirâmide pequena, na entrada, o da direita.
| |
|
| |
|
| <!--T:17-->
| | Após se provar capaz de resolver o enigma, Stacy vai analisar o jogador para decidir a pessoa mais adequada para orientá-lo sobre os elementos da natureza: Fogo, Água ou Planta. |
| [[Arquivo:Stacy6.png|link=Stacy_Quest]]
| |
|
| |
|
| <!--T:18-->
| | Ela fará algumas perguntas com três opções de resposta cada. É importante escolher com cuidado, pois '''as escolhas vão afetar como será o resto da quest'''. É recomendado conferir as próximas sessões desta página antes de prosseguir. |
| 6 - Pirâmide dos drowzee, no meio.
| |
|
| |
|
| <!--T:19-->
| | Deve-se ter em mente que este é um teste de personalidade: |
| [[Arquivo:Stacy7.png|link=Stacy_Quest]]
| | <ul> |
| | <li>Respostas que aludem a algo agitado, agressivo, etc tendem a identificar afinidade com o elemento <span style="color:red"><b>Fogo</b></span>.</li> |
| | <li>Respostas que aludem a algo pacífico, tranquilo, etc tendem a identificar afinidade com o elemento <span style="color:blue"><b>Água</b></span>.</li> |
| | <li>Respostas que aludem a algo equilibrado, que não se encaixe muito em nenhum dos acima, tendem a identificar afinidade com o elemento <span style="color:green"><b>Planta</b></span>.</li> |
| | </ul> |
|
| |
|
| <!--T:20--> | | Abaixo encontram-se algumas <b>sugestões</b> de quais elementos cada resposta <b>pode</b> representar. |
| 7 - Pirâmide da Desert Quest, na entrada, no mesmo local do terceiro obelisco, o da esquerda dessa vez.
| |
|
| |
|
| <!--T:21-->
| | Algumas das perguntas possíveis são: |
| [[Arquivo:Stacy8.png|link=Stacy_Quest]]
| |
|
| |
|
| <!--T:22--> | | <center> |
| 8 - Pirâmide dos drowzee, antes da escada, o de cima.</b>
| | {| class="wikitable" width="56%" |
| | ! width="1%" | Pergunta |
| | ! width="1%" | Sugestões de resposta |
| | |- |
| | | align="center" | Qual desenho você mais gosta? |
| | | align="center" | |
| | <ul> |
| | <li>Pokémon (<span style="color:green">'''Planta'''</span>)</li> |
| | <li>Dragon Ball (<span style="color:red">'''Fogo'''</span>)</li> |
| | <li>One Piece (<span style="color:blue">'''Água'''</span>)</li> |
| | </ul> |
| | |- |
| | | align="center" | Qual desses locais você gosta mais? |
| | | align="center" | |
| | <ul> |
| | <li>Praia (<span style="color:blue">'''Água'''</span>)</li> |
| | <li>Campo (<span style="color:green">'''Planta'''</span>)</li> |
| | <li>Cidade (<span style="color:red">'''Fogo'''</span>)</li> |
| | </ul> |
| | |- |
| | | align="center" | Qual é mais importante para você? |
| | | align="center" | |
| | <ul> |
| | <li>Equilíbrio (<span style="color:green">'''Planta'''</span>)</li> |
| | <li>Conquistas (<span style="color:red">'''Fogo'''</span>)</li> |
| | <li>Paz (<span style="color:blue">'''Água'''</span>)</li> |
| | </ul> |
| | |- |
| | | align="center" | Qual programa de TV você mais gosta? |
| | | align="center" | |
| | <ul> |
| | <li>The Walking Dead (<span style="color:red">'''Fogo'''</span>)</li> |
| | <li>Game of Thrones (<span style="color:green">'''Planta'''</span>)</li> |
| | <li>Outro (<span style="color:blue">'''Água'''</span>)</li> |
| | </ul> |
| | |- |
| | | align="center" | Qual seu estilo favorito de música? |
| | | align="center" | |
| | <ul> |
| | <li>Rock (<span style="color:red">'''Fogo'''</span>)</li> |
| | <li>Eletrônica (<span style="color:green">'''Planta'''</span>)</li> |
| | <li>Pop (<span style="color:blue">'''Água'''</span>)</li> |
| | </ul> |
| | |- |
| | | align="center" | Qual é sua preferência como treinador Pokémon? |
| | | align="center" | |
| | <ul> |
| | <li>Caçar (<span style="color:red">'''Fogo'''</span>)</li> |
| | <li>Zonas Dimensionais(<span style="color:green">'''Planta'''</span>)</li> |
| | <li>Capturar Pokémon (<span style="color:blue">'''Água'''</span>)</li> |
| | </ul> |
| | |- |
| | | align="center" | Se você tivesse a chance de recomeçar sua jornada, qual Pokémon você escolheria? |
| | | align="center" | |
| | <ul> |
| | <li>Bulbasaur (<span style="color:green">'''Planta'''</span>)</li> |
| | <li>Squirtle (<span style="color:blue">'''Água'''</span>)</li> |
| | <li>Charmander (<span style="color:red">'''Fogo'''</span>)</li> |
| | </ul> |
| | |- |
| | |} |
| | </center> |
|
| |
|
| <!--T:23--> | | Após o destino do jogador ser decidido Stacy pedirá para que ele procure um dos NPCs orientadores abaixo, na <b>Golden Island</b>, dependendo de sua afinidade elemental. |
| [[Arquivo:Stacy9.png|link=Stacy_Quest]]
| |
|
| |
|
| <!--T:24--> | | <center> |
| Ao acertar a ordem dos 8 obeliscos, volte a Stacy e receba sua recompensa.
| | {| class="wikitable" width="60%" |
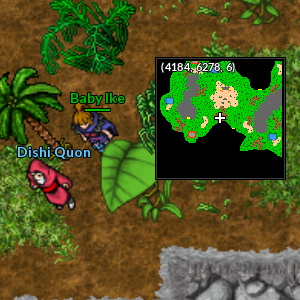
| | ! width="1%" | Dishi Quon (Fogo) <br> Coordenadas: {{Copiar|4183, 6279, 6}} |
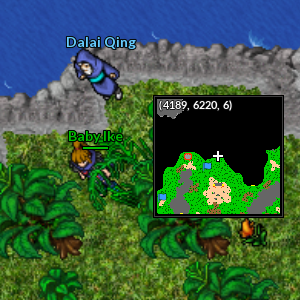
| | ! width="1%" | Dalai Qing (Água) <br> Coordenadas: {{Copiar|4189, 6218, 6}} |
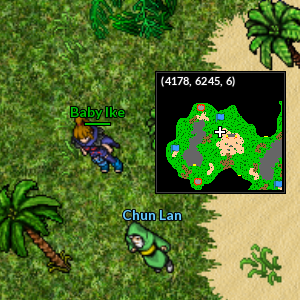
| | ! width="1%" | Chun Lan (Planta) <br> Coordenadas: {{Copiar|4179, 6247, 6}} |
| | |- |
| | | align="center" | [[Arquivo:NPC Dishi Quon localizacao.png|link=]] |
| | | align="center" | [[Arquivo:NPC Dalai Qing localizacao.png|link=]] |
| | | align="center" | [[Arquivo:NPC Chun Lan localizacao.png|link=]] |
| | |- |
| | |} |
| | </center> |
|
| |
|
|
| | O NPC orientador guiará o jogador através das próximas missões. A primeira coisa que ele pedirá é a <b>captura</b> de um pokémon correspondente à afinidade definida pelo teste de personalidade: |
|
| |
|
| ==<b>2ª Parte</b>== <!--T:25--> | | <center> |
| | {| class="wikitable" width="56%" |
| | ! width="1%" | Fogo |
| | ! width="1%" | Água |
| | ! width="1%" | Planta |
| | |- |
| | | align="center" | [[Arquivo:004-Charmander.png|link=Charmander]] <br> [[Charmander|Charmander]] |
| | | align="center" | [[Arquivo:007-Squirtle.png|link=Squirtle]] <br> [[Squirtle|Squirtle]] |
| | | align="center" | [[Arquivo:001-Bulbasaur.png|link=Bulbasaur]] <br> [[Bulbasaur|Bulbasaur]] |
| | |- |
| | |} |
| | </center> |
|
| |
|
| <!--T:26-->
| | '''Observações:''' |
| Stacy irá lhe fazer várias perguntas pessoais, e em base as suas respostas, te mandar a procura do npc referente ao elemento que ela achar que mais te representa, serão 7 perguntas, cada pergunta tem 3 respostas, cada resposta te da 1 ponto para cada elemento, quando o jogador completar 3 pontos em determinado elemento o npc define qual elemento você irá cair, respostas que fazem menção a algo mais agitado, agressivo, etc. remetem ao elemento fogo, ao oposto disso algo que remete a uma pessoa mais calma, mais pacífica, mais tranquila remete ao elemento água, e respostas que sejam meio termo entre os outros dois remetem ao elemento planta,
| | * O pokémon precisa ser capturado dentro do '''tempo limite de 2 horas'''. Vale também observar que caso o jogador já tenha capturado este pokémon anteriormente, o NPC ignorará este fato, e pedirá uma nova captura de qualquer forma. |
| <b> os 3 Npcs se encontram na Golden Island, cada um representa um elemento (Dishi Quon - Fogo, Dalai Qing - Água, Chun Lan - Planta)</b>, os Npcs se encontram nos seguintes locais na ilha:
| | * O jogador terá o tempo de recarga do teletransporte redefinido quando o NPC solicitar a captura de um pokémon. |
|
| |
|
| <!--T:27-->
| | O NPC orientador recompensará o jogador pela captura com um [[Arquivo:Baby_Pok%C3%A9mon_Egg.gif|link=]] [[Pokémon Egg#Baby Pokémon Egg|Baby Pokémon Egg]] e 200K [[Arquivo:Exp_icon.png|link=]] de Experiência. |
| [[Arquivo:Stacy10.png|link=Stacy_Quest]] | |
|
| |
|
| <!--T:28-->
| | ==Tirando fotos== |
| [[Arquivo:Stacy11.png|link=Stacy_Quest]]
| |
|
| |
|
| <!--T:29-->
| | A segunda missão do NPC Orientador é '''tirar fotos''' de determinados locais e itens usando a câmera que ele entrega. Clique na aba correspondente abaixo para conferir o que precisa ser fotografado. |
| [[Arquivo:Stacy12.png|link=Stacy_Quest]]
| |
|
| |
|
| <!--T:30-->
| | '''Observação:''' Não há uma ordem para ser seguida. |
| Dependendo de qual Npc escolher, as missões serão iguais, sua primeira missão será capturar em <b>menos de 2 horas</b> um:
| |
| <table border="1" cellpadding="3" cellspacing="1" class="modernTable" style="padding: 0px; border: 0px; font-size: 10.88px; width: 650px;">
| |
| <tr>
| |
|
| |
| <td style="text-align: center; width: 150px;>'''[[Arquivo:004-Charmander.png|link=Charmander]]'''</td>
| |
| <td style="text-align: center; width: 150px;">'''<b>Fogo - Charmander</b>'''</td>
| |
| </tr>
| |
| <tr>
| |
|
| |
| <td style="text-align: center; width: 150px;>'''[[Arquivo:007-Squirtle.png|link=Squirtle]]'''</td>
| |
| <td style="text-align: center; width: 150px;">'''<b>Água - Squirtle</b>'''</td>
| |
| </tr>
| |
| <tr>
| |
|
| |
| <td style="text-align: center; width: 150px;>'''[[Arquivo:001-Bulbasaur.png|link=Bulbasaur]]'''</td>
| |
| <td style="text-align: center; width: 150px;">'''<b>Planta - Bulbasaur</b>'''</td>
| |
| </tr>
| |
| </table>
| |
|
| |
|
| <!--T:31--> | | <tabber> |
| Capturando, volte ao seu Npc e receba sua recompensa. <br>
| | |-|Fogo= |
| <span style="color:red"> '''Obs.: '''Você receberá um [https://wiki.pokexgames.com/index.php/Pok%C3%A9mon_Egg#Baby_Pok.C3.A9mon_Egg Baby Pokémon Egg] e dentro poderá vir um Baby Pokémon '''aleatório'''.</span> | | <center> |
| | <br> |
| | <span class="mw-customtoggle-Fire">'''Clique aqui para exibir o spoiler'''</span><div class="mw-collapsible mw-collapsed" id="mw-customcollapsible-Fire"> |
| | {| class="wikitable sortable" width="70%" |
| | ! width="1%" style="background-color: #9d1a64" | Nº |
| | ! width="10%" style="background-color: #9d1a64" | Imagem |
| | ! width="20%" style="background-color: #9d1a64" | Nome |
| | ! width="40%" style="background-color: #9d1a64" | Localização do mapa |
| | ! width="1%" style="background-color: #9d1a64" | Mapa |
| | |- |
| | ! align="center" | <font size='5'>'''1'''</font> |
| | | align="center" | [[Arquivo:Torch_Stacy.png|link=]] |
| | | align="center" | '''Torch''' |
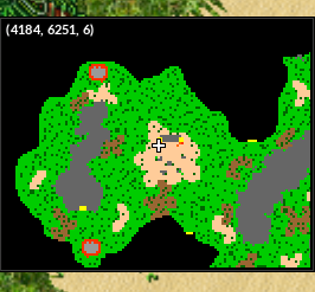
| | | align="center" | Golden Island <br> '''Coordenadas:''' {{Copiar|4186, 6251, 6}} |
| | | align="center" | [[Arquivo:Torch_mapa.png|link=]] |
| | |- |
| | ! align="center" | <font size='5'>'''2'''</font> |
| | | align="center" | [[Arquivo:Lava_Hole_Stacy.png|link=]] |
| | | align="center" | '''Lava Hole''' |
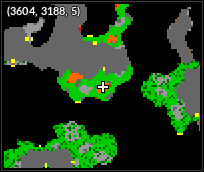
| | | align="center" | Charicific Valley <br> '''Coordenadas:''' {{Copiar|3604, 3188, 5}} |
| | | align="center" | [[Arquivo:Lava_hole_mapa.png|link=]] |
| | |- |
| | ! align="center" | <font size='5'>'''3'''</font> |
| | | align="center" | [[Arquivo:Lava_Fountain_2.png|link=]] |
| | | align="center" | '''Giant Rock''' |
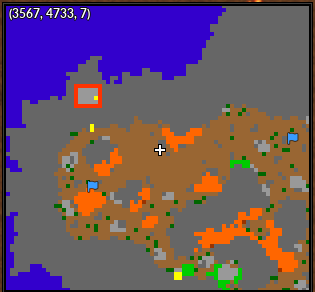
| | | align="center" | Magma Island <br> '''Coordenadas:''' {{Copiar|3567, 4732, 7}} |
| | | align="center" | [[Arquivo:Lava_fountain_2_mapa.png|link=]] |
| | |- |
| | ! align="center" | <font size='5'>'''4'''</font> |
| | | align="center" | [[Arquivo:Campfire_Stacy.png|link=]] |
| | | align="center" | '''Campfire''' |
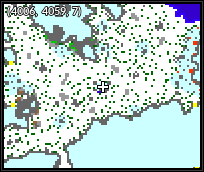
| | | align="center" | Seafoam Islands <br> '''Coordenadas:''' {{Copiar|4006, 4059, 7}} |
| | | align="center" | [[Arquivo:Campfire2_mapa.png|link=]] |
| | |- |
| | ! align="center" | <font size='5'>'''5'''</font> |
| | | align="center" | [[Arquivo:Hot_Cauldron.png|link=]] |
| | | align="center" | '''Hot Cauldron''' |
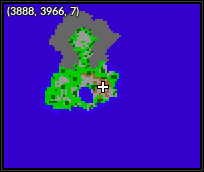
| | | align="center" | Ilha pequena entre Cinnabar e Fuchsia <br> '''Coordenadas:''' {{Copiar|3888, 3966, 7}} |
| | | align="center" | [[Arquivo:Hot_Cauldron_mapa.png|link=]] |
| | |- |
| | ! align="center" | <font size='5'>'''6'''</font> |
| | | align="center" | [[Arquivo:Candles.png|link=]] |
| | | align="center" | '''Candles''' |
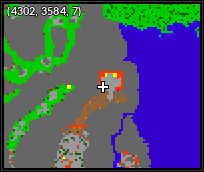
| | | align="center" | Cemitério de Lavender <br> '''Coordenadas:''' {{Copiar|4302, 3584, 7}} |
| | | align="center" | [[Arquivo:Candles_mapa.png|link=]] |
| | |- |
| | ! align="center" | <font size='5'>'''7'''</font> |
| | | align="center" | [[Arquivo:Coal_Basin.png|link=]] |
| | | align="center" | '''Coal Basin''' |
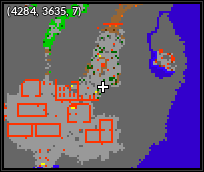
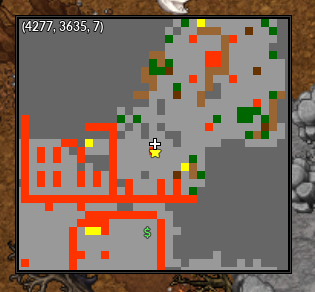
| | | align="center" | Cemitério de Lavender <br> '''Coordenadas:''' {{Copiar|4284, 3635, 7}} |
| | | align="center" | [[Arquivo:Coal_basin_mapa.png|link=]] |
| | |- |
| | ! align="center" | <font size='5'>'''8'''</font> |
| | | align="center" | [[Arquivo:Candelabrum.png|link=]] |
| | | align="center" | '''Candelabrum''' |
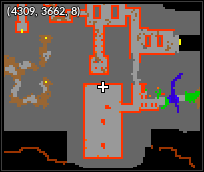
| | | align="center" | Cemitério de Lavender <br> '''Coordenadas:''' {{Copiar|4309, 3662, 8}} |
| | | align="center" | [[Arquivo:Candle_torch_mapa.png|link=]] |
| | |- |
| | ! align="center" | <font size='5'>'''9'''</font> |
| | | align="center" | [[Arquivo:Skull_Stacy.png|link=]] |
| | | align="center" | '''Skull''' |
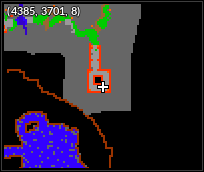
| | | align="center" | Cemitério de Lavender <br> '''Coordenadas:''' {{Copiar|4385, 3701, 8}} |
| | | align="center" | [[Arquivo:Skull3_mapa.png|link=]] |
| | |- |
| | ! align="center" | <font size='5'>'''10'''</font> |
| | | align="center" | [[Arquivo:Campfire1.png|link=]] |
| | | align="center" | '''Campfire''' |
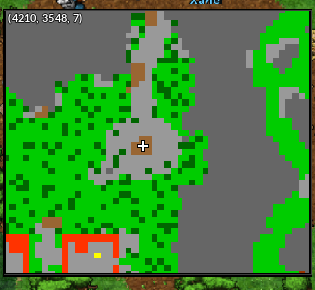
| | | align="center" | Em frente ao NPC Beleno, em Cerulean <br> '''Coordenadas:''' {{Copiar|4211, 3548, 7}} |
| | | align="center" | [[Arquivo:Campfire1_mapa.png|link=]] |
| | |- |
| | ! align="center" | <font size='5'>'''11'''</font> |
| | | align="center" | [[Arquivo:Skull_Candle.png|link=]] |
| | | align="center" | '''Skull Candle''' |
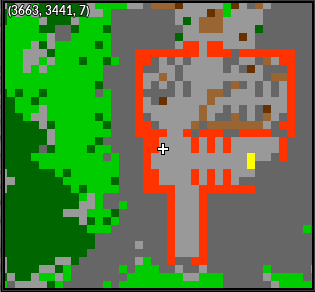
| | | align="center" | Cemitério de Pewter <br> '''Coordenadas:''' {{Copiar|3663, 3442, 7}} |
| | | align="center" | [[Arquivo:Skull_Candle_Stacy_Map.png|link=]] |
| | |- |
| | ! align="center" | <font size='5'>'''12'''</font> |
| | | align="center" | [[Arquivo:Totem.png|link=]] |
| | | align="center" | '''Totem''' |
| | | align="center" | Cemitério de Lavender <br> '''Coordenadas:''' {{Copiar|4277, 3636, 7}} |
| | | align="center" | [[Arquivo:Totem_Loc.png|link=]] |
| | |- |
| | ! align="center" | <font size='5'>'''13'''</font> |
| | | align="center" | [[Arquivo:Lava Fountain.png|link=]] |
| | | align="center" | '''Lava Fountain''' |
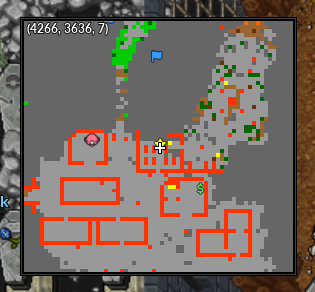
| | | align="center" | Cemitério de Lavender <br> '''Coordenadas:''' {{Copiar|4267, 3635, 7}} |
| | | align="center" | [[Arquivo:Lava_fountain.png|link=]] |
| | |- |
| | ! align="center" | <font size='5'>'''14'''</font> |
| | | align="center" | [[Arquivo:Statue.png|link=]] |
| | | align="center" | '''Statue''' |
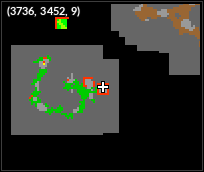
| | | align="center" | Cemitério de Pewter <br> '''Coordenadas:''' {{Copiar|3736, 3452, 9}} |
| | | align="center" | [[Arquivo:Statue_mapa.png|link=]] |
| | |- |
| | ! align="center" | <font size='5'>'''15'''</font> |
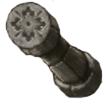
| | | align="center" | [[Arquivo:Stone_Coal_Basin_Stacy.png|link=]] |
| | | align="center" | '''Stone Coal Basin''' |
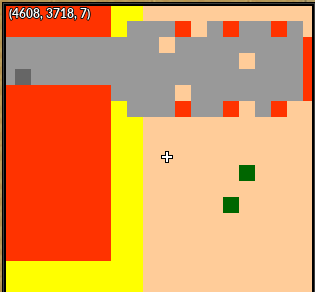
| | | align="center" | Desert Island <br> '''Coordenadas:''' {{Copiar|4607, 3718, 7}} |
| | | align="center" | [[Arquivo:Stone_coal_basin_mapa.png|link=]] |
| | |- |
| | ! align="center" | <font size='5'>'''16'''</font> |
| | | align="center" | [[Arquivo:Magmar_Statue.png|link=]] |
| | | align="center" | '''Magmar Statue''' |
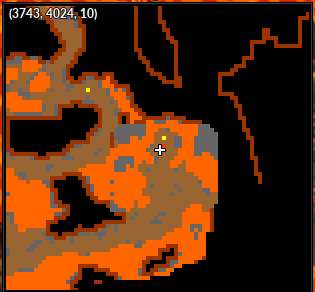
| | | align="center" | Subsolo de Cinnabar Island <br> '''Coordenadas:''' {{Copiar|3744, 4023, 10}} |
| | | align="center" | [[Arquivo:Magmar_statue_mapa.png|link=]] |
| | |- |
| | ! align="center" | <font size='5'>'''17'''</font> |
| | | align="center" | [[Arquivo:Volcanic_Carpet.png|link=]] |
| | | align="center" | '''Volcanic Carpet''' |
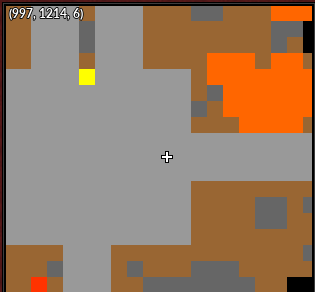
| | | align="center" | Área do Clã Volcanic, no Trade Center <br> '''Coordenadas:''' {{Copiar|997, 1210, 6}} |
| | | align="center" | [[Arquivo:Volcanic_carpet_mapa.png|link=]] |
| | |- |
| | ! align="center" | <font size='5'>'''18'''</font> |
| | | align="center" | [[Arquivo:Rustic_Column.png|link=]] |
| | | align="center" | '''Rustic Column''' |
| | | align="center" | Cemitério de Lavender <br> '''Coordenadas:''' {{Copiar|4380, 3682, 8}} |
| | | align="center" | [[Arquivo:Rustic_column_mapa.png|link=]] |
| | |- |
| | ! align="center" | <font size='5'>'''19'''</font> |
| | | align="center" | [[Arquivo:Skull1.png|link=]] |
| | | align="center" | '''Skull''' |
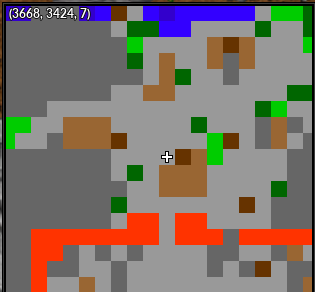
| | | align="center" | Cemitério de Pewter <br> '''Coordenadas:''' {{Copiar|3667, 3422, 7}} |
| | | align="center" | [[Arquivo:Skull1_mapa.png|link=]] |
| | |- |
| | ! align="center" | <font size='5'>'''20'''</font> |
| | | align="center" | [[Arquivo:Skull2.png|link=]] |
| | | align="center" | '''Skull''' |
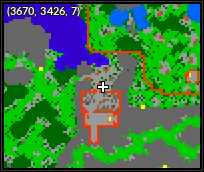
| | | align="center" | Cemitério de Pewter <br> '''Coordenadas:''' {{Copiar|3670, 3426, 7}} |
| | | align="center" | [[Arquivo:Skull2_mapa.png|link=]] |
| | |- |
| | ! align="center" | <font size='5'>'''21'''</font> |
| | | align="center" | [[Arquivo:Dead_tree_6.png|link=]] |
| | | align="center" | '''Dead Tree''' |
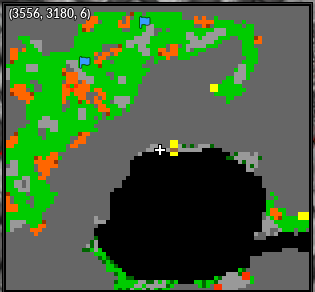
| | | align="center" | Charicific Valley <br> '''Coordenadas:''' {{Copiar|3555, 3180, 6}} |
| | | align="center" | [[Arquivo:Dead_Tree_6_mapa.png|link=]] |
| | |- |
| | ! align="center" | <font size='5'>'''22'''</font> |
| | | align="center" | [[Arquivo:Dragon_Flag_Stacy.png|link=]] |
| | | align="center" | '''Dragon Flag''' |
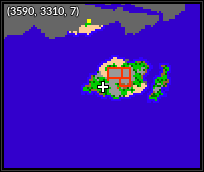
| | | align="center" | Ilha do Lance, ao sul do Charicific Valley <br> '''Coordenadas:''' {{Copiar|3590, 3310, 7}} |
| | | align="center" | [[Arquivo:Dragon_flag_mapa.png|link=]] |
| | |- |
| | ! align="center" | <font size='5'>'''23'''</font> |
| | | align="center" | [[Arquivo:Dead_tree_1.png|link=]] |
| | | align="center" | '''Dead Tree''' |
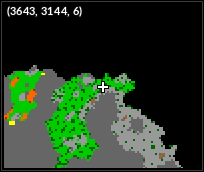
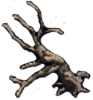
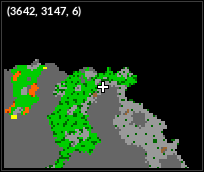
| | | align="center" | Charicific Valley <br> '''Coordenadas:''' {{Copiar|3643, 3144, 6}} |
| | | align="center" | [[Arquivo:Dead_Tree_1mapa.png|link=]] |
| | |- |
| | ! align="center" | <font size='5'>'''24'''</font> |
| | | align="center" | [[Arquivo:Dead_tree_2.png|link=]] |
| | | align="center" | '''Dead Tree''' |
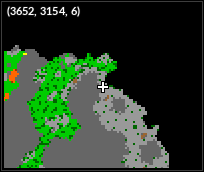
| | | align="center" | Charicific Valley <br> '''Coordenadas:''' {{Copiar|3652, 3154, 6}} |
| | | align="center" | [[Arquivo:Dead_Tree_2_mapa.png|link=]] |
| | |- |
| | ! align="center" | <font size='5'>'''25'''</font> |
| | | align="center" | [[Arquivo:Dead_tree_3.png|link=]] |
| | | align="center" | '''Dead Tree''' |
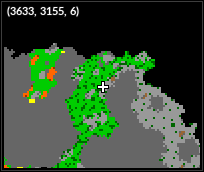
| | | align="center" | Charicific Valley <br> '''Coordenadas:''' {{Copiar|3633, 3155, 6}} |
| | | align="center" | [[Arquivo:Dead_Tree_3_mapa.png|link=]] |
| | |- |
| | ! align="center" | <font size='5'>'''26'''</font> |
| | | align="center" | [[Arquivo:Dead_tree_4.png|link=]] |
| | | align="center" | '''Dead Tree''' |
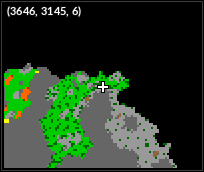
| | | align="center" | Charicific Valley <br> '''Coordenadas:''' {{Copiar|3646, 3145, 6}} |
| | | align="center" | [[Arquivo:Dead_Tree_1_e_4_mapa.png|link=]] |
| | |- |
| | ! align="center" | <font size='5'>'''27'''</font> |
| | | align="center" | [[Arquivo:Dead_tree_5.png|link=]] |
| | | align="center" | '''Dead Tree''' |
| | | align="center" | Charicific Valley <br> '''Coordenadas:''' {{Copiar|3642, 3147, 6}} |
| | | align="center" | [[Arquivo:Dead_Tree_5_mapa.png|link=]] |
| | |- |
| | ! align="center" | <font size='5'>'''28'''</font> |
| | | align="center" | [[Arquivo:Charizard_Heart_Statue_Stacy.png|link=]] |
| | | align="center" | '''Charizard Heart Statue''' |
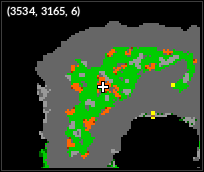
| | | align="center" | Charicific Valley <br> (Precisa ter começado a [[Mike Quest|'''Mike Quest''']]) <br> '''Coordenadas:''' {{Copiar|3534, 3165, 6}} |
| | | align="center" | [[Arquivo:Charizard_heart_statue_mapa.png|link=]] |
| | |}</div></center> |
|
| |
|
| ==<b>3ª Parte</b>== <!--T:32--> | | |-|Água= |
| | <center> |
| | <br> |
| | <span class="mw-customtoggle-Fire">'''Clique aqui para exibir o spoiler'''</span><div class="mw-collapsible mw-collapsed" id="mw-customcollapsible-Fire"> |
| | {| class="wikitable sortable" width="70%" |
| | ! width="1%" style="background-color: #9d1a64" | Nº |
| | ! width="10%" style="background-color: #9d1a64" | Imagem |
| | ! width="20%" style="background-color: #9d1a64" | Nome |
| | ! width="40%" style="background-color: #9d1a64" | Localização do mapa |
| | ! width="1%" style="background-color: #9d1a64" | Mapa |
| | |- |
| | ! align="center" | <font size='5'>'''1'''</font> |
| | | align="center" | [[Arquivo:Coconut_palm.png|link=]] |
| | | align="center" | '''Coconut Palm''' |
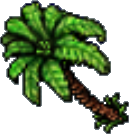
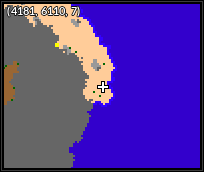
| | | align="center" | Leek Island <br> '''Coordenadas:''' {{Copiar|4181, 6110, 7}} |
| | | align="center" | [[Arquivo:Coconut_palm_mapa.png|link=]] |
| | |- |
| | ! align="center" | <font size='5'>'''2'''</font> |
| | | align="center" | [[Arquivo:Coconut_Palm2.png|link=]] |
| | | align="center" | '''Coconut Palm''' |
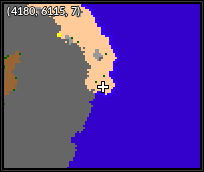
| | | align="center" | Leek Island <br> '''Coordenadas:''' {{Copiar|4180, 6115, 7}} |
| | | align="center" | [[Arquivo:Coconut_palm_mapa2.png|link=]] |
| | |- |
| | ! align="center" | <font size='5'>'''3'''</font> |
| | | align="center" | [[Arquivo:Shell_1.png|link=]] |
| | | align="center" | '''Shells''' |
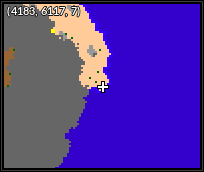
| | | align="center" | Leek Island <br> '''Coordenadas:''' {{Copiar|4183, 6117, 7}} |
| | | align="center" | [[Arquivo:Shells_1_mapa.png|link=]] |
| | |- |
| | ! align="center" | <font size='5'>'''4'''</font> |
| | | align="center" | [[Arquivo:Shell_2.png|link=]] |
| | | align="center" | '''Shells''' |
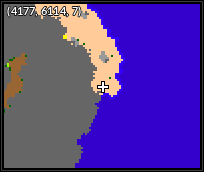
| | | align="center" | Leek Island <br> '''Coordenadas:''' {{Copiar|4177, 6114, 7}} |
| | | align="center" | [[Arquivo:Shells_3_mapa.png|link=]] |
| | |- |
| | ! align="center" | <font size='5'>'''5'''</font> |
| | | align="center" | [[Arquivo:Shell_3.png|link=]] |
| | | align="center" | '''Shells''' |
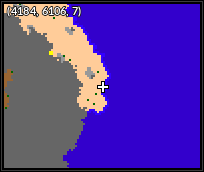
| | | align="center" | Leek Island <br> '''Coordenadas:''' {{Copiar|4184, 6106, 7}} |
| | | align="center" | [[Arquivo:Shells_3.1_mapa.png|link=]] |
| | |- |
| | ! align="center" | <font size='5'>'''6'''</font> |
| | | align="center" | [[Arquivo:Shell_4.png|link=]] |
| | | align="center" | '''Shells''' |
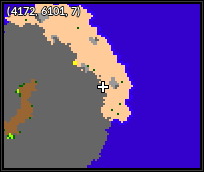
| | | align="center" | Leek Island <br> '''Coordenadas:''' {{Copiar|4172, 6101, 7}} |
| | | align="center" | [[Arquivo:Shells_4_mapa.png|link=]] |
| | |- |
| | ! align="center" | <font size='5'>'''7'''</font> |
| | | align="center" | [[Arquivo:Starfish.png|link=]] |
| | | align="center" | '''Starfish''' |
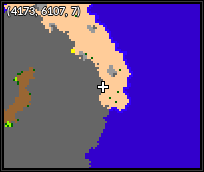
| | | align="center" | Leek Island <br> '''Coordenadas:''' {{Copiar|4173, 6107, 7}} |
| | | align="center" | [[Arquivo:Starfish_mapa.png|link=]] |
| | |- |
| | ! align="center" | <font size='5'>'''8'''</font> |
| | | align="center" | [[Arquivo:Algae.png|link=]] |
| | | align="center" | '''Algae''' |
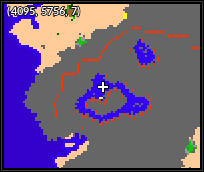
| | | align="center" | Kinnow Island <br> '''Coordenadas:''' {{Copiar|4095, 5756, 7}} |
| | | align="center" | [[Arquivo:Algae_mapa.png|link=]] |
| | |- |
| | ! align="center" | <font size='5'>'''9'''</font> |
| | | align="center" | [[Arquivo:Coral.png|link=]] |
| | | align="center" | '''Coral''' |
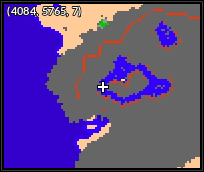
| | | align="center" | Kinnow Island <br> '''Coordenadas:''' {{Copiar|4084, 5765, 7}} |
| | | align="center" | [[Arquivo:Coral_mapa.png|link=]] |
| | |- |
| | ! align="center" | <font size='5'>'''10'''</font> |
| | | align="center" | [[Arquivo:Coral_reef_1.png|link=]] |
| | | align="center" | '''Coral Reef''' |
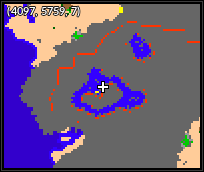
| | | align="center" | Kinnow Island <br> '''Coordenadas:''' {{Copiar|4097, 5759, 7}} |
| | | align="center" | [[Arquivo:Coral_reef_1_mapa.png|link=]] |
| | |- |
| | ! align="center" | <font size='5'>'''11'''</font> |
| | | align="center" | [[Arquivo:Coral_reef_2.png|link=]] |
| | | align="center" | '''Coral Reef''' |
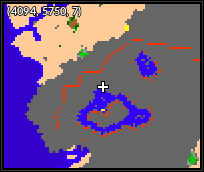
| | | align="center" | Kinnow Island <br> '''Coordenadas:''' {{Copiar|4094, 5750, 7}} |
| | | align="center" | [[Arquivo:Coral_reef_2_mapa.png|link=]] |
| | |- |
| | ! align="center" | <font size='5'>'''12'''</font> |
| | | align="center" | [[Arquivo:Coral_reef_3.png|link=]] |
| | | align="center" | '''Coral Reef''' |
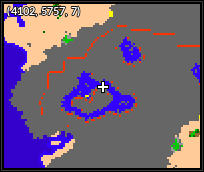
| | | align="center" | Kinnow Island <br> '''Coordenadas:''' {{Copiar|4102, 5757, 7}} |
| | | align="center" | [[Arquivo:Coral_reef_3_mapa.png|link=]] |
| | |- |
| | ! align="center" | <font size='5'>'''13'''</font> |
| | | align="center" | [[Arquivo:Coral_reef_4.png|link=]] |
| | | align="center" | '''Coral Reef''' |
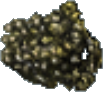
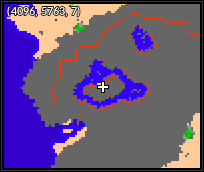
| | | align="center" | Kinnow Island <br> '''Coordenadas:''' {{Copiar|4096, 5763, 7}} |
| | | align="center" | [[Arquivo:Coral_reef_4_mapa.png|link=]] |
| | |- |
| | ! align="center" | <font size='5'>'''14'''</font> |
| | | align="center" | [[Arquivo:Coral_reef_5.png|link=]] |
| | | align="center" | '''Coral Reef''' |
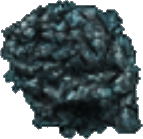
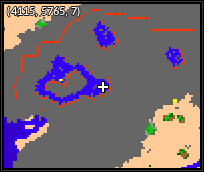
| | | align="center" | Kinnow Island <br> '''Coordenadas:''' {{Copiar|4115, 5765, 7}} |
| | | align="center" | [[Arquivo:Coral_reef_5_mapa.png|link=]] |
| | |- |
| | ! align="center" | <font size='5'>'''15'''</font> |
| | | align="center" | [[Arquivo:Open oyster.png|link=]] |
| | | align="center" | '''Open Oyster''' |
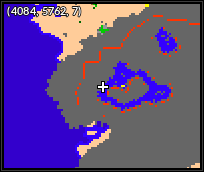
| | | align="center" | Kinnow Island <br> '''Coordenadas:''' {{Copiar|4084, 5762, 7}} |
| | | align="center" | [[Arquivo:Open oyster mapa.png|link=]] |
| | |- |
| | ! align="center" | <font size='5'>'''16'''</font> |
| | | align="center" | [[Arquivo:Coral_reef_6.png|link=]] |
| | | align="center" | '''Coral Reef''' |
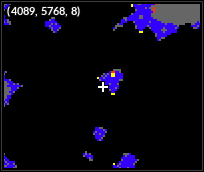
| | | align="center" | Kinnow Island <br> '''Coordenadas:''' {{Copiar|4089, 5768, 8}} |
| | | align="center" | [[Arquivo:Coral_reef_6_mapa.png|link=]] |
| | |- |
| | ! align="center" | <font size='5'>'''17'''</font> |
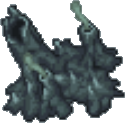
| | | align="center" | [[Arquivo:Underwater_volcano.png|link=]] |
| | | align="center" | '''Underwater Volcano''' |
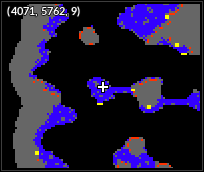
| | | align="center" | Kinnow Island <br> '''Coordenadas:''' {{Copiar|4071, 5762, 9}} |
| | | align="center" | [[Arquivo:Underwater_volcano_mapa.png|link=]] |
| | |- |
| | ! align="center" | <font size='5'>'''18'''</font> |
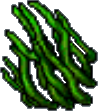
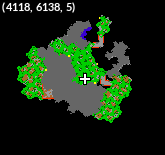
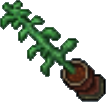
| | | align="center" | [[Arquivo:Kelp.png|link=]] |
| | | align="center" | '''Kelp''' |
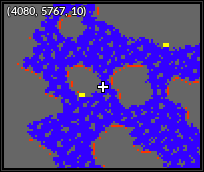
| | | align="center" | Kinnow Island <br> '''Coordenadas:''' {{Copiar|4080, 5767, 10}} |
| | | align="center" | [[Arquivo:Kelp_mapa.png|link=]] |
| | |- |
| | ! align="center" | <font size='5'>'''19'''</font> |
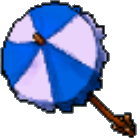
| | | align="center" | [[Arquivo:Beach_Umbrella_3.png|link=]] |
| | | align="center" | '''Beach Umbrella''' |
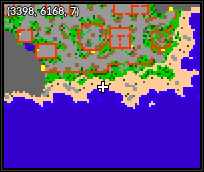
| | | align="center" | Valencia <br> '''Coordenadas:''' {{Copiar|3398, 6168, 7}} |
| | | align="center" | [[Arquivo:Beach_umbrella_3_mapa.png|link=]] |
| | |- |
| | ! align="center" | <font size='5'>'''20'''</font> |
| | | align="center" | [[Arquivo:Beach_Umbrella_1.png|link=]] |
| | | align="center" | '''Beach Umbrella''' |
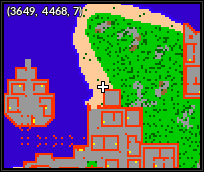
| | | align="center" | Hamlin <br> '''Coordenadas:''' {{Copiar|3649, 4468, 7}} |
| | | align="center" | [[Arquivo:Beach_umbrella_1_mapa.png|link=]] |
| | |- |
| | ! align="center" | <font size='5'>'''21'''</font> |
| | | align="center" | [[Arquivo:Broken_Anchor.png|link=]] |
| | | align="center" | '''Broken Anchor''' |
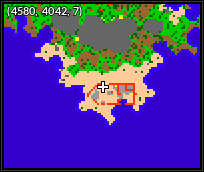
| | | align="center" | Lost Island <br> '''Coordenadas:''' {{Copiar|4580, 4042, 7}} |
| | | align="center" | [[Arquivo:Broken_anchor_mapa.png|link=]] |
| | |- |
| | ! align="center" | <font size='5'>'''22'''</font> |
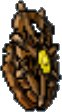
| | | align="center" | [[Arquivo:Steering_wheel.png|link=]] |
| | | align="center" | '''Steering Wheel''' |
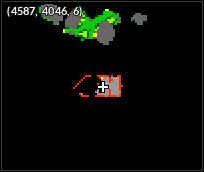
| | | align="center" | Lost Island <br> '''Coordenadas:''' {{Copiar|4587, 4046, 6}} |
| | | align="center" | [[Arquivo:Steering_wheel_mapa.png|link=]] |
| | |- |
| | ! align="center" | <font size='5'>'''23'''</font> |
| | | align="center" | [[Arquivo:Blastoise_Hull.png|link=]] |
| | | align="center" | '''Blastoise Hull''' |
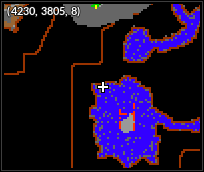
| | | align="center" | Diving Spot <br> '''Coordenadas:''' {{Copiar|4230, 3805, 8}} |
| | | align="center" | [[Arquivo:Blastoise_hull_mapa.png|link=]] |
| | |- |
| | ! align="center" | <font size='5'>'''24'''</font> |
| | | align="center" | [[Arquivo:Damaged_Mast_1.png|link=]] |
| | | align="center" | '''Damaged Mast''' |
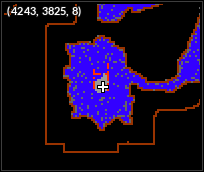
| | | align="center" | Diving Spot <br> '''Coordenadas:''' {{Copiar|4243, 3825, 8}} |
| | | align="center" | [[Arquivo:Damaged_mast_1_mapa.png|link=]] |
| | |- |
| | ! align="center" | <font size='5'>'''25'''</font> |
| | | align="center" | [[Arquivo:Damaged_Mast_2.png|link=]] |
| | | align="center" | '''Damaged Mast''' |
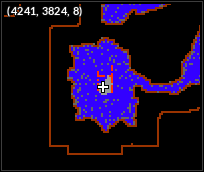
| | | align="center" | Diving Spot <br> '''Coordenadas:''' {{Copiar|4241, 3824, 8}} |
| | | align="center" | [[Arquivo:Damaged_mast_2_mapa.png|link=]] |
| | |- |
| | ! align="center" | <font size='5'>'''26'''</font> |
| | | align="center" | [[Arquivo:Damaged_Mast_3.png|link=]] |
| | | align="center" | '''Damaged Mast''' |
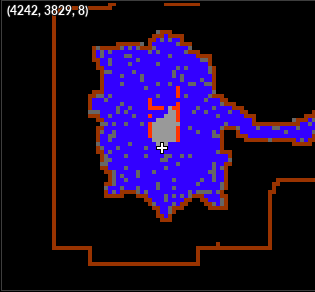
| | | align="center" | Diving Spot <br> '''Coordenadas:''' {{Copiar|4242, 3829, 8}} |
| | | align="center" | [[Arquivo:Damaged_mast_3_mapa.png|link=]] |
| | |- |
| | ! align="center" | <font size='5'>'''27'''</font> |
| | | align="center" | [[Arquivo:Damaged_Mast_4.png|link=]] |
| | | align="center" | '''Damaged Mast''' |
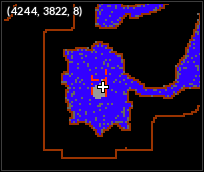
| | | align="center" | Diving Spot <br> '''Coordenadas:''' {{Copiar|4244, 3822, 8}} |
| | | align="center" | [[Arquivo:Damaged_mast_4_mapa.png|link=]] |
| | |- |
| | ! align="center" | <font size='5'>'''28'''</font> |
| | | align="center" | [[Arquivo:Firefly-pronto.gif|link=]] |
| | | align="center" | '''Firefly''' |
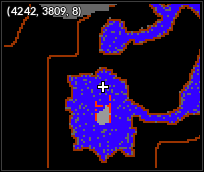
| | | align="center" | Diving Spot <br> '''Coordenadas:''' {{Copiar|4242, 3809, 8}} |
| | | align="center" | [[Arquivo:Firefly_mapa.png|link=]] |
| | |- |
| | ! align="center" | <font size='5'>'''29'''</font> |
| | | align="center" | [[Arquivo:Beach_Umbrella_2.png|link=]] |
| | | align="center" | '''Beach Umbrella''' |
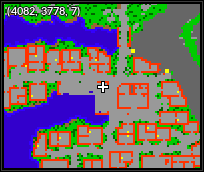
| | | align="center" | Vermilion <br> '''Coordenadas:''' {{Copiar|4082, 3778, 7}} |
| | | align="center" | [[Arquivo:Beach_umbrella_2_mapa.png|link=]] |
| | |- |
| | ! align="center" | <font size='5'>'''30'''</font> |
| | | align="center" | [[Arquivo:Damaged_Mast_5.png|link=]] |
| | | align="center" | '''Damaged Mast''' |
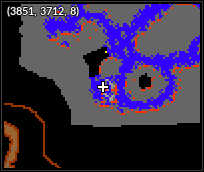
| | | align="center" | Respawn Subaquatico, entre Viridian e Celadon <br> '''Coordenadas:''' {{Copiar|3851, 3712, 8}} |
| | | align="center" | [[Arquivo:Damaged_mast_5_mapa.png|link=]] |
| | |- |
| | ! align="center" | <font size='5'>'''31'''</font> |
| | | align="center" | [[Arquivo:Damaged_Mast_6.png|link=]] |
| | | align="center" | '''Damaged Mast''' |
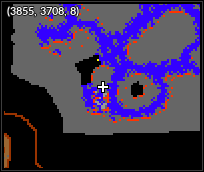
| | | align="center" | Respawn Subaquatico, entre Viridian e Celadon <br> '''Coordenadas:''' {{Copiar|3855, 3708, 8}} |
| | | align="center" | [[Arquivo:Damaged_mast_6_mapa.png|link=]] |
| | |}</div></center> |
|
| |
|
| <!--T:33--> | | |-|Planta= |
| Sua segunda missão será <b>tirar fotos</b> com a câmera que o Npc te entregar, de lugares onde frequentam os pokémon do elemento escolhido:
| | <center> |
| | <br> |
| | <span class="mw-customtoggle-Fire">'''Clique aqui para exibir o spoiler'''</span><div class="mw-collapsible mw-collapsed" id="mw-customcollapsible-Fire"> |
| | {| class="wikitable sortable" width="70%" |
| | ! width="1%" style="background-color: #9d1a64" | Nº |
| | ! width="10%" style="background-color: #9d1a64" | Imagem |
| | ! width="20%" style="background-color: #9d1a64" | Nome |
| | ! width="40%" style="background-color: #9d1a64" | Localização do mapa |
| | ! width="1%" style="background-color: #9d1a64" | Mapa |
| | |- |
| | ! align="center" | <font size='5'>'''1'''</font> |
| | | align="center" | [[Arquivo:Thread_Tree.png|link=]] |
| | | align="center" | '''Thread Tree''' |
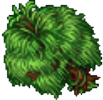
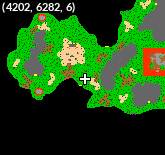
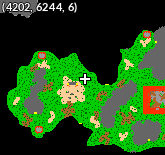
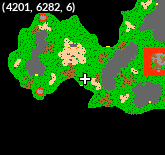
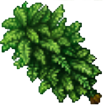
| | | align="center" | Golden Island <br> '''Coordenadas:''' {{Copiar|4202, 6283, 6}} |
| | | align="center" | [[Arquivo:Stacy_Quest_-_Thread_Tree.png|link=]] |
| | |- |
| | ! align="center" | <font size='5'>'''2'''</font> |
| | | align="center" | [[Arquivo:Large_Pearl_Flower.png|link=]] |
| | | align="center" | '''Large Pearl Flower''' |
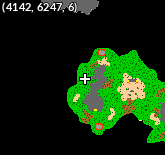
| | | align="center" | Golden Island <br> '''Coordenadas:''' {{Copiar|4141, 6247, 6}} |
| | | align="center" | [[Arquivo:Stacy_Quest_-_Large_Pearl_Flower.png|link=]] |
| | |- |
| | ! align="center" | <font size='5'>'''3'''</font> |
| | | align="center" | [[Arquivo:Crane_Plant.png|link=]] |
| | | align="center" | '''Crane Plant''' |
| | | align="center" | Golden Island <br> '''Coordenadas:''' {{Copiar|4202, 6243, 6}} |
| | | align="center" | [[Arquivo:Stacy_Quest_-_Crane_Plant.png|link=]] |
| | |- |
| | ! align="center" | <font size='5'>'''4'''</font> |
| | | align="center" | [[Arquivo:Plant.png|link=]] |
| | | align="center" | '''Plant''' |
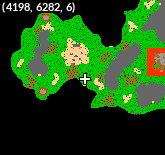
| | | align="center" | Golden Island <br> '''Coordenadas:''' {{Copiar|4200, 6282, 6}} |
| | | align="center" | [[Arquivo:Stacy_Quest_-_Plant.png|link=]] |
| | |- |
| | ! align="center" | <font size='5'>'''5'''</font> |
| | | align="center" | [[Arquivo:Giant_Sunflower.png|link=]] |
| | | align="center" | '''Giant Sunflower''' |
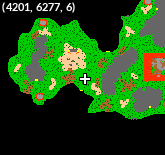
| | | align="center" | Golden Island <br> '''Coordenadas:''' {{Copiar|4203, 6278, 6}} |
| | | align="center" | [[Arquivo:Stacy_Quest_-_Giant_Sunflower.png|link=]] |
| | |- |
| | ! align="center" | <font size='5'>'''6'''</font> |
| | | align="center" | [[Arquivo:Purple_Kiss_Bush.png|link=]] |
| | | align="center" | '''Purple Kiss Bush''' |
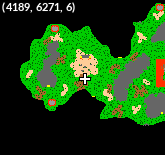
| | | align="center" | Golden Island <br> '''Coordenadas:''' {{Copiar|4188, 6271, 6}} |
| | | align="center" | [[Arquivo:Stacy_Quest_-_Purple_Kiss_Bush.png|link=]] |
| | |- |
| | ! align="center" | <font size='5'>'''7'''</font> |
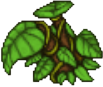
| | | align="center" | [[Arquivo:Jungle_Umbrella.png|link=]] |
| | | align="center" | '''Jungle Umbrella''' |
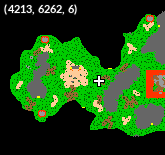
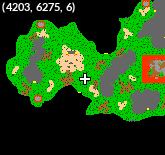
| | | align="center" | Golden Island <br> '''Coordenadas:''' {{Copiar|4215, 6263, 6}} |
| | | align="center" | [[Arquivo:Stacy_Quest_-_Jungle_Umbrella1.png|link=]] |
| | |- |
| | ! align="center" | <font size='5'>'''8'''</font> |
| | | align="center" | [[Arquivo:Jungle_Umbrella_2.png|link=]] |
| | | align="center" | '''Jungle Umbrella''' |
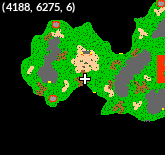
| | | align="center" | Golden Island <br> '''Coordenadas:''' {{Copiar|4187, 6275, 6}} |
| | | align="center" | [[Arquivo:Stacy_Quest_-_Jungle_Umbrella2.png|link=]] |
| | |- |
| | ! align="center" | <font size='5'>'''9'''</font> |
| | | align="center" | [[Arquivo:Strange_Tree.png|link=]] |
| | | align="center" | '''Strange Tree''' |
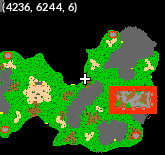
| | | align="center" | Golden Island <br> '''Coordenadas:''' {{Copiar|4235, 6244, 6}} |
| | | align="center" | [[Arquivo:Stacy_Quest_-_Strange_Tree.png|link=]] |
| | |- |
| | ! align="center" | <font size='5'>'''10'''</font> |
| | | align="center" | [[Arquivo:Green_Plant_1.png|link=]] |
| | | align="center" | '''Green Plant''' |
| | | align="center" | Golden Island <br> '''Coordenadas:''' {{Copiar|4203, 6274, 6}} |
| | | align="center" | [[Arquivo:Stacy_Quest_-_Green_Plant1.png|link=]] |
| | |- |
| | ! align="center" | <font size='5'>'''11'''</font> |
| | | align="center" | [[Arquivo:Green_Plant_2.png|link=]] |
| | | align="center" | '''Green Plant''' |
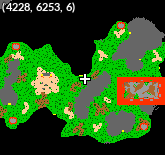
| | | align="center" | Golden Island <br> '''Coordenadas:''' {{Copiar|4228, 6252, 6}} |
| | | align="center" | [[Arquivo:Stacy_Quest_-_Green_Plant2.png|link=]] |
| | |- |
| | ! align="center" | <font size='5'>'''12'''</font> |
| | | align="center" | [[Arquivo:Jungle_Dweller_Bush.png|link=]] |
| | | align="center" | '''Jungle Dweller Bush''' |
| | | align="center" | Golden Island <br> '''Coordenadas:''' {{Copiar|4225, 6255, 6}} |
| | | align="center" | [[Arquivo:Stacy_Quest_-_Jungle_Dweller_Bush.png|link=]] |
| | |- |
| | ! align="center" | <font size='5'>'''13'''</font> |
| | | align="center" | [[Arquivo:Jungle_Bells.png|link=]] |
| | | align="center" | '''Jungle Bells''' |
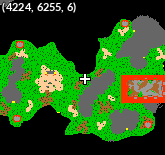
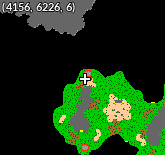
| | | align="center" | Golden Island <br> '''Coordenadas:''' {{Copiar|4156, 6226, 6}} |
| | | align="center" | [[Arquivo:Stacy_Quest_-_Jungle_Bells.png|link=]] |
| | |- |
| | ! align="center" | <font size='5'>'''14'''</font> |
| | | align="center" | [[Arquivo:Dawn_Singer.png|link=]] |
| | | align="center" | '''Dawn Singer''' |
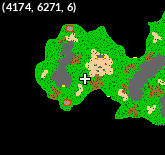
| | | align="center" | Golden Island <br> '''Coordenadas:''' {{Copiar|4174, 6271, 6}} |
| | | align="center" | [[Arquivo:Stacy_Quest_-_Dawn_Singer.png|link=]] |
| | |- |
| | ! align="center" | <font size='5'>'''15'''</font> |
| | | align="center" | [[Arquivo:Giant_Rose.png|link=]] |
| | | align="center" | '''Giant Rose''' |
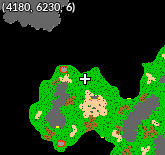
| | | align="center" | Golden Island <br> '''Coordenadas:''' {{Copiar|4179, 6230, 6}} |
| | | align="center" | [[Arquivo:Stacy_Quest_-_Giant_Rose.png|link=]] |
| | |- |
| | ! align="center" | <font size='5'>'''16'''</font> |
| | | align="center" | [[Arquivo:Tulip.png|link=]] |
| | | align="center" | '''Tulip''' |
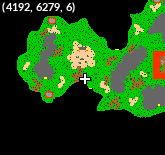
| | | align="center" | Golden Island <br> '''Coordenadas:''' {{Copiar|4192, 6279, 6}} |
| | | align="center" | [[Arquivo:Stacy_Quest_-_Tulip.png|link=]] |
| | |- |
| | ! align="center" | <font size='5'>'''17'''</font> |
| | | align="center" | [[Arquivo:Bush.png|link=]] |
| | | align="center" | '''Bush''' |
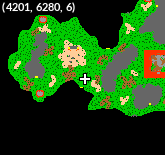
| | | align="center" | Golden Island <br> '''Coordenadas:''' {{Copiar|4200, 6280, 6}} |
| | | align="center" | [[Arquivo:Stacy_Quest_-_Bush1.png|link=]] |
| | |- |
| | ! align="center" | <font size='5'>'''18'''</font> |
| | | align="center" | [[Arquivo:Amazonian_Tree.png|link=]] |
| | | align="center" | '''Amazonian Tree''' |
| | | align="center" | Golden Island <br> '''Coordenadas:''' {{Copiar|4198, 6281, 6}} |
| | | align="center" | [[Arquivo:Stacy_Quest_-_Amazonian_Tree.png|link=]] |
| | |- |
| | ! align="center" | <font size='5'>'''19'''</font> |
| | | align="center" | [[Arquivo:Flower_Plant.png|link=]] |
| | | align="center" | '''Flower Plant''' |
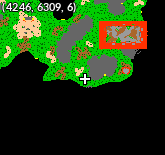
| | | align="center" | Golden Island <br> '''Coordenadas:''' {{Copiar|4245, 6309, 6}} |
| | | align="center" | [[Arquivo:Stacy_Quest_-_Flower_Plant.png|link=]] |
| | |- |
| | ! align="center" | <font size='5'>'''20'''</font> |
| | | align="center" | [[Arquivo:Bulb_Tree.png|link=]] |
| | | align="center" | '''Bulb Tree''' |
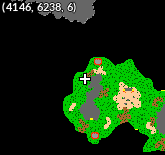
| | | align="center" | Golden Island <br> '''Coordenadas:''' {{Copiar|4145, 6238, 6}} |
| | | align="center" | [[Arquivo:Stacy_Quest_-_Bulb_Tree.png|link=]] |
| | |- |
| | ! align="center" | <font size='5'>'''21'''</font> |
| | | align="center" | [[Arquivo:Wild Plant.png|link=]] |
| | | align="center" | '''Wild Plant''' |
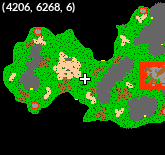
| | | align="center" | Golden Island <br> '''Coordenadas:''' {{Copiar|4205, 6268, 6}} |
| | | align="center" | [[Arquivo:Stacy_Quest_-_Wild_Plant.png|link=]] |
| | |- |
| | ! align="center" | <font size='5'>'''22'''</font> |
| | | align="center" | [[Arquivo:Moonflowers.png|link=]] |
| | | align="center" | '''Moonflowers''' |
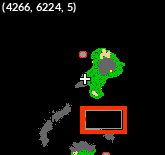
| | | align="center" | Golden Island <br> '''Coordenadas:''' {{Copiar|4266, 6224, 5}} |
| | | align="center" | [[Arquivo:Stacy_Quest_-_Moon_Flowers.png|link=]] |
| | |- |
| | ! align="center" | <font size='5'>'''23'''</font> |
| | | align="center" | [[Arquivo:Heaven_Blossom.png|link=]] |
| | | align="center" | '''Heaven Blossom''' |
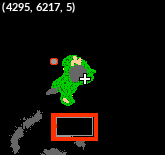
| | | align="center" | Golden Island <br> '''Coordenadas:''' {{Copiar|4295, 6217, 5}} |
| | | align="center" | [[Arquivo:Stacy_Quest_-_Heaven_Blossom.png|link=]] |
| | |- |
| | ! align="center" | <font size='5'>'''24'''</font> |
| | | align="center" | [[Arquivo:White_Flowers.png|link=]] |
| | | align="center" | '''White Flowers''' |
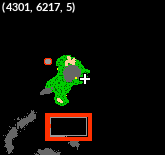
| | | align="center" | Golden Island <br> '''Coordenadas:''' {{Copiar|4301, 6217, 5}} |
| | | align="center" | [[Arquivo:Stacy_Quest_-_White_Flowers1.png|link=]] |
| | |- |
| | ! align="center" | <font size='5'>'''25'''</font> |
| | | align="center" | [[Arquivo:Sunflower.png|link=]] |
| | | align="center" | '''Sunflower''' |
| | | align="center" | Golden Island <br> '''Coordenadas:''' {{Copiar|4284, 6220, 5}} |
| | | align="center" | [[Arquivo:Stacy_Quest_-_Sunflower.png|link=]] |
| | |- |
| | ! align="center" | <font size='5'>'''26'''</font> |
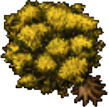
| | | align="center" | [[Arquivo:Yellow_Maple.png|link=]] |
| | | align="center" | '''Yellow Maple''' |
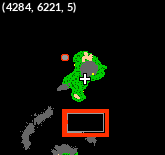
| | | align="center" | Leek Island <br> '''Coordenadas:''' {{Copiar|4138, 6132, 5}} |
| | | align="center" | [[Arquivo:Stacy_Quest_-_Yellow_Maple.png|link=]] |
| | |- |
| | ! align="center" | <font size='5'>'''27'''</font> |
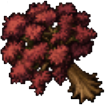
| | | align="center" | [[Arquivo:Red_Maple.png|link=]] |
| | | align="center" | '''Red Maple''' |
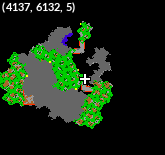
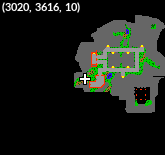
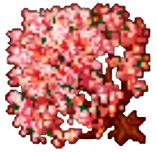
| | | align="center" | Leek Island <br> '''Coordenadas:''' {{Copiar|4117, 6138, 5}} |
| | | align="center" | [[Arquivo:Stacy_Quest_-_Red_Maple.png|link=]] |
| | |- |
| | ! align="center" | <font size='5'>'''28'''</font> |
| | | align="center" | [[Arquivo:Indoor_Plant.png|link=]] |
| | | align="center" | '''Indoor Plant''' |
| | | align="center" | Entrada do metrô de Phenac <br> '''Coordenadas:''' {{Copiar|5563, 5671, 10}} |
| | | align="center" | [[Arquivo:Stacy_Quest_-_Indoor_Plant.png|link=]] |
| | |- |
| | ! align="center" | <font size='5'>'''29'''</font> |
| | | align="center" | [[Arquivo:Georgeous_Tree.png|link=]] |
| | | align="center" | '''Gorgeous Tree''' |
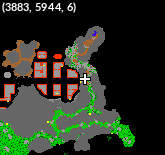
| | | align="center" | Mandarin Island <br> '''Coordenadas:''' {{Copiar|3884, 5944, 6}} |
| | | align="center" | [[Arquivo:Stacy_Quest_-_Gorgeous_Tree.png|link=]] |
| | |- |
| | ! align="center" | <font size='5'>'''30'''</font> |
| | | align="center" | [[Arquivo:Pearl_Flower_1.png|link=]] |
| | | align="center" | '''Pearl Flower''' |
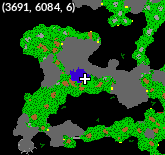
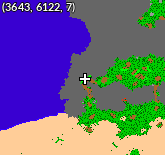
| | | align="center" | Mandarin Island <br> '''Coordenadas:''' {{Copiar|3690, 6084, 6}} |
| | | align="center" | [[Arquivo:Stacy_Quest_-_Pearl_Flower1.png|link=]] |
| | |- |
| | ! align="center" | <font size='5'>'''31'''</font> |
| | | align="center" | [[Arquivo:Pearl_Flower_2.png|link=]] |
| | | align="center" | '''Pearl Flower''' |
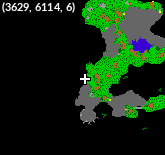
| | | align="center" | Mandarin Island <br> '''Coordenadas:''' {{Copiar|3628, 6113, 6}} |
| | | align="center" | [[Arquivo:Stacy_Quest_-_Pearl_Flower2.png|link=]] |
| | |- |
| | ! align="center" | <font size='5'>'''32'''</font> |
| | | align="center" | [[Arquivo:White_Flower.png|link=]] |
| | | align="center" | '''White Flower''' |
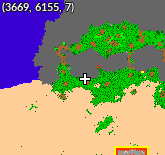
| | | align="center" | Mandarin Island <br> '''Coordenadas:''' {{Copiar|3669, 6155, 7}} |
| | | align="center" | [[Arquivo:Stacy_Quest_-_White_Flower.png|link=]] |
| | |- |
| | ! align="center" | <font size='5'>'''33'''</font> |
| | | align="center" | [[Arquivo:Swamp_Plant.png|link=]] |
| | | align="center" | '''Swamp Plant''' |
| | | align="center" | Mandarin Island <br> '''Coordenadas:''' {{Copiar|3643, 6121, 7}} |
| | | align="center" | [[Arquivo:Stacy_Quest_-_Swamp_Plant.png|link=]] |
| | |- |
| | ! align="center" | <font size='5'>'''34'''</font> |
| | | align="center" | [[Arquivo:Cactus.png|link=]] |
| | | align="center" | '''Cactus''' |
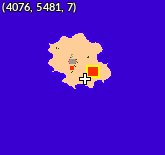
| | | align="center" | Sphinx Island <br> '''Coordenadas:''' {{Copiar|4075, 5481, 7}} |
| | | align="center" | [[Arquivo:Stacy_Quest_-_Cactus.png|link=]] |
| | |- |
| | ! align="center" | <font size='5'>'''35'''</font> |
| | | align="center" | [[Arquivo:Pinkan_Tree.png|link=]] |
| | | align="center" | '''Pinkan Tree''' |
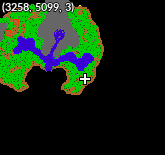
| | | align="center" | Pinkan Island <br> '''Coordenadas:''' {{Copiar|3257, 5099, 3}} |
| | | align="center" | [[Arquivo:Stacy_Quest_-_Pinkan_Tree.png|link=]] |
| | |- |
| | ! align="center" | <font size='5'>'''36'''</font> |
| | | align="center" | [[Arquivo:Yellow_Royal_Blossom.png|link=]] |
| | | align="center" | '''Yellow Royal Blossom''' |
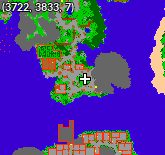
| | | align="center" | Pallet <br> '''Coordenadas:''' {{Copiar|3721, 3834, 7}} |
| | | align="center" | [[Arquivo:Stacy_Quest_-_Yellow_Royal_Blossom.png|link=]] |
| | |- |
| | ! align="center" | <font size='5'>'''37'''</font> |
| | | align="center" | [[Arquivo:Red_Royal_Blossom.png|link=]] |
| | | align="center" | '''Red Royal Blossom''' |
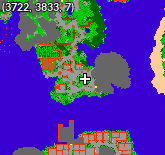
| | | align="center" | Pallet <br> '''Coordenadas:''' {{Copiar|3723, 3832, 7}} |
| | | align="center" | [[Arquivo:Stacy_Quest_-_Red_Royal_Blossom.png|link=]] |
| | |- |
| | ! align="center" | <font size='5'>'''38'''</font> |
| | | align="center" | [[Arquivo:Pink_Royal_Blossom.png|link=]] |
| | | align="center" | '''Pink Royal Blossom''' |
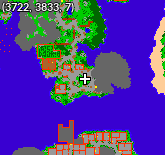
| | | align="center" | Pallet <br> '''Coordenadas:''' {{Copiar|3721, 3833, 7}} |
| | | align="center" | [[Arquivo:Stacy_Quest_-_Pink_Royal_Blossom.png|link=]] |
| | |- |
| | ! align="center" | <font size='5'>'''39'''</font> |
| | | align="center" | [[Arquivo:Mushrooms.png|link=]] |
| | | align="center" | '''Mushrooms''' |
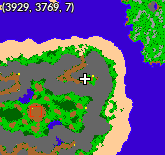
| | | align="center" | Jungle Island <br> '''Coordenadas:''' {{Copiar|3928, 3769, 7}} |
| | | align="center" | [[Arquivo:Stacy_Quest_-_Mushroom.png|link=]] |
| | |- |
| | ! align="center" | <font size='5'>'''40'''</font> |
| | | align="center" | [[Arquivo:Jungle_Maw.png|link=]] |
| | | align="center" | '''Jungle Maw''' |
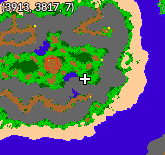
| | | align="center" | Jungle Island <br> '''Coordenadas:''' {{Copiar|3913, 3817, 7}} |
| | | align="center" | [[Arquivo:Stacy_Quest_-_Jungle_Maw.png|link=]] |
| | |- |
| | ! align="center" | <font size='5'>'''41'''</font> |
| | | align="center" | [[Arquivo:Small_Fruit.png|link=]] |
| | | align="center" | '''Small Fruit''' |
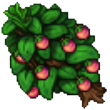
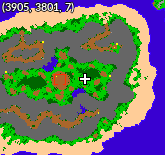
| | | align="center" | Jungle Island <br> '''Coordenadas:''' {{Copiar|3905, 3801, 7}} |
| | | align="center" | [[Arquivo:Stacy_Quest_-_Small_Fruit.png|link=]] |
| | |- |
| | ! align="center" | <font size='5'>'''42'''</font> |
| | | align="center" | [[Arquivo:Hairy_Plant.png|link=]] |
| | | align="center" | '''Hairy Plant''' |
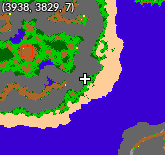
| | | align="center" | Jungle Island <br> '''Coordenadas:''' {{Copiar|3937, 3828, 7}} |
| | | align="center" | [[Arquivo:Stacy_Quest_-_Hairy_Plant.png|link=]] |
| | |- |
| | ! align="center" | <font size='5'>'''43'''</font> |
| | | align="center" | [[Arquivo:White_Flowers_2.png|link=]] |
| | | align="center" | '''White Flowers''' |
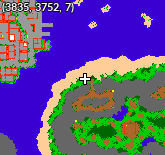
| | | align="center" | Jungle Island <br> '''Coordenadas:''' {{Copiar|3835, 3752, 7}} |
| | | align="center" | [[Arquivo:Stacy_Quest_-_White_Flowers2.png|link=]] |
| | |- |
| | ! align="center" | <font size='5'>'''44'''</font> |
| | | align="center" | [[Arquivo:Moldy_Mushroom.png|link=]] |
| | | align="center" | '''Moldy Mushroom''' |
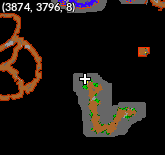
| | | align="center" | Subsolo de Jungle Island <br> '''Coordenadas:''' {{Copiar|3873, 3796, 8}} |
| | | align="center" | [[Arquivo:Stacy_Quest_-_Moldy_Mushroom.png|link=]] |
| | |- |
| | ! align="center" | <font size='5'>'''45'''</font> |
| | | align="center" | [[Arquivo:Pack_of_Mushrooms.png|link=]] |
| | | align="center" | '''Pack of Mushrooms''' |
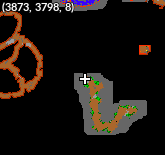
| | | align="center" | Subsolo de Jungle Island <br> '''Coordenadas:''' {{Copiar|3873, 3798, 8}} |
| | | align="center" | [[Arquivo:Stacy_Quest_-_Pack_Of_Mushrooms.png|link=]] |
| | |- |
| | |} |
| | </div></center> |
| | </tabber> |
|
| |
|
| <!--T:34-->
| | Ao concluir todas as fotos, o jogador recebe como recompensa um [[Arquivo:Volcegg.png|link=]] [[Arquivo:Seaegg.png|link=]] [[Arquivo:Naturiaegg.png|link=]] [[Pokémon_Egg#Stacy_Quest_Eggs|'''Ovo de Pokémon''']] e uma [[Arquivo:Volca Urn2.png|link=]] [[Arquivo:Sea Urn2.png|link=]] [[Arquivo:Natu Urn2.png|link=]] [[Interface_de_Personalização_da_Poké_Bola#Urnas-1|Urn]] especial relacionada ao elemento de afinidade do NPC orientador e 800K [[Arquivo:Exp_icon.png|link=]] de Experiência. |
| <b>(Imagens de todos os itens em breve)</b>
| |
|
| |
|
| <!--T:35-->
| | ==Teste de conhecimento== |
| <span style="color:red">'''Fogo: (Você irá encontrar todos os itens que precisa em Cinnabar, Magma Island, Charizard Valley, Ascorbia no respawn fire, Ilha do Moltres, Outland Ghost ou no respawn de Unown de Mandarin para o Candelabrum)</span>
| |
| 6 Dead Tree
| |
| 1 Mammoth Totem
| |
| 2 Campfire
| |
| 1 Charizard Heart Statue
| |
| 2 Lava Fountain
| |
| 1 Rustic Column
| |
| 1 Candles
| |
| 1 Thorn Bush (este item é um caldeirão que fica na ilha das butterfree, tal ilha pode ser encontrada no meio do mar entre cinnabar e a safari zone)
| |
| 1 Stone Coal Basin
| |
| 1 Magmar Statue
| |
| 1 Dragon Flag
| |
| 1 Statue
| |
| 3 Skull
| |
| 1 Volcanic Carpet
| |
| 1 Candelabrum
| |
| 1 Torch
| |
| 1 Lava Hole
| |
| 1 Skull Candle
| |
| 1 Coal Basin
| |
|
| |
|
| <!--T:36-->
| | O último teste do NPC orientador é uma série de perguntas sobre o elemento da afinidade do jogador. Clique na aba correspondente ao elemento abaixo para visualizar as perguntas e suas respectivas respostas. |
| <span style="color:blue">'''Água: (Você irá encontrar todos os itens que precisa em Moro no barco, Kinnown Islands, Tropical Island, Shell Island, Diving Spot, Lost Island.)</span>
| |
| 1 Open Oyster
| |
| 1 Coconut Palm
| |
| 1 Algae
| |
| 6 Coral Reef
| |
| 1 Palm Tree
| |
| 1 Coral
| |
| 1 Blastoise Hull
| |
| 4 Shells
| |
| 1 Broken Anchor
| |
| 1 Starfish
| |
| 1 Firefly
| |
| 6 Damaged Mast
| |
| 1 Steering Wheel
| |
| 3 Guard-sun
| |
| 1 Underwater Volcano
| |
| 1 Kelp
| |
|
| |
|
| <!--T:37--> | | <tabber> |
| <span style="color:green">'''Planta: (Você irá encontrar todos os itens que precisa em Green Island, Viridian Florest, Jungle Island, Swamp, Lost Island, Butwal Island, Lakeshore Island, Kinnown Islands, Mandarin na parte grass, Golden Island, Murcott Island, Outland Grass, Petalgroove Island) </span> | | |-|Fogo= |
| 1 Thread Tree
| | <center> |
| 1 Yellow Royal Blossom
| | {| class="wikitable" width="50%" |
| 1 Red Royal Blossom
| | ! width="0.05%" style=" | Nº |
| 1 Pinkan Royal Blossom
| | ! width="0.05%"" style=" | Pergunta |
| 1 Jungle Maw
| | ! width="0.05%"" style=" | Resposta |
| 1 Fairy Queen
| | |- |
| 1 Purple Kiss Bush
| | | align="center" height="75px"style="background-color: #eaecf0" | <font size='3.5'><b>1</b></font> |
| 1 Dragon Nest Tree
| | | align="center" height="75px"| Qual desses Pokémon recebe menos dano para ataques do elemento água? |
| 1 Cactus
| | | align="center" height="75px"| <b>Camerupt</b> |
| 1 Purple Cardinal
| | |- |
| 1 Amazonian Tree
| | | align="center" height="75px"style="background-color: #eaecf0" | <font size='3.5'><b>2</b></font> |
| 2 Jungle Umbrella
| | | align="center" height="75px"| Quantos tipos causam dano muito inefetivo a Pokémon do tipo puro fogo? |
| 1 Mushrooms
| | | align="center" height="75px"| <b>6</b> |
| 1 Moldy Mushroom
| | |- |
| 1 Crane Plant
| | | align="center" height="75px"style="background-color: #eaecf0" | <font size='3.5'><b>3</b></font> |
| 1 Wild Plant
| | | align="center" height="75px"| Quantos tipos causam dano normal a Pokémon do tipo puro fogo? |
| 1 Jungle dweller bush
| | | align="center" height="75px"| <b>10</b> |
| 1 Witches Cauldron
| | |- |
| 1 Large Pearl Flower
| | | align="center" height="75px"style="background-color: #eaecf0" | <font size='3.5'><b>4</b></font> |
| 1 Bees Ballroom
| | | align="center" height="75px"| Qual Pokémon lendário é o único que pode ser adquirido? |
| 1 Swamp Plant
| | | align="center" height="75px"| <b>Heatran</b> |
| 1 Moonflowers
| | |- |
| 1 Heaven Blossom
| | | align="center" height="75px"style="background-color: #eaecf0" | <font size='3.5'><b>4</b></font> |
| 1 White Flower
| | | align="center" height="75px"| Quantos tipos causam dano super efetivo a Pokémon do tipo puro fogo? |
| 2 White Flowers
| | | align="center" height="75px"| <b>3</b> |
| 1 Jungle Bells
| | |- |
| 1 Strange Tree
| | |} |
| 1 Pack of Mushrooms
| | </center> |
| 1 Monkey Tail
| | |-|Água= |
| 1 Small sunflower
| | <center> |
| 2 Pearl Flower
| | {| class="wikitable" width="50%" |
| 1 Yellow Maple
| | ! width="0.05%" style=" | Nº</span> |
| 1 Bush
| | ! width="0.05%"" style=" | Pergunta |
| 1 Tulip
| | ! width="0.05%"" style=" | Resposta |
| 1 Velvet Petal
| | |- |
| 1 Jungle Maw
| | | align="center" height="75px"style="background-color: #eaecf0" | <font size='3.5'><b>1</b></font> |
| 1 Georgeous Tree
| | | align="center" height="75px"| Qual desses Pokémon a Misty nunca teve? |
| 1 Pinkan Tree
| | | align="center" height="75px"| <b>Blastoise</b> |
| 1 Chill Nettle
| | |- |
| 1 Red Maple
| | | align="center" height="75px"style="background-color: #eaecf0" | <font size='3.5'><b>2</b></font> |
| 1 Indoor Plant
| | | align="center" height="75px"| Qual desses Pokémon não pode ser encontrado pescando? |
| 1 Plant
| | | align="center" height="75px"| <b>Marill</b> |
| | |- |
| | | align="center" height="75px"style="background-color: #eaecf0" | <font size='3.5'><b>3</b></font> |
| | | align="center" height="75px"| Quantos tipos causam dano muito inefetivo a Pokémon do tipo puro água? |
| | | align="center" height="75px"| <b>4</b> |
| | |- |
| | | align="center" height="75px"style="background-color: #eaecf0" | <font size='3.5'><b>4</b></font> |
| | | align="center" height="75px"| Quantos tipos causam dano normal a Pokémon do tipo puro água? |
| | | align="center" height="75px"| <b>13</b> |
| | |- |
| | | align="center" height="75px"style="background-color: #eaecf0" | <font size='3.5'><b>5</b></font> |
| | | align="center" height="75px"| Quantos tipos causam dano super efetivo a Pokémon do tipo puro água? |
| | | align="center" height="75px"| <b>2</b> |
| | |- |
| | |} |
| | </center> |
| | |-|Planta= |
| | <center> |
| | {| class="wikitable" width="50%" |
| | ! width="0.05%" style="| Nº |
| | ! width="0.05%"" style="| Pergunta |
| | ! width="0.05%"" style=" | Resposta |
| | |- |
| | | align="center" height="75px"style="background-color: #eaecf0" | <font size='3.5'><b>1</b></font> |
| | | align="center" height="75px"| Quantos tipos causam dano muito inefetivo a Pokémon do tipo puro planta? |
| | | align="center" height="75px"| <b>4</b> |
| | |- |
| | | align="center" height="75px"style="background-color: #eaecf0" | <font size='3.5'><b>2</b></font> |
| | | align="center" height="75px"| Quais desses Pokémon não podem ser encontrados usando Headbutt? |
| | | align="center" height="75px"| <b>Jumpluff</b> |
| | |- |
| | | align="center" height="75px"style="background-color: #eaecf0" | <font size='3.5'><b>2</b></font> |
| | | align="center" height="75px"| Qual destes Pokémon de Planta podem Mega Evoluir? |
| | | align="center" height="75px"| <b>Venusaur</b> |
| | |- |
| | | align="center" height="75px"style="background-color: #eaecf0" | <font size='3.5'><b>4</b></font> |
| | | align="center" height="75px"| Quantos tipos causam dano normal a Pokémon do tipo puro planta? |
| | | align="center" height="75px"| <b>10</b> |
| | |- |
| | | align="center" height="75px"style="background-color: #eaecf0" | <font size='3.5'><b>5</b></font> |
| | | align="center" height="75px"| Quantos tipos causam dano super efetivo a Pokémon do tipo puro planta? |
| | | align="center" height="75px"| <b>5</b> |
| | |- |
| | |} |
| | </center> |
| | </tabber> |
|
| |
|
| <!--T:38-->
| | Ao passar no teste, o jogador deverá retornar a NPC Stacy para prosseguir na quest. |
| Ao tirar todas as fotos retorne ao Npc e receba sua recompensa. | |
|
| |
|
| ==<b>4ª Parte</b>== <!--T:39--> | | ==Boss final== |
|
| |
|
| <!--T:40-->
| | Por último, Stacy pedirá para o jogador derrotar um pokémon fantasma poderoso, que só pode ser revelado em sua forma real com um item fornecido por ela. |
| O Npc de seu elemento agora irá lhe fazer algumas perguntas para testar seu conhecimento no elemento escolhido:
| |
|
| |
|
| <!--T:41--> | | <center> |
| <span style="color:red">'''Fogo:</span>
| | {| class="wikitable" width="30%" |
| | |- align="center" |
| | !align="center" width="1%" colspan="9" | Item para usar no fantasma |
| | |- |
| | !width="10% |Silph Scope |
| | |- align="center" |
| | | [[Arquivo:Silph_scope.png|link=]] |
| | |} |
| | </center> |
|
| |
|
| <!--T:42-->
| | O fantasma se encontra dentro de uma área que pode ser acessada apenas através de um portal, no fundo da caverna à direita da sala em que Stacy está. |
| 1 - Camerupt
| |
|
| |
|
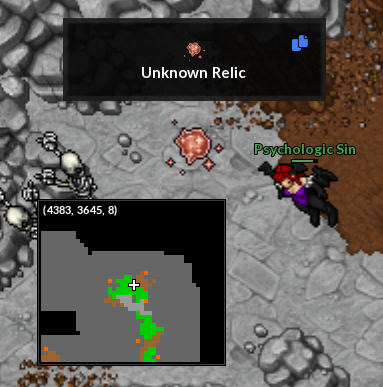
| <!--T:43--> | | <center>[[Arquivo:Unknown_Relic_mapa.png|link=]]<br> |
| 2 - 38
| | '''Coordenadas:''' {{Copiar|4381, 3644, 8}}</center> |
|
| |
|
| <!--T:44-->
| | Para atravessar o portal, o jogador deve clicar na "Unknown Relic". Uma vez dentro da área correta, pode-se utilizar o Silph Scope no fantasma que está na parte sudeste da caverna para revelar o Boss final. |
| 3 - Morcego
| |
|
| |
|
| <!--T:45--> | | <center> |
| 4 - Heatran
| | {| class="wikitable" width="30%" |
| | ! width="1%" | Boss |
| | ! width="1%" | Efetividade |
| | |- |
| | | align="center" | [[Arquivo:429-Shiny_Mismagius.png|link=Shiny Mismagius]] <br> [[Shiny Mismagius]] |
| | | align="center" | [[Arquivo:Dark1.png|link=]] [[Arquivo:Ghost1.png|link=]] |
| | |- |
| | |} |
| | </center> |
|
| |
|
| <!--T:46-->
| | Há um limite de tempo para derrotar este Pokémon. '''Caso morra, perderá EXP e Bless normalmente.''' Revives podem ser utilizados normalmente. |
| 5 - 8
| |
|
| |
|
| <!--T:47-->
| | Recomenda-se utilizar Pokémon com efetividade e da categoria [[Arquivo:Interface_Speedster_PVE.png|24px|link=Tier_e_Funções#Speedster]] [[Tier_e_Funções#Speedster|Speedster]] para tornar o duelo mais seguro. |
| <span style="color:blue">'''Água:</span>
| |
|
| |
|
| <!--T:48--> | | <center>[[Arquivo:Pedra_stacy.png|link=]]</center> |
| 1 - Blastoise
| |
|
| |
|
| <!--T:49-->
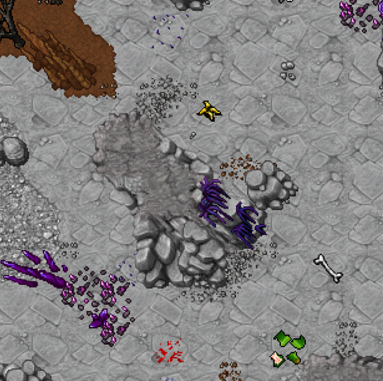
| | O Shiny Mismagius perseguirá o jogador e seus Pokémon, criando ilusões para confundir. Recomenda-se posicionar o Pokémon de um lado da parede, utilizar '''!pokestop''' e manter o treinador do lado oposto, protegido dos ataques. |
| 2 - Marill
| |
|
| |
|
| <!--T:50-->
| | Quando o Shiny Mismagius entrar no alcance dos ataques de área, ative-os e utilize um Revive para recarregar o tempo de espera. Em seguida, reposicione o Pokémon e repita o processo até derrotá-lo. Não é necessário utilizar mais de um Pokémon, a menos que os Revives acabem. |
| 3 - 107
| |
|
| |
|
| <!--T:51-->
| | Como o boss só aparece após utilizar o Silph Scope no fantasma, é possível explorar a área previamente para se familiarizar com o local. |
| 4 - Waterspot
| |
|
| |
|
| <!--T:52-->
| | Após vencer o Shiny Mismagius, o jogador pode retornar à NPC Stacy para receber sua recompensa final, composta por 5 Fisherman's Elixir, 5 Juggernaut's Elixir, 1 Fortune Elixir, 2 Bounty Elixir, 5 Healing Elixir, 5 Swordsman's Elixir, 5 Attack Elixir, 2 Mogul Kahn's Elixir, 5 Shield Elixir, 2 Shielder's Elixir, 5 Defense Elixir, 2 Speedster's Elixir, 5 Running Elixir e 700K [[Arquivo:Exp_icon.png|link=]] de Experiência. |
| 5 - 29 | |
| | |
| <!--T:53-->
| |
| <span style="color:green">'''Planta:</span>
| |
| | |
| <!--T:54-->
| |
| 1 - 47 | |
| | |
| <!--T:55-->
| |
| 2 - Jumpluff | |
| | |
| <!--T:56-->
| |
| 3 - 99
| |
| | |
| <!--T:57-->
| |
| 4 - Breloom
| |
| | |
| <!--T:58-->
| |
| 5 - Abomasnow | |
| | |
| <!--T:59-->
| |
| Ao completar, você receberá sua recompensa, e será mandado de volta para falar com a Stacy.<br>
| |
| <span style="color:red"> '''Obs.: '''Você receberá um [[Pokémon_Egg#Stacy_Quest_Eggs|Flame/Waterfall/Sprout Egg]] e dentro poderá vir um Pokémon '''aleatório''' de acordo com o elemento do Egg.</span>
| |
| | |
| ==<b>5ª Parte</b>== <!--T:60-->
| |
| | |
| <!--T:61-->
| |
| Stacy irá dar a sua última e difícil missão, derrotar o boss (no respawn de gengar a direita da stacy):
| |
| <table border="1" cellpadding="3" cellspacing="1" class="modernTable" style="padding: 0px; border: 0px; font-size: 10.88px; width: 650px;">
| |
| <tr>
| |
|
| |
| <td style="text-align: center; width: 150px;>'''[[Arquivo:429-Mismagius.png|link=Mismagius]]'''</td>
| |
| <td style="text-align: center; width: 150px;">'''<b>Mismagius</b>'''</td>
| |
| </tr>
| |
| </table>
| |
| | |
| <!--T:62-->
| |
| <b>Clique com o botão direito do seu mouse no seguinte local para encontrar o respawn:</b>
| |
| | |
| <!--T:63-->
| |
| [[Arquivo:Stacy13.png|link=Stacy_Quest]]
| |
| | |
| <!--T:64-->
| |
| Ao entrar, use o item no pokémon fantasiado <b>(Ghost)</b> ao sul do respawn, a mismagius irá aparecer, tome muito cuidado, você terá um certo tempo para conseguir derrotá-la.
| |
| | |
| <!--T:65-->
| |
| Após derrotá-lo, retorne a Stacy e receba sua recompensa.
| |
| </translate>
| |

 Running Elixir, 1
  Mini Wings e 300K
  de Experiência como recompensa.