Bill's Research Milestones: mudanças entre as edições
Sem resumo de edição |
|||
| (12 revisões intermediárias por 2 usuários não estão sendo mostradas) | |||
| Linha 24: | Linha 24: | ||
* [[Mystery Dungeons]] vermelhas (dificuldades ''Master'' e ''Grand Master'') | * [[Mystery Dungeons]] vermelhas (dificuldades ''Master'' e ''Grand Master'') | ||
* [[Boss_Fight#Nightmare_Terror|Nightmare Terrors]] (ambas as dificuldades) | * [[Boss_Fight#Nightmare_Terror|Nightmare Terrors]] (ambas as dificuldades) | ||
* Derrotar o treinador | * Derrotar o treinador [[Duelo Contra o Red|Red]] | ||
* Dungeon semanal da Rainbow Hero. | |||
* Tarefa semanal do [[Ultra Lab]] | * Tarefa semanal do [[Ultra Lab]] | ||
| Linha 40: | Linha 41: | ||
== Recompensas == | == Recompensas == | ||
<center> | <center> | ||
{| class="wikitable" width=" | {| class="wikitable" width="50%" style="text-align:center;" | ||
! colspan="2" | Recompensas por quantidade de Echo Shard | ! colspan="2" | Recompensas por quantidade de Echo Shard | ||
|- | |- | ||
| Linha 51: | Linha 50: | ||
|- | |- | ||
| '''650''' [[Arquivo:Echo Shard.gif|link=]] <br> Echo Shard | | '''650''' [[Arquivo:Echo Shard.gif|link=]] <br> Echo Shard | ||
| | | [[Arquivo:Improved_XP2.png|link=]] 2KK de Improved Experience e [[Arquivo:Premier-ball%281%29.png|link=]] 15 Premier Ball. | ||
|- | |||
| '''700''' [[Arquivo:Echo Shard.gif|link=]] <br> Echo Shard | |||
| [[Arquivo:Improved_XP2.png|link=]] 2.5KK de Improved Experience, [[Arquivo:Premier-ball%281%29.png|link=]] 20 Premier Ball, [[Arquivo:Profession_Resource_Boost.png|link=]] 2 Profession Boosters e [[Arquivo:Avatar Pack.png|link=]] 5 Avatar Pack. | |||
|- | |||
| '''750''' [[Arquivo:Echo Shard.gif|link=]] <br> Echo Shard | |||
| [[Arquivo:Improved_XP2.png|link=]] 3KK de Improved Experience, [[Arquivo:Premier-ball%281%29.png|link=]] 20 Premier Ball, [[Arquivo:Pokelog_Booster.png|link=]] 2 Pokélog Boosters | |||
|- | |||
| '''800''' [[Arquivo:Echo Shard.gif|link=]] <br> Echo Shard | |||
| [[Arquivo:Improved_XP2.png|link=]] 3.5KK de Improved Experience, [[Arquivo:Premier-ball%281%29.png|link=]] 20 Premier Ball e [[Arquivo:Beast Ball.png|link=]] 5 Beast Ball. | |||
|- | |||
| '''800''' [[Arquivo:Echo Shard.gif|link=]] <br> Echo Shard | |||
| [[Arquivo:Improved_XP2.png|link=]] 3.5KK de Improved Experience, [[Arquivo:Avatar_Pack.png|link=]] 5 Avatar Packs, [[Arquivo:Condensed_Red_Energy.png|link=Itens Especiais#Outros]] 5 Condensed Red Energy e [[Arquivo:Premier-ball%281%29.png|link=]] 20 Premier Ball | |||
|- | |||
| '''850''' [[Arquivo:Echo Shard.gif|link=]] <br> Echo Shard | |||
| [[Arquivo:Improved_XP2.png|link=]] 4KK de Improved Experience, [[Arquivo:Jade Fortune Totem.png|link=Itens Especiais#Outros]] Jade Fortune Totem e [[Arquivo:Premier-ball%281%29.png|link=]] 20 Premier Ball | |||
|- | |||
| '''850''' [[Arquivo:Echo Shard.gif|link=]] <br> Echo Shard | |||
| [[Arquivo:Improved_XP2.png|link=]] 4.5KK de Improved Experience, [[Arquivo:Condensed_Red_Energy.png|link=Itens Especiais#Outros]] 5 Condensed Red Energy e [[Arquivo:Premier-ball%281%29.png|link=]] 20 Premier Ball | |||
|- | |||
| '''900''' [[Arquivo:Echo Shard.gif|link=]] <br> Echo Shard | |||
| [[Arquivo:Improved_XP2.png|link=]] 5KK de Improved Experience, [[Arquivo:Avatar_Pack.png|link=]] 5 Avatar Packs, [[Arquivo:Beast Ball.png|link=]] 5 Beast Ball e [[Arquivo:Premier-ball%281%29.png|link=]] 20 Premier Ball | |||
|- | |||
| '''900''' [[Arquivo:Echo Shard.gif|link=]] <br> Echo Shard | |||
| [[Arquivo:Improved_XP2.png|link=]] 5KK de Improved Experience, [[Arquivo:Profession_Resource_Boost.png|link=]] 2 Profession Boosters e [[Arquivo:Premier-ball%281%29.png|link=]] 20 Premier Ball | |||
|- | |||
| '''950''' [[Arquivo:Echo Shard.gif|link=]] <br> Echo Shard | |||
| [[Arquivo:Improved_XP2.png|link=]] 6KK de Improved Experience, [[Arquivo:Jade Fortune Totem.png|link=Itens Especiais#Outros]] Jade Fortune Totem e [[Arquivo:Premier-ball%281%29.png|link=]] 20 Premier Ball | |||
|- | |- | ||
| '''950''' [[Arquivo:Echo Shard.gif|link=]] <br> Echo Shard | |||
| [[Arquivo:Improved_XP2.png|link=]] 6KK de Improved Experience, [[Arquivo:Avatar_Pack.png|link=]] 5 Avatar Packs, [[Arquivo:Pokelog_Booster.png|link=]] 2 Pokélog Boosters e [[Arquivo:Premier-ball%281%29.png|link=]] 20 Premier Ball | |||
|- | |||
| '''1000''' [[Arquivo:Echo Shard.gif|link=]] <br> Echo Shard | |||
| [[Arquivo:Improved_XP2.png|link=]] 7KK de Improved Experience, [[Arquivo:Beast Ball.png|link=]] 5 Beast Ball e [[Arquivo:Premier-ball%281%29.png|link=]] 25 Premier Ball | |||
|- | |||
| '''1050''' [[Arquivo:Echo Shard.gif|link=]] <br> Echo Shard | |||
| [[Arquivo:Improved_XP2.png|link=]] 7KK de Improved Experience, [[Arquivo:Jade Fortune Totem.png|link=]] 2 Jade Fortune Totem e [[Arquivo:Premier-ball%281%29.png|link=]] 25 Premier Ball | |||
|- | |||
| '''1200''' [[Arquivo:Echo Shard.gif|link=]] <br> Echo Shard | |||
| [[Arquivo:Improved_XP2.png|link=]] 9KK de Improved Experience, [[Arquivo:Condensed_Red_Energy.png|link=]] 10 Condensed Red Energy e [[Arquivo:Premier-ball%281%29.png|link=]] 40 Premier Ball | |||
|} | |} | ||
</center> | </center> | ||
'''Obs.:''' O Bill recolhe as Echo Shards entregues. | '''Obs.:''' O Bill recolhe as Echo Shards entregues. | ||
== Loja de Echo Shard == | |||
Ao concluir essa etapa da Quest, Bill libera uma loja com diversos itens que podem ser adquiridos uma única vez por personagem, enquanto outros possuem limite de compra semanal ou mensal. | |||
<center> | |||
{| class="wikitable" width="40%" style="text-align:center" | |||
! width="1%" class="unsortable" | Item | |||
! width="1%" class="unsortable" | Limite de craft por personagem | |||
! width="2%" class="unsortable" | Echo Shard | |||
|- | |||
| align="center" | [[Arquivo:Deluxe Outfit (Unisex).png|link=]] <br> 1 Deluxe Outfit (Unisex) | |||
| align="center" | 1 | |||
| align="center" | [[Arquivo:Echo Shard.gif|link=]] <br> 4000 Echo Shard | |||
|- | |||
| align="center" | [[Arquivo:Deluxe Vehicle.png|link=]] <br> 1 Deluxe Vehicle | |||
| align="center" | 1 | |||
| align="center" | [[Arquivo:Echo Shard.gif|link=]] <br> 3000 Echo Shard | |||
|- | |||
| align="center" | [[Arquivo:Deluxe Backpack.gif|link=]] <br> 1 Deluxe Backpack | |||
| align="center" | Sem limite | |||
| align="center" | [[Arquivo:Echo Shard.gif|link=]] <br> 2500 Echo Shard | |||
|- | |||
| align="center" | [[Arquivo:Deluxe Camera.png|link=]] <br> 1 Deluxe Camera | |||
| align="center" | Sem limite | |||
| align="center" | [[Arquivo:Echo Shard.gif|link=]] <br> 1500 Echo Shard | |||
|- | |||
| align="center" | [[Arquivo:Deluxe Avatar-Female.png|link=]] <br> 1 Deluxe Avatar - Female | |||
| align="center" | 1 | |||
| align="center" | [[Arquivo:Echo Shard.gif|link=]] <br> 3500 Echo Shard | |||
|- | |||
| align="center" | [[Arquivo:Deluxe Avatar-Female.png|link=]] <br> 1 Deluxe Avatar - Male | |||
| align="center" | 1 | |||
| align="center" | [[Arquivo:Echo Shard.gif|link=]] <br> 3500 Echo Shard | |||
|- | |||
| align="center" | [[Arquivo:Deluxe Background.png|link=]] <br> 1 Deluxe Background | |||
| align="center" | 1 | |||
| align="center" | [[Arquivo:Echo Shard.gif|link=]] <br> 3500 Echo Shard | |||
|- | |||
| align="center" | [[Arquivo:Deluxe Locker.gif|link=]] <br> 1 Deluxe Locker | |||
| align="center" | Sem limite | |||
| align="center" | [[Arquivo:Echo Shard.gif|link=]] <br> 2000 Echo Shard | |||
|- | |||
| align="center" | [[Arquivo:Deluxe Bathtub.png|link=]] <br> 1 Deluxe Bathtub | |||
| align="center" | Sem limite | |||
| align="center" | [[Arquivo:Echo Shard.gif|link=]] <br> 2000 Echo Shard | |||
|- | |||
| align="center" | [[Arquivo:Deluxe Healing Machine.png|link=]] <br> 1 Deluxe Healing Machine | |||
| align="center" | Sem limite | |||
| align="center" | [[Arquivo:Echo Shard.gif|link=]] <br> 2000 Echo Shard | |||
|- | |||
| align="center" | [[Arquivo:Deluxe Chest.gif|link=]] <br> 1 Deluxe Chest | |||
| align="center" | Sem limite | |||
| align="center" | [[Arquivo:Echo Shard.gif|link=]] <br> 500 Echo Shard | |||
|- | |||
| align="center" | [[Arquivo:Deluxe Carpet.png|link=]] <br> 1 Deluxe Carpet | |||
| align="center" | Sem limite | |||
| align="center" | [[Arquivo:Echo Shard.gif|link=]] <br> 500 Echo Shard | |||
|- | |||
| align="center" | [[Arquivo:Bill's Portrait.png|link=]] <br> 1 Bill's Portrait | |||
| align="center" | Sem limite | |||
| align="center" | [[Arquivo:Echo Shard.gif|link=]] <br> 500 Echo Shard | |||
|- | |||
| align="center" | [[Arquivo:Deluxe Poké Ball Capsule.gif|link=]] <br> 1 Deluxe Poké Ball Capsule | |||
| align="center" | Sem limite | |||
| align="center" | [[Arquivo:Echo Shard.gif|link=]] <br> 500 Echo Shard | |||
|- | |||
| align="center" | [[Arquivo:Premier-ball%281%29.png|link=]] <br> 1 Premier Ball | |||
| align="center" | 20 por '''mês''' | |||
| align="center" | [[Arquivo:Echo Shard.gif|link=]] <br> 50 Echo Shard | |||
|- | |||
| align="center" | [[Arquivo:Profession_Resource_Boost.png|link=]] <br> 1 Profession Booster | |||
| align="center" | 1 por '''semana''' | |||
| align="center" | [[Arquivo:Echo Shard.gif|link=]] <br> 300 Echo Shard | |||
|- | |||
| align="center" | [[Arquivo:Catcher-totem-1.png|link=]] <br> 1 Catcher Totem | |||
| align="center" | 3 por '''semana''' | |||
| align="center" | [[Arquivo:Echo Shard.gif|link=]] <br> 100 Echo Shard | |||
|- | |||
| align="center" | [[Arquivo:Borage-flower-1.png|link=]] <br> 1 Borage Flower | |||
| align="center" | 3 por '''semana''' | |||
| align="center" | [[Arquivo:Echo Shard.gif|link=]] <br> 100 Echo Shard | |||
|- | |||
| align="center" | [[Arquivo:Beast_Ball.png|link=]] <br> 1 Beast Ball | |||
| align="center" | 5 por '''mês''' | |||
| align="center" | [[Arquivo:Echo Shard.gif|link=]] <br> 200 Echo Shard | |||
|- | |||
| align="center" | [[Arquivo:Avatar_Pack.png|link=]] <br> 1 Avatar Pack | |||
| align="center" | 2 por '''semana''' | |||
| align="center" | [[Arquivo:Echo Shard.gif|link=]] <br> 150 Echo Shard | |||
|- | |||
| align="center" | [[Arquivo:Background Pack.png|link=]] <br> 1 Background Pack | |||
| align="center" | 2 por '''semana''' | |||
| align="center" | [[Arquivo:Echo Shard.gif|link=]] <br> 150 Echo Shard | |||
|} | |||
Edição atual tal como às 15h58min de 24 de agosto de 2026
Bill's Research Milestones
O Bill's Research Milestones é um sistema de progressão voltado para jogadores acima do nível 600, com foco no ganho de Improved Experience e recompensas utilitárias.
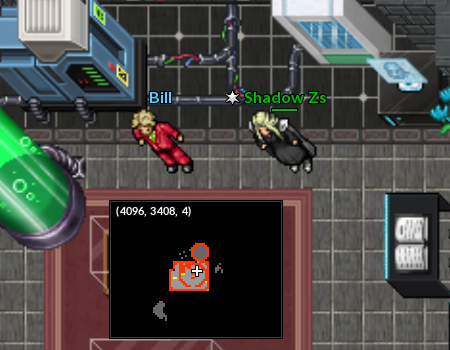
O NPC Bill, é um cientista e entusiasta Pokémon, poderá ser encontrado em seu laboratório no farol de Cerulean, localizado ao norte da cidade.
Como funciona
O sistema é baseado na coleta de um item especial chamado  Echo Shard.
Bill está conduzindo pesquisas sobre essas joias e recompensa os treinadores que as entregam por meio de um sistema de marcos. Os marcos foram projetados para não serem concluídos rapidamente, incentivando a participação constante em conteúdos do jogo.
- Ao entregar Echo Shards, o jogador progride em marcos, que possui progressão contínua, porém finita
- Cada marco concluído concede: Improved Experience e itens utilitários
Como obter Echo Shards
As Echo Shards podem ser obtidas através dos seguintes conteúdos:
- Mystery Dungeons vermelhas (dificuldades Master e Grand Master)
- Nightmare Terrors (ambas as dificuldades)
- Derrotar o treinador Red
- Dungeon semanal da Rainbow Hero.
- Tarefa semanal do Ultra Lab
Bônus semanal
Além das fontes padrão, existe uma recompensa semanal adicional:
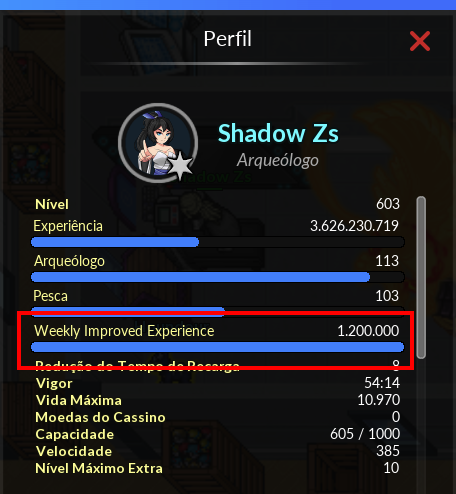
- Jogadores que obtiverem pelo menos 1.200.000 de Improved Experience na semana recebem 100 Echo Shards
O progresso pode ser acompanhado pelo perfil privado do jogador.
Ao concluir todos os marcos, Bill deixa de conceder Improved Experience e com os Echo Shards que o jogador continua ganhando, será possível trocar por recompensas utilitárias ou decorativas.
Recompensas
| Recompensas por quantidade de Echo Shard | |
|---|---|
| 600 Echo Shard |
 2KK de Improved Experience e 2KK de Improved Experience e  15 Premier Ball. 15 Premier Ball.
|
| 650 Echo Shard |
2KK de Improved Experience e 15 Premier Ball.
|
| 700 Echo Shard |
2.5KK de Improved Experience, 20 Premier Ball,  2 Profession Boosters e 2 Profession Boosters e  5 Avatar Pack. 5 Avatar Pack.
|
| 750 Echo Shard |
3KK de Improved Experience, 20 Premier Ball,  2 Pokélog Boosters 2 Pokélog Boosters
|
| 800 Echo Shard |
3.5KK de Improved Experience, 20 Premier Ball e  5 Beast Ball. 5 Beast Ball.
|
| 800 Echo Shard |
3.5KK de Improved Experience, 5 Avatar Packs,  5 Condensed Red Energy e 20 Premier Ball 5 Condensed Red Energy e 20 Premier Ball
|
| 850 Echo Shard |
4KK de Improved Experience,  Jade Fortune Totem e 20 Premier Ball Jade Fortune Totem e 20 Premier Ball
|
| 850 Echo Shard |
4.5KK de Improved Experience, 5 Condensed Red Energy e 20 Premier Ball
|
| 900 Echo Shard |
5KK de Improved Experience, 5 Avatar Packs, 5 Beast Ball e 20 Premier Ball
|
| 900 Echo Shard |
5KK de Improved Experience, 2 Profession Boosters e 20 Premier Ball
|
| 950 Echo Shard |
6KK de Improved Experience, Jade Fortune Totem e 20 Premier Ball
|
| 950 Echo Shard |
6KK de Improved Experience, 5 Avatar Packs, 2 Pokélog Boosters e 20 Premier Ball
|
| 1000 Echo Shard |
7KK de Improved Experience, 5 Beast Ball e 25 Premier Ball
|
| 1050 Echo Shard |
7KK de Improved Experience, 2 Jade Fortune Totem e 25 Premier Ball
|
| 1200 Echo Shard |
9KK de Improved Experience, 10 Condensed Red Energy e 40 Premier Ball
|
Obs.: O Bill recolhe as Echo Shards entregues.
Loja de Echo Shard
Ao concluir essa etapa da Quest, Bill libera uma loja com diversos itens que podem ser adquiridos uma única vez por personagem, enquanto outros possuem limite de compra semanal ou mensal.
| Item | Limite de craft por personagem | Echo Shard |
|---|---|---|
 1 Deluxe Outfit (Unisex) |
1 | 4000 Echo Shard |
 1 Deluxe Vehicle |
1 | 3000 Echo Shard |
 1 Deluxe Backpack |
Sem limite | 2500 Echo Shard |
 1 Deluxe Camera |
Sem limite | 1500 Echo Shard |
 1 Deluxe Avatar - Female |
1 | 3500 Echo Shard |
| 1 Deluxe Avatar - Male |
1 | 3500 Echo Shard |
 1 Deluxe Background |
1 | 3500 Echo Shard |
 1 Deluxe Locker |
Sem limite | 2000 Echo Shard |
 1 Deluxe Bathtub |
Sem limite | 2000 Echo Shard |
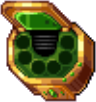 1 Deluxe Healing Machine |
Sem limite | 2000 Echo Shard |
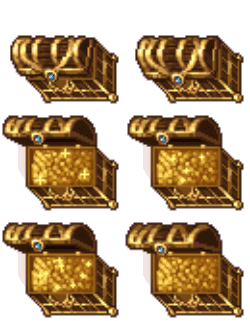 1 Deluxe Chest |
Sem limite | 500 Echo Shard |
 1 Deluxe Carpet |
Sem limite | 500 Echo Shard |
 1 Bill's Portrait |
Sem limite | 500 Echo Shard |
 1 Deluxe Poké Ball Capsule |
Sem limite | 500 Echo Shard |
| 1 Premier Ball |
20 por mês | 50 Echo Shard |
| 1 Profession Booster |
1 por semana | 300 Echo Shard |
 1 Catcher Totem |
3 por semana | 100 Echo Shard |
 1 Borage Flower |
3 por semana | 100 Echo Shard |
| 1 Beast Ball |
5 por mês | 200 Echo Shard |
| 1 Avatar Pack |
2 por semana | 150 Echo Shard |
 1 Background Pack |
2 por semana | 150 Echo Shard |