Gardestrike: mudanças entre as edições
| (145 revisões intermediárias por 14 usuários não estão sendo mostradas) | |||
| Linha 1: | Linha 1: | ||
'''Caso encontre algum erro ou queira acrescentar alguma informação, <span style="color:#F60303">entre em contato com um dos membros da wiki</span>.''' | <center>[[file:Banner Clã Gardestrike.png|link=]]<br></center> | ||
<br>'''Caso encontre algum erro ou queira acrescentar alguma informação, <span style="color:#F60303">entre em contato com um dos membros da wiki</span>.''' | |||
=Introdução= | =Introdução= | ||
Os membros deste clã são fortes. Sua força foi conquistada após um longo treinamento com Pokémon do tipo [[Arquivo:Normal1.png|link=]] Normal e [[Arquivo:Fighting.png|link=]] Fighting. | Os membros deste clã são fortes. Sua força foi conquistada após um longo treinamento com Pokémon do tipo [[Arquivo:Normal1.png|link=]] Normal e [[Arquivo:Fighting.png|link=]] Fighting. | ||
=Ranking= | =Ranking= | ||
| Linha 153: | Linha 14: | ||
*'''Rank 4:''' Gardestrike Deathand. | *'''Rank 4:''' Gardestrike Deathand. | ||
*'''Rank 5:''' Gardestrike Champion. | *'''Rank 5:''' Gardestrike Champion. | ||
*'''Rank 6:''' Gardestrike Ascendant. | |||
Acesse a página de '''[[Gardestrike_Tasks|Tasks]]''' do clã '''Gardestrike''' para conferir os requisitos necessários em cada um dos Rankings. | Acesse a página de '''[[Gardestrike_Tasks|Tasks]]''' do clã '''Gardestrike''' para conferir os requisitos necessários em cada um dos Rankings. | ||
=Bônus de Clã= | =Bônus de Clã= | ||
[[Arquivo:Normal1.png|link=]] '''Normal:''' Atk 25%, Def 25% | O bônus máximo do clã é aplicado ao completar as tarefas do '''Rank 5'''. Abaixo estão as porcentagens de bônus adquiridas: | ||
[[Arquivo:Normal1.png|link=]] '''Normal:''' Atk 25%, Def 25% | |||
[[Arquivo:Fighting.png|link=]] '''Fighting:''' Atk 25%, Def 25% | [[Arquivo:Fighting.png|link=]] '''Fighting:''' Atk 25%, Def 25% | ||
Jogadores mais experientes que completaram a The Rainbow Hero Quest e realizaram o Ascension Path poderão alcançar o '''Rank 6''' do clã, obtendo porcentagens de bônus ainda maiores. | |||
[[Arquivo:Normal1.png|link=]] '''Normal:''' Atk 27%, Def 27% | |||
[[Arquivo:Fighting.png|link=]] '''Fighting:''' Atk 27%, Def 27% | |||
'''Observações:''' | |||
* É possível visualizar, no [[Diamond Shop]], dentro do jogo, os bônus ofensivos e defensivos recebidos por cada clã nos Ranks 5 e 6, desde que o jogador tenha alcançado um desses ranks. | |||
* O bônus de ataque é aplicado aos movimentos do Pokémon. Se o jogador estiver usando um Pokémon de fora do seu clã, mas que execute um movimento do elemento do seu clã, o bônus de ataque ainda será concedido. | |||
=Tiers= | =Tiers= | ||
| Linha 211: | Linha 48: | ||
{| class="wikitable" style="text-align:center" width="50%;" | {| class="wikitable" style="text-align:center" width="50%;" | ||
|- | |- | ||
! colspan="2" scope="col" style="background-color: #8A0808"| | ! colspan="2" scope="col" style="background-color: #8A0808"| Função PvE | ||
! colspan="2" scope="col" style="background-color: #8A0808"| | ! colspan="2" scope="col" style="background-color: #8A0808"| Função PvP | ||
|- | |- | ||
! scope="col" | <span style="color:black">Ícone</span> | ! scope="col" | <span style="color:black">Ícone</span> | ||
| Linha 244: | Linha 81: | ||
| text-align:"center;" | Support | | text-align:"center;" | Support | ||
|- | |- | ||
| | | text-align:"center;" | [[Arquivo:Interface_Speedster_PVE.png|24px|link=]] | ||
| text-align:"center;" | Speedster | |||
| text-align:"center;" | [[Arquivo:Interface_Disrupter_PVP.png|24px|link=]] | | text-align:"center;" | [[Arquivo:Interface_Disrupter_PVP.png|24px|link=]] | ||
| text-align:"center;" | Disrupter | | text-align:"center;" | Disrupter | ||
| Linha 250: | Linha 88: | ||
</center> | </center> | ||
Abaixo estão listados todos os Pokémon do clã Gardestrike e suas respectivas funções, separados por Tier. | Abaixo estão listados todos os Pokémon do clã '''Gardestrike''' e suas respectivas funções, separados por Tier e com algumas recomendações de Held Itens. <br> | ||
<b>Observação:</b> A nossa lista de Helds Recomendados foi composta por colaboradores experientes da Wiki da PokeXGames e serve como sugestões de Held Itens para os Pokémon no âmbito do PvP e PvE, respectivamente. | |||
O jogador ainda tem toda a liberdade de testar e utilizar outros Helds que não esses, podendo personalizar seu Pokémon de um jeito diferente. Ressaltamos que em caso de alterações nos Pokémon, essa lista pode ser alterada e não será garantido que o Pokémon seja adicionado como opção no NPC Jorge.</br> | |||
<b>Observação:</b> Na listagem, o Held PvP sugerido é o primeiro, seguido pelo Held PvE. Caso o Pokémon utilize o mesmo Held Item nos 2 âmbitos, aparecerá listado somente 1 Held Item.</br> | |||
==Tier 1A== | ==Tier 1A== | ||
<center> | <center> | ||
{| class="wikitable" style="text-align:center" width=" | {| class="wikitable" style="text-align:center" width="65%;" | ||
|- | |- | ||
! scope="col" width=" | ! scope="col" width="10%" style="background-color: #F1C232"| <span style="color:black">Nº Dex</span> | ||
! scope="col" style="background-color: # | ! scope="col" style="background-color: #F1C232"| <span style="color:black">Ícone</span> | ||
! scope="col" width=" | ! scope="col" width="15%;" style="background-color: #F1C232"| <span style="color:black">Nome</span> | ||
! scope="col" style="background-color: # | ! scope="col" style="background-color: #F1C232"| <span style="color:black">Elementos</span> | ||
! scope="col" width=" | ! scope="col" width="15%;" style="background-color: #F1C232"| <span style="color:black">Função PvE</span> | ||
! scope="col" width=" | ! scope="col" width="15%;" style="background-color: #F1C232"| <span style="color:black">Função PvP</span> | ||
! scope="col" width="20%;" style="background-color: #F1C232"| <span style="color:black">Held Recomendado (PvP/PvE)</span> | |||
|- | |- | ||
| text-align:center;" | #143 | | text-align:center;" | #143 | ||
| Linha 268: | Linha 111: | ||
| text-align:center;" | [[Shiny Snorlax]] | | text-align:center;" | [[Shiny Snorlax]] | ||
| text-align:center;" | [[Arquivo:Normal1.png|link=]] | | text-align:center;" | [[Arquivo:Normal1.png|link=]] | ||
| width="10%" | [[Arquivo: | | width="10%" | [[Arquivo:Interface_BDD_PVE.png|24px|Causador de Dano Explosivo|link=]] [[Arquivo:Interface_OTDD_PVE.png|24px|Causador de Dano Contínuo|link=]] | ||
| width="10%" | [[Arquivo:Interface_Tanker_PVP.png|24px|link=]] | | width="10%" | [[Arquivo:Interface_Tanker_PVP.png|24px|Tanque|link=]] | ||
| text-align:"center;" | [[file:Def7.png|Defense T7|link=]] [[file:Atk7.png|Attack T7|link=]] | |||
|} | |} | ||
</center> | </center> | ||
| Linha 276: | Linha 120: | ||
<center> | <center> | ||
{| class="wikitable" style="text-align:center" width=" | {| class="wikitable" style="text-align:center" width="65%;" | ||
|- | |- | ||
! scope="col" width=" | ! scope="col" width="10%" style="background-color: #F1C232"| <span style="color:black">Nº Dex</span> | ||
! scope="col" style="background-color: # | ! scope="col" style="background-color: #F1C232"| <span style="color:black">Ícone</span> | ||
! scope="col" width=" | ! scope="col" width="15%;" style="background-color: #F1C232"| <span style="color:black">Nome</span> | ||
! scope="col" style="background-color: # | ! scope="col" style="background-color: #F1C232"| <span style="color:black">Elementos</span> | ||
! scope="col" width=" | ! scope="col" width="15%;" style="background-color: #F1C232"| <span style="color:black">Função PvE</span> | ||
! scope="col" width=" | ! scope="col" width="15%;" style="background-color: #F1C232"| <span style="color:black">Função PvP</span> | ||
! scope="col" width="20%;" style="background-color: #F1C232"| <span style="color:black">Held Recomendado (PvP/PvE)</span> | |||
|- | |- | ||
| text-align:center;" | #128 | | text-align:center;" | #128 | ||
| Linha 289: | Linha 134: | ||
| text-align:center;" | [[Shiny Tauros]] | | text-align:center;" | [[Shiny Tauros]] | ||
| text-align:center;" | [[Arquivo:Normal1.png|link=]] | | text-align:center;" | [[Arquivo:Normal1.png|link=]] | ||
| width="10%" | [[Arquivo: | | width="10%" | [[Arquivo:Interface_BDD_PVE.png|24px|Causador de Dano Explosivo|link=]] [[Arquivo:Interface_OTDD_PVE.png|24px|Causador de Dano Contínuo|link=]] | ||
| width="10%" | [[Arquivo:Interface_Tanker_PVP.png|24px|link=]] | | width="10%" | [[Arquivo:Interface_Tanker_PVP.png|24px|Tanque|link=]] | ||
| text-align:"center;" | [[file:Def7.png|Defense T7|link=]] [[file:Atk7.png|Attack T7|link=]] | |||
|} | |} | ||
</center> | </center> | ||
| Linha 297: | Linha 143: | ||
<center> | <center> | ||
{| class="wikitable sortable" style="text-align:center" width=" | {| class="wikitable sortable" style="text-align:center" width="65%;" | ||
! scope="col" width="10%" style="background-color: #F1C232"| <span style="color:black">Nº Dex</span> | |||
! scope="col" width=" | ! scope="col" style="background-color: #F1C232"| <span style="color:black">Ícone</span> | ||
! scope="col" style="background-color: # | ! scope="col" width="15%;" style="background-color: #F1C232"| <span style="color:black">Nome</span> | ||
! scope="col" width=" | ! scope="col" style="background-color: #F1C232"| <span style="color:black">Elementos</span> | ||
! scope="col" style="background-color: # | ! scope="col" width="15%;" style="background-color: #F1C232"| <span style="color:black">Função PvE</span> | ||
! scope="col" width=" | ! scope="col" width="15%;" style="background-color: #F1C232"| <span style="color:black">Função PvP</span> | ||
! scope="col" width=" | ! scope="col" width="20%;" style="background-color: #F1C232"| <span style="color:black">Held Recomendado (PvP/PvE)</span> | ||
|- | |- | ||
| text-align:center;" | #018 | | text-align:center;" | #018 | ||
| Linha 310: | Linha 156: | ||
| text-align:center;" | [[Shiny Pidgeot]] | | text-align:center;" | [[Shiny Pidgeot]] | ||
| text-align:center;" | [[Arquivo:Normal1.png|link=]] [[Arquivo:Flying.png|link=Wingeon]] | | text-align:center;" | [[Arquivo:Normal1.png|link=]] [[Arquivo:Flying.png|link=Wingeon]] | ||
| width="10%" | [[Arquivo: | | width="10%" | [[Arquivo:Interface_BDD_PVE.png|24px|Causador de Dano Explosivo|link=]] | ||
| width="10%" | [[Arquivo:Interface_OffTank_PVP.png|24px|link=]] | | width="10%" | [[Arquivo:Interface_OffTank_PVP.png|24px|Tanque Ofensivo|link=]] | ||
| text-align:"center;" | [[file:Def7.png|Defense T7|link=]] [[file:Atk7.png|Attack T7|link=]] | |||
|- | |- | ||
| text-align:center;" | #020 | | text-align:center;" | #020 | ||
| Linha 317: | Linha 164: | ||
| text-align:center;" | [[Alolan Raticate]] | | text-align:center;" | [[Alolan Raticate]] | ||
| text-align:center;" | [[Arquivo:Dark1.png|link=Malefic]] [[Arquivo:Normal1.png|link=]] | | text-align:center;" | [[Arquivo:Dark1.png|link=Malefic]] [[Arquivo:Normal1.png|link=]] | ||
| width="10%" | [[Arquivo: | | width="10%" | [[Arquivo:Interface_OTDD_PVE.png|24px|Causador de Dano Contínuo|link=]] | ||
| width="10%" | [[Arquivo:Interface_OTDD_PVP.png|24px|link=]] | | width="10%" | [[Arquivo:Interface_OTDD_PVP.png|24px|Causador de Dano Contínuo|link=]] | ||
| text-align:"center;" | [[file:Def7.png|Defense T7|link=]] [[file:Atk7.png|Attack T7|link=]] | |||
|- | |- | ||
| text-align:center;" | #068 | | text-align:center;" | #068 | ||
| Linha 324: | Linha 172: | ||
| text-align:center;" | [[Shiny Machamp]] | | text-align:center;" | [[Shiny Machamp]] | ||
| text-align:center;" | [[Arquivo:Fighting.png|link=]] | | text-align:center;" | [[Arquivo:Fighting.png|link=]] | ||
| width="10%" | [[Arquivo: | | width="10%" | [[Arquivo:Interface_BDD_PVE.png|24px|Causador de Dano Explosivo|link=]] | ||
| width="10%" | [[Arquivo:Interface_OTDD_PVP.png|24px|link=]] | | width="10%" | [[Arquivo:Interface_OTDD_PVP.png|24px|Causador de Dano Contínuo|link=]] | ||
| text-align:"center;" | [[file:Def7.png|Defense T7|link=]] [[file:Atk7.png|Attack T7|link=]] | |||
|- | |- | ||
| text-align:center;" | #083 | | text-align:center;" | #083 | ||
| Linha 331: | Linha 180: | ||
| text-align:center;" | [[Elite Farfetch'D]] | | text-align:center;" | [[Elite Farfetch'D]] | ||
| text-align:center;" | [[Arquivo:Normal1.png|link=]] [[Arquivo:Flying.png|link=Wingeon]] | | text-align:center;" | [[Arquivo:Normal1.png|link=]] [[Arquivo:Flying.png|link=Wingeon]] | ||
| width="10%" | [[Arquivo: | | width="10%" | [[Arquivo:Interface_BDD_PVE.png|24px|Causador de Dano Explosivo|link=]] | ||
| width="10%" | [[Arquivo:Interface_OTDD_PVP.png|24px|link=]] | | width="10%" | [[Arquivo:Interface_OTDD_PVP.png|24px|Causador de Dano Contínuo|link=]] | ||
| text-align:"center;" | [[file:Def7.png|Defense T7|link=]] [[file:Atk7.png|Attack T7|link=]] | |||
|- | |- | ||
| text-align:center;" | #115 | | text-align:center;" | #115 | ||
| Linha 339: | Linha 189: | ||
| text-align:center;" | [[Arquivo:Normal1.png|link=]] | | text-align:center;" | [[Arquivo:Normal1.png|link=]] | ||
| width="10%" | [[Arquivo:Not.png|link=]] | | width="10%" | [[Arquivo:Not.png|link=]] | ||
| width="10%" | [[Arquivo:Interface_OTDD_PVP.png|24px|link=]] | | width="10%" | [[Arquivo:Interface_OTDD_PVP.png|24px|Causador de Dano Contínuo|link=]] | ||
| text-align:"center;" | [[file:Def7.png|Defense T7|link=]] | |||
|- | |||
| text-align:"center;" | #214 | |||
| text-align:"center;" | [[file:214 - Mega Heracross.png|link=Mega Heracross]] | |||
| text-align:"center;" | '''[[Mega Heracross]]*''' | |||
| text-align:"center;" | [[Arquivo:Bug.png|link=Naturia]] [[Arquivo:Fighting.png|link=Gardestrike]] | |||
| text-align:"center;" | [[Arquivo:Interface_BDD_PVE.png|24px|Causador de Dano Explosivo|link=]] | |||
| text-align:"center;" | [[Arquivo:Interface_OffTank_PVP.png|24px|Tanque Ofensivo|link=]] | |||
| text-align:"center;" | [[file:Atk7.png|Attack T7|link=]] | |||
|- | |- | ||
| text-align:center;" | #234 | | text-align:center;" | #234 | ||
| Linha 346: | Linha 205: | ||
| text-align:center;" | [[Arquivo:Normal1.png|link=]] | | text-align:center;" | [[Arquivo:Normal1.png|link=]] | ||
| width="10%" | [[Arquivo:Not.png|link=]] | | width="10%" | [[Arquivo:Not.png|link=]] | ||
| width="10%" | [[Arquivo:Interface_Disrupter_PVP.png|24px|link=]] | | width="10%" | [[Arquivo:Interface_Disrupter_PVP.png|24px|Disruptor|link=]] | ||
| text-align:"center;" | [[file:Acc7.png|Accuracy T7|link=]] | |||
|- | |- | ||
| text-align:center;" | #130 | | text-align:center;" | #130 | ||
| Linha 352: | Linha 212: | ||
| text-align:center;" | [[Mega Blaziken]] | | text-align:center;" | [[Mega Blaziken]] | ||
| text-align:center;" | [[Arquivo:Fire.png|link=Volcanic]] [[Arquivo:Fighting.png|link=]] | | text-align:center;" | [[Arquivo:Fire.png|link=Volcanic]] [[Arquivo:Fighting.png|link=]] | ||
| width="10%" | [[Arquivo: | | width="10%" | [[Arquivo:Interface_OTDD_PVE.png|24px|Causador de Dano Contínuo|link=]] | ||
| width="10%" | [[Arquivo:Interface_OffTank_PVP.png|24px|link=]] | | width="10%" | [[Arquivo:Interface_OffTank_PVP.png|24px|Tanque Ofensivo|link=]] | ||
| text-align:"center;" | [[file:Def7.png|Defense T7|link=]] [[file:Atk7.png|Attack T7|link=]] | |||
|- | |- | ||
| text-align:center;" | #289 | | text-align:center;" | #289 | ||
| Linha 360: | Linha 221: | ||
| text-align:center;" | [[Arquivo:Normal1.png|link=]] | | text-align:center;" | [[Arquivo:Normal1.png|link=]] | ||
| width="10%" | [[Arquivo:Not.png|link=]] | | width="10%" | [[Arquivo:Not.png|link=]] | ||
| width="10%" | [[Arquivo:Interface_OffTank_PVP.png|24px|link=]] | | width="10%" | [[Arquivo:Interface_OffTank_PVP.png|24px|Tanque Ofensivo|link=]] | ||
| text-align:"center;" | [[file:Atk7.png|Attack T7|link=]] | |||
|- | |- | ||
| text-align:"center;" | #392 | | text-align:"center;" | #392 | ||
| Linha 366: | Linha 228: | ||
| text-align:"center;" | [[Shiny Infernape]] | | text-align:"center;" | [[Shiny Infernape]] | ||
| text-align:"center;" | [[Arquivo:Fire.png|link=Volcanic]] [[Arquivo:Fighting.png|link=Gardestrike]] | | text-align:"center;" | [[Arquivo:Fire.png|link=Volcanic]] [[Arquivo:Fighting.png|link=Gardestrike]] | ||
| text-align:"center;" | [[Arquivo: | | text-align:"center;" | [[Arquivo:Interface_OTDD_PVE.png|24px|Causador de Dano Contínuo|link=]] | ||
| text-align:"center;" | [[Arquivo:Interface_OffTank_PVP.png|24px|link=]] | | text-align:"center;" | [[Arquivo:Interface_OffTank_PVP.png|24px|Tanque Ofensivo|link=]] | ||
| text-align:"center;" | [[file:Atk7.png|Attack T7|link=]] | |||
|- | |- | ||
| text-align:center;" | #448 | | text-align:center;" | #448 | ||
| Linha 373: | Linha 236: | ||
| text-align:center;" | [[Mega Lucario]] | | text-align:center;" | [[Mega Lucario]] | ||
| text-align:center;" | [[Arquivo:Fighting.png|link=]] [[Arquivo:Steel.png|link=Ironhard]] | | text-align:center;" | [[Arquivo:Fighting.png|link=]] [[Arquivo:Steel.png|link=Ironhard]] | ||
| width="10%" | [[Arquivo: | | width="10%" | [[Arquivo:Interface_BDD_PVE.png|24px|Causador de Dano Explosivo|link=]] | ||
| width="10%" | [[Arquivo:Interface_OffTank_PVP.png|24px|link=]] | | width="10%" | [[Arquivo:Interface_OffTank_PVP.png|24px|Tanque Ofensivo|link=]] | ||
| text-align:"center;" | [[file:Atk7.png|Attack T7|link=]] | |||
|- | |- | ||
| text-align:center;" | #474 | | text-align:center;" | #474 | ||
| Linha 380: | Linha 244: | ||
| text-align:center;" | [[Porygon-Z]] | | text-align:center;" | [[Porygon-Z]] | ||
| text-align:center;" | [[Arquivo:Normal1.png|link=]] | | text-align:center;" | [[Arquivo:Normal1.png|link=]] | ||
| width="10%" | [[Arquivo: | | width="10%" | [[Arquivo:Interface_OTDD_PVE.png|24px|Causador de Dano Contínuo|link=]] | ||
| width="10%" | [[Arquivo:Interface_Disrupter_PVP.png|24px|link=]] | | width="10%" | [[Arquivo:Interface_Disrupter_PVP.png|24px|Disruptor|link=]] | ||
| text-align:"center;" | [[file:Acc7.png|Accuracy T7|link=]] | |||
|- | |- | ||
| text-align:center;" | #475 | | text-align:center;" | #475 | ||
| text-align:center;" | [[Arquivo:475-Shiny_Gallade.png|link=Shiny Gallade]] | | text-align:center;" | [[Arquivo:475-Shiny_Gallade.png|link=Shiny Gallade]] | ||
| text-align:center;" | [[Shiny Gallade]]* | | text-align:center;" | '''[[Shiny Gallade]]'''* | ||
| text-align:center;" | [[Arquivo:Psychic.png|link=Psycraft]] [[Arquivo:Fighting.png|link=]] | |||
| width="10%" | [[Arquivo:Interface_OTDD_PVE.png|24px|Causador de Dano Contínuo|link=]] | |||
| width="10%" | [[Arquivo:Interface_Tanker_PVP.png|24px|Tanque|link=]] | |||
| text-align:"center;" | [[file:Atk7.png|Attack T7|link=]] [[file:Def7.png|Defense T7|link=]] | |||
|- | |||
| text-align:center;" | #475 | |||
| text-align:center;" | [[Arquivo:475-Mega_Gallade.png|link=Mega Gallade]] | |||
| text-align:center;" | '''[[Mega Gallade]]'''* | |||
| text-align:center;" | [[Arquivo:Psychic.png|link=Psycraft]] [[Arquivo:Fighting.png|link=]] | | text-align:center;" | [[Arquivo:Psychic.png|link=Psycraft]] [[Arquivo:Fighting.png|link=]] | ||
| width="10%" | [[Arquivo: | | width="10%" | [[Arquivo:not.png|link=]] | ||
| width="10%" | [[Arquivo:Interface_OffTank_PVP.png|24px|link=]] | | width="10%" | [[Arquivo:Interface_OffTank_PVP.png|24px|Tanque Ofensivo|link=]] | ||
| text-align:"center;" | [[file:Def7.png|Defense T7|link=]] [[file:Atk7.png|Attack T7|link=]] | |||
|- | |- | ||
| text-align:center;" | #531 | | text-align:center;" | #531 | ||
| Linha 394: | Linha 268: | ||
| text-align:center;" | [[Mega Audino]] | | text-align:center;" | [[Mega Audino]] | ||
| text-align:center;" | [[Arquivo:Normal1.png|link=]] [[Arquivo:Fairy.png|link=Psycraft]] | | text-align:center;" | [[Arquivo:Normal1.png|link=]] [[Arquivo:Fairy.png|link=Psycraft]] | ||
| width="10%" | [[Arquivo: | | width="10%" | [[Arquivo:Interface_BDD_PVE.png|24px|Causador de Dano Explosivo|link=]] | ||
| width="10%" | [[Arquivo:Interface_Disrupter_PVP.png|24px|link=]] | | width="10%" | [[Arquivo:Interface_Disrupter_PVP.png|24px|Disruptor|link=]] | ||
| text-align:"center;" | [[file:Acc7.png|Accuracy T7|link=]] [[file:Atk7.png|Attack T7|link=]] | |||
|- | |- | ||
| text-align:center;" | #534 | | text-align:center;" | #534 | ||
| Linha 401: | Linha 276: | ||
| text-align:center;" | [[Conkeldurr]] | | text-align:center;" | [[Conkeldurr]] | ||
| text-align:center;" | [[Arquivo:Fighting.png|link=]] | | text-align:center;" | [[Arquivo:Fighting.png|link=]] | ||
| width="10%" |[[Arquivo:Interface_OTDD_PVE.png|24px|Causador de Dano Contínuo|link=]] | |||
| width="10%" | [[Arquivo:Interface_Tanker_PVP.png|24px|Tanque|link=]] | |||
| text-align:"center;" | [[file:Def7.png|Defense T7|link=]] [[file:Atk7.png|Attack T7|link=]] | |||
|- | |||
| text-align:center;" | #870 | |||
| text-align:center;" | [[Arquivo:870-Mega Falinks.png|link=Mega Falinks]] | |||
| text-align:center;" | [[Mega Falinks]] | |||
| text-align:center;" | [[Arquivo:Fighting.png|link=]] | |||
| width="10%" | [[Arquivo:Interface_BDD_PVE.png|24px|Causador de Dano Explosivo|link=]] | |||
| width="10%" | [[Arquivo:Interface_OffTank_PVP.png|24px|Tanque Ofensivo|link=]] | |||
| text-align:"center;" | [[file:Atk7.png|Attack T7|link=]] [[file:Def7.png|Defense T7|link=]] | |||
|- | |||
| text-align:center;" | #899 | |||
| text-align:center;" | [[file:899 - Wyrdeer.png|link=Wyrdeer]] | |||
| text-align:center;" | '''[[Wyrdeer]]'''* | |||
| text-align:center;" | [[Arquivo:Normal1.png|link=]] [[arquivo:Psychic.png|link=Psycraft]] | |||
| width="10%" | [[Arquivo:Interface_BDD_PVE.png|24px|Causador de Dano Explosivo|link=]] | |||
| width="10%" | [[Arquivo:Interface_Tanker_PVP.png|24px|Tanque|link=]] | |||
| text-align:"center;" | [[file:Atk7.png|Attack T7|link=]] [[file:Def7.png|Defense T7|link=]] | |||
|- | |||
| text-align:center;" | #901 | |||
| text-align:center;" | [[file:901 - Bloodmoon Ursaluna.png|link=Bloodmoon Ursaluna]] | |||
| text-align:center;" | [[Bloodmoon Ursaluna]] | |||
| text-align:center;" | [[Arquivo:Normal1.png|link=]] [[arquivo:Ground.png|link=Orebound]] | |||
| width="10%" | [[Arquivo:Not.png|link=]] | | width="10%" | [[Arquivo:Not.png|link=]] | ||
| width="10%" | [[Arquivo: | | width="10%" | [[Arquivo:Interface_OffTank_PVP.png|24px|Tanque Ofensivo|link=]] | ||
| text-align:"center;" | [[file:Atk7.png|Attack T7|link=]] | |||
|} | |||
</center> | |||
'''*Observação:''' Os Pokémon [[Arquivo:475-Shiny_Gallade.png|link=Shiny Gallade]] '''[[Shiny Gallade]]''' , [[file:214 - Mega Heracross.png|link=Mega Heracross]] '''[[Mega Heracross]]''' , [[file:899 - Wyrdeer.png|link=Wyrdeer]] '''[[Wyrdeer]]''' e [[Arquivo:475-Mega_Gallade.png|link=Mega Gallade]] '''[[Mega Gallade]]''' são exclusivos de outros clãs no PvP. | |||
==Technical Machine (TM)== | |||
<center> | |||
{| class="wikitable sortable" style="text-align:center" width="65%;" | |||
|- | |||
! scope="col" width="10%" style="background-color: #F1C232"| <span style="color:black">Nº Dex</span> | |||
! scope="col" style="background-color: #F1C232"| <span style="color:black">Ícone</span> | |||
! scope="col" width="15%;" style="background-color: #F1C232"| <span style="color:black">Nome</span> | |||
! scope="col" style="background-color: #F1C232"| <span style="color:black">Elementos</span> | |||
! scope="col" width="15%;" style="background-color: #F1C232"| <span style="color:black">Função PvE</span> | |||
! scope="col" width="15%;" style="background-color: #F1C232"| <span style="color:black">Função PvP</span> | |||
! scope="col" width="20%;" style="background-color: #F1C232"| <span style="color:black">Held Recomendado (PvE)</span> | |||
|- | |||
| text-align:"center;" | #068 | |||
| text-align:"center;" | [[Arquivo:068-Sh Machamp.png|link=Shiny Machamp (TM)]] | |||
| text-align:"center;" | [[Shiny Machamp (TM)]] | |||
| text-align:"center;" | [[Arquivo: Fighting.png|link=Gardestrike]] | |||
| text-align:"center;" | [[Arquivo:Interface OTDD PVE.png|24px|Causador de Dano Contínuo|link=]] | |||
| text-align:"center;" | [[Arquivo:not.png|link=]] | |||
| text-align:"center;" | [[file:Atk7.png|Attack T7|link=]] | |||
|- | |||
| text-align:"center;" | #115 | |||
| text-align:"center;" | [[Arquivo:115-MegaKangaskhan.png|link=Mega Kangaskhan (TM)]] | |||
| text-align:"center;" | [[Mega Kangaskhan (TM)]] | |||
| text-align:"center;" | [[Arquivo: Normal1.png|link=Gardestrike]] | |||
| text-align:"center;" | [[Arquivo:Interface_BDD_PVE.png|24px|Causador de Dano Explosivo|link=]] | |||
| text-align:"center;" | [[Arquivo:not.png|link=]] | |||
| text-align:"center;" | [[file:Atk7.png|Attack T7|link=]] | |||
|- | |||
| text-align:"center;" | #392 | |||
| text-align:"center;" | [[Arquivo:Shiny Infernape.png|link=Shiny Infernape (TM)]] | |||
| text-align:"center;" | [[Shiny Infernape (TM)]] | |||
| text-align:"center;" | [[Arquivo: Fighting.png|link=Gardestrike]] | |||
| text-align:"center;" | [[Arquivo:Interface OTDD PVE.png|24px|Causador de Dano Contínuo|link=]] | |||
| text-align:"center;" | [[Arquivo:not.png|link=]] | |||
| text-align:"center;" | [[file:Atk7.png|Attack T7|link=]] | |||
|- | |||
| text-align:"center;" | #448 | |||
| text-align:"center;" | [[Arquivo:448-MegaLucario.png|link=Mega Lucario Fighting (TM)]] | |||
| text-align:"center;" | [[Mega Lucario Fighting (TM)]] | |||
| text-align:"center;" | [[Arquivo: Fighting.png|link=Gardestrike]] | |||
| text-align:"center;" | [[Arquivo:Interface_OffensiveTanker_pve.png|25px|Tanque Ofensivo|link=]] | |||
| text-align:"center;" | [[Arquivo:not.png|link=]] | |||
| text-align:"center;" | [[file:Atk7.png|Attack T7|link=]] | |||
|- | |||
| text-align:"center;" | #534 | |||
| text-align:"center;" | [[Arquivo:534-Conkeldurr.png|link=Conkeldurr (TM)]] | |||
| text-align:"center;" | [[Conkeldurr (TM)]] | |||
| text-align:"center;" | [[Arquivo: Fighting.png|link=Gardestrike]] | |||
| text-align:"center;" | [[Arquivo:Interface Tank PVE.png|24px|Tanque|link=]] | |||
| text-align:"center;" | [[Arquivo:not.png|link=]] | |||
| text-align:"center;" | [[file:Def7.png|Defense T7|link=]] | |||
|} | |||
</center> <br> | |||
{{#widget:container}} | |||
<table class="seeMore"> | |||
<tr> | |||
<td class="seeMore__image">[[Arquivo:Telekinetic-compass.gif|link=]]</td> | |||
<td> '''Saiba Mais: [[Technical Machine (TM)]]'''</td> | |||
</tr> | |||
</table> | |||
{{#widget:closecontainer}} | |||
==Technical Records (TR)== | |||
<center> | |||
{| class="wikitable sortable" style="text-align:center" width="65%;" | |||
|- | |||
! scope="col" width="10%" style="background-color: #F1C232"| <span style="color:black">Nº Dex</span> | |||
! scope="col" style="background-color: #F1C232"| <span style="color:black">Ícone</span> | |||
! scope="col" width="15%;" style="background-color: #F1C232"| <span style="color:black">Nome</span> | |||
! scope="col" style="background-color: #F1C232"| <span style="color:black">Elementos</span> | |||
! scope="col" width="15%;" style="background-color: #F1C232"| <span style="color:black">Função PvE</span> | |||
! scope="col" width="15%;" style="background-color: #F1C232"| <span style="color:black">Função PvP</span> | |||
! scope="col" width="20%;" style="background-color: #F1C232"| <span style="color:black">Held Recomendado (PvE)</span> | |||
|- | |||
| text-align:"center;" | #143 | |||
| text-align:"center;" | [[Arquivo:143-Snorlax.png|link=Snorlax (TR)]] | |||
| text-align:"center;" | [[Snorlax (TR)]] | |||
| text-align:"center;" | [[Arquivo:Normal1.png|link=]] | |||
| text-align:"center;" | [[Arquivo:Interface BDD PVE.png|24px|Causador de Dano Explosivo|link=]] | |||
| text-align:"center;" | [[Arquivo:not.png|link=]] | |||
| text-align:"center;" | [[file:Atk7.png|Attack T7|link=]] | |||
|- | |||
| text-align:"center;" | #214 | |||
| text-align:"center;" | [[Arquivo:214-Heracross.png|link=Heracross (TR)]] | |||
| text-align:"center;" | [[Heracross (TR)]] | |||
| text-align:"center;" | [[Arquivo:Bug.png|link=]] [[Arquivo:Fighting.png|link=]] | |||
| text-align:"center;" | [[Arquivo:Interface BDD PVE.png|24px|Causador de Dano Explosivo|link=]] | |||
| text-align:"center;" | [[Arquivo:not.png|link=]] | |||
| text-align:"center;" | [[file:Atk7.png|Attack T7|link=]] | |||
|- | |- | ||
|} | |} | ||
</center> | </center> | ||
''' | |||
{{#widget:container}} | |||
<table class="seeMore"> | |||
<tr> | |||
<td class="seeMore__image">[[Arquivo:Telekinetic-compass.gif|link=]]</td> | |||
<td> '''Saiba Mais: [[Technical Records (TR)]]'''</td> | |||
</tr> | |||
</table> | |||
{{#widget:closecontainer}} | |||
==Tier 1H== | ==Tier 1H== | ||
<center> | <center> | ||
{| class="wikitable" style="text-align:center" width=" | {| class="wikitable" style="text-align:center" width="65%;" | ||
|- | |||
! scope="col" width="10%" style="background-color: #F1C232"| <span style="color:black">Nº Dex</span> | |||
! scope="col" style="background-color: #F1C232"| <span style="color:black">Ícone</span> | |||
! scope="col" width="15%;" style="background-color: #F1C232"| <span style="color:black">Nome</span> | |||
! scope="col" style="background-color: #F1C232"| <span style="color:black">Elementos</span> | |||
! scope="col" width="15%;" style="background-color: #F1C232"| <span style="color:black">Função PvE</span> | |||
! scope="col" width="15%;" style="background-color: #F1C232"| <span style="color:black">Função PvP</span> | |||
! scope="col" width="20%;" style="background-color: #F1C232"| <span style="color:black">Held Recomendado (PvE)</span> | |||
|- | |- | ||
| text-align:center;" | #214 | |||
| text-align:center;" | [[Arquivo:214 - Shiny Heracross.png|link=Shiny Heracross]] | |||
| text-align:center;" | [[Shiny Heracross]] | |||
| text-align:center;" | [[Arquivo:Fighting.png|link=]] | |||
| width="10%" | [[Arquivo:Interface_OTDD_PVE.png|24px|Causador de Dano Contínuo|link=]] | |||
| width="10%" | [[Arquivo:Not.png|link=]] | |||
| text-align:"center;" | [[file:Atk7.png|Attack T7|link=]] | |||
|- | |- | ||
| text-align:center;" | #297 | | text-align:center;" | #297 | ||
| Linha 425: | Linha 439: | ||
| text-align:center;" | [[Shiny Hariyama]] | | text-align:center;" | [[Shiny Hariyama]] | ||
| text-align:center;" | [[Arquivo:Fighting.png|link=]] | | text-align:center;" | [[Arquivo:Fighting.png|link=]] | ||
| width="10%" | [[Arquivo:Interface_BDD_PVE.png|24px|link=]] | | width="10%" | [[Arquivo:Interface_BDD_PVE.png|24px|Causador de Dano Explosivo|link=]] | ||
| width="10%" | [[Arquivo:Not.png|link=]] | |||
| text-align:"center;" | [[file:Atk7.png|Attack T7|link=]] | |||
|- | |||
| text-align:center;" | #620 | |||
| text-align:center;" | [[Arquivo:620-Shiny_Mienshao.png|link=Shiny Mienshao]] | |||
| text-align:center;" | [[Shiny Mienshao]] | |||
| text-align:center;" | [[Arquivo:Fighting.png|link=]] | |||
| width="10%" | [[Arquivo:Interface_BDD_PVE.png|24px|Causador de Dano Explosivo|link=]] | |||
| width="10%" | [[Arquivo:Not.png|link=]] | |||
| text-align:"center;" | [[file:Atk7.png|Attack T7|link=]] | |||
|- | |||
| text-align:"center;" | #668 | |||
| text-align:"center;" | [[Arquivo:668-Mega Pyroar.png|link=Mega Pyroar]] | |||
| text-align:"center;" | [[Mega Pyroar]] | |||
| text-align:"center;" | [[Arquivo:Normal1.png|link=Volcanic]] [[Arquivo:Fire.png|link=Volcanic]] | |||
| text-align:"center;" | [[Arquivo:Interface_BDD_PVE.png|24px|Causador de Dano Explosivo|link=]] | |||
| text-align:"center;" | [[Arquivo:Not.png|link=]] | |||
| text-align:"center;" | [[file:Atk7.png|Attack T7|link=]] | |||
|- | |||
| text-align:"center;" | #553 | |||
| text-align:"center;" | [[Arquivo:689-Mega Barbaracle.png|link=Mega Barbaracle]] | |||
| text-align:"center;" | [[Mega Barbaracle]] | |||
| text-align:"center;" | [[Arquivo:Rock.png|link=]] [[Arquivo:Fighting.png|link=]] | |||
| text-align:"center;" | [[Arquivo:Interface_BDD_PVE.png|24px|Causador de Dano Explosivo|link=]] | |||
| text-align:"center;" | [[Arquivo:Not.png|link=]] | |||
| text-align:"center;" | [[file:Atk7.png|Attack T7|link=]] | |||
|- | |||
| text-align:center;" | #701 | |||
| text-align:center;" | [[Arquivo:701-Mega Hawlucha.png|link=Mega Hawlucha]] | |||
| text-align:center;" | [[Mega Hawlucha]] | |||
| text-align:center;" | [[Arquivo:Fighting.png|link=]] [[Arquivo:Flying.png|link=Wingeon]] | |||
| width="10%" | [[Arquivo:Interface_BDD_PVE.png|24px|Causador de Dano Explosivo|link=]] | |||
| width="10%" | [[Arquivo:Not.png|link=]] | | width="10%" | [[Arquivo:Not.png|link=]] | ||
| text-align:"center;" | [[file:Atk7.png|Attack T7|link=]] | |||
|- | |||
| text-align:"center;" | #780 | |||
| text-align:"center;" | [[Arquivo:780-Mega Drampa.png|link=Mega Drampa]] | |||
| text-align:"center;" | [[Mega Drampa]] | |||
| text-align:"center;" | [[Arquivo:Normal1.png|link=]] [[Arquivo:Dragon.png|link=Wingeon]] | |||
| text-align:"center;" | [[Arquivo:Interface_BDD_PVE.png|24px|Causador de Dano Explosivo|link=]] | |||
| text-align:"center;" | [[Arquivo:Not.png|link=]] | |||
| text-align:"center;" | [[file:Atk7.png|Attack T7|link=]] | |||
|- | |||
| text-align:"center;" | #901 | |||
| text-align:"center;" | [[Arquivo:901 - Ursaluna.png|link=Ursaluna]] | |||
| text-align:"center;" | [[Ursaluna]] | |||
| text-align:"center;" | [[Arquivo:Normal1.png|link=]] [[Arquivo:Ground.png|link=Orebound]] | |||
| text-align:"center;" | [[Arquivo:Interface_OTDD_PVE.png|24px|Causador de Dano Contínuo|link=]] | |||
| text-align:"center;" | [[Arquivo:Not.png|link=]] | |||
| text-align:"center;" | [[file:Atk7.png|Attack T7|link=]] | |||
|} | |} | ||
</center> | </center> | ||
'''Observação:''' Os Pokémon T1H tem força de T1C fora da Nightmare World e são acima dos T1C dentro dela ou pelo menos tem um diferencial perante os demais Pokémon. São balanceados exclusivamente para conteúdos PvE e não podem ser utilizados em duelos PvP. | '''Observação:''' Os Pokémon T1H tem força de T1C fora da Nightmare World e são acima dos T1C dentro dela ou pelo menos tem um diferencial perante os demais Pokémon. São balanceados exclusivamente para conteúdos PvE e não podem ser utilizados em duelos PvP. | ||
* O [[Arquivo:668-Mega Pyroar.png|link=Mega Pyroar]] '''[[Mega Pyroar]]''' possui seu moveset focado no tipo [[Arquivo:Fire.png|link=]] Fire.<br> | |||
* O [[Arquivo:689-Mega Barbaracle.png|link=Mega Barbaracle]] '''[[Mega Barbaracle]]''' possui seu moveset focado no tipo [[Arquivo:Rock.png|link=]] Rock.<br> | |||
* O [[Arquivo:780-Mega Drampa.png|link=Mega Drampa]] '''[[Mega Drampa]]''' possui seu moveset focado no tipo [[arquivo:Dragon.png|link=]] Dragon. <br> | |||
==Tier 2== | ==Tier 2== | ||
<center> | <center> | ||
{| class="wikitable sortable" style="text-align:center" width=" | {| class="wikitable sortable" style="text-align:center" width="65%;" | ||
|- | |- | ||
! scope="col" width=" | ! scope="col" width="10%" style="background-color: #F1C232"| <span style="color:black">Nº Dex</span> | ||
! scope="col" style="background-color: # | ! scope="col" style="background-color: #F1C232"| <span style="color:black">Ícone</span> | ||
! scope="col" width=" | ! scope="col" width="15%;" style="background-color: #F1C232"| <span style="color:black">Nome</span> | ||
! scope="col" style="background-color: # | ! scope="col" style="background-color: #F1C232"| <span style="color:black">Elementos</span> | ||
! scope="col" width=" | ! scope="col" width="15%;" style="background-color: #F1C232"| <span style="color:black">Função PvE</span> | ||
! scope="col" width=" | ! scope="col" width="15%;" style="background-color: #F1C232"| <span style="color:black">Função PvP</span> | ||
! scope="col" width="20%;" style="background-color: #F1C232"| <span style="color:black">Held Recomendado (PvP/PvE)</span> | |||
|- | |||
| text-align:center;" | #040 | |||
| text-align:center;" | [[Arquivo:040 - Shiny Wigglytuff.png|link=Shiny Wigglytuff]] | |||
| text-align:center;" | [[Shiny Wigglytuff]] | |||
| text-align:center;" | [[Arquivo:Normal1.png|link=]] [[Arquivo:Fairy.png|link=]] | |||
| width="10%" | [[Arquivo:Interface_OTDD_PVE.png|24px|Causador de Dano Contínuo|link=]] | |||
| width="10%" | [[Arquivo:Interface_BDD_PVP.png|24px|Causador de Dano Explosivo|link=]] | |||
| text-align:"center;" | [[file:Atk7.png|Attack T7|link=]] | |||
|- | |- | ||
| | | text-align:center;" | #065 | ||
| | | text-align:center;" | [[Arquivo:62-Champion_Poliwrath.png|link=Champion Poliwrath]] | ||
| | | text-align:center;" | '''[[Champion Poliwrath]]'''* | ||
| | | text-align:center;" | [[Arquivo:Water.png|link=Seavell]] [[Arquivo:Fighting.png|link=]] | ||
| | | width="10%" | [[Arquivo:Not.png|link=]] | ||
| | | width="10%" | [[Arquivo:Interface_Tanker_PVP.png|24px|Tanque|link=]] | ||
| text-align:"center;" | [[file:Def7.png|Defense T7|link=]] | |||
|- | |- | ||
| text-align:center;" | #106 | | text-align:center;" | #106 | ||
| Linha 456: | Linha 532: | ||
| text-align:center;" | [[Arquivo:Fighting.png|link=]] | | text-align:center;" | [[Arquivo:Fighting.png|link=]] | ||
| width="10%" | [[Arquivo:Not.png|link=]] | | width="10%" | [[Arquivo:Not.png|link=]] | ||
| width="10%" | [[Arquivo:Interface_OTDD_PVP.png|24px|link=]] | | width="10%" | [[Arquivo:Interface_OTDD_PVP.png|24px|Causador de Dano Contínuo|link=]] | ||
| text-align:"center;" | [[file:Def7.png|Defense T7|link=]] | |||
|- | |- | ||
| text-align:center;" | #107 | | text-align:center;" | #107 | ||
| Linha 463: | Linha 540: | ||
| text-align:center;" | [[Arquivo:Fighting.png|link=]] | | text-align:center;" | [[Arquivo:Fighting.png|link=]] | ||
| width="10%" | [[Arquivo:Not.png|link=]] | | width="10%" | [[Arquivo:Not.png|link=]] | ||
| width="10%" | [[Arquivo:Interface_Tanker_PVP.png|24px|link=]] | | width="10%" | [[Arquivo:Interface_Tanker_PVP.png|24px|Tanque|link=]] | ||
| text-align:"center;" | [[file:Def7.png|Defense T7|link=]] | |||
|- | |- | ||
| text-align:center;" | #143 | | text-align:center;" | #143 | ||
| Linha 470: | Linha 548: | ||
| text-align:center;" | [[Arquivo:Normal1.png|link=]] | | text-align:center;" | [[Arquivo:Normal1.png|link=]] | ||
| width="10%" | [[Arquivo:Not.png|link=]] | | width="10%" | [[Arquivo:Not.png|link=]] | ||
| width="10%" | [[Arquivo:Interface_OffTank_PVP.png|24px|link=]] | | width="10%" | [[Arquivo:Interface_OffTank_PVP.png|24px|Tanque Ofensivo|link=]] | ||
| text-align:"center;" | [[file:Def7.png|Defense T7|link=]] | |||
|- | |- | ||
| text-align:center;" | # | | text-align:center;" | #203 | ||
| text-align:center;" | [[Arquivo: | | text-align:center;" | [[Arquivo:203 - Shiny Girafarig.png|link=Shiny Girafarig]] | ||
| text-align:center;" | [[Shiny | | text-align:center;" | [[Shiny Girafarig]] | ||
| text-align:center;" | [[Arquivo:Normal1.png|link=]] [[Arquivo: | | text-align:center;" | [[Arquivo:Normal1.png|link=Gardestrike]] [[Arquivo:Psychic.png|link=]] | ||
| width="10%" | [[Arquivo: | | width="10%" | [[Arquivo:Interface_Speedster_PVE.png|24px|Velocista|link=]] | ||
| width="10%" | [[Arquivo: | | width="10%" | [[Arquivo:Interface_BDD_PVP.png|24px|Causador de Dano Explosivo|link=]] | ||
| text-align:"center;" | [[file:Atk7.png|Attack T7|link=]] | |||
|- | |- | ||
| text-align:center;" | #214 | | text-align:center;" | #214 | ||
| Linha 484: | Linha 564: | ||
| text-align:center;" | [[Arquivo:Bug.png|link=Naturia]] [[Arquivo:Fighting.png|link=]] | | text-align:center;" | [[Arquivo:Bug.png|link=Naturia]] [[Arquivo:Fighting.png|link=]] | ||
| width="10%" | [[Arquivo:Not.png|link=]] | | width="10%" | [[Arquivo:Not.png|link=]] | ||
| width="10%" | [[Arquivo:Interface_OffTank_PVP.png|24px|link=]] | | width="10%" | [[Arquivo:Interface_OffTank_PVP.png|24px|Tanque Ofensivo|link=]] | ||
| text-align:"center;" | [[file:Def7.png|Defense T7|link=]] | |||
|- | |- | ||
| text-align:center;" | #217 | | text-align:center;" | #217 | ||
| Linha 491: | Linha 572: | ||
| text-align:center;" | [[Arquivo:Normal1.png|link=]] | | text-align:center;" | [[Arquivo:Normal1.png|link=]] | ||
| width="10%" | [[Arquivo:Not.png|link=]] | | width="10%" | [[Arquivo:Not.png|link=]] | ||
| width="10%" | [[Arquivo:Interface_BDD_PVP.png|24px|link=]] | | width="10%" | [[Arquivo:Interface_BDD_PVP.png|24px|Causador de Dano Explosivo|link=]] | ||
| text-align:"center;" | [[file:Atk7.png|Attack T7|link=]] | |||
|- | |- | ||
| text-align:center;" | #235 | | text-align:center;" | #235 | ||
| Linha 497: | Linha 579: | ||
| text-align:center;" | [[Smeargle|Smeargle 8]] | | text-align:center;" | [[Smeargle|Smeargle 8]] | ||
| text-align:center;" | [[Arquivo:Normal1.png|link=]] | | text-align:center;" | [[Arquivo:Normal1.png|link=]] | ||
| width="10%" | [[Arquivo:Interface_BDD_PVE.png|24px|link=]] | | width="10%" | [[Arquivo:Interface_BDD_PVE.png|24px|Causador de Dano Explosivo|link=]] | ||
| width="10%" | [[Arquivo:Not.png|link=]] | | width="10%" | [[Arquivo:Not.png|link=]] | ||
| text-align:"center;" | [[file:Atk7.png|Attack T7|link=]] | |||
|- | |- | ||
| text-align:center;" | #237 | | text-align:center;" | #237 | ||
| Linha 504: | Linha 587: | ||
| text-align:center;" | [[Elite Hitmontop]] | | text-align:center;" | [[Elite Hitmontop]] | ||
| text-align:center;" | [[Arquivo:Fighting.png|link=]] | | text-align:center;" | [[Arquivo:Fighting.png|link=]] | ||
| width="10%" | [[Arquivo:Interface_OffensiveTanker_pve.png|24px|link=]] | | width="10%" | [[Arquivo:Interface_OffensiveTanker_pve.png|24px|Tanque Ofensivo|link=]] | ||
| width="10%" | [[Arquivo:Not.png|link=]] | | width="10%" | [[Arquivo:Not.png|link=]] | ||
| text-align:"center;" | [[file:Atk7.png|Attack T7|link=]] | |||
|- | |- | ||
| text-align:center;" | #242 | | text-align:center;" | #242 | ||
| Linha 512: | Linha 596: | ||
| text-align:center;" | [[Arquivo:Normal1.png|link=]] | | text-align:center;" | [[Arquivo:Normal1.png|link=]] | ||
| width="10%" | [[Arquivo:Not.png|link=]] | | width="10%" | [[Arquivo:Not.png|link=]] | ||
| width="10%" | [[Arquivo:Interface_Disrupter_PVP.png|24px|link=]] [[Arquivo:Interface_Support_PVP.png|24px|link=]] | | width="10%" | [[Arquivo:Interface_Disrupter_PVP.png|24px|Disruptor|link=]] [[Arquivo:Interface_Support_PVP.png|24px|Suporte|link=]] | ||
| text-align:"center;" | [[file:Acc7.png|Accuracy T7|link=]] | |||
|- | |||
| text-align:center;" | #295 | |||
| text-align:center;" | [[Arquivo:295-Exploud.png|link=Exploud]] | |||
| text-align:center;" | [[Exploud]] | |||
| text-align:center;" | [[Arquivo:Normal1.png|link=]] | |||
| width="10%" | [[Arquivo:Interface_BDD_PVE.png|24px|Causador de Dano Explosivo|link=]] | |||
| width="10%" | [[Arquivo:Not.png|link=]] | |||
| text-align:"center;" | [[file:Atk7.png|Attack T7|link=]] | |||
|- | |- | ||
| text-align:center;" | #297 | | text-align:center;" | #297 | ||
| Linha 519: | Linha 612: | ||
| text-align:center;" | [[Arquivo:Fighting.png|link=]] | | text-align:center;" | [[Arquivo:Fighting.png|link=]] | ||
| width="10%" | [[Arquivo:Not.png|link=]] | | width="10%" | [[Arquivo:Not.png|link=]] | ||
| width="10%" | [[Arquivo:Interface_Tanker_PVP.png|24px|link=]] | | width="10%" | [[Arquivo:Interface_Tanker_PVP.png|24px|Tanque|link=]] | ||
| text-align:"center;" | [[file:Def7.png|Defense T7|link=]] | |||
|- | |||
| text-align:center;" | #308 | |||
| text-align:center;" | [[Arquivo:308-Mega_Medicham.png|link=Mega Medicham]] | |||
| text-align:center;" | [[Mega Medicham]] | |||
| text-align:center;" | [[Arquivo:Fighting.png|link=Gardestrike]] [[Arquivo:Psychic.png|link=]] | |||
| width="10%" | [[Arquivo:Not.png|link=]] | |||
| width="10%" | [[Arquivo:Interface_OTDD_PVP.png|24px|Causador de Dano Contínuo|link=]] | |||
| text-align:"center;" | [[file:Def7.png|Defense T7|link=]] | |||
|- | |||
| text-align:center;" | #335 | |||
| text-align:center;" | [[Arquivo:335-Zangoose.png|link=Zangoose]] | |||
| text-align:center;" | [[Zangoose]] | |||
| text-align:center;" | [[Arquivo:Normal1.png|link=]] | |||
| width="10%" | [[Arquivo:Not.png|link=]] | |||
| width="10%" | [[Arquivo:Interface_Disrupter_PVP.png|24px|Disruptor|link=]] | |||
| text-align:"center;" | [[file:Acc7.png|Accuracy T7|link=]] | |||
|- | |- | ||
| text-align:center;" | #392 | | text-align:center;" | #392 | ||
| Linha 526: | Linha 636: | ||
| text-align:center;" | [[Arquivo:Fire.png|link=Volcanic]] [[Arquivo:Fighting.png|link]] | | text-align:center;" | [[Arquivo:Fire.png|link=Volcanic]] [[Arquivo:Fighting.png|link]] | ||
| width="10%" | [[Arquivo:Not.png|link=]] | | width="10%" | [[Arquivo:Not.png|link=]] | ||
| width="10%" | [[Arquivo:Interface_OTDD_PVP.png|24px|link=]] | | width="10%" | [[Arquivo:Interface_OTDD_PVP.png|24px|Causador de Dano Contínuo|link=]] | ||
| text-align:"center;" | [[file:Def7.png|Defense T7|link=]] | |||
|- | |||
| text-align:center;" | #424 | |||
| text-align:center;" | [[Arquivo:424-Ambipom.png|link=Ambipom]] | |||
| text-align:center;" | [[Ambipom]] | |||
| text-align:center;" | [[Arquivo:Normal1.png|link=]] | |||
| width="10%" | [[Arquivo:Interface_OTDD_PVE.png|24px|Causador de Dano Contínuo|link=]] | |||
| width="10%" | [[Arquivo:Not.png|link=]] | |||
| text-align:"center;" | [[file:Atk7.png|Attack T7|link=]] | |||
|- | |- | ||
| text-align:center;" | #428 | | text-align:center;" | #428 | ||
| Linha 532: | Linha 651: | ||
| text-align:center;" | [[Mega Lopunny]] | | text-align:center;" | [[Mega Lopunny]] | ||
| text-align:center;" | [[Arquivo:Normal1.png|link=]] [[Arquivo:Fighting.png|link=]] | | text-align:center;" | [[Arquivo:Normal1.png|link=]] [[Arquivo:Fighting.png|link=]] | ||
| width="10%" | [[Arquivo:Interface_OffensiveTanker_pve.png|24px|link=]] | | width="10%" | [[Arquivo:Interface_OffensiveTanker_pve.png|24px|Tanque Ofensivo|link=]] | ||
| width="10%" | [[Arquivo:Not.png|link=]] | | width="10%" | [[Arquivo:Not.png|link=]] | ||
| text-align:"center;" | [[file:Atk7.png|Attack T7|link=]] [[file:Def7.png|Defense T7|link=]] | |||
|- | |- | ||
| text-align:center;" | #446 | | text-align:center;" | #446 | ||
| Linha 540: | Linha 660: | ||
| text-align:center;" | [[Arquivo:Normal1.png|link=]] | | text-align:center;" | [[Arquivo:Normal1.png|link=]] | ||
| width="10%" | [[Arquivo:Not.png|link=]] | | width="10%" | [[Arquivo:Not.png|link=]] | ||
| width="10%" | [[Arquivo:Interface_OffTank_PVP.png|24px|link=]] | | width="10%" | [[Arquivo:Interface_OffTank_PVP.png|24px|Tanque Ofensivo|link=]] | ||
| text-align:"center;" | [[file:Atk7.png|Attack T7|link=]] | |||
|- | |||
| text-align:center;" | #448 | |||
| text-align:center;" | [[Arquivo:Shinyluc.png|link=Shiny Lucario]] | |||
| text-align:center;" | '''[[Shiny Lucario]]'''* | |||
| text-align:center;" | [[arquivo:Fighting.png|link=Gardestrike]] [[Arquivo:Steel.png|link=Ironhard]] | |||
| width="10%" | [[Arquivo:Not.png|link=]] | |||
| width="10%" | [[Arquivo:Interface_OTDD_PVP.png|24px|Causador de Dano Contínuo|link=]] | |||
| text-align:"center;" | [[file:Atk7.png|Attack T7|link=]] | |||
|- | |- | ||
| text-align:center;" | #454 | | text-align:center;" | #454 | ||
| Linha 547: | Linha 676: | ||
| text-align:center;" | [[Arquivo:Poison1.png|link=Malefic]] [[Arquivo:Fighting.png|link=]] | | text-align:center;" | [[Arquivo:Poison1.png|link=Malefic]] [[Arquivo:Fighting.png|link=]] | ||
| width="10%" | [[Arquivo:Not.png|link=]] | | width="10%" | [[Arquivo:Not.png|link=]] | ||
| width="10%" | [[Arquivo:Interface_OffTank_PVP.png|24px|link=]] | | width="10%" | [[Arquivo:Interface_OffTank_PVP.png|24px|Tanque Ofensivo|link=]] | ||
| text-align:"center;" | [[file:Def7.png|Defense T7|link=]] | |||
|- | |- | ||
| text-align:center;" | #463 | | text-align:center;" | #463 | ||
| Linha 554: | Linha 684: | ||
| text-align:center;" | [[Arquivo:Normal1.png|link=]] | | text-align:center;" | [[Arquivo:Normal1.png|link=]] | ||
| width="10%" | [[Arquivo:Not.png|link=]] | | width="10%" | [[Arquivo:Not.png|link=]] | ||
| width="10%" | [[Arquivo:Interface_Tanker_PVP.png|24px|link=]] | | width="10%" | [[Arquivo:Interface_Tanker_PVP.png|24px|Tanque|link=]] | ||
| text-align:"center;" | [[file:Def7.png|Defense T7|link=]] | |||
|- | |||
| text-align:center;" | #475 | |||
| text-align:center;" | [[Arquivo:475-Gallade.png|link=Gallade]] | |||
| text-align:center;" | '''[[Gallade]]'''* | |||
| text-align:center;" | [[Arquivo:Psychic.png|link=Psycraft]] [[Arquivo:Fighting.png|link=]] | |||
| width="10%" | [[Arquivo:Not.png|link=]] | |||
| width="10%" | [[Arquivo:Interface_OffTank_PVP.png|24px|Tanque Ofensivo|link=]] | |||
| text-align:"center;" | [[file:Def7.png|Defense T7|link=]] | |||
|- | |- | ||
| text-align:center;" | #538 | | text-align:center;" | #538 | ||
| Linha 560: | Linha 699: | ||
| text-align:center;" | [[Throh]] | | text-align:center;" | [[Throh]] | ||
| text-align:center;" | [[Arquivo:Fighting.png|link=]] | | text-align:center;" | [[Arquivo:Fighting.png|link=]] | ||
| width="10%" | [[Arquivo:Interface_Tank_PVE.png|24px|link=]] | | width="10%" | [[Arquivo:Interface_Tank_PVE.png|24px|Tanque|link=]] | ||
| width="10%" | [[Arquivo:Not.png|link=]] | | width="10%" | [[Arquivo:Not.png|link=]] | ||
| text-align:"center;" | [[file:Def7.png|Defense T7|link=]] | |||
|- | |- | ||
| text-align:center;" | #539 | | text-align:center;" | #539 | ||
| Linha 567: | Linha 707: | ||
| text-align:center;" | [[Sawk]] | | text-align:center;" | [[Sawk]] | ||
| text-align:center;" | [[Arquivo:Fighting.png|link=]] | | text-align:center;" | [[Arquivo:Fighting.png|link=]] | ||
| width="10%" | [[Arquivo:Interface_BDD_PVE.png|24px|link=]] | | width="10%" | [[Arquivo:Interface_BDD_PVE.png|24px|Causador de Dano Explosivo|link=]] | ||
| width="10%" | [[Arquivo:Not.png|link]] | |||
| text-align:"center;" | [[file:Atk7.png|Attack T7|link=]] | |||
|- | |||
| text-align:center;" | #560 | |||
| text-align:center;" | [[Arquivo:560-Scrafty.png|link=Scrafty]] | |||
| text-align:center;" | '''[[Scrafty]]'''* | |||
| text-align:center;" | [[arquivo:Dark1.png|link=Malefic]][[Arquivo:Fighting.png|link=]] | |||
| width="10%" | [[Arquivo:Not.png|link=]] | |||
| width="10%" | [[Arquivo:Interface Tanker PVP.png|24px|Tanque|link=]] | |||
| text-align:"center;" | [[file:Def7.png|Defense T7|link=]] | |||
|- | |||
| text-align:center;" | #620 | |||
| text-align:center;" | [[Arquivo:620-Mienshao.png|link=Mienshao]] | |||
| text-align:center;" | [[Mienshao]] | |||
| text-align:center;" | [[Arquivo:Fighting.png|link=]] | |||
| width="10%" | [[Arquivo:Interface_OTDD_PVE.png|24px|Causador de Dano Contínuo|link=]] | |||
| width="10%" | [[Arquivo:Not.png|link]] | | width="10%" | [[Arquivo:Not.png|link]] | ||
| text-align:"center;" | [[file:Atk7.png|Attack T7|link=]] | |||
|- | |||
| text-align:center;" | #628 | |||
| text-align:center;" | [[Arquivo:628-Braviary.png|link=Braviary]] | |||
| text-align:center;" | [[Braviary]] | |||
| text-align:center;" | [[Arquivo:Normal1.png|link=]] [[Arquivo:Flying.png|link=Wingeon]] | |||
| width="10%" | [[Arquivo:Interface_BDD_PVE.png|24px|Causador de Dano Explosivo|link=]] | |||
| width="10%" | [[Arquivo:Not.png|link=]] | |||
| text-align:"center;" | [[file:Atk7.png|Attack T7|link=]] | |||
|- | |- | ||
| text-align:center;" | #668 | | text-align:center;" | #668 | ||
| Linha 575: | Linha 740: | ||
| text-align:center;" | [[Arquivo:Normal1.png|link=]] [[Arquivo:Fire.png|link=Volcanic]] | | text-align:center;" | [[Arquivo:Normal1.png|link=]] [[Arquivo:Fire.png|link=Volcanic]] | ||
| width="10%" | [[Arquivo:Not.png|link=]] | | width="10%" | [[Arquivo:Not.png|link=]] | ||
| width="10%" | [[Arquivo:Interface_OffTank_PVP.png|24px|link=]] | | width="10%" | [[Arquivo:Interface_OffTank_PVP.png|24px|Tanque Ofensivo|link=]] | ||
| text-align:"center;" | [[file:Def7.png|Defense T7|link=]] | |||
|- | |- | ||
| text-align:center;" | #668 | | text-align:center;" | #668 | ||
| Linha 581: | Linha 747: | ||
| text-align:center;" | [[Pyroar Female]] | | text-align:center;" | [[Pyroar Female]] | ||
| text-align:center;" | [[Arquivo:Normal1.png|link=]] [[Arquivo:Fire.png|link=Volcanic]] | | text-align:center;" | [[Arquivo:Normal1.png|link=]] [[Arquivo:Fire.png|link=Volcanic]] | ||
| width="10%" | [[Arquivo:Interface_Tank_PVE.png|24px|link=]] | | width="10%" | [[Arquivo:Interface_Tank_PVE.png|24px|Tanque|link=]] | ||
| width="10%" | [[Arquivo: | | width="10%" | [[Arquivo:Interface_Tanker_PVP.png|24px|Tanque|link=]] | ||
| text-align:"center;" | [[file:Def7.png|Defense T7|link=]] | |||
|- | |- | ||
| text-align:center;" | #675 | | text-align:center;" | #675 | ||
| Linha 589: | Linha 756: | ||
| text-align:center;" | [[Arquivo:Fighting.png|link=]] [[Arquivo:Dark1.png|link=Malefic]] | | text-align:center;" | [[Arquivo:Fighting.png|link=]] [[Arquivo:Dark1.png|link=Malefic]] | ||
| width="10%" | [[Arquivo:Not.png|link=]] | | width="10%" | [[Arquivo:Not.png|link=]] | ||
| width="10%" | [[Arquivo:Interface_BDD_PVP.png|24px|link=]] | | width="10%" | [[Arquivo:Interface_BDD_PVP.png|24px|Causador de Dano Explosivo|link=]] | ||
| text-align:"center;" | [[file:Atk7.png|Attack T7|link=]] | |||
|- | |||
| text-align:center;" | #701 | |||
| text-align:center;" | [[Arquivo:701-Shiny Hawlucha.png|link=Shiny Hawlucha]] | |||
| text-align:center;" | '''[[Shiny Hawlucha]]'''* | |||
| text-align:center;" | [[Arquivo:Fighting.png|link=]] [[Arquivo:Flying.png|link=Wingeon]] | |||
| width="10%" | [[Arquivo:Not.png|link=]] | |||
| width="10%" | [[Arquivo:Interface_BDD_PVP.png|24px|Causador de Dano Explosivo|link=]] | |||
| text-align:"center;" | [[file:Atk7.png|Attack T7|link=]] | |||
|- | |- | ||
| text-align:center;" | # | | text-align:center;" | #780 | ||
| text-align:center;" | [[Arquivo: | | text-align:center;" | [[Arquivo:780-Drampa.png|link=Drampa]] | ||
| text-align:center;" | [[ | | text-align:center;" | [[Drampa]] | ||
| text-align:center;" | [[Arquivo:Normal1.png|link=]] | | text-align:center;" | [[Arquivo:Normal1.png|link=]] [[Arquivo:Dragon.png|link=Wingeon]] | ||
| width="10%" | [[Arquivo:Not.png|link=]] | |||
| width="10%" | [[Arquivo:Interface_Disrupter_PVP.png|24px|Disruptor|link=]] | |||
| text-align:"center;" | [[file:Acc7.png|Accuracy T7|link=]] | |||
|- | |||
| text-align:center;" | #865 | |||
| text-align:center;" | [[Arquivo:865-Sirfetch'd.png|link=Sirfetch'd]] | |||
| text-align:center;" | [[Sirfetch'd]] | |||
| text-align:center;" | [[Arquivo:Fighting.png|link=]] | |||
| width="10%" | [[Arquivo:Interface_BDD_PVE.png|24px|Causador de Dano Explosivo|link=]] | |||
| width="10%" | [[Arquivo:Not.png|link=]] | | width="10%" | [[Arquivo:Not.png|link=]] | ||
| | | text-align:"center;" | [[file:Atk7.png|Attack T7|link=]] | ||
|- | |||
| text-align:"center;" | #903 | |||
| text-align:"center;" | [[file:903 - Sneasler.png]] | |||
| text-align:"center;" | [[Sneasler]] | |||
| text-align:"center;" | [[Arquivo:Fighting.png|link=Gardestrike]] [[Arquivo:Poison1.png|link=Malefic]] | |||
| text-align:"center;" | [[Arquivo:Interface_OTDD_PVE.png|24px|Causador de Dano Contínuo|link=]] | |||
| text-align:"center;" | [[Arquivo:Not.png|link=]] | |||
| text-align:"center;" | [[file:Atk7.png|Attack T7|link=]] | |||
|} | |} | ||
</center> | </center> | ||
'''*Observação:''' | '''*Observação:''' Os Pokémon [[Arquivo:62-Champion_Poliwrath.png|link=Champion Poliwrath]] '''[[Champion Poliwrath]]''' , [[Arquivo:475-Gallade.png|link=Gallade]] '''[[Gallade]]''' , [[Arquivo:560-Scrafty.png|link=Scrafty]] '''[[Scrafty]]''' , [[Arquivo:Shinyluc.png|link=Shiny Lucario]] '''[[Shiny Lucario]]''' e [[Arquivo:701-Shiny Hawlucha.png|link=Shiny Hawlucha]] '''[[Shiny Hawlucha]]''' são exclusivos de outros clãs no PvP. | ||
''' | |||
==Tier 3== | ==Tier 3== | ||
<center> | <center> | ||
{| class="wikitable sortable" style="text-align:center" width=" | {| class="wikitable sortable" style="text-align:center" width="65%;" | ||
|- | |- | ||
! scope="col" width=" | ! scope="col" width="10%" style="background-color: #F1C232"| <span style="color:black">Nº Dex</span> | ||
! scope="col" style="background-color: # | ! scope="col" style="background-color: #F1C232"| <span style="color:black">Ícone</span> | ||
! scope="col" width=" | ! scope="col" width="15%;" style="background-color: #F1C232"| <span style="color:black">Nome</span> | ||
! scope="col" style="background-color: # | ! scope="col" style="background-color: #F1C232"| <span style="color:black">Elementos</span> | ||
! scope="col" width=" | ! scope="col" width="15%;" style="background-color: #F1C232"| <span style="color:black">Função PvE</span> | ||
! scope="col" width=" | ! scope="col" width="15%;" style="background-color: #F1C232"| <span style="color:black">Função PvP</span> | ||
! scope="col" width="20%;" style="background-color: #F1C232"| <span style="color:black">Held Recomendado (PvP/PvE)</span> | |||
|- | |- | ||
| text-align:center;" | #018 | | text-align:center;" | #018 | ||
| Linha 619: | Linha 812: | ||
| text-align:center;" | [[Pidgeot]] | | text-align:center;" | [[Pidgeot]] | ||
| text-align:center;" | [[Arquivo:Normal1.png|link=]] [[Arquivo:Flying.png|link=Wingeon]] | | text-align:center;" | [[Arquivo:Normal1.png|link=]] [[Arquivo:Flying.png|link=Wingeon]] | ||
| width="10%" | [[Arquivo:Interface_BDD_PVE.png|24px|Causador de Dano Explosivo|link=]] | |||
| width="10%" | [[Arquivo:Not.png|link=]] | | width="10%" | [[Arquivo:Not.png|link=]] | ||
| | | text-align:"center;" | [[file:Atk7.png|Attack T7|link=]] | ||
|- | |- | ||
| text-align:center;" | #040 | | text-align:center;" | #040 | ||
| Linha 627: | Linha 821: | ||
| text-align:center;" | [[Arquivo:Normal1.png|link=]] [[Arquivo:Fairy.png|link=Psycraft]] | | text-align:center;" | [[Arquivo:Normal1.png|link=]] [[Arquivo:Fairy.png|link=Psycraft]] | ||
| width="10%" | [[Arquivo:Not.png|link=]] | | width="10%" | [[Arquivo:Not.png|link=]] | ||
| width="10%" | [[Arquivo:Interface_Disrupter_PVP.png|24px|link=]] | | width="10%" | [[Arquivo:Interface_Disrupter_PVP.png|24px|Disruptor|link=]] | ||
| text-align:"center;" | [[file:Acc7.png|Accuracy T7|link=]] | |||
|- | |- | ||
| text-align:center;" | #057 | | text-align:center;" | #057 | ||
| Linha 633: | Linha 828: | ||
| text-align:center;" | [[Champion Primeape]] | | text-align:center;" | [[Champion Primeape]] | ||
| text-align:center;" | [[Arquivo:Fighting.png|link=]] | | text-align:center;" | [[Arquivo:Fighting.png|link=]] | ||
| width="10%" | [[Arquivo:Interface_BDD_PVE.png|24px|link=]] | | width="10%" | [[Arquivo:Interface_BDD_PVE.png|24px|Causador de Dano Explosivo|link=]] | ||
| width="10%" | [[Arquivo:Not.png]] | |||
| text-align:"center;" | [[file:Atk7.png|Attack T7|link=]] | |||
|- | |||
| text-align:center;" | #057 | |||
| text-align:center;" | [[Arquivo:057 - Shiny Primeape.png|link=Shiny Primeape]] | |||
| text-align:center;" | [[Shiny Primeape]] | |||
| text-align:center;" | [[Arquivo:Fighting.png|link=]] | |||
| width="10%" | [[Arquivo:Interface_BDD_PVE.png|24px|Causador de Dano Explosivo|link=]] | |||
| width="10%" | [[Arquivo:Not.png]] | | width="10%" | [[Arquivo:Not.png]] | ||
| text-align:"center;" | [[file:Atk7.png|Attack T7|link=]] | |||
|- | |- | ||
| text-align:center;" | #062 | | text-align:center;" | #062 | ||
| Linha 640: | Linha 844: | ||
| text-align:center;" | [[Poliwrath]] | | text-align:center;" | [[Poliwrath]] | ||
| text-align:center;" | [[Arquivo:Water.png|link=Seavell]] [[Arquivo:Fighting.png|link=]] | | text-align:center;" | [[Arquivo:Water.png|link=Seavell]] [[Arquivo:Fighting.png|link=]] | ||
| width="10%" | [[Arquivo:Not.png|link=]] | | width="10%" | [[Arquivo:Not.png|link=]] | ||
| width="10%" | [[Arquivo:Interface_Disrupter_PVP.png|24px|Disruptor|link=]] | |||
| text-align:"center;" | [[file:Acc7.png|Accuracy T7|link=]] | |||
|- | |||
| text-align:center;" | #067 | |||
| text-align:center;" | [[Arquivo:Shiny Machoke1.png|link=Shiny Machoke]] | |||
| text-align:center;" | [[Shiny Machoke]] | |||
| text-align:center;" | [[Arquivo:Fighting.png|link=]] | |||
| width="10%" | [[Arquivo:Interface_Speedster_PVE.png|24px|Velocista|link=]] | |||
| width="10%" | [[Arquivo:not.png|link=]] | |||
| text-align:"center;" | [[file:Atk7.png|Attack T7|link=]] | |||
|- | |- | ||
| text-align:center;" | #068 | | text-align:center;" | #068 | ||
| Linha 647: | Linha 860: | ||
| text-align:center;" | [[Machamp]] | | text-align:center;" | [[Machamp]] | ||
| text-align:center;" | [[Arquivo:Fighting.png|link=]] | | text-align:center;" | [[Arquivo:Fighting.png|link=]] | ||
| width="10%" | [[Arquivo: | | width="10%" | [[Arquivo:Interface_BDD_PVE.png|24px|Causador de Dano Explosivo|link=]] | ||
| width="10%" | [[Arquivo:Interface_OTDD_PVP.png|24px|link=]] | | width="10%" | [[Arquivo:Interface_OTDD_PVP.png|24px|Causador de Dano Contínuo|link=]] | ||
| text-align:"center;" | [[file:Atk7.png|Attack T7|link=]] | |||
|- | |- | ||
| text-align:center;" | #115 | | text-align:center;" | #115 | ||
| Linha 655: | Linha 869: | ||
| text-align:center;" | [[Arquivo:Normal1.png|link=]] | | text-align:center;" | [[Arquivo:Normal1.png|link=]] | ||
| width="10%" | [[Arquivo:Not.png|link=]] | | width="10%" | [[Arquivo:Not.png|link=]] | ||
| width="10%" | [[Arquivo:Interface_BDD_PVP.png|24px|link=]] | | width="10%" | [[Arquivo:Interface_BDD_PVP.png|24px|Causador de Dano Explosivo|link=]] | ||
| text-align:"center;" | [[file:Atk7.png|Attack T7|link=]] | |||
|- | |- | ||
| text-align:center;" | #203 | | text-align:center;" | #203 | ||
| Linha 662: | Linha 877: | ||
| text-align:center;" | [[Arquivo:Normal1.png|link=]] [[Arquivo:Psychic.png|link=Psycraft]] | | text-align:center;" | [[Arquivo:Normal1.png|link=]] [[Arquivo:Psychic.png|link=Psycraft]] | ||
| width="10%" | [[Arquivo:Not.png|link=]] | | width="10%" | [[Arquivo:Not.png|link=]] | ||
| width="10%" | [[Arquivo:Interface_OTDD_PVP.png|24px|link=]] | | width="10%" | [[Arquivo:Interface_OTDD_PVP.png|24px|Causador de Dano Contínuo|link=]] | ||
| text-align:"center;" | [[file:Def7.png|Defense T7|link=]] | |||
|- | |- | ||
| text-align:center;" | #233 | | text-align:center;" | #233 | ||
| Linha 669: | Linha 885: | ||
| text-align:center;" | [[Arquivo:Normal1.png|link=]] | | text-align:center;" | [[Arquivo:Normal1.png|link=]] | ||
| width="10%" | [[Arquivo:Not.png|link=]] | | width="10%" | [[Arquivo:Not.png|link=]] | ||
| width="10%" | [[Arquivo:Interface_BDD_PVP.png|24px|link=]] | | width="10%" | [[Arquivo:Interface_BDD_PVP.png|24px|Causador de Dano Explosivo|link=]] | ||
| text-align:"center;" | [[file:Atk7.png|Attack T7|link=]] | |||
|- | |- | ||
| text-align:center;" | #235 | | text-align:center;" | #235 | ||
| Linha 675: | Linha 892: | ||
| text-align:center;" | [[Smeargle|Smeargle 7]] | | text-align:center;" | [[Smeargle|Smeargle 7]] | ||
| text-align:center;" | [[Arquivo:Normal1.png|link=]] | | text-align:center;" | [[Arquivo:Normal1.png|link=]] | ||
| width="10%" | [[Arquivo:Interface_BDD_PVE.png|24px|link=]] | | width="10%" | [[Arquivo:Interface_BDD_PVE.png|24px|Causador de Dano Explosivo|link=]] | ||
| width="10%" | [[Arquivo:Not.png|link=]] | | width="10%" | [[Arquivo:Not.png|link=]] | ||
| text-align:"center;" | [[file:Atk7.png|Attack T7|link=]] | |||
|- | |- | ||
| text-align:center;" | #241 | | text-align:center;" | #241 | ||
| Linha 683: | Linha 901: | ||
| text-align:center;" | [[Arquivo:Normal1.png|link=]] | | text-align:center;" | [[Arquivo:Normal1.png|link=]] | ||
| width="10%" | [[Arquivo:Not.png|link=]] | | width="10%" | [[Arquivo:Not.png|link=]] | ||
| width="10%" | [[Arquivo:Interface_Support_PVP.png|24px|link=]] | | width="10%" | [[Arquivo:Interface_Support_PVP.png|24px|Suporte|link=]] | ||
| text-align:"center;" | [[file:Def7.png|Defense T7|link=]] | |||
|- | |- | ||
| text-align:center;" | #257 | | text-align:center;" | #257 | ||
| Linha 690: | Linha 909: | ||
| text-align:center;" | [[Arquivo:Fire.png|link=Volcanic]] [[Arquivo:Fighting.png|link=]] | | text-align:center;" | [[Arquivo:Fire.png|link=Volcanic]] [[Arquivo:Fighting.png|link=]] | ||
| width="10%" | [[Arquivo:Not.png|link=]] | | width="10%" | [[Arquivo:Not.png|link=]] | ||
| width="10%" | [[Arquivo:Interface_OffTank_PVP.png|24px|link=]] | | width="10%" | [[Arquivo:Interface_OffTank_PVP.png|24px|Tanque Ofensivo|link=]] | ||
| text-align:"center;" | [[file:Atk7.png|Attack T7|link=]] | |||
|- | |- | ||
| text-align:center;" | #277 | | text-align:center;" | #277 | ||
| Linha 697: | Linha 917: | ||
| text-align:center;" | [[Arquivo:Normal1.png|link=]] [[Arquivo:Flying.png|link=Wingeon]] | | text-align:center;" | [[Arquivo:Normal1.png|link=]] [[Arquivo:Flying.png|link=Wingeon]] | ||
| width="10%" | [[Arquivo:Not.png|link=]] | | width="10%" | [[Arquivo:Not.png|link=]] | ||
| width="10%" | [[Arquivo:Interface_BDD_PVP.png|24px|link=]] | | width="10%" | [[Arquivo:Interface_BDD_PVP.png|24px|Causador de Dano Explosivo|link=]] | ||
| text-align:"center;" | [[file:Atk7.png|Attack T7|link=]] | |||
|- | |- | ||
| text-align:center;" | #286 | | text-align:center;" | #286 | ||
| Linha 704: | Linha 925: | ||
| text-align:center;" | [[Arquivo:Grass.png|link=Naturia]] [[Arquivo:Fighting.png|link=]] | | text-align:center;" | [[Arquivo:Grass.png|link=Naturia]] [[Arquivo:Fighting.png|link=]] | ||
| width="10%" | [[Arquivo:Not.png|link=]] | | width="10%" | [[Arquivo:Not.png|link=]] | ||
| width="10%" | [[Arquivo:Interface_BDD_PVP.png|24px| | | width="10%" | [[Arquivo:Interface_BDD_PVP.png|24px|Causador de Dano Explosivo|link=]] | ||
| text-align:"center;" | [[file:Def7.png|Defense T7|link=]] | |||
| text-align: | |||
|- | |- | ||
| text-align:center;" | #308 | | text-align:center;" | #308 | ||
| Linha 718: | Linha 933: | ||
| text-align:center;" | [[Arquivo:Fighting.png|link=]] [[Arquivo:Psychic.png|link=Psycraft]] | | text-align:center;" | [[Arquivo:Fighting.png|link=]] [[Arquivo:Psychic.png|link=Psycraft]] | ||
| width="10%" | [[Arquivo:Not.png|link=]] | | width="10%" | [[Arquivo:Not.png|link=]] | ||
| width="10%" | [[Arquivo:Interface_OTDD_PVP.png|24px|link=]] | | width="10%" | [[Arquivo:Interface_OTDD_PVP.png|24px|Causador de Dano Contínuo|link=]] | ||
| text-align:"center;" | [[file:Acc7.png|Accuracy T7|link=]] | |||
|- | |- | ||
| text-align:center;" | #352 | | text-align:center;" | #352 | ||
| Linha 725: | Linha 941: | ||
| text-align:center;" | [[Arquivo:Normal1.png|link=]] | | text-align:center;" | [[Arquivo:Normal1.png|link=]] | ||
| width="10%" | [[Arquivo:Not.png|link=]] | | width="10%" | [[Arquivo:Not.png|link=]] | ||
| width="10%" | [[Arquivo:Interface_Disrupter_PVP.png|24px| | | width="10%" | [[Arquivo:Interface_Disrupter_PVP.png|24px|Disruptor|link=]] | ||
| text-align:"center;" | [[file:Acc7.png|Accuracy T7|link=]] | |||
| text-align: | |||
|- | |- | ||
| text-align:center;" | #428 | | text-align:center;" | #428 | ||
| Linha 739: | Linha 949: | ||
| text-align:center;" | [[Arquivo:Normal1.png|link=]] | | text-align:center;" | [[Arquivo:Normal1.png|link=]] | ||
| width="10%" | [[Arquivo:Not.png|link=]] | | width="10%" | [[Arquivo:Not.png|link=]] | ||
| width="10%" | [[Arquivo:Interface_Disrupter_PVP.png|24px|link=]] | | width="10%" | [[Arquivo:Interface_Disrupter_PVP.png|24px|Disruptor|link=]] | ||
| text-align:"center;" | [[file:Acc7.png|Accuracy T7|link=]] | |||
|- | |- | ||
| text-align:center;" | #432 | | text-align:center;" | #432 | ||
| Linha 746: | Linha 957: | ||
| text-align:center;" | [[Arquivo:Normal1.png|link=]] | | text-align:center;" | [[Arquivo:Normal1.png|link=]] | ||
| width="10%" | [[Arquivo:Not.png|link=]] | | width="10%" | [[Arquivo:Not.png|link=]] | ||
| width="10%" | | | width="10%" | [[Arquivo:Interface_BDD_PVP.png|24px|Causador de Dano Explosivo|link=]] | ||
| text-align:"center;" | [[file:Atk7.png|Attack T7|link=]] | |||
|- | |- | ||
| text-align:center;" | #448 | | text-align:center;" | #448 | ||
| text-align:center;" | [[Arquivo:448-Lucario.png|link=Lucario]] | | text-align:center;" | [[Arquivo:448-Lucario.png|link=Lucario]] | ||
| text-align:center;" | [[Lucario]] | | text-align:center;" | [[Lucario]] | ||
| text-align:center;" | [[Arquivo:Fighting.png|link=]] [[Arquivo:Steel.png|link=Ironhard]] | | text-align:center;" | [[Arquivo:Fighting.png|link=]] [[Arquivo:Steel.png|link=Ironhard]] | ||
| width="10%" | [[Arquivo: | | width="10%" | [[Arquivo:Interface_Speedster_PVE.png|24px|Velocista|link=]] | ||
| width="10%" | [[Arquivo: | | width="10%" | [[Arquivo:Interface_BDD_PVP.png|24px|Causador de Dano Explosivo|link=]] | ||
| text-align:"center;" | [[file:Atk7.png|Attack T7|link=]] | |||
|- | |- | ||
| text-align:center;" | #660 | | text-align:center;" | #660 | ||
| text-align:center;" | [[Arquivo:660-Diggersby.png|link=Diggersby]] | | text-align:center;" | [[Arquivo:660-Diggersby.png|link=Diggersby]] | ||
| text-align:center;" | [[Diggersby]] | | text-align:center;" | [[Diggersby]] | ||
| text-align:center;" | [[Arquivo:Normal1.png|link=]] [[Arquivo:Ground.png|link=Orebound | | text-align:center;" | [[Arquivo:Normal1.png|link=]] [[Arquivo:Ground.png|link=Orebound]] | ||
| width="10%" | [[Arquivo:Not.png|link=]] | | width="10%" | [[Arquivo:Not.png|link=]] | ||
| width="10%" | [[Arquivo:Interface_Disrupter_PVP.png|24px|link=]] | | width="10%" | [[Arquivo:Interface_Disrupter_PVP.png|24px|Disruptor|link=]] | ||
| text-align:"center;" | [[file:Acc7.png|Accuracy T7|link=]] | |||
|- | |||
| text-align:center;" | #701 | |||
| text-align:center;" | [[Arquivo:701-Hawlucha.png|link=Hawlucha]] | |||
| text-align:center;" | [[Hawlucha]] | |||
| text-align:center;" | [[Arquivo:Fighting.png|link=]] [[Arquivo:Flying.png|link=Wingeon]] | |||
| width="10%" | [[Arquivo:Not.png|link=]] | |||
| width="10%" | [[Arquivo:Interface_BDD_PVP.png|24px|Causador de Dano Explosivo|link=]] | |||
| text-align:"center;" | [[file:Atk7.png|Attack T7|link=]] | |||
|- | |- | ||
| text-align:center;" | # | | text-align:center;" | #870 | ||
| text-align:center;" | [[Arquivo: | | text-align:center;" | [[Arquivo:870-Falinks.png|link=Falinks]] | ||
| text-align:center;" | [[ | | text-align:center;" | [[Falinks]] | ||
| text-align:center;" | [[Arquivo:Fighting.png|link=]] | | text-align:center;" | [[Arquivo:Fighting.png|link=]] | ||
| width="10%" | [[Arquivo:Interface_BDD_PVE.png|24px|link=]] | | width="10%" | [[Arquivo:Interface_BDD_PVE.png|24px|Causador de Dano Explosivo|link=]] | ||
| width="10%" | [[Arquivo: | | width="10%" | [[Arquivo:Interface_OffTank_PVP.png|24px|Tanque Ofensivo|link=]] | ||
| text-align:"center;" | [[file:Atk7.png|Attack T7|link=]] [[file:Def7.png|Defense T7|link=]] | |||
|- | |- | ||
|} | |} | ||
</center> | </center> | ||
=Rotação Mid-Late Game= | |||
= | |||
<center> | <center> | ||
{| class="wikitable" style="text-align:center" width="50%;" | {| class="wikitable" style="text-align:center" width="50%;" | ||
|- | |- | ||
! colspan="4" scope="col" style="background-color: #8A0808| | ! colspan="4" scope="col" style="background-color: #8A0808| [[Arquivo:Fighting.png|link=]] Fighting | ||
|- | |- | ||
! scope="col" | <span style="color:black">Pokémon</span> | ! scope="col" | <span style="color:black">Pokémon</span> | ||
| Linha 788: | Linha 1 009: | ||
| text-align:"center;" | [[Arquivo:538-Throh.png|link=Throh]] | | text-align:"center;" | [[Arquivo:538-Throh.png|link=Throh]] | ||
| text-align:"center;" | [[Throh]] | | text-align:"center;" | [[Throh]] | ||
| text-align:"center;" | [[Arquivo:Interface_Tank_PVE.png|24px|link=]] | | text-align:"center;" | [[Arquivo:Interface_Tank_PVE.png|24px|Tanque|link=]] | ||
| text-align:"center;" | 2 | | text-align:"center;" | 2 | ||
|- | |||
| text-align:"center;" | [[Arquivo:448-MegaLucario.png|link=Mega Lucario Fighting (TM)]] | |||
| text-align:"center;" | [[Mega Lucario Fighting (TM)]] | |||
| text-align:"center;" | [[Arquivo:Interface_OffensiveTanker_pve.png|24px|Tanque Ofensivo|link=]] | |||
| text-align:"center;" | TM OFF-Tank | |||
|- | |- | ||
| text-align:"center;" | [[Arquivo:428-MegaLopunny.png|link=Mega Lopunny]] | | text-align:"center;" | [[Arquivo:428-MegaLopunny.png|link=Mega Lopunny]] | ||
| text-align:"center;" | [[Mega Lopunny]] | | text-align:"center;" | [[Mega Lopunny]] | ||
| text-align:"center;" | [[Arquivo:Interface_OffensiveTanker_pve.png|24px|link=]] | | text-align:"center;" | [[Arquivo:Interface_OffensiveTanker_pve.png|24px|Tanque Ofensivo|link=]] | ||
| text-align:"center;" | 2 | | text-align:"center;" | 2 | ||
|- | |- | ||
| text-align:"center;" | [[Arquivo:237-EliteHitmontop.png | | text-align:"center;" | [[Arquivo:237-EliteHitmontop.png|link=Elite Hitmontop]] | ||
| text-align:"center;" | [[Elite Hitmontop]] | | text-align:"center;" | [[Elite Hitmontop]] | ||
| text-align:"center;" | [[Arquivo:Interface_OffensiveTanker_pve.png|24px|link=]] | | text-align:"center;" | [[Arquivo:Interface_OffensiveTanker_pve.png|24px|Tanque Ofensivo|link=]] | ||
| text-align:"center;" | 2 | | text-align:"center;" | 2 | ||
|- | |- | ||
| text-align:"center;" | [[Arquivo:297-Shiny_Hariyama.png|link=Shiny Hariyama]] | | text-align:"center;" | [[Arquivo:297-Shiny_Hariyama.png|link=Shiny Hariyama]] | ||
| text-align:"center;" | [[Shiny Hariyama]] | | text-align:"center;" | [[Shiny Hariyama]] | ||
| text-align:"center;" | [[Arquivo:Interface_BDD_PVE.png|24px|link=]] | | text-align:"center;" | [[Arquivo:Interface_BDD_PVE.png|24px|Causador de Dano Explosivo|link=]] | ||
| text-align:"center;" | 1H | |||
|- | |||
| text-align:"center;" | [[Arquivo:620-Shiny_Mienshao.png|link=Shiny Mienshao]] | |||
| text-align:"center;" | [[Shiny Mienshao]] | |||
| text-align:"center;" | [[Arquivo:Interface_BDD_PVE.png|24px|Causador de Dano Explosivo|link=]] | |||
| text-align:"center;" | 1H | |||
|- | |||
| text-align:"center;" | [[Arquivo:701-Mega_Hawlucha.png|link=Mega Hawlucha]] | |||
| text-align:"center;" | [[Mega Hawlucha]] | |||
| text-align:"center;" | [[Arquivo:Interface_BDD_PVE.png|24px|Causador de Dano Explosivo|link=]] | |||
| text-align:"center;" | 1H | | text-align:"center;" | 1H | ||
|- | |- | ||
| text-align:"center;" | [[Arquivo:539-Sawk.png|link=Sawk]] | | text-align:"center;" | [[Arquivo:539-Sawk.png|link=Sawk]] | ||
| text-align:"center;" | [[Sawk]] | | text-align:"center;" | [[Sawk]] | ||
| text-align:"center;" | [[Arquivo:Interface_BDD_PVE.png|25px|link=]] | | text-align:"center;" | [[Arquivo:Interface_BDD_PVE.png|25px|Causador de Dano Explosivo|link=]] | ||
| text-align:"center;" | 2 | | text-align:"center;" | 2 | ||
|- | |- | ||
| text-align:"center;" | [[Arquivo:865-Sirfetch'd.png|link=Sirfetch'd]] | | text-align:"center;" | [[Arquivo:865-Sirfetch'd.png|link=Sirfetch'd]] | ||
| text-align:"center;" | [[Sirfetch'd]] | | text-align:"center;" | [[Sirfetch'd]] | ||
| text-align:"center;" | [[Arquivo:Interface_BDD_PVE.png|25px|link=]] | | text-align:"center;" | [[Arquivo:Interface_BDD_PVE.png|25px|Causador de Dano Explosivo|link=]] | ||
| text-align:"center;" | 2 | |||
|- | |||
| text-align:"center;" | [[Arquivo:068-Machamp.png|link=Machamp]] | |||
| text-align:"center;" | [[Machamp]] | |||
| text-align:"center;" | [[Arquivo:Interface_BDD_PVE.png|25px|Causador de Dano Explosivo|link=]] | |||
| text-align:"center;" | 3 | | text-align:"center;" | 3 | ||
|- | |- | ||
| text-align:"center;" | [[Arquivo:057-Champion_Primeape.png|link=Champion Primeape]] | | text-align:"center;" | [[Arquivo:057-Champion_Primeape.png|link=Champion Primeape]] | ||
| text-align:"center;" | [[Champion Primeape]] | | text-align:"center;" | [[Champion Primeape]] | ||
| text-align:"center;" | [[Arquivo:Interface_BDD_PVE.png|25px|link=]] | | text-align:"center;" | [[Arquivo:Interface_BDD_PVE.png|25px|Causador de Dano Explosivo|link=]] | ||
| text-align:"center;" | 3 | |||
|- | |||
| text-align:"center;" | [[Arquivo:057 - Shiny Primeape.png|link=Shiny Primeape]] | |||
| text-align:"center;" | [[Shiny Primeape]] | |||
| text-align:"center;" | [[Arquivo:Interface_BDD_PVE.png|25px|Causador de Dano Explosivo|link=]] | |||
| text-align:"center;" | 3 | | text-align:"center;" | 3 | ||
|- | |||
| text-align:"center;" | [[Arquivo:115-MegaKangaskhan.png|link=Mega Kangaskhan (TM)]] | |||
| text-align:"center;" | [[Mega Kangaskhan (TM)]] | |||
| text-align:"center;" | [[Arquivo:Interface_BDD_PVE.png|25px|Causador de Dano Explosivo|link=]] | |||
| text-align:"center;" | TM Burst | |||
|- | |||
| text-align:"center;" | [[Arquivo:214-Heracross.png|link=Heracross (TR)]] | |||
| text-align:"center;" | [[Heracross (TR)]] | |||
| text-align:"center;" | [[Arquivo:Interface BDD PVE.png|24px|Causador de Dano Explosivo|link=]] | |||
| text-align:"center;" | TR | |||
|} | |} | ||
</center> | </center> <br> | ||
'''Observação:''' Apesar da Mega Kangaskhan TM ser do elemento [[arquivo:Normal1.png|link=]] Normal, os seus movimentos são todos [[arquivo:Fighting.png|link=]] Fighting, assim sendo possível utilizar na rotação. | |||
''' | |||
<center> | <center> | ||
{| class="wikitable" style="text-align:center" width="50%;" | {| class="wikitable" style="text-align:center" width="50%;" | ||
|- | |- | ||
! colspan="4" scope="col" style="background-color: #8A0808| | ! colspan="4" scope="col" style="background-color: #8A0808| [[Arquivo:Normal1.png|link=]] Normal | ||
|- | |- | ||
! scope="col" | <span style="color:black">Pokémon</span> | ! scope="col" | <span style="color:black">Pokémon</span> | ||
| Linha 837: | Linha 1 092: | ||
| text-align:"center;" | [[Arquivo:668-Pyroar_Female.png|link=Pyroar Female]] | | text-align:"center;" | [[Arquivo:668-Pyroar_Female.png|link=Pyroar Female]] | ||
| text-align:"center;" | [[Pyroar Female]] | | text-align:"center;" | [[Pyroar Female]] | ||
| text-align:"center;" | [[Arquivo:Interface_Tank_PVE.png|24px|link=]] | | text-align:"center;" | [[Arquivo:Interface_Tank_PVE.png|24px|Tanque|link=]] | ||
| text-align:"center;" | 2 | | text-align:"center;" | 2 | ||
|- | |- | ||
| text-align:"center;" | [[Arquivo: | | text-align:"center;" | [[Arquivo:295-Exploud.png|link=Exploud]] | ||
| text-align:"center;" | [[ | | text-align:"center;" | [[Exploud]] | ||
| text-align:"center;" | [[Arquivo:Interface_BDD_PVE.png| | | text-align:"center;" | [[Arquivo:Interface_BDD_PVE.png|25px|Causador de Dano Explosivo|link=]] | ||
| text-align:"center;" | 2 | | text-align:"center;" | 2 | ||
|- | |- | ||
| text-align:"center;" | [[Arquivo: | | text-align:"center;" | [[Arquivo:143-Snorlax.png|link=Snorlax (TR)]] | ||
| text-align:"center;" | [[ | | text-align:"center;" | [[Snorlax (TR)]] | ||
| text-align:"center;" | [[Arquivo: | | text-align:"center;" | [[Arquivo:Interface BDD PVE.png|24px|Causador de Dano Explosivo|link=]] | ||
| text-align:"center;" | | | text-align:"center;" | TR | ||
|} | |||
</center> <br> | |||
=Exclusividade do Clã no PvP= | |||
<center> | |||
{| class="wikitable" style="text-align:center" width="25%;" | |||
|- | |||
! scope="col" width="5%;" style="background-color: #8A0808"| Pokémon | |||
! scope="col" width="15%;" style="background-color: #8A0808"| Nome | |||
|- | |||
| text-align:"center;" | [[Arquivo:020-AlolanRaticate.png|link=Alolan Raticate]] | |||
| text-align:"center;" | [[Alolan Raticate]] | |||
|- | |||
| text-align:"center;" | [[Arquivo:115-MegaKangaskhan.png|link=Mega Kangaskhan]] | |||
| text-align:"center;" | [[Mega Kangaskhan]] | |||
|- | |||
| text-align:"center;" | [[Arquivo:237-EliteHitmontop.png|link=Elite Hitmontop]] | |||
| text-align:"center;" | [[Elite Hitmontop]] | |||
|- | |||
| text-align:"center;" | [[Arquivo:392-Infernape.png|link=Infernape]] | |||
| text-align:"center;" | [[Infernape]] | |||
|- | |||
| text-align:"center;" | [[Arquivo:Shiny_Infernape.png|link=Shiny Infernape]] | |||
| text-align:"center;" | [[Shiny Infernape]] | |||
|- | |||
| text-align:"center;" | [[Arquivo:446-ShinyMunchlax.png|link=Shiny Munchlax]] | |||
| text-align:"center;" | [[Shiny Munchlax]] | |||
|- | |||
| text-align:"center;" | [[Arquivo:531-MegaAudino.png|link=Mega Audino]] | |||
| text-align:"center;" | [[Mega Audino]] | |||
|- | |||
| text-align:"center;" | [[Arquivo:675-Pangoro.png|link=Pangoro]] | |||
| text-align:"center;" | [[Pangoro]] | |||
|- | |||
| text-align:"center;" | [[Arquivo:870-Mega Falinks.png|link=Mega Falinks]] | |||
| text-align:"center;" | [[Mega Falinks]] | |||
|- | |||
| text-align:"center;" | [[file:901 - Bloodmoon Ursaluna.png|link=Bloodmoon Ursaluna]] | |||
| text-align:"center;" | [[Bloodmoon Ursaluna]] | |||
|} | |} | ||
</center> | </center> | ||
''' | '''Observação:''' A exclusividade é aplicada apenas em conteúdos PvP. No PvE, o uso é liberado para todos os clãs. | ||
=Pokémon obtido via NPC de Clã= | =Pokémon obtido via NPC de Clã= | ||
| Linha 858: | Linha 1 165: | ||
*'''Shiny de Clã''' | *'''Shiny de Clã''' | ||
Para obter um [[Arquivo:237-EliteHitmontop.png|link=Elite Hitmontop]] '''[[Elite Hitmontop]]''', [[Arquivo:107-Hitmonchan.png|link=Elite Hitmonchan]] '''[[Elite Hitmonchan]]''' ou [[Arquivo:Elite_Hitmonlee.png|link=Elite Hitmonlee]] '''[[Elite Hitmonlee]]''', fale com a '''[[ | Para obter um [[Arquivo:237-EliteHitmontop.png|link=Elite Hitmontop]] '''[[Elite Hitmontop]]''', [[Arquivo:107-Hitmonchan.png|link=Elite Hitmonchan]] '''[[Elite Hitmonchan]]''' ou [[Arquivo:Elite_Hitmonlee.png|link=Elite Hitmonlee]] '''[[Elite Hitmonlee]]''', fale com a '''[[Pokémon_Obtidos_via_NPC#Shiny_de_Cl.C3.A3|NPC Betsy]]''' na área do clã Gardestrike, no Trade Center. | ||
<center> | |||
<br>[[Arquivo:NPC Betsy Gardestrike.png|link=]] | |||
</center> | |||
*'''Shiny de Clã da Nightmare World | |||
Para obter um [[Arquivo:446-ShinyMunchlax1.png|link=Shiny Munchlax]] '''[[Shiny Munchlax]]''', fale com a '''[[Pokémon_Obtidos_via_NPC#Shiny_de_Cl.C3.A3_da_Nightmare_World|NPC Betsy]]''' na área de Gardestrike, na resistência de Cerulean. | |||
<center> | |||
<br>[[Arquivo:NPC NW Betsy Gardestrike.png|link=]] | |||
</center> | </center> | ||
=Efetividade= | |||
Abaixo são apresentadas as efetividades dos Pokémon deste clã, considerando apenas aqueles que possuem '''um elemento'''. A efetividade pode mudar caso o Pokémon possua dois elementos ou possua alguma resistência à algum elemento, como é o caso da '''[[Mega Lopunny]]''', que possui a passiva '''Tough Spirit''', permitindo que ganhe resistência contra ataques do tipo Normal (0,5x). | |||
A efetividade de um Pokémon pode ser conferida na [[Arquivo:PokedexIcon.png|link=]] '''Pokédex''' ou realizando uma busca na página '''[[Pokémon]]''' (uso do Ctrl+F recomendado).Clique no ícone do elemento desejado para conferir a tabela de efetividade deste clã. | |||
<span class="mw-customtoggle-myDivision72"><font size="2"> [[Arquivo:Fighting.png|20px|link=]] '''Fighting''' </font></span> | |||
<div class="mw-collapsible mw-collapsed" id="mw-customcollapsible-myDivision72"> | |||
<center> | <center> | ||
{| class="wikitable" style="text-align:center" width="30%;" | |||
|- | |||
! colspan="3" scope="col" width="2%" style="background-color: #8A0808"| [[Arquivo:Fighting.png|link=]] Ofensivo | |||
|- | |||
! scope="col" width="1%" | <span style="color:black">Dano</span> | |||
! colspan="2" scope="col" width="4%" | <span style="color:black">Elemento</span> | |||
|- | |||
| rowspan="5" style="border-right-style: hidden; background-color: #01DF01;" | 2x | |||
| width="1%" style="border-bottom-style: hidden;" | [[Arquivo:Dark1.png|link=Malefic]] | |||
| style="border-left-style: hidden; text-align:left; border-bottom-style: hidden;" | Dark | |||
|- | |||
| width="1%" style="border-bottom-style: hidden;" | [[Arquivo:Ice.png|link=Seavell]] | |||
| style="border-left-style: hidden; text-align:left; border-bottom-style: hidden;" | Ice | |||
|- | |||
| width="1%" style="border-bottom-style: hidden;" | [[Arquivo:Normal1.png|link=]] | |||
| style="border-left-style: hidden; text-align:left; border-bottom-style: hidden;" | Normal | |||
|- | |||
| width="1%" style="border-bottom-style: hidden;" | [[Arquivo:Rock.png|link=Orebound]] | |||
| style="border-left-style: hidden; text-align:left; border-bottom-style: hidden;" | Rock | |||
|- | |||
| width="1%" | [[Arquivo:Steel.png|link=Ironhard]] | |||
| style="border-left-style: hidden; text-align:left; | Steel | |||
|- | |||
| rowspan="5" style="border-right-style: hidden; style="background-color: #FE2E2E" | 0.5x | |||
| width="1%" style="border-bottom-style: hidden;" | [[Arquivo:Bug.png|link=Naturia]] | |||
| style="border-left-style: hidden; text-align:left; border-bottom-style: hidden;" | Bug | |||
|- | |||
| width="1%" style="border-bottom-style: hidden;" | [[Arquivo:Fairy.png|link=Psycraft]] | |||
| style="border-left-style: hidden; text-align:left; border-bottom-style: hidden;" | Fairy | |||
|- | |||
| width="1%" " style="border-bottom-style: hidden;" | [[Arquivo:Flying.png|link=Wingeon]] | |||
| style="border-left-style: hidden; text-align:left; border-bottom-style: hidden;" | Flying | |||
|- | |||
| width="1%" style="border-bottom-style: hidden;" | [[Arquivo:Poison1.png|link=Malefic]] | |||
| style="border-left-style: hidden; text-align:left; border-bottom-style: hidden;" | Poison | |||
|- | |||
| width="1%" | [[Arquivo:Psychic.png|link=Gardestrike]] | |||
| style="border-left-style: hidden; text-align:left; | Psychic | |||
|- | |||
| width="1%" style="background-color: #A4A4A4" | 0x | |||
| width="1%"| [[Arquivo:Ghost1.png|link=Malefic]] | |||
| style="border-left-style: hidden; text-align:left; | Ghost | |||
|- | |||
|} | |||
</center> | |||
[[Arquivo: | <center> | ||
{| class="wikitable" style="text-align:center" width="30%;" | |||
|- | |||
! colspan="3" scope="col" width="2%" style="background-color: #8A0808"| [[Arquivo:Fighting.png|link=]] Defensivo | |||
|- | |||
! scope="col" width="1%" | <span style="color:black">Dano</span> | |||
! colspan="2" scope="col" width="4%" | <span style="color:black">Elemento</span> | |||
|- | |||
| rowspan="3" style="border-right-style: hidden; style="background-color: #FE2E2E"| 0.5x | |||
| width="1%" style="border-bottom-style: hidden;" | [[Arquivo:Bug.png|link=Naturia]] | |||
| style="border-left-style: hidden; text-align:left; border-bottom-style: hidden;" | Bug | |||
|- | |||
| width="1%" style="border-bottom-style: hidden;" | [[Arquivo:Dark1.png|link=Malefic]] | |||
| style="border-left-style: hidden; text-align:left; border-bottom-style: hidden;" | Dark | |||
|- | |||
| width="1%" | [[Arquivo:Rock.png|link=Orebound]] | |||
| style="border-left-style: hidden; text-align:left;" | Rock | |||
|- | |||
| rowspan="3" style="border-right-style: hidden; style="background-color: #01DF01" | 2x | |||
| width="1%" style="border-bottom-style: hidden;" | [[Arquivo:Fairy.png|link=Psycraft]] | |||
| style="border-left-style: hidden; text-align:left; border-bottom-style: hidden;" | Fairy | |||
|- | |||
| width="1%" style="border-bottom-style: hidden;" | [[Arquivo:Flying.png|link=Wingeon]] | |||
| style="border-left-style: hidden; text-align:left; border-bottom-style: hidden;" | Flying | |||
|- | |||
| width="1%" | [[Arquivo:Psychic.png|link=Psychic]] | |||
| style="border-left-style: hidden; text-align:left;" | Psychic | |||
|- | |||
| width="1%" style="background-color: #A4A4A4" | 0x | |||
| colspan="2" widht="1%" | - | |||
|} | |||
</center> | </center> | ||
</div> | |||
= | <span class="mw-customtoggle-myDivision73"><font size="2"> [[Arquivo:Normal1.png|20px|link=]] '''Normal''' </font></span> | ||
<div class="mw-collapsible mw-collapsed" id="mw-customcollapsible-myDivision73"> | |||
<center> | <center> | ||
{| class="wikitable" style="text-align:center" width=" | {| class="wikitable" style="text-align:center" width="30%;" | ||
|- | |- | ||
! scope="col" width=" | ! colspan="3" scope="col" width="2%" style="background-color: #8A0808"| [[Arquivo:Normal1.png|link=]] Ofensivo | ||
! scope="col" width=" | |- | ||
! scope="col" width="1%" | <span style="color:black">Dano</span> | |||
! colspan="2" scope="col" width="4%" | <span style="color:black">Elemento</span> | |||
|- | |||
| style="border-right-style: hidden; style="background-color: #01DF01;" | 2x | |||
| colspan="2" width="1%" | - | |||
|- | |||
| rowspan="2" style="border-right-style: hidden; style="background-color: #FE2E2E" | 0.5x | |||
| width="1%" style="border-bottom-style: hidden;" | [[Arquivo:Rock.png|link=Orebound]] | |||
| style="border-left-style: hidden; text-align:left; border-bottom-style: hidden;" | Rock | |||
|- | |- | ||
| | | width="1%" | [[Arquivo:Steel.png|link=Ironhard]] | ||
| | | style="border-left-style: hidden; text-align:left; | Steel | ||
|- | |- | ||
| | | width="1%" style="background-color: #A4A4A4" | 0x | ||
| | | width="1%" | [[Arquivo:Ghost1.png|link=Malefic]] | ||
| | | style="border-left-style: hidden; text-align:left" | Ghost | ||
|} | |||
</center> | |||
<center> | |||
{| class="wikitable" style="text-align:center" width="30%;" | |||
|- | |- | ||
! colspan="3" scope="col" width="2%" style="background-color: #8A0808"| [[Arquivo:Normal1.png|link=]] Defensivo | |||
|- | |- | ||
| | ! scope="col" width="1%" | <span style="color:black">Dano</span> | ||
! colspan="2" scope="col" width="4%" | <span style="color:black">Elemento</span> | |||
|- | |- | ||
| | | style="border-right-style: hidden; style="background-color: #FE2E2E"| 0.5x | ||
| colspan="2" width="1%" | - | |||
|- | |- | ||
| | | style="border-right-style: hidden; style="background-color: #01DF01" | 2x | ||
| | | width="1%" | [[Arquivo:Fighting.png|link=]] | ||
| style="border-left-style: hidden; text-align:left;" | Fighting | |||
|- | |- | ||
| width="1%" style="background-color: #A4A4A4" | 0x | |||
| width="1%" | [[Arquivo:Ghost1.png|link=]] | |||
| style="border-left-style: hidden; text-align:left;" | Ghost | |||
|} | |} | ||
</center> | </center> | ||
</div> | |||
Mais informações poderão ser adquiridas acessando a página '''[[Efetividades]]'''. | |||
=Outfits Exclusivas= | |||
<center> | |||
{| class="wikitable" width="42%" | |||
! colspan="2" width="50%" style="background-color: #8A0808" | Rank 1 | |||
! colspan="2" width="50%" style="background-color: #8A0808" | Rank 5 | |||
|- | |||
| width="5%" align="center" | [[Arquivo:Gardestrike1_female.png|link=]] | |||
| width="5%" align="center" | [[Arquivo:Gardestrike1_male.png|link=]] | |||
| width="5%" align="center" | [[Arquivo:Gardestrike5_female.png|link=]] | |||
| width="5%" align="center" | [[Arquivo:Gardestrike5_male.png|link=]] | |||
|} | |||
</center> | |||
<center> | |||
{| class="wikitable" width="42%" | |||
! colspan="2" width="50%" style="background-color: #8A0808" | Master | |||
|- | |||
| width="5%" align="center" | [[Arquivo:Gardestrike_fem.gif|link=]] | |||
| width="5%" align="center" | [[Arquivo:Gardestrikemale.gif|link=]] | |||
|} | |||
</center> | |||
<center> | |||
{| class="wikitable" width="42%" | |||
! colspan="2" width="50%" style="background-color: #8A0808" | Gardestrike Ascendant | |||
|- | |||
| width="5%" align="center" | [[Arquivo:Gardestrike Ascendant Female-1.png|link=]] [[Arquivo:Gardestrike Ascendant Female-2.png|link=]] | |||
| width="5%" align="center" | [[Arquivo:Gardestrike Ascendant Male-1.png|link=]] [[Arquivo:Gardestrike Ascendant Male-2.png|link=]] | |||
|} | |||
</center> | |||
Edição atual tal como às 20h56min de 8 de julho de 2026
Caso encontre algum erro ou queira acrescentar alguma informação, entre em contato com um dos membros da wiki.
Introdução
Os membros deste clã são fortes. Sua força foi conquistada após um longo treinamento com Pokémon do tipo  Normal e
  Fighting.
Ranking
- Rank 1: Gardestrike Fist.
- Rank 2: Gardestrike Tamer.
- Rank 3: Gardestrike Fighter.
- Rank 4: Gardestrike Deathand.
- Rank 5: Gardestrike Champion.
- Rank 6: Gardestrike Ascendant.
Acesse a página de Tasks do clã Gardestrike para conferir os requisitos necessários em cada um dos Rankings.
Bônus de Clã
O bônus máximo do clã é aplicado ao completar as tarefas do Rank 5. Abaixo estão as porcentagens de bônus adquiridas:
Normal: Atk 25%, Def 25%
Fighting: Atk 25%, Def 25%
Jogadores mais experientes que completaram a The Rainbow Hero Quest e realizaram o Ascension Path poderão alcançar o Rank 6 do clã, obtendo porcentagens de bônus ainda maiores.
Normal: Atk 27%, Def 27%
Fighting: Atk 27%, Def 27%
Observações:
- É possível visualizar, no Diamond Shop, dentro do jogo, os bônus ofensivos e defensivos recebidos por cada clã nos Ranks 5 e 6, desde que o jogador tenha alcançado um desses ranks.
- O bônus de ataque é aplicado aos movimentos do Pokémon. Se o jogador estiver usando um Pokémon de fora do seu clã, mas que execute um movimento do elemento do seu clã, o bônus de ataque ainda será concedido.
Tiers
Tier é uma classificação comum entre os Pokémon, indicando não apenas a raridade deste dentro do jogo, mas também qual executará melhor uma função, contanto que a comparação seja realizada entre dois Pokémon de mesma função. O Tier e a Função de um Pokémon pode ser conferido na  Pokédex (Atalho Shift + D). Caso deseje ler mais sobre, acesse a página Tier e Funções ou Tiers (listagem) para conferir a listagem de Tier de todos os Pokémon.
Para facilitar a leitura desta página, a tabela a seguir contém a legenda de todas as Funções, PvP e PvE disponíveis no jogo.
| Função PvE | Função PvP | ||
|---|---|---|---|
| Ícone | Função | Ícone | Função |

|
Tank | 
|
Tank |

|
Offensive Tank | 
|
Offensive Tank |

|
Burst Damage Dealer | 
|
Burst Damage Dealer |

|
Over Time Damage Dealer | 
|
Over Time Damage Dealer |

|
Support Overtime | 
|
Support |

|
Speedster | 
|
Disrupter |
Abaixo estão listados todos os Pokémon do clã Gardestrike e suas respectivas funções, separados por Tier e com algumas recomendações de Held Itens.
Observação: A nossa lista de Helds Recomendados foi composta por colaboradores experientes da Wiki da PokeXGames e serve como sugestões de Held Itens para os Pokémon no âmbito do PvP e PvE, respectivamente.
O jogador ainda tem toda a liberdade de testar e utilizar outros Helds que não esses, podendo personalizar seu Pokémon de um jeito diferente. Ressaltamos que em caso de alterações nos Pokémon, essa lista pode ser alterada e não será garantido que o Pokémon seja adicionado como opção no NPC Jorge.
Observação: Na listagem, o Held PvP sugerido é o primeiro, seguido pelo Held PvE. Caso o Pokémon utilize o mesmo Held Item nos 2 âmbitos, aparecerá listado somente 1 Held Item.
Tier 1A
| Nº Dex | Ícone | Nome | Elementos | Função PvE | Função PvP | Held Recomendado (PvP/PvE) |
|---|---|---|---|---|---|---|
| #143 | 
|
Shiny Snorlax |
|
|
|
 
|
Tier 1B
| Nº Dex | Ícone | Nome | Elementos | Função PvE | Função PvP | Held Recomendado (PvP/PvE) |
|---|---|---|---|---|---|---|
| #128 | 
|
Shiny Tauros |
|
|
|
|
Tier 1C
| Nº Dex | Ícone | Nome | Elementos | Função PvE | Função PvP | Held Recomendado (PvP/PvE) |
|---|---|---|---|---|---|---|
| #018 | 
|
Shiny Pidgeot | 
|
|
|
|
| #020 | 
|
Alolan Raticate | 
|
|
|
|
| #068 | 
|
Shiny Machamp |
|
|
|
|
| #083 | 
|
Elite Farfetch'D |
|
|
|
|
| #115 | 
|
Mega Kangaskhan |
|

|
|
|
| #214 | 
|
Mega Heracross* | 
|
|
|
|
| #234 | 
|
Shiny Stantler |
|
|
|

|
| #130 | 
|
Mega Blaziken | 
|
|
|
|
| #289 | 
|
Slaking |
|
|
|
|
| #392 | 
|
Shiny Infernape |
|
|
|
|
| #448 | 
|
Mega Lucario | 
|
|
|
|
| #474 | 
|
Porygon-Z |
|
|
|
|
| #475 | 
|
Shiny Gallade* | 
|
|
|
|
| #475 | 
|
Mega Gallade* |
|
|
|
|
| #531 | 
|
Mega Audino | 
|
|
|
|
| #534 | 
|
Conkeldurr |
|
|
|
|
| #870 | 
|
Mega Falinks |
|
|
|
|
| #899 | 
|
Wyrdeer* |
|
|
|
|
| #901 | 
|
Bloodmoon Ursaluna | 
|
|
|
|
*Observação: Os Pokémon Shiny Gallade , Mega Heracross , Wyrdeer e Mega Gallade são exclusivos de outros clãs no PvP.
Technical Machine (TM)
| Nº Dex | Ícone | Nome | Elementos | Função PvE | Função PvP | Held Recomendado (PvE) |
|---|---|---|---|---|---|---|
| #068 |
|
Shiny Machamp (TM) |
|
|
|
|
| #115 |
|
Mega Kangaskhan (TM) |
|
|
|
|
| #392 |
|
Shiny Infernape (TM) |
|
|
|
|
| #448 |
|
Mega Lucario Fighting (TM) |
|

|
|
|
| #534 |
|
Conkeldurr (TM) |
|
|
|
|
 |
Saiba Mais: Technical Machine (TM) |
Technical Records (TR)
| Nº Dex | Ícone | Nome | Elementos | Função PvE | Função PvP | Held Recomendado (PvE) |
|---|---|---|---|---|---|---|
| #143 | 
|
Snorlax (TR) |
|
|
|
|
| #214 | 
|
Heracross (TR) |
|
|
|
|
|
Saiba Mais: Technical Records (TR) |
Tier 1H
| Nº Dex | Ícone | Nome | Elementos | Função PvE | Função PvP | Held Recomendado (PvE) |
|---|---|---|---|---|---|---|
| #214 | 
|
Shiny Heracross |
|
|
|
|
| #297 | 
|
Shiny Hariyama |
|
|
|
|
| #620 | 
|
Shiny Mienshao |
|
|
|
|
| #668 | 
|
Mega Pyroar |
|
|
|
|
| #553 | 
|
Mega Barbaracle | 
|
|
|
|
| #701 | 
|
Mega Hawlucha |
|
|
|
|
| #780 | 
|
Mega Drampa | 
|
|
|
|
| #901 | 
|
Ursaluna |
|
|
|
|
Observação: Os Pokémon T1H tem força de T1C fora da Nightmare World e são acima dos T1C dentro dela ou pelo menos tem um diferencial perante os demais Pokémon. São balanceados exclusivamente para conteúdos PvE e não podem ser utilizados em duelos PvP.
- O Mega Pyroar possui seu moveset focado no tipo Fire.
- O Mega Barbaracle possui seu moveset focado no tipo Rock.
- O Mega Drampa possui seu moveset focado no tipo Dragon.
Tier 2
| Nº Dex | Ícone | Nome | Elementos | Função PvE | Função PvP | Held Recomendado (PvP/PvE) |
|---|---|---|---|---|---|---|
| #040 | 
|
Shiny Wigglytuff |
|
|
|
|
| #065 | 
|
Champion Poliwrath* | 
|
|
|
|
| #106 | 
|
Elite Hitmonlee |
|
|
|
|
| #107 | 
|
Elite Hitmonchan |
|
|
|
|
| #143 |
|
Snorlax |
|
|
|
|
| #203 | 
|
Shiny Girafarig |
|
|
|
|
| #214 |
|
Heracross |
|
|
|
|
| #217 | 
|
Ursaring |
|
|
|
|
| #235 | 
|
Smeargle 8 |
|
|
|
|
| #237 | 
|
Elite Hitmontop |
|
|
|
|
| #242 | 
|
Blissey |
|
|
|
|
| #295 | 
|
Exploud |
|
|
|
|
| #297 | 
|
Hariyama |
|
|
|
|
| #308 | 
|
Mega Medicham |
|
|
|
|
| #335 | 
|
Zangoose |
|
|
|
|
| #392 | 
|
Infernape | 
|
|
|
|
| #424 | 
|
Ambipom |
|
|
|
|
| #428 | 
|
Mega Lopunny |
|
|
|
|
| #446 | 
|
Shiny Munchlax |
|
|
|
|
| #448 | 
|
Shiny Lucario* |
|
|
|
|
| #454 | 
|
Toxicroak | 
|
|
|
|
| #463 | 
|
Lickilicky |
|
|
|
|
| #475 | 
|
Gallade* |
|
|
|
|
| #538 | 
|
Throh |
|
|
|
|
| #539 | 
|
Sawk |
|
|

|
|
| #560 | 
|
Scrafty* |
|
|
|
|
| #620 | 
|
Mienshao |
|
|
|
|
| #628 | 
|
Braviary |
|
|
|
|
| #668 | 
|
Pyroar |
|
|
|
|
| #668 | 
|
Pyroar Female |
|
|
|
|
| #675 | 
|
Pangoro |
|
|
|
|
| #701 | 
|
Shiny Hawlucha* |
|
|
|
|
| #780 | 
|
Drampa |
|
|
|
|
| #865 | 
|
Sirfetch'd |
|
|
|
|
| #903 | 
|
Sneasler |
|
|
|
|
*Observação: Os Pokémon Champion Poliwrath , Gallade , Scrafty , Shiny Lucario e Shiny Hawlucha são exclusivos de outros clãs no PvP.
Tier 3
| Nº Dex | Ícone | Nome | Elementos | Função PvE | Função PvP | Held Recomendado (PvP/PvE) |
|---|---|---|---|---|---|---|
| #018 | 
|
Pidgeot |
|
|
|
|
| #040 | 
|
Wigglytuff |
|
|
|
|
| #057 | 
|
Champion Primeape |
|
|
|
|
| #057 | 
|
Shiny Primeape |
|
|
|
|
| #062 | 
|
Poliwrath |
|
|
|
|
| #067 | 
|
Shiny Machoke |
|
|
|
|
| #068 | 
|
Machamp |
|
|
|
|
| #115 | 
|
Kangaskhan |
|
|
|
|
| #203 | 
|
Girafarig |
|
|
|
|
| #233 | 
|
Porygon2 |
|
|
|
|
| #235 | 
|
Smeargle 7 |
|
|
|
|
| #241 | 
|
Miltank |
|
|
|
|
| #257 | 
|
Blaziken |
|
|
|
|
| #277 | 
|
Swellow |
|
|
|
|
| #286 | 
|
Breloom | 
|
|
|
|
| #308 | 
|
Medicham |
|
|
|
|
| #352 | 
|
Kecleon |
|
|
|
|
| #428 | 
|
Lopunny |
|
|
|
|
| #432 | 
|
Purugly |
|
|
|
|
| #448 | 
|
Lucario |
|
|
|
|
| #660 | 
|
Diggersby |
|
|
|
|
| #701 | 
|
Hawlucha |
|
|
|
|
| #870 | 
|
Falinks |
|
|
|
|
Rotação Mid-Late Game
| Fighting
| |||
|---|---|---|---|
| Pokémon | Nome | Função | Tier |
|
|
Throh |
|
2 |
|
|
Mega Lucario Fighting (TM) |
|
TM OFF-Tank |
|
|
Mega Lopunny |
|
2 |
|
|
Elite Hitmontop |
|
2 |
|
|
Shiny Hariyama |
|
1H |
|
|
Shiny Mienshao |
|
1H |
|
|
Mega Hawlucha |
|
1H |
|
|
Sawk | 
|
2 |
|
|
Sirfetch'd |
|
2 |
|
|
Machamp |
|
3 |
|
|
Champion Primeape |
|
3 |
|
|
Shiny Primeape |
|
3 |
|
|
Mega Kangaskhan (TM) |
|
TM Burst |
|
|
Heracross (TR) |
|
TR |
Observação: Apesar da Mega Kangaskhan TM ser do elemento Normal, os seus movimentos são todos Fighting, assim sendo possível utilizar na rotação.
| Normal
| |||
|---|---|---|---|
| Pokémon | Nome | Função | Tier |
|
|
Pyroar Female |
|
2 |
|
|
Exploud |
|
2 |
|
|
Snorlax (TR) |
|
TR |
Exclusividade do Clã no PvP
| Pokémon | Nome |
|---|---|
|
|
Alolan Raticate |
|
|
Mega Kangaskhan |
|
|
Elite Hitmontop |
|
|
Infernape |
|
|
Shiny Infernape |

|
Shiny Munchlax |
|
|
Mega Audino |
|
|
Pangoro |
|
|
Mega Falinks |
|
|
Bloodmoon Ursaluna |
Observação: A exclusividade é aplicada apenas em conteúdos PvP. No PvE, o uso é liberado para todos os clãs.
Pokémon obtido via NPC de Clã
- Shiny de Clã
Para obter um Elite Hitmontop, Elite Hitmonchan ou Elite Hitmonlee, fale com a NPC Betsy na área do clã Gardestrike, no Trade Center.
- Shiny de Clã da Nightmare World
Para obter um Shiny Munchlax, fale com a NPC Betsy na área de Gardestrike, na resistência de Cerulean.
Efetividade
Abaixo são apresentadas as efetividades dos Pokémon deste clã, considerando apenas aqueles que possuem um elemento. A efetividade pode mudar caso o Pokémon possua dois elementos ou possua alguma resistência à algum elemento, como é o caso da Mega Lopunny, que possui a passiva Tough Spirit, permitindo que ganhe resistência contra ataques do tipo Normal (0,5x).
A efetividade de um Pokémon pode ser conferida na Pokédex ou realizando uma busca na página Pokémon (uso do Ctrl+F recomendado).Clique no ícone do elemento desejado para conferir a tabela de efetividade deste clã.
 Fighting
| Ofensivo
| ||
|---|---|---|
| Dano | Elemento | |
|
|
||
|
|
||
| 0x | 
|
|

| Defensivo
| ||
|---|---|---|
| Dano | Elemento | |
|
|
||
|
|
||
| 0x | - | |
 Normal
| Ofensivo
| ||
|---|---|---|
| Dano | Elemento | |
| - | ||
|
|
||
| 0x |
|
|
| Defensivo
| ||
|---|---|---|
| Dano | Elemento | |
| - | ||
|
|
||
| 0x |
|
|
Mais informações poderão ser adquiridas acessando a página Efetividades.
Outfits Exclusivas
| Rank 1 | Rank 5 | ||
|---|---|---|---|

|

|

|

|
| Master | |
|---|---|

|
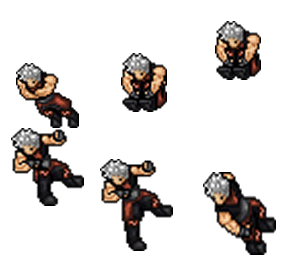
|
| Gardestrike Ascendant | |
|---|---|
 
|
 
|