Shiny Torterra: mudanças entre as edições
Ir para navegação
Ir para pesquisar
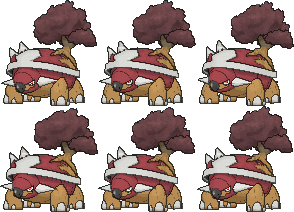
Sem resumo de edição |
|||
| (13 revisões intermediárias por 4 usuários não estão sendo mostradas) | |||
| Linha 6: | Linha 6: | ||
'''Level:''' 100<br /> | '''Level:''' 100<br /> | ||
'''Elemento:''' Grass/Ground<br /> | '''Elemento:''' Grass/Ground<br /> | ||
'''Habilidades:''' Dig, | '''Habilidades:''' Dig, Rock Smash, Cut, Light, Headbutt and Strength.<br /> | ||
'''Boost:''' Leaf | '''Boost:''' Leaf Stone ou Earth Stone (2)<br /> | ||
'''Materia''' | '''Materia:''' Naturia Mastered ou Orebound Mastered<br /> | ||
== '''Evoluções''' == | == '''Evoluções''' == | ||
'''Torterra''' precisa de Level 100. | '''Shiny Torterra''' precisa de Level 100. | ||
== '''Descrição | == '''Descrição''' == | ||
Ocasionalmente, pequenos Pokémon juntam-se em suas costas imóveis para começar a construir seus ninhos. | Ocasionalmente, pequenos Pokémon juntam-se em suas costas imóveis para começar a construir seus ninhos. | ||
== '''Movimentos''' == | == '''Movimentos''' == | ||
=== | ==='''Movimentos PvP'''=== | ||
{| border="0" style="border-collapse:collapse" | {| border="0" style="border-collapse:collapse" | ||
|- align="center" style="background-color: #E6E6FA;" | |||
|- align="center" | |||
! rowspan="2" | M1 | ! rowspan="2" | M1 | ||
| width="10px" | | | width="10px" | | ||
| align="left" | Bite (15s) | | align="left" | Bite (15s) | ||
| width="50px" rowspan="2" | | | width="50px" rowspan="2" | | ||
| rowspan="2" align="right" | [[Arquivo: | | rowspan="2" align="right" | [[Arquivo:Target.png|Target]] [[Arquivo:Damage.png|Damage]] | ||
| rowspan="2" | [[Arquivo: | | rowspan="2" | [[Arquivo:Dark1.png|Dark|link=Malefic]] | ||
|- align="center" | |- align="center" style="background-color: #E6E6FA;" | ||
| width="10px" | | | width="10px" | | ||
| align="left" | Level 100 | | align="left" | Level 100 | ||
|- align="center" | |||
|- align="center" | |||
! rowspan="2" | M2 | ! rowspan="2" | M2 | ||
| width="10px" | | | width="10px" | | ||
| align="left" | Razor Leaf (10s) | | align="left" | Razor Leaf (10s) | ||
| width="50px" rowspan="2" | | | width="50px" rowspan="2" | | ||
| rowspan="2" align="right" | [[Arquivo: | | rowspan="2" align="right" | [[Arquivo:Target.png|Target]] [[Arquivo:Damage.png|Damage]] | ||
| rowspan="2" | [[Arquivo: | | rowspan="2" | [[Arquivo:Grass.png|Grass|link=Naturia]] | ||
|- align="center" | |- align="center" | ||
| width="10px" | | | width="10px" | | ||
| align="left" | Level 100 | | align="left" | Level 100 | ||
|- align="center" style="background-color: #E6E6FA;" | |||
|- align="center" | |||
! rowspan="2" | M3 | ! rowspan="2" | M3 | ||
| width="10px" | | | width="10px" | | ||
| align="left" | | | align="left" | Earth Power (20s) | ||
| width="50px" rowspan="2" | | | width="50px" rowspan="2" | | ||
| rowspan="2" align="right" | [[Arquivo: | | rowspan="2" align="right" | [[Arquivo:Target.png|Target]] [[Arquivo:AOE.png|AOE]] [[Arquivo:Damage.png|Damage]] | ||
| rowspan="2" | [[Arquivo: | | rowspan="2" | [[Arquivo:Ground.png|Ground|link=Orebound]] | ||
|- align="center" | |- align="center" style="background-color: #E6E6FA;" | ||
| width="10px" | | | width="10px" | | ||
| align="left" | Level 100 | | align="left" | Level 100 | ||
|- align="center" | |||
|- align="center" | |||
! rowspan="2" | M4 | ! rowspan="2" | M4 | ||
| width="10px" | | | width="10px" | | ||
| align="left" | | | align="left" | High Horsepower (10s) | ||
| width="50px" rowspan="2" | | | width="50px" rowspan="2" | | ||
| rowspan="2" align="right" | [[Arquivo: | | rowspan="2" align="right" | [[Arquivo:Target.png|Target]] [[Arquivo:Damage.png|Damage]] | ||
| rowspan="2" | [[Arquivo: | | rowspan="2" | [[Arquivo:Ground.png|Ground|link=Orebound]] | ||
|- align="center" | |- align="center" | ||
| width="10px" | | | width="10px" | | ||
| align="left" | Level 100 | | align="left" | Level 100 | ||
|- align="center" style="background-color: #E6E6FA;" | |||
|- align="center" | |||
! rowspan="2" | M5 | ! rowspan="2" | M5 | ||
| width="10px" | | | width="10px" | | ||
| align="left" | Wood Hammer (30s) | | align="left" | Wood Hammer (30s) | ||
| width="50px" rowspan="2" | | | width="50px" rowspan="2" | | ||
| rowspan="2" align="right" | [[Arquivo: | | rowspan="2" align="right" | [[Arquivo:AOE.png|AOE]] [[Arquivo:Damage.png|Damage]] | ||
| rowspan="2" | [[Arquivo:Grass.png|Grass|link=Naturia]] | | rowspan="2" | [[Arquivo:Grass.png|Grass|link=Naturia]] | ||
|- align="center" | |- align="center" style="background-color: #E6E6FA;" | ||
| width="10px" | | | width="10px" | | ||
| align="left" | Level 100 | | align="left" | Level 100 | ||
|- align="center" | |||
|- align="center" | |||
! rowspan="2" | M6 | ! rowspan="2" | M6 | ||
| width="10px" | | | width="10px" | | ||
| align="left" | Bulldoze (30s) | | align="left" | Bulldoze (30s) | ||
| width="50px" rowspan="2" | | | width="50px" rowspan="2" | | ||
| rowspan="2" align="right" | [[Arquivo:AOE.png|AOE]][[Arquivo:Damage.png|Damage]] | | rowspan="2" align="right" | [[Arquivo:AOE.png|AOE]] [[Arquivo:Damage.png|Damage]] [[Arquivo:Slow.png|Slow]] | ||
| rowspan="2" | [[Arquivo: | | rowspan="2" | [[Arquivo:Ground.png|Ground|link=Orebound]] | ||
|- align="center" | |- align="center" | ||
| width="10px" | | | width="10px" | | ||
| align="left" | Level | | align="left" | Level 100 | ||
|- align="center" style="background-color: #E6E6FA;" | |||
|- align="center" | |||
! rowspan="2" | M7 | ! rowspan="2" | M7 | ||
| width="10px" | | | width="10px" | | ||
| align="left" | | | align="left" | Headlong Rush (50s) | ||
| width="50px" rowspan="2" | | | width="50px" rowspan="2" | | ||
| rowspan="2" align="right" | [[Arquivo:AOE.png|AOE]][[Arquivo:Damage.png|Damage]] | | rowspan="2" align="right" | [[Arquivo:AOE.png|AOE]] [[Arquivo:Damage.png|Damage]] | ||
| rowspan="2" | [[Arquivo: | | rowspan="2" | [[Arquivo:Ground.png|Ground|link=Orebound]] | ||
|- align="center" | |- align="center" style="background-color: #E6E6FA;" | ||
| width="10px" | | | width="10px" | | ||
| align="left" | Level 100 | | align="left" | Level 100 | ||
|- align="center" | |||
|- align="center" | |||
! rowspan="2" | M8 | ! rowspan="2" | M8 | ||
| width="10px" | | | width="10px" | | ||
| align="left" | | | align="left" | Earthquake (50s) | ||
| width="50px" rowspan="2" | | | width="50px" rowspan="2" | | ||
| rowspan="2" align="right" | [[Arquivo:AOE.png|AOE]][[Arquivo:Damage.png|Damage]] | | rowspan="2" align="right" | [[Arquivo:AOE.png|AOE]] [[Arquivo:Damage.png|Damage]] [[Arquivo:Slow.png|Slow]] | ||
| rowspan="2" | [[Arquivo: | | rowspan="2" | [[Arquivo:Ground.png|Ground|link=Orebound]] | ||
|- align="center" | |- align="center" | ||
| width="10px" | | | width="10px" | | ||
| align="left" | Level | | align="left" | Level 100 | ||
|- align="center" style="background-color: #E6E6FA;" | |||
|- align="center" | |||
! rowspan="2" | M9 | ! rowspan="2" | M9 | ||
| width="10px" | | | width="10px" | | ||
| align="left" | Giga Drain (60s) | | align="left" | Giga Drain (60s) | ||
| width="50px" rowspan="2" | | | width="50px" rowspan="2" | | ||
| rowspan="2" align="right" | [[Arquivo:Target.png|Target]][[Arquivo:Damage.png|Damage]][[Arquivo:Lifesteal.png|Lifesteal]][[Arquivo:Nevermiss.png|Nevermiss]] | | rowspan="2" align="right" | [[Arquivo:Target.png|Target]] [[Arquivo:Damage.png|Damage]] [[Arquivo:Lifesteal.png|Lifesteal]] [[Arquivo:Nevermiss.png|Nevermiss]] | ||
| rowspan="2" | [[Arquivo:Grass.png|Grass|link=Naturia]] | | rowspan="2" | [[Arquivo:Grass.png|Grass|link=Naturia]] | ||
|- align="center" | |- align="center" style="background-color: #E6E6FA;" | ||
| width="10px" | | | width="10px" | | ||
| align="left" | Level | | align="left" | Level 100 | ||
|- align="center" | |||
|- align="center" | |||
! rowspan="2" | P | ! rowspan="2" | P | ||
| width="10px" | | | width="10px" | | ||
| align="left" | | | align="left" | Shell Armor | ||
| width="50px" rowspan="2" | | | width="50px" rowspan="2" | | ||
| rowspan="2" align="right" | [[Arquivo:Buff.png|Buff]] [[Arquivo:Passive.png|Passive]] | | rowspan="2" align="right" | [[Arquivo:Buff.png|Buff]] [[Arquivo:Passive.png|Passive]] | ||
| rowspan="2" | [[Arquivo: | | rowspan="2" | [[Arquivo:Grass.png|Grass|link=Naturia]] | ||
|- align="center" | |- align="center" | ||
| width="10px" | | | width="10px" | | ||
| align="left" | | | align="left" | Level 100 | ||
|- align="center" style="background-color: #E6E6FA;" | |||
|- align="center" | |||
! rowspan="2" | P | ! rowspan="2" | P | ||
| width="10px" | | | width="10px" | | ||
| align="left" | Shell | | align="left" | Impervious Shell | ||
| width="50px" rowspan="2" | | | width="50px" rowspan="2" | | ||
| rowspan="2" align="right" | [[Arquivo:Buff.png|Buff]] [[Arquivo:Passive.png|Passive]] | | rowspan="2" align="right" | [[Arquivo:Buff.png|Buff]] [[Arquivo:Passive.png|Passive]] | ||
| rowspan="2" | [[Arquivo: | | rowspan="2" | [[Arquivo:Rock.png|Rock|link=Orebound]] | ||
|- align="center" | |- align="center" style="background-color: #E6E6FA;" | ||
| width="10px" | | | width="10px" | | ||
| align="left" | | | align="left" | Level 100 | ||
|} | |} | ||
=== | ==='''Movimentos PvE'''=== | ||
{| border="0" style="border-collapse:collapse" | {| border="0" style="border-collapse:collapse" | ||
|- align="center" style="background-color: #E6E6FA;" | |||
|- align="center" | |||
! rowspan="2" | M1 | ! rowspan="2" | M1 | ||
| width="10px" | | | width="10px" | | ||
| align="left" | Bite ( | | align="left" | Bite (15s) | ||
| width="50px" rowspan="2" | | | width="50px" rowspan="2" | | ||
| rowspan="2" align="right" | [[Arquivo: | | rowspan="2" align="right" | [[Arquivo:Target.png|Target]] [[Arquivo:Damage.png|Damage]] | ||
| rowspan="2" | [[Arquivo: | | rowspan="2" | [[Arquivo:Dark1.png|Dark|link=Malefic]] | ||
|- align="center" | |- align="center" style="background-color: #E6E6FA;" | ||
| width="10px" | | | width="10px" | | ||
| align="left" | Level 100 | | align="left" | Level 100 | ||
|- align="center" | |||
|- align="center" | |||
! rowspan="2" | M2 | ! rowspan="2" | M2 | ||
| width="10px" | | | width="10px" | | ||
| align="left" | '''Razor Leaf ( | | align="left" | '''Razor Leaf (15s)''' | ||
| width="50px" rowspan="2" | | | width="50px" rowspan="2" | | ||
| rowspan="2" align="right" | [[Arquivo: | | rowspan="2" align="right" | [[Arquivo:Target.png|Target]] [[Arquivo:Damage.png|Damage]] | ||
| rowspan="2" | [[Arquivo: | | rowspan="2" | [[Arquivo:Grass.png|Grass|link=Naturia]] | ||
|- align="center" | |- align="center" | ||
| width="10px" | | | width="10px" | | ||
| align="left" | Level 100 | | align="left" | Level 100 | ||
|- align="center" style="background-color: #E6E6FA;" | |||
|- align="center" | |||
! rowspan="2" | M3 | ! rowspan="2" | M3 | ||
| width="10px" | | | width="10px" | | ||
| align="left" | ''' | | align="left" | '''Earth Power (30s)''' | ||
| width="50px" rowspan="2" | | | width="50px" rowspan="2" | | ||
| rowspan="2" align="right" | [[Arquivo: | | rowspan="2" align="right" | [[Arquivo:Target.png|Target]] [[Arquivo:AOE.png|AOE]] [[Arquivo:Damage.png|Damage]] | ||
| rowspan="2" | [[Arquivo: | | rowspan="2" | [[Arquivo:Ground.png|Ground|link=Orebound]] | ||
|- align="center" | |- align="center" style="background-color: #E6E6FA;" | ||
| width="10px" | | | width="10px" | | ||
| align="left" | Level 100 | | align="left" | Level 100 | ||
|- align="center" | |||
|- align="center" | |||
! rowspan="2" | M4 | ! rowspan="2" | M4 | ||
| width="10px" | | | width="10px" | | ||
| align="left" | ''' | | align="left" | '''High Horsepower (20s)''' | ||
| width="50px" rowspan="2" | | | width="50px" rowspan="2" | | ||
| rowspan="2" align="right" | [[Arquivo: | | rowspan="2" align="right" | [[Arquivo:Target.png|Target]] [[Arquivo:Damage.png|Damage]] | ||
| rowspan="2" | [[Arquivo: | | rowspan="2" | [[Arquivo:Ground.png|Ground|link=Orebound]] | ||
|- align="center" | |- align="center" | ||
| width="10px" | | | width="10px" | | ||
| align="left" | Level 100 | | align="left" | Level 100 | ||
|- align="center" style="background-color: #E6E6FA;" | |||
|- align="center" | |||
! rowspan="2" | M5 | ! rowspan="2" | M5 | ||
| width="10px" | | | width="10px" | | ||
| align="left" | | | align="left" | Wood Hammer (30s) | ||
| width="50px" rowspan="2" | | | width="50px" rowspan="2" | | ||
| rowspan="2" align="right" | [[Arquivo: | | rowspan="2" align="right" | [[Arquivo:AOE.png|AOE]] [[Arquivo:Damage.png|Damage]] | ||
| rowspan="2" | [[Arquivo:Grass.png|Grass|link=Naturia]] | | rowspan="2" | [[Arquivo:Grass.png|Grass|link=Naturia]] | ||
|- align="center" | |- align="center" style="background-color: #E6E6FA;" | ||
| width="10px" | | | width="10px" | | ||
| align="left" | Level 100 | | align="left" | Level 100 | ||
|- align="center" | |||
|- align="center" | |||
! rowspan="2" | M6 | ! rowspan="2" | M6 | ||
| width="10px" | | | width="10px" | | ||
| align="left" | Bulldoze ( | | align="left" | '''Bulldoze (40s)''' | ||
| width="50px" rowspan="2" | | | width="50px" rowspan="2" | | ||
| rowspan="2" align="right" | [[Arquivo:AOE.png|AOE]][[Arquivo:Damage.png|Damage]] | | rowspan="2" align="right" | [[Arquivo:AOE.png|AOE]] [[Arquivo:Damage.png|Damage]] [[Arquivo:Slow.png|Slow]] | ||
| rowspan="2" | [[Arquivo: | | rowspan="2" | [[Arquivo:Ground.png|Ground|link=Orebound]] | ||
|- align="center" | |- align="center" | ||
| width="10px" | | | width="10px" | | ||
| align="left" | Level | | align="left" | Level 100 | ||
|- align="center" style="background-color: #E6E6FA;" | |||
|- align="center" | |||
! rowspan="2" | M7 | ! rowspan="2" | M7 | ||
| width="10px" | | | width="10px" | | ||
| align="left" | | | align="left" | '''Headlong Rush (40s)''' | ||
| width="50px" rowspan="2" | | | width="50px" rowspan="2" | | ||
| rowspan="2" align="right" | [[Arquivo:AOE.png|AOE]][[Arquivo:Damage.png|Damage]] | | rowspan="2" align="right" | [[Arquivo:AOE.png|AOE]] [[Arquivo:Damage.png|Damage]] | ||
| rowspan="2" | [[Arquivo: | | rowspan="2" | [[Arquivo:Ground.png|Ground|link=Orebound]] | ||
|- align="center" | |- align="center" style="background-color: #E6E6FA;" | ||
| width="10px" | | | width="10px" | | ||
| align="left" | Level 100 | | align="left" | Level 100 | ||
|- align="center" | |||
|- align="center" | |||
! rowspan="2" | M8 | ! rowspan="2" | M8 | ||
| width="10px" | | | width="10px" | | ||
| align="left" | | | align="left" | Earthquake (50s) | ||
| width="50px" rowspan="2" | | | width="50px" rowspan="2" | | ||
| rowspan="2" align="right" | [[Arquivo:AOE.png|AOE]][[Arquivo:Damage.png|Damage]] | | rowspan="2" align="right" | [[Arquivo:AOE.png|AOE]] [[Arquivo:Damage.png|Damage]] [[Arquivo:Slow.png|Slow]] | ||
| rowspan="2" | [[Arquivo: | | rowspan="2" | [[Arquivo:Ground.png|Ground|link=Orebound]] | ||
|- align="center" | |- align="center" | ||
| width="10px" | | | width="10px" | | ||
| align="left" | Level | | align="left" | Level 100 | ||
|- align="center" style="background-color: #E6E6FA;" | |||
|- align="center" | |||
! rowspan="2" | M9 | ! rowspan="2" | M9 | ||
| width="10px" | | | width="10px" | | ||
| align="left" | '''Giga Drain (50s)''' | | align="left" | '''Giga Drain (50s)''' | ||
| width="50px" rowspan="2" | | | width="50px" rowspan="2" | | ||
| rowspan="2" align="right" | [[Arquivo:Target.png|Target]][[Arquivo:Damage.png|Damage]][[Arquivo:Lifesteal.png|Lifesteal]][[Arquivo:Nevermiss.png|Nevermiss]] | | rowspan="2" align="right" | [[Arquivo:Target.png|Target]] [[Arquivo:Damage.png|Damage]] [[Arquivo:Lifesteal.png|Lifesteal]] [[Arquivo:Nevermiss.png|Nevermiss]] | ||
| rowspan="2" | [[Arquivo:Grass.png|Grass|link=Naturia]] | | rowspan="2" | [[Arquivo:Grass.png|Grass|link=Naturia]] | ||
|- align="center" | |- align="center" style="background-color: #E6E6FA;" | ||
| width="10px" | | | width="10px" | | ||
| align="left" | Level | | align="left" | Level 100 | ||
|- align="center" | |||
|- align="center" | |||
! rowspan="2" | P | ! rowspan="2" | P | ||
| width="10px" | | | width="10px" | | ||
| align="left" | | | align="left" | Shell Armor | ||
| width="50px" rowspan="2" | | | width="50px" rowspan="2" | | ||
| rowspan="2" align="right" | [[Arquivo:Buff.png|Buff]] [[Arquivo:Passive.png|Passive]] | | rowspan="2" align="right" | [[Arquivo:Buff.png|Buff]] [[Arquivo:Passive.png|Passive]] | ||
| rowspan="2" | [[Arquivo: | | rowspan="2" | [[Arquivo:Grass.png|Grass|link=Naturia]] | ||
|- align="center" | |- align="center" | ||
| width="10px" | | | width="10px" | | ||
| align="left" | | | align="left" | Level 100 | ||
|- align="center" style="background-color: #E6E6FA;" | |||
|- align="center" | |||
! rowspan="2" | P | ! rowspan="2" | P | ||
| width="10px" | | | width="10px" | | ||
| align="left" | Shell | | align="left" | Impervious Shell | ||
| width="50px" rowspan="2" | | | width="50px" rowspan="2" | | ||
| rowspan="2" align="right" | [[Arquivo:Buff.png|Buff]] [[Arquivo:Passive.png|Passive]] | | rowspan="2" align="right" | [[Arquivo:Buff.png|Buff]] [[Arquivo:Passive.png|Passive]] | ||
| rowspan="2" | [[Arquivo: | | rowspan="2" | [[Arquivo:Rock.png|Rock|link=Orebound]] | ||
|- align="center" | |- align="center" style="background-color: #E6E6FA;" | ||
| width="10px" | | | width="10px" | | ||
| align="left" | | | align="left" | Level 100 | ||
|} | |} | ||
| Linha 276: | Linha 252: | ||
'''Super Efetivo:''' Ice.<br /> | '''Super Efetivo:''' Ice.<br /> | ||
'''Efetivo:''' Fire, | '''Efetivo:''' Fire, Flying and Bug.<br /> | ||
'''Normal:''' Normal, | '''Normal:''' Normal, Water, Grass, Fighting, Poison, Psychic, Ghost, Dragon, Steel, Dark, Crystal and Fairy.<br /> | ||
'''Inefetivo:''' Ground and | '''Inefetivo:''' Ground and Rock.<br /> | ||
'''Nulo:''' Electric. | '''Nulo:''' Electric.<br /> | ||
== '''Outras Versões''' == | == '''Outras Versões''' == | ||
| Linha 287: | Linha 263: | ||
| style="width:50px; text-align:center;" | <b>[[Arquivo:389-Torterra.png|link=Torterra]]</b> | | style="width:50px; text-align:center;" | <b>[[Arquivo:389-Torterra.png|link=Torterra]]</b> | ||
| style="width:150px; text-align:center;" | <b>'''[[Torterra]]'''</b> | | style="width:150px; text-align:center;" | <b>'''[[Torterra]]'''</b> | ||
|- style="vertical-align:top; text-align=center;" | |||
| style="width:50px; text-align:center;" | <b>[[Arquivo:389-Shiny_Torterra.png|link=Shiny Torterra (TM)]]</b> | |||
| style="width:150px; text-align:center;" | <b>'''[[Shiny Torterra (TM)]]'''</b> | |||
|} | |} | ||
Edição atual tal como às 12h29min de 7 de julho de 2026
Informações Gerais
Nome: Shiny Torterra
Level: 100
Elemento: Grass/Ground
Habilidades: Dig, Rock Smash, Cut, Light, Headbutt and Strength.
Boost: Leaf Stone ou Earth Stone (2)
Materia: Naturia Mastered ou Orebound Mastered
Evoluções
Shiny Torterra precisa de Level 100.
Descrição
Ocasionalmente, pequenos Pokémon juntam-se em suas costas imóveis para começar a construir seus ninhos.
Movimentos
Movimentos PvP
| M1 | Bite (15s) |  
|

| ||
|---|---|---|---|---|---|
| Level 100 | |||||
| M2 | Razor Leaf (10s) |
|

| ||
| Level 100 | |||||
| M3 | Earth Power (20s) | 
|

| ||
| Level 100 | |||||
| M4 | High Horsepower (10s) |
|
| ||
| Level 100 | |||||
| M5 | Wood Hammer (30s) |
|
| ||
| Level 100 | |||||
| M6 | Bulldoze (30s) | 
|
| ||
| Level 100 | |||||
| M7 | Headlong Rush (50s) |
|
| ||
| Level 100 | |||||
| M8 | Earthquake (50s) |
|
| ||
| Level 100 | |||||
| M9 | Giga Drain (60s) |  
|
| ||
| Level 100 | |||||
| P | Shell Armor |  
|
| ||
| Level 100 | |||||
| P | Impervious Shell |
|

| ||
| Level 100 |
Movimentos PvE
| M1 | Bite (15s) |
|
| ||
|---|---|---|---|---|---|
| Level 100 | |||||
| M2 | Razor Leaf (15s) |
|
| ||
| Level 100 | |||||
| M3 | Earth Power (30s) |
|
| ||
| Level 100 | |||||
| M4 | High Horsepower (20s) |
|
| ||
| Level 100 | |||||
| M5 | Wood Hammer (30s) |
|
| ||
| Level 100 | |||||
| M6 | Bulldoze (40s) |
|
| ||
| Level 100 | |||||
| M7 | Headlong Rush (40s) |
|
| ||
| Level 100 | |||||
| M8 | Earthquake (50s) |
|
| ||
| Level 100 | |||||
| M9 | Giga Drain (50s) |
|
| ||
| Level 100 | |||||
| P | Shell Armor |
|
| ||
| Level 100 | |||||
| P | Impervious Shell |
|
| ||
| Level 100 |
Efetividades
Super Efetivo: Ice.
Efetivo: Fire, Flying and Bug.
Normal: Normal, Water, Grass, Fighting, Poison, Psychic, Ghost, Dragon, Steel, Dark, Crystal and Fairy.
Inefetivo: Ground and Rock.
Nulo: Electric.
Outras Versões

|
Torterra |

|
Shiny Torterra (TM) |