Magnezone (TR): mudanças entre as edições
Ir para navegação
Ir para pesquisar
Sem resumo de edição |
|||
| (Uma revisão intermediária pelo mesmo usuário não está sendo mostrada) | |||
| Linha 27: | Linha 27: | ||
|- align="center" style="background-color: #E6E6FA;" | |- align="center" style="background-color: #E6E6FA;" | ||
| width="10px" | | | width="10px" | | ||
| align="left" | Level | | align="left" | Level 170 | ||
|- align="center" | |- align="center" | ||
| Linha 38: | Linha 38: | ||
|- align="center" | |- align="center" | ||
| width="10px" | | | width="10px" | | ||
| align="left" | Level | | align="left" | Level 170 | ||
|- align="center" style="background-color: #E6E6FA;" | |- align="center" style="background-color: #E6E6FA;" | ||
| Linha 49: | Linha 49: | ||
|- align="center" style="background-color: #E6E6FA;" | |- align="center" style="background-color: #E6E6FA;" | ||
| width="10px" | | | width="10px" | | ||
| align="left" | Level | | align="left" | Level 170 | ||
|- align="center" | |- align="center" | ||
| Linha 60: | Linha 60: | ||
|- align="center" | |- align="center" | ||
| width="10px" | | | width="10px" | | ||
| align="left" | Level | | align="left" | Level 170 | ||
|- align="center" style="background-color: #E6E6FA;" | |- align="center" style="background-color: #E6E6FA;" | ||
! rowspan="2" | M5 | ! rowspan="2" | M5 | ||
| width="10px" | | | width="10px" | | ||
| align="left" | Thunder ( | | align="left" | Thunder (50s) | ||
| width="50px" rowspan="2" | | | width="50px" rowspan="2" | | ||
| rowspan="2" align="right" | [[Arquivo:AOE.png|AOE]] [[Arquivo:Damage.png|Damage]] | | rowspan="2" align="right" | [[Arquivo:AOE.png|AOE]] [[Arquivo:Damage.png|Damage]] | ||
| Linha 71: | Linha 71: | ||
|- align="center" style="background-color: #E6E6FA;" | |- align="center" style="background-color: #E6E6FA;" | ||
| width="10px" | | | width="10px" | | ||
| align="left" | Level | | align="left" | Level 170 | ||
|- align="center" | |- align="center" | ||
| Linha 82: | Linha 82: | ||
|- align="center" | |- align="center" | ||
| width="10px" | | | width="10px" | | ||
| align="left" | Level | | align="left" | Level 170 | ||
|- align="center" style="background-color: #E6E6FA;" | |- align="center" style="background-color: #E6E6FA;" | ||
| Linha 93: | Linha 93: | ||
|- align="center" style="background-color: #E6E6FA;" | |- align="center" style="background-color: #E6E6FA;" | ||
| width="10px" | | | width="10px" | | ||
| align="left" | Level | | align="left" | Level 170 | ||
|- align="center" | |- align="center" | ||
| Linha 104: | Linha 104: | ||
|- align="center" | |- align="center" | ||
| width="10px" | | | width="10px" | | ||
| align="left" | Level | | align="left" | Level 170 | ||
|- align="center" style="background-color: #E6E6FA;" | |- align="center" style="background-color: #E6E6FA;" | ||
! rowspan="2" | | ! rowspan="2" | P | ||
| width="10px" | | | width="10px" | | ||
| align="left" | Magnet Rise | | align="left" | Magnet Rise | ||
| width="50px" rowspan="2" | | | width="50px" rowspan="2" | | ||
| rowspan="2" align="right" | [[Arquivo:Buff.png|Buff]] | | rowspan="2" align="right" | [[Arquivo:Buff.png|Buff]] | ||
| Linha 115: | Linha 115: | ||
|- align="center" style="background-color: #E6E6FA;" | |- align="center" style="background-color: #E6E6FA;" | ||
| width="10px" | | | width="10px" | | ||
| align="left" | Level | | align="left" | Level 170 | ||
|- align="center" | |- align="center" | ||
! rowspan="2" | | ! rowspan="2" | P | ||
| width="10px" | | | width="10px" | | ||
| align="left" | Tri-Vision | | align="left" | Tri-Vision | ||
| width="50px" rowspan="2" | | | width="50px" rowspan="2" | | ||
| rowspan="2" align="right" | [[Arquivo:Buff.png|Buff]] [[Arquivo:Focus Blocked.png|Focus Blocked]] | | rowspan="2" align="right" | [[Arquivo:Buff.png|Buff]] [[Arquivo:Focus Blocked.png|Focus Blocked]] | ||
| Linha 126: | Linha 126: | ||
|- align="center" | |- align="center" | ||
| width="10px" | | | width="10px" | | ||
| align="left" | Level | | align="left" | Level 170 | ||
|} | |} | ||
== '''Efetividades''' == | == '''Efetividades''' == | ||
Edição atual tal como às 18h13min de 2 de julho de 2026
Informações Gerais
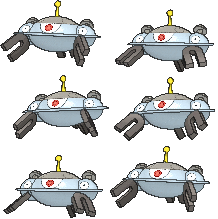
Nome: TR Magnezone
Level: 170
Elemento: Electric and Steel
Habilidades: light, fly e headbutt.
Evoluções
Tr Magnezone precisa de Level 170.
Descrição:
Evoluiu da exposição a um campo magnético especial. Três unidades geram magnetismo..
Movimentos
| M1 | Scrap Throw (15s) |  
|

| ||
|---|---|---|---|---|---|
| Level 170 | |||||
| M2 | Thunder Shock (20s) |
|

| ||
| Level 170 | |||||
| M3 | Spark (20s) |
|
| ||
| Level 170 | |||||
| M4 | Shock Wave (40s) |   
|
| ||
| Level 170 | |||||
| M5 | Thunder (50s) |
|
| ||
| Level 170 | |||||
| M6 | Rising Voltage (40s) |
|
| ||
| Level 170 | |||||
| M7 | Electric Terrain (40s) |     
|
| ||
| Level 170 | |||||
| M8 | Discharg (50s) |
|
| ||
| Level 170 | |||||
| P | Magnet Rise |
|
| ||
| Level 170 | |||||
| P | Tri-Vision |
|

| ||
| Level 170 |
Efetividades
Muito Efetivo: Ground.
Efetivo: Fire e Fighting.
Normal: Water, Ghost, Dark e Crystal.
Inefetivo: Normal, Grass, Electric, Ice, Psychic, Bug, Rock, Dragon, Fairy.
Muito Inefetivo: Flying, Steel.
Nulo: Poison.
Outras Versões

|
Magnezone |

|
Shiny Magnezone |
|
|
Shiny Magnezone (TM) |